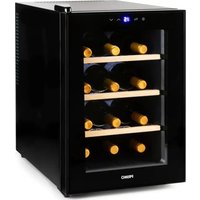
PR190WK - Wine cellar PRIMO - Free user manual and instructions
Find the device manual for free PR190WK PRIMO in PDF.


| Product type | Wine cooler |
| Brand | PRIMO |
| Model | PR190WK |
| Approximate capacity | Up to 18 bottles (depending on shelves provided) |
| Adjustable temperature range | 11 °C to 18 °C |
| Temperature display | Digital (Celsius or Fahrenheit) |
| Interior lighting | LED (turns off automatically after 10 minutes) |
| Ventilation | Built-in with minimum 5 cm clearance around the appliance |
| Adjustable feet | Yes, for leveling |
| Door type | Solid (non-transparent) with rubber seal |
| Installation | Freestanding or partially built-in, flat and sturdy surface |
| Power supply | 220-240 V ~ 50 Hz (according to rating plate) |
| Climate class | N (normal): 16 °C to 32 °C |
| Energy consumption | Low (not specified) |
| Noise level | Not specified (fan turns on regularly) |
| Warranty | 2 years (accessories: 6 months) |
| Customer service | info@primo-elektro.be, Monday to Thursday 8:30 AM – 5:00 PM, Friday 8:30 AM – 4:30 PM |
| Recommended cleaning | Warm water and mild detergent, no abrasive products |
| Spare parts | Accessories (shelves) available, contact after-sales service |
| Repairs | By the manufacturer or authorized service only |
| Intended use | Household and indoor only |
| Recycling | Electronic device: do not dispose of with household waste |
Frequently Asked Questions - PR190WK PRIMO
User questions about PR190WK PRIMO
0 question about this device. Answer the ones you know or ask your own.
Ask a new question about this device
Download the instructions for your Wine cellar in PDF format for free! Find your manual PR190WK - PRIMO and take your electronic device back in hand. On this page are published all the documents necessary for the use of your device. PR190WK by PRIMO.
USER MANUAL PR190WK PRIMO
natural_image
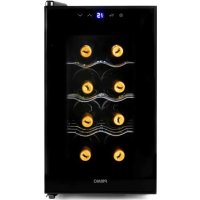
Black PRIMO beer refrigerator with three-tiered shelves and a digital display (no visible text or symbols on the main body)natural_image
Two simple line icons: a triangular warning triangle with an exclamation mark and an open book with a blank pages (no text or symbols)Read all instructions carefully - save this instruction manual for future reference.
| NL Nederlands 4 | |
| FR Français 16 | |
| DE Deutsch 28 | |
| EN English 40 |
GARANTIE (NL)
Geachte klant,
⚠️PRODUCTSPECIFIEKE WAARSCHUWINGEN
natural_image
Interior view of a refrigerated industrial appliance with cooling fins and heat exchanger (no text or symbols visible)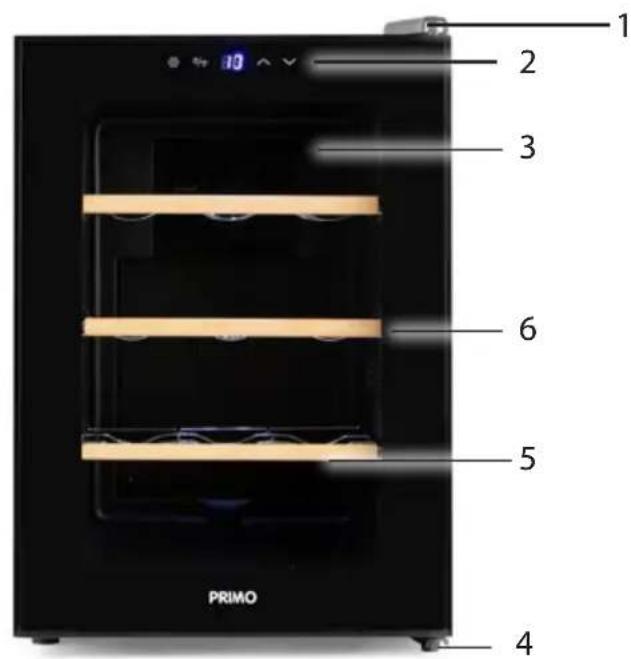
APPARAAT VERPLAATSEN
natural_image
Symbol of a trash bin with crossed lines indicating no waste, and a solid black rectangle below (no text or labels)⚠️ AVERTISSEMENTS SPÉCIFIQUES AU PRODUIT

natural_image
Symbol of a trash bin with crossed lines indicating no waste or discharge, and a solid black rectangle below (no text or labels)natural_image
Recycling symbol with three chasing arrows forming a triangle (no text or labels)natural_image
Symbol of a trash bin crossed with no text or numbers, representing waste sorting or disposal (no text present)All of our products are always submitted to a strict quality control before they are sold to you. Should you nevertheless experience problems with your device, we sincerely regret this.
In that case, we kindly request you to contact our customer service. Our staff will gladly assist you.

www.primo-elektro.be
Monday – Thursday: 8.30 – 12.00 and 13.00 – 17.00
Friday: 8.30 – 12.00 and 13.00 – 16.30
This appliance has a two year warranty period. During this period the manufacturer is responsible for any failures that are the direct result of construction failure. When these failures occur the appliance will be repaired or replaced if necessary. The warranty will not be valid when the damage to the appliance is caused by wrong use, not following the instructions or repairs executed by a third party. The guarantee issued with the original till receipt. All parts, which are subject to wear, are excluded from the warranty. If your device breaks down within the 2-year warranty period, you can return the device together with your receipt to the shop where you purchased it. The guarantee on accessories and components that are liable to wear-and-tear is only 6 months.
The guarantee and responsibility of the supplier and manufacturer lapse automatically in the following cases:
- If the instructions in this manual have not been followed.
- In case of incorrect connection, e.g. electrical voltage that is too high.
• In case of incorrect, rough or abnormal use.
• In case of insufficient or incorrect maintenance. - In case of repairs or alterations to the device by the consumer or non-authorised third parties.
- If the customer used parts or accessories that are not recommended or provided by the supplier / manufacturer.
SAFETY INSTRUCTIONS
When using electrical appliances, basic safety precautions should always be taken, including the following:
- Read all instructions carefully. Keep this manual for future reference.
- Make sure all packaging materials and promotional stickers have been removed before using the appliance for the first time. Make sure children cannot play with the packaging materials.
- This appliance is intended to be used in household and similar applications such as:
- staff kitchen areas in shops, offices and other working environments;
- farm houses;
- by clients in hotels, motels and other residential type environments;
- bed and breakfast type environments.
- Children should be supervised to ensure that they do not play with the appliance.
- This appliance can be used by children aged from 16 years and above and persons with reduced physical, sensory or mental capabilities or lack of experience and knowledge if they have been given supervision or instruction concerning use of the appliance in a safe way and understand the hazards involved.
• Children shall not play with the appliance.
- Cleaning and user maintenance shall not be made by children unless they are older than 16 or supervised.
- Keep the appliance and its cord out of reach of children younger than 16 years.
- All repairs should be carried out by the manufacturer or its aftersales service.
- Using the appliance incorrectly may cause an injury. Any injury or damage caused by failure to comply with these rules are at your own risk. Neither the manufacturer, importer, or the supplier may be held liable.
⚠️ELECTRICAL WARNINGS
- In order to avoid a hazard this appliance must not be supplied through an external switching device, such as a timer or a separate remote control, or connected to a circuit that is regularly switched on and off by the utility.
- The appliance must be disconnected from its power source when not in use, during service and when replacing parts. Allow to cool before putting on or taking off parts, and before cleaning the appliance. To disconnect, turn controls to “OFF” or “0” position, then remove the plug from the wall. Never pull the cord or appliance to remove the plug from the socket.
- Before use, check carefully that the electric tension and frequency of the power net at your home match the indications on the rating label of the appliance.
- The appliance must be plugged into an appropriate outlet that is installed and grounded in accordance with local installation regulations.
- Do not let the power supply cord hang over the edge of a counter, or touch hot surfaces.
- Keep the power cord away from hot parts and don't cover the appliance.
- Unwrap the cord completely to prevent overheating of the cord. Do not allow the power cord supply to run underneath or around the unit.
- To avoid danger, do not operate this appliance with a damaged cord or plug or in the event the appliance malfunctions or has been damaged in any manner. Return the appliance to the DOMO Service Department or its service agent for examination, repair, or electrical or mechanical adjustment. Do not try to repair the appliance yourself.
⚠️INSTALLATION
- Never place this appliance near a gas stove or electrical stove or in a place where it may come into contact with a warm appliance.
• Always use the appliance on a steady, dry and level surface.
- Keep the cord away from sharp edges and hot parts or other heat sources.
- Keep the ventilation openings free of obstructions.
- Do not place portable power strips or portable power supplies at the back of the device.
- Avoid long exposure to direct sunlight.
- Make sure that you have access to the plug of the appliance.
- Make sure that the plug does not get squashed or damaged by the back of the appliance. A squashed or damaged power plug may overheat and cause fire.
- This is a heavy appliance. Be careful when moving it.
- This cooling appliance is designed to be for free-standing or built-in installation.
⚠ USE
- Do not use the appliance outdoors.
- Only use the appliance for its intended use.
- Only use the appliance for domestic use. The manufacturer cannot be held responsible for accidents that result from improper use of the appliance or not following the instructions described in this manual.
- Do not use any other electrical appliance inside the fridge, unless they are approved for this purpose by the manufacturer.
- Do not operate the appliance with wet hands.
- Make sure that children do not climb into the appliance and that they cannot get trapped inside.
- Do not store any food inside the wine cooler.
- Do not keep any explosive substances inside the appliance, like for instance aerosol cans with a flammable propellant.
- The use of accessories that are not recommended or sold by the manufacturer can cause fire, electrical shock or injuries.
- Keeping the door open for long periods may cause the temperature in the compartments of the appliance to rise considerably.
- If the appliance is left empty for longer periods, it should be turned off, defrosted and cleaned. Allow it to dry and leave the door ajar to prevent mould from growing in the appliance.
⚠️CLEANING AND MAINTENANCE
- Never immerse the appliance, the cord or the plug in water or any other liquid.
- Do not place warm or hot objects on top of the appliance.
- Do not clean the appliance with anything made of metal.
- Never clean the appliance with inflammable products. The fumes could cause a fire hazard or explosions. Never store gasoline or inflammable products inside the wine cooler.
- Make sure that the refrigerant circuit does not get damaged, for instance during transportation or installation.
⚠️PRODUCT-SPECIFIC WARNINGS
- WARNING! Never place this appliance on or in the neighbourhood of a gas or electric fire or in a place where it could come into contact with a heat source.
There are flammable materials located on the back of the appliance.
- Pay attention to the symbol 'Fire risk – flammable materials' located on the back of the appliance.
SAVE THESE INSTRUCTIONS FOR FUTURE REFERENCE
PARTS
- Hinge cover
- Control panel
- Door
- Levelling feet
- Metal shelves*
- Lighting
- Ventilation
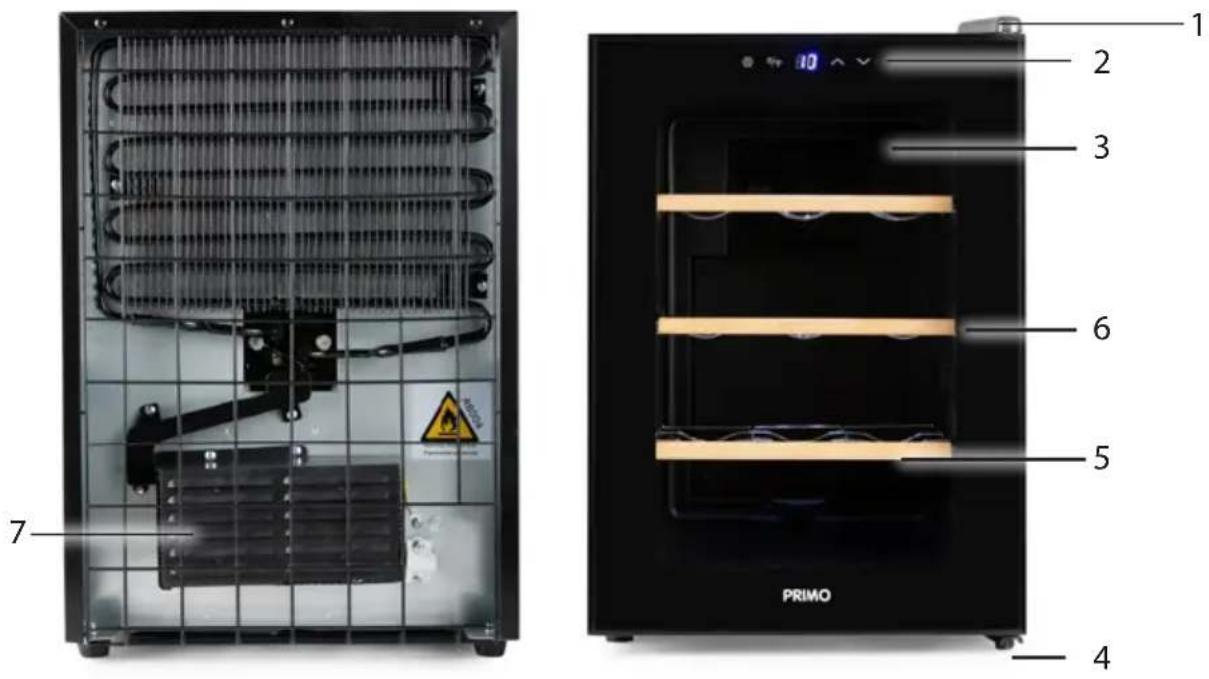
*The number of metal shelves may vary depending on the model purchased.
INSTALLATION
- Remove the exterior and interior packing, wipe the outside thoroughly with a soft dry cloth and the inside with a wet, lukewarm cloth. Dry the appliance off well.
- Use two or more people to move and install the appliance. Failure to do so can result in back or other injury.
- Make sure that the air can circulate around the appliance. Therefore, leave a free space of at least 5 cm between the appliance and any other object.
- Make sure there is sufficient space to open the door.
- To ensure proper ventilation for your appliance, the front of the unit must be completely unobstructed. Choose a well-ventilated area with temperatures above 16^ C ( 60^ F) and below 32^ C ( 90^ F). This unit must be installed in an area protected from the elements, such as wind, rain, water spray or drips.
- This cooling appliance is designed to be for free-standing or built-in installation.
- Place the appliance on a firm, steady surface, that is strong enough to carry a filled wine cooler.
- Do not place the appliance directly into sunlight or near heat sources. Direct sunlight could affect the coating of the appliance and the proximity of heat sources may cause an increase of the energy consumption. Extreme temperatures may also cause malfunctioning of the appliance.
- Avoid very moist places. Too much moisture in the air will cause frost to form very quickly on the evaporator, and your refrigerator.
- Before connecting your refrigerator to the power supply, check that the voltage stated on the rating label of your appliance corresponds to the voltage in your home. A different voltage could damage the appliance.
- The cord should not be exposed or left hanging loose to prevent possible accidents.
- After installation, leave the refrigerator for 24 hours before turning it on. This way the refrigerant can settle.
- Before connecting the appliance to the power net, leave it standing upright for about 2 hours. This reduces the risk of any malfunctioning of the cooling system due to transportation.
- Allow the appliance to run empty for 8 hours so the compartment can cool to the appropriate temperature.
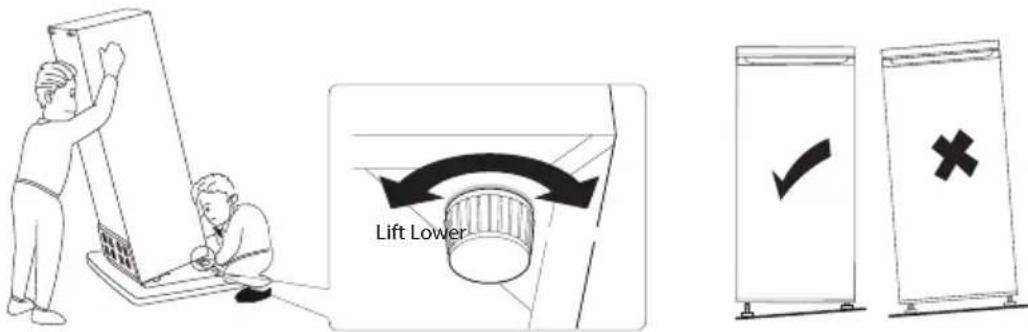
- One can level the appliance using adjustable legs. The adjustable legs can be adjusted by screwing them in or out of the appliance.
- The climate class indicates the minimum and maximum ambient temperature for the proper operation of an appliance. You can find the climate class on the type plate on the back of the appliance.
- SN: Subnormal: ambient temperature between 10°C and 32°C
- N: Normal: ambient temperature between 16°C and 32°C
- ST: Subtropical: ambient temperature between 16°C and 38°C
- T: Tropical: ambient temperature between 16°C and 43°C
Make sure that the room temperature lies between 16°C and 32°C. If the temperature is higher or lower, the performances of the appliance may be affected. Ideal is an ambient temperature between 19°C and 24°C (66°F-75°F), and a humidity under 60%.
The temperature may vary depending on whether the bottles are on the upper, middle or lower racks and whether the inside lighting is on or not.
USE
CONTROL PANEL
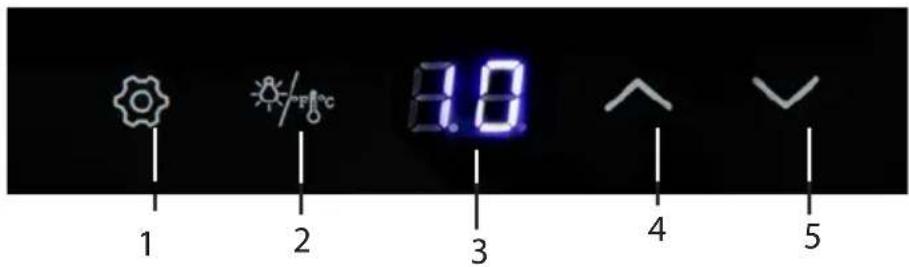
- Button for unlocking control panel
- On/off button of the light + Celsius/Fahrenheit
- Display
- Button to raise the temperature
- Button to lower the temperature
- The appliance turns on as soon as the cord is plugged in.
- Press the ⚙ - button for a few seconds to activate the control panel. You will hear a signal when the control panel is activated.
- The temperature can be displayed in either Celsius or Fahrenheit. To change this, press the * - button for a few seconds for Celsius/Fahrenheit.
- The desired temperature can be set using the increase and decrease temperature buttons. By pressing the ▲button, the temperature increases by 1°C each time. By pressing the √button, the temperature decreases by 1°C each time.
•The temperature can be set between 11-18°C.
- The selected temperature will flash 5 times on the display. Then the current temperature of the wine cooler will reappear.
- The appliance will cool until the selected temperature is reached and then keep it stable.
- The interior lighting can be turned on or off by pressing the * - button.
Notes:
•The interior lighting will automatically turn off after 10 minutes.
- The unit is equipped with an automatic panel lock. The panel lock will be enabled 20 seconds after a button was last touched.
MOVING THE APPLIANCE
- Remove all bottles from the wine cooler.
- Tape all loose parts to the inside of the wine cooler.
- Set the support feet at the bottom of the appliance to their lowest position to avoid damaging.
- Tape the door shut.
- Make sure that the appliance is kept upright during transportation.
LIGHTING
The lighting in the fridge is a LED light. These are more ecological and manufactured for a long life. For this reason, these may not be replaced. If there is a problem with the lighting, contact a qualified service centre in your area.
VACATION TIME
For short vacation periods, leave the control knobs at their usual settings. During longer absences:
- Remove all bottles from the wine cooler.
- Disconnect from electrical outlet.
- Clean the refrigerator thoroughly, including defrost pan.
- Leave door open to avoid possible formations of condensate, mould or odours.
POWER FAILURE
Most power failures are corrected within an hour or two and will not affect your refrigerator temperatures. However, you should minimize the number of door openings while the power is off.
IMPORTANT RULES
- Beverages should be stored in sealed containers.
- Don't open the door of the wine cooler unless necessary.
- The appliance should not be used for outdoor camping, e.g. in a tent.
•The appliance must be used indoors only.
•The appliance cannot be used in public transportation.
- Keep all accessories, such as shelves, door racks, and drawers, in the appliance to minimise energy consumption.
MAINTENANCE AND CLEANING
- Turn the appliance off. Remove the plug from the socket and remove the bottles from the wine cooler.
- Wipe the door seal with clear water only and then wipe dry thoroughly.
- Clean the inside and outside of the wine cooler with warm water and a mild detergent.
- Do not use aggressive or abrasive cleaning products.
FREQUENTLY ASKED QUESTIONS
| PROBLEM POSSIBLE SOLUTIONS | |
| The wine cooler does not work. | ·Check if the plug is connected to the power outlet and if the voltage indicated on the label on the appliance corresponds with the voltage of the power net. |
| The wine cooler is not cool enough. | ·Check the temperature settings. Ambient temperatures may cause the need of a higher or lower temperature setting.·The door is being opened too frequently.·The door is not shut properly.·The rubber seal of the door does not close off properly. |
| The appliance does not cool. | ·When the ambient temperature is colder than the set temperature, the unit will not cool. Thus, it is best to place the unit in an area of 10°C to 26°C. |
| The wine cooler vibrates. | ·Check whether the wine cooler is level.·Make sure the bottles do not touch each other. |
| The wine cooler makes too much noise. | ·The wine cooler may not be level.·Check the ventilator. |
| The door does not close properly. | ·The wine cooler may not be level.·The rubber seal is not strong enough.·The racks are not placed well into the wine cooler. |
| The fans turn on and off frequently. | ·This is normal. |
| The light does not work. | ·Press the on/off button for the light. |
ENVIRONMENTAL GUIDELINES
natural_image
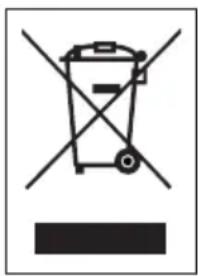
Symbol of a trash bin crossed with no text or numbers, representing waste sorting or disposal (no text present)This symbol on the product or on its packaging indicates that this product may not be treated as household waste. Instead it must be brought to the applicable collection point for recycling of electrical and electronic equipment. By ensuring this product is disposed of correctly, you will help prevent potential negative consequences for the environment and human health, which could otherwise be caused by inappropriate waste handling of this product. For more detailed information about recycling of this product, please contact your local city office, your household waste disposal service or the shop where you purchased the product.

natural_image
Recycling symbol with three chasing arrows forming a triangle (no text or labels)The packaging is recyclable. Please treat the packaging ecologically.

This appliance conforms to all European requirements in the areas of safety, health, and environmental protection.
The EU declaration concerning this appliance can be requested at any time from info@primo-elektro.be
WEBSHOP

Following accessories have 6 months warranty, and can be easily ordered using the link below.
WWW.PRIMO-ELEKTRO.BE

WWW.PRIMO-ELEKTRO.BE
- GARANTIE (NL)
- ⚠️PRODUCTSPECIFIEKE WAARSCHUWINGEN
- APPARAAT VERPLAATSEN
- ⚠️ AVERTISSEMENTS SPÉCIFIQUES AU PRODUIT
- SAFETY INSTRUCTIONS
- When using electrical appliances, basic safety precautions should always be taken, including the following:
- ⚠️ELECTRICAL WARNINGS
- ⚠️INSTALLATION
- ⚠ USE
- ⚠️CLEANING AND MAINTENANCE
- ⚠️PRODUCT-SPECIFIC WARNINGS
- SAVE THESE INSTRUCTIONS FOR FUTURE REFERENCE
- PARTS
- INSTALLATION
- USE
- CONTROL PANEL
- Notes:
- MOVING THE APPLIANCE
- LIGHTING
- VACATION TIME
- POWER FAILURE
- IMPORTANT RULES
- MAINTENANCE AND CLEANING
- FREQUENTLY ASKED QUESTIONS
- ENVIRONMENTAL GUIDELINES
- WEBSHOP
Brand : PRIMO
Model : PR190WK
Category : Wine cellar