SJ-SC11CMXWD-EU - Freezer SHARP - Free user manual and instructions
Find the device manual for free SJ-SC11CMXWD-EU SHARP in PDF.

| Product type | Upright freezer |
| Brand | Sharp |
| Model | SJ-SC11CMXWD-EU |
| Climate class | SN-T (10 °C to 43 °C) |
| Technology | No Frost (frost-free) |
| Freezing capacity (24 h) | 25 kg |
| Temperature setting | From -16 °C to -24 °C, in steps |
| Super freeze mode | Yes, can be activated 24 h before, automatic deactivation after 24 h or -32 °C |
| Visual alarm | Red indicator in case of malfunction |
| Ice maker | Yes, built-in (depending on model) |
| Defrosting | Automatic (No Frost) |
| Door reversal | Not possible with front handles; possible on some models without handle |
| Dimensions (H × W × D) | Approximately 185 × 60 × 65 cm |
| Weight | Approximately 65 kg |
| Power supply | 220-240 V ~ 50 Hz |
| Noise level | Approximately 42 dB(A) |
| Energy class | E (according to energy label) |
| Availability of spare parts | 10 years after the last unit sold |
| Maintenance | Clean interior with baking soda; clean condenser once a year |
| Warranty | 2 years (parts + labor); extension possible via after-sales service |
Frequently Asked Questions - SJ-SC11CMXWD-EU SHARP
User questions about SJ-SC11CMXWD-EU SHARP
0 question about this device. Answer the ones you know or ask your own.
Ask a new question about this device
Download the instructions for your Freezer in PDF format for free! Find your manual SJ-SC11CMXWD-EU - SHARP and take your electronic device back in hand. On this page are published all the documents necessary for the use of your device. SJ-SC11CMXWD-EU by SHARP.
USER MANUAL SJ-SC11CMXWD-EU SHARP
SJ-SC11CMXWD-EU SJ-SC11CMXID-EU SJ-SC11CMXIE-EU
Freezer
User Manual
Bedienungsanleitung
FR Guide d'utilisation
Handleiding
Manual de Uso
Manual de Instruções
Brugsanvisning
Bruksanvisning
Instruktionsbok
Käyttöohje
EE Kasutusjuhend
Contents
CHAPTER -1: GENERAL WARNINGS ......2
CHAPTER -2: YOUR FREEZER....7
CHAPTER -3: USING YOUR FREEZER....8
CHAPTER -4: FOOD STORAGE GUIDANCE ....10
CHAPTER -5: DOOR REVERSAL ....11
CHAPTER -6: TROUBLESHOOTING ....11
CHAPTER -7: TIPS FOR SAVING ENERGY ......13
CHAPTER -8: TECHNICAL DATA....13
CHAPTER -9: CUSTOMER CARE AND SERVICE....13
Your fridge freezer conforms to current safety requirements. Inappropriate use can lead to personal injury and damage to property. To avoid the risk of damage read this manual carefully before using your fridge freezer for the first time. It contains important safety information on the installation, safety, use and maintenance of your Fridge Freezer. Retain this manual for future use.
FIRE
Warning; Risk of fire / flammable materials
CHAPTER -1: GENERAL WARNINGS

WARNING: Keep the ventilation openings of the Fridge clear from obstruction.

WARNING: Do not use mechanical devices or other means to accelerate the defrosting process.

WARNING: Do not use other electrical appliances inside the Fridge.

WARNING: Do not damage the refrigerant circuit.

WARNING: When positioning the appliance, ensure the supply cord is not trapped or damaged.

WARNING: Do not locate multiple portable socket-outlets or portable power supplies at the rear of the appliance.

WARNING: To avoid personal injury or damage this appliance must be installed in accordance with the manufacturer instructions.

The small quantity of refrigerant used in this fridge is eco-friendly R600a (an isobutene) and is flammable and osive if ignited in enclosed conditions.
* While carrying and positioning the fridge, do not damage the cooler gas circuit.
* Do not store any containers with flammable materials, such as spray cans or fire extinguisher refill cartridges in the vicinity of the fridge.
* This appliance is intended to be used in household and similar applications such as;
- staff kitchen areas in shops, offices and other working environments which can be equated with ordinary household
- farm houses and by clients in hotels, motels and other residential type environments which can be equated with ordinary household
- bed and breakfast type environments which can be equated with ordinary household
- catering and similar non-retail applications which can be
equated with ordinary household
* Your fridge requires a 220-240V, 50Hz mains supply. Do not use any other supply. Before connecting your fridge, ensure that the information on the data plate (voltage and connected load) matches the mains electricity supply. If in doubt, consult a qualified electrician)
* This appliance can be used by children aged from 8 years and above and persons with reduced physical, sensory or mental capabilities or lack of experience and knowledge if they have been given supervision or instruction concerning use of the appliance in a safe way and understand the hazard involved. Children shall not play with the appliance. Cleaning and user maintenance, shall not be made by children without supervision.
* Children aged from 3 to 8 years are allowed to load and unload refrigerating appliances. Children are not expected to perform cleaning or user maintenance of the appliance, very young children (0-3 years old) are not expected to use appliances, young children (3-8 years old) are not expected to use appliances safely unless continuous supervision is given, older children (8-14 years old) and vulnerable people can use appliances safely after they have been given appropriate supervision or instruction concerning use of the appliance. Very vulnerable people are not expected to use appliances safely unless continuous supervision is given.
* A damaged power cord /plug can cause fire or give you an electric shock. When damaged it must be replaced, this should only be done by qualified personnel.
* This appliance is not intended for use at altitudes exceeding 2000 m.
To avoid contamination of food, please respect the following instructions:
* Opening the door for long periods can cause a significant increase of the temperature in the compartments of the appliance.
* Clean regularly surfaces that can come in contact with food and accessible drainage systems.
* Store raw meat and fish in suitable containers in the refrigerator, so that it is not in contact with or drip onto other food.
* Two-star frozen-food compartments are suitable for storing pre-frozen food, storing or making ice cream and making ice cubes.
* One-, two- and three-star compartments are not suitable for the freezing of fresh food.
* If the refrigerating appliance is left empty for long periods, switch off, defrost, clean, dry, and leave the door open to prevent mould developing within the appliance.
Disposal
- All packaging and materials used are environmentally friendly and recyclable. Please dispose of any packaging in an environmentally friendly manner. Consult your local council for further details.
- When the appliance is to be scrapped, cut off the electrical supply cable and destroy the plug and cable. Disable the door catch in order to prevent children becoming trapped inside.
- A cut off plug inserted into a 16 amp socket is a serious safety (shock) hazard. Please ensure the cut off plug is disposed of safely.
For Denmark products:
The appliance is equipped with a plug approved in the EU (EU-Schuko Plug) and can be used in Finland, Norway and Sweden. In Denmark, the appliance is only approved for use with a wall outlet type E or type CEE7 // 7-S with a ground leg. If there is only wall outlet type K at the connection point, Replacing EU-Schuko plug with the Danish plug must be performed by only an authorized service personnel. Alternatively, connect a suitable and approved power adapter to transition between Schuko plug and Danish earth system. This adapter (min. 10 amps and up to max. 13 amps) can be ordered via at well assorted whitegoods dealer or authorized electrician. Only with one of these methods it can be ensured that the appliance is the correct safety ground. In the absence of earthing installation, an authorised electrician should carry out an earthing installation. In the case of use without earthing installed, we will not be responsible for any loss of use that may occur.
Disposal of your old appliance
The symbol of the crossed-out wheeled bin shown on the product or its packaging means that the device must not be disposed of with other household waste but requires separate collection. You can dispose of the device free of charge at your local waste return and collection system. The addresses can be obtained from your responsible city council or local government. Regarding the return of waste electrical and electronic equipment (WEEE) at certain retailers free of charge, please contact your retailer.
Returned WEEE can be prepared for recycling to reduce waste and save resources. Please note that the device may contain substances which are harmful for the environment and human health if not used according to environmental protection standards. The separate collection and recycling of WEEE helps to prevent negative consequences for the environment and human health.
If possible, please remove all batteries and accumulators as well as all removable lamps before disposing of the device.
Please note that you are responsible for deleting all personal data on the device to be disposed of.
Notes:
- Please read the instruction manual carefully before installing and using your appliance. We are not responsible for the damage occurred due to misuse.
- Follow all instructions on your appliance and instruction manual, and keep this manual in a safe place to resolve the problems that may occur in the future.
- This appliance is produced to be used in homes and it can only be used in domestic environments and for the specified purposes. It is not suitable for commercial or common use. Such use will cause the guarantee of the appliance to be cancelled and our company will not be responsible for the losses to be occurred.
- This appliance is produced to be used in houses and it is only suitable for cooling / storing foods. It is not suitable for commercial or common use and/or for storing substances except for food. Our company is not responsible for the losses to be occurred in the contrary case.
Safety warnings

- Do not connect your Freezer to the mains electricity supply using an extension lead.
- A damaged power cord / plug can cause fire or give you and electric shock. When damaged it must be replaced, this should only be dine by qualified personnel.
- Never bend the power cord excessively.
- Never touch the power cord / plug with wet hands as this could cause a short circuit electric shock.
- Do not place glass bottles or beverage cans in the freezer. Bottles or cans may explode.
- When taking ice made in the freezer, do not touch it, ice may cause ice burns and/or cuts.
- Do not remove items from the freezer if your hands are damp or wet. Tis could cause skin abrasions or frost / freezer burns.
- Do not refreeze food once it has thawed out.
Installation Information
Before unpacking and manoeuvring your freezer please take some time to familiarise yourself with the following points.
- Position away from direct sunlight and away from any heat source such as a radiator.
- Your appliance should be at least 50 cm away from stoves, Gas ovens and heater cores, and should be at least 5 cm away from electrical ovens.
- Do not expose your freezer to moisture or rain.
- Your freezer should be positioned at least 20mm away from another freezer.
- Clearance of at least 150 mm is required at the top of your appliance. Do not place anything on top of your appliance.
- For safe operation it is important that your freezer is safe and balanced. The adjustable feet are used to level your freezer. Make sure that your appliance is level before placing any foodstuffs inside it.
- We recommend that you wipe all shelving and trays with a cloth soaked in warm water mixed with a teaspoon of bicarbonate of soda before use. After cleaning rinse with warm water and dry.
• Install using the plastic distance guides, which can be found at the rear of the appliance. Turn 90 degrees (as shown in the diagram). This will keep the condenser from touching the wall.
- Freezer should be placed against a wall with a free distance not exceeding 75 mm.
- This appliance is designed to work in difficult climate conditions (up to 43 °C or 110° F) and is powered with 'Freezer Shield' technology which ensures that the frozen food in the freezer will not defrost even if the ambient temperature falls as low as -15 °C. So you may then install your appliance in an unheated room without having to worry about frozen food in the freezer being spoilt. When the ambient temperature returns to normal, you may continue using the appliance as usual.
natural_image
Diagram of a heat exchanger with two cooling chambers and a valve, showing airflow direction (no text or labels)Before using your freezer

- Before setting up your freezer, check for any visible damage. Do not install or use your freezer if it is damaged.
- When using your freezer for the first time, keep it in an upright position for at least 3 hours before plugging into the mains. This will allow efficient operation and prevents damage to the compressor.
- You may notice a light odour when using your freezer for the first time. This is perfectly normal and will fade away as the freezer starts to cool.
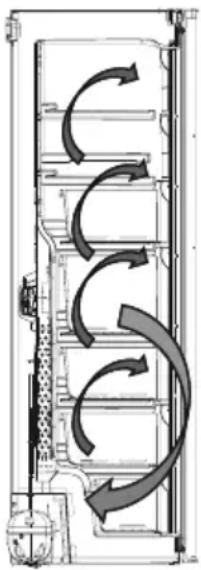
No-Frost technology
No-frost freezers differ from other static freezers in their operating principle.
In normal freezers, the humidity entering the freezer due to opening the door and the humidity inherent in the food causes freezing in the freezer compartment. To defrost the frost and ice in the freezer compartment, you are periodically required to turn off the freezer, place the food that needs to be kept frozen in a separately cooled container and remove the ice gathered in the freezer compartment.
The situation is completely different in no-frost freezers. Dry and cold air is blown into the freezer compartment homogeneously and evenly from several points via a blower fan. Cold air dispersed homogeneously and evenly between the shelves cools all of your food equally and uniformly, thus preventing humidity and freezing.
Therefore your no-frost freezer allows you ease of use, in addition to its huge capacity and stylish appearance.
natural_image
Diagram of a vertical storage or filtration unit with curved arrows indicating flow direction (no text or symbols)This appliance is not intended to be used as a built-in appliance.
General notes:
Freezer Compartment (Freezer): Most Efficient use of energy is ensured in the configuration with the drawers and bins are on stock position.
In some models there is a shelf with icematic in the top basket.
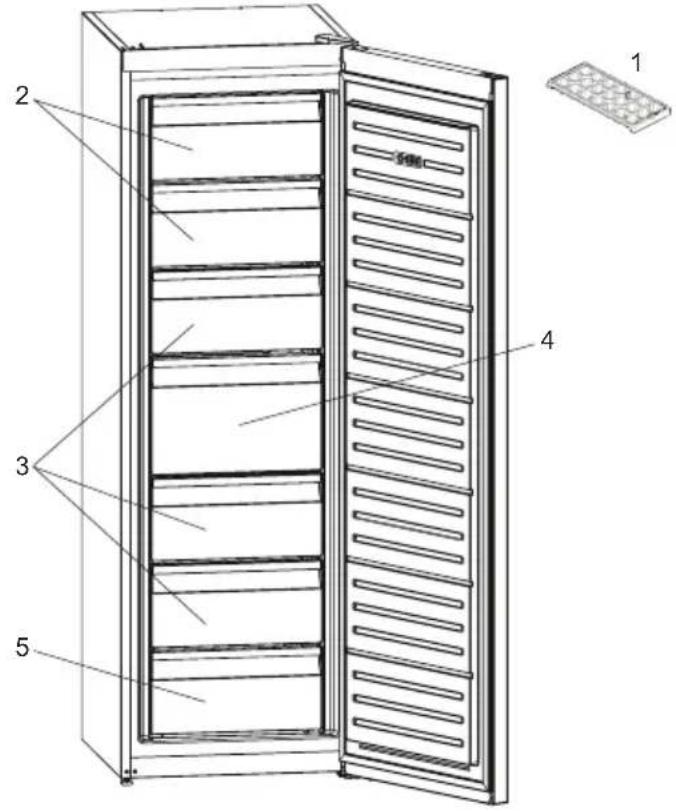
natural_image
Technical line drawing of a room layout with ventilation units and fixtures (no text or symbols)- Ice tray * / Ice matic *
- Freezer flap
- Freezer drawers
- Freezer big drawer
- Freezer bottom drawer
* In some models
This figure has been drawn for information purposes to show the various parts and accessories in the appliance. Parts may vary according to the model of the appliance.
CHAPTER -3: USING YOUR FREEZER
Control panel
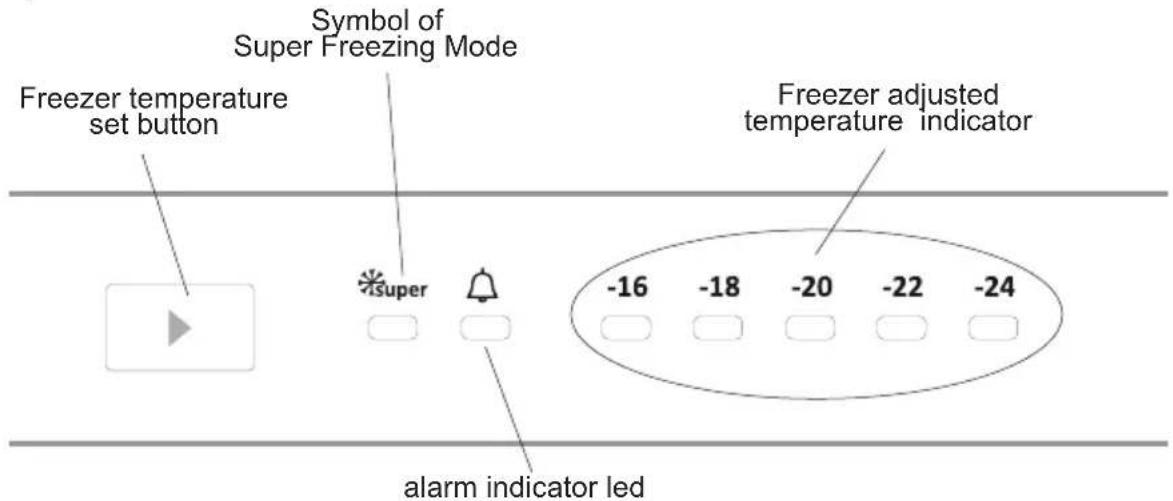
Freezer partition temperature setting button
This button allows setting temperature of the freezer. In order to set values for freezer partition, press this button. Use this button also to activate SF mode.
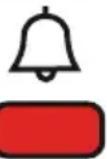
Alarm light
In case of a problem within the freezer, the alarm led will release red light
Super freezer mode
When would it be used?
• To freeze huge quantities of food.
• To freeze fast food.
• To freeze food quickly.
• To store seasonal food for a long time.
How to use?
- Press temperature set button until super freezing light comes on.
- Super freezing led will light during this mode.
• Maximum amount of fresh food (in kilograms) to be frozen within 24 hours is shown on the appliance label. - For optimal appliance performance in maximum freezer capacity, set the appliance to active SF mode 24 hours before you put the fresh food into the freezer.
During this mode:
If you press temperature set button, the mode will be cancelled and the setting will be restored from -16.
Freezer temperature settings
• The initial temperature of the Setting Display is -18^ .
- Press freezer setting button once.
- Every time you press the button, the setting temperature will decrease. (-16°C, -18°C, -20°C,.. super freezing)
- If you press freezer setting button until super freezer symbol is displayed on Freezer
- Settings Display and you do not press any button within the following 3 seconds,
- Super Freezing will blink.
• If you keep on pressing, it will restart from last value.
Lighting (If available)
When the product is plugged in for the first time, the interior lights may turn on 1 minute late due to opening tests.
This option shall be turned on 24 hours before placing the fresh food to the freezer. After 54h, it returns to the normal set value.
Recommended Temperature Values for Freezer
| When to adjust Inner Temperature | |
| For minimum freezing capacity -16 | °C, -18 °C |
| In normal usage -18 | °C, -20 °C, -22 °C |
| For maximum freezing capacity -24 | °C |
CHAPTER -3: USING YOUR FREEZER
Stand-By Mode
How To Activate?
Set “-16” set value and push set button until all leds are blink three times.
How It Works?
In stand-by mode; all components will be disabled. If user push set button while in stand-by mode, all leds will blink three times to show stand-by mode is active.
How To Deactivate?
Push and hold set button until display returns to normal working. After the mode is deactivated, the “Alarm LED” may light on the display because the product may be hot. The “Alarm LED” will turn off when the product reaches normal temperature.
Warnings for temperature settings
- The ambient temperature, temperature of the freshly stored food and how often the door is opened, affects the temperature in the freezer. If required, change the temperature setting.
- It is not recommended that you operate your freezer in environments colder than 10^ .
- The temperature setting should be set by taking into consideration how often the freezer door is opened and closed, how much food is stored in the freezer and the environment in which and the positioning of the appliance.
- We recommend that when first using the freezer it should be left running for 24 hours uninterrupted to ensure it is completely cooled. Do not open the freezer door, or put food inside for this period.
- Your freezer has a 5 minute built in delay function, designed to prevent damage to the compressor. When power is applied to your freezer, it will begin to operate normally after 5 minutes.
- Your freezer is designed to operate in the ambient temperature intervals stated in the standards, according to the climate class stated in the information label. It is not recommended that your freezer is operated in the environments which are out of the stated temperature intervals in terms of cooling efficiency.
- This appliance is designed for use at an ambient temperature within the 10^ - 43^ range.
Climate class and meaning:
T (tropical): This refrigerating appliance is intended to be used at ambient temperatures ranging from 16 °C to 43 °C.
ST (subtropical): This refrigerating appliance is intended to be used at ambient temperatures ranging from 16 °C to 38 °C.
N (temperate): This refrigerating appliance is intended to be used at ambient temperatures ranging from 16 °C to 32 °C.
SN (extended temperate): This refrigerating appliance is intended to be used at ambient temperatures ranging from 10 °C to 32 °C.
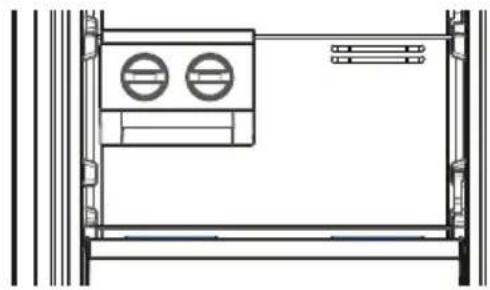
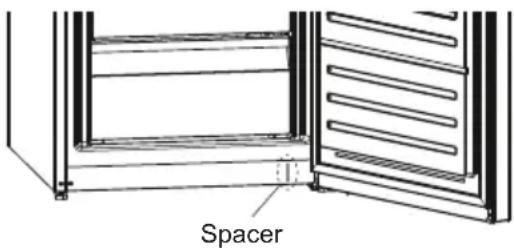
Spacer
- When the door of the freezer is closed, vacuum will occur. Wait for about 1 minute to reopen it.
- This application is optional for easy opening door. With this application, a little condensation may occur around this area and you may take it out.
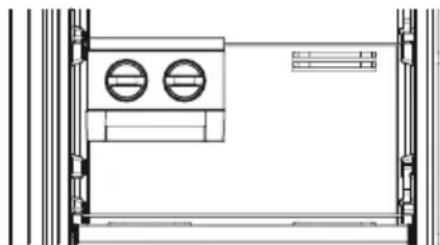
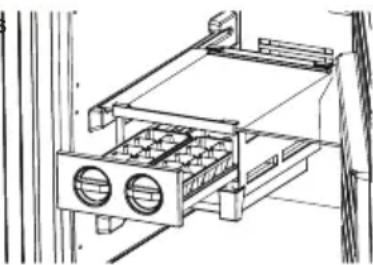
Accessories
Icematic (In some models)
• Take out the ice making tray
- Fill the water to the line.
- Place the ice making tray in its original position
- When ice cubes are formed, twist the lever to drop ice cubes into the icebox.
natural_image
Architectural line drawing of a room layout with two circular vented elements and vertical supports (no text or symbols)Note:
- Do not fill the icebox with water in order to make ice. It may be broken.
- The movement of the ice maker may be difficult while the refrigerator is running. In such a case, it should be cleaned after removing the glass shelves.
natural_image
Technical line drawing of a mechanical device with two circular components and a tray (no text or symbols)CHAPTER -3: USING YOUR FREEZER
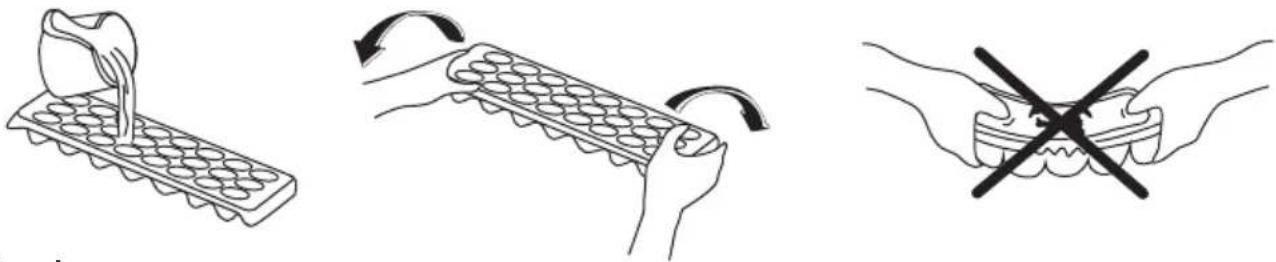
Ice tray (In some models)
- Fill the ice tray with water and place in freezer compartment.
• After the water completely turned into ice, you can twist the tray as shown below to get the ice cube.
Cleaning
• Before cleaning your freezer, turn your mains supply off and remove the plug from the socket.
- Do not wash your freezer by pouring water on to it.
- Use a warm, soapy cloth or sponge to wipe the interior and exterior of your freezer.
- Carefully remove all baskets by sliding upwards or outwards and clean with soapy water. Do not wash in a washing machine or dishwasher.
- Do not use solvents, abrasive cleaners, glass cleaners or all purpose cleaning agents to clean your freezer. This may cause damage to the plastic surfaces and other components with the chemicals they contain.
- Clean the condenser at the back of your freezer at least once a year with a soft brush or vacuum cleaner.
Make sure that your freezer is unplugged while cleaning.
Replacing LED Lighting (In some models)
If your fridge freezer has LED lighting contact the Sharp help desk as this should be changed by authorized personnel only.
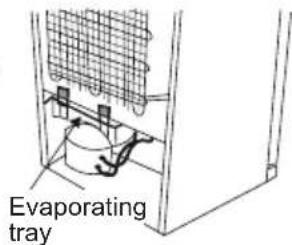
Defrosting
Your freezer automatically defrosts. The water formed as a result of defrosting passes through the water collection spout, flows into the vaporization container behind your freezer and evaporates by itself in there.
CHAPTER -4: FOOD STORAGE GUIDANCE
- The freezer compartment is used for freezing fresh food, for storing frozen foods for the period of time indicated on packaging and for making ice cubes..
- Do not put fresh and warm food next to frozen food as it can thaw the frozen food.
- While freezing fresh foods (i.e. meat, fish and mincemeat) divide them in portions you will use in a single serving.
- For storing frozen foods, the instructions shown on frozen food packages should always be followed carefully. If no information is provided, food should not be stored for more than 3 months from the purchased date.
- Maximum load: if you want to store large quantities of food and use the maximum net capacity of the freezer, you can remove all the sliding drawers but you should keep the upper shelf flaps. Thanks to this, it is possible to store bulky items directly on the shelves.'
- When buying frozen food ensure that these have been frozen at suitable temperatures and that the packing is intact.
- Frozen food should be transported in appropriate containers to maintain the quality of the food and should be returned to the freezing surfaces of the unit in the shortest possible time.
- If a package of frozen food shows signs of humidity and abnormal swelling it is probable that it has been previously stored at an unsuitable temperature and that the contents have deteriorated..
- The storage life of frozen foods depends on the room temperature, thermostat setting, how often the door is opened, the type of food and the length of time required to transport the product from the shop to your home. Always follow the instructions printed on the packaging and never exceed the maximum storage life indicated.
If you would use maximum freezing capacity of your freezer:
- While freezing fresh foods, the maximum amount of fresh food (in kg) that can be frozen in 24 hours is indicated on the appliance label. (your refrigerator has the capacity to freeze 25 kg at 25°C ambient)
- For optimum appliance performance to reach maximum freezing capacity, activate Super Freeze (SF) mode 24 hours before placing fresh food into the freezer.
- After placing fresh food into the freezer, 24 hours is generally sufficient for freezing. "Super Freeze" mode will be deactivated automatically in 2-3 days to save energy.
CHAPTER -4: FOOD STORAGE GUIDANCE
If you would freeze a small amount (up to 3 kg) in your freezer:
- Place your food without touching already frozen food and activate "Fast Freezing" mode. You can put your food next to other frozen food after it is completely frozen (after minimum 24 hours).
- Do not re-freeze frozen food after it has thawed. This may cause health issues, such as food poisoning.
- Allow hot food to completely cool down before placing it in the freezer.
- When buying frozen food ensure that these have been frozen at suitable temperatures and that the packing is intact.
CHAPTER -5: DOOR REVERSAL
Repositioning the door
- It depends on which freezer you have as to whether it is possible the reverse the door.
- It is not possible where handles are attached at the front of the appliance.
- If your model does not have handles it is possible to reverse the doors, but this needs to be completed by authorised personnel. Please call Sharp service.
CHAPTER -6: TROUBLESHOOTING
Your Freezer is equipped with a built in fault detection system, which is able to give you guidance should your freezer not operate as expected. In the event of an error code will be displayed on the control panel. The most common error codes are shown below. If your freezer displays a code not shown below contact the Sharp help-desk.
| Alarm indicator led is turning on | ERROR TYPE WHY WHAT TO DO | ||
 | "Failure Warning" | There is/are some part(s) Out of order or there is a failure in cooling process | Check the door is open or not. If the door is not open, contact the Sharp helpdesk as soon as possible. |
Check Warnings;
If your freezer is not operating;
• Is there a power failure?
- Is the plug connected to the socket correctly?
- Is the fuse of the socket to which the plug is connected or the main fuse blown?
- Is there any failure at the socket? To check this, plug your refrigerator into a known working socket.
If your freezer is not cooling enough;
- Is the temperature adjustment right?
- Is the door of your freezer opened frequently and left open for a long while?
• Is the door of freezer closed properly? - Did you put a dish or food on your freezer so that it contacts the rear wall of your freezer so as to prevent the air circulation?
- Is your freezer filled excessively?
- Is there adequate distance between your freezer and the rear and side walls?
- Is the ambient temperature within the range of values specified in the operating manual?
If the food in your freezer is over cooled
• Is the temperature adjustment right?
- Are there many food recently put inside the freezer?
If your freezer is operating too loudly;
To maintain the set cooling level, compressor may be activated from time to time. Noises from your freezer at this time are normal and due to its function. When the required cooling level is reached, noises will be decreased automatically. If the noises persist;
- Is your appliance stable? Are the legs adjusted?
• Is there anything behind your freezer? - Are the shelves or dishes on the shelves vibrating? Re-place the shelves and/or dishes if this is the case.
- Are the items placed on your freezer vibrating?
CHAPTER -6: TROUBLESHOOTING
Normal Noises;
Cracking (Ice cracking) Noise:
• During automatic defrosting.
- When the appliance is cooled or warmed (due to expansion of appliance material).
Short cracking: Heard when the thermostat switches the compressor on/off.
Compressor noise (Normal motor noise): This noise means that the compressor operates normally Compressor may cause more noise for a short time when it is activated.
Bubbling noise and splash: This noise is caused by the flow of the refrigerant in the tubes of the system.
Water flow noise: Normal flow noise of water flowing to the evaporation container during defrosting. This noise can be heard during defrosting.
Air Blowing Noise (Normal fan noise): This noise can be heard in No-Frost freezer during normal operation of the system due to the circulation of air.
If humidity builds up inside the freezer;
- Has the food been properly packaged? Have the containers been well dried before they were put into the freezer?
- Is the door of the freezer opened very frequently? When the door is opened, the humidity found in the air in the room enters the freezer. Especially if the humidity rate in the room is too high, the more frequently the door is opened the faster will be the humidification.
If the doors are not opened and closed properly;
- Do the food packages prevent closing of the door?
- Are the door freezer, baskets and ice box placed properly?
- Is door gasket broken or torn?
- Is your freezer on a level surface?
If the edges of freezer cabinet that the door joint contact are warm;
Especially in summer (hot weather), the surfaces that the joint contact may get warmer during the operation of the compressor, this is normal.
IMPORTANT NOTES:
- The compressor protection thermal fuse will cutout after sudden power breakdowns or after unplugging the appliance, because the gas in the cooling system is not stabilised. This is quite normal, and the freezer will restart after 4 or 5 minutes.
- The cooling unit of your freezer is hidden in the rear wall. Therefore, water droplets or ice may occur on the rear surface of your freezer due to the operation of the compressor in specified intervals. This is normal. There is no need to perform a defrosting operation unless the ice is excessive.
- If you will not use your freezer for a long time (e.g. in summer holidays) unplug it. Clean your freezer according to Part 4 and leave the door open to prevent humidity and smell.
- The appliance you have purchased is designed for home type use and can be used only at home and for the stated purposes. It is not suitable for commercial or common use. If the consumer use the appliance in a way that does not comply with these features, we emphasise that the producer and the dealer shall not be responsible for any repair and failure within the guarantee period.
- If the problem persists after you have followed all the instructions above, please consult an authorised service provider.
CHAPTER -7: TIPS FOR SAVING ENERGY
- Do not install the appliance close to heat producing appliances. Such as cooker, oven, dishwaher or radiator, and locate the appliance in the coolest part of the room.
- Locate the appliance in a cool well ventilated room and make sure that the air openings of the appliances are not obstructed.
• Always leave warm food to cool down to room temperature before placing in the freezer. - Try to avoid keeping the door open for long periods or opening the door too frequently as warm air will enter the cabinet and cause the compresor to switch on unnecessarily often.
- Ensure there are no obstructions preventing the door from closing properly.
• Cover foods before placing them in the freezer. This cuts down on moisture build-up inside the unit. - Refer to the "temperature settings" section for the suggested temperature control settings.
- Do not block cold air vents. Doing so causes the freezer to run longer and use more energy.
- Keep freezer full.
- Level the freezer so that the door closes tightly.
- Occasionally clean the rear of the appliance with a vacuum cleaner or paint brush to prevent an increased power consumption.
- Keep door gaskets clean and pliable. Replace gaskets if worn.
CHAPTER -8: TECHNICAL DATA
The technical information is situated in the rating plate on the internal side of the appliance and on the energy label.
The QR code on the energy label supplied with the appliance provides a web link to the information related to the performance of the appliance in the EU EPREL database.
Keep the energy label for reference together with the user manual and all other documents provided with this appliance.
It is also possible to find the same information in EPREL using the link https://eprel.ec.europa.eu and the model name and product number that you find on the rating plate of the appliance.
See the link www.theenergylabel.eu for detailed information about the energy label.
CHAPTER -9: CUSTOMER CARE AND SERVICE
Always use original spare parts.
When contacting our Authorised Service Centre, ensure that you have the following data available: Model, Serial Number and Service Index.
The information can be found on the rating plate. You can find the rating label inside the fridge zone on the left lower side.
The original spare parts for some specific components are available for a minimum of 7 or 10 years, based on the type of component, from the placing on the market of the last unit of the model.
Visit our website to:
www.sharphome.eu
Inhalt
natural_image
Technical line drawing of a mechanical assembly with two circular components and mounting brackets (no text or symbols)natural_image
Architectural floor plan showing room layout with two circular fixtures and structural framing (no text or labels)Hinweis:
natural_image
Technical line drawing of a mechanical device with two circular components and a rectangular housing (no text or symbols)natural_image
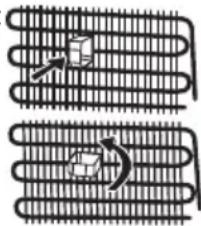
Illustration showing three steps of a robotic arm: pressing a button, moving a curved object, and holding a tool with a cross (no text or symbols)Reinigung
natural_image
Technical line drawing of a mechanical assembly with grid and mounting bracket (no text or symbols)Verdampferwanne
natural_image
Diagram of two heat exchanger-like structures with internal flow arrows (no text or labels)PARTIE -1: AVERTISSEMENTS GÉNÉRAUX
natural_image
Diagram of a vertical cylindrical device with curved arrows indicating flow or circulation (no text or symbols)natural_image
Technical line drawing of a mechanical assembly with two circular components and two horizontal bars (no text or symbols)Mode Super congélation
Quand l'utiliser ?
natural_image
Technical line drawing of a mechanical or architectural component with two circular features and vertical supports (no text or symbols)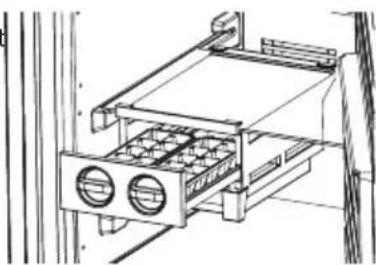
natural_image
Technical line drawing of a mechanical device with two circular components and a tray (no text or symbols)natural_image
Technical line drawing of a refrigerator interior with cooling fan and door (no text or symbols)Bac d'évaporation
PARTIE -4: DISPOSITION DES ALIMENTS
natural_image
Diagram of a vertical container with internal flow arrows indicating circulation or circulation (no text or symbols present)HOOFDSTUK -2: UW VRIEZER
natural_image
Technical line drawing of a mechanical or electrical enclosure with two circular components and a rectangular frame (no text or symbols)natural_image
Technical line drawing of a cabinet or storage unit with horizontal shelves and slats (no text or symbols)Afstandhouder
Accessoires
natural_image
Architectural floor plan showing room layout with two circular vented elements and structural framing (no text or labels)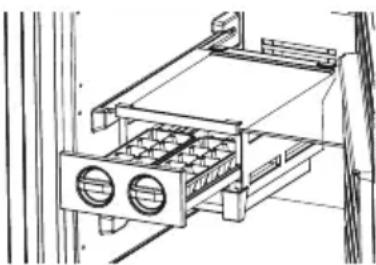
natural_image
Technical line drawing of a mechanical device with two circular components and a tray (no text or symbols)HOOFDSTUK -3: GEBRUIK VAN UW VRIEZER
Ijslade (In sommige modellen)
natural_image
Three-step illustration showing hand positioning: pressing a tray, moving a grid, and holding a bowl with a crossed-out black symbol (no text or symbols present)Reiniging
natural_image
Diagram of two heat exchanger-like structures with internal flow indicators (no text or labels)natural_image
Architectural floor plan showing room layout with ventilation units and fixtures (no text or labels)natural_image
Line drawing of a cabinet or storage unit with horizontal shelves and slats (no text or symbols)Separador
natural_image
Technical line drawing of a mechanical device with two circular components and an exploded view (no text or symbols)Nota:
natural_image
Illustration showing three steps of a robotic manipulation: pouring liquid into a tray, rotating around a wavy surface, and removing a weight (no text or symbols)Limpieza
Notas gerais
natural_image
Architectural floor plan showing room layout with two circular fixtures and a horizontal beam (no text or labels)- Bandeja de gelo *
- Tampa para do congelador
- Gavetas do congelador
- Gaveta grande do congelador
- Gaveta de baixo do congelador
* Em alguns modelos
natural_image
Technical line drawing of a door frame with horizontal slats and a small inset detail (no text or symbols)Separador
Acessórios
natural_image
Pure technical line drawing of a mechanical or electrical component without any text, numbers, or symbolsNota:
natural_image
Technical line drawing of a mechanical device with internal components and mounting brackets (no text or symbols)natural_image
Illustration showing three steps of a dental tool manipulation: using an abacus, moving a tooth with arrows, and removing it by hand (no text or symbols present)Limpeza
natural_image
Diagram of two coiled heat exchangers with internal flow arrows (no text or labels)KAPITEL -1: GENERELLE ADVARSLER
natural_image
Diagram of a vertical container with curved arrows indicating flow or circulation (no text or symbols present)natural_image
Technical line drawing of a mechanical assembly with two circular components and mounting brackets (no text or symbols)- Isbakke *
- Den fryserklap
- Fryerskuffer
- Fryserens store skuffe
- Fryserens nederste skuffe
* På visse modeller
natural_image
Technical line drawing of a door frame with horizontal ladders (no text or symbols)KAPITEL -3: SÅDAN BRUGER DU DIN FRYSER
Tilbehør
Afstandsstykke
Icematic (På visse modeller)
natural_image
Pure technical line drawing of a mechanical or electrical component without any text, numbers, or symbolsBemærk:
natural_image
Technical line drawing of a mechanical device with two circular components and a tray (no text or symbols)natural_image
Illustration of hands holding a grid-like object with curved arrows indicating rotation (no text or symbols)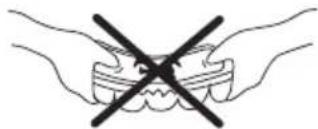
natural_image
Illustration of two hands holding a tooth with a crossed-out black X symbol (no text or labels)Rengøring
natural_image
Diagram of two coiled heat exchangers with heat transfer arrows (no text or labels)KAPITTEL 1: GENERELLE ADVARSLER
Før fryseren brukes

natural_image
Diagram of a vertical cylindrical device with curved arrows indicating rotational flow, no text or symbols present.Generelle merknader
natural_image
Technical line drawing of a mechanical or electrical enclosure with two circular components and a horizontal bar (no text or symbols)- Isbitbrett *
- Klaff
- Fryseskuffer
- Stor skuff
- Nedre skuff
* I noen modeller
natural_image
Pure technical line drawing of a room layout with no text, numbers, or symbols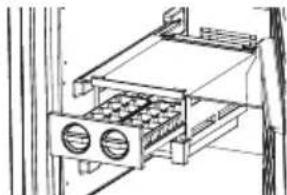
natural_image
Technical line drawing of a mechanical device with two circular components and a tray (no text or symbols)Isterningsbrett (I noen modeller)
natural_image
Line drawing of a container being inserted into a grid tray (no text or symbols)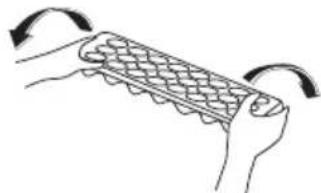
natural_image
Illustration of hands holding a woven mat with curved arrows indicating rotation (no text or symbols)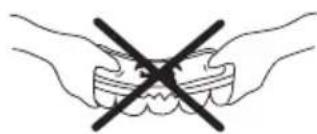
natural_image
Illustration of two hands holding a tooth with a crossed black X (no text or symbols)Rengjøring
Installationsinformation
natural_image
Diagram of a vertical storage unit with curved arrows indicating flow or circulation (no text or symbols)KAPITEL -2: DIN FRYS
natural_image
Technical line drawing of a mechanical or electrical enclosure with two circular components and a horizontal bar (no text or symbols)natural_image
Technical line drawing of a door frame with horizontal slats and a vertical guide (no text or symbols)Distansbricka
KAPITEL -3: ANVÄNDA DIN FRYS
Tillbehör
Icematic (I vissa modeller)
natural_image
Technical line drawing of a mechanical device with two circular components and a labeled 'ste' section (no text or symbols on the diagram itself)ls-tråg
natural_image
Line drawing of a hand pouring liquid into a grid-patterned tray (no text or symbols)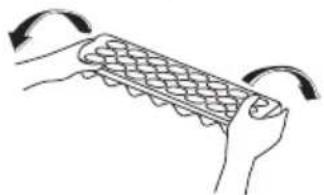
natural_image
Illustration of two hands holding a grid-like object with curved arrows indicating rotation (no text or symbols)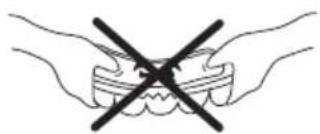
natural_image
Illustration of two hands holding a tooth with a black X symbol (no text or labels)Rengöring
natural_image
Technical line drawing of a refrigerator interior with coiled bed and hanging arm (no text or symbols)Förångningsfack