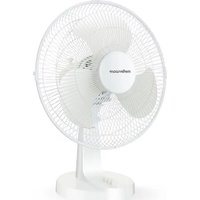
Aquillo 35810WH - Fan Mellerware - Free user manual and instructions
Find the device manual for free Aquillo 35810WH Mellerware in PDF.


| Product type | Pedestal fan |
| Brand | Mellerware |
| Model | Aquillo 35810WH |
| Number of speeds | 3 (low, medium, high) |
| Oscillation function | Yes, with oscillation button |
| Adjustable tilt | Yes, manually |
| Removable front grille | Yes, for cleaning |
| Power supply | Mains 220-240 V, 50/60 Hz |
| Blade material | Plastic |
| Assembly | Base, rear grille, blade, front grille |
| Maintenance and cleaning | Unplug, clean with a damp cloth, do not immerse |
| Safety | Do not use outdoors, do not touch rotating blades |
| Intended use | Household use only |
| Spare parts and repairability | Replace cord by a professional, use original parts |
| Recycling | Do not dispose with household waste, take to recycling center |
Frequently Asked Questions - Aquillo 35810WH Mellerware
User questions about Aquillo 35810WH Mellerware
0 question about this device. Answer the ones you know or ask your own.
Ask a new question about this device
Download the instructions for your Fan in PDF format for free! Find your manual Aquillo 35810WH - Mellerware and take your electronic device back in hand. On this page are published all the documents necessary for the use of your device. Aquillo 35810WH by Mellerware.
USER MANUAL Aquillo 35810WH Mellerware
natural_image
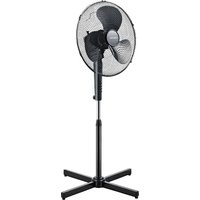
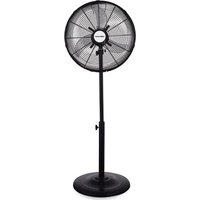
Two mellerware fans on stands, one black and one white, displayed against a plain background (no text or symbols visible on the fan surfaces)2YEAR WARRANTY
1YEAR RETAIL & 1YEAR EXTENDED
Register online: www.mellerware.co.za

complies with
INTERNATIONAL
IEC60335
SAFETY SPECIFICATIONS

35W
2 YEAR
WARRANTY
Model:
35810WH
35810B
Dear customer,
Thank you for choosing to purchase a Mellerware brand product. Thanks to its technology, design and operation and the fact that it exceeds the strictest quality standards, a fully satisfactory use and long product life can be assured.
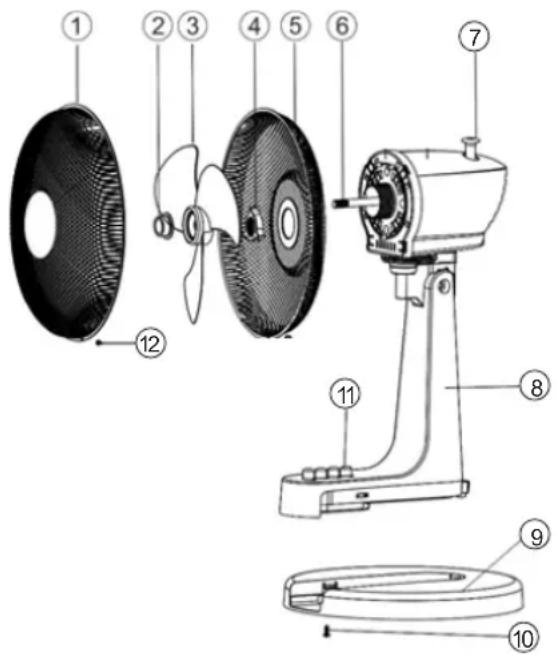
1. Parts Description
- Front Grill
- Blade Lock Nut
- Blade
- Grill Lock Nut
- Back Grill
- Motor
- Oscillation Button
- Main Body
- Base
- Base Fixed Screw
- Speed Selection
- Grill Clips
2. Safety advice and warnings!
Read these instructions carefully before switching on the appliance and keep them for future reference. Failure to follow and observe these instructions could lead to an accident. Clean all the parts of the product that will be in contact with food, as indicated in the cleaning section, before use.
2.1. Use or working environment:
2.1.1. Keep the working area clean and well lit. Cluttered and dark areas invite accidents.
2.1.2. Use the appliance in a well-ventilated area.
2.1.3. Do not place the appliance on hot surfaces, such
as cooking plates, gas burners, ovens, or similar items.
2.1.4. Keep children and bystanders away when using this appliance.
2.1.5. Place the appliance on a horizontal, flat, stable surface and away from other heat sources and contact with water.
2.1.6. Keep the appliance away from flammable material such as textiles, curtains, cardboard, or paper, etc.
2.1.7. Do not place flammable material near the appliance.
2.1.8. Do not use the appliance in association with a programmer, timer or other device that automatically switches it on.
2.1.9. Do not use the appliance if the cable or plug is damaged.
2.1.10. Ensure that the voltage indicated on the rating label matches the mains power supply voltage before plugging in the appliance.
2.1.11. Connect the appliance to the mains power supply with an earth socket withstanding a minimum of 10 amperes.
2.1.12. The appliance's plug must fit into the mains power supply socket properly. Do not alter the plug.
2.1.13. If using a multi plug check ratings carefully as the current used by several appliances could easily exceed the rating of the multi plug.
2.1.14. If any of the appliance casings breaks, immediately disconnect the appliance from the mains power supply to prevent the possibility of an electric shock.
2.1.15. Do not use the appliance if it has fallen on the floor or if there are visible signs of damage.
2.1.16. Do not force the power cord. Never use the power cord to lift up, carry or unplug the appliance.
2.1.17. Do not wrap the power cord around the appliance.
2.1.18. Do not clip or crease the power cord.
2.1.19. Do not allow the power cord to hang or to come into contact with the hot surfaces of the appliance.
2.1.20. Check the state of the power cord. Damaged or tangled cables increase the risk of electric shock.
2.1.21. The appliance is not suitable for outdoor use.
2.1.22. Power cord should be regularly examined for signs of damage, and if the cord is damaged, the appliance must not be used.
2.1.23. Do not touch the plug with wet hands.
2.2. Personal safety:
2.2.1. CAUTION: Do not leave the appliance unattended during use as there is a risk of an accident.
2.2.2. Do not touch the rotating parts of the appliance, as it may cause serious injury.
2.2.3. This appliance is only for domestic use, not for industrial or professional use. It is not intended to be used by guests in hospitality environments such as bed and breakfast, hotels, motels, and other types of residential environments, even in farmhouses, areas of the kitchen staff in shops, offices and other work environments.
2.2.4. This appliance is not intended for use by persons (including children) with reduced physical, sensory, or mental capabilities, or lack of experience and knowledge, unless they have been given supervision or instruction concerning use of the appliance by a person responsible for their safety.
2.2.5. This appliance is not a toy. Children should be supervised to ensure that they do not play with the appliance.
2.3. Use and care:
2.3.1. Fully unroll the appliance's power cable before each use.
2.3.2. Do not use the appliance if the parts or accessories are not properly fitted.
2.3.3. Do not turn the appliance over while it is in use or connected to the mains power supply.
2.3.4. Unplug the appliance from the mains power supply when not in use and before undertaking any cleaning task.
2.3.5. This appliance should be stored out of reach of children.
2.3.6. Do not store the appliance if it is still hot.
2.3.7. Never leave the appliance unattended when in use and keep out of the reach of children.
2.3.8. If for some reason, the appliance were to catch fire, disconnect the appliance from the mains power supply and DO NOT USE WATER TO PUT THE FIRE OUT.
2.4. Service:
2.4.1. Make sure that the appliance is serviced only by suitably qualified technician, and that only original spare parts or accessories are used to replace existing parts/accessories.
2.4.2. If the power cord is damaged, the manufacturer or its service agent or a similarly qualified person must replace it in order to avoid a hazard.
2.4.3. Any misuse or failure to follow the instructions for use renders the guarantee and the manufacturer's liability null and void.
3. Instructions for use:
3.1. Before use:
3.1.1. Remove the appliance's protective film (if ap-
plicable).
3.1.2. Before using the product for the first time, clean in the manner described in the cleaning section.
3.2. Assembly:
3.2.1. Take out all of the appliance's parts out of the packaging and remove all the packaging materials and inserts.
3.2.2. Loosen the Fixed Screw (10) and place the Main Body (8) into the Base (9) and then replace the screw and tighten.
3.2.3. Remove the fixed screws (12)
3.2.4. Remove the Blade Lock Nut (2) and Grill Lock Nut (4). Place the Back Grill (5) – ensuring the handle on the grill is facing up. Replace the Grill Lock Nut (4) and tighten.
3.2.5. Line up the Blade (3) and secure with the Blade Lock Nut (2).
3.2.6. Place the Front Grill (1) and secure in place with Grill Clips (12)
3.3. Use and care:
3.3.1. Turning on the fan:
3.3.1.1. Connect the appliance to the mains.
3.3.1.2. Select the airflow required using the buttons (11):
-
Stop Fan
-
Low Speed
- Medium Speed
- High Speed
3.3.2. Swing and Tilt
3.3.2.1. The fan head can swing from left to right to left, sweeping air from a certain area. To do so, simply press the Oscillation Button (7).
3.4. Once you have finished using the appliance:
3.4.1. Allow fan blade to come to a complete stop.
3.4.2. Unplug the appliance from the mains power supply.
3.4.3. Clean the appliance as described in the cleaning section.
4. Cleaning:
4.1. Disconnect the appliance from the mains power supply and allow it to cool completely before undertaking any cleaning task.
4.2. Remove the front grill in order to clean the propeller. When removing the front grill to clean the propeller, make sure that the fan is unplugged before removing the guard.
4.3. Clean the outer parts of the appliance with a damp cloth with a few drops of washing-up liquid and then dry. CAUTION! Do not immerse electrical parts of the appliance in any liquid.
4.4. Do not use solvents, or products with an acid or base pH such as bleach or abrasive products, for cleaning the appliance.
4.5. Never submerge the appliance in water or any other liquid or place it under running water.
5. Anomalies and repair
5.1. Take the appliance to an authorised support centre if product is damaged or other problems arise.
5.2. If the connection to the mains has been damaged, it must be replaced and you should proceed as you would in the case of damage
6. Recycling
6.1. These electrical products, cables, batteries, packaging, and the manual, should not be mixed with general household waste. For proper recycling, please take these products to your nearest Creative Housewares office where they will be accepted for recycling free of charge.
6.2. Alternatively, please contact your local authority or household waste disposal service for further details of your nearest designated collection point. Correct product disposal saves resources and prevents negative effects on human health and the environment.
Geagte Klient,
1. Parte beskrywing
- Front Grill
- Blade Lock Nut
- Blade
- Grill Lock Nut
- Back Grill
- Motor
- Oscillation Button
- Main Body
- Base
- Base Fixed Screw
- Speed Selection
- Grill Clips
Thank you for purchasing a Mellerware product. Mellerware guarantees that your product has been thoroughly inspected and tested before being dispatched and is free from mechanical and electrical defects and complies with the applicable safety standards. With every Mellerware product purchased you get a 2 year warranty as detailed in the terms and conditions below.
First Year – 1 Year Retail Warranty:
Should defects due to faulty parts or workmanship develop, under normal use, within 12 months from the original purchase date, please return the product to the store from where it was purchased for repair free of charge. However, for the customer's convenience we will replace products where the purchase price is equal to or less than R750 incl. VAT
Second Year – 1 Year Extended Warranty
Mellerware takes pride in their product quality and therefore offer an extended 12 month warranty over and above the 1 Year Retail Warranty. Should defects due to faulty material or workmanship develop, under normal domestic use, after the 12 month period and within 24 months from the original date of purchase, please return the product postage pre-paid to Mellerware for repair. Mellerware will repair the product free of charge and return it to you directly. Mellerware will replace a product with a similar product in the same or better condition, if the repair cannot be conducted for whatever reason.
NB: The 1 Year Extended Warranty is only valid for customers who have registered their warranty online at www.mellerware.co.za within the first year after making their purchase. See overleaf for details and instructions.
Before returning your product, check the following:
- Your household mains supply socket is in good condition, working and switched on.
- The mains supply circuit is not overloaded (White trip switch on your DB board is off).
- You have read the trouble shooting guide in your Instructions for Use.
- All accessories and parts are present.
The following conditions apply:
-
Please ensure you retain your original receipt as this must be presented when making a claim under the terms of the warranty. It is impossible to determine the warranty period without your original proof of purchase, so please keep this in a safe place. (NB. Your warranty can be scanned onto the Mellerware web site for safe storage – see reverse side for details.)
-
If a refund or exchange is required the product must be complete with all accessories, parts and packaging. Missing parts will render the warranty void.
-
Upon receipt of your appliance, check it for any transport damage to ensure it is safe for use. Return it to the store as soon as possible for exchange if damaged. The warranty is void if products are damaged after use, so please do not use the damaged product.
-
Your product is designed for normal domestic
household use. Failure to read and comply with the instructions for use, cleaning and maintenance will render your warranty void, so please read these instructions carefully to ensure your safety, and to get the most effective use from the product. (e.g. not removing lime scale; water deposits; insect infestation, and/or burnt products)
- Any abuse, negligent, improper or accidental use or care will render the warranty void and Creative Housewares (Pty) Ltd will not be liable for any loss or damage.
- Any attempted repair, or replacement of unauthorised parts will render the warranty void, so please contact an authorised service centre or service agent for any service or repair requirements.
- NB: The warranty on replaced products will be from the original date of purchase and not from when the date replacement was made.
- All repairs carry a 3 month warranty even if this falls outside of the 2 year warranty period.
- Mellerware will attempt to conduct repairs within reasonable time in line with industry standards but cannot be held responsible or liable for any circumstances not under our control.
- Terms and Conditions are subject to change without prior notice.
Repairs Out of the Warranty Period
If service or repair becomes necessary outside the warranty period, this service is still available however all transport/postage, spares and labour costs will be for the customers' account. All chargeable repairs will require the customers' written acceptance of the quote. Once the go-ahead has been received Mellerware will undertake to conduct the repair within a reasonable time and maintain the condition of the product as received. All repairs are warranted for 3 months from the date of the repair.
For any service, enquiries and complaints please contact our Customer Care on 086 111 5006 or e-mail help@chwsa.co.za from 08h00 to 15h00 Monday to Friday excluding public holidays. Please also note that the company is normally closed for 2 weeks around Christmas and New Year.
Please send all products for repair postage pre-paid to one of the service centres listed on the back of this page.
ONLINE WARRANTY REGISTRATION
Why register your warranty?
We at Mellerware pride ourselves on bringing premium quality appliances to market, and as a commitment to this level of quality we offer a 2 year warranty (1 Year Retail + 1 Year Extended) on all of our products. We often hear that our customers lose their receipts and can therefore no longer claim if they have a problem. To take advantage of the 1 Year Extended Warranty you will need to register your warranty online within the first year of purchase in order to make a valid claim. Now you can register your product, upload your warranty online, never have to worry about losing your receipt again and enjoy the benefit of your 2 year warranty.
Added Benefits
In addition to providing you with an online profile of your registered products we will also provide a host of value added benefits:
• Incentives and Competitions for registered users
- New recipes or ideas for your products
- New product developments – be the first to get the latest appliances
- Special offers on promotional items
How to Register your Online Warranty?
STEP1 Create your user profile:
If you haven't done so already, simply visit www.mellerware.co.za, click on the "Product Registration" link and follow the easy instructions. You will receive a username and password once registered. This will give you access to your user profile.

STEP2 Pick a registration method:

DESKTOP/LAPTOP
- Open your internet browser and visit www.mellerware.co.za
- Click on the "Registration" link and login using your user name and password.
- Click on "Register your products and upload receipts" and follow the easy instructions.
- Scan and upload your receipt

SMART PHONE/ TABLET
- Scan the QR code above or visit www.mellerware.co.za
- Click on the "Registration" link and login using your user name and password.
- Click on "Register your products and upload receipts" and follow the easy instructions.
- Scan or take a photo and upload your receipt.

FAX
• Fax the following to 021 931 4058
- First Name and Surname
- Contact telephone and fax number.
• Product Model number and Type.
- Traceability Code (found on a label on the product)
• A clear and legible copy of your receipt.
Notes:
- The online warranty system is a safe storage facility for your receipt.
- You will be required to register on the Mellerware website. You will receive a username and password once registered. This will give you access to your profile.
- From your profile you will be able to load products that you have purchased. In order to successfully register your warranty you will need to either scan and upload, or fax through your receipt to us.
- All instructions on how to load your products are available
inside your profile.
-
Please note that you must check that your receipt has been uploaded correctly. Creative Housewares cannot be held responsible for faxes or files not received.
-
For assistance with registration please email: marketing@chwsa.co.za
NB: Your 1 year extended warranty is only valid if your product is registered online within the first year after purchasing your Mellerware product. Failure to register your product on-line within the first year will render the extended warranty as void.
creative housewares
National Service Centre: 086 111 5006
e-mail: help@chwsa.co.za
www.creativehousewares.co.za
Cape Town
20 Tekstiel Street, Parow, Cape Town, 7493, South Africa • P.O. Box 6156 Parow East, 7501, South Africa Tel: +27 21 931 8117
Fax: +27 21 931 4058
Durban
243 Percy Osborn Road Morningside,
Durban, South Africa
Tel: +27 31 303 3465
Fax: +27 31 303 8259
Johannesburg
Unit 25 & 26 San Croy Office Park
Die Agora Road, Croydon, 1619
Tel:+27 11 392 5652
Fax:+27 11 392 1694
mellerware®
makes life easier
2YEAR WARRANTY
1YEAR RETAIL & 1YEAR EXTENDED
Register online: www.mellerware.co.za

STAP 2 Kies 'n registrasie metode:

REKENAAR/
SKOOTREK-
ENAAR
- Maak u internet snuffelgids oop en besoek www.mellerware.co.za
- Klik op die "Registrasie" skakel en teken in met u gebruikersnaam en wagwoord.
- Klik op "Register your products" en laai kwitansies en volg die maklike instruksies.
- Skandeer en laai u strokie

SMART-FOON / TABLET
243 Percy Osborn Road Morningside,
Durban, South Africa
Tel: +27 31 303 3465
Fax: +27 31 303 8259
Johannesburg
Unit 25 & 26 San Croy Office park
Die Agora Road, Croydon, 1619
Tel: +27 11 392 5652
Fax: +27 11 392 1694
Durban
243 Percy Osborn Road Morning-
side, Durban, South Africa
Tell: +27 31 303 3465
Fax: +27 31 303 8259
creative housewares
合 20 Tekstiel St, Parow. cape Town. 7493, RSA
P.O. Box 6156 Parow East, 7501, RSA
+27 21 931 8117 / Helpline: 086 111 5006
+27 63 014 0457 +27 21 931 4058
www.creativehousewares.co.za
Johannesburg
Unit 25 & 26 San Croy Office Park
Die Agora Road, Croydon, 1619
Tell: +27 11 392 5652
Fax: +27 11 392 1694
- Dear customer,
- Parts Description
- Safety advice and warnings!
- Use or working environment:
- Personal safety:
- Use and care:
- Service:
- Instructions for use:
- Before use:
- Assembly:
- Use and care:
- Swing and Tilt
- Once you have finished using the appliance:
- Cleaning:
- Anomalies and repair
- Recycling
- Geagte Klient,
- Parte beskrywing
- First Year – 1 Year Retail Warranty:
- Second Year – 1 Year Extended Warranty
- Before returning your product, check the following:
- The following conditions apply:
- Repairs Out of the Warranty Period
- ONLINE WARRANTY REGISTRATION
- Why register your warranty?
- Added Benefits
- How to Register your Online Warranty?
- STEP1 Create your user profile:
- STEP2 Pick a registration method:
- DESKTOP/LAPTOP
- SMART PHONE/ TABLET
- FAX
- Notes:
- creative housewares
- Cape Town
- Durban
- Johannesburg
- mellerware®
- STAP 2 Kies 'n registrasie metode:
Brand : Mellerware
Model : Aquillo 35810WH
Category : Fan