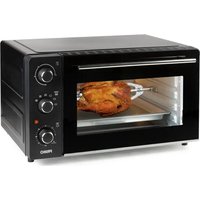
PR255OV - Oven PRIMO - Free user manual and instructions
Find the device manual for free PR255OV PRIMO in PDF.


| Product type | Oven |
| Brand | PRIMO |
| Model | PR255OV |
| Supply voltage | 220-240 V ~ 50 Hz |
| Power | Not available |
| Maximum temperature | 230 °C |
| Timer | Up to 90 minutes, with audible signal |
| Cooking functions | Top heat, bottom heat, top+bottom heat, top+bottom+convection, roasting (rotisserie) |
| Number of cooking levels | 3 |
| Interior material | Stainless steel |
| Included accessories | Cooking grid, baking tray, rotisserie spit with fork, handle for removing spit, crumb tray |
| Glass type | Porthole |
| Interior lighting | Yes, turns on when operating |
| Maintenance and cleaning | Clean the interior after each use with a damp cloth; accessories can be washed in hot water with mild detergent |
| Warranty | 2 years on the appliance, 6 months on accessories |
| Spare parts and repairability | Accessories can be ordered; repairs by the manufacturer or authorized service center |
| Safety instructions | Do not immerse, do not use outdoors, keep out of reach of children under 16 without supervision |
| Intended use | Domestic and similar environments (kitchen, farm, guest houses) |
| Manual available | PDF format, free, in multiple languages |
| Customer service | www.primo-electro.be, Monday to Thursday 8:30-12:00 and 13:00-17:00, Friday 8:30-12:00 and 13:00-16:30 |
Frequently Asked Questions - PR255OV PRIMO
User questions about PR255OV PRIMO
0 question about this device. Answer the ones you know or ask your own.
Ask a new question about this device
Download the instructions for your Oven in PDF format for free! Find your manual PR255OV - PRIMO and take your electronic device back in hand. On this page are published all the documents necessary for the use of your device. PR255OV by PRIMO.
USER MANUAL PR255OV PRIMO
Read all instructions carefully - save this instruction manual for future reference.
| NL Nederlands 4 |
| FR Français 16 |
| DE Deutsch 28 |
| EN English 40 |
GARANTIE (NL)
Geachte klant,
Chere cliente, cher client,
All of our products are always submitted to a strict quality control before they are sold to you. Should you nevertheless experience problems with your device, we sincerely regret this.
In that case, we kindly request you to contact our customer service. Our staff will gladly assist you.

www.primo-elektro.be
Monday - Thursday: 8.30 - 12.00 and 13.00 - 17.00
Friday: 8.30 - 12.00 and 13.00 - 16.30
This appliance has a two year warranty period. During this period the manufacturer is responsible for any failures that are the direct result of construction failure. When these failures occur the appliance will be repaired or replaced if necessary. The warranty will not be valid when the damage to the appliance is caused by wrong use, not following the instructions or repairs executed by a third party. The guarantee is issued with the original till receipt. All parts, which are subject to wear, are excluded from the warranty. If your device breaks down within the 2-year warranty period, you can return the device together with your receipt to the shop where you purchased it. The guarantee on accessories and components that are liable to wear-and-tear is only 6 months.
The guarantee and responsibility of the supplier and manufacturer lapse automatically in the following cases:
- If the instructions in this manual have not been followed.
- In case of incorrect connection, e.g. electrical voltage that is too high.
- In case of incorrect, rough or abnormal use.
- In case of insufficient or incorrect maintenance.
- In case of repairs or alterations to the device by the consumer or non-authorised third parties.
- If the customer used parts or accessories that are not recommended or provided by the supplier / manufacturer.
SAFETY INSTRUCTIONS
When using electrical appliances, basic safety precautions should always be taken, including the following:
- Read all instructions carefully. Keep this manual for future reference.
- Make sure all packaging materials and promotional stickers have been removed before using the appliance for the first time. Make sure children cannot play with the packaging materials.
-
This appliance is intended to be used in household and similar applications such as:
-
staff kitchen areas in shops, offices and other working environments;
- farm houses;
- by clients in hotels, motels and other residential type environments;
-
bed and breakfast type environments.
-
Children should be supervised to ensure that they do not play with the appliance.
- This appliance can be used by children aged from 16 years and above and persons with reduced physical, sensory or mental capabilities or lack of experience and knowledge if they have been given supervision or instruction concerning use of the appliance in a safe way and understand the hazards involved.
-
Children shall not play with the appliance.
-
Cleaning and user maintenance shall not be made by children unless they are older than 16 or supervised.
- Keep the appliance and its cord out of reach of children younger than 16 years.
- All repairs should be carried out by the manufacturer or its aftersales service.
- Using the appliance incorrectly may cause an injury. Any injury or damage caused by failure to comply with these rules are at your own risk. Neither the manufacturer, importer, or the supplier may be held liable.
ELECTRICALWARNINGS
-
In order to avoid a hazard this appliance must not be supplied through an external switching device, such as a timer or a separate remote control, or connected to a circuit that is regularly switched on and off by the utility.
-
The appliance must be disconnected from its power source when not in use, during service and when replacing parts. Allow to cool before putting on or taking off parts, and before cleaning the appliance. To disconnect, turn controls to "OFF" or "0" position, then remove the plug from the wall. Never pull the cord or appliance to remove the plug from the socket.
-
Before use, check carefully that the electric tension and frequency of the power net at your home match
the indications on the rating label of the appliance.
- The appliance must be plugged into an appropriate outlet that is installed and grounded in accordance with local installation regulations.
- Do not let the power supply cord hang over the edge of a counter, or touch hot surfaces.
- Keep the power cord away from hot parts and don't cover the appliance.
- Unwrap the cord completely to prevent overheating of the cord. Do not allow the power cord supply to run underneath or around the unit.
- To avoid danger, do not operate this appliance with a damaged cord or plug or in the event the appliance malfunctions or has been damaged in any manner. Return the appliance to the PRIMO Service Department or its service agent for examination, repair, or electrical or mechanical adjustment. Do not try to repair the appliance yourself.
INSTALLATION
- Do not place near flammable materials, gases or explosives.
- Do not use or store this appliance outdoors.
- Always use the appliance on a steady, dry and level surface.
- Never place this appliance near a gas stove or electrical stove or in a place where it may come into contact with a warm appliance.
USE
- Do not use this appliance for other than intended use.
- Only use the appliance for domestic use. The manufacturer cannot be held responsible for accidents that result from improper use of the appliance or not following the instructions described in this manual.
- Never leave the appliance unattended while it is functioning.
- Do not operate the appliance with wet hands.
- The use of accessories that are not recommended or sold by the manufacturer can cause fire, electrical shock or injuries. Only use the utensils delivered with the appliance.
CLEANING AND MAINTENANCE
- To protect against electrical shock or burns, do not immerse unit, cord, or plug in water or other liquid.
- Failure to maintain this appliance in a clean condition could adversely affect the life of the appliance and possibly result in a hazardous situation.
PRODUCT-SPECIFICWARNINGS
- Do not touch any hot parts, use the handles and knobs.
-
When using the oven, ensure you have a clearance of minimum 10cm around every side to allow air to circulate freely around the machine.
-
The machine must not be used in an enclosed space (such as a cupboard, for example).
- Never cover the machine's plate and grill with aluminium foil. This could cause the oven to overheat.
- Do not use metal scourers to clean the oven. Small particles of the scourer may break loose and land on the heating element.
- Do not put foods or metal accessories that are too big in the oven as they may cause fire or electrocution.
- A fire may be caused if the machine comes into contact with or is covered with flammable materials during operation, such as oven gloves, curtains, wall, etc. Do not place any objects on top of the oven when it is in use.
- Take great care when using dishes made entirely of metal or glass.
- Do not place any of the following materials in the oven: cardboard, plastic, paper or similar.
- Store only oven parts in the machine when it is not in use.
- Always use oven gloves when placing or removing items in the oven.
- The housing of the oven can get hot during use.
- Keep the electrical cord away from hot parts and do not cover the oven.
SAVE THESE INSTRUCTIONS FOR FUTURE REFERENCE
PARTS
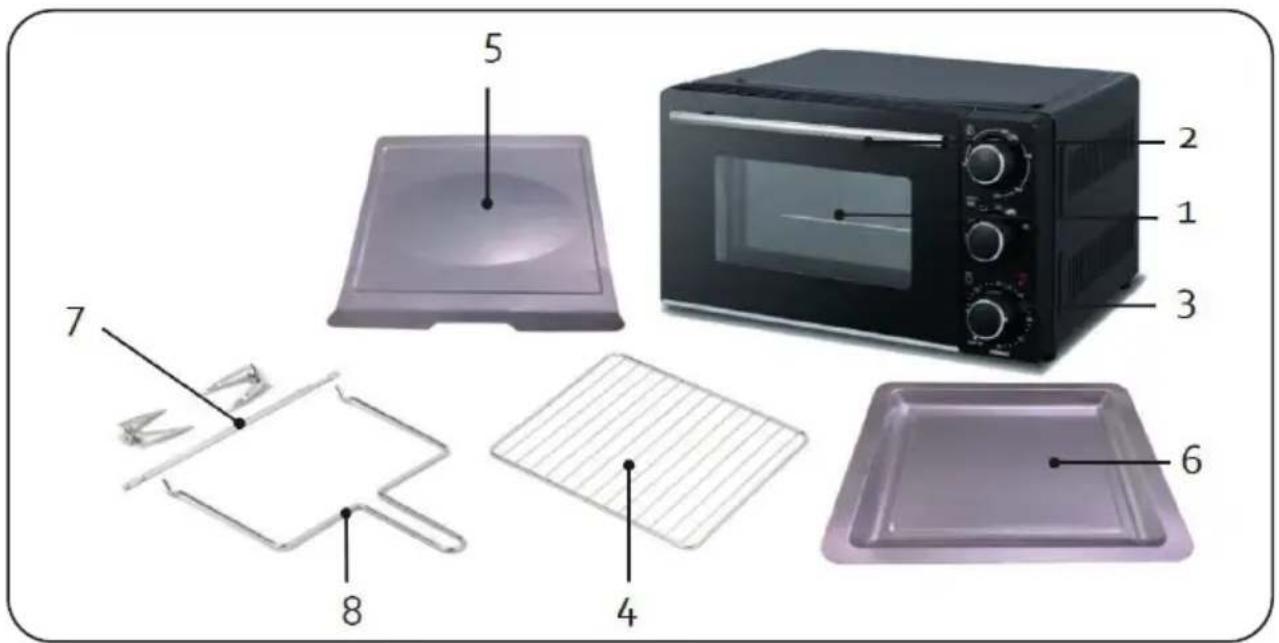
- Observation window
- Handle
- Control panel
- Grill rack
- Crumb tray
- Baking sheet
- Grill spit with meat holders
- Handle to remove grill spit
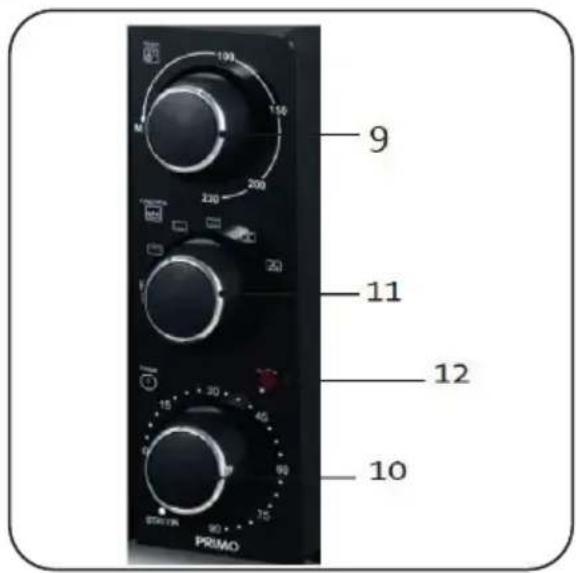
- Temperature setting button
- Timer setting button
- Function setting button
- Temperature indicator light
BEFORE THE FIRST USE
Remove all packaging materials and wipe the machine with a damp cloth. Clean the baking tray, grill rack, rotary spit, crumb tray and handle to remove the rotary spit in warm water and a mild detergent. Make sure that the parts are completely dry before using the machine again.
USE
Insert the baking tray or grill rack in the oven in one of the three available levels. This of course depends on the height of the dish. Never allow the dish to come into contact with the heating element. The deep back ensures you can even fit a complete pizza inside the oven.
Check if the crumb tray is well in place on the bottom of the oven.
SET THE TEMPERATURE
Select the required temperature by rotating the knob. The maximum temperature is 230^ . Remember to preheat the oven for 5 to 10 minutes prior to use so that the oven is at the right temperature before food is placed in the oven.
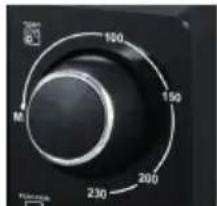
SET FUNCTIONS
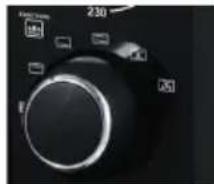
Turn this knob to the required position.
-
Position "OFF": at this position, the oven is turned off.
-
Top heating on this setting, the heating element heats from the top of the oven.
-
Bottom heating : on this setting, the heating element heats from the bottom of the oven.
-
Top and bottom heating on this setting, the heating element at both the bottom and at the top heat up to cook the dish evenly.
-
Top and bottom heating and convection this setting, the heating element at both the bottom and at the top heat up to cook the dish evenly, and the dish in the oven is cooked by hot air as well.
-
Rotisserie function: the grill spit with meat holders is used for grilling meat and poultry by rotating it (rotisserie). To do this, slide the meat or poultry onto the spit and secure it with the help of the two meat holders located on the spit. Always make sure that the meat does not touch the heating element and that the spit can rotate freely. For poultry, the thighs and wings must be additionally held in place using roulade skewers or the like, so that they do not restrict the rotation while cooking. Now place the rotisserie spit in the holders inside the oven. Place the long end in the recess provided on the right side, so that the other end can then rest in the holder on the left side. Place the baking tray under the spit so that the fat or jus from the meat does not drip onto the heating element. Use the handle provided to remove the grill spit from the oven after grilling.
SET THE TIMER
Set the timer by rotating the knob. If the required time is less than 15 minutes, first rotate the button past the 15 minutes and then turn the button back to the required time. The maximum amount of time that can be set is 90 minutes. A bell will ring when the time has expired. The oven will not work if the timer has not been set. If you
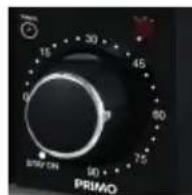
do not want to set a timer, turn the knob to the left (STAY ON). This will enable you to use the oven without setting a time. The indicator light turns red to indicate that the machine is heating up. The indicator light will go out when the appliance has reached the set temperature. The light on the inside of the oven will light up so that you easily track the progress of baking without having to open the door.
Note: the machine will not begin to work until the temperature, timer and function
have been set.
You can always change the time during the cooking process if required.
Note: the indicator light will go off and on regularly as the appliance continuously maintains its temperature.
The table below shows a few dishes, and their recommended settings.
Recommendation: pre-heat the oven for 10 minutes.
| Preparation Temperature setting | Preparation time Function |
| Fresh pizza 200°C 25 min. | |
| Frozen pizza 220°C 15 min. | |
| Cake 200°C 35 min. | |
| Vegetable casserole | 200°C 30 min. |
| Oven dish with meat | 190°C 35 min. |
| Meat 220°C 20 min. | |
| Complete chicken 180°C 60 min. | |
| Apple cake 190°C 90 min. | |
| Lasagne 210°C 30 min. | |
| Reheat 150°C 10 min. |
Note: the machine will not begin to work until the temperature, timer and function have been set.
After use, turn all the knobs back to OFF/O/MIN before switching the machine off.
Use oven gloves or potholders to remove the grill rack or baking tray from the appliance after use.
ROTISSERIE
- Meat or poultry should be secured on the spit (fix bolts and wings extra) so that the grill spit can rotate unhindered.
- Leave the baking tray in the oven while using the rotisserie spit. The baking tray will catch the splashes so they do not land on the lower heating element. Splashes on the heating element can cause smoke and damage.
- The rotisserie spit will periodically stop spinning. This is normal. The heating elements will shut off when the appliance reaches temperature. As a result, you will not have direct heat on the food at that time. When the temperature has dropped, the thermostat will turn back on, and the spit will also begin to
turn again. This will give you an even browning of the food.
- When the meat or poultry is ready, remove the spit from the oven using oven gloves or potholders and the handle to remove the grill spit.
MAINTENANCE AND CLEANING
- Always make sure you remove the plug from the socket before cleaning the appliance.
- Let the appliance cool down before cleaning.
- Clean the inside of the appliance after every use with a slightly damp cloth.
- Clean the parts in warm water with a mild detergent.
- The door and the control panel can be cleaned with a slightly damp cloth.
TROUBLESHOOTING GUIDE
| PROBLEM SOLUTION | |
| The oven does not heat. | Make sure that the timer, function and temperature buttons are set correctly. ·Make sure that the appliance is plugged into a working outlet. Test the outlet with other appliances and have it repaired by a professional if necessary. ·Check the fuse in the fuse box and have it repaired by a professional if necessary. |
| The timer is not counting down. | ·If the desired time is less than 15 minutes, first turn the knob past 15 minutes and then turn the knob back to the desired time. |
| The food is burnt at the top. | ·Next time, place the food on a lower floor and/or use just the lower heater. ·Lower the temperature setting. |
| Smoke is coming from the appliance. | ·At first use, this is perfectly normal and it will stop after a short period of time. ·If this happens after the first use, it is probably from spilled food residue on the heating elements at the top or bottom. Allow the appliance to cool completely and clean the heating elements. |
| There is a burnt smell coming from the appliance. | ·This is probably from spilled food residue on the heating elements at the top or bottom. Allow the appliance to cool completely and clean the heating elements. |
The rotisserie will stop rotating when the appliance reaches temperature.
- This is normal. The heating elements will turn off when the appliance reaches temperature. As a result, you will not have direct heat on the food at that time. When the temperature has dropped, the thermostat will turn back on, and the spit will also begin to turn again. This will give you an even browning of the food.
ENVIRONMENTAL GUIDELINES
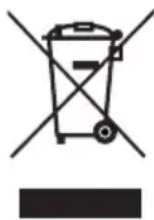
This symbol on the product or on its packaging indicates that this product may not be treated as household waste. Instead it must be brought to the applicable collection point for recycling of electrical and electronic equipment. By ensuring this product is disposed of correctly, you will help prevent potential negative consequences for the environment and human health, which could otherwise be caused by inappropriate waste handling of this product. For more detailed information about recycling of this product, please contact your local city office, your household waste disposal service or the shop where you purchased the product.

The packaging is recyclable. Please treat the packaging ecologically.
WEBSHOP

Following accessories have 6 months warranty, and can be easily ordered using the link below.
WWW.PRIMO-ELEKTRO.BE

- GARANTIE (NL)
- SAFETY INSTRUCTIONS
- ELECTRICALWARNINGS
- INSTALLATION
- USE
- CLEANING AND MAINTENANCE
- PRODUCT-SPECIFICWARNINGS
- PARTS
- BEFORE THE FIRST USE
- SET THE TEMPERATURE
- SET FUNCTIONS
- SET THE TIMER
- ROTISSERIE
- MAINTENANCE AND CLEANING
- TROUBLESHOOTING GUIDE
- ENVIRONMENTAL GUIDELINES
- WEBSHOP
- WWW.PRIMO-ELEKTRO.BE
Brand : PRIMO
Model : PR255OV
Category : Oven