USER MANUAL EK7D19S1 AEG
natural_image
Simple line drawing of a refrigerator with two doors (no text or symbols)

NL Gebruiksaanwijzing | Koel-vriescombinatie 2
EN User Manual | Fridge Freezer 21
FR Notice d'utilisation | Réfrigérateur/congélateur 38
DE Benutzerinformation | Kühl - Gefrierschrank 57
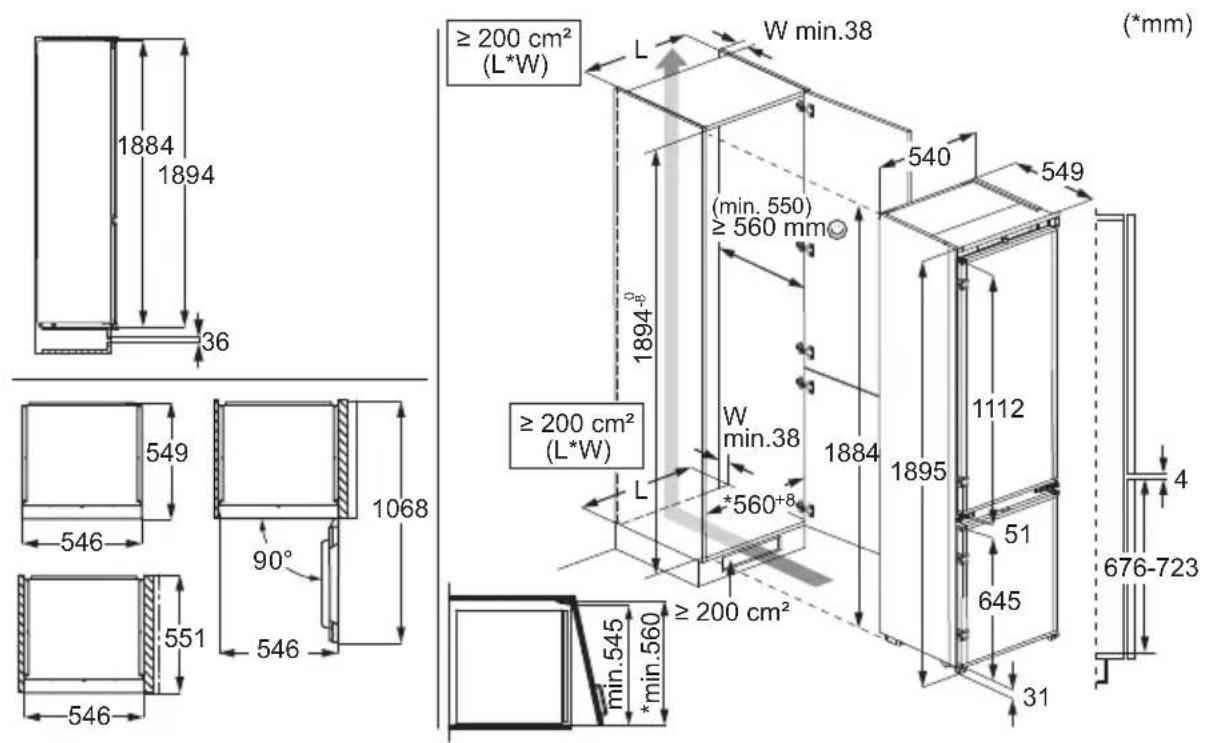
INSTALLATIE / INSTALLATION / INSTALLATION / MONTAGE
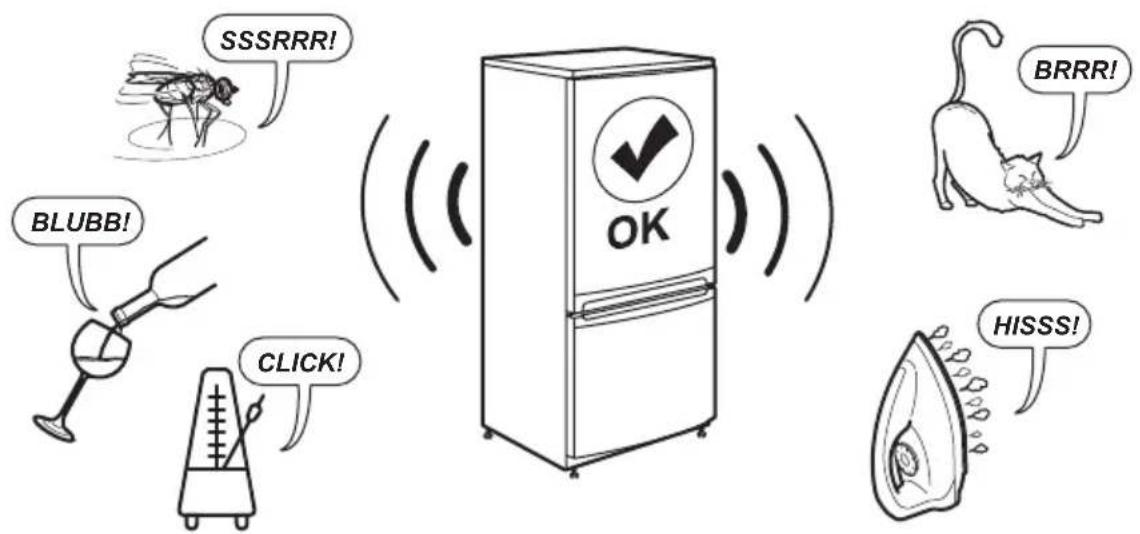
GELUIDEN / NOISES / BRUITS / GERÄUSCHE
2 NEDERLANDS
- VEILIGHEIDSINFORMATIE....3
- VEILIGHEIDSINSTRUCTIES....5
- BEDIENINGSPANEEEL....7
- DAGELIJKS GEBRUIK.... 10
- AANWIJZINGEN EN TIPS.... 13
-
ONDERHOUD EN REINIGING......14
-
PROBLEEMOPLOSSING.... 16
- TECHNISCHE GEGEVENS....19
- INFORMATIE VOOR TESTINSTITUTEN 19
- HET MILIEUPERSPECTIEF...... 20
natural_image
Illustration of hands using a tool to adjust or install a mechanical component, no text or symbols present
natural_image
Line drawing of a metal shelf with a triangular support and vertical supports (no text or symbols)
natural_image
Illustration of hands adjusting a window frame with directional arrows (no text or symbols)
natural_image
Diagram of hands holding a rectangular object with a grid pattern, showing rotational arrows indicating movement (no text or symbols)
natural_image
Illustration of a hand holding a tab with a curved arrow indicating rotation (no text or symbols)
natural_image
Illustration of hands operating a window with arrows indicating direction (no text or symbols)
natural_image
Illustration of hands using a tool to adjust or install a mechanical component (no text or symbols visible)
natural_image
Illustration of a hand using a tool to lift a vertical pole, with an arrow indicating rotation (no text or symbols present)
natural_image
Illustration of a hand using a ruler to measure a circular motion, showing hand positioning and rotation (no text or symbols)
4.8 MULTIFLOW
natural_image
Simple line drawing of a blank rectangular object with a folded corner (no text or symbols)
natural_image
Diagram of a multi-tiered shelving unit with curved arrows indicating rotation or movement (no text or symbols)
natural_image
Diagram showing a mechanical component being processed into a layered structure with an arrow indicating rotation (no text or symbols present)
natural_image
Illustration of hands using a mechanical device to press or install a layered electronic component, with an inset showing magnified detail (no text or symbols)
natural_image
Technical line drawing of a mechanical component with an inset magnified view showing a pin inserted into a housing (no text or symbols)
natural_image
Simple line drawing of a container with an arrow pointing to it, and two separate geometric shapes below (no text or symbols)
natural_image
Hand holding a mechanical component with an upward arrow indicating force or direction (no text or symbols)
natural_image
Illustration of a hand reaching toward a window with an upward arrow (no text or symbols)
7. PROBLEEMOPLOSSING

WAARSCHUWING!
Before the installation and use of the appliance read the supplied instructions carefully. The manufacturer is not responsible for any injuries or damage that result from incorrect installation or usage. Always keep the instructions in a safe and accessible location for future reference.
1.1 Children and vulnerable people safety
- This appliance can be used by children aged from 8 years and above and persons with reduced physical, sensory or mental capabilities or lack of experience and knowledge if they have been given supervision or instruction concerning the use of the appliance in a safe way and understand the hazards involved. Children aged from 3 to 8 years and persons with very ex-
tensive and complex disabilities are allowed to load and unload the appliance provided that they have been properly instructed. Children of less than 3 years of age should be kept away from the appliance unless continuously supervised.
• Children should be supervised to ensure that they do not play with the appliance.
- Children shall not carry out cleaning and user maintenance of the appliance without supervision.
- Keep all packaging away from children and dispose of it appropriately.
1.2 General Safety
- This appliance is for storing food and beverages only.
- This appliance is designed for single household do-
mestic use in an indoor environment.
- This appliance may be used in, offices, hotel guest rooms, bed & breakfast guest rooms, farm guest houses and other similar accommodation where such use does not exceed (average) domestic usage levels.
-
To avoid contamination of food respect the following instructions:
-
do not open the door for long periods;
- clean regularly surfaces that can come in contact with food and accessible drainage systems;
-
store raw meat and fish in suitable containers in the refrigerator, so that it is not in contact with or drip onto other food.
-
WARNING: Keep ventilation openings, in the appliance enclosure or in the built-in structure, clear of obstruction.
-
WARNING: Do not use mechanical devices or other means to accelerate the defrosting process, other than those recommended by the manufacturer.
-
WARNING: Do not damage the refrigerant circuit.
- WARNING: Do not use electrical appliances inside the food storage compartments of the appliance, unless they are of the type recommended by the manufacturer.
- Do not use water spray and steam to clean the appliance.
- Clean the appliance with a moist soft cloth. Only use neutral detergents. Do not use abrasive products, abrasive cleaning pads, solvents or metal objects.
- When the appliance is empty for long period, switch it off, defrost, clean, dry and leave the door open to prevent mould from developing within the appliance.
- Do not store explosive substances such as aerosol cans with a flammable propellant in this appliance.
- If the supply cord is damaged, it must be replaced by the manufacturer, its Authorised Service Centre or similarly qualified persons in order to avoid a hazard.
2. SAFETY INSTRUCTIONS
2.1 Installation

WARNING!
Only a qualified person must install this appliance.
- Remove all the packaging.
- Do not install or use a damaged appliance.
- Do not use the appliance before installing it in the built-in structure due to safety manner.
- Follow the separate instructions for the appliance installation and door reversing available on our website.
• Always take care when moving the appliance as it is heavy. Always use safety gloves and enclosed footwear.
- Make sure the air can circulate around the appliance.
- At first installation or after reversing the door, wait at least 4 hours before connecting the appliance to the power supply. This is to allow the oil to flow back in the compressor.
- Before carrying out any operations on the appliance (e.g. reversing the door), remove the plug from the power socket.
- Do not install the appliance close to radiators or cookers, ovens, or hobs, unless otherwise specified in the installation instructions.
- Do not expose the appliance to the rain.
- Do not install the appliance where there is direct sunlight.
- Do not install this appliance in areas that are too humid or too cold.
- When you move the appliance, lift it by the front edge to avoid scratching the floor.
- Protect the floor from scratches when reversing the appliance door.
- The appliance contains a bag of desiccant. This is not a toy. This is not food. Please dispose of it immediately.
2.2 Electrical connection

WARNING!
Risk of fire and electric shock.

WARNING!
When positioning the appliance, ensure the supply cord is not trapped or damaged.

WARNING!
Do not use multi-plug adapters and extension cables.

CAUTION!
Any electrical work required to install this appliance should be carried out by a qualified electrician.
- Make sure that the parameters on the rating plate are compatible with the electrical ratings of the mains power supply.
• The appliance must be earthed.
• Always use a correctly installed shockproof socket.
- If the domestic power supply socket is not earthed, connect the appliance to a separate earth in compliance with current regulations, consulting a qualified electrician.
- Make sure not to cause damage to the electrical components (e.g. mains plug, mains cable, compressor). Contact the Authorised Service Centre or an electrician to change the electrical components.
- The mains cable must stay below the level of the mains plug.
- Connect the mains plug to the mains socket only at the end of the installation. Make sure that there is access to the mains plug after the installation.
- Do not disconnect the appliance by pulling on the mains cable. Always pull on the mains plug.
- This appliance is fitted with a 13 A mains plug. If it is necessary to change the mains plug fuse, use only a 13 A ASTA (BS 1362) fuse (UK and Ireland only).
2.3 Use

WARNING!
Risk of injury, burns, electric shock or fire.

The appliance contains flammable gas, isobutane (R600a), a natural gas with a high level of environmental compatibility. Be careful not to cause damage to the refrigerant circuit containing isobutane.
- Do not change the specification of the appliance.
- Any use of the built-in product as freestanding is strictly prohibited.
- This appliance is intended to be used at ambient temperature ranging from 10°C to 43°C. The specified temperature range guarantees the correct operations of the appliance.
- Do not put electrical appliances (e.g. ice cream makers) in the appliance unless they are stated applicable by the manufacturer.
- If damage occurs to the refrigerant circuit, make sure that there are no flames and sources of ignition in the room. Ventilate the room.
- Do not let hot items to touch the plastic parts of the appliance.
- Do not put soft drinks in the freezer compartment. This will create pressure on the drink container.
- Do not store flammable gas and liquid in the appliance.
- Do not put flammable products or items that are wet with flammable products in, near or on the appliance.
- Do not touch the compressor or the condenser. They are hot.
- Do not remove or touch items from the freezer compartment if your hands are wet or damp.
- Do not freeze again food that has been thawed.
- Follow the storage instructions on the packaging of frozen food.
- Wrap the food in any food contact material before putting it in the freezer compartment.
- Do not allow food to come in contact with the inner walls of the appliance compartments.
2.4 Internal lighting

WARNING!
Risk of electric shock.
- This product contains one or more light sources of energy efficiency class F.
- Concerning the lamp(s) inside this product and spare part lamps sold separately:
These lamps are intended to withstand extreme physical conditions in household appliances, such as temperature, vibration, humidity, or are intended to signal information about the operational status of the appliance. They are not intended to be used in other applications and are not suitable for household room illumination.
2.5 Care and cleaning

WARNING!
Risk of injury or damage to the appliance.
- Before maintenance, deactivate the appliance and disconnect the mains plug from the mains socket.
- This appliance contains hydrocarbons in the cooling unit. Only a qualified person must do the maintenance and the recharging of the unit.
- Replace the air filter every 6 months. Contact your local dealer to purchase a replacement.
2.6 Service
• To repair the appliance contact the Authorised Service Centre. Use only original spare parts.
- Please note that self-repair or non-professional repair can have safety consequences and might void the guarantee.
- The following spare parts are available for at least 7 years after the model has been discontinued: thermostats, temperature sensors, printed circuit boards, light sources, door handles, door hinges, trays and baskets. Door gaskets are available for at least 10 years after the model has been discontinued. The duration may be longer in your country. For further information, please visit our website.
- Please note that some of these spare parts are only available to professional repairers, and that not all spare parts are relevant for all models.
2.7 Disposal

WARNING!
Risk of injury or suffocation.
- Disconnect the appliance from the mains supply.
- Cut off the mains cable and discard it.
-
Remove the door to prevent children and pets to be closed inside of the appliance.
-
The refrigerant circuit and the insulation materials of this appliance are ozone-friendly.
• The insulation foam contains flammable gas. Contact your municipal authority for
information on how to discard the appliance correctly.
- Do not cause damage to the part of the cooling unit that is near the heat exchanger.
3. CONTROL PANEL
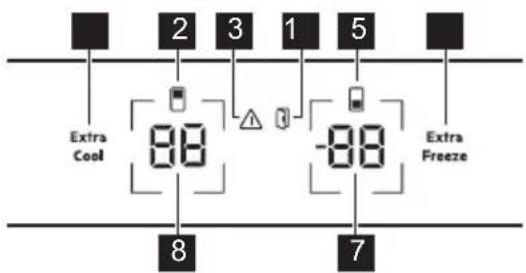
1 Extra Cool button / indicator
2 Fridge compartment indicator
3 Alarm indicator
4 Door open alarm indicator
5 Freezer compartment indicator
6 Extra Freeze button / indicator
7 Freezer temperature button / indicator
8 Fridge temperature button / indicator
3.1 Switching on/off
Switch on
Connect the mains plug to the power socket. To select a different set temperature, refer to "Temperature regulation".
If dE on appears on the display, refer to "Troubleshooting".
Switch off
- Press and hold the fridge temperature button and freezer temperature button simultaneously for 5 sec
The display shows blinking OF.
- When display reads OF, disconnect the main plug from the power socket.
3.2 Temperature regulation
The temperature range may vary between -15°C and -24°C for freezer (recommended -18°C) and between 2°C and 8°C for fridge (recommended 4°C).
Press the temperature buttons to set the temperature of the appliance.
The temperature indicators show the set temperature.
① The set temperature will be reached within 24 h.
After a power failure, the appliance restores to the set temperature.
3.3 Switching off/on the fridge compartment
To switch off:
- Press and hold the fridge temperature button for 5 sec. The display shows blinking OF.
- Once the fridge compartment is switched off, the display reads OF.
To switch on:
- Press and hold the fridge temperature button for 5 sec. The display shows blinking On.
- The fridge compartment is switched on and the previous set temperature is restored.
3.4 Switching off/on the freezer compartment
To switch off:
- Press and hold the freezer temperature button for 5 sec. The display shows blinking OF.
- Once the freezer compartment is switched off, the display reads OF.
To switch on:
- Press and hold the freezer temperature button for 5 sec. The display shows blinking On.
- The freezer compartment is switched on and the previous set temperature is restored.
3.5 MultiSwitch
This function allows you to convert the freezer compartment into a fridge.
① Before activating the MultiSwitch function remove the frozen food from the freezer compartment.
To convert the compartment:
- Tap the freezer temperature button repeatedly until the display shows blinking -.
- Press - - within the next 7 sec. If you do not press the button within this time, the freezer compartment will not convert into a fridge.
- The freezer temperature indicator shows the temperature of the MultiSwitch compartment (4°C).
① Wait 24 h before using the MultiSwitch compartment.
When the MultiSwitch function is on the High temperature alarm is disabled and it is not possible to activate the Extra Freeze function.
The MultiSwitch function deactivates when you switch off the appliance or switch off the converted compartment.
The MultiSwitch function resumes operation once the power is restored after a power failure.
Before deactivating the MultiSwitch function, remove the food from the MultiSwitch compartment.
To convert the MultiSwitch compartment back:
- Press the freezer temperature button until -- starts blinking.
- Press -- within the next 7 sec. If you do not press the button within this time, the MultiSwitch compartment will not convert back into a freezer.
- The freezer temperature indicator shows the temperature of the freezer compartment.
① The MultiSwitch compartment reaches the set temperature after 24 h. Wait until the MultiSwitch compartment has reached the set temperature before using it.
The High temperature alarm starts working again 1 h after deactivating the MultiSwitch function.
This function allows you to rapidly cool large amounts of warm food without warming food already stored in the fridge compartment.
To activate the function, press the Extra Cool button.
The Extra Cool indicator lights up. When the Extra Cool function is on, the fan may work automatically.
This function stops automatically after approximately 6 h. Once the function is off, the Extra Cool indicator goes out.
Press the Extra Cool button to deactivate the Extra Cool function before it automatically ends.
① To set a different fridge temperature, switch off the Extra Cool function.
Extra Freeze function is used to pre-freeze and fast freeze in sequence in the freezer compartment. This function accelerates the freezing of fresh food and protects foodstuffs already stored from warming.
To freeze fresh food, activate the Extra Freeze function at least 24 h before placing the food to complete pre-freezing.
Press the Extra Freeze button to activate this function.
The Extra Freeze indicator lights up. The Extra Freeze function stops automatically after a maximum of 52 h.
Press the Extra Freeze button to deactivate the function before it automatically ends.
3.8 High temperature alarm
When the temperature in the freezer compartment increases, the alarm indicator flashes, the freezer temperature indicator shows blinking H^ and the sound is on.
To deactivate the alarm, press any button.
The alarm indicator and sound turn off. The freezer temperature indicator shows H^ for 5 sec before indicating the freezer temperature again.
① The alarm restarts 1 h after deactivation until the normal conditions are restored. If you do not press any button, the sound switches off automatically after 1h.
3.9 Door open alarm
The door open alarm indicator turns on with the sound if the fridge door is left open for 5 min. or if the freezer door is left open for 80 sec.
The alarm stops after closing the door. Press any button to switch off the sound.
① If you do not press any button, the sound switches off automatically after 1 hour.
3.10 Setting mode
The Setting mode allows you to enable or disable the sounds, the Sabbath mode, Demo mode, to reset the appliance factory settings and to change the temperature units from ^ C to ^ F.:
Activating the Setting mode
- Press and hold the Extra Cool button for approx. 3 sec. The display shows blinking SE tt.
- Once the Setting mode is switched on, the display shows tS on.
- Press and hold the Extra Cool button for approx. 3 sec to deactivate the Setting mode.
The Setting mode deactivates if you do not interact with the control panel for 60 sec.
Navigating the Setting mode
Tap the Extra Cool to change the parameter. Tap the fridge temperature button to change the parameter value.
Display Default parameters
| tS on Button sounds |
| CF °C Temperature units |
| Sb OF Sabbath mode |
| dE OF Demo mode |
| FS 03 Factory settings |
To enable or disable the sounds:
- Activate the Setting mode.
-
Navigate the Setting mode until the display shows tS. Tap the fridge temperature button to switch the sounds on or off. The indicator will change to On for the enabled or OF for the disabled sounds.
-
Exit the Setting mode.
Temperature units
To change the temperature unit:
- Activate the Setting mode.
-
Navigate the Setting mode until the display shows CF and °C. Tap the fridge temperature button to select between °C for Celsius and °F for Fahrenheit.
-
Exit the Setting mode.
Sabbath mode
Sabbath mode disables the following features during religious holidays:
- all buttons except for the button combination necessary to deactivate the mode
• sound, except for the High temperature alarm
- alarm indicators, except for the High temperature alarm.
To switch on the Sabbath mode:
- Activate the Setting mode.
- Navigate the Setting mode until the display shows Sb. Tap the fridge temperature button to switch Sabbath mode on or off. The indicator will change to On for the enabled or OF for the disabled Sabbath mode.
- Exit the Setting mode.
After switching on the Sabbath mode, the display shows Sb and On. Accessing any other setting is blocked.
Demo mode
The Demo mode simulates the operation of the appliance without cooling. It is designed for showroom or display purposes only.
① You can not store food when Demo Mode is on.
To switch on the Demo mode:
- Activate the Setting mode.
-
Navigate the Setting mode until the display shows dE. Tap the fridge temperature button to switch the mode on or off. The indicator will change to On for the enabled or OF for the disabled Demo mode.
-
Exit the Setting mode.
Factory settings
This function restores each setting to the factory default settings. To restore the factory default settings:
- Activate the Setting mode.
-
Navigate the Setting mode until the display shows FS. Tap the fridge temperature button to restore the factory settings. The display shows on and turns into 03.
-
Exit the Setting mode.
4. DAILY USE
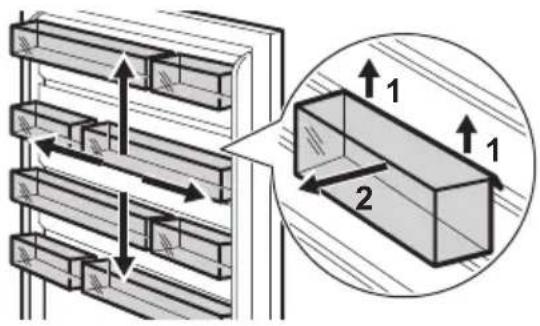
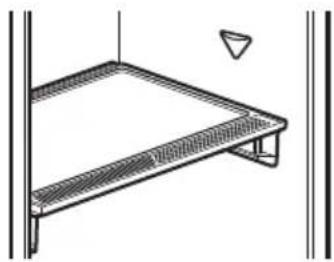
4.1 Positioning door shelves
The door runners allow to rearrange the shelves.
To reposition the door shelves/bins:
- Move the shelf/bin in the direction of the arrows.
- Place the shelf/bin in position and carefully insert it into the runner.
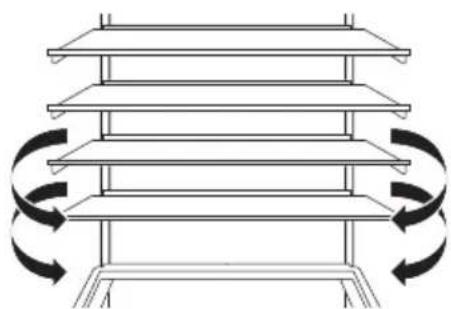
4.2 Movable shelves
The walls of the fridge are equipped with runners. You can change the position of the shelves.
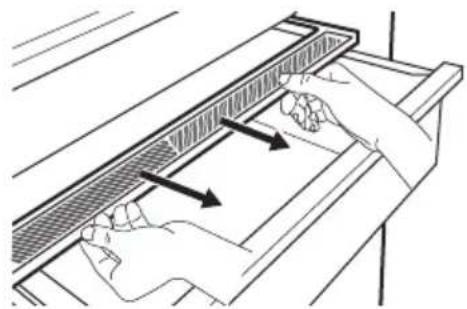
This appliance is equipped with a flexible shelf. The front half of the shelf can be placed under the second half:
- Take out the front half carefully.
- Slide it into the lower rail and under the second half.
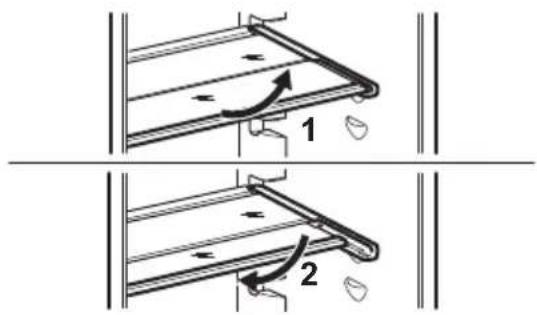
Do not move the glass shelf above the vegetable drawer to ensure correct air circulation.
4.3 GreenZone drawer
The GreenZone is a pull-out drawer marked with 🎨 and located at the bottom of the fridge compartment.
It has a sealing that provides the optimal humidity inside the drawer.
4.4 Removing GreenZone drawer
- Empty the drawer.
- Pull out the drawer from the fridge.
natural_image
Diagram showing hands operating a mechanical device with an arrow indicating motion (no text or symbols present)
- Lift up the front of the drawer.
- Pull the drawer out while lifting it up.
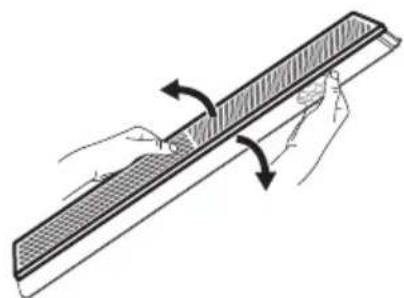
4.5 Removing the glass cover of the drawers
- Unlock lateral gripping from both sides simultaneously.
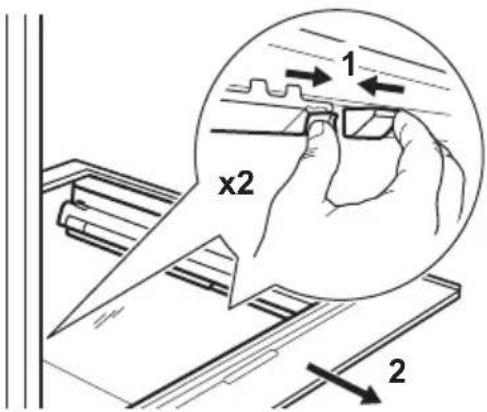
- Pull the glass shelf support towards yourself.
4.6 Humidity control
The glass shelf of the GreenZone drawer features a device that provides for optimal humidity inside the drawer.
①Do not place any food products on the humidity control device.
natural_image
Simple line drawing of a rectangular metal frame with a small triangular object on top (no text or symbols)
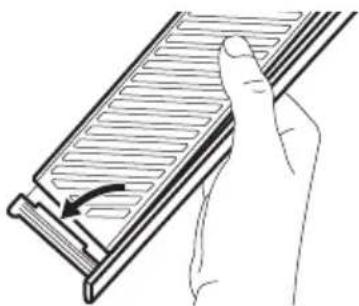
To remove the humidity control device:
- Open the drawer below the glass shelf and pull out the cover.
natural_image
Illustration of hands holding a curved panel with arrows indicating direction (no text or symbols)
- To replace the device's white membrane, grab the device in the middle and separate the membrane from the cover by pulling the cover.
natural_image
Diagram of hands holding a rectangular object with arrows indicating rotation or movement (no text or symbols)
- Assemble a new membrane into the cover by pressing the edge of the membrane into the cover.
natural_image
Illustration of a hand holding a metal tray with a curved arrow indicating rotation (no text or symbols)
- Reassemble the humidity control back on the drawer.
natural_image
Illustration of hands operating a window with arrows indicating direction (no text or symbols)
① Condensation may occur in the Green-Zone drawer. Remove it using a soft cloth.
There is a drawer above the GreenZone drawer.
To remove the drawer:
- Pull out the drawer from the fridge.
natural_image
Illustration of hands using a tool to adjust or install a component, with no visible text or symbols
- Lift up the front of the drawer.
natural_image
Illustration of a hand using a ruler to measure a vertical pole, with an arrow indicating rotation (no text or symbols present)
- Lift and turn the drawer to pull it out of the appliance.
natural_image
Illustration of a hand using a ruler to measure a vertical object, with an arrow indicating rotational motion (no text or symbols)
4.8 MULTIFLOW
The fridge compartment is equipped with the MULTIFLOW fan that allows for rapid and effective cooling of food, and keeps uniform temperature in the compartment.
The fan activates automatically and operates only when the door is closed.
natural_image
Simple line drawing of a blank rectangular object with no text or symbols
① Do not block the air vents.
natural_image
Diagram of a multi-tiered shelving unit with curved arrows indicating rotation or movement (no text or symbols)
Do not remove the MULTIFLOW panel. For cleaning instructions, refer to the "Care and cleaning" chapter.
4.9 CleanAir+ filter
In the appliance, there can be a CleanAir+ carbon filter provided by manufacturer.
The carbon filter purifies the air from odours in the fridge compartment, improving the storage quality.
On delivery, the filter and its plastic housing are in a plastic bag (refer to the "Installing and replacing the CleanAir+ filter" section in the "Care and cleaning" chapter for the installation).
4.10 Freezing fresh food
Use the freezer compartment for freezing fresh food and storing frozen and deep-frozen food for a long time.
① Wrap the food in any food contact material before putting it into the freezer.
Activate the Extra Freeze function at least 24 h before placing the food to be frozen in the freezer compartment.
Store the fresh food evenly distributed in the first compartment or drawer from the top.
Do not exceed the max. amount of food that can be frozen without adding other fresh food within 24 h (refer to the rating plate).
When the freezing process is complete, the appliance automatically returns to the previous temperature setting (see "Extra Freeze function").
For more information refer to "Hints for freezing".
4.11 Storage of frozen food
When activating the appliance for the first time or after a period out of use, activate the Extra Freeze function at least 3 h before putting the products in the freezing compartment.
To store large quantities of food, remove the drawers and place the food directly on the shelves, at least 15 mm away from the door.
CAUTION!
If the power has been off for longer than the value shown on rating plate under "rising time", the defrosted food must be consumed immediately. Refer to "High temperature alarm".
4.12 Ice-cube production
This appliance is equipped with one or more trays for the production of ice-cubes.
① Do not use metallic instruments to remove the trays from the freezer.
5. HINTS AND TIPS
5.1 Hints for energy saving
- Freezer: The original configuration ensures the most efficient use of energy.
- Fridge: The configuration with the drawers in the bottom part of the appliance and shelves evenly distributed ensures the most efficient use of energy. Position of the door bins does not affect energy consumption.
- Do not open the door frequently or leave it open longer than necessary.
- Freezer: The colder the temperature setting, the higher the energy consumption.
- Fridge: Do not set too high temperature unless it is required by the characteristics of the food.
- If the ambient temperature is high and the temperature control is set to low temperature and the appliance is fully loaded, the compressor may run continuously, causing frost or ice formation on the evaporator. In this case, set the temperature control toward higher temperature to allow automatic defrosting.
- Do not cover the ventilation grilles or holes.
- Ensure that food products inside the appliance allow air circulation through holes in the rear interior of the appliance.
5.2 Hints for freezing
- Do not freeze bottles or cans with liquids, in particular drinks containing carbon dioxide. They may explode during freezing.
- Do not put hot food in the freezer compartment.
- Do not place fresh unfrozen food directly next to already frozen food.
- Do not eat ice cubes, water ices or ice lollies immediately after taking them out of the freezer to avoid frostbites.
- Do not re-freeze defrosted food.
5.3 Hints for storage of frozen food
• Freezer compartment is marked with

- Good temperature setting that ensures preservation of frozen food products is a temperature less than or equal to -18^ .
- Higher temperature setting inside the appliance may lead to shorter shelf life.
- The whole freezer compartment is suitable for storage of frozen food products.
- Leave enough space around the food to allow air to circulate freely.
5.4 Shelf life for freezer compartment
| Type of food | Shelf life (months) |
| Bread 3 |
| Fruits (except citrus) 6 - 12 |
| Vegetables 8 - 10 |
| Leftovers without meat 1 - 2 |
| Dairy food: |
| Butter 6 - 9 |
| Soft cheese (e.g. mozzarella) 3 - 4 |
| Hard cheese (e.g. parmesan, cheddar) | 6 |
| Seafood: |
| Fatty fish (e.g. salmon, mackerel) 2 - 3 |
| Lean fish (e.g. cod, flounder) 4 - 6 |
| Shrimps 12 |
| Shucked clams and mussels 3 - 4 |
| Cooked fish 1 - 2 |
| Meat: |
| Poultry 9 - 12 |
| Beef 6 - 12 |
| Pork 4 - 6 |
| Lamb 6 - 9 |
| Sausage 1 - 2 |
| Ham 1 - 2 |
| Leftovers with meat | 2 - 3 |
5.5 Hints for food refrigeration
① Fresh food compartment is the space above the GreenZone drawer.
- Good temperature setting that ensures preservation of fresh food is a temperature less than or equal to +4°C.
• Always use closed containers for liquids and for food, to avoid flavours or odours in the compartment.
• To avoid the cross-contamination between cooked and raw food, cover the cooked food and separate it from the raw one.
- Wrap and place meat on the glass shelf above the vegetable drawer.
• Defrost the food inside the fridge.
- Do not insert hot food inside the appliance.
- Clean fruit and vegetables and place in a dedicated drawer (vegetable drawer).
- Do not keep exotic fruits in the fridge.
- Do not keep vegetables like tomatoes, potatoes, onions, and garlic in the fridge.
- Close the bottles before you put them into the fridge.
6. CARE AND CLEANING

WARNING!
Refer to Safety chapters.
6.1 Cleaning the interior
Before first use clean the interior and all accessories with lukewarm water and neutral soap, then dry.

CAUTION!
The accessories and parts of the appliance are not suitable for washing in a dishwasher.

CAUTION!
Clean the control panel with a moist cloth. Do not use any detergents. Wipe the control panel dry with a soft cloth.
6.2 Periodic cleaning
Clean the equipment regularly:
- Clean the inside and accessories with lukewarm water and neutral soap. Rinse and wipe them dry.
- Wipe down the door seals regularly.
6.3 Defrosting of the refrigerator
Defrosting of the fridge compartment is automatic. The water that condenses flows into a recipient on the compressor and evaporates. The recipient cannot be removed.
6.4 Defrosting of the freezer
The freezer compartment is frost free. There is no build up frost on the internal walls nor on the foods, when the appliance is in operation.
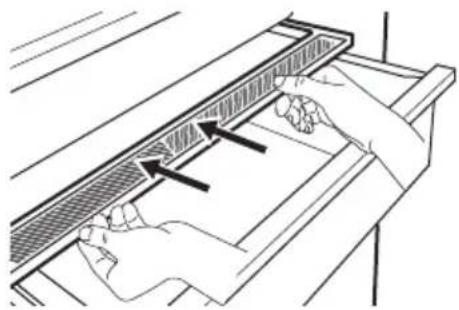
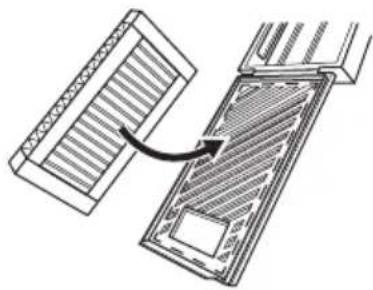
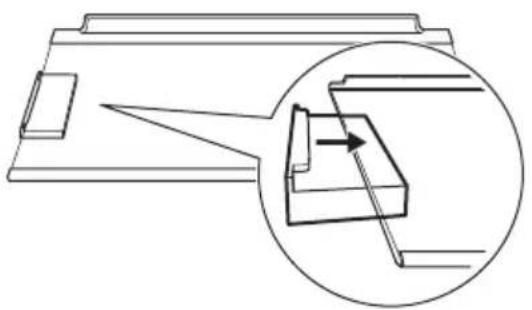
6.5 Installing and replacing the CleanAir+ filter
i Handle the air filter carefully to avoid scratching its surface. On delivery, the air filter is in a plastic bag to preserve performance.
Install the air filter before activating the appliance.
- Open the plastic housing and put the pleated surface on the grid, fitting the filter inside the marked area on the gridded surface.
natural_image
Diagram showing a device with a grid-like structure and an arrow indicating rotation or assembly (no text or symbols present)
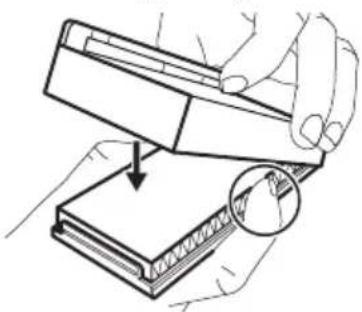
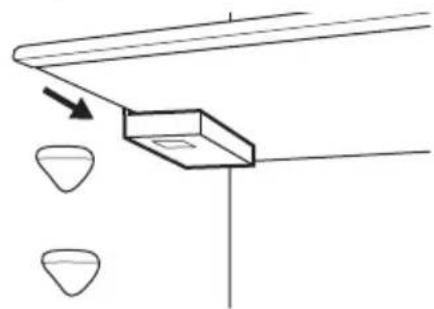
- Hold the filter down while closing the plastic housing until you hear a click.
natural_image
Illustration of a hand using a mechanical device to press down a layered material (no text or symbols visible)
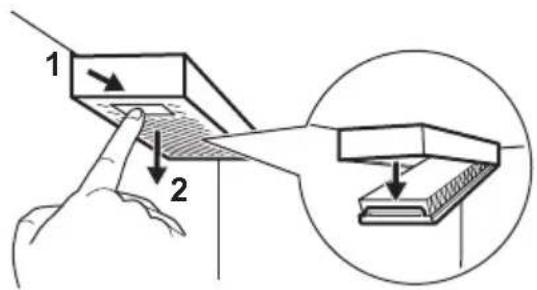
- Remove the top glass shelf from the fridge compartment. Slip the plastic housing with the air filter on the left side of the glass shelf.
natural_image
Technical line drawing of a mechanical component with an inset magnified view showing a pin inserted into a housing (no text or symbols)
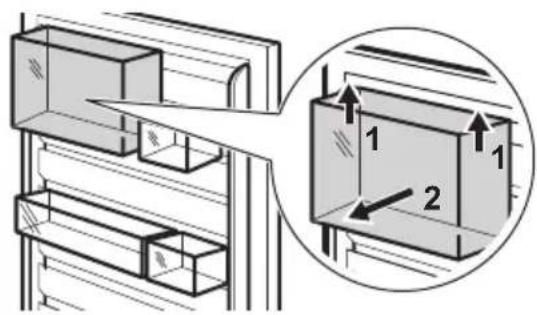
- Insert the glass shelf back in the fridge compartment. Do not hit the filter.
natural_image
Simple line drawing of a container with an arrow pointing to it, and two small bowls below (no text or symbols)
Replacing the air filter
- Open the filter housing.
- Remove the used air filter.
- Insert the new air filter in the housing and close it.

natural_image
Hand holding a mechanical component with an upward arrow indicating force or direction (no text or symbols)
Replace the air filter every 6 months.
① The air filter is a consumable accessory and as such is not covered by the guarantee.
You can purchase new air filters from your local dealer.
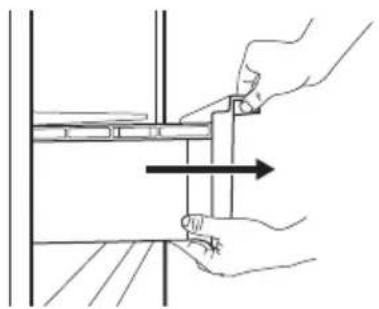
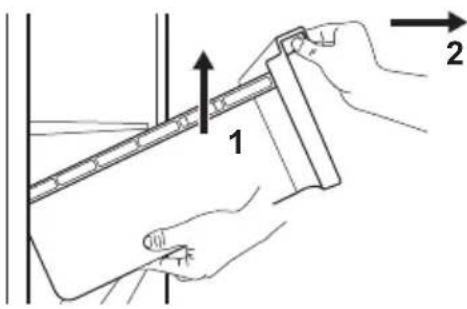
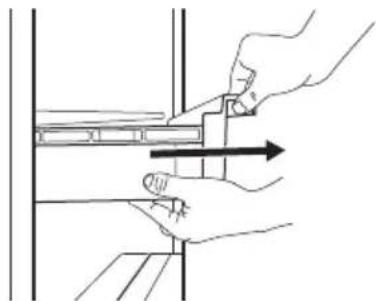
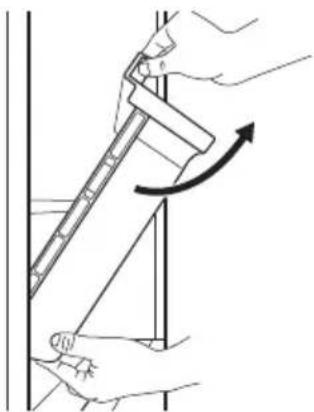
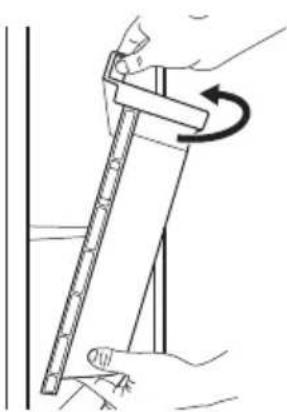
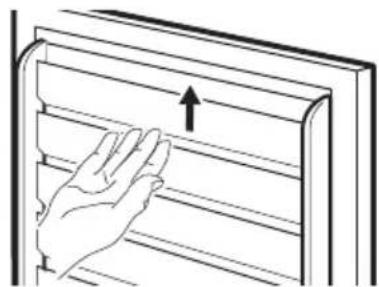
6.6 Removing CustomFlex plastic runners
- Remove all bins, boxes and clips from the door.
- Remove the upper rail grabbing and lifting it from the center.
natural_image
Illustration of a hand reaching toward horizontal slats with an upward arrow (no text or symbols)
- Slide upwards the other runners to remove them (they constitute one part).
Install back all the door equipment in a reverse order.
6.7 Period of non-operation
When the appliance is not in use for long period, take the following precautions:
- Disconnect the appliance from electricity supply.
- Remove all food.
- Clean the appliance and all accessories.
- Leave the doors open to prevent unpleasant smells.
7. TROUBLESHOOTING

WARNING!
Refer to Safety chapters.
7.1 What to do if...
| Problem Possible cause Solution |
| The appliance does not operate. | The appliance is switched off. Switch on the appliance. |
| The mains plug is not connected to the mains socket correctly. | Connect the mains plug to the mains socket correctly. |
| There is no voltage in the mains socket. | Connect a different electrical appliance to the mains socket. Contact a qualified electrician. |
| The appliance is noisy. | The appliance is not supported properly. | Check if the appliance stands stable. |
| Acoustic or visual alarm is on. | The cabinet has been recently switched on. | Refer to "High temperature alarm" or "Door open alarm". |
| The temperature in the appliance is too high. | Refer to "High temperature alarm" or "Door open alarm". |
| The door is left open. Close the door. |
| The compressor operates continuously. | Temperature is set incorrectly. | Refer to "Control panel" chapter. |
| Too much food is put in at the same time. | Wait a few hours and then check the temperature again. |
| The room temperature is too high. | Refer to "Installation" chapter. |
| Food placed in the appliance is too warm. | Allow food to cool to room temperature before storing. |
| The door is not closed correctly. | Refer to "Closing the door" section. |
| The Extra Freeze function is switched on. | Refer to "Extra Freeze function" section. |
| The Extra Cool function is switched on. | Refer to "Extra Cool function" section. |
| The compressor does not start immediately after pressing the "Extra Freeze" or "Extra Cool", or after changing the temperature. | The compressor starts after a period of time. | This is normal, no error has occurred. |
| Door is misaligned or interferes with ventilation grill. | The appliance is not levelled. Refer to installation instructions. |
| Door does not open easily. | You attempted to re-open the door immediately after closing. | Wait a few seconds between closing and re-opening of the door. |
| The lamp does not work. The lamp is in stand-by mode. Close and open the door. |
| The lamp is defective. | Contact the Authorized Service Centre. |
| There is too much frost and ice. | The door is not closed correctly. | Refer to "Closing the door" section. |
| The gasket is deformed or dirty. | Refer to "Closing the door" section. |
| Food is not wrapped properly. Wrap the food properly. |
| Temperature is set incorrectly. | Refer to "Control panel" chapter. |
| Appliance is fully loaded and is set to the lowest temperature. | Set a higher temperature. Refer to "Control panel" chapter. |
| Temperature set in the appliance is too low and the ambient temperature is too high. | Set a higher temperature. Refer to "Control panel" chapter. |
| Water flows on the rear plate of the refrigerator. | During the automatic defrosting process, frost melts on the rear plate. | This is correct. |
| There is too much condensed water inside the fridge. | Door was opened too frequently. | Open the door only when necessary. |
| Door was not closed completely. | Make sure the door is closed completely. |
| Stored food was not wrapped. | Wrap food in suitable packaging before storing it in the appliance. |
| This is normal that during summer and autumn more condensation can form due to the increased air and food humidity. Fridge does not produce any moisture. After this period, the humidity in the fridge decreases itself. | In summer and autumn, set the warmer temperature in the refrigerator (approx. 6-7°C). |
| There are water drops on the glass shelves. | There is too much moisture inside the fridge. | Wipe the glass shelves with a cloth to remove water drops. |
| Water flows on the floor. | The melting water outlet is not connected to the evaporative tray above the compressor. | Attach the melting water outlet to the evaporative tray. |
| Temperature cannot be set. | The Extra Freeze function or Extra Cool function is switched on. | Switch off Extra Freeze function or Extra Cool function manually, or wait until it deactivates automatically. Refer to "Extra Freeze function" or "Extra Cool function" section. |
| The temperature in the appliance is too low/too high. | The temperature is not set correctly. | Set a higher/lower temperature. |
| The door is not closed correctly. | Refer to the "Closing the door" section. |
| The food is too hot. | Let the food cool down before storage. |
| Too much food is stored at the same time. | Store less food at the same time. |
| The door has been opened often. | Open the door only if necessary. |
Problem Possible cause Solution
| The Extra Freeze function is switched on. | Refer to the "Extra Freeze function" section. |
| The Extra Cool function is switched on. | Refer to the "Extra Cool function" section. |
| There is no cold air circulation in the appliance. | Ensure cold air circulation in the appliance. Refer to the "Hints and tips" chapter. |
| dE on appears on the display. | The appliance is in the demo mode. | |
| Er CE appears and the alarm indicator is on. | Communication problem. | Contact the Authorised Service Centre. The cooling system will continue to keep food cold, but temperature adjustment will not be possible. |
| Er t1 or Er t3 or Er t5 and the current setting appear alternately for 5 sec and the alarm indicator is on. | Temperature sensor problem. | Contact the Authorised Service Centre. The cooling system will continue to keep food cold, but temperature adjustment will not be possible. |
① If the problem persists, contact the Authorised Service Centre.
7.2 Replacing the lamp
For replacing the lamp, contact the Authorized Service Centre.
7.3 Closing the door
- Clean the door gaskets.
- To adjust the door, refer to installation instructions.
- To replace the defective door gaskets, contact the Authorized Service Centre.
8. TECHNICAL DATA
The technical information is on the energy label and on the appliance rating plate, which may be located on or inside the appliance.
For Switzerland only
Voltage: 220-240 V
Frequency: 50 Hz
For EU only
The QR code on the energy label supplied with the appliance provides a web link to the information related to the performance of the appliance in the EU EPREL database. Keep the energy label for reference together with the user manual and all other documents pro-
vided with this appliance. It is also possible to find the same information in EPREL using the link https://eprel.ec.europa.eu and the model name and product number that you find on the rating plate of the appliance. See the link www.theenergylabel.eu for detailed information about the energy label.
For UK only
The QR code on the energy label supplied with the appliance provides a web link to the information related to the performance of the appliance. Keep the energy label for reference together with the user manual and all other documents provided with this appliance.
Installation and preparation of the appliance for any EcoDesign verification shall be compliant with:
UK BS EN 62552
EU, Switzerland, Israel EN 62552
Australia IEC 62552
South Africa SANS 62552
UAE UAE.S 5010-3:2022
GCC SASO-2892_2018
Ventilation requirements, recess dimensions and minimum rear clearances shall be as stated in this User Manual in "Installation". Contact the manufacturer for any other further information, including loading plans.
10. ENVIRONMENTAL CONCERNS
Recycle materials with the symbol Put the packaging in relevant containers to recycle it. Help protect the environment and human health by recycling waste of electrical and electronic appliances. Do not dispose of ap-
pliances marked with the symbol with the household waste. Return the product to your local recycling facility or contact your municipal office.
- CONSIGNES DE SÉCURITÉ......38
- CONSIGNES DE SÉCURITÉ....40
- BANDEAU DE COMMANDE....42
- UTILISATION QUOTIDIENNE.... 45
- CONSEILS.... 49
-
ENTRETIEN ET NETTOYAGE.... 50
-
DÉPANNAGE....52
- DONNÉES TECHNIQUES......55
- IINFORMATIONS POUR LES LABORATOIRES D'ESSAIS.... 55
- CONSIDÉRATIONS ENVIRONNEMENTALES.... 56
1. ⚠CONSIGNES DE SÉCURITÉ
4.2 Clayettes amovibles
natural_image
Hand using a tool to adjust or install a mechanical component, no text or symbols visible
natural_image
Simple line drawing of a metal shelf with a triangular support and a small triangle on the wall (no text or symbols)
natural_image
Illustration of two hands adjusting a metal frame with arrows indicating direction (no text or symbols)
natural_image
Diagram of hands holding a rectangular object with a hatched pattern, showing rotational motion arrows (no text or symbols)
natural_image
Hand holding a metal tab with a curved arrow indicating rotation (no text or symbols)
natural_image
Illustration of hands operating a window with arrows indicating direction (no text or symbols)
natural_image
Line drawing of hands using a tool to adjust or install a component, with no visible text or symbols
natural_image
Illustration of a hand using a ruler to measure a vertical pole, with an arrow indicating rotation (no text or symbols present)
natural_image
Illustration of a hand using a ruler to measure a vertical object, with an arrow indicating rotational motion (no text or symbols)
4.8 MULTIFLOW
natural_image
Simple line drawing of a closed book with a bookmark (no text or symbols)
natural_image
Diagram of a multi-tiered shelving unit with curved arrows indicating rotation or movement (no text or symbols)
natural_image
Diagram showing a device with a grid-like structure and an arrow indicating rotation or assembly (no text or symbols present)
natural_image
Illustration of a hand pressing down on a layered electronic device with a magnified inset showing the component (no text or symbols)
natural_image
Technical line drawing of a mechanical assembly with an inset showing a component being inserted (no text or symbols present)
natural_image
Simple line drawing of a container with liquid and two separate bowls below (no text or symbols)
natural_image
Hand holding a mechanical component with an upward arrow indicating force or direction (no text or symbols)
natural_image
Illustration of a hand reaching toward a window with an upward arrow (no text or symbols)
natural_image
Hand using a tool to adjust or install a mechanical component, no text or symbols visible
natural_image
Simple line drawing of a metal shelf with a triangular top and side supports (no text or symbols)
natural_image
Illustration of hands operating a window with arrows indicating direction (no text or symbols)
natural_image
Diagram of hands holding a rectangular object with a curved arrow indicating rotation or movement (no text or symbols present)
natural_image
Hand holding a metal tray with a curved arrow indicating rotation (no text or symbols)
natural_image
Illustration of hands installing or adjusting a window frame with arrows indicating direction (no text or symbols)
natural_image
Line drawing of hands using a tool to adjust or install a component, with no visible text or symbols
natural_image
Illustration of a person using a ruler to measure an angle, with an arrow indicating rotation (no text or symbols present)
natural_image
Illustration of a hand using a ruler to measure a surface, showing motion with an arrow (no text or symbols)
4.8 MULTIFLOW
natural_image
Simple line drawing of a closed book with a bookmark (no text or symbols)
natural_image
Diagram of a multi-level shelving unit with curved arrows indicating rotation or movement (no text or symbols)
natural_image
Diagram showing a mechanical component with a curved arrow indicating rotation or assembly (no text or symbols present)
natural_image
Illustration of a hand using a tool to press down a layered electronic device (no text or symbols visible)
natural_image
Technical line drawing of a mechanical assembly with an inset showing a close-up of a component (no text or symbols)
natural_image
Simple line drawing of a mechanical assembly with a component and two separate views (no text or symbols)
natural_image
Hand holding a mechanical component with an upward arrow indicating force or movement (no text or symbols present)
natural_image
Illustration of a hand opening a window with an upward arrow indicating direction (no text or symbols)
natural_image
Symbol of a trash bin crossed with a diagonal line, representing no waste or discharge (no text or labels)
natural_image
Recycling symbol with three arrows forming a triangle (no text or labels)

