H-C350W - Heating Brentwood - Free user manual and instructions
Find the device manual for free H-C350W Brentwood in PDF.

User questions about H-C350W Brentwood
0 question about this device. Answer the ones you know or ask your own.
Ask a new question about this device
Download the instructions for your Heating in PDF format for free! Find your manual H-C350W - Brentwood and take your electronic device back in hand. On this page are published all the documents necessary for the use of your device. H-C350W by Brentwood.
USER MANUAL H-C350W Brentwood
text_image
Brentwood® Appliances© 2021 Brentwood Appliances, Inc.
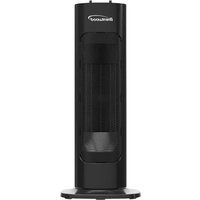
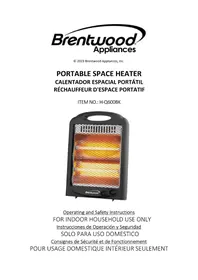
PERSONAL SPACE HEATER
CALENTADOR PERSONAL RADIATEUR SOUFFLANT PERSONNEL
ITEM NO.: H-C350W
natural_image
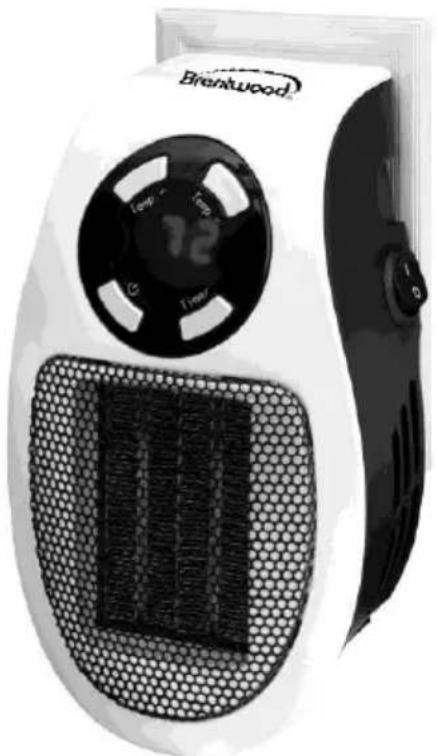
White Brentwood electric heater with a digital display and mesh grille (no visible text or symbols)Operating and Safety Instructions
FOR INDOOR HOUSEHOLD USE ONLY
When using this or any other electrical appliance, always follow these basic safety precautions, especially when children are present.
READ ALL INSTRUCTIONS BEFORE USE
WARNING-To reduce the risk of fire, electric shock, serious personal injury and proper damage please note the following:
- Your heater is for INDOOR HOUSEHOLD USE ONLY. DO NOT use your heater outdoors, or for industrial or commercial purposes.
- DO NOT depend on the Power Control Switch as the sole means of disconnecting power from your heater.
- Disconnect the power cord from the electrical outlet when your heater is not in use, when changing locations, or prior to cleaning.
- Place your heater on a stable, level surface, and keep the power cord away from high traffic areas.
- Connect the power cord to an easily-accessible electrical outlet so that your heater can be disconnected immediately in the event of an emergency.
- Ensure that 12 inches of clearance exists around your heater to avoid obstructing intake and exhaust flow.
- For optimal operation and to avoid overloading a circuit, connect your heater to a circuit that is not supplying power to other electrical appliances.
- DO NOT operate your heater near curtains, plants, window covers, or other loose objects; such objects can become lodged in your heater's moving components and cause a fire.
- NEVER cover your heater or place your heater or its power cord under rugs, carpeting or similar objects, as fire can occur.
- Your heater is not intended for use in bathrooms, laundry areas or similar damp locations. Never place your heater where it may come in contact with water or other liquids.
- DO NOT use devices that would turn your heater on and off automatically, as the use of such devices can cause a fire.
- Avoid contact with moving parts. NEVER insert your fingers or other objects through the heater's grill.
- DO NOT immerse or expose your heater to any form of liquid.
- NEVER operate your heater near an open flame or in the presence of explosive or combustible gases or fumes, such as: gasoline, paint or other flammable liquids. Your heater has hot intern components, and components that can spark during normal operation.
- NEVER operate your heater near an open flame or in the presence of explosive or combustible gases or fumes, such as: gasoline, paint or other flammable liquids. Your heater has hot intern components, and components that can spark during normal operation.
- DO NOT expose your heater to excessive heat or humidity, as electrical component damage can occur.
- DO NOT pull on the power cord. Always grasp the plug when connecting and
disconnecting the power cord from the electrical outlet.
- DO NOT use extension cords with your heater. Extension cords can overheat and cause fire.
- DO NOT remove, replace, repair or tamper with the originally-supplied plug.
- NEVER attempt to open or service your heater. Doing so may cause personal injury or property damage. Should your heater or its power cord malfunction or become damaged, discontinue operation immediately. This product has no user-serviceable parts. Do not attempt to examine or repair this product yourself. Please review the Warranty Policy on Page 7.
- Extreme caution is necessary when your heater is used near children, pets and disabled persons. Keep your heater out of reach of children, pets and disabled persons to reduce the risk of personal injury and electrical shock.
SPECIAL INSTRUCTIONS: Do NOT use an extension cord with this product.
WARNING: This product is equipped with a polarized plug (one blade is wider than the other blade) to reduce the risk of electrical shock. This is a safety feature. The plug will fit into a polarized outlet only one way. If you are unable to insert the plug into the electrical outlet, try reversing the plug. If the plug still does not fit, contact a qualified electrician. Never use the plug with an extension cord. Do not alter the plug. Do not attempt to defeat the safety purpose of the polarized plug.
SPECIFICATION:
Voltage: 120VAC/60Hz/Power:350W
Before Use:
- Carefully remove your heater from its shipping container.
- Ensure that your heater's Power Control Switch is in the 'O' position.
- Connect your heater directly into a 120 Volt, grounded AC electrical outlet.
CAUTION: Ensure that the plug fits tightly into the electrical outlet. A loose fit can cause overheating and damage the plug. TO PREVENT ELECTRIC SHOCK MATCH WIDE BLADE OF PLUG TO WIDE SLOT, FULLY INSERT PLUG.
NOTE: The plug is polarized (with one blade wider than the other) and will only fit in a polarized outlet one way. DO NOT defeat the safety purpose of the polarized plug.
SAVE THESE INSTRUCTIONS
FOR FUTURE REFERENCE
Parts:
text_image
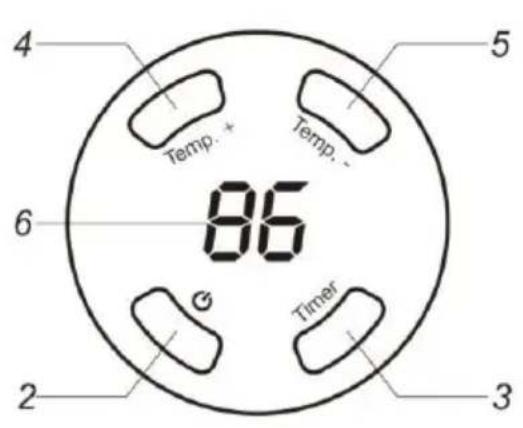
4 Temp. + Temp. + 86 6 Timer 2 3 5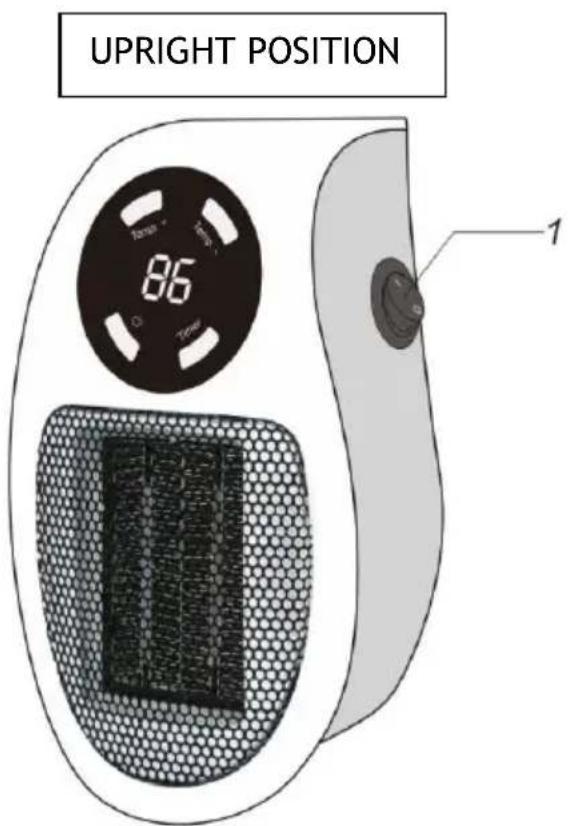
text_image
UPRIGHT POSITION 86 1- Power switch: Turn on the heater with indicator. "0" - Off "l" - On
- On/Off ⏻ button: Push "⏻" Button to turn on heating function.
- Timer button: Used to set hour value for the timer.
- Temp. + button: To increase desired temperature
- Temp. - button: To decrease desired temperature
- Digital display: Indicates set room temperature or time.
PRE-OPERATING INSTRUCTIONS:
Press the Power button to allow the heating process to stop. The fan will continue to blow for approximately 1 minute to allow for the interior components to cool. Once the Fan is cooled the digital display will show “—”. You may now turn off the Power from “I” to “O”.
OPERATING INSTRUCTIONS:
Attention: During the first use the heating element undergoes a minor chemical reaction that may result in a slight odor and/or minor smoking. It quickly goes away.
natural_image
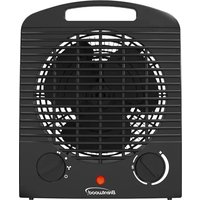
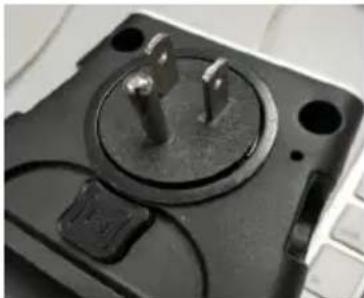
Close-up of a black electronic device with two metallic pins and a button, placed on a keyboard (no visible text or symbols)- Plug the heater into a suitable power outlet. The heater must be positioned upright (Control panel is at the top). Press the bottom under the plug and move the prongs to the same direction as your wall plug. The distance between the heater bottom and the ground should be more than
1ft/30cm, the distance between the side of the heater and the opposite wall or any other object should be more than 1.5Ft. / 50 cm. Make sure the Heater is not hanging out of the plug.
- Press the Power switch to "I" to turn on heater.
- Press "⏻" button, the heater will start running automatically.
- Press "Temp. +" button to increase the temperature setting. (60 °F \~ 90 °F) or press "Temp. -" button to decrease the temperature setting (60 °F \~ 90 °F).
- Power-on Timer: When the heater is off, Press "Timer" the digital display shows the "Hours" option for the timer. Continue to press the timer button to change the number of hours you would like the heater's internal clock to count down before powering itself on. The Hour options for the timer are from 0 to 12 hrs. (in 1 hour increments).
- Power-off Timer: When the heater is running, press "Timer" the digital display changes from the "Temperature" to the "Hours" option for the timer. Continue to press the timer button to change the number of hours you would like the heater to run before powering itself off. The Hour options for the timer are from 0 to 12 hrs. (in 1 hour increments).
- When finished using, press "☐" button, the heater will cool down automatically in 1 minute. Once Digital display shows "--", press the power switch to "0" to turn off heater.
- Always unplug heater from power outlet when not in use.
Cleaning Instructions:
- Turn the Power Switch to the '0' position. Disconnect the heater from the electrical outlet.
WARNING: Do not expose the heating elements or switches to water, cleaning liquids or other chemicals, as fire, electrical shock, personal injury and properly damage can occur.
CAUTION: Do not use gasoline, benzene or thinner to clean your heater, as these chemicals can cause surface damage.
- Use a vacuum cleaner with a crevice tool to remove dust from the vents in the front and back of the heater.
- Use a clean, soft and lightly damp cloth to gently wipe the surface of the enclosure.
- Allow the enclosure to dry completely prior to operating your heater.
OFF-SEASON STORAGE INSTRUCTIONS: Place your heater in its original shipping container, or a similar container. Store the container in a cool, dry location.
SAFETY FEATURES
OVERHEAT PROTECTON
Your heater is equipped with an Overheat Protection System. When the threshold temperature has been reached, your heater will turn off automatically.
To reset your heater after the Overheat Protection System has been activated:
- Turn the Power Control Switch to the 'O' position and turn the Temperature Control Switch to the lowest setting.
- Disconnect the power cord from the electrical outlet. Allow your heater to cool down for approximately ten minutes.
- Ensure that both the intake and the exhaust vents are clear of obstructions.
- Connect the power cord to the electrical outlet.
- Turn the Power Switch to the 'I' position. Press the "☐", turn the Temperature Control Switch to the highest setting.
- If your heater does not operate normally, Press the "☐" to turn heating off. Turn the Power Switch to the '0' position, disconnect the power cord from the electrical outlet, and consult an authorized repair technician.
TROUBLESHOOTING: Review this manual to ensure that you understand the basic operations and features of your heater.
- Check your household circuit breaker or fuse.
- Check for obstructions at the intake and exhaust vents.
- If obstructions are present, refer to the instructions for resetting your heater when the Overheat Protection System has been activated.
- If no obstructions are present, and your heater still does not operate normally, turn the Power Control Switch to the '0' position, disconnect the power cord from the electrical outlet and contact manufacturer, if under warranty. See Warranty Page for details. If not under warranty, take to your local electrician for service.
ONE YEAR LIMITED WARRANTY
Write down the following information about your appliance to better help you obtain assistance or service if you ever need it.
CUSTOMER RECORD
Date of Purchase ____ Store/Dealer ____
Model/Item No: ____
THIS WARRANTY APPLIES TO PRODUCTS PURCHASED AND USED IN THE CONTINENTAL U.S. AND CANADA ONLY. This is the only express warranty for this product and is in lieu of any other warranty or condition. This product is warranted to be free from defects in material and workmanship for a period of one (1) year from the date of original purchase. During this period, your exclusive remedy is repair or replacement of this product, at our option; however, you are responsible for all costs associated with returning the product to us and our returning a product or component under this warranty to you. If the product or component is no longer available, we will replace with a similar one of equal or greater value. This warranty does not cover glass, filters, wear from normal use, use not in conformity with the printed directions, or damage to the product resulting from accident, alteration, abuse, or misuse.
THIS WARRANTY EXTENDS ONLY TO THE ORIGINAL CONSUMER PURCHASER. KEEP THE ORIGINAL SALES RECEIPT, AS PROOF OF PURCHASE IS REQUIRED TO MAKE A WARRANTY CLAIM.
This warranty is void if the product is used for other than single-family household use or subjected to any voltage and waveform other than what is specified on the rating label (E.G., 120V\~60Hz). We exclude all claims for special, incidental, and consequential damages caused by breach of express or implied warranty. All liability is limited to the amount of the purchase price. Every implied warranty, including any statutory warranty or condition of merchantability or fitness for a particular purpose, is disclaimed except to the extent prohibited by law, in which case such warranty or condition is limited to the duration of this written warranty. This warranty gives you specific legal rights. You may have other legal rights that vary depending on where you live. Some states do not allow limitations on implied warranties or special, incidental, or consequential damages, so the foregoing limitations may not apply to you. To make a warranty claim do not return this appliance to the store.
TO OBTAIN WARRANTY SERVICE AND/OR TROUBLESHOOTING INFORMATION:
Call Customer Service at 1-888-903-0060 in the U.S.
Monday through Friday: 9:00am – 5:00pm PST.
U.S. Customers Please Email: warranty@brentwoodus.com
Canadian Customers Please Email: canada.warranty@brentwoodus.com
Go online at www.brentwoodus.com
PRECAUCIONES IMPORTANTES

natural_image
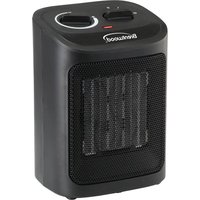
Close-up of a black electrical socket with two metal pins and a button, placed on a keyboard (no visible text or symbols)text_image
86 Temperature Temperature 1natural_image
Close-up of a black electronic device with two metallic pins and a circular socket, placed on a keyboard (no visible text or symbols)© 2021 Brentwood Appliances, Inc.