UPPFRISKANDE 505.270.28 - Basket IKEA - Free user manual and instructions
Find the device manual for free UPPFRISKANDE 505.270.28 IKEA in PDF.

User questions about UPPFRISKANDE 505.270.28 IKEA
0 question about this device. Answer the ones you know or ask your own.
Ask a new question about this device
Download the instructions for your Basket in PDF format for free! Find your manual UPPFRISKANDE 505.270.28 - IKEA and take your electronic device back in hand. On this page are published all the documents necessary for the use of your device. UPPFRISKANDE 505.270.28 by IKEA.
USER MANUAL UPPFRISKANDE 505.270.28 IKEA
Please refer to the last page of this manual for the full list of IKEA appointed Authorized Service Centre and relative national phone numbers.
ENGLISH 4
DEUTSCH 14
FRANÇAIS 26
ITALIANO 38
Cleaning and maintenance 8 What to do if ... 10 Technical data 11 Environmental concerns 12
Safety Information
Before first use
Your safety and that of others is paramount. Remove cardboard protection pieces, protective film and adhesive labels from accessories. Check the appliance for any transport damage. To avoid any damage do not place any weights on the appliance. Do not expose the appliance to atmospheric agents. This manual and the appliance itself provide important safety warnings, to be read and observed at all times.
This is the attention symbol, pertaining to safety, which alerts users to potential risks to themselves and others. All safety warnings are preceded by the attention symbol and the following terms:
DANGER: indicates a hazardous situation which, if not avoided, will cause serious injury.
WARNING: Indicates a hazardous situation which, if not avoided, could cause serious injury.
All safety warnings give specific details of the potential danger/warning present and indicate how to reduce risk of injury, damage and electric shock resulting from improper use of the appliance. Carefully observe the following instructions.
Precautions and general recommendations
- The electrical installation and the electrical connection must be carried out by a qualified technician according to the manufacturer's instructions and in compliance with the local safety regulations. Do not repair or replace any part of the appliance unless specifically stated in the user manual.
- The appliance must be disconnected from the power supply before carrying out any installation work.
⚠ WARNING: Failure to install the screws or fixing device in accordance with these instructions may result in electrical hazards.
- Earthing of the appliance is compulsory. (Not possible for class II hoods identified by the symbol □ on the dataplate).
- Do not pull the power supply cable in order to unplug the appliance.
- The electrical components must not be accessible to the user after installation.
- Do not touch the appliance with any wet part of the body and do not operate it when barefoot.
- This appliance can be used by children aged from 8 years and above and persons with reduced physical, sensory or mental capabilities or lack of experience and knowledge if they have been given supervision or instruction concerning use of the appliance in a safe way and understand the hazards involved. Children shall not play with the appliance. Cleaning and user maintenance shall not be made by children without supervision.
- All other maintenance services must be carried out by a specialised technician.
- When drilling through the wall pay attention not to damage electric connections and/or pipes.
• Air vents must always discharge to the outside.
- The manufacturer rejects all responsibilities for any damage caused by improper use or wrong settings.
- Appropriate maintenance and cleaning ensure the good working order and the best performance of the appliance. Regularly clean all stubborn surface dirt to avoid grease build up. Remove and clean or change the filter regularly. This must be completed in accordance with the “Cleaning and maintenance” instructions provided.
- Never flame cook food (flambé) under the appliance. Using free flames might cause fire.
- Failure to observe the instructions for cleaning the hood and replacing the filters may result in a fire.
- Exhaust air must not be vented through a flue used for removal of fumes produced by gas combustion appliances or other combustible materials, but must have a separate outlet. All national regulations governing extraction of fumes must be observed.
• There shall be adequate ventilation if the hood is being
used at the same time as other appliances using gas or other combustible materials. The negative pressure of the room must not exceed 4 Pa (4x 10⁻⁵ bars). For this reason ensure that the room is well ventilated.
In case of doubts, please consult an autorized service assistance center or similar qualified person.
- Do not leave frying pans unattended when frying, as the frying oil may catch fire.
- Before touching the light bulbs, ensure that they are cold.
- Do not use or leave the hood without the light bulb correctly fitted, as this may cause electric shock.
- The hood is not a work surface, therefore do not place any objects on top of it or overload it.
- During all installation and maintenance operations wear appropriate working gloves.
- This appliance is not suitable for outdoor use.
⚠ WARNING: when the hob is in use, accessible parts of the hood may become hot.
Installation and connection
In the event of problems, contact the Authorized Service Centre.
To prevent any damage, only remove the appliance from its packaging at the time of installation.
Preparing for installation
⚠ WARNING: this is a heavy product; the hood should only be lifted and installed by two or more people.
The minimum distance between the hob and the bottom part of the hood must not be less than 65 cm for burning gas or other fuels and 50cm for electric cookers.
Before installation also check the minimum distances stated in the manual of the cooker.
If the installation instructions for the cooker specify a greater distance between cooker and hood, this distance must be observed.
Electrical connection
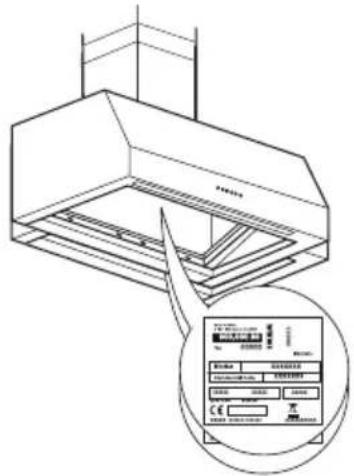
Make sure the power voltage specified on the appliance rating plate is the same as the mains voltage.
This information can be found on the inside of the hood, under the grease filter. Power cable replacement (type H05 VV-F) must be carried out by a qualified electrician. Contact an authorized service centre.
If the hood is fitted with an
electric plug, connect the plug to a socket complying with current regulations, located in an accessible place.
⚠ WARNING: if no plug is fitted (direct wiring to the mains), or if the socket is not located in an accessible place, a qualified electrician should install a standardised double pole power
switch that will enable complete isolation from the mains in case of category III overvoltage conditions, in accordance with wiring rules.
Use
The hood has been designed to be installed and used either as a “Extraction installation”, or as a “Recirculation installation”.
Extraction installation (see symbol in installation booklet)
Cooking steam is sucked and channelled outside the house through a discharge duct (not supplied), fitted to the hood steam outlet.
Ensure that the discharge duct is correctly fitted to the air outlet, unit using an appropriate connection system.
Important: If already installed, remove the charcoal filter/s.
Recirculation installation
(see symbol in-installation booklet)
The air is filtered through one or more the charcoal filters, and then resent into room.
Important: Ensure appropriate air circulation around the hood.
Important: If the hood is supplied without charcoal filters, these must be fitted before the hood can be used. Filters are available in IKEA shops.
The hood should be installed away from particularly dirty areas, windows, doors and heat sources.
The accessories for wall fixing are not included because walls made of different materials require different types of fixing accessories. Use fixing systems suitable for the walls of your home and the weight of the appliance. For more details, contact a specialized dealer.
Keep this booklet for future consultation.
Product description
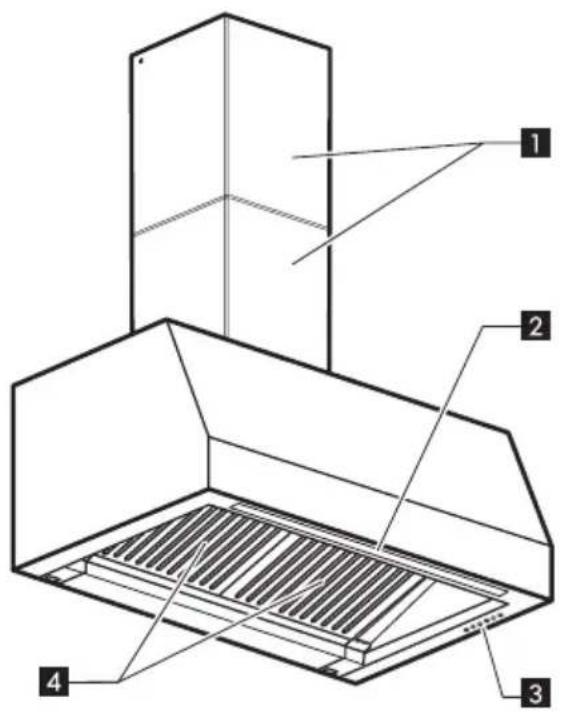
1 Chimney.
2 LED light.
3 Control Panel.
4 Grease filter.
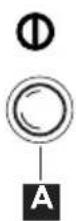
Control panel
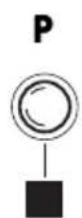
A Motor OFF button
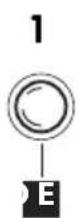
B Extraction power 1 selection button. Speed 1 - very quiet
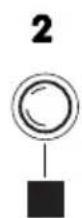
C Extraction power 2 selection button.
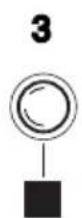
D Extraction power 3 selection button.
E Extraction power 4 selection button.
Timed for 5 minutes, after which the hood returns to the speed set previously
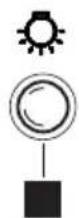
Light ON/OFF button.
You can adjust the light intensity by pressing and holding the button
Note: Please note that you will experience a 5 second delay when switching the hood directly into extraction power 1 mode (from any other speed) due to electronics control of the product.
Cleaning and maintenance

WARNING:
- Never use steam cleaning equipment.
- Disconnect the appliance from the power supply.
IMPORTANT: do not use corrosive or abrasive detergents. If any of these products accidentally comes into contact with the appliance, clean immediately with a damp cloth.
- Clean the surfaces with a damp cloth. If it is very dirty, add a few drops of washing up detergent to the water. Finish off with a dry cloth.
IMPORTANT: do not use abrasive sponges or metallic scrapers or scourers. Over time, these can ruin the surface.
- Use detergents specifically designed for cleaning the appliance and follow the manufacturer instructions.
IMPORTANT: clean the filters at least monthly to remove any oil or grease residuals.
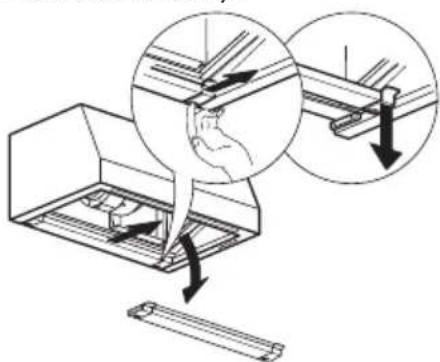
To clean the grease filter
The metal grease filter has an unlimited life and must be washed once a month by hand or dishwasher at low temperature and with a short cycle. With cleaning in a dishwasher the grease filter may become dull; this does not effect its filtering capacity.
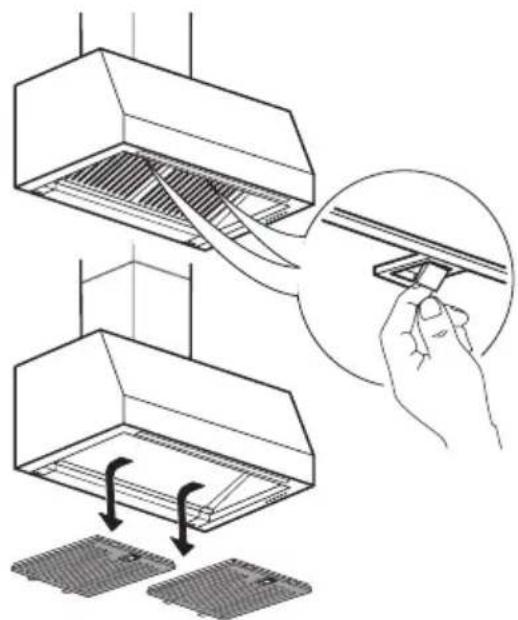
Grease filter maintenance:
- Unplug the appliance or disconnect the power supply.
- Remove the grease filters: pull the spring release handle, then remove the filter downwards.
- After cleaning the grease filter, remount in reverse order ensuring the entire extraction surface is covered.
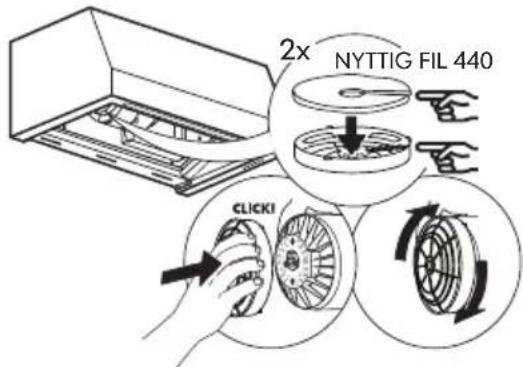
Charcoal filter maintenance (if the hood is installed in recirculation installation)
- Pull out the plug or disconnect the power supply.
- Remove the grease filter
- If the carbon filters are already fitted (two filters that cover the protective grilles for the motor impeller) and have to be replaced, turn the central handle anti-clockwise to unlock them.
- Open the two filter shells
- Pull out the two circular mats
- Proceed in reverse order to fit the new filters.
- Refit the grease filters.
Unlike traditional charcoal filters, this charcoal filter can be washed and reactivated.
Care and cleaning long life Charcoal filter
- The anti-odour filter shall be washed and regenerated every 3-4 months (or more frequently if the hood is subject to intensive use), up to a Max. of 8 regeneration cycles (in case of particularly intensive use it is recommended that you do not exceed 5 cycles).
Regeneration procedure:
- Wash in the dishwasher at a MAX temperature of 70^ or hand wash in hot
water without using abrasive sponges (do not use detergents!)
- Dry in the oven at a MAX temperature of 70° for 2 hours or dry at room temperature, standing the filter in a vertical position to facilitate drainage.
Maintenance of the condensate collection basin
Regularly check the basin, emptying and cleaning it when full.
In any case, the basin must be emptied and cleaned AT LEAST once a week (or more often, depending on the use of the hood).
The basin can be cleaned manually or in the dishwasher (on a short, low-temperature cycle).
-
Disconnect the hood from the electricity supply.
-
Remove the condensate collection basin by using the side handles as a lever to open it, then uncoupling it from the fixing pins.
-
After cleaning the basin, follow the above steps in reverse order to reassemble it, making sure it's firmly fixed to the coupling points and then inserted correctly.
Lamp maintenance
The hood is equipped with a lighting system based on LED technology.
The LEDs guarantee an optimum lighting, a duration up to 10 times as long as the traditional lamps and allow to save 90% electrical energy.
For replacement, contact the Authorized Service Centre.
What to do if ...
| Problem Possible cause Solution | ||
| The appliance does not work | There is no mains electrical power | Check for the presence of mains electrical power.Turn off the appliance and restart it to see if the faults persists. |
| The appliance is not connected to the electrical supply. | Check if the appliance is connected to the electrical supply.Turn off the appliance and restart it to see if the faults persists. | |
| You are using the first speed, which is deliberately very quiet | Check carefully to make sure the motor is actually working | |
| The hood's suction level is not enough | The suction speed is too low | Check the suction speed and adjust as necessary. |
| The grease filters are dirty 4 | Check that the filters are cleanIf not, clean the filters in the dishwasher. | |
| The anti-odors filters are dirty | Check that the anti-odour filters are properly washed as recommended | |
| The air vents are obstructed | Check the air vents for any obstructions and remove as necessary. | |
| The light does not work | The LED is broken 2 | For replacement, contact the Authorized Service Centre. |
Before contacting the Authorized Service Centre:
Switch the appliance on again to see if the problem has disappeared. If not, switch it off again and repeat the operation after an hour. If your appliance still does not work properly after carrying out the checks listed in the troubleshooting guide and switching the appliance on again, contact the Authorized Service Centre, clearly explaining the problem
and specifying:
- the type of fault;
- the model;
- the type and serial number of the appliance (given on the rating plate);
- the Service number (the number after the word SERVICE on the rating plate inside the appliance).
Technical data
| Type of product Wall mounted hood | |||
| Dimensions | Width mm | 798 | |
| Depth mm | 510 | ||
| Total height in extraction installation version min-max mm | 750 - 1030 | ||
| Total height in recirculation installation version min-max mm | 735 - 1090 | ||
| Total power W | 257 | ||
| Lamps info | Type | LED | |
| Number & Power W | 1X7 | ||
| Socket | STRIP LED | ||
| Installation minimum height - gas hob mm | 650 | ||
| Installation minimum height - elec hob mm | 500 | ||
| Product Weight Kg | 15.6 | ||
| Product Information compliant to commission regulation (EU) No 65/2014 - UK SI 2019 No.539 | |||
| Model identifier | UPPFRISKANDE 50527028 | ||
| Annual Energy Consumption - AEC Hood kWh/A | 40.4 | ||
| Energy Efficiency Class | A+ | ||
| Fluid Dynamic Efficiency FDE Hood % | 35.2 | ||
| Fluid Dynamic Efficiency Class | A | ||
| Light Efficiency - LE Hood lux/W | 44.1 | ||
| Light Efficiency Class lux | A | ||
| Grease Filtering efficiency Hood - GFE Hood | % | 85.1 | |
| Grease Filtering efficiency Class | B | ||
| Minimum Airflow in normal use | m^3/h | 130.0 | |
| Maximum Airflow in normal use | m^3/h | 430.0 | |
| Air Flow at intensive/boost setting | m^3/h | 720.0 | |
| A-Weighted Sound Power Emission at minimum speed | db(A) re 1pW | 34.0 | |
| A-Weighted Sound Power Emission at maximum speed | db(A) re 1pW | 58.0 | |
| A-Weighted Sound Power Emission at Intensive or boost speed | db(A) re 1pW | 70.0 | |
| Power consumption off mode-P0 | W | NA | |
| Power consumption in stand by mode -Ps | W | 0.49 | |
| Product Information compliant to commission regulation (EU) No 66/2014 | |||
| Time increase factor - f | 0.7 | ||
| Energy efficiency index - EEIhood | 42.8 | ||
| Measured airflow rate at best efficiency point -QBEP | m^3/h | 420.0 | |
| Measured air pressure at best efficiency point -PBEP | Pa | 465.0 | |
| Maximum Airflow - Qmax m | ^3/h | 720.0 | |
| Measured electric power input at best efficiency point - WBEP | W | 154.0 | |
| Nominal Power of the lighting system - WL | W | 7.0 | |
| Average illumination of the lighting system on the cooking surface - Emiddle | lux | 309.0 | |
The technical information is situated in the rating plate on the internal side of the appliance.
Environmental concerns
Disposal of packing
The packing material is 100% recyclable and is marked with the recycle symbol. The various parts of the packing must therefore be disposed of responsibly and in full compliance with local authority regulations governing waste disposal.
Scrapping the product
- This appliance is marked in compliance with European Directive 2012/19/EU, Waste Electrical and Electronic Equipment (WEEE).
- By ensuring this product is disposed of correctly, you will help prevent potential negative consequences for the environment and human health, which could otherwise be caused by inappropriate waste handling of this product.
The symbol 📂 on the product or on the accompanying documentation indicates that it should not be treated as domestic waste but must be taken to an appropriate collection centre for the recycling of electrical and electronic equipment.
Scrapping of household appliances
- This appliance is manufactured with recyclable or reusable materials. Dispose of it in accordance with local waste disposal regulations. Before scrapping, cut off the power supply cable.
- For further information on the treatment, recovery and recycling of household electrical appliances, contact your competent local authority, the collection service for household waste or the store where you purchased the appliance.
Energy saving tips
- Switch ON the hood at minimum speed when you start cooking and kept it running for few minutes after cooking is finished.
- Increase the speed only in case of large amount of smoke and vapour and use boost speed(s) only in extreme situations.
- Replace the charcoal filter(s) when necessary to maintain a good odour reduction efficiency.
- Clean the grease filter(s) when necessary to maintain a good grease filter efficiency.
- Use the maximum diameter of the ducting system indicated in this manual to optimize efficiency and minimize noise.
Declaration of conformity CE
This appliance has been designed, manufactured and marketed in compliance with:
- safety objectives of the "Low Voltage" Directive 2014/35/EU;
- the eco design requirements of european regulations n. 65/2014, and n. 66/2014 in conformity to the european standard en 61591;
- the protection requirements of Directive "EMC" 2014/30/EU.
Electrical safety of the appliance can only be guaranteed if it is correctly connected to an approved earthing system.
Inhalt
Wartung der Lampe
Installation et raccordement
1 Camino
2 Lampada
3 Pannello comandi
4 Filtro antigrasso
Pannello comandi
Opening hours: Monday - Friday 8.00 - 20.00
ROMANIA
Număr de telefon: 021 2044888
Tarif: Tarif local
Orar: Luni - Vineri 8.00 - 20.00
РОССИЯ
Opening hours: Monday - Friday 8,30am - 6,30pm
Saturday 8,30am - 5,30pm
Sunday 9,30am - 3,30pm