
SLCPTBCR30 - Bathtub SereneLife - Free user manual and instructions
Find the device manual for free SLCPTBCR30 SereneLife in PDF.
| Product Type | Inflatable Insulated Cold Tub |
| Brand | SereneLife |
| Model | SLCPTBCR30 |
| Product Dimensions (L x W x H) | 31.50 x 31.50 x 40.55 inches (80 x 80 x 103 cm) |
| Item Weight | 18 lbs (8.2 kg) |
| Water Capacity | 64.2 gallons (243 L) |
| Lid Thickness | 3.15 inches (80 mm) |
| Tub Material | DWF Tarp + PVC |
| Lid Material | DWF Tarp + PVC |
| Storage Bag Material | 600D Oxford Fabric |
| EVA Floor Mat Material | EVA 4 mm |
| Water Connector | 3/4 inch threaded stainless steel, female inlet/outlet |
| Recommended Inflation Pressure | 8 psi (0.55 bar) |
| Use | For one person |
| Main Functions | Cold immersion therapy, muscle recovery, inflammation reduction |
| Included Accessories | Hand pump, repair kit, lid, storage bag, EVA floor mat, connectors and plugs |
| Cleaning and Maintenance | Clean with vinyl cleaner; use hydrogen peroxide and ozone purifier for water; repair leaks with provided kit |
| Safety Instructions | Supervise children, avoid cold shock, do not consume alcohol/drugs before use, consult a doctor if health issues |
| Repairability | Repair kit included for small punctures; follow repair instructions |
| Warranty | Not specified in the manual |
Frequently Asked Questions - SLCPTBCR30 SereneLife
User questions about SLCPTBCR30 SereneLife
0 question about this device. Answer the ones you know or ask your own.
Ask a new question about this device
Download the instructions for your Bathtub in PDF format for free! Find your manual SLCPTBCR30 - SereneLife and take your electronic device back in hand. On this page are published all the documents necessary for the use of your device. SLCPTBCR30 by SereneLife.
USER MANUAL SLCPTBCR30 SereneLife
natural_image
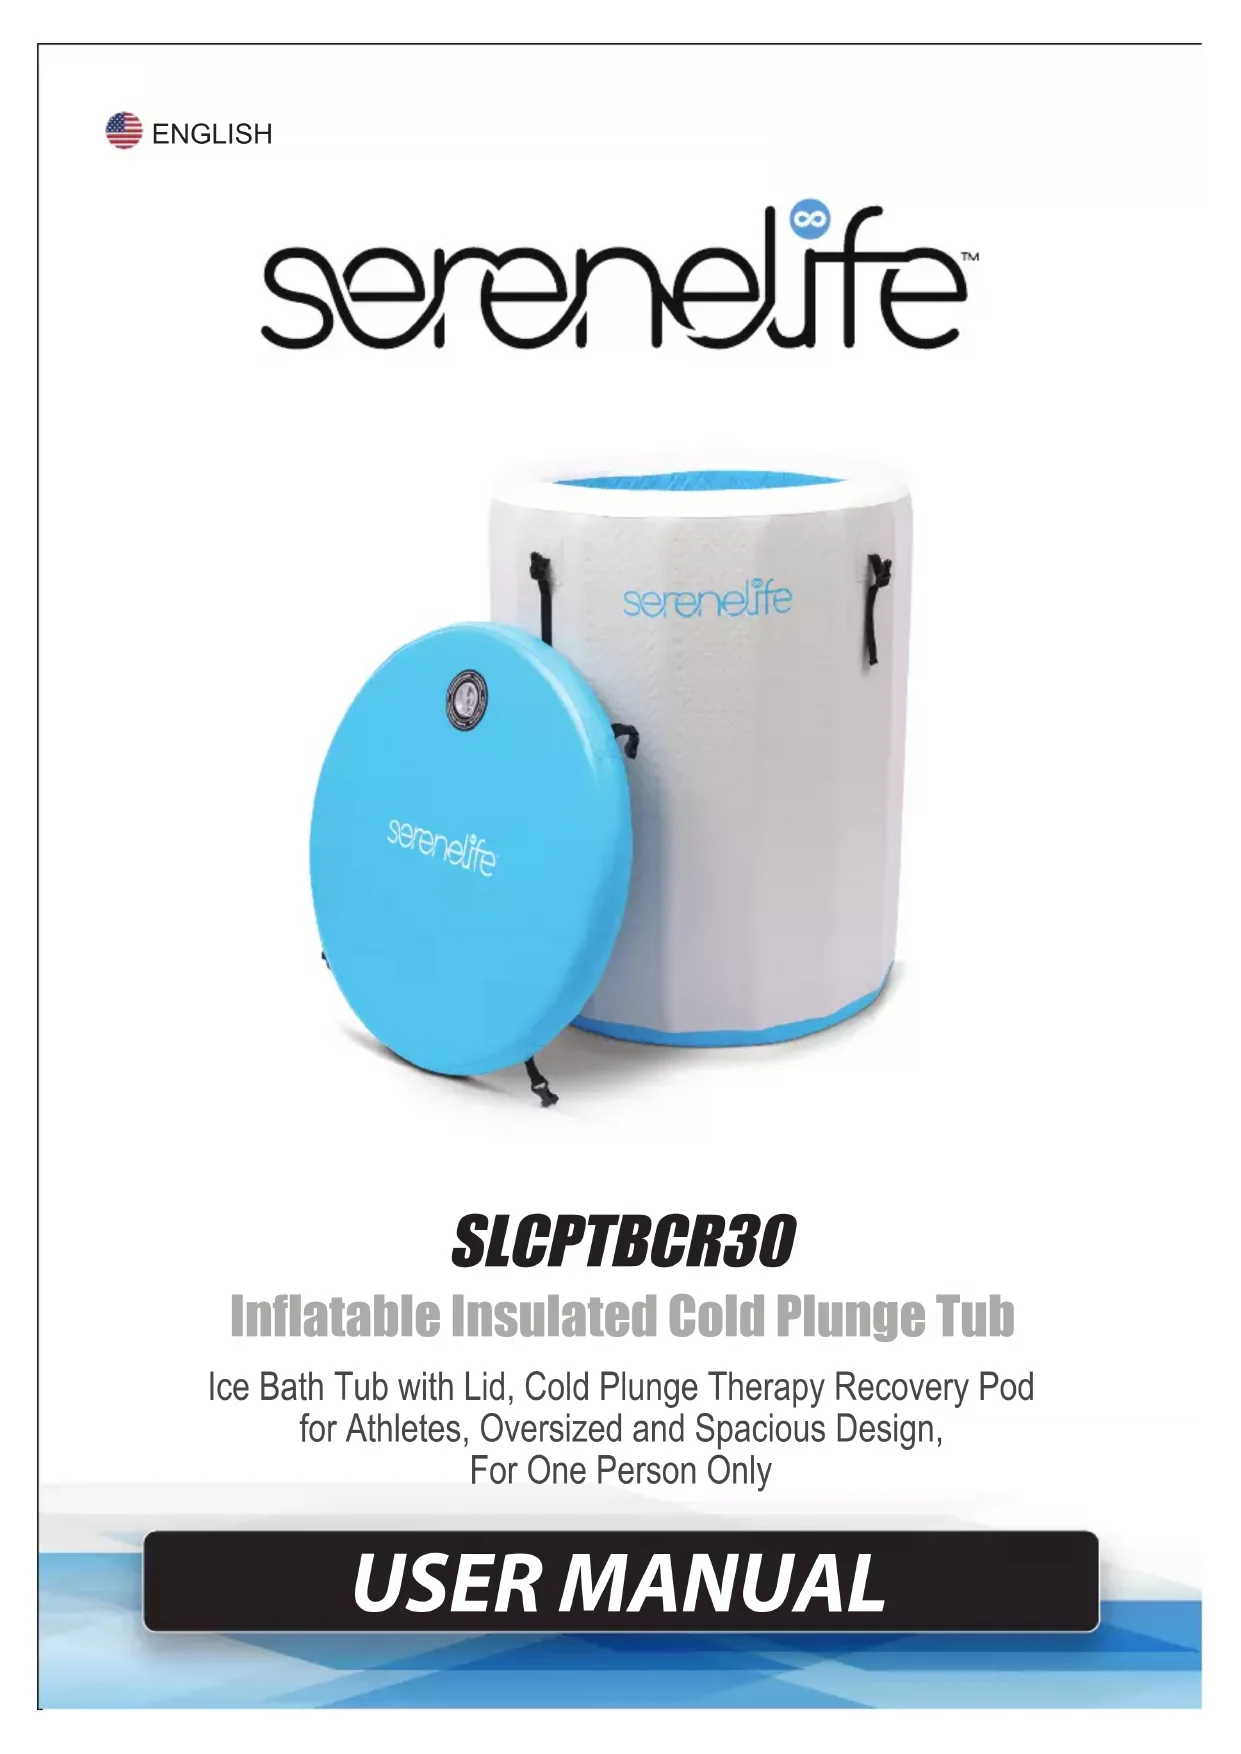
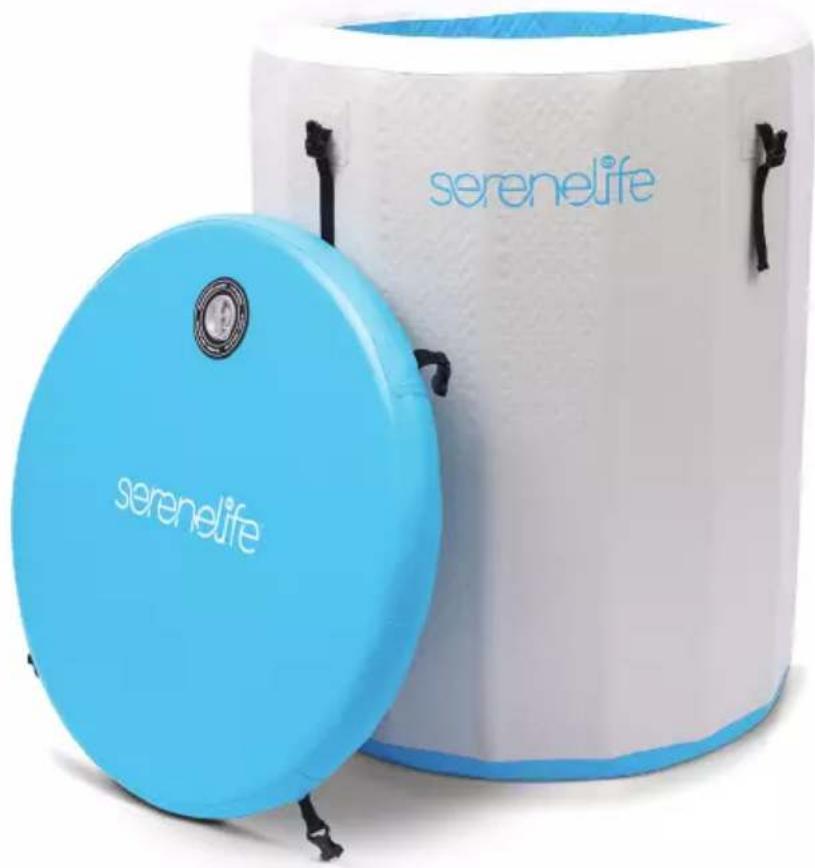
Two branded storage containers, one blue and one white, with no visible text or symbols on the main objects.SLCPTBCR30
Inflatable Insulated Cold Plunge Tub
Ice Bath Tub with Lid, Cold Plunge Therapy Recovery Pod for Athletes, Oversized and Spacious Design, For One Person Only
USER MANUAL
This portable and durable tub is designed for comfort and ease of use, providing you with a convenient recovery solution that can be easily transported and stored. Whether you're a professional athlete, a fitness enthusiast, or simply looking for relief from everyday aches and pains, our inflatable ice tub is here to enhance your recovery experience.
Note: The tub is designed for one person and can be used with ice or any portable cooling/heating unit.

WARNINGS
-
Supervision for Children: To reduce the risk of injury, do not allow children to use this product without close supervision at all times.
-
Cold Shock: Cold shock may occur, leading to a sudden increase in heart rate and blood pressure, especially when entering the ice bath. This can be dangerous for people with heart conditions. To minimize the risk of cold shock, start by placing your feet in the water first and gradually lower your body into the bath.
-
Impaired Judgment: Cold water in an ice bath can impair judgment. Avoid making important decisions or driving immediately after taking an ice bath.
-
Substance Use: The use of alcohol, drugs, or medication before or during the use of the ice tub may lead to unconsciousness with the possibility of drowning.
-
Electrical Requirements: Ensure that the electrical wiring of the cooling/heating unit meets the requirements of the National Electrical Code (NEC) and any applicable state, local, or country codes.
-
Physical Demands: Ice baths can be physically demanding and may not be suitable for everyone. If you have underlying health conditions or concerns, consult with a healthcare professional before attempting an ice bath.
INSTRUCTIONS FOR USE
- Set up the inflatable tub on a flat and stable surface.
- Add ice or use a portable cooling/heating unit, following the provided guidelines.
- Enter the tub carefully, starting with your feet to minimize the risk of cold shock.
- Enjoy the benefits of your ice bath for recovery.
Remember to prioritize safety and consult with a healthcare professional if you have any health concerns before using the inflatable plunge tub.
INSTALLATION GUIDE: ICE TUB
Before you begin, ensure that all parts are present. Here is a checklist:
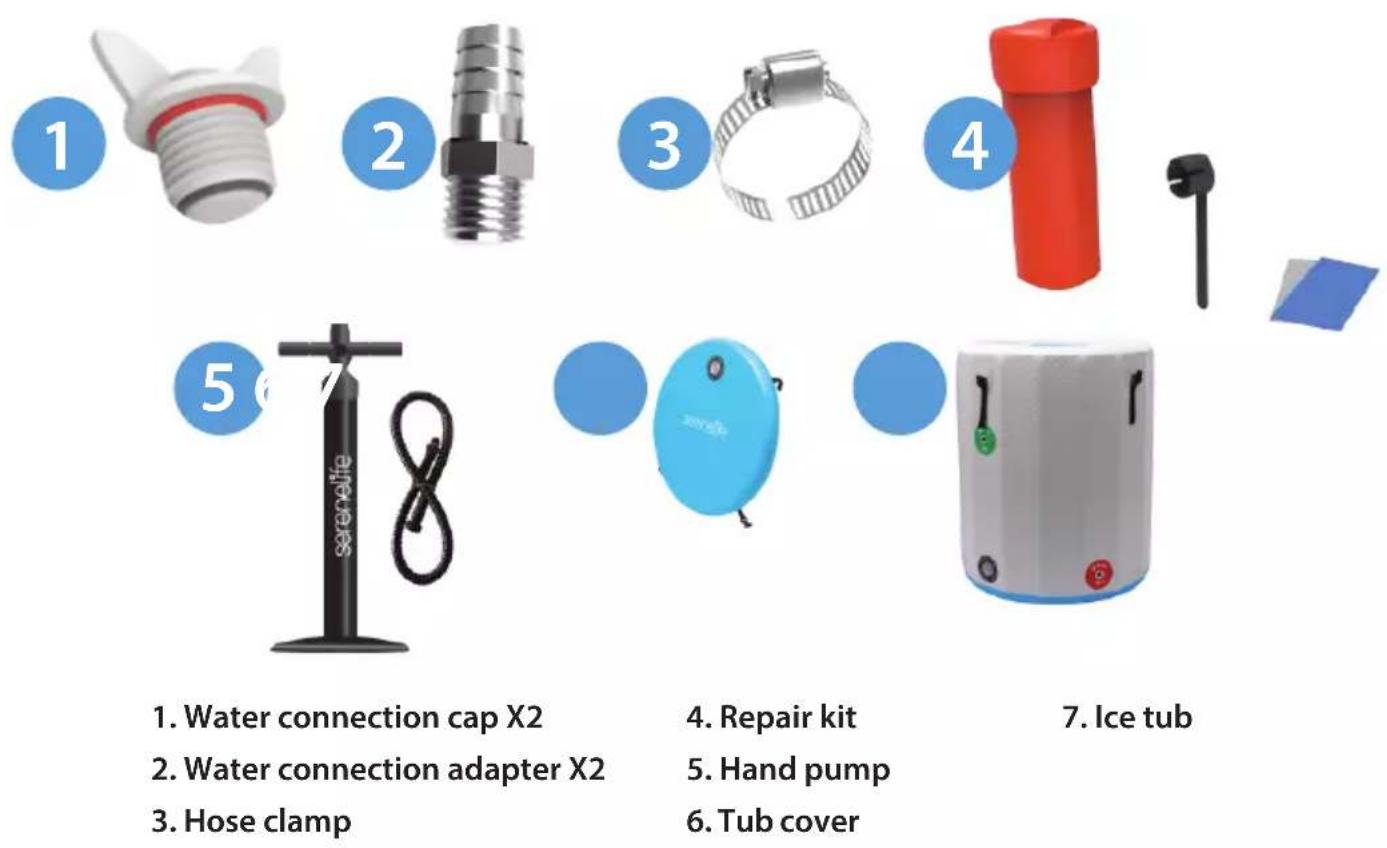
Cold Plunge Water Chiller Sold Separately!
SETTING UP THE ICE TUB:
- Unpacking: Check that all parts are present.
Lay the tub and cover on a clean, damage-free surface.
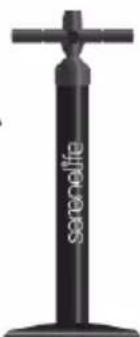
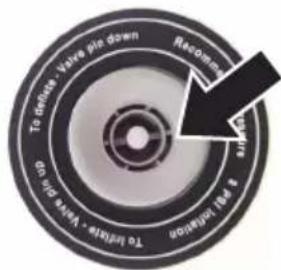
- Assemble the Hand Pump: Remove the valve cap. Insert the inflation hose into the valve and turn clockwise to lock (ensure valve pin is in the up position). Use the hand pump to inflate the tub and cover to 8psi. Recap valves.
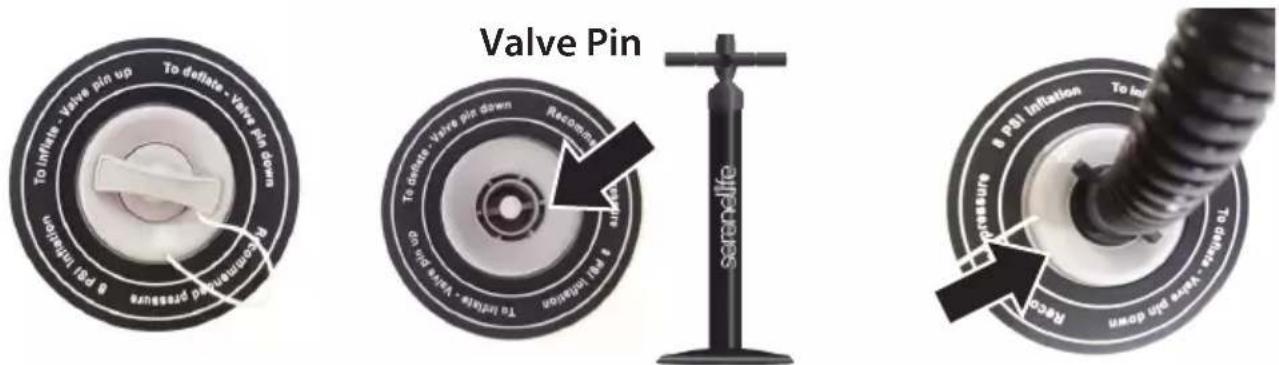
Caution: Do not over-inflate. To release air, press the valve pin into the open position.
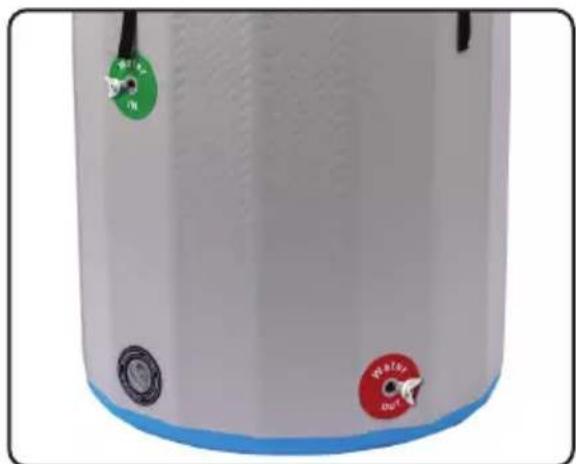
- Water Connection Caps: Screw the water connection caps into the water connection points. Ensure caps are securely in place to prevent water loss.
natural_image
Close-up of a white cylindrical device with blue base and three circular buttons labeled 'WATER OUT' and 'WATER IN' (no additional text or symbols)
natural_image
White cylindrical device with blue interior and 'serenelife' branding, no visible text or symbols on body4. Filling with Water:
Fill the tub with cold water, leaving space for ice. Add ice to achieve the desired temperature.
Caution: Do not overfill.
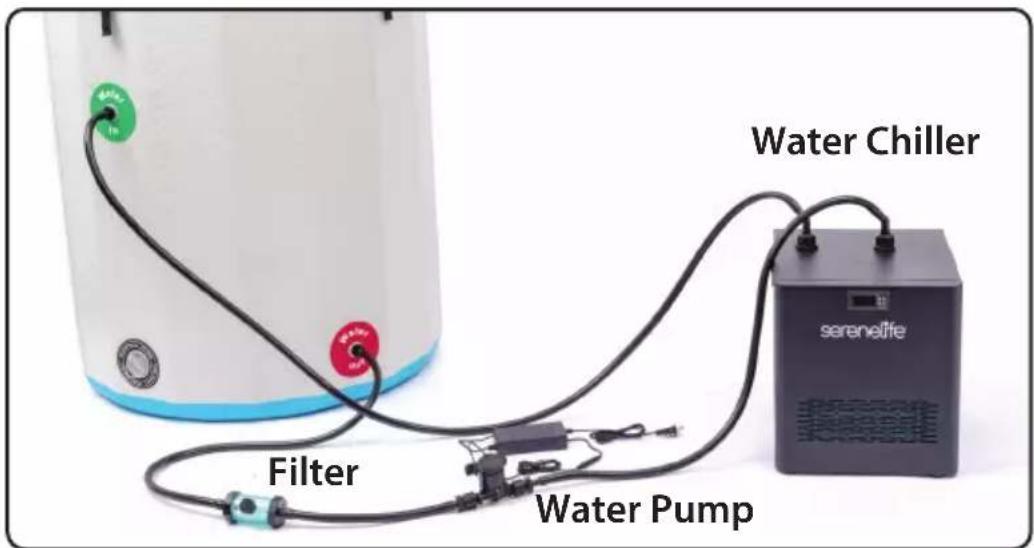
- Water Chiller (Optional): For precise temperature control, consider using a water chiller. Follow safety precautions and warnings.
Water Circulation: Ice tub "WATER OUT" » Filter » Water Pump »
Inlet of Water Chiller » Outlet of Water Chiller » Ice tub "WATER IN"
Water Chiller Installation (First Time)
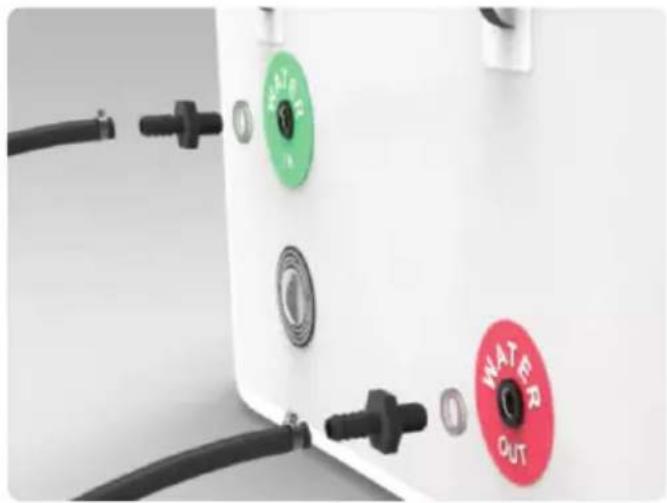
- Install adapters and gaskets to the connection points on the tub wall.
- Cut the hose into four pieces.
- Insert hoses into adapters and tighten hose clamps with a screwdriver.
- Consider using hot water or oil to facilitate hose installation.
natural_image
Close-up of a white industrial water heater with green and red buttons labeled 'WATER OUT', connected by black cables (no readable text beyond labels)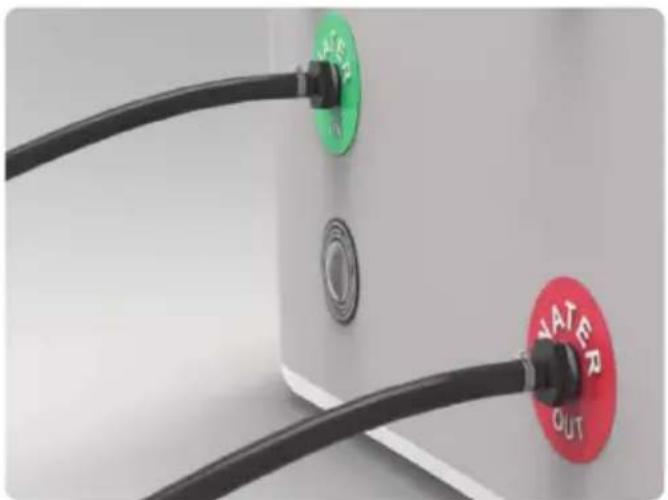
natural_image
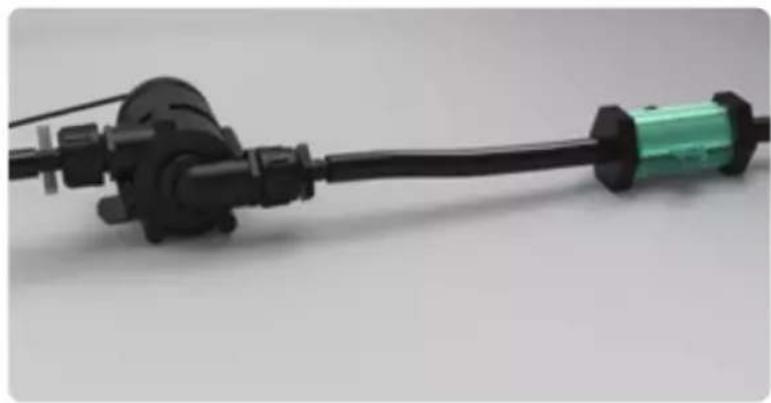
Close-up of a white industrial electrical outlet with two black cables labeled 'VATER OUT' and a green circular switch (no additional text or symbols visible)Connecting Filter and Water Pump
- Identify the arrow mark on the pump indicating the water flow direction.
- Ensure the arrow points towards the water chiller.
- Connect the filter and water pump.
natural_image
Close-up of a black mechanical component with a green cylindrical housing attached, against a plain background (no text or symbols visible)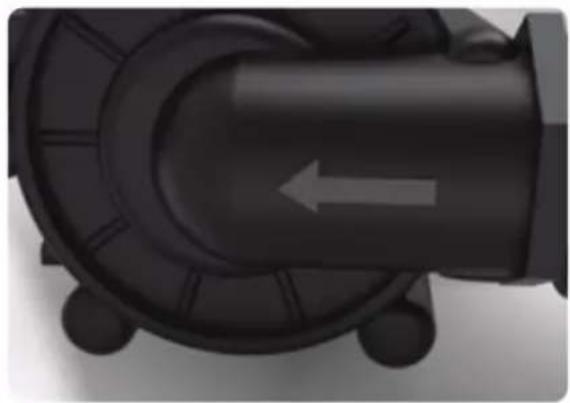
natural_image
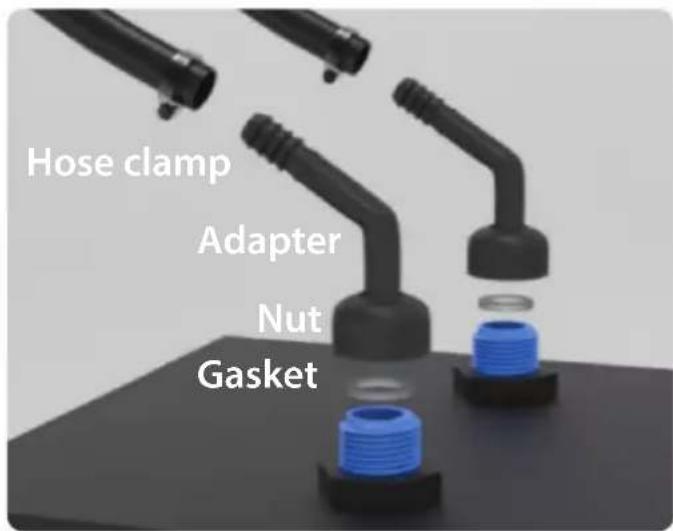
Close-up of a black mechanical component with a white arrow indicating direction (no text or symbols)Adapters and Gaskets
- Place gaskets on the water inlet and outlet (no distinction between them).
- Position fixing nuts onto the adapters.
- Twist fixing nuts onto the threads.
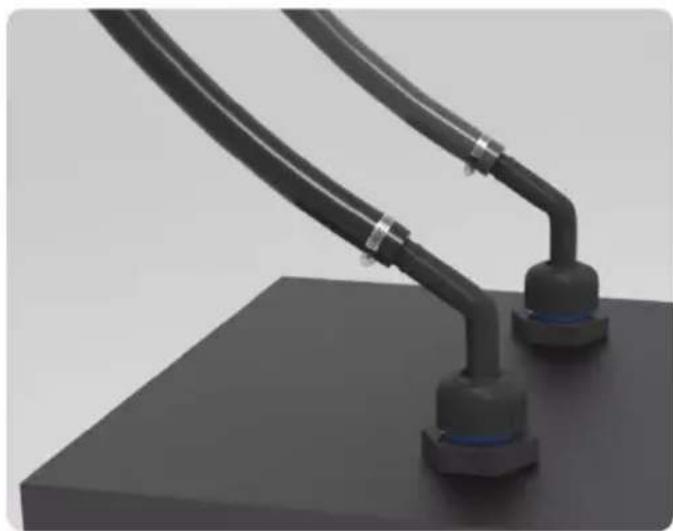
Connecting Water Chiller
- Connect the water chiller to the hoses.
- Tighten hose clamps securely.
natural_image
3D rendering of two black curved pipes with hexagonal bases, mounted on a dark base (no text or symbols visible)Filling the Tub
Fill the tub with water, observing the water level to prevent overflow.
Powering Up
- Plug in the power.
- Turn on the water pump.
- Set up the water chiller following its specific instructions.
CAUTION
- Check every joint for leaks before taking an ice bath.
- Read the water chiller instructions thoroughly.
- Familiarize yourself with safety features to minimize potential hazards.
Tips for Taking an Ice Bath Safely
- Start with a cold shower or a pool around 65^ F/ 18^ C for beginners.
- Begin with a small amount of ice, gradually adding more as your tolerance builds.
- Start with a short duration, like 5 minutes, and increase over time.
- Limit ice bath time to 15 minutes.
- Exit if you feel dizzy, lightheaded, or nauseated.
- Warm up gradually after the ice bath.
Embark on your ice bath adventure and explore the potential health benefits, including reduced inflammation, faster recovery, and enhanced overall well-being.
How to Keep the Water CLEAN in the Cold Plunge Tub
- Rinse yourself off. Always rinse before getting in.
- Three things you need:
a. Skimming Net: Use the skimming net to skim small debris that ends up in the cold plunge.
b. Hydrogen Peroxide: Use 1 bottle of food-grade hydrogen peroxide after doing a full cleaning of the water. If replacing all the water, take a quarter aof a bottle and put it in there—about a quarter to a half a bottle every time you recycle, refresh, and change out the water.
c. Ozone Purifier (with tube for water): This is a type of air purification system that produces Ozone (O3) to help reduce the presence of airborne contaminants. Ozone's highly reactive composition of three oxygen atoms allows the molecules to attach to airborne organic contaminants, oxidizing and eliminating them.
REPAIRING
Your SereneLife inflatable tub comes with a repair kit for patching minor punctures. Most leaks only take a few minutes to repair.
Air Leakage
If your inflatable tub appears a bit soft, it might not be because of a leak, since any change in temperature can result in modifications of 0.003 bar (0.045 psi) per Celsius degree (34F). If the inflatable tub was inflated late in the day, that air might cool overnight. The cooler air exerts less pressure on the hull, so it could appear soft the next morning.
If there has been no temperature variation, you need to first determine exactly where the air is leaking.
Please follow these instructions:
- Check that there is no sand or debris within the air valve.
- Make sure that the valve gasket is in place.
- Inflate all chambers of the tube.
- Close the cap on all the valves.
- Rinse the boat with soapy water, including perimeter of the inflation valves.
- Wherever bubbles appear, that is the location of the leak to be repaired.
Small Repairs
Deflate your inflatable tub. Thoroughly clean (you can use vinyl cleaner for this purpose) and dry the area to be repaired. For a small puncture (less than 1/8 inch) apply a small drop of glue. Let dry for 12 hours.
Patches
Leaks larger than a pinhole can be patched.
NOTE: Repairs should be carried out on deflated inflatable tub.

natural_image
Simple black curved line on a light gray background with a blue circular label containing the number 1 (no text or symbols on the line itself)Thoroughly clean the area surrounding the leak to remove any dirt or grime.
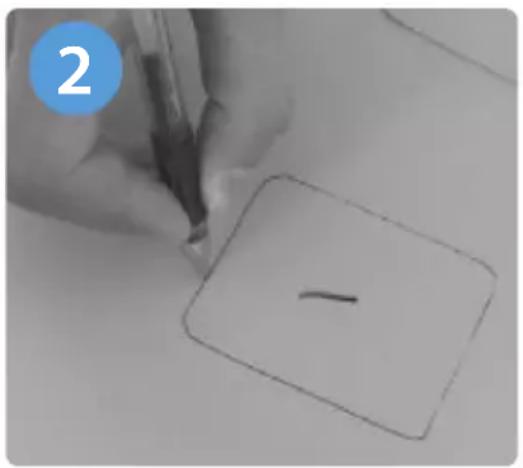
Cut a piece of repair material large enough to overlap the damaged area by approximately 1/2 inch. Use a pencil to trace the outline of the patch.
natural_image
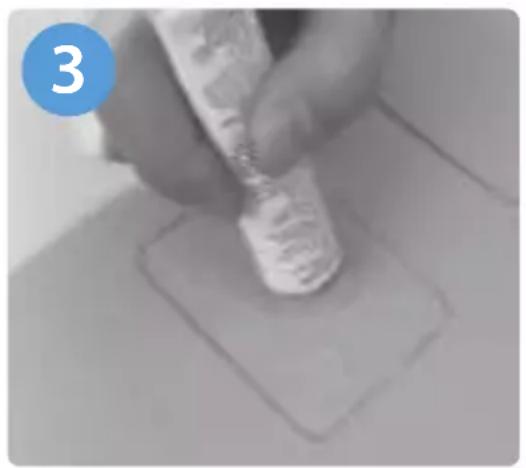
Close-up of a hand holding a small white object with a blue circular badge labeled '3' in the corner (no readable text or symbols on the object itself)Apply adhesive to the underneath side of patch and around the area to be repaired. Coat the affected area lightly but completely with glue. Let the glue sit for 2-4 minutes until it appears tacky.
natural_image
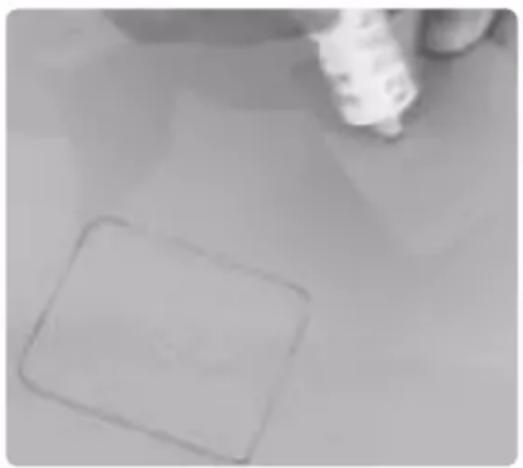
Close-up of a hand holding a spray bottle over a square surface (no text or symbols visible)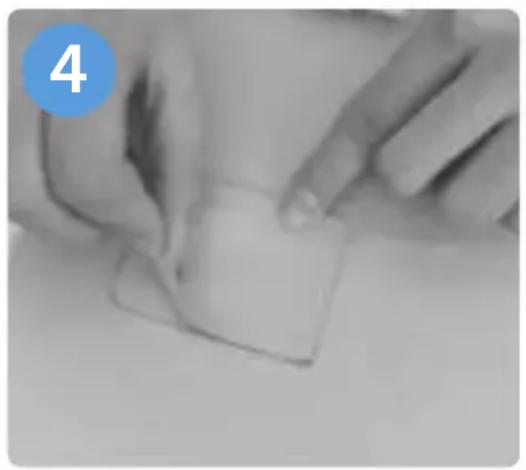
natural_image
Close-up of hands holding a small square object, no visible text or symbolsPlace the patch on the damaged area and press down firmly. Allow 12 hours for repair to dry. After patch has dried, apply glue around the edges for a complete seal (dry for 4 hours).
natural_image
Blank white rectangular shape on a plain gray background (no text or symbols)Features:
• Heavy Duty Stainless Steel Threaded 3/4 Inches
• Female Water Inlets/Outlets, Making it Easy to Connect to a Water Chiller
• Cold Plunge Therapy Recovery Pod for Athletes
• Built to Last with High-Quality Drop Stitch Material
• Strong Enough to Support Body Weight
- With a Dual-Action Hand Pump or Air Pump for Quick and Easy Set-up
- Includes Lid or Cover to Help Maintain the Temperature and Keeps Water Clean
- With a Sturdy Backpack or Storage Bag for Easy Portability and Transportation
• Helps Reduce Muscle Soreness and inflammation, and Improves Recovery
- Designed to be Freestanding, doesn't Require Installation or Permanent Fixtures
• High-quality Materials Ensure the Tub's Durability
- Provides Consistent and Comfortable Experience During Cold Plunge Therapy
- Easy to Set Up and Store and Allow Athletes to take them to Training Camps, Events, or at Home
What's in the Box:
- Inflatable Plunge Tub
- Hand Pump
- Repair Kit
- Improved Copper Connector
• Lid - Storage Bag with Zipper
• EVA Floor Mata
Construction Materials:
• Inflatable Plunge Tub: DWF+PVC Tarpaulin
• Hand Pump: PP, LDPE, ABS, Aluminum
• Lid: DWF+PVC Tarpaulin
• Storage Bag with Zipper: 600D Oxford Fabric
• EVA Floor Mat: 4mm EVA
Technical Specs:
• Lid Thickness: 3.15" -inches (80 mm)
- Stainless Steel Connector Thickness: 0.4" -inch (10 mm)
- Item Weight: 18 lbs.
• Water Capacity: 64.2 Gallons (243 L)
- Stainless Steel Connector Dimensions (L x W x H): 3/4 inches
- Bag Dimensions (L x W x H): 34.65" x 15.75" x 13.39"-inches
• EVA Floor Mat Dimensions (Diameter): 35.43" -inches
- Product Dimensions (L x W x H): 31.50" x 40.55"-inches
serenelife™
Questions? Comments?
We are here to help!
(1) 718-535-1800
support@pyleusa.com
serenelife™
natural_image
Two branded storage containers, one blue and one white, with no visible text or symbols on the main objects.SLCPTBCR30
pasador de válvula

natural_image
Black cylindrical soap dispenser with 'serenella' label on the side (no other text or symbols visible)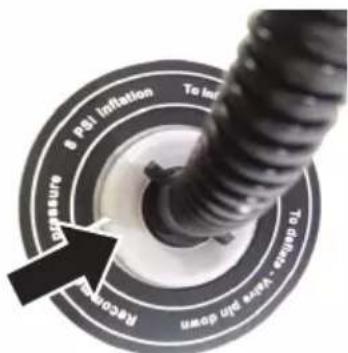
natural_image
Close-up of a white cylindrical device with blue base and three circular buttons labeled 'WATER OUT' and 'WATER IN' (no additional text or symbols)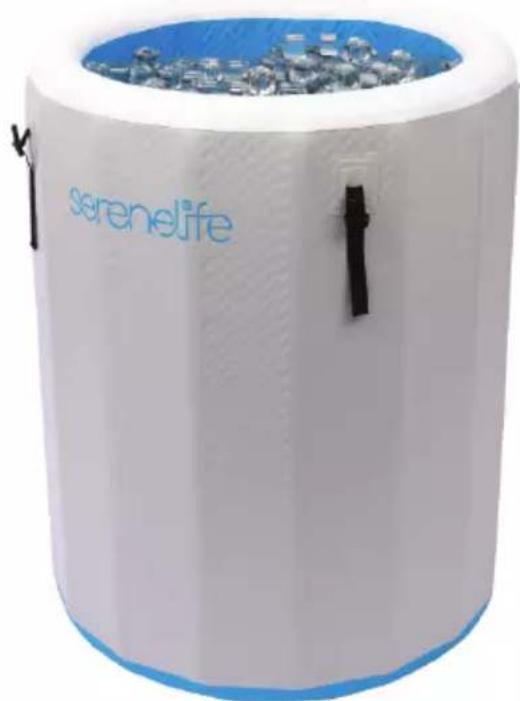
natural_image
White cylindrical device with blue interior and 'serenelife' branding, no visible text or symbols on body4. Llenado de Agua:
natural_image
Close-up of a white industrial equipment with two labeled buttons (green and red) and black connectors, no readable text or symbols.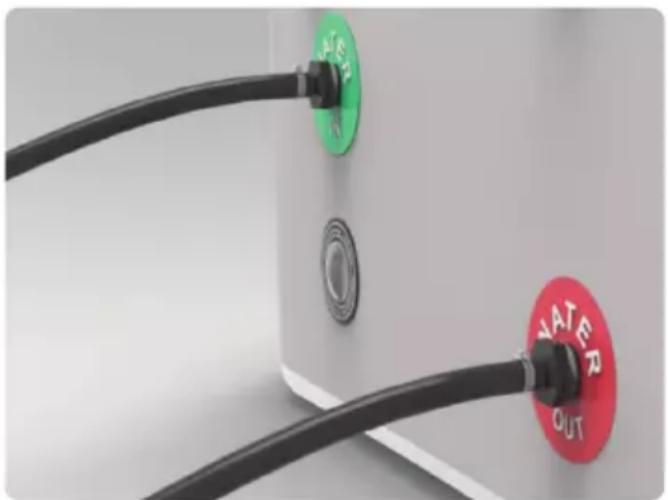
natural_image
Close-up of a white industrial electrical outlet with two black cables labeled 'VATER OUT' and a green circular component (no text beyond labels)natural_image
Close-up of a mechanical component with black and green parts, no visible text or symbols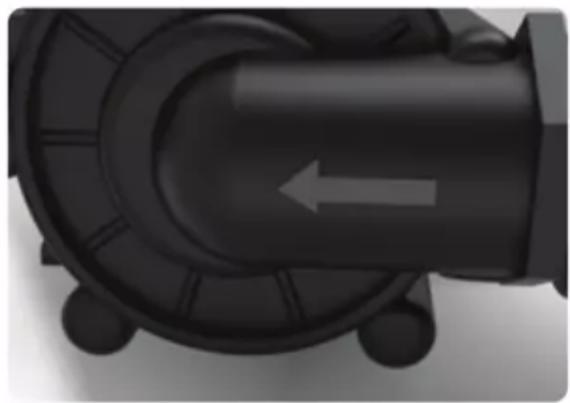
natural_image
Close-up of a black mechanical component with a white arrow indicating direction (no text or symbols)natural_image
Close-up of two black curved cables with hexagonal connectors, mounted on a dark base (no text or symbols visible)Cómo Llenar la Tina
Tips for Taking an Ice Bath Safely
- Start with a cold shower or a pool around 65^ F/ 18^ C for beginners.
- Begin with a small amount of ice, gradually adding more as your tolerance builds.
- Start with a short duration, like 5 minutes, and increase over time.
- Limit ice bath time to 15 minutes.
- Exit if you feel dizzy, lightheaded, or nauseated.
- Warm up gradually after the ice bath.
- Check that there is no sand or debris within the air valve.
- Make sure that the valve gasket is in place.
- Inflate all chambers of the tube.
- Close the cap on all the valves.
- Rinse the boat with soapy water, including perimeter of the inflation valves.
- Wherever bubbles appear, that is the location of the leak to be repaired.
natural_image
Simple black curved line on a light gray background with a blue circular label containing the number 1 (no text or symbols on the line itself)natural_image
Close-up of a hand using a tube to apply substance on a flat surface, no visible text or symbolsnatural_image
Close-up of a hand holding a spray bottle over a square surface (no text or symbols visible)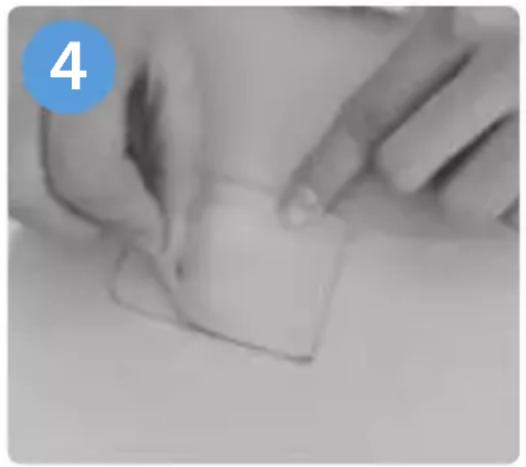
natural_image
Close-up of hands holding a small transparent object, no visible text or symbolsnatural_image
Blank white rectangular shape on a plain gray background (no text or symbols)Características:
natural_image
Two Serenelife branded containers, one open and one closed, with no visible text or symbols on the main objects.SLCPTBCR30
Goupille de soupape

natural_image
Black cylindrical soap dispenser with 'serenelle' branding on the side (no additional text or symbols visible)
natural_image
Close-up of a white cylindrical device with blue base and three circular buttons labeled 'WATER OUT' and 'WATER IN' (no additional text or symbols)
natural_image
White cylindrical device with blue interior and 'serenelife' branding, no visible text or symbols on bodynatural_image
Close-up of a white industrial water heater with green and red buttons labeled 'WATER OUT', connected by black cables (no readable text beyond labels)
natural_image
Close-up of a white industrial electrical outlet with two black cables labeled 'WATER OUT' and a green circular component (no text beyond labels)natural_image
Close-up of a black mechanical component with a green cylindrical body, no visible text or symbols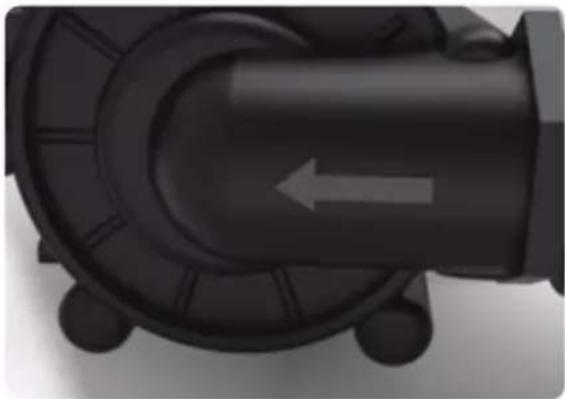
natural_image
Close-up of a black mechanical component with a white arrow indicating direction (no text or symbols)natural_image
3D rendering of two black curved pipes with hexagonal bases, mounted on a dark base (no text or symbols visible)Remplir la baignoire
natural_image
Simple black curved line on a light gray background with a blue circular label containing the number 1 (no text or symbols on the line itself)natural_image
Close-up of a hand using a tube to apply substance on a surface, no visible text or symbolsnatural_image
Close-up of a hand holding a spray bottle over a square surface (no text or symbols visible)
natural_image
Close-up of hands holding a small transparent object, no visible text or symbolsnatural_image
Blank white rectangular shape on a plain gray background (no text or symbols)Caractéristiques:
Des questions? Commentaires?
- SLCPTBCR30
- Inflatable Insulated Cold Plunge Tub
- WARNINGS
- INSTRUCTIONS FOR USE
- INSTALLATION GUIDE: ICE TUB
- Cold Plunge Water Chiller Sold Separately!
- SETTING UP THE ICE TUB:
- Filling with Water:
- Water Chiller Installation (First Time)
- Connecting Filter and Water Pump
- Adapters and Gaskets
- Connecting Water Chiller
- Filling the Tub
- Powering Up
- CAUTION
- Tips for Taking an Ice Bath Safely
- How to Keep the Water CLEAN in the Cold Plunge Tub
- REPAIRING
- Air Leakage
- Please follow these instructions:
- Small Repairs
- Patches
- Features:
- What's in the Box:
- Construction Materials:
- Technical Specs:
- serenelife™
- Llenado de Agua:
- Cómo Llenar la Tina
- Características:
- Remplir la baignoire
- Caractéristiques:
Brand : SereneLife
Model : SLCPTBCR30
Category : Bathtub