ETE102A - Tumble drier BRANDT - Free user manual and instructions
Find the device manual for free ETE102A BRANDT in PDF.
Questions des utilisateurs sur ETE102A BRANDT
0 question sur cet appareil. Repondez a celles que vous connaissez ou posez la votre.
Poser une nouvelle question sur cet appareil
Download the instructions for your Tumble drier in PDF format for free! Find your manual ETE102A - BRANDT and take your electronic device back in hand. On this page are published all the documents necessary for the use of your device. ETE102A by BRANDT.
USER MANUAL ETE102A BRANDT
Codes : 15900 A - 07/03 Contents Installation of your new evacuation tumble dryer Page Installation of your new evacuation tumble dryer
Selecting a drying programme
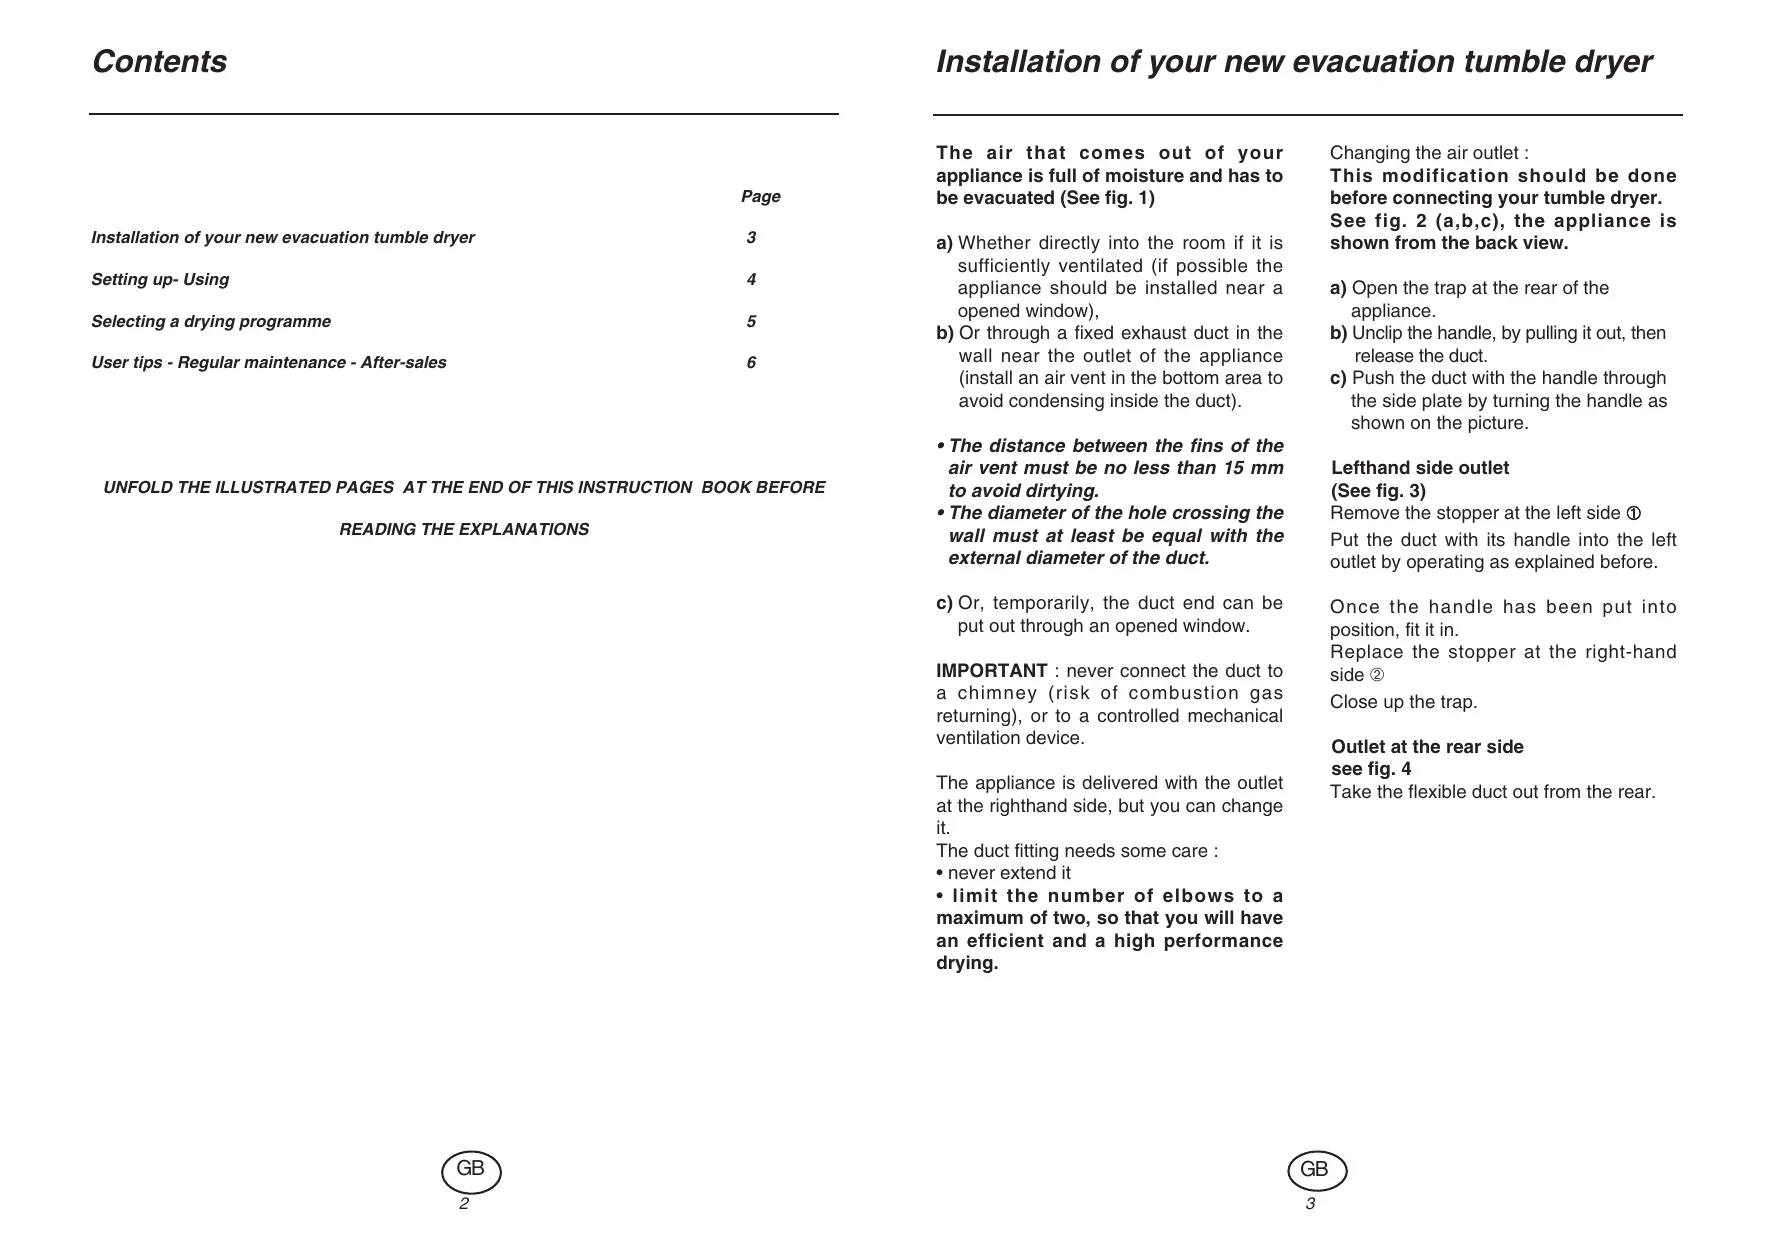
The air that comes out of your appliance is full of moisture and has to be evacuated (See fig. 1) Changing the air outlet : This modification should be done before connecting your tumble dryer. See fig. 2 (a,b,c), the appliance is shown from the back view. a) Whether directly into the room if it is sufficiently ventilated (if possible the appliance should be installed near a opened window), b) Or through a fixed exhaust duct in the wall near the outlet of the appliance (install an air vent in the bottom area to avoid condensing inside the duct). a) Open the trap at the rear of the appliance. b) Unclip the handle, by pulling it out, then release the duct. c) Push the duct with the handle through the side plate by turning the handle as shown on the picture.
- The distance between the fins of the air vent must be no less than 15 mm to avoid dirtying.
- The diameter of the hole crossing the wall must at least be equal with the external diameter of the duct. Lefthand side outlet (See fig. 3) Remove the stopper at the left side ➀ Put the duct with its handle into the left outlet by operating as explained before. c) Or, temporarily, the duct end can be put out through an opened window. Once the handle has been put into position, fit it in. Replace the stopper at the right-hand side ➁ Close up the trap. IMPORTANT : never connect the duct to a chimney (risk of combustion gas returning), or to a controlled mechanical ventilation device. Outlet at the rear side see fig. 4 Take the flexible duct out from the rear. The appliance is delivered with the outlet at the righthand side, but you can change it. The duct fitting needs some care :
- limit the number of elbows to a maximum of two, so that you will have an efficient and a high performance drying.
Putting in place Using Selecting a Drying programme It is not recommended to install your dryer on a carpeted floor. If this cannot be avoided, provide proper air circulation underneath the appliance. LEVELLING (FIG. 5) The tumble dryer has to be in a horizontal position, not sloping. Levelling is essential to ensure proper operation of the machine. Adjust the feet using a spanner to ensure that the dryer is level and check with a spirit level (maximum angle 1.5°, that is less than 1 cm). ENVIRONMENT Your tumble dryer releases hot air. If it is placed near another appliance or next to a cabinet, a minimum 1 cm space should be provided in between to assist ventilation. ELECTRICAL CONNECTION (Fig. 6) The electrical installation must be made in accordance to the standard. Do not connect the appliance through an extension but plug it directly into an electrical socket. In case of supply cord defect call for a skilled person to replace it because special tools are required. Replacing the electric lead
WARNING: In the interests of safety,
the electrical supply lead should ONLY be replaced by the manufacturer’s after-sales staff or a similarly qualified person. We cannot be held liable for any damage and possible repercussions resulting from a faulty earthing, or the absence of earthing of the appliance. DOOR OPENING Lift the cover to reach the drum. Cover safety device : It is only possible to switch on if the cover is properly closed. SWITCHING ON
- Check that the electricity supply cable is properly connected.
- Selecting a drying-time starts the dryer. The lamp “on” light will go on. Safety device: the machine can only be switched on if the lid is properly closed. LAUNDRY LOADING After your clothes have been washed and spun, put the laundry loosely in the drum without folding and squeezing. Any items which have been treated with a chemical stain remover or an aerosol, must not be put into the tumble dryer : inflammable products, danger of explosion If your laundry needs such treatment, it must absolutely be done before washing. LINT FILTER CLEANING (fig. 7)
WARNING : After every drying process it
is necessery to clear the lint deposits on the filter. Do not clean it with water. The lint filter, on the lefthand side of the drum, has to be cleaned without any water after every cycle. Never rinse it with water at the end of the programme. ➀ Remove the filter by pulling it upwards ➁ Once the thin layer of lint has been removed from the filter, put it back into position by pushing it firmly downwards. At the end of the programme, your appliance stops at the position “STOP”. The lamp ‘’filter cleaning’’ lights up to remind you that you have to clean the filter. The lamp ‘’on’’ goes out. DRYING TIME Recommended loads according to the kind of the laundry are the following : COTTON : Maximum 5 kg dry laundry Minimum 1.5 kg dry laundry SYNTHETIC : Maximum 2 kg dry laundry Minimum 0.5 kg dry laundry The drying times below include an 8- minute cooling phase at the end of the cycle and are given as a general indication, as they vary according to : - the desired result : dry, slightly damp,... - the room temperature (the indications correspond to 20°). - the spinning efficiency. For a spinning speed of 850 r.p.m. : COTTON : 5 kg between 1h 30 and 1h 40 MIXED : 3.5 kg between 1h 30 and 1h 40 For a spinning speed of 500 r.p.m. : MIXED : 2 kg between 50 and 60 mn. DELICATE : 1 kg between 55 and 65 mn. Lower spinning speeds mean relatively longer drying times.
SELECTING OF THE LAUNDRY
see picture 8 ➀ COTTON : For household linen, towels and cotton clothes and underwear Do not press any button MIXED : For loads including a mixture of different types and thicknesses of fabric (e.g cottons + resistant synthetics) or mixed-fibre clothes Press the MIXED button SYNTHETICS : fabrics For 100% synthetic SWITCHING OFF After the 8-minute coolong phase, the knob will be in the “STOP” position.Turn it to the off “O” position. As a precaution, the supply cable should be disconnected. Press the SYNTHETICS button DELICATES : For delicate synthetics and other particularly heat-sensitive fabrics (e.g acrylic fibres) Press the two buttons COLD PROGRAMME This position can be selected to freshen clothes which have been kept for a long time. This programme can also be used as supplementary drying for clothes which have not been sufficiently dried at the end of the normal programme.
see picture 8 ➁ With the knob ➁, select the required drying time according to the type and the load of laundry as well as to the spinning efficiency of your washing machine. This operation switches on your appliance.
Regular maintenance After-sales User tips Better drying Different laundry fabrics come from different origins, so their reaction during drying is very varied. You can usually dry together items which have been washed together, apart from the fabrics which carry the “Do not Tumble Dry” Symbol. It is better to avoid :
- drying together light materials with thick cotton items, the weight of the cotton will crease the lighter fabrics
- overloading the drum : the drying time will be longer ( Maximum : 1 wash load)
- ‘’overdrying’’ your laundry : this accentuates creasing because the cotton is ‘’broken’’. Non colourfast materials should be dried separately. Economical drying In order to save energy, spin your laundry very well : the higher the spin speed, the shorter the drying time and the lower the energy consumption. Ensure a low room temperature. If necessary, open the door or the window. Particular care Usually, all machine washable textile fabrics can be dried in the tumble dryer, with the exception of the following items :
- Woolen or silk materials
- Fabrics with chlorine fibres ( ex. : Thermolactyl*, Rhovyl*) Machine cleaning : Use only soap and water. Control panel cleaning : Use only a damp rag. Never use : - abrasive powders - detergents with alcohol (alcohol, solvents, ...) - scouring pad or plastic sponges. Any servicing operations on your appliance should be carried out by a qualified professional working with the brand name. When you call, mention the complete reference number of your appliance (model, type, serial number). This information appears on your warranty card and on the rating plate.
- Some particular items : net curtains, nylon tights and stockings, bulky items (like duvet, pillow,...etc.), items containing foam rubber or plastic parts, metallic parts, which could come off, plastic covered textiles, any non-spun laundry. Follow scrupulously the recommendations on the fabric labels.
Length of the power cord : about 1,70 m Electrical power : 230 V standard plug 13 on earth.
flexible duct handle
SYMBOL GUIDE normal drying soft drying
respect prohibitions