
UM1811 - Freezer BRANDT - Free user manual and instructions
Find the device manual for free UM1811 BRANDT in PDF.
| Brand | BRANDT |
| Model | UM1811 |
| Product type | Freezer (freezer) |
| Electrical supply | 220-240 V ~ 50 Hz, earthed plug |
| Climate class | N / ST / T (according to rating plate) |
| Refrigerant | Isobutane (R600a) |
| Functions | Super freeze (orange light), Temperature alarm (red light), Power indicator (green light) |
| Defrosting | Manual, when frost reaches 4 mm |
| Number of drawers | 1 to 2 freezer drawers + storage drawers (according to model) |
| Door reversal | Possible (unplug before) |
| Interior cleaning | Warm water and baking soda |
| Prohibited products | Solvents, abrasive detergents, dishwasher for accessories |
| Safety instructions | Use an earthed plug, avoid adapters and extension cords |
| Environmental protection | Recyclable packaging, recyclable appliance (WEEE directive) |
| After-sales service | Brandt: 0892 02 88 01 or www.brandt.com |
| Spare parts | Certified original, intervention by qualified professional |
Frequently Asked Questions - UM1811 BRANDT
User questions about UM1811 BRANDT
0 question about this device. Answer the ones you know or ask your own.
Ask a new question about this device
Download the instructions for your Freezer in PDF format for free! Find your manual UM1811 - BRANDT and take your electronic device back in hand. On this page are published all the documents necessary for the use of your device. UM1811 by BRANDT.
USER MANUAL UM1811 BRANDT
FR GUIDE D'INSTALLATION ET D'UTILISATION
natural_image
3D rendering of a mechanical clamp or bracket component with a screwdriver inserted (no text or symbols visible)CET APPAREIL RESPECTE LES DIRECTIVES CEE 73/23, 93/68, 89/336, 96/57, 92/31, 94/62
natural_image
3D rendering of a mechanical clamp or bracket with a screwdriver inserted (no text or symbols visible)natural_image
3D rendered image of a mechanical clamp or bracket component (no text or symbols visible)73/23, 93/68, 89/336, 96/57, 92/31, 94/62
You have just purchased a BRANDT freezer and we thank you for your confidence in our products.
We have poured all our own passion and know-how into this appliance so that it meets your requirements in the best way possible. We have designed it to be innovative and to provide high-performance but always be easy to use.
The Brandt range of products also offers you a vast selection of microwave ovens, hobs, cooker hoods, cookers, dishwashers, washing machines, driers, refrigerators and freezers that will go perfectly with your new BRANDT freezer.
We are, of course, constantly concerned to improve how we meet your requirements from our products. Our Consumer Services Department is available to answer all your questions and respond to your suggestions (contact details at the end of this manual).
And also contact our web site www.brandt.com where you will find all our products as well as useful additional information.
BRANDT
From our desire to improve our products, we reserve the right to make any modifications necessary to improve their technical, operating or aesthetic characteristics.

Important : Please read these installation and user's manual carefully before switching on your appliance. They enable you to familiarize yourself with its operation very quickly
www.brandt.com

- Safety instructions ____ 03
1 / INSTALLING YOUR APPLIANCE
- Electrical connection ____ 04
- Before connecting your appliance ____ 04
• Environmental protection ____ 04 - Recycling 04
• Description of your appliance 05 - Reversing the door opening direction ____ 05
2 / HOW TO USE YOUR APPLIANCE
- Advice 06
3 / ONGOING MAINTENANCE OF YOUR APPLIANCE
- Defrosting 07
- Cleaning and maintenance 07
4 / PARTICULAR MESSAGES, INCIDENTS
- Operating problems 08
5 / AFTER-SALES SERVICE 09
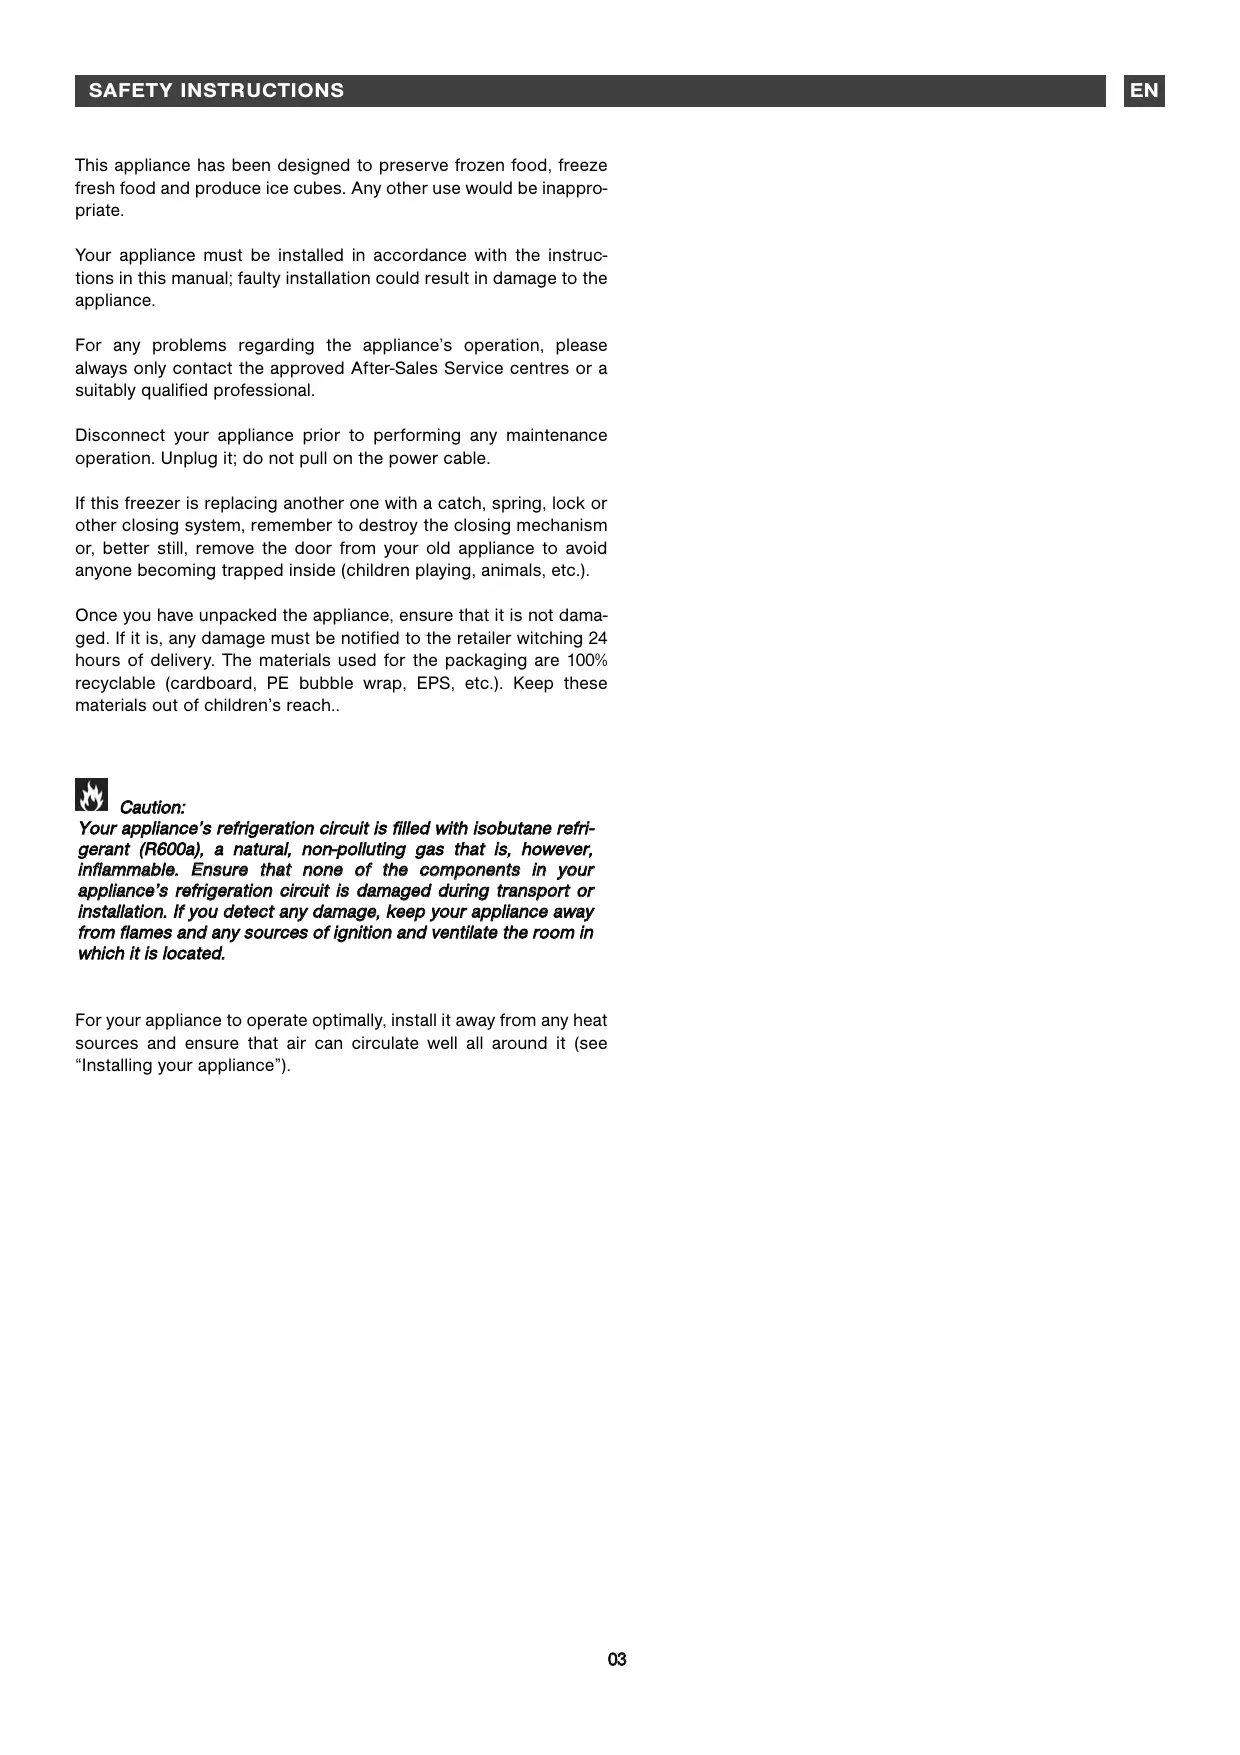
This appliance has been designed to preserve frozen food, freeze fresh food and produce ice cubes. Any other use would be inappropriate.
Your appliance must be installed in accordance with the instructions in this manual; faulty installation could result in damage to the appliance.
For any problems regarding the appliance's operation, please always only contact the approved After-Sales Service centres or a suitably qualified professional.
Disconnect your appliance prior to performing any maintenance operation. Unplug it; do not pull on the power cable.
If this freezer is replacing another one with a catch, spring, lock or other closing system, remember to destroy the closing mechanism or, better still, remove the door from your old appliance to avoid anyone becoming trapped inside (children playing, animals, etc.).
Once you have unpacked the appliance, ensure that it is not damaged. If it is, any damage must be notified to the retailer witching 24 hours of delivery. The materials used for the packaging are 100% recyclable (cardboard, PE bubble wrap, EPS, etc.). Keep these materials out of children's reach..

Caution:
Your appliance's refrigeration circuit is filled with isobutane refrigerant (R600a), a natural, non-polluting gas that is, however, inflammable. Ensure that none of the components in your appliance's refrigeration circuit is damaged during transport or installation. If you detect any damage, keep your appliance away from flames and any sources of ignition and ventilate the room in which it is located.
For your appliance to operate optimally, install it away from any heat sources and ensure that air can circulate well all around it (see "Installing your appliance").

Important:
Before installing your appliance please carefully read the safety instructions in order to avoid some minor inconveniences.
Install the appliance in a dry, well-ventilated room, away from any heat source. Leave a minimum distance of 10cm between the top of your appliance and any unit above it. If your installation does not permit this, leave 5cm between the top of the casing and any kitchen unit fixed to the wall and a gap of 2.5cm on each side of the appliance.
If your appliance must be installed next to another refrigerator or freezer, do not attach the two appliances together to avoid condensation forming on the outside.
Your appliance's climate class is shown on the identification plate. It determines the ambient temperature range for which the refrigeration unit has been designed to ensure that the appliance will operate correctly.
| Climate class | Ambient temperatures |
| N | 16° to 32° |
| ST | 18° to 38° |
| T | 18° to 43° |
ELECTRICAL CONNECTION
Socket characteristics: 220-240V with Earth.
Do not use extension leads or adaptors.
The cable must not be in contact with the compressor.
Do not trap the cable under the appliance.
The appliance's electrical installation s provided with an Earth. For your safety's sake, connect the appliance to a socket fitted with an efficient Earth (in accordance with the prevailing electrical installation safety regulations).
The manufacturer declines any responsibility for any damage caused through lack of Earthing.

BEFORE CONNECTION
- Clean the inside of your appliance with warm water and bicarbonate of soda. Rinse and dry thoroughly.
- Wait 2 hours before switching on to ensure that the oil in the compressor has stabilized.
ENVIRONMENTAL PROTECTION
This appliance contains no refrigerant gases harmful to the ozone layer in its refrigeration circuit and its insulation materials. It must not be disposed of with normal urban waste and scrap metal in order to avoid damage to the refrigeration circuit, particularly at the rear of the appliance. Contact your local town hall for information on the collection of this type of appliance.
RECYCLING
The packaging materials for your appliance are made from recyclable materials. Participate in recycling them and thereby contributing to protecting the environment by disposing of them in the municipal containers provided for this purpose.

Your appliance also contains many recyclable materials. It is therefore marked with this logo to inform you that worn-out appliances should not be mixed in with other waste. The recycling that your manufacturer arranges can then be done in optimum conditions n accordance with European Directive 2002/9/EEC regarding waste electrical and electronic equipment. Please contact your local town hall or your dealer for the worn-out appliances collection points nearest to your home. We thank you for collaborating in protecting the environment.
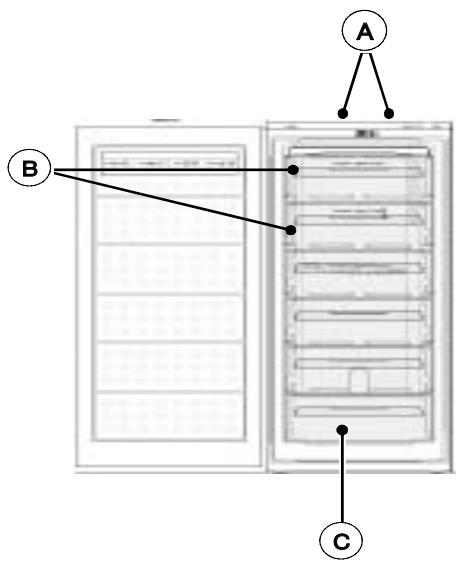
DESCRIPTION OF YOUR APPLIANCE (depending on the model)
flowchart
graph TD
    A["A"] --> B["B"]
    B --> C["C"]
    style A fill:#fff,stroke:#000
    style B fill:#fff,stroke:#000
    style C fill:#fff,stroke:#000
A Control panel and indicator lights
B Freezing drawers (1 or 2, depending on the model)
© Vegetable compartment
REVERSING THE DIRECTION THE DOORS OPEN
You can alter the direction in which the doors open if you wish:
The appliance must always be disconnected from the power supply when changing the direction the doors open.
- Gently tilt the appliance backwards and wedge it in this position.
- Remove the pin from the lower hinge and then remove the door. Remove the lower hinge and fit it on the opposite side.
- Unscrew the upper hinge and fit this on the opposite side.
- Take the plastic guide off the hinge pin for the upper hinge and press it into the opposite hole after removing the hole cover, which is subsequently placed over the hole you have just created.
- Slide the door onto the pin for the upper hinge and close it.
- Insert the pin for the lower hinge and screw it down tightly.
- If your appliance is fitted with a vertical handle, ensure that you move it over to the opposite side.
FITTING THE DOOR HANDLES (depending on the model)
The handles are located inside the refrigerator. Fit the handles on the doors, positioning them opposite the respective holes and fasten them with the screws provided as shown in the diagram below. Once the handles are in place, insert the screw covers supplied in the spaces provided for this purpose

natural_image
3D rendering of a mechanical clamp or bracket component with a screwdriver inserted (no text or symbols visible)REMOVING THE REMOVABLE TOP (depending on the model)
To install your appliance under a worktop, you may need to remove its top.
The appliance must always be disconnected when you proceed to remove the removable top.
- Remove the two screws at the back of the top.
- Free the top by lifting it at the back and sliding it gently forwards.
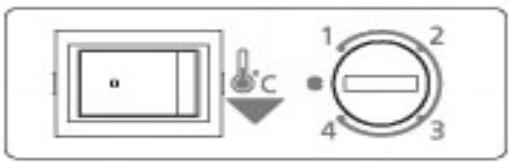
The thermostat knob behind the freezer door enables you to adjust the temperature. When set to position 0, the appliance is OFF. We recommend that you select a middle position: 2 or 3.
text_image
1 0 C 1 2 4 3This appliance also has 3 indicator lights to help you to use it:
Orange: Quick Freeze
Red: Temperature alarm
Green: ON
• ON / OFF
The green light illuminated as soon as your freezer is plugged in unless your thermostat is set to 0.
- Quick Freeze
This function enables you to freeze a large amount of food at one time. We recommend that you switch this on 24 hours before you put in the food and that you keep it on for 24 hours afterwards.
To switch on the Quick Freeze function, all you have to do is press the switch behind the door, next to the thermostat.
• Temperature alarm
This lights up when the temperature exceeds a certain threshold that could adversely affect preservation of the frozen food (over -12°C). It is quite normal for the light to stay lit for a while when the appliance is switched on, i.e. until the temperature reaches the best temperature for keeping the food.
In freezing mode, the compressor operates continuously in order to obtain maximum benefit from its refrigeration output. Keep the freezer in this mode for 24 hours after introducing the food to be frozen and then switch over to normal operation.
Place the food to be frozen in the top compartment(s) in the appliance so as to avoid it coming into contact with products that are already frozen, which would raise their temperature and risk making them unfit to eat. If there are only a few items to freeze, always use the top compartment, in which the items can be piled up, taking care not to prevent air from circulating.
The maximum amount of food that can be frozen in 24 hours is shown on the manufacturer's plate inside the appliance. Take care not to exceed this; you would risk your food not being properly frozen.
After the requisite freezing time is over, share out the frozen products among the storage drawers.

Advice:
- Do not put hot food or unsealed liquids into the refrigerator.
- NEVER introduce volatile, inflammable or explosive fluids such as alcohol, acetone or petrol because of the risk of explosion.
- Do not freeze too large an amount of food at one time; the faster the food is frozen, the more of its qualities are preserved.
- Ensure that you package your items correctly before freezing them so that they keep all their flavour and do not spoil the other products..
FREEZING ADVICE
- The time that frozen food can be kept depends on the type of food. Please refer to the instructions on the pack.
- Do not open the door and insert new items for freezing when the appliance is already freezing other items.
- Once defrosted, an item should never be refrozen.
- Note the frozen products' production date and comply with the storage times the manufacturer indicates.
- Avoid opening the door too often and never leave it open longer than necessary: a rise in temperature can reduce the item's conservation times quite significantly.
- Ensure that the outer packaging is intact. If not, the item may be spoiled.
- If a pack swells up or shows traces of dampness, this means that it has not been kept at a suitable temperature and has lost its original qualities.
- It is advisable to pay particular attention when purchasing frozen food because defrosted, or even partially defrosted, items cannot be refrozen. In this case, they must be eaten within 24 hours..
DEFROSTING
Before you use it, your frozen food must be left to defrost in the refrigerator (red meat, poultry, fish, etc.) or at ambient temperature (for other items). In the case of items that are thin or divided up, these can be cooked directly: in this case, the cooking time is longer.
DEFROSTING

You must defrost your freezer when the layer of frost in it is found 4mm. you may use the plastic spatula supplied with the liance but never use a metal item or electrical appliance for this pose.
Follow the procedure below to defrost it completely:
- Turn the thermostat knob to 0,
- Wrap the food in several sheets of newspaper and keep it in a cool place.
- Keep the door open to let the ice melt. You can accelerate defrosting by placing a bowl of hot water in the appliance.
- Sponge down and dry the walls carefully.
- Return the thermostat knob to the desired position and switch on Quick Freeze mode.
After 2 or 3 hours of operation, appliance is once again ready to preserve frozen food and you can switch off Quick Freeze mode.
CLEANING AND MAINTENANCE

Switch off your refrigerator before proceeding to clean it.
We recommend that you clean and disinfect your appliance regularly
- Clean the interior with water and bicarbonate of soda using a sponge or a dishcloth to prevent any bad smells occurring.
- Never, under any circumstances, use solvents or abrasive detergents because these could damage the interior of your appliance. Also do not put any of the interior's accessories in the dishwasher.
- We recommend that you dust the back of the appliance with a cloth once a year because if it is dirty, your refrigerator's output reduces and its consumption increases.
OPERATING PROBLEMS
There are some noises that it is quite normal for a freezer to make:
- The refrigerant gas can produce a gurgling sound as it travels through the circuits.
- The compressor may produce a buzzing noise, which can be more noticeable during start-up.
- The “cracking” noise produced by expansion and contraction of the materials used.
| PROBLEM | SOLUTION |
| The appliance does not work. | Check that the plug is correctly connected, that the fuse hasn’t blown or that the circuit-breaker has not jumped. |
| The freezer vibrates or is noisy. | Check that it is level. Adjust the feet. |
| The freezer gets too cold or not cold enough. | Check the position of the thermostat and set it to a more suitable temperature. |
| The compressor does not start after a change in the temperature. | This is normal; the compressor will restart after a certain time. |
TECHNICAL ASSISTANCE DEPARTMENT
If you have already performed the indicated checks and your problem still persists, DO NOT ATTEMPT TO MAKE ANY REPAIRS YOUR-SELF. Contact your nearest Technical Assistance Department.

THIS APPLIANCE COMPLIES WITH EEC DIRECTIVES 73/23, 93/68, 89/336, 96/57, 92/31, 94/62
Any work on your appliance must be performed by a Brandt-accredited qualified professional.
When you call, please mention the complete reference for your machine (model, type, serial number): this information is provided on your guarantee certificate and the information plate on your appliance.
ORIGINAL SPARE PARTS: when any maintenance work is being performed, ask that only certified original spare parts be used.
73/23, 93/68, 89/336, 96/57, 92/31, 94/62
natural_image
3D rendered image of a micrometer tool (no text or symbols visible)1 / INSTALLATIE VAN HET APPARAAT
natural_image
3D rendering of a mechanical clamp or bracket component (no text or symbols visible)73/23, 93/68, 89/336, 96/57, 92/31, 94/62


