IBraai 2017001 - Food thermometer CADAC - Free user manual and instructions
Find the device manual for free IBraai 2017001 CADAC in PDF.
| Product type | Food thermometer |
| Brand | CADAC |
| Model | IBraai 2017001 |
| Power supply | Battery (included, installed) |
| Connectivity | Bluetooth 4.0 |
| Compatibility | iPhone 4S+, iPad 3rd generation+, iPad mini, iPod touch 5th+, Android with Bluetooth 4.0 and Android 4.3+ |
| Included probe | Meat probe |
| Magnetic base | Yes, for attachment on cold surface |
| Probe temperature range | Up to 300°C (572°F) for the wire |
| Application | CADAC i-Braai (iOS and Android) |
| Main functions | Preset alarms for meats, timer, custom temperature, photo sharing |
| Warranty | 2 years |
| Care and cleaning | Clean the probe by hand with a damp cloth; do not immerse or put in dishwasher |
| Safety | Do not expose the probe cable to water; magnetic base on cold surface only |
| Temperature display | Celsius or Fahrenheit |
| Spare parts | Replacement probe available (not included) |
Frequently Asked Questions - IBraai 2017001 CADAC
User questions about IBraai 2017001 CADAC
0 question about this device. Answer the ones you know or ask your own.
Ask a new question about this device
Download the instructions for your Food thermometer in PDF format for free! Find your manual IBraai 2017001 - CADAC and take your electronic device back in hand. On this page are published all the documents necessary for the use of your device. IBraai 2017001 by CADAC.
USER MANUAL IBraai 2017001 CADAC
BLUETOOTH THERMOMETER
MODEL No 2017001
text_image
CAOAC 27.0°C 27.0°C * ©
USER INSTRUCTIONS
GBDEDKE5FRITNLN0PLSE
CAUTION
This product gets used with products in connection with hot surfaces.
IMPORTANT
Read these instructions carefully so as to familiarise yourself with the product.
Retain these instructions for future reference.
1. General
Thank you for purchasing the i-Braai thermometer.
To get started, simply follow the below steps to help guide you on how to set up and how to operate the app and its functions.
2. In the box
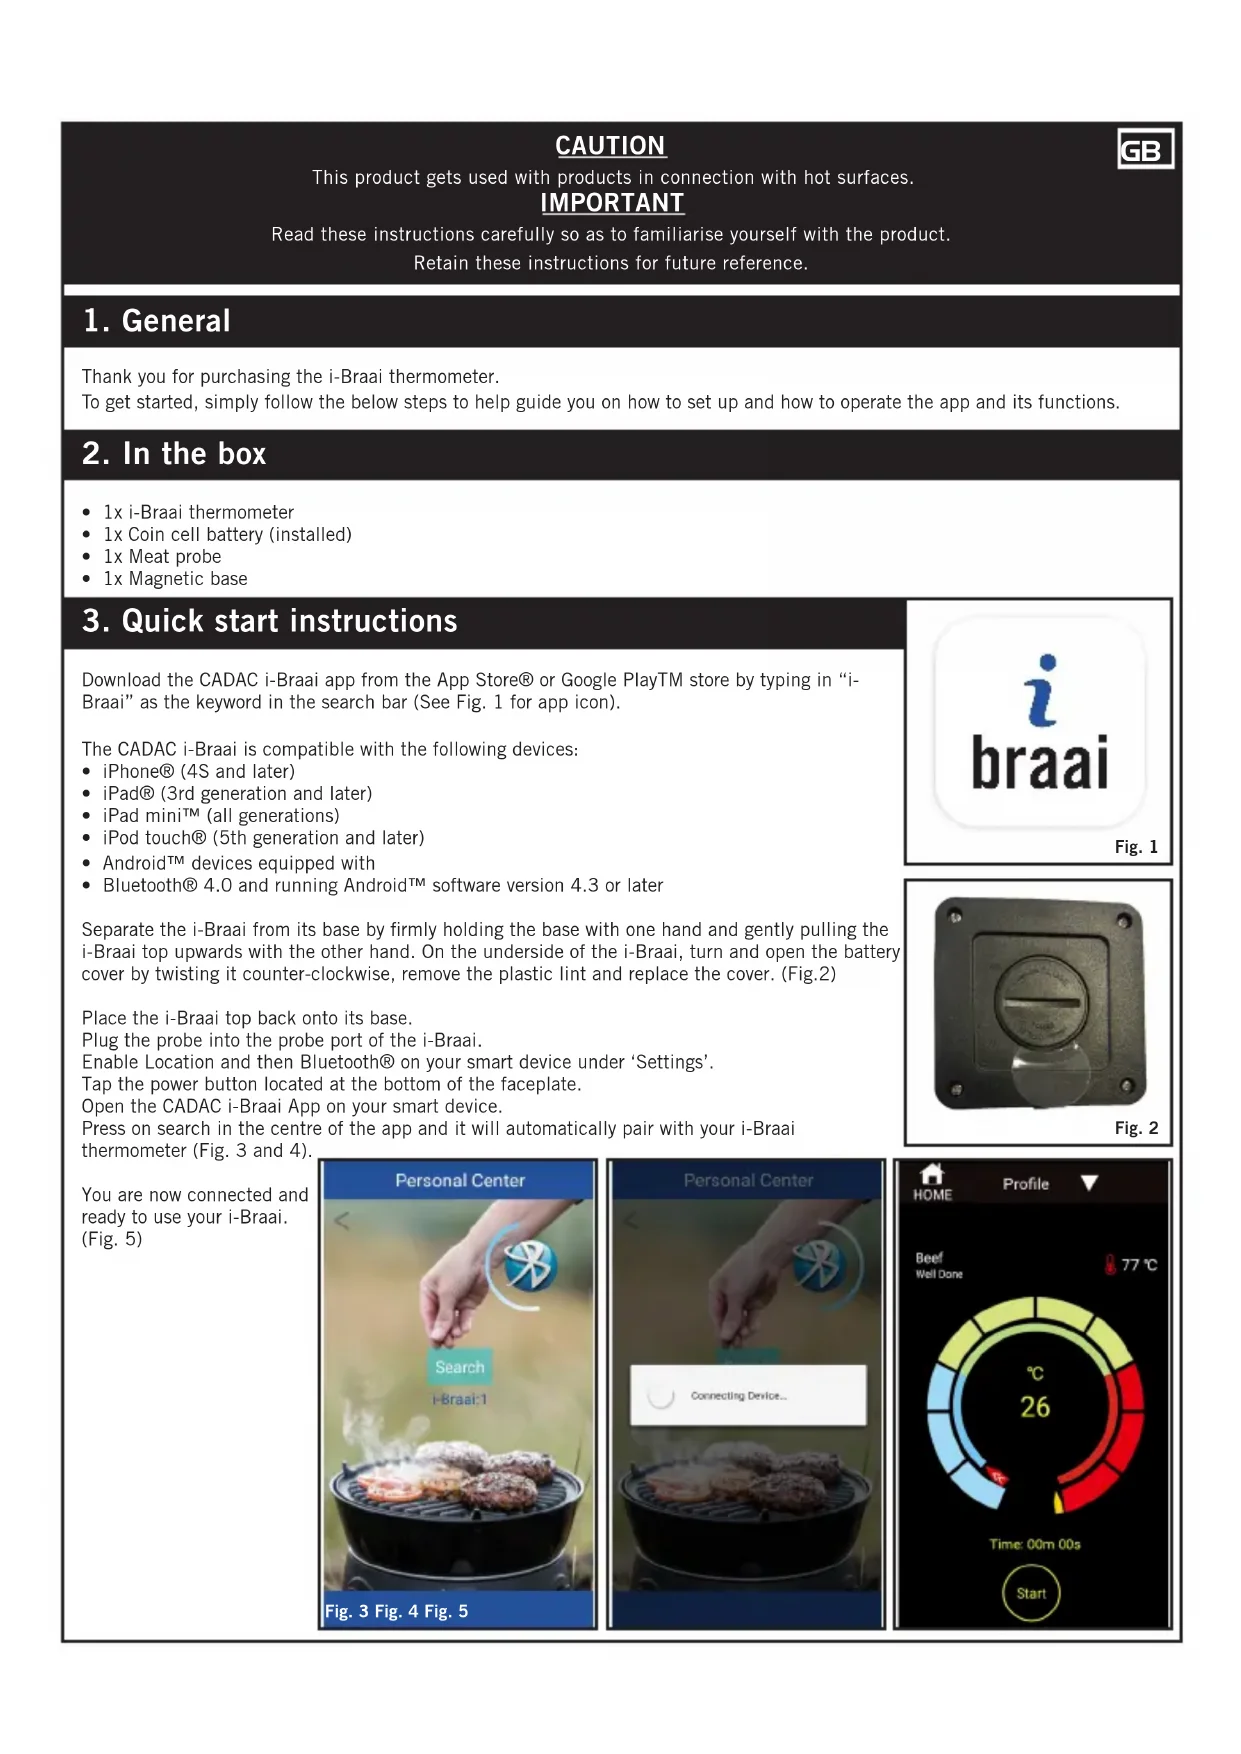
• 1x i-Braai thermometer
• 1x Coin cell battery (installed)
- 1x Meat probe
- 1x Magnetic base
3. Quick start instructions
Download the CADAC i-Braai app from the App Store® or Google PlayTM store by typing in "i-Braai" as the keyword in the search bar (See Fig. 1 for app icon).
The CADAC i-Braai is compatible with the following devices:
- iPhone® (4S and later)
- iPad® (3rd generation and later)
- iPad mini™ (all generations)
- iPod touch® (5th generation and later)
- Android™ devices equipped with
- Bluetooth® 4.0 and running Android™ software version 4.3 or later
Separate the i-Braai from its base by firmly holding the base with one hand and gently pulling the i-Braai top upwards with the other hand. On the underside of the i-Braai, turn and open the battery cover by twisting it counter-clockwise, remove the plastic lint and replace the cover. (Fig.2)
Place the i-Braai top back onto its base.
Plug the probe into the probe port of the i-Braai.
Enable Location and then Bluetooth® on your smart device under 'Settings'.
Tap the power button located at the bottom of the faceplate.
Open the CADAC i-Braai App on your smart device.
Press on search in the centre of the app and it will automatically pair with your i-Braai thermometer (Fig. 3 and 4).
You are now connected and ready to use your i-Braai. (Fig. 5)

text_image
Personal Center Search 1-Braal:1 Fig. 3 Fig. 4 Fig. 5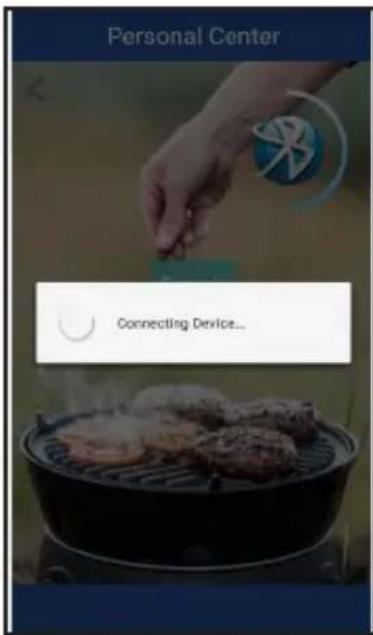
text_image
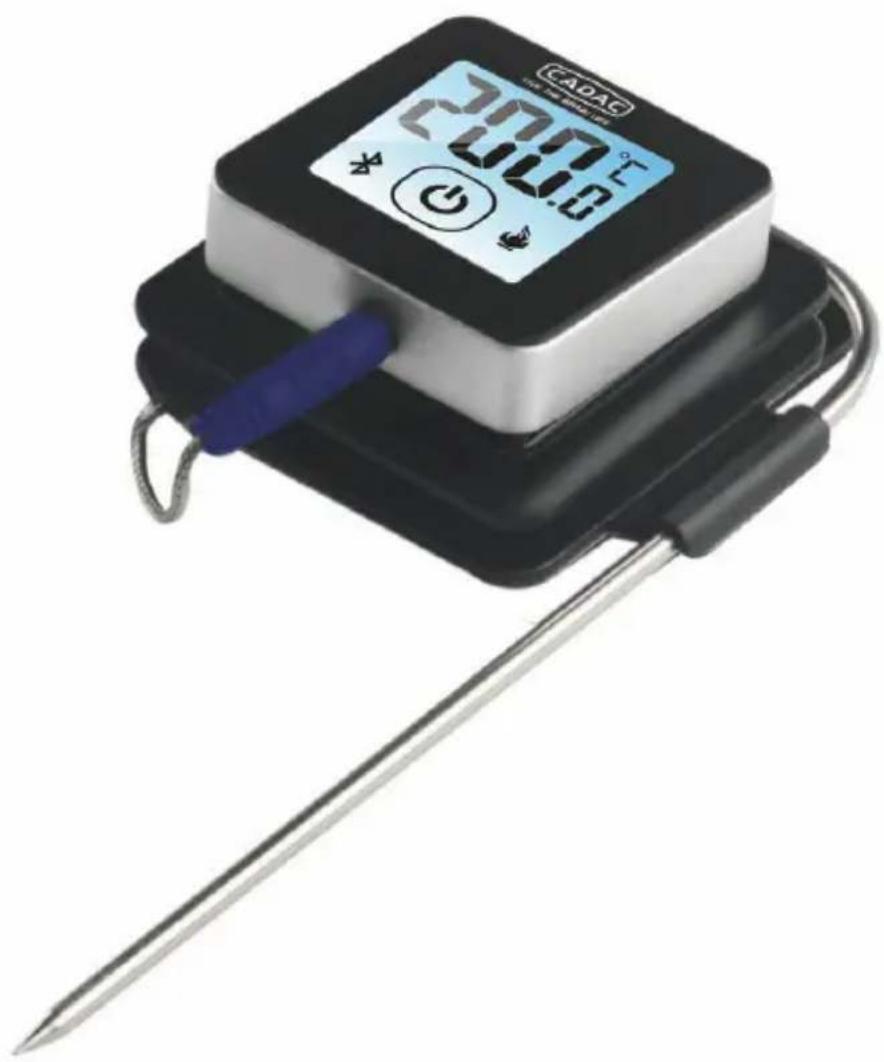
Personal Center Connecting Device...
text_image
i braai Fig. 1
natural_image
Metal mechanical component with circular dial and mounting holes, labeled Fig. 2 (no text or symbols on the component itself)
gauge
| Phase | Temperature (°C) | |---|---| | Beef Well Done | 77 | | 26 | (Not labeled) |4. Powering On & Off
To turn on the i-Braai follow these steps:
• Make sure the probe is installed
- Press the power button located at the centre of the faceplate once.
- Press the power button again quickly to change between Celsius and Fahrenheit.
To turn off the i-Braai follow these steps:
- Press and hold down the power button located in the centre of the faceplate for several seconds.
5. Connecting
To connect your i-Braai to your iPhone®, iPad®, iPod touch® or Android™ device follow these steps:
- Open Settings.
- Set Location to On.
- Tap Bluetooth®.
- Set Bluetooth® to On.
- While turned on, place your i-Braai thermometer next to your smart device and open the i-Braai App.
- Select "Search" in the centre of the screen.
6. Disconnecting
To disconnect your i-Braai device from your iPhone®, iPad®, iPod Touch® or Android™ device, follow these steps:
- While turned on, place your i-Braai next to your smart device and select the home screen.
- Tap "Pair" in the top left corner of the screen.
- Tap "Disconnect" in the centre of the screen.
7. Positioning of magnetic base
- The base of the i-Braai is magnetic for convenient positioning on a cool portion of your grill, smoker or other magnetic surfaces.
- The magnetic base is not designed to withstand high heat and it must be placed on a cool surface.
8. Probe
- Meat probes should always be inserted into the centre of the item being cooked for an accurate temperature reading.
- When using the standard meat probe, be sure to route the probe wire where it will not be exposed to flames or temperatures exceeding 572°F / 300°C).
- The probe should be cleaned by hand with a damp towel or sanitary wipe. The probe is not dishwasher safe. Take precaution not to get the wiring of the probe wet.
- Be sure to avoid water exposure to the wiring of the probes as well as the area where the wiring and crimp meet the probe.
- The probe is not waterproof and damage may result from water exposure.
- The probe should never be submersed in water.
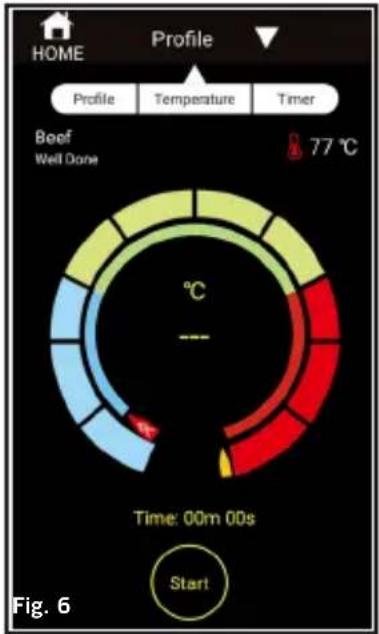
9. APP functions
BBQ (Fig. 6)
- The i-Braai App offers pre-set alarms for many types of meats and cooking temperatures. Tapping profile and then meat type will take you to the pre-set alarms.
- Change between type of meats by tapping the meat type or temperature mark.
- Once the meat is selected, you can 'Select Your Doneness.'
- Tap "Back" and then "Start" to commence.
- You can also create your own custom pre-set alarm for any desired temperature by tapping profile and then type of meats or temperature mark.
- You can choose to bypass the pre-set alarms by choosing "Temperature" or "Timer".
- For "Temperature" choose the desired doneness and then start.
- For "Timer" choose the time and then start for the countdown to commence.
CAMERA (Fig. 7)
- Upload photos of your meals whilst they are still cooking and share it with others.
- Tap the camera icon and choose the platform to share it.
SETTINGS (Fig. 8)
- Choose your alarm tone by doing the following:
- Select profile to view the sound options.
- Tap on each tone to hear and select the desired ton sound.
SUPPORT
- Instruction manual
VERSION
• Version of the installed APP
10. Warranty
CADAC (Pty) Ltd hereby warrants to the ORIGINAL PURCHASER of this CADAC product, that it will be free of defects in material and workmanship from the date of purchase for 2 years.
The warranty will only apply if the unit is assembled and operated in accordance with the printed instructions.
CADAC may require reasonable proof of your date of purchase. THEREFORE, YOU SHOULD RETAIN YOUR SALES SLIP OR INVOICE.
This Limited Warranty shall be limited to the repair or replacement of parts that prove defective under normal use and service and which on examination shall indicate, to CADAC's satisfaction, they are defective. Before returning any parts, contact the customer service representative in your region. If CADAC confirms the defect and approves the claim, CADAC will elect to replace such parts.
This Limited Warranty does not cover any failures or operating difficulties due to accident, abuse, misuse, alteration, misapplication, vandalism, improper installation or improper maintenance or service, or failure to perform normal and routine maintenance.
Deterioration or damage due to severe weather conditions such as hail, hurricanes, earthquakes or tornadoes, discoloration due to exposure to chemicals either directly or in the atmosphere, is not cover by this Limited Warranty.
gauge
| Zone Color | Value | |---|---| | Green | 77 °C | | Yellow | 77 °C | | Light Green | 77 °C | | Red | 77 °C | | Blue | 77 °C | | Light Blue | 77 °C | | Dark Blue | 77 °C | | Grey | 77 °C | | Grey (Start) | 00m 00s |
text_image
HOME Camera 28.00 79- Facebook Twitter E-mail Fig. 7 Cancel
text_image
HOME Settings Unit: Profile: Beef Temperature: 100°C Time: 00m 00s Sound: play Fig. 8There are no other express warrants except as set forth herein and any applicable implied warranties of merchantability and fitness are limited in duration to the period of coverage of this express written limited warranty. Some regions do not allow limitation on how long an implied warranty lasts, so this limitation may not apply to you.
CADAC is not liable for any special, indirect or consequential damages. Some regions do not allow the exclusion or limitation of incidental or consequential damages, to this limitation or exclusion may not apply to you.
CADAC does not authorize any person or company to assume for it any obligation or liability in connection with the sale, installation, use, removal, return, or replacement of its equipment; and no such representations are binding on CADAC.
This Warranty applies only to products sold at retail.
VORSICHT
text_image
Personal Center Connecting Device...
text_image
i braai Abb. 1
natural_image
Close-up of a metallic mechanical knob with a circular dial and mounting holes, labeled Abb. 2 (no text or symbols on the knob itself)
gauge
| Value | |---| | 77 °C | | 26 |gauge
| Zone | Value | |---|---| | Top Left (Green) | 77 °C | | Top Middle (Yellow) | 77 °C | | Bottom Left (Blue) | 77 °C | | Bottom Middle (Red) | 77 °C | | Bottom Right (Red) | 77 °C | | End (Green) | Start |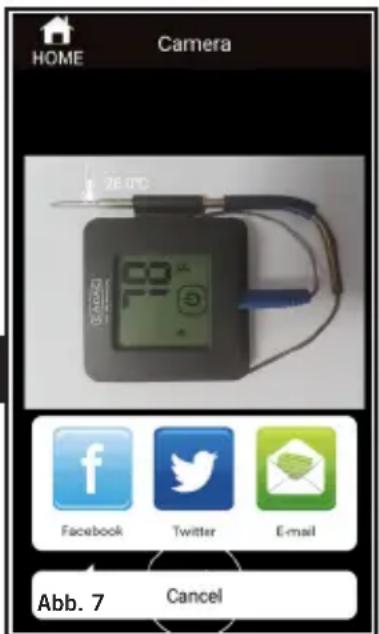
text_image
HOME Camera 28.0°C 79 Abb. 7 Cancel
text_image
HOME Settings Unit: ° C T Profile: Beef > Temperature: 100°C > Time: 00m 00s > Sound: play > Abb. 8text_image
Personal Center Connecting Device...
text_image
i braai Fig. 1
natural_image
Metal mechanical component with circular dial and mounting holes, labeled Fig. 2 (no text or symbols on the component itself)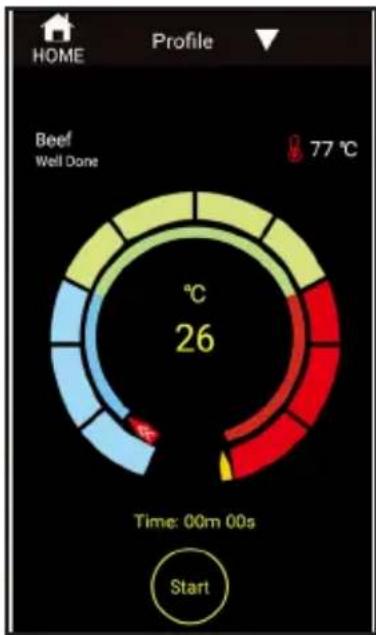
gauge
| Value | |---| | 77 °C | | 26 |gauge
| Zone Color | Value | |---|---| | Green | 77 °C | | Yellow | 77 °C | | Light Green | 77 °C | | Red | 77 °C | | Blue | 77 °C | | Light Blue | 77 °C | | Dark Blue | 77 °C | | Grey | 77 °C | | Grey (Start) | 00m 00s |
text_image
HOME Camera 28.00 79- Facebook Twitter E-mail Fig. 7 Cancel
text_image
HOME Settings Unit: Profile: Beef Temperature: 100°C Time: 00m 00s Sound: play Fig. 8text_image
Personal Center Connecting Device...
text_image
i braai Fig. 1
natural_image
Close-up of a metallic mechanical knob or dial component with mounting holes, labeled Fig. 2 (no text or symbols on the knob itself)