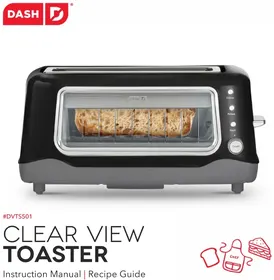
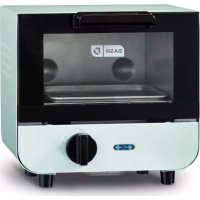
Clear View Toaster DVTS501AQ - Oven Dash - Free user manual and instructions
Find the device manual for free Clear View Toaster DVTS501AQ Dash in PDF.


| Product Type | Toaster / Oven |
| Brand | Dash |
| Model | Clear View Toaster DVTS501AQ |
| Dimensions (approx.) | 30 x 25 x 20 cm |
| Weight (approx.) | 2.7 kg |
| Power Supply | 120 V ~ 60 Hz |
| Power | 1200 W |
| Capacity | 4 slices of bread |
| Material | Stainless steel and tempered glass |
| Functions | Toasting, baking, roasting, keep warm |
| Controls | Temperature dial, mechanical timer, lowering lever |
| Timer | Up to 30 minutes |
| Thermostat | Adjustable from 90°C to 230°C |
| Auto shut-off | Yes, at the end of the timer |
| Indicator light | Indicates the appliance is on |
| Crumb tray | Removable for easy cleaning |
| Care and cleaning | Unplug and let cool; clean with a damp cloth; do not immerse |
| Safety | Hot surface, polarized plug, do not use near water, supervision required |
| Replacement parts | Contact after-sales service |
| Warranty | 1 year (common estimate) |
Frequently Asked Questions - Clear View Toaster DVTS501AQ Dash
User questions about Clear View Toaster DVTS501AQ Dash
0 question about this device. Answer the ones you know or ask your own.
Ask a new question about this device
Download the instructions for your Oven in PDF format for free! Find your manual Clear View Toaster DVTS501AQ - Dash and take your electronic device back in hand. On this page are published all the documents necessary for the use of your device. Clear View Toaster DVTS501AQ by Dash.
USER MANUAL Clear View Toaster DVTS501AQ Dash
natural_image
Black DASH 2008 dual-tanita toaster with open glass showing four slices of bread, no visible text or symbols on the device itself.DVTS501
CLEAR VIEW TOASTER
Instruction Manual | Recipe Guide
natural_image
Simple line drawing of a chef's hat, bread roll, and slice of cheese (no text or symbols)












CLEAR VIEW TOASTER
Important Safeguards 47
Parts and Features 8-9
Using Your Toaster....11-13
Cleaning and Maintenance 14
Tips and Tricks 16
Recipe Ideas....17
Notes 20 21
Customer Service 22
Warranty 23

IMPORTANT SAFEGUARDS
IMPORTANT SAFEGUARDS
IMPORTANT SAFEGUARDS: PLEASE READ AND SAVE THIS INSTRUCTION AND CARE MANUAL.
When using electrical appliances, basic safety precautions should be followed, including:
- Please read and save this instruction and care manual.
- Remove all bags and packaging from appliance prior to use.
- Never leave Toaster unattended while in use.
- Make sure the appliance is cleaned thoroughly before using.
- For maintenance questions other than cleaning, please contact StoreBound directly at 1-800-898-6970 from 7AM - 7PM PST Monday - Friday or by email at support@bydash.com.
- Warning: hot surfaces. Do not touch hot surfaces. Use handles or knobs.
- Close supervision is necessary when appliance is used by or near children.
- Do not operate this appliance with a damaged cord, damaged plug, after the appliance malfunctions, is dropped, or damaged in any manner. Return your Clear View Toaster to the nearest authorized service facility for examination, repair, electrical, or mechanical adjustment.
- Do not place appliance on or near a hot gas burner, hot electric burner, or in a heated oven.
- Never operate the Toaster without its proper accessories.
- Do not use the appliance if any of the parts are damaged.
-
Do not place the cord, plug, or unit near water or other liquids.
• To protect against electric shock, do not immerse the appliance, plug, or cord in water or any other liquid. -
This appliance is not intended for use by persons (including children) with reduced physical, sensory or mental capabilities, or lack of experience and knowledge unless they are provided with supervision and instruction concerning use of the appliance by a person responsible for their safety.
- Do not place utensils, fingers, or other foreign objects inside the Toaster while in use as this may result in fire, electric shock, or injury.
- Do not use appliance for other than its intended use.
• Always be sure to turn off and unplug the appliance prior to assembly, disassembly, cleaning, and storage. - Do not let the cord hang over the edge of tables or counters.
- Do not attempt to dislodge food when the Toaster is plugged in. Unplug and allow the appliance to cool down completely before proceeding.
- Do not use attachments that are not recommended by the appliance manufacturer, as this may result in fire, electric shock, or personal injury.
- Only plug your appliance into a power outlet of the correct voltage (A.C. only) as marked on the appliance.
-
Warning: always unplug appliance from outlet when not in use and before cleaning to prevent the risk of electric shock. Allow to cool before putting on or taking off parts.
-
Do not let the power cord touch hot surfaces as the cord may become damaged by the heat.
- Do not use appliance outdoors or for commercial purposes.
• Make sure the appliance is off first before unplugging from outlet. - Do not use the appliance for defrosting food other than bread and waffles.
- If the Carriage Lever is stuck while the Toaster is on, immediately unplug the appliance and let it cool down before emptying and cleaning. If the problem persists, discontinue use of the appliance.
- Do not place wet foods inside the Toaster.
- Oversized foods, utensils, or metal foil packages must not be inserted into the Toaster as this may result in fire or electric shock.
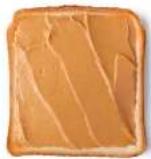
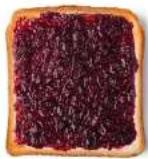
- Do not place food in the Toaster that has been covered with butter, jelly, frosting or other condiments as this may result in fire, smoke, or jamming of the appliance.
-
A fire may occur if the Toaster is covered or touching flammable materials, such as curtains, draperies, walls, and the like, when in operation.
-
StoreBound shall not accept liability for damages caused by improper use of the appliance.
- This appliance has a polarized plug (one blade is wider than the other). To reduce the risk of electric shock, this plug will fit in a polarized outlet only one way. If the plug does not completely fit in the outlet, reverse the plug. If it still does not fit, contact a qualified electrician. Do not attempt to modify the plug in any way.
- A short power supply cord is to be provided to reduce the risk resulting from becoming entangled in or tripping over a longer cord. An extension cords is available and may be used if care is exercised in their use. If an extension cord is used, the marked electrical rating of the extension cord should be at least as great as the electrical rating of the appliance. The extension cord should be arranged so that it will not drape over the countertop or tabletop where it can be pulled on by children or tripped over unintentionally.
- When heating toaster pastries, always use the lightest toast color setting.
IMPORTANT SAFEGUARDS: PLEASE READ AND SAVE THIS INSTRUCTION AND CARE MANUAL.
GARANTIES IMPORTANTES GARANTIES IMPORTANTES
GARANTIES IMPORTANTES: VEUILLEZ LIRE ET CONSERVER CE MODE D'EMPLOI ET D'ENTRETIEN
8 · parts & features parts & features · 9
USING YOUR
TOASTER
USING YOUR TOASTER
- Remove all packaging material and stickers from your Dash Clear View Toaster.
- Clean the appliance and all of its components prior to assembly and use.
• Make sure loose objects have not fallen inside the Toaster. - In order to eliminate any manufacturing residues, turn on the Toaster without bread and set the Browning Dial to level 4. The appliance may give off some smoke which is perfectly normal.
natural_image
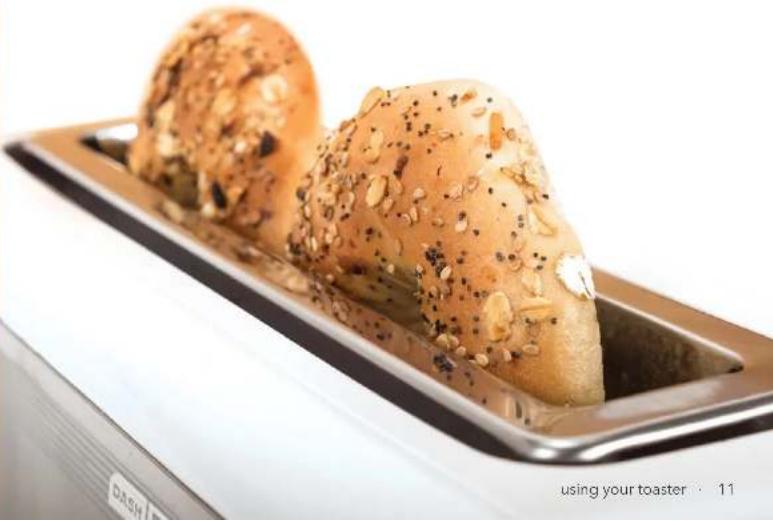
Close-up of sesame-coated bread rolls in a rectangular kitchen grater (no text or symbols visible)using your toaster
GETTING STARTED
- Place the Clear View Toaster on a clean and stable surface. Make sure that no liquids or flammable objects are near the appliance.
- Place the bread slices in the Toasting Slot. Press the Carriage Lever down until it locks into place to start the heating process. If the handle doesn't lock, check if the appliance is plugged in. The Carriage Lever will not click into place if the toaster is not plugged in.
- Turn the Browning Dial to the desired level. The higher the number, the more toasted your bread will be. You can stop the toasting process at any time by simply pressing the Cancel Button.
- Always unplug the appliance after use and let it cool down before cleaning or storing. When storing the Clear View Toaster, wind the power cord around the hooks located on the bottom of the appliance.
Note: Never stick your bare hands in the Toaster to remove food.
TYPE DESCRIPTION
| DEFROST | Thoroughly toasts frozen bread with an extended toasting cycla. |
| REHEAT | Rshoats already toasted broad or toasts broad that is not browned enough. |
| BAGEL | Toasts bagel's by using only one side of the heating element. |
12 · using your toaster using your toaster · 13
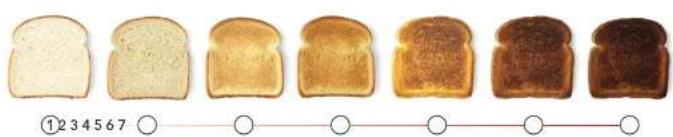
BROWNING DIAL
Seven heating levels give you precise toasting results. Simply select your desired browning level from the chart below.
DO NOT SUBMERGE the unit in water. Instead, use a damp cloth to wipe down the surface of the Toaster. Clean the Slide-Out Crumb Tray with warm water and mild dish soap. Rinse and dry thoroughly with a lint-free cloth.
Caution: Be sure to clean the Slide-Out Crumb Tray regularly to prevent crumbs from accumulating at the bottom of the Toaster.
- Before cleaning your Toaster, unplug the appliance and let it cool down completely.
- Do not use abrasive scrubbers, sponges, or chemical cleaners to clean your appliance as this may damage it. Instead, use a damp cloth to wipe down the surface of your Clear View Toaster.
- When not in use, store your Toaster in a clean, dry place.
CLEANING THE SLIDE-OUT CRUMB TRAY
- Remove the Slide-Out Crumb Tray located at the bottom of the Toaster by sliding it out from the side.
- Wash the Tray with warm, soapy water. Rinse and dry thoroughly before returning the Tray to its slot.
- To avoid any lingering food odors, remove and clean the Slide-Out Crumb Tray after each use.
CLEANING THE GLASS PANEL
- Make sure the Slide-Out Crumb Tray is empty. Turn the Toaster upside down or on its side. Gently press the Glass Panel Clamp underneath the Toaster and then slide the Glass Panel out of the Toaster.
- Carefully wash the Glass Panel in warm, soapy water. Rinse and dry thoroughly. Slide the Glass Panel back into its grooves until the Glass Panel Clamp locks into place.
14 · cleaning & maintenance
natural_image
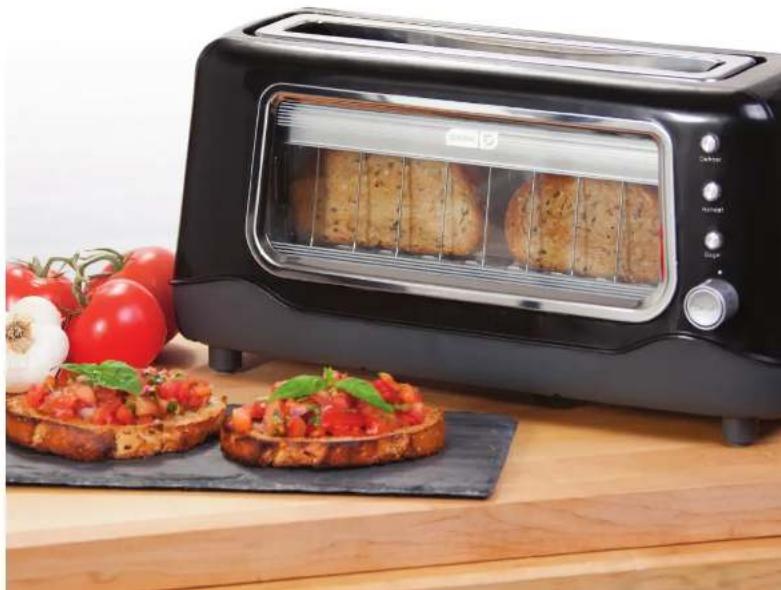
Black toaster with open die and two tortilla bread slices on a wooden table, surrounded by fresh tomatoes and garlic (no visible text or symbols)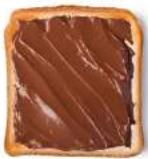
- If the bread is too small to be removed from the Toasting Slot, simply lift the Carriage Lever to raise the Carriage to its uppermost position and then pick up the toasted bread. If you still cannot carefully take out the bread, unplug your Toaster and use thin heat-resistant tongs to remove the bread from the Toasting Slot.
- Do NOT touch the metal parts as they will be hot!
- For pop tarts or frozen waffles, toast as directed.
- ONLY toast food that is meant to be toasted in a slot toaster.
- If the Toaster jams, the bread might be too thick. Remove the bread from the Toaster and slice it thinly.
NOTE: If the Carriage Lever does not stay down, the Glass Panel Clamp is not properly inserted all the way in. Make sure the Glass Panel Clamp is fully and securely inserted. See included note for photos.

natural_image
Close-up of a layered sandwich with red sauce, pebbles, and herbs (no text or symbols visible)LOX BAGELS
toasted bagel, light cream cheese, lox, red onion, capers, dill

natural_image
Close-up of a plate with three sandwiched slices topped with tomato and cheese (no text or symbols visible)AVOCADO TOAST
toasted baguette, mashed avocado, diced tomato, onion, salt, pepper, drizzle of olive oil
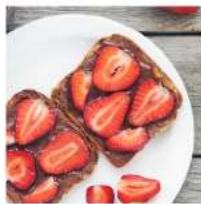
natural_image
Close-up of a white plate with sliced strawberries and chocolate sauce, placed on a wooden surface (no text or symbols visible)STRAWBERRY NUTELLA
toasted bread, Nutella, sliced strawberries
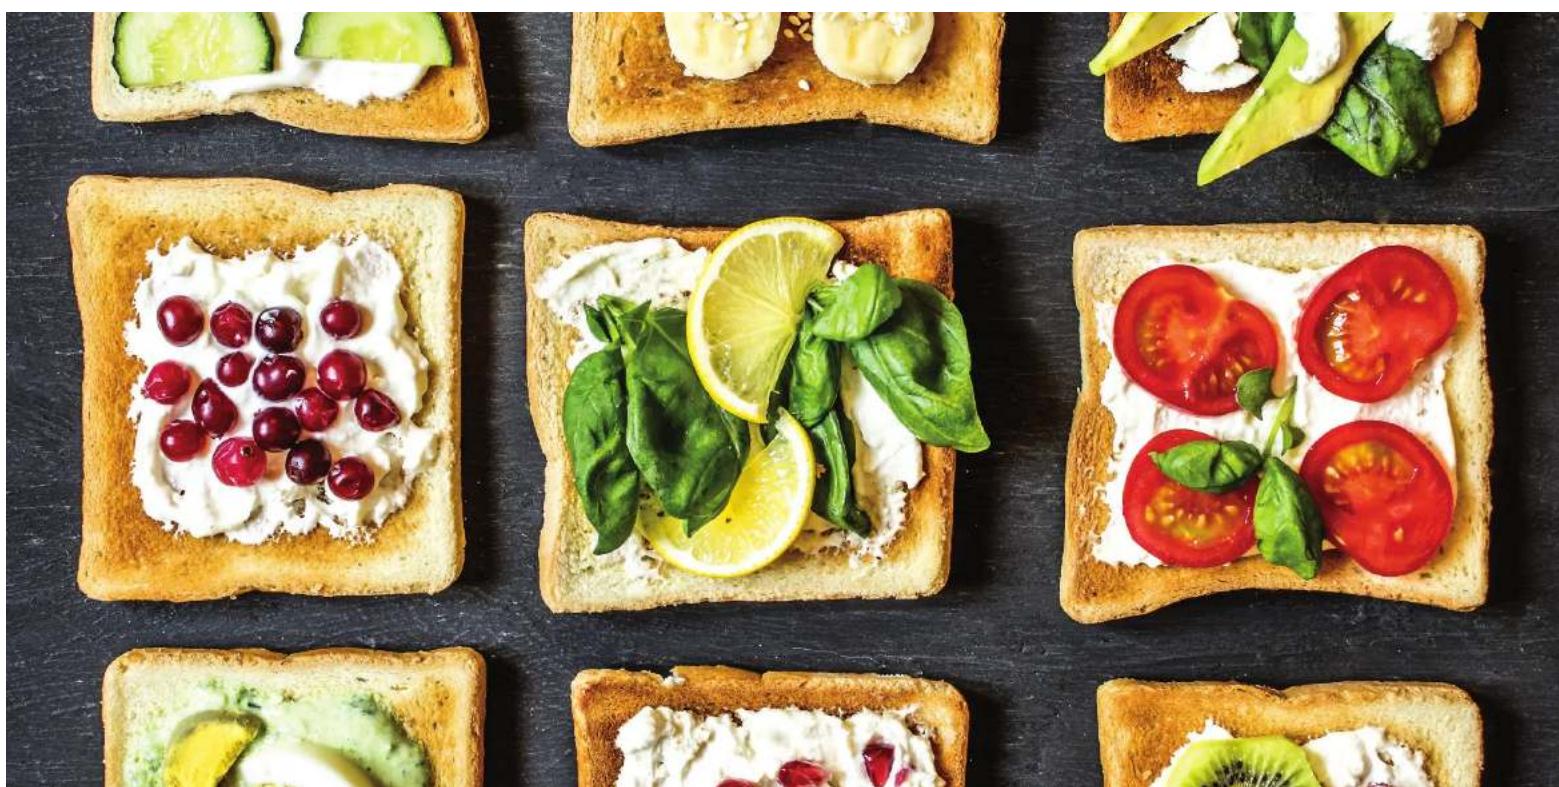
natural_image
Top-down view of various sandwiches arranged on a dark surface, featuring various pastries with toppings like cherries, lettuce, and tomatoes (no text or symbols visible)NOTES NOTES
CUSTOMER SUPPORT WARRANTY

Dash values quality and workmanship and stands behind this product with our Feel Good Guarantee™. To learn more about our commitment to quality, visit bydash.com/feelgood.
Our customer support teams in the US and Canada are at your service Monday - Friday during the times below. Contact us at 1 (800) 898-6970 or support@bydash.com
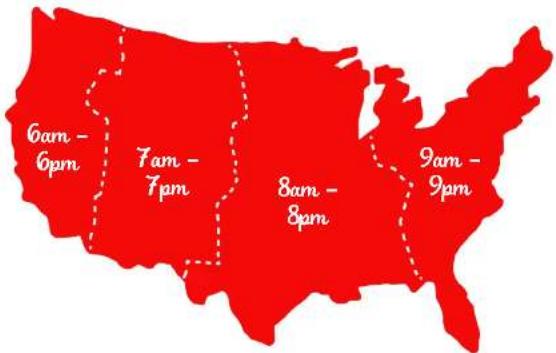
Hey Hawaii! You can reach our customer service team from 3AM to 3PM. And also, Alaska, feel free to reach out from 5AM to 5PM.
STOREBOUND, LLC - 1 YEAR LIMITED WARRANTY
Your StoreBound product is warranted to be free from defects in material and workmanship for a period of one (1) year from the date of the original purchase when utilized for normal and intended household use. Should any defect covered by the terms of the limited warranty be discovered within one (1) year, StoreBound, LLC will repair or replace the defective part. To process a warranty claim, contact Customer Support at 1-800-898-6970 for further assistance and instruction. A Customer Support agent will assist you by troubleshooting minor problems. If troubleshooting fails to fix the problem, a return authorization will be issued. Proof of purchase indicating the date and place of purchase is required and should accompany the return. You must also include your full name, shipping address, and telephone number. We are unable to ship returns to a PO box. StoreBound will not be responsible for delays or unprocessed claims resulting from a purchaser's failure to provide any or all of the necessary information. Freight costs must be prepaid by the purchaser.
Send all inquiries to support@bydash.com.
There are no express warranties except as listed above.
REPAIR OR REPLACEMENT AS PROVIDED UNDER THIS WARRANTY IS THE EXCLUSIVE REMEDY OF THE CUSTOMER. STOREBOUND SHALL NOT BE LIABLE FOR ANY INCIDENTAL OR CONSEQUENTIAL DAMAGES OR FOR BREACH OF ANY EXPRESS OR IMPLIED WARRANTY ON THIS PRODUCT EXCEPT TO THE EXTENT REQUIRED BY APPLICABLE LAW. ANY IMPLIED WARRANTY OF MERCHANTABILITY OR FITNESS FOR A PARTICULAR PURPOSE ON THIS PRODUCT IS LIMITED IN DURATION TO THE DURATION OF THIS WARRANTY. Some states do not allow the exclusion or limitation of incidental or consequential damages, or limitations on how long an implied warranty lasts. Therefore, the above exclusions or limitations may not apply to you. This warranty gives you specific legal rights and you may also have other rights, which vary from state to state. Refurbished items or items not purchased through an authorized retailer are not eligible for warranty claims.
REPAIRS
DANGER! Risk of electric shock! The Dash Clear View Toaster is an electrical appliance.
Do not attempt to repair the appliance yourself under any circumstances,
Contact Customer Support regarding repairs to the appliance.
TECHNICAL SPECIFICATIONS
Model: DVTS501
Voltage 120V - 60Hz
Power Rating 1100W
Stock #: DVTS501 20170803 v13

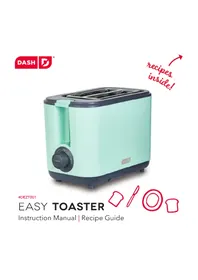
- DVTS501
- CLEAR VIEW TOASTER
- IMPORTANT SAFEGUARDS
- IMPORTANT SAFEGUARDS: PLEASE READ AND SAVE THIS INSTRUCTION AND CARE MANUAL.
- GARANTIES IMPORTANTES GARANTIES IMPORTANTES
- GARANTIES IMPORTANTES: VEUILLEZ LIRE ET CONSERVER CE MODE D'EMPLOI ET D'ENTRETIEN
- USING YOUR
- TOASTER
- USING YOUR TOASTER
- GETTING STARTED
- BROWNING DIAL
- CLEANING THE SLIDE-OUT CRUMB TRAY
- CLEANING THE GLASS PANEL
- LOX BAGELS
- AVOCADO TOAST
- STRAWBERRY NUTELLA
- NOTES NOTES
- CUSTOMER SUPPORT WARRANTY
- STOREBOUND, LLC - 1 YEAR LIMITED WARRANTY
- REPAIRS
- TECHNICAL SPECIFICATIONS
Brand : Dash
Model : Clear View Toaster DVTS501AQ
Category : Oven