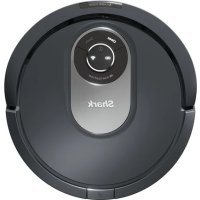
AI Robot RV2001EU - Vacuum Cleaner SHARK - Free user manual and instructions
Find the device manual for free AI Robot RV2001EU SHARK in PDF.



| Product type | Smart robot vacuum |
| Brand | Shark |
| Model | AI Robot RV2001EU |
| Dimensions (L x W x H) | 33.5 x 33.5 x 10.2 cm |
| Weight | 3.5 kg |
| Power supply | Rechargeable lithium-ion battery (model RVBAT850A) |
| Runtime | Up to 90 minutes |
| Charging time | Approximately 6 hours |
| Charging dock | Shark XDCKRV2000 |
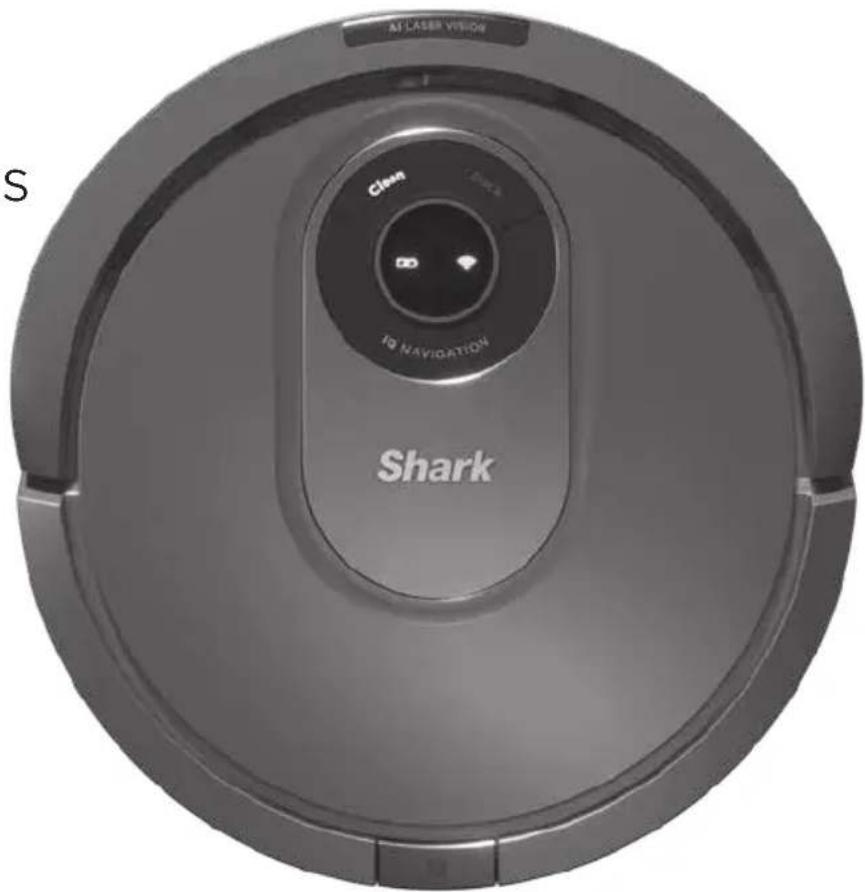
| Navigation technology | Navigation IQ and AI Laser Vision |
| Connectivity | Wi-Fi 2.4 GHz, SharkClean app |
| Main functions | Scheduling, no-go zones, interactive mapping, recharge and resume |
| Cleaning system | Anti-tangle rotating brush, side brushes |
| Dustbin capacity | 0.3 L |
| Filter | Washable, clean monthly |
| Safety | Anti-drop sensors, auto-stop, obstacle protection |
| Maintenance | Regular dustbin emptying, cleaning of filter, sensors and wheels |
| Spare parts | Filter, rotating brush, side brushes, battery, charging dock |
| Warranty | 2 years (Shark commercial warranty + legal warranties) |
| General information | Household use only |
Frequently Asked Questions - AI Robot RV2001EU SHARK
User questions about AI Robot RV2001EU SHARK
0 question about this device. Answer the ones you know or ask your own.
Ask a new question about this device
Download the instructions for your Vacuum Cleaner in PDF format for free! Find your manual AI Robot RV2001EU - SHARK and take your electronic device back in hand. On this page are published all the documents necessary for the use of your device. AI Robot RV2001EU by SHARK.
USER MANUAL AI Robot RV2001EU SHARK
Robotic Vacuum Cleaner
Roboter Staubsauger Robot aspirador Aspirateur robot Robot aspirapolvere
RV2001EU
GEBRAUCHSANWEISUNG
INSTRUCTIONS
INSTRUCCIONES
GUIDE D'INSTRUCTIONS
ET GARANTIE SHARK
ISTRUZIONI
natural_image
Interior scene with a TV, floor tiles, and scattered shoes (no text or symbols)natural_image
Hand pressing a button on a mechanical component (no text or symbols visible)natural_image
Interior view of a room with a rug, a potted plant, and a mat on a tiled floor (no text or symbols)LEBEN MIT IHREM ROBOTER
INTERAKTIVE KARTE
natural_image
Simple line drawing of a door with an arrow pointing to a circular component (no text or symbols)natural_image
Prohibition sign with a circular diagram and diagonal line, no text or symbols presentnatural_image
Technical illustration showing a mechanical component being cut with an arrow indicating motion (no text or symbols present)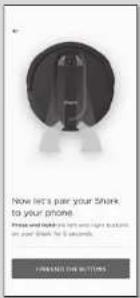
SCHRITT 4
SCHRITT 5
Erfolg!
WLAN-FEHLERBEHEBUNG
natural_image
Technical line drawing of a mechanical component with mounting holes and a central dashed line, labeled 'Ladekabelwickel' (no other text or symbols)DOCK-EINRICHTUNG
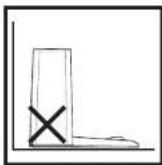
natural_image
Technical diagram of a mechanical component with arrows indicating assembly or adjustment (no text or symbols present)natural_image
Line drawing of a hand pressing a button on a device panel (no text or symbols visible)natural_image
Line drawing of a robotic vacuum cleaner with a power outlet connected to it (no text or symbols)natural_image
Line drawing of a robotic vacuum cleaner with a circular top and mounting holes, showing a downward arrow (no text or symbols)In Verwendung
natural_image
Line drawing of a room with a rug, a potted plant, and a tiled floor (no text or symbols)natural_image
Line drawing of a room interior with TV, rug, and floor (no text or symbols)natural_image
Technical line drawing of a robotic vacuum cleaner with internal components and an inset view (no text or symbols)natural_image
Diagram of a mechanical component with arrows indicating direction (no text or symbols)natural_image
Line drawing of a mechanical component pouring liquid into a container (no text or symbols)natural_image
Technical line drawing of a mechanical assembly with an arrow indicating a component (no text or symbols present)natural_image
Technical line drawing of a mechanical component or housing (no text or symbols)natural_image
Technical line drawing of a mechanical component with two views: one showing internal structure and the other showing a flat base (no text or symbols)natural_image
Hand holding a cleaning brush with a brush tip, spraying powder onto a surface (no text or symbols visible)natural_image
Technical line drawing of a mechanical component with two views: one showing internal structure and the other a flat base (no text or symbols)natural_image
Cross-sectional diagram of a mechanical device showing internal components and two upward arrows indicating motion or force directions (no text or symbols present)natural_image
Illustration of a hand using a tool to adjust or install electronic components on a circular device (no text or symbols visible)natural_image
Technical diagram of a circular mechanical or electronic component with internal components and mounting holes (no text or symbols)natural_image
Diagram of a wall-mounted electrical connector with mounting bracket and wiring, showing connection arrows (no text or symbols)natural_image
Line drawing of a hand using a tool to adjust or install electronic components on a device casing (no text or symbols visible)natural_image
Line drawing of a robotic arm holding a brush near a circular device (no text or symbols)natural_image
Line drawing of a hand using a tool to adjust or install a device component (no text or symbols visible)IMPORTANT SAFETY INSTRUCTIONS
PLEASE READ CAREFULLY BEFORE USE • FOR HOUSEHOLD USE ONLY
If the charging cable plug does not fit fully into the socket, contact a qualified electrician. DO NOT force into socket or try to modify to fit.
WARNING
To reduce the risk of fire, electric shock, injury, or property damage:
GENERAL USE
CHILDREN OR ANIMALS SHOULD NOT BE LEFT UNATTENDED IN ANY ROOMS THAT THE ROBOTIC VACUUM HAS ACCESS TO DURING CLEANING.
When using an electrical appliance, basic precautions should always be followed, including the following:
- This appliance consists of a robotic vacuum and charging dock with power supply. These components contain electrical connections, electrical wiring, and moving parts that potentially present risk to the user.
- Before each use, carefully inspect all parts for any damage. If a part is damaged, discontinue use.
- Use only identical replacement parts.
- This robotic vacuum cleaner contains no serviceable parts.
- Use only as described in this manual. DO NOT use the robotic vacuum cleaner for any purpose other than those described in this manual.
- With the exception of filters, DO NOT expose any parts of the robotic vacuum cleaner to water or other liquids.
USE WARNINGS
-
This appliance can be used by persons with reduced physical, sensory or mental capabilities or lack of experience and knowledge if they have been given supervision or instruction concerning use of the appliance in a safe way and understand the hazards involved. a) Children should not play with the appliance. b) Cleaning and user maintenance should not be made by children without supervision.
-
Always turn off the robotic vacuum cleaner before inserting or removing the filter or dust bin.
-
DO NOT handle plug, charging dock, charging cable, or robotic vacuum cleaner with wet hands.
- DO NOT use without robot dust bin and filters in place.
- DO NOT damage the charging cord: a) DO NOT pull or carry charging dock by the cord or use the cord as a handle. b) DO NOT unplug by pulling on cord. Grasp the plug, not the cord. c) DO NOT close a door on the cord, pull the cord around sharp corners, or leave the cord near heated surfaces.
- DO NOT put any objects into nozzle or accessory openings. DO NOT use with any opening blocked; keep free of dust, lint, hair, and anything that may reduce airflow.
- DO NOT use if robotic vacuum cleaner airflow is restricted. If the air paths become blocked, turn the vacuum cleaner off and remove all obstructions before turning on the unit again.
- Keep nozzle and all vacuum openings away from hair, face, fingers, uncovered feet, or loose clothing.
- DO NOT use if robotic vacuum cleaner is not working as it should, or has been dropped, damaged, left outdoors, or dropped into water.
- DO NOT place vacuum cleaner on unstable surfaces.
-
When manually moving the robot to a new location, it must be placed at least 1.5 feet (20 cm) away from any stairs or cliffs.
-
DO NOT use to pick up:
a) Liquid spills
b) Large objects
c) Hard or sharp objects (glass, nails, screws, or coins)
d) Large quantities of dust (drywall dust, fireplace ash, or embers). DO NOT use as an attachment to power tools for dust collection.
e) Smoking or burning objects (hot coals, cigarette butts, or matches)
f) Flammable or combustible materials (lighter fluid, gasoline, or kerosene)
g) Toxic materials (chlorine bleach, ammonia, or drain cleaner)
- DO NOT use in the following areas: a) Outdoor areas near fireplaces with unobstructed entrances
b) Spaces that are enclosed and may contain explosive or toxic fumes or vapors (lighter fluid, gasoline, kerosene, paint, paint thinners, mothproofing substances, or flammable dust
c) In an area with a space heater
d) Near fireplaces with unobstructed entrances
e) On wet or slippery surfaces
-
Turn off the robotic vacuum cleaner before any adjustment, cleaning, maintenance or troubleshooting. Note: in the OFF (O) position, the robot still uses a small amount of power.
-
Allow all filters to air-dry completely before replacing in the robotic vacuum cleaner to prevent liquid from being drawn into electric parts.
- DO NOT modify or attempt to repair the robotic vacuum cleaner or the battery yourself, except as indicated in this manual. DO NOT use the vacuum if it has been modified or damaged.
-
Remove any spilled or leaked liquid from the base or floor, as it could lead to risk of electrical shock.
-
For your robot's cliff sensors to work properly, all runners, rugs, or carpets must be 20cm away from any stairs (or it must be continuous and extend over the edge of the stairs). If a runner, rug, or carpet edge is less than 20cm from the cliff edge or stairs, then the use of a BotBoundary® strip is required to block off the stairs and any cliff edge. BotBoundary strips are not included with your robot.
BATTERY USE
- The battery is the power source for the vacuum. Carefully read and follow all charging instructions.
- To prevent unintentional starting, ensure the vacuum is powered off before picking up or carrying the vacuum. DO NOT carry the appliance with your finger on the power switch.
- Use ONLY the Shark ^b charging dock XDKRV2001WDEU and use only battery RVBAT850A. Use of batteries or battery chargers other than those indicated may create a risk of fire.
- Keep the battery away from all metal objects such as paper clips, coins, keys, nails, or screws. Shorting the battery terminals together increases the risk of fire or burns.
- Under abusive conditions, liquids may be ejected from the battery. Avoid contact with this liquid, as it may cause irritation or burns. If contact occurs, flush with water. If liquid contacts eyes, seek medical help.
- Robotic vacuum cleaner should not be stored, charged, or used at temperatures below 50^ F ( 10^ C) or above 104^ F ( 40^ C). Ensure the battery and vacuum have reached room temperature before charging or use. Exposing the robot or battery to temperatures outside of this range may damage the battery and increase the risk of fire.
- DO NOT expose the robotic vacuum cleaner or battery to fire or temperatures above 265°F (130°C) as it may cause explosion.
- Non-rechargeable batteries cannot be recharged.
SAVE THESE INSTRUCTIONS
SETUP
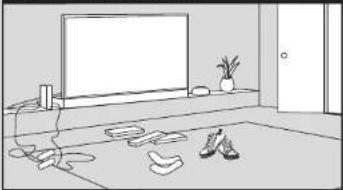
STEP 1 PREP YOUR HOME
natural_image
Interior scene with a TV, floor tiles, potted plant, and shoes (no text or symbols)- Before cleaning, clear cords and remove small
obstacles like clothing or toys that are less than
- Open interior doors in rooms you want your robot to clean.
STEP 3 SET UP THE DOCK
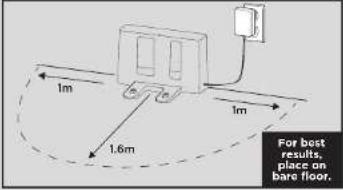
• Find a permanent location for the dock, as pictured above, in a central area with a strong Wi-Fi signal.
- Place the dock on bare floor, with its back against the wall.
- Plug in the dock. The Indicator Light will illuminate green when the dock has power.
STEP 5 CHARGE THE ROBOT
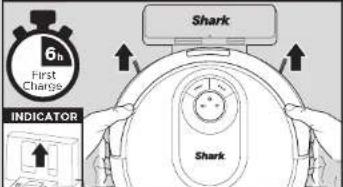
Place robot on dock to charge. The dock indicator light will turn blue and the robot will beep when charging begins.
STEP 2 PREP THE ROBOT
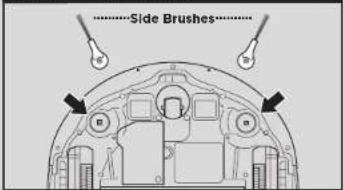
- Remove protective film from robot and dock.
- Attach side brushes.
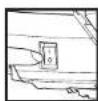
STEP 4 POWER ON ROBOT
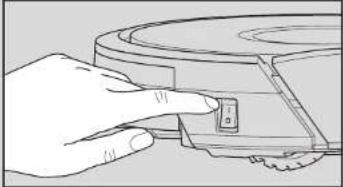
natural_image
Hand pressing a button on a mechanical component (no text or symbols visible)To charge, the Power button on the side of the robot must be in the ON position (I).
STEP 6 DOWNLOAD THE APP
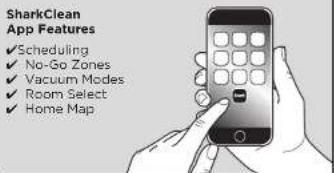
Search for "Shark Clean" to download the app. NOTE: For more information on connecting your robot, see next page.
STEPS FOR SUCCESS
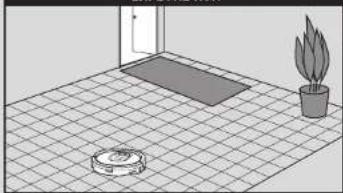
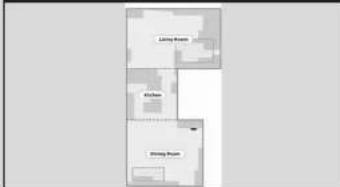
To set up a map of your home in the app, you need to complete an Explore Run.
- This will take loss time than a full vacuum run. - After the Explore Run, there will be an interactive map of your home in the app, and your robot will be ready to clean.
After the explore run is complete, press the Clean button on the robot or in the app to send the robot on its first vacuuming run.
EXPLORE RUN
natural_image
Interior view of a room with a rug, a potted plant, and a tiled floor (no text or symbols)LIVING WITH YOUR ROBOT
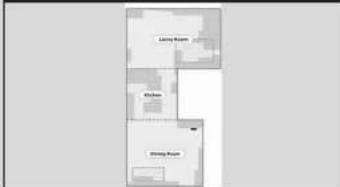
INTERACTIVE MAP
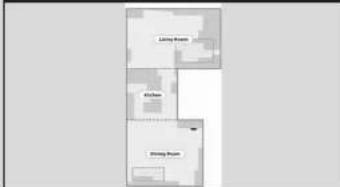
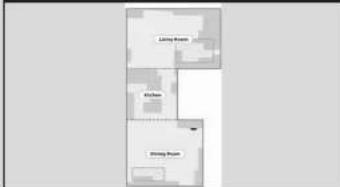
After the Explore Run, the robot will create an interactive map in the app, where you can create rooms and no-go zones.
DOORWAYS AND THRESHOLDS
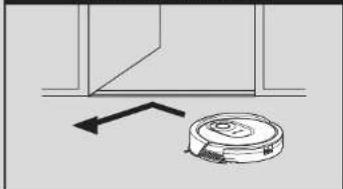
natural_image
Simple line drawing of a robotic vacuum cleaner inside a room with a wall and window (no text or symbols)Your robot can easily climb over most thresholds, but if one is too high, set up a no-go zone in the app to block it off.
AVOID MOVING THE ROBOT OR DOCK
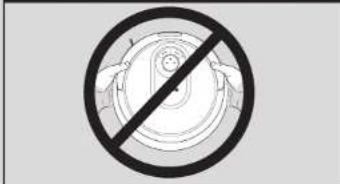
While your robot is cleaning, do not pick it up and move it, or move the charging dock - this will impact the robot's ability to map your home.
EMPTYING THE DUST BIN
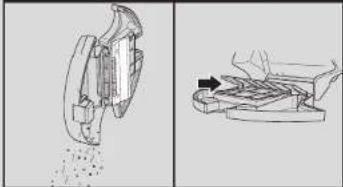
natural_image
Technical illustration of a mechanical assembly with cross-sectional view and side view (no text or symbols)During the first few weeks of use, the dust bin will need to be emptied more frequently, as your robot will now be removing dust and debris from areas that were previously hard to reach. Empty debris and dust into trash.
Remove any debris between the filter and the plastic shield.
Questions? Easy Steps If You're Stuck:
Having trouble connecting to your robot?
For how-to videos, FAGs, troubleshooting, and tips & tricks visit: sharkclean.eu
CONNECTING THE SHARKCLEAN APP AND ROBOT
STEP 1
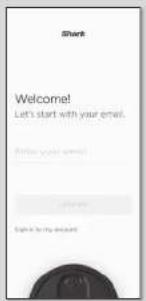
Create An Account
- Open the SharkClean app and set up your account.
STEP 2
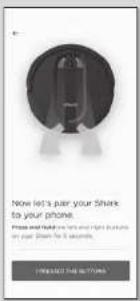
Activate Robot Wi-Fi
- Hold down Dock and Clean buttons simultaneously until Wi-Fi light (💡) on robot blinks.
STEP 3
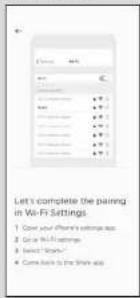
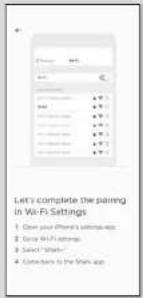
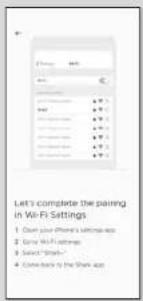
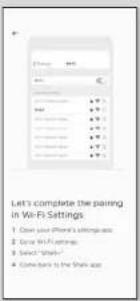
Select Robot (Apple iOS Only)
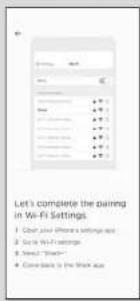
- Exit the app and open Wi-Fi settings. - Select your robot (Ex. Shark_RVXXX) from the menu. - Exit settings and return to the SharkClean app.
STEP 4
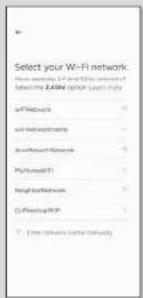
Connect To Home Wi-Fi
- If you have multiple Wi-Fi networks, select the 2.4 GHz network.
STEP 5
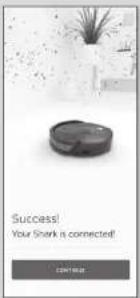
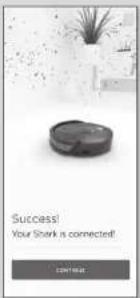
SUCCESS
- When pairing is complete, the Success screen will appear.
WI-FI TROUBLESHOOTING
- To use the app, your phone must be connected to a 2.4GHz network. The app will not work on a 5GHz network. - DO NOT use a VPN or a proxy server. - Make sure Wi-Fi isolation is turned off on the router.
CAN'T CONNECT TO WI-FI? Restart your phone Reboot your robot
- Press the power button on the side of the ROBOT to the OFF position for 10 seconds. Press it again to turn power back ON. Reboot your router - Unplug the router power cable for 30 seconds, then plug it back in. Allow several minutes for your router to reboot completely.
GETTING TO KNOW YOUR SHARK® AI ROBOT
Error Indicator Light
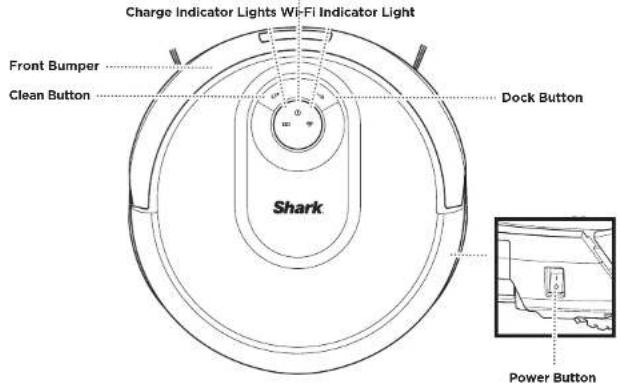
Cliff and Boundary Sensors
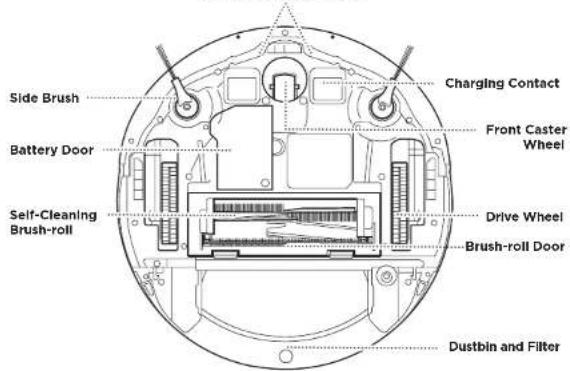
sharkclean.eu
GETTING TO KNOW YOUR SHARK® AI ROBOT
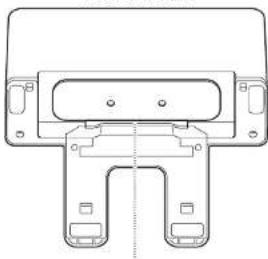
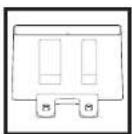
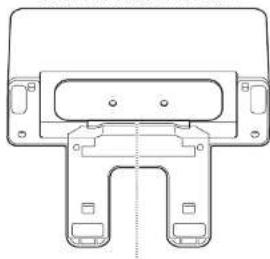
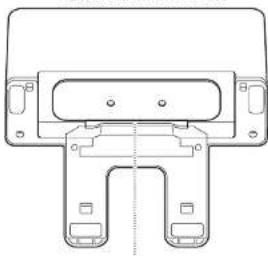
DOCK FRONT
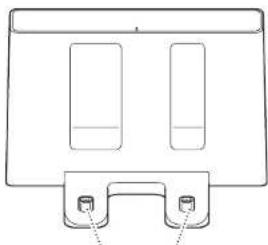
natural_image
Pure technical line drawing of a mechanical component with two vertical slots and two base notches (no text or symbols)Charging Contacts
DOCK BOTTOM
natural_image
Technical line drawing of a mechanical clamp or bracket component (no text or symbols)Charger Cord Wrap
DOCK SETUP
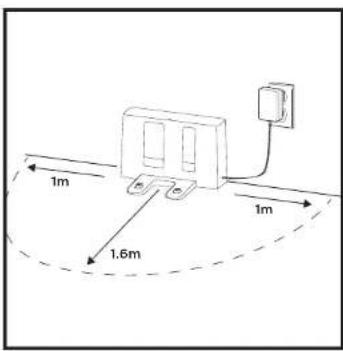
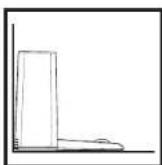
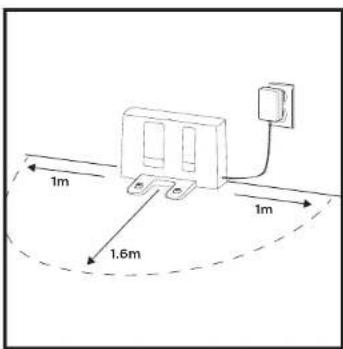
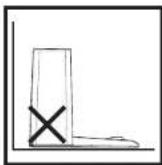
- Select a permanent location for the Charging Dock, because every time you relocate it, your robot will have to completely re-map your house.
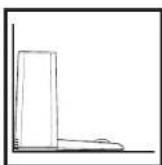
- Place the dock with its back against a wall. Select a level surface on bare floor, in a central area. Do not place dock against baseboards or heating elements.
- Remove any objects that are closer than 3 feet from either side of the dock, or closer than 5 feet from the front of the dock.
- Plug charging cord into an outlet. The dock must be plugged in continuously for the robot to find it.
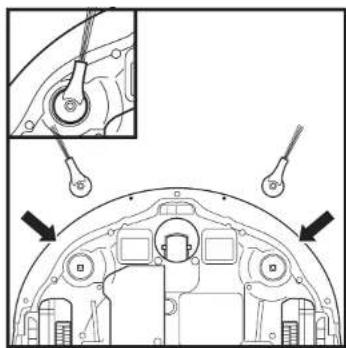
INSTALLING THE SIDE BRUSHES
natural_image
Technical diagram of a mechanical component with labeled parts and an inset showing a close-up view of a tool (no text or symbols present)Snap the 2 included Side Brushes onto the square pegs on the bottom of the robot.
CHARGING
IMPORTANT: The Shark® AI Robot has a pre-installed rechargeable battery. Charge the battery completely before first use. It may take up to 6 hours to fully charge.
natural_image
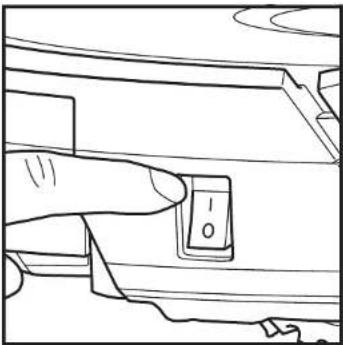
Line drawing of a finger pressing a button labeled '0' on a mechanical component (no text or symbols beyond the number)To charge, place the robot on the dock. The Power button on the side of the robot must be in the ON position (1). The robot will beep when charging begins.
natural_image
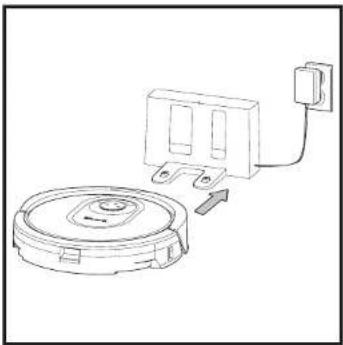
Line drawing of a robotic vacuum cleaner with a mounted electrical outlet (no text or symbols)When the cleaning cycle is complete, the battery is low, or when programmed to in a recharge/resume mission, the robot will search for the clock. If the robot doesn't return to clock, its charge may have run out.
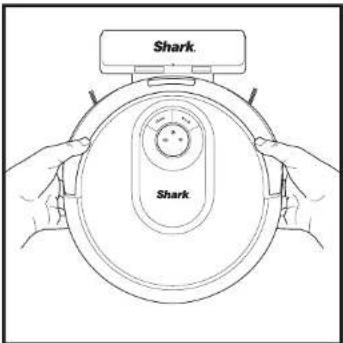
If the robot has no charge or it cannot return to the dock, manually place it on the dock. The indicator light will flash and the robot will beep when charging begins.
NOTE: When manually placing the robot on the dock, make sure the Charging Contacts on the bottom of the robot are touching the ones on the dock. While the robot is charging, both white LED lights will flash. When charging is complete, lights will illuminate steadily. NOTE: When picking up the robot, be careful not to place fingers between the bumper and the base of the robot.
CHARGE INDICATOR LIGHTS
natural_image
Line drawing of a robotic vacuum cleaner with a circular top and mounting base, showing a downward arrow (no text or symbols)In Use


While Charging (White)


No Charge or Off

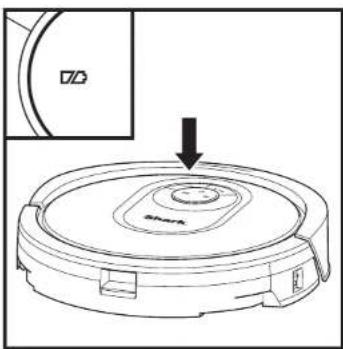
The white charge indicator lights show how much battery power is remaining.
While the robot is charging, both white LED lights will flash. When charging is complete, both will illuminate steadily. It may take up to 6 hours to fully charge your robot.
If the robot is idle and away from the charging dock for 10 minutes, it will enter Sleep Mode. The indicator lights will turn off, but the battery and Wi-Fi lights will remain on in sleep mode. Wake up the robot by pressing any button.
NOTE: If the low charge light is blinking red, there is not enough battery power for the robot to return to the dock. Manually piece the robot on the dock. TIP: To preserve battery life, turn off the power switch if the robot will not be used for a long period of time. The robot should be recharged at least once every three months. The switch must be in the ON position to charge the robot.
IMPORTANT: Before clearing an entire room for the first time, we recommend that you first test your robot on a small section of the floor to ensure there is no scratching.
BUTTONS AND INDICATOR LIGHTS
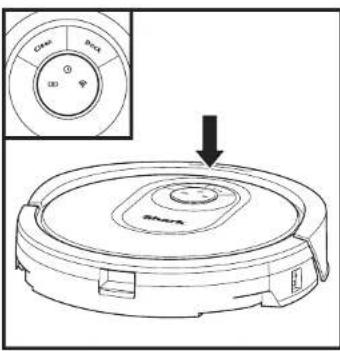
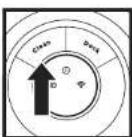
CLEAN BUTTON
Press to begin a cleaning session. Press again to stop.
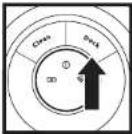
DOCK BUTTON
Press to stop cleaning and send robot back to the charging dock.
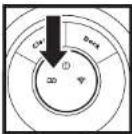
CHARGE INDICATOR LIGHTS
Display the amount of charge remaining in the battery.
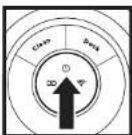
"!" ERROR INDICATOR
See Troubleshooting section for full list of error codes.
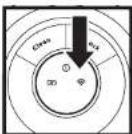
WI-FI INDICATOR
White light: connected to Wi-Fi.
Red light: not connected. Flashing White: setup mode. No light: not set up yet.
PREP YOUR HOME
Your robot uses an array of sensors to navigate around walls, furniture legs, and other obstacles while it cleans. To prevent the robot from entering areas you don't want it to, set up no-go zones in the app. For best results, prepare your home as indicated below, and schedule a daily cleaning to ensure all floor areas are regularly maintained.
NOTE: scheduling can only be done in the app.
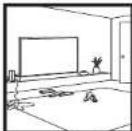
OBSTRUCTIONS
Clear cords and objects smaller than 8cm in height from floors and open interior doors to ensure a complete map of your home.
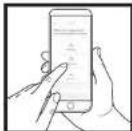
SCHEDULING
Schedule whole-home vacuuming runs with the app.
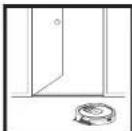
THRESHOLDS
Your robot can easily climb over most thresholds, but if one is too high, set up a no-go zone in the app to block it off.

AVOID MOVING THE
ROBOT & DOCK
While your robot is cleaning, do not pick it up and move it, or move the charging dock—this will impact the robot's navigation and ability to return to dock when cleaning is complete.
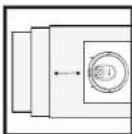
STAIRS
Your robot's cliff sensors will prevent it from falling off ledges. For the cliff sensors to work properly in any mode, all runners, rugs, or carpets must be at least 20cm from any stairs, or must extend over the edge of the stairs.
USING THE SHARK® AI ROBOT
IQ NAVIGATION AND AI LASER VISION
natural_image
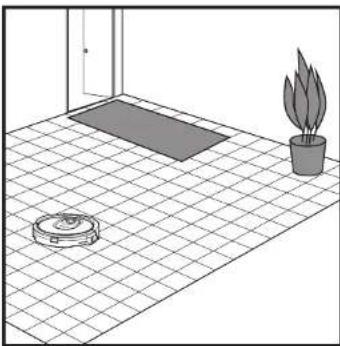
Simple line drawing of a room with a rug, a small robot, and a potted plant on a tiled floor (no text or symbols)After setup is complete, your robot will conduct an Explore Run to create an initial map of your home. The robot will travel from room to room to identify walls, furniture, and other obstacles as it cleans. This run will take less time than a full cleaning, as it doesn't cover the entire floor.
natural_image
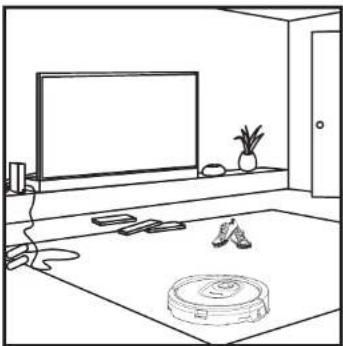
Line drawing of a room interior with TV, rug, and cleaning items (no text or symbols)The robot's object detection technology helps it navigate around obstacles taller than 8cm in height. Clear away small objects that may interfere with the cleaning path of your robot. Create no-go zones in the app to block off areas. you do not want the robot to enter. You can set up no-go zones around small objects, or use them to block off large areas.
MANUAL CLEANING MODE
To manually start a cleaning cycle, press the Clean button on the robot or on the mobile app. To immediately send the robot back to the dock, press the Dock button.
NOTE: Be sure to charge the robot completely before its first cleaning so that it can explore, map, and clean as much of your home as possible. It may take up to 6 hours to fully charge your robot.
NOTE: Avoid moving the dock. If it is relocated, the robot may not be able to find its way back to the dock. If the robot is relocated while in use, it may not be able to follow its intelligent cleaning path, or find its way back to the dock.
USING THE SHARK® AI ROBOT
Please visit sharkclean.eu for answers to all your app questions.
USING THE SHARKCLEAN APP
Get the most out of your Shark AI Robot with these app features:
- Recharge and Resume
Enable this feature to handle multi-room cleaning in larger homes. The robot will return to the dock, recharge, and can pick up where it left off.
- No-Go Zones
Use the no-go zones in the app to keep your robot out of the areas you would like it to avoid.
- Scheduling
Set whole-home cleanings for any time, any day.
- Control From Anywhere
Wherever you are, you're in control of your robot.
- Cleaning Reports
Each time your robot cleans your app will generate a cleaning report.
- Interactive Map
See where the robot is cleaning in real time.
Search for SharkClean in the app store and download the app to your smartphone.
WI-FI TROUBLESHOOTING
• To use the app, your phone must be connected to a 2.4GHz network. The app will only work on a 2.4GHz network.
• Typical home Wi-Fi networks support both 2.4GHz and 5GHz.
• Do not use a VPN or a proxy server.
• Make sure Wi-Fi isolation is turned off on the
router.
• DO NOT use Wi-Fi repeaters to connect your robot.
• If you cannot connect, visit sharkclean.eu.
ERROR CODE PROBLEM
| ! (RED) + Wi-Fi indicator (RED Flashing) Wrong password for Wi-Fi |
| ! (Flashing red) + Wi-Fi (RED) SSD cannot be found, try connecting again |
| ! + Wi-Fi (Flashing RED alternately) Wrong user name or password for your SharkClean account |
| ! + Wi-Fi (Flashing RED at the same time) Cannot connect in Wi-Fi |
MAINTENANCE
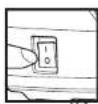
CAUTION: Turn off power before performing any maintenance. NOTE: in the OFF (O) position, the robot still uses a small amount of power.
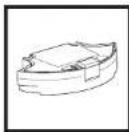
EMPTYING THE DUST BIN
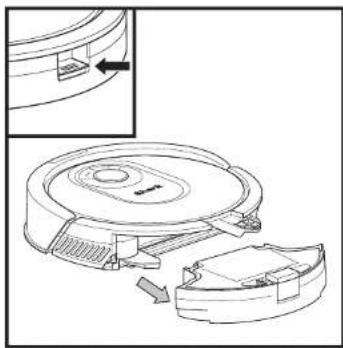
natural_image
Technical line drawing of a robotic vacuum cleaner with internal components and an inset view (no text or symbols)Press the Dustbin Release Button and slide out the dust bin.
natural_image
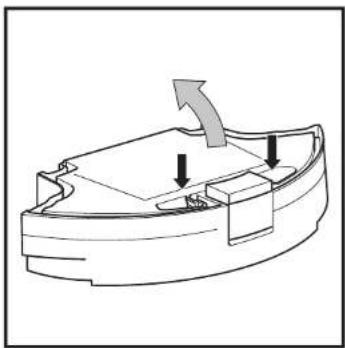
Diagram of a mechanical component with arrows indicating direction (no text or symbols)To open the dust bin lid, press and hold the button while lifting the lid, using the finger slots.
natural_image
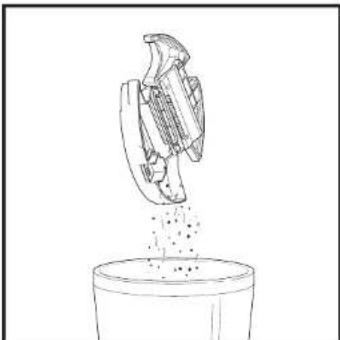
Line drawing of a mechanical component falling into a container with particles (no text or symbols)Empty debris and dust into dust bin. Remove filter and wash dust bin if necessary.
NOTE: Make sure to insert the dust bin completely, until it clicks into place.
natural_image
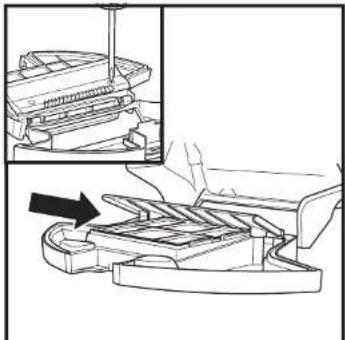
Technical line drawing of a mechanical assembly with an inset showing a component being inserted (no text or symbols present)Look between the filter and the plastic shield and make sure there is no debris buildup.
Remove shield and clear any debris buildup with a dry cloth or soft brush.
MAINTENANCE
CLEANING AND REPLACING THE FILTER
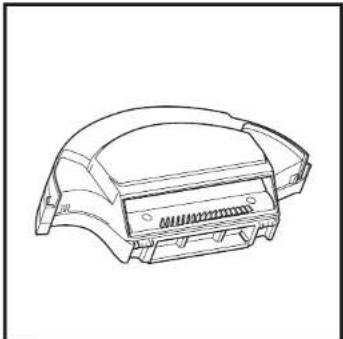
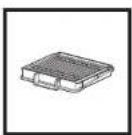
For optimal suction power, after each use, clean and reinsert the filter inside the robot's dust bin. See sharkclean.eu for replacement filters.
natural_image
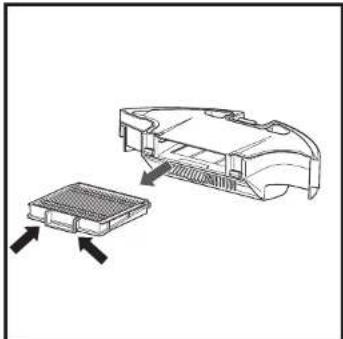
Line drawing of a car body panel with no text or symbolsRemove and empty the dust bin. Clean any hair or debris off the Anti-Tangle Comb on the back of the dust bin.
natural_image
Diagram showing a device's internal structure with arrows indicating assembly or component (no text or symbols present)Pull filter out of the dust bin by the tabs.
natural_image
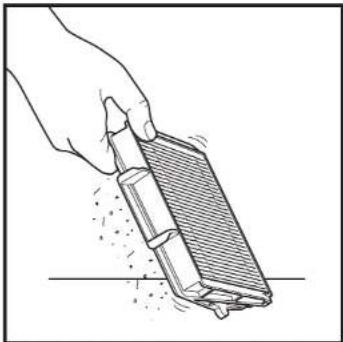
Hand holding a cleaning brush with a textured brush, no text or symbols visibleLightly tap the filter to remove debris every time you empty the dust bin. For a deeper clean, rinse the filter with water once a month. Allow the filter to air-dry for up to 24 hours before reinstalling.
natural_image
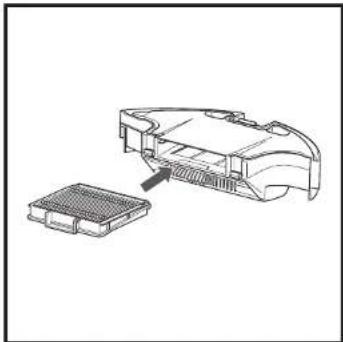
Technical line drawing of a mechanical component with a magnified inset showing internal structure (no text or symbols)Reinsert the filter into the dust bin, then slide the dust bin back into the robot until it clicks into place.
MAINTENANCE
SHARK ANTI HAIR WRAP TECHNOLOGY
ANTI HAIR WRAP
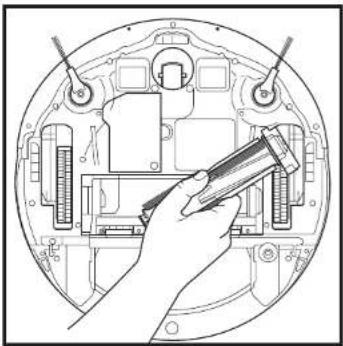
The Anti Hair Wrap Brush-roll actively removes hair wrap while your robot cleans. If some debris remains wrapped around the brush-roll, continue to run the robot to give the brush-roll time to clean itself. If some hair wrap or debris remains after continued cleaning, carefully remove it from the brush-roll.
natural_image
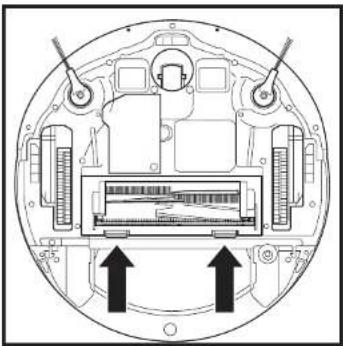
Cross-sectional diagram of a device showing internal components and two upward arrows indicating movement or force (no text or symbols present)To access the brush-roll, push up on the tabs on the brush-roll door, then lift off the door.
natural_image
Diagram of a hand using a tool to adjust internal components in a circular device (no text or symbols visible)Lift out the brush-roll and remove any debris. Reinstall the brush-roll, inserting the flat end first. Close the brush-roll access door and press down until both sides click into place.
NOTE: Replace brush roll every 6 to 12 months, or when visibly worn. See sharkclean.eu for replacement parts.
MAINTENANCE
CLEANING SENSORS AND CHARGING CONTACTS
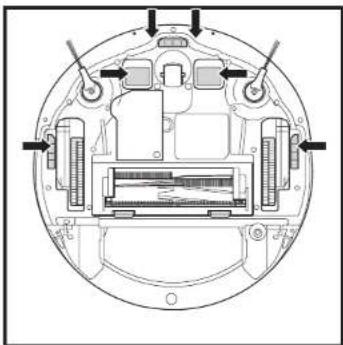
CLEAN SENSORS AND CHARGING CONTACTS AS NEEDED. With a dry cloth, gently dust off the sensors and contacts located on the bottom of the robot and on the dock.
natural_image
Technical diagram of a circular mechanical or electronic component with internal components and mounting brackets (no text or symbols)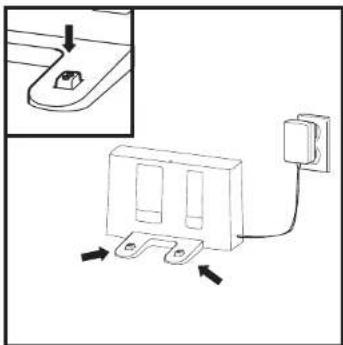
natural_image
Diagram of a switch or power outlet with a wall-mounted cable and two switches, shown with arrows indicating connection (no text or symbols present)IMPORTANT: The robot uses cliff sensors to avoid stairs and other steep drops. Sensors may work less effectively when they are dirty. For best results, clean sensors regularly.
CLEANING SIDE BRUSHES
CLEAN SIDE BRUSHES AS NEEDED.
natural_image
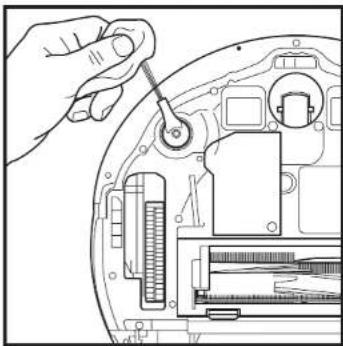
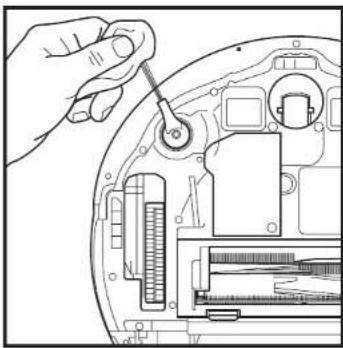
Hand using a tool to adjust or install electronic components on a device casing (no visible text or symbols)Carefully unwind and remove any string or hair wrapped around brushes. Gently wipe brushes with a dry cloth. To reinstall, snap the brushes over the pegs. Spin the brushes manually to make sure they are installed correctly.
NOTE: Remove and replace any side brushes that are bent or damaged. To remove a brush, lift it off its peg.
MAINTENANCE
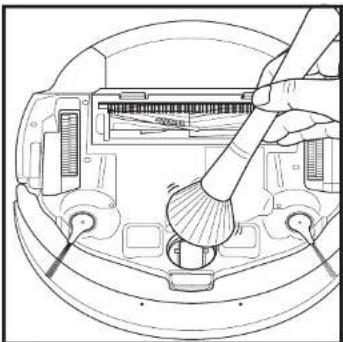
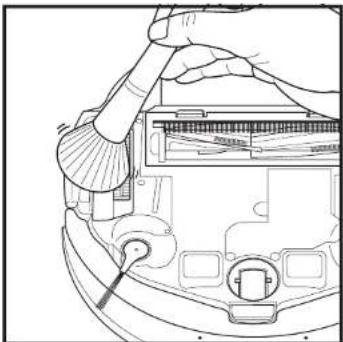
CLEANING THE WHEELS
CLEAN FRONT WHEEL HOUSING PERIODICALLY. See sharkclean.eu for replacement parts.
natural_image
Line drawing of a device interior with a hand holding a brush (no text or symbols)Rotate the front wheel while lightly brushing away dirt and debris. Clean the wheel and the housing around it.
natural_image
Line drawing of a hand using a tool to adjust or install a device component (no text or symbols visible)Periodically clean the drive wheels and the housing around them. To clean, rotate each drive wheel while dusting.
NOTE: Brush not included.
REPLACEMENT PARTS
Washable Filter
Robot Dustbin
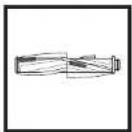
Brush-roll
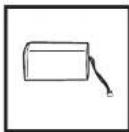
Battery
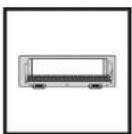
Brush-roll Door
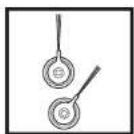
Side Brushes Charging Dock
PLEASE READ CAREFULLY AND KEEP FOR FUTURE REFERENCE.
These instructions are designed to help you keep your Shark AI Robot running at peak performance.
Euro-Pro Europe Limited.
3150 Century Way,
Thorpe Park,
Leeds.
LS15 8ZB
SharkNinja Germany GmbH
c/o Regus Management GmbH.
Excellent Business Center 10.+11. Stock,
Westhafenplatz 1.
60327 Frankfurt am Main, Germany
sharkclean.eu
Illustrations may differ from actual product. We are constantly striving to improve our products; therefore the specifications contained herein are subject to change without notice.
NOTE: To order replacement parts and filters, visit sharkclean.eu.
MAINTENANCE
CAUTION: Turn off power before performing any maintenance.
TROUBLESHOOTING
If any error lights are illuminated or flashing on your Shark® AI Robot, see the error code chart below:
ERROR CODE SOLUTION
| CLEAN (RED) + ! (RED) flashing | Suction motor failure. Remove and empty the dust bin, clean the filters, and remove blockages to ensure nothing is reducing suction. |
| CLEAN (RED) flashing | Robot may be stuck on an obstacle. Move robot to a new location on a level surface. |
| DOCK (RED) flashing | Front bumper may be jammed. Clean the bumper and make sure it moves in and out freely. |
| CLEAN (WHITE) + DOCK (RED) solid | BotRoundery* error. Move your robot to a flat surface away from the magnetic boundary strip and try cleaning again. |
| CLEAN (RED) + DOCK (WHITE) flashing | Cliff sensor error. Move your robot to a new location and clean its cliff sensors. |
| CLEAN (RED) + DOCK (RED) flashing | Robot dust bin has been removed and needs to be reinserted. |
| DOCK (RED) + ! (RED) flashing | Side brush is stuck. Remove any debris from around the side brushes. |
| CLEAN (RED) + DOCK (RED) + ! (RED) flashing | A drive wheel is stuck. Clean the wheels and remove any debris wrapped around the axles. |
| CLEAN (WHITE) + DOCK (RED) + ! (RED) flashing | Wheel motor encoder failure. |
| CLEAN (WHITE) + ! (RED) flashing | Blockage in brush-roll. Remove any debris from around the brush-roll. |
| CLEAN (RED) + DOCK (WHITE) + ! (RED) flashing | Robot has encountered an error while booting. Please turn the power off and back on. |
| CLEAN (WHITE) + DOCK (RED) flashing | Robot cannot locate dock. Please stick up your robot and place it on the dock. |
| BATTERY ICON (RED) flashing | Battery is critically low and needs recharging. If your robot is unable to dock, place the robot manually on the dock. |
| CLEAN (RED) + DOCK (WHITE) flashing + ! (RED) | Robot is stuck. Please move to a level surface. |
Shark NINJA
TWO (2) YEAR LIMITED GUARANTEE
When a consumer buys a product in the Europe, they get the benefit of legal rights relating to the quality of the product (your "statutory rights"). You can enforce these rights against your retailer. However, at Shark we are so confident about the quality of our products that we give you an additional manufacturer's guarantee of two years. These terms and conditions relate to our manufacturer's guarantee only - your statutory rights are unaffected. Every Shark machine comes with a free parts and labour guarantee. You'll also find online support at www.sharkclean.eu.
How do I register my extended Shark guarantee?
You can register your guarantee online within 28 days of purchase. To save time, you'll need the following information about your machine:
- Model Number
- Serial Number (only if available)
• Date you received the machine (from your in-store receipt or delivery note)
To register online, please visit www.sharkclean.eu
IMPORTANT
• The manufacturer's guarantee covers your product for 2 years starting on the date of delivery.
- Please keep your receipt at all times. Should you need to use your guarantee we will need your receipt to verify the information you have supplied to us is correct. The inability to produce a valid receipt may invalidate your guarantee.
How long are new Shark machines guaranteed for?
Our confidence in our design and quality control means that your new Shark vacuum cleaner is guaranteed for two years.
What is covered by the free Shark guarantee?
Repair or replacement of your Shark machine (at Shark's discretion to decide whether to replace or repair) including all parts and labour. A Shark guarantee is in addition to your legal rights as a consumer.
What is not covered by the free Shark guarantee?
1 Blockages - For details of how to unblock your vacuum cleaner, please refer to the instructions.
2 Normal wear and tear of parts which require regular maintenance and/or replacement to ensure the proper functioning of your unit.
3 Accidental damage, faults caused by negligent use or care, misuse, neglect, careless operation or handling of the vacuum cleaner which is not in accordance with the Shark Instructions supplied with your machine.
4 Use of the vacuum cleaner for anything other than normal domestic household purposes.
5 Use of parts not assembled or installed in accordance with the operating instructions.
6 Use of parts and accessories which are not Shark spares.
7 Faulty installation (except where installed by Shark).
Where can I buy genuine Shark spares and accessories?
Shark spares and accessories are developed by the same engineers who developed your Shark vacuum. You'll find a full range of Shark spares, replacement parts and accessories for all Shark machines at www.sharkclean.eu. Please remember that using non-Shark spares may invalidate your manufacturer's guarantee. However, your statutory rights are unaffected.
END-USER LICENSE AGREEMENT FOR SHARKNINJA SOFTWARE
www.SharkClean.co.uk/EULA
natural_image
Interior scene with a TV, floor tiles, potted plant, and shoes (no text or symbols)natural_image
Hand pressing a button on a mechanical component (no text or symbols visible)natural_image
Simple line drawing of a room with a rug, a potted plant, and a tiled floor (no text or symbols)CONVIVIR CON SU ROBOT
MAPA INTERACTIVO
natural_image
Simple line drawing of a robotic vacuum cleaner inside a room with an arrow indicating left motion (no text or symbols)natural_image
Technical line drawing of a mechanical assembly with two views: top shows internal components, bottom shows assembled parts (no text or symbols)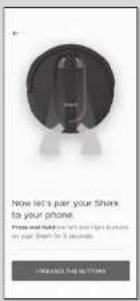
PASO 4
Conectese a la wifi de casa
natural_image
Technical line drawing of a mechanical component with two rectangular slots and two mounting feet (no text or symbols)Contactos de carga
PARTE INFERIOR DE LA BASE
natural_image
Technical line drawing of a mechanical clamp or bracket component (no text or symbols)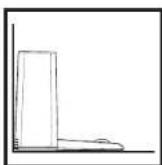
natural_image
Technical diagram of a mechanical component with labeled parts and an inset showing a close-up view of a tool (no text or symbols present)natural_image
Line drawing of a finger pressing a button labeled '0' on a mechanical component (no text or symbols beyond the number)natural_image
Line drawing of a robotic vacuum cleaner with attached electrical outlet (no text or symbols)En uso


natural_image
Line drawing of a room with a rug, a potted plant, and a tiled floor (no text or symbols)natural_image
Line drawing of a room interior with TV, rug, and floor (no text or symbols)natural_image
Technical line drawing of a robotic vacuum cleaner with internal components and an inset view (no text or symbols)natural_image
Diagram of a mechanical component with arrows indicating direction (no text or symbols)natural_image
Line drawing of a mechanical component pouring liquid into a container (no text or symbols)natural_image
Technical line drawing of a mechanical assembly with an inset showing a component being inserted (no text or symbols present)natural_image
Technical line drawing of a mechanical component or housing (no text or symbols)natural_image
Diagram showing a device component with arrows indicating assembly or insertion (no text or symbols present)natural_image
Hand holding a cleaning tool with a brush, spraying particles (no text or symbols visible)natural_image
Technical line drawing of a mechanical component with a separate inset showing internal structure (no text or symbols)natural_image
Cross-sectional diagram of a device showing internal components and two upward arrows indicating movement or force (no text or symbols present)natural_image
Technical line drawing of a mechanical assembly with a hand holding a tool (no text or symbols present)natural_image
Technical diagram of a circular mechanical or electronic component with internal components and mounting brackets (no text or symbols)natural_image
Diagram of a switch or power outlet with a wall-mounted cable and two switches, shown with arrows indicating connection (no text or symbols present)LIMPIEZA DE LOS CEPILLOS LATERALES
LIMPIE LOS CEPILLOS LATERALES CUANDO SEA NECESARIO.
natural_image
Hand inserting a screw into a device casing (no text or symbols visible)natural_image
Line drawing of a robotic arm holding a brush near a circular device (no text or symbols)natural_image
Line drawing of a hand using a tool to adjust or install electronic components on a device (no text or symbols visible)natural_image
Interior scene with a TV, floor tiles, and scattered shoes (no text or symbols)natural_image
Hand pressing a button on a mechanical component (no text or symbols visible)natural_image
Interior view of a room with a rug, a potted plant, and a mat on the floor (no text or symbols)VOTRE ROBOT AU QUOTIDIEN
CARTE INTERACTIVE
natural_image
Simple line drawing of a door with an arrow pointing to a circular component (no text or symbols)natural_image
Technical line drawing of a mechanical component with cross-sectional view (no text or symbols)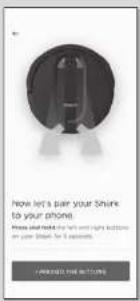
ETAPE 4
natural_image
Pure technical line drawing of a mechanical component with two vertical slots and two base notches (no text or symbols)Contacts de charge
ARRIÈRE DE LA STATION
natural_image
Technical line drawing of a mechanical clamp or bracket component (no text or symbols)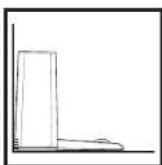
natural_image
Technical diagram of a mechanical component with labeled parts and an inset showing a close-up view of a tool (no text or symbols present)natural_image
Line drawing of a finger pressing a button labeled '0' on a mechanical component (no text or symbols beyond basic outline)natural_image
Line drawing of a robotic vacuum cleaner with attached electrical outlet (no text or symbols)natural_image
Line drawing of a robotic vacuum cleaner with a circular top and mounting holes, showing a downward arrow indicating motion (no text or symbols present)natural_image
Line drawing of a room with a rug, a potted plant, and a tiled floor (no text or symbols)natural_image
Line drawing of a room interior with TV, rug, and cleaning items (no text or symbols)natural_image
Technical line drawing of a robotic vacuum cleaner with internal components and an inset view (no text or symbols)natural_image
Diagram of a mechanical component with arrows indicating direction (no text or symbols)natural_image
Line drawing of a mechanical component pouring liquid into a container (no text or symbols)natural_image
Technical line drawing of a mechanical assembly with an inset showing a component being inserted (no text or symbols present)natural_image
Technical line drawing of a mechanical component or housing (no text or symbols)natural_image
Diagram showing a device with a grid base and internal components, no text or symbols presentnatural_image
Hand holding a grater with granular material, no text or symbols visiblenatural_image
Technical line drawing of a mechanical component with a grid base and internal structure (no text or symbols)natural_image
Cross-sectional diagram of a device showing internal components and two upward arrows indicating movement or force (no text or symbols present)natural_image
Technical line drawing of a mechanical assembly with a hand holding a tool (no text or symbols visible)natural_image
Technical diagram of a circular mechanical or electronic component with internal components and mounting brackets (no text or symbols)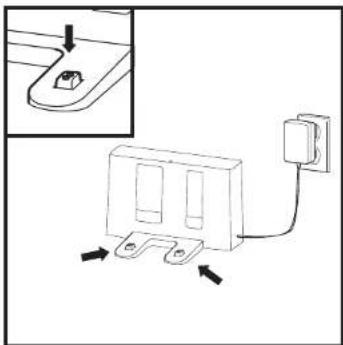
natural_image
Diagram of a wall-mounted electrical outlet with a separate inset showing a small component (no text or symbols)natural_image
Hand using a tool to adjust internal components of an electronic device (no text or symbols visible)natural_image
Line drawing of a hand using a tool to clean or inspect internal components (no text or symbols visible)natural_image
Line drawing of a hand using a tool to adjust or install a device component (no text or symbols visible)PLEASE READ CAREFULLY AND KEEP FOR FUTURE REFERENCE.
These instructions are designed to help you keep your Shark AI Robot running at peak performance.
Euro-Pro Europe Limited,
3150 Century Way,
Thorpe Park,
Leeds
LS15 8ZB
SharkNinja Germany GmbH
c/o Regus Management GmbH.
Excellent Business Center 10.+11. Stock,
Westhafenplatz 1.
60327 Frankfurt am Main, Germany
sharkclean.eu
Illustrations may differ from actual product. We are constantly striving to improve our products; therefore the specifications contained herein are subject to change without notice.
natural_image
Interior scene with a TV, floor tiles, potted plant, and shoes (no text or symbols)natural_image
Hand pressing a small component on a circular mechanical component (no text or symbols visible)natural_image
Simple line drawing of a room with a rug, a potted plant, and a tiled floor (no text or symbols)VIVERE CON IL ROBOT
MAPPA INTERATTIVA
natural_image
Simple line drawing of a robotic vacuum cleaner inside a room with a wall and window (no text or symbols)natural_image
Technical line drawing of a mechanical assembly with no visible text or symbols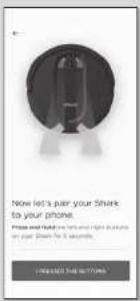
PASSAGGIO 4
PASSAGGIO 5
Ecco fatto!
natural_image
Technical line drawing of a mechanical component with two rectangular slots and two mounting feet (no text or symbols)natural_image
Technical line drawing of a mechanical clamp or bracket component (no text or symbols)natural_image
Technical diagram of a mechanical component with labeled parts and an inset showing a close-up view of a tool (no text or symbols present)natural_image
Line drawing of a finger pressing a button labeled '0' on a mechanical component (no text or symbols beyond basic outline)natural_image
Line drawing of a robotic vacuum cleaner with a mounted electrical outlet connected to a circular base (no text or symbols)natural_image
Line drawing of a robotic vacuum cleaner with a circular top and mounting holes, showing a downward arrow (no text or symbols)In uso


natural_image
Line drawing of a room with a rug, a small robot, and a potted plant on a tiled floor (no text or symbols)natural_image
Line drawing of a room interior with TV, rug, and floor items (no text or symbols)USO DELL'APP SHARKCLEAN
natural_image
Technical line drawing of a robotic vacuum cleaner with internal components and an inset view (no text or symbols)natural_image
Diagram of a mechanical component with arrows indicating direction (no text or symbols)natural_image
Line drawing of a mechanical component falling into a container with particles (no text or symbols)natural_image
Technical line drawing of a mechanical assembly with an arrow indicating a component (no text or symbols present)natural_image
Technical line drawing of a mechanical component or housing (no text or symbols)natural_image
Technical line drawing of a device with two views: one showing a meshed component and the other showing a closed lid (no text or symbols)natural_image
Hand holding a tool with a textured surface and granular material, no text or symbols visiblenatural_image
Technical line drawing of a mechanical component with two views: one showing internal structure and the other a flat base (no text or symbols)natural_image
Cross-sectional diagram of a mechanical device showing internal components and two upward arrows indicating motion or force (no text or symbols present)natural_image
Technical line drawing of a mechanical assembly with a hand holding a tool, no visible text or symbolsnatural_image
Technical diagram of a circular mechanical device with internal components and mounting holes (no text or symbols)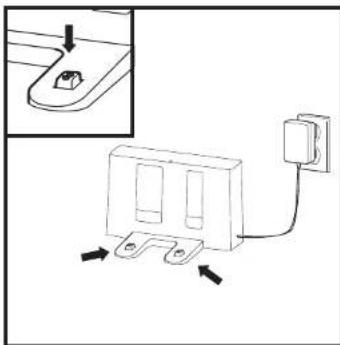
natural_image
Diagram of a wall-mounted electrical connector with mounting holes and wiring, showing no text or symbolsnatural_image
Line drawing of a hand using a tool to adjust internal components on a device casing (no text or symbols)natural_image
Line drawing of a hand using a tool to clean or adjust internal components (no text or symbols visible)natural_image
Line drawing of a hand using a tool to adjust or install a device component (no text or symbols visible)ENGLISH Illustrations may differ from actual product. We are constantly striving to improve our products; therefore the specifications contained here in are subject to change without notice.
© 2020 SharkNinja Operating LLC. SHARK, SHARK ANTI HAIR WRAP TECHNOLOGY and SHARK IQ ROBOT are registered trademarks of SharkNinja Operating LLC.
- Robotic Vacuum Cleaner
- RV2001EU
- SCHRITT 4
- SCHRITT 5
- Erfolg!
- WLAN-FEHLERBEHEBUNG
- DOCK-EINRICHTUNG
- IMPORTANT SAFETY INSTRUCTIONS
- WARNING
- GENERAL USE
- USE WARNINGS
- BATTERY USE
- SAVE THESE INSTRUCTIONS
- SETUP
- STEPS FOR SUCCESS
- LIVING WITH YOUR ROBOT
- CONNECTING THE SHARKCLEAN APP AND ROBOT
- STEP 1
- Create An Account
- STEP 2
- Activate Robot Wi-Fi
- STEP 3
- Select Robot (Apple iOS Only)
- STEP 4
- Connect To Home Wi-Fi
- STEP 5
- SUCCESS
- WI-FI TROUBLESHOOTING
- CAN'T CONNECT TO WI-FI? Restart your phone Reboot your robot
- GETTING TO KNOW YOUR SHARK® AI ROBOT
- DOCK SETUP
- INSTALLING THE SIDE BRUSHES
- CHARGING
- CHARGE INDICATOR LIGHTS
- PREP YOUR HOME
- USING THE SHARK® AI ROBOT
- IQ NAVIGATION AND AI LASER VISION
- MANUAL CLEANING MODE
- USING THE SHARKCLEAN APP
- MAINTENANCE
- CLEANING AND REPLACING THE FILTER
- SHARK ANTI HAIR WRAP TECHNOLOGY
- ANTI HAIR WRAP
- CLEANING SENSORS AND CHARGING CONTACTS
- CLEANING SIDE BRUSHES
- CLEANING THE WHEELS
- REPLACEMENT PARTS
- PLEASE READ CAREFULLY AND KEEP FOR FUTURE REFERENCE.
- TROUBLESHOOTING
- Shark NINJA
- TWO (2) YEAR LIMITED GUARANTEE
- How do I register my extended Shark guarantee?
- IMPORTANT
- How long are new Shark machines guaranteed for?
- What is covered by the free Shark guarantee?
- Where can I buy genuine Shark spares and accessories?
- END-USER LICENSE AGREEMENT FOR SHARKNINJA SOFTWARE
- CONVIVIR CON SU ROBOT
- PASO 4
- Conectese a la wifi de casa
- LIMPIEZA DE LOS CEPILLOS LATERALES
- VOTRE ROBOT AU QUOTIDIEN
- ETAPE 4
- VIVERE CON IL ROBOT
- PASSAGGIO 4
- PASSAGGIO 5
- USO DELL'APP SHARKCLEAN
Brand : SHARK
Model : AI Robot RV2001EU
Category : Vacuum Cleaner