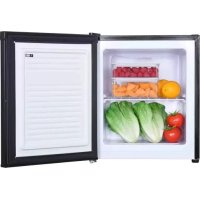
PR106DV - Freezer PRIMO - Free user manual and instructions
Find the device manual for free PR106DV PRIMO in PDF.


| Brand | PRIMO |
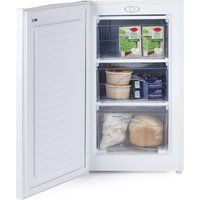
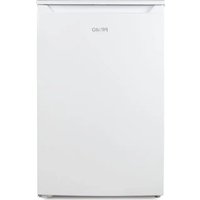
| Model | PR106DV |
| Product type | Freezer |
| Power supply | 220-240 V ~ 50 Hz |
| Climate class | SN, N, ST, T (10 °C to 43 °C) |
| Recommended ambient temperature | 16 °C to 38 °C |
| Thermostat setting | MIN, NORMAL, MAX (rear of appliance) |
| Freezing capacity | Not specified (household use) |
| Power failure autonomy | Not specified |
| Main functions | Freezing and storage of frozen food |
| Included parts | Removable shelf, door gasket, adjustable feet, temperature sensor |
| Door opening direction reversal | Possible (procedure described in the manual) |
| Interior cleaning | Warm water and baking soda (5 ml per 0.5 L) |
| Exterior cleaning | Warm soapy water |
| Defrosting | Manual - unplug, open door, collect water |
| Safety | Do not use extension cord, do not place near heat source, do not refreeze thawed food |
| Warranty | 2 years (accessories: 6 months) |
| Customer service | www.primo-elektro.be (Mon-Thu 8:30-17:00, Fri 8:30-16:30) |
| Weight | Not specified (heavy appliance, handle with care) |
Frequently Asked Questions - PR106DV PRIMO
User questions about PR106DV PRIMO
0 question about this device. Answer the ones you know or ask your own.
Ask a new question about this device
Download the instructions for your Freezer in PDF format for free! Find your manual PR106DV - PRIMO and take your electronic device back in hand. On this page are published all the documents necessary for the use of your device. PR106DV by PRIMO.
USER MANUAL PR106DV PRIMO
natural_image
White PRIMO refrigerator with lid, no visible text or symbols on bodyRead all instructions carefully - keep this manual for later reference.

| 1. GARANTIE 4 | |
| 2. VEILIGHEIDSVOORSCHRIFTEN 5 | |
| 3. ONDERDELEN 9 | |
| 4. INSTALLATIE 9 | |
| 5. DRAAIRICHTING VAN DE DEUR VERANDEREN | 11 |
| 6. GEBRUIK 13 | |
| 7. ONDERHOUD EN REINIGING 14 | |
| 8. VEELGESTELDE VRAGEN 15 | |
| 9. MILIEURICHTLIJNEN 16 | |
| 10. WEBSHOP 57 |

4. INSTALLATIE
Opgelet:
DIEPVRIESPRODUCTEN BEWAREN
natural_image
White appliance with two black arrows pointing left and right, no visible text or symbols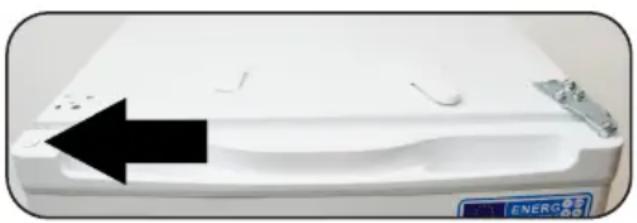
natural_image
White appliance with a black arrow pointing to a curved surface, no visible text or symbols on the device itself.natural_image
Close-up of a metallic electrical connector with three screws and a screw base (no text or symbols visible)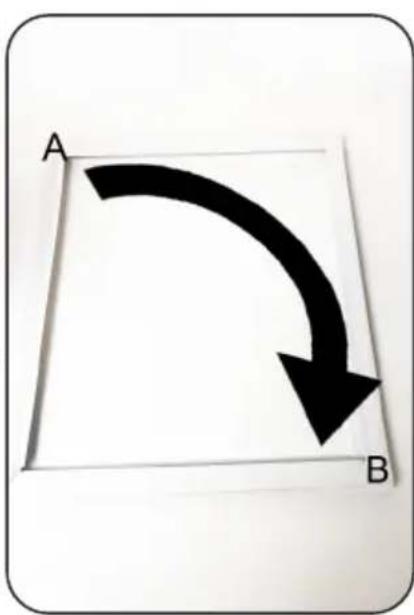
natural_image
Exterior view of a white ventilation grille with horizontal slats, labeled A and B (no text or symbols on the grille itself)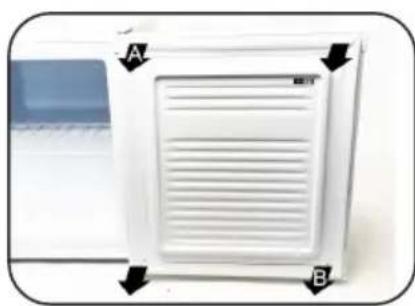
natural_image
White air vent grater with ventilation slots, labeled A and B (no text or symbols on the device itself)natural_image
Close-up of a metallic mechanical component with circular features and directional arrows indicating rotation (no text or symbols)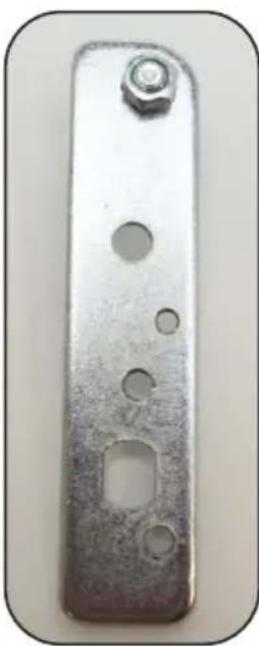
natural_image
Metal plate with holes and a hexagonal bolt, no visible text or markings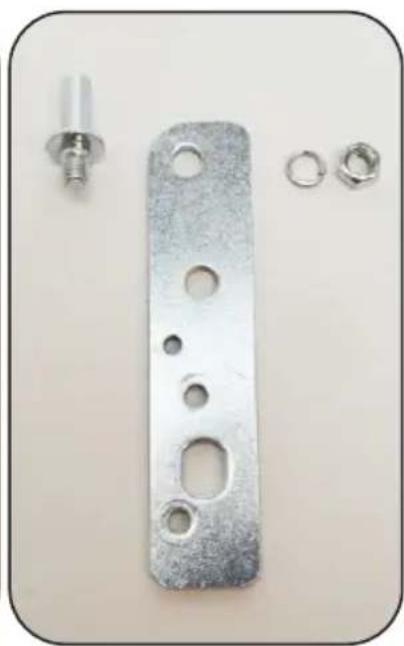
natural_image
Metal mechanical component with multiple holes and small bolts, shown on a plain surface (no text or symbols)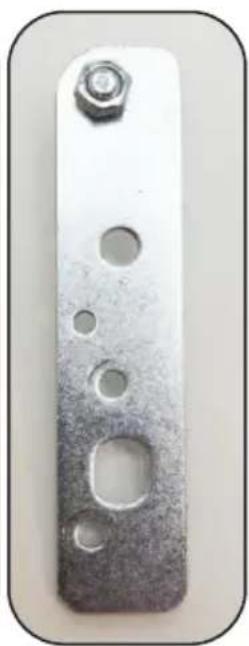
natural_image
Metal plate with bolt holes and a hexagonal hole, no text or symbols visiblenatural_image
Exterior view of a white industrial machine with black base and metal fittings (no visible text or symbols)natural_image
Close-up of a metallic mechanical component with multiple bolts, mounted on a white base (no text or symbols visible)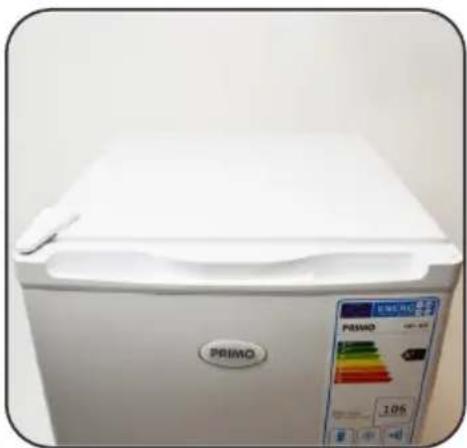
natural_image
Front view of a white PRIMO refrigerator with a digital display showing color scale and battery (no text or symbols on the appliance itself)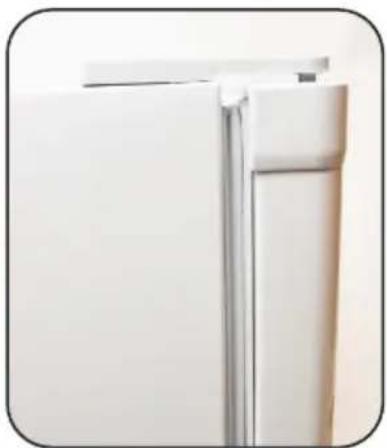
natural_image
Close-up of a white refrigerator front panel with metal trim (no visible text or symbols)6. GEBRUIK
4. INSTALLATION
Attention:
natural_image
White electronic device with two black arrows pointing left and right, no visible text or symbols on the device itself.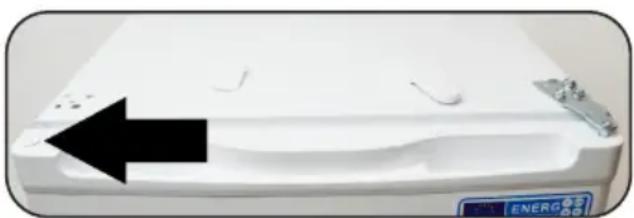
natural_image
White appliance with black arrow pointing to a side panel, no visible text or symbols on the bodynatural_image
Close-up of a metallic electrical connector with screws and mounting holes (no text or symbols visible)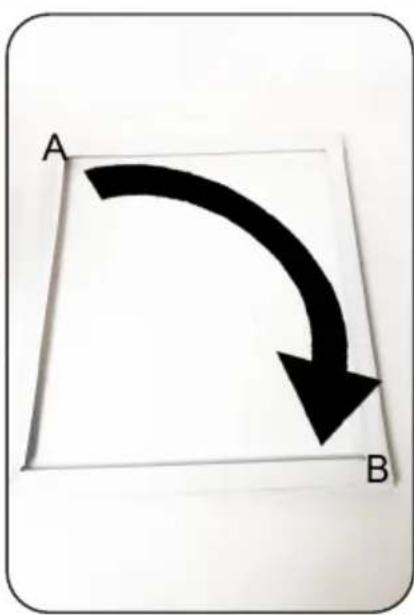
natural_image
Exterior view of a white ventilation grille with labeled points A and B (no text or symbols beyond labels)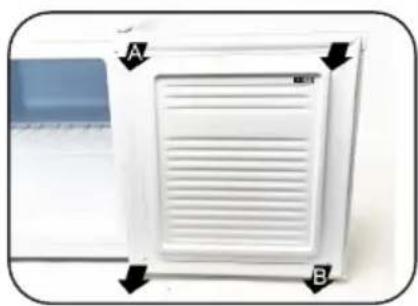
natural_image
White air vent or ventilation grille with labeled arrows A and B, no visible text or symbols on the grille itself.natural_image
Close-up of a metallic mechanical component with three circular holes and directional arrows indicating movement or adjustment (no text or symbols)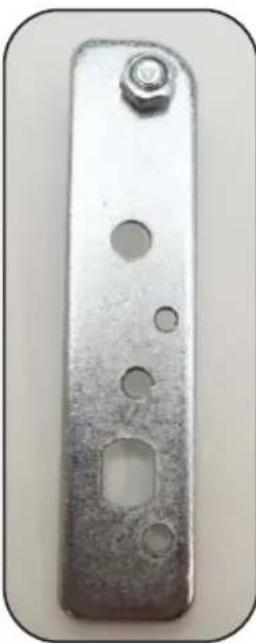
natural_image
Metal bracket with holes and a bolt, no visible text or markings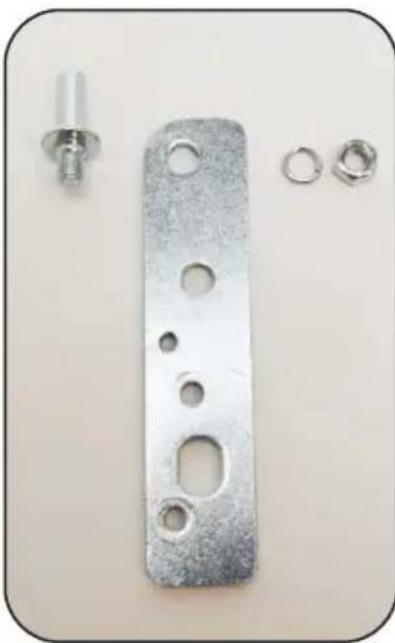
natural_image
Metal mechanical part with holes and four small components (no text or symbols visible)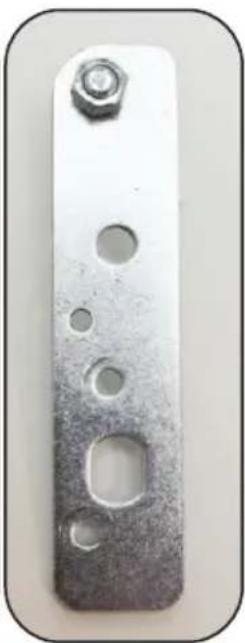
natural_image
Metal plate with holes and a hexagonal bolt, shown against a plain background (no text or symbols)natural_image
Exterior view of a white electronic device with black base and metallic connectors (no visible text or symbols)natural_image
Close-up of a metallic mechanical component with four bolts, resting on a white surface (no text or symbols visible)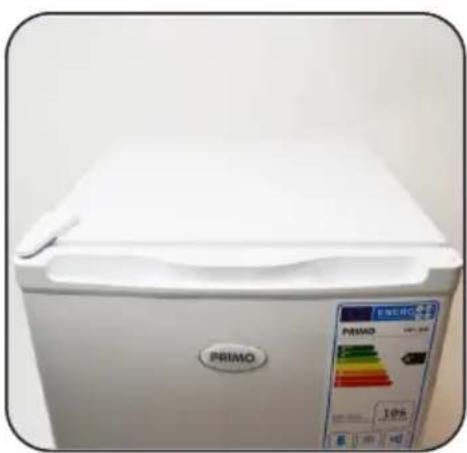
natural_image
White PRIMO refrigerator with a digital display showing color scale and price (no visible text or symbols on the device itself)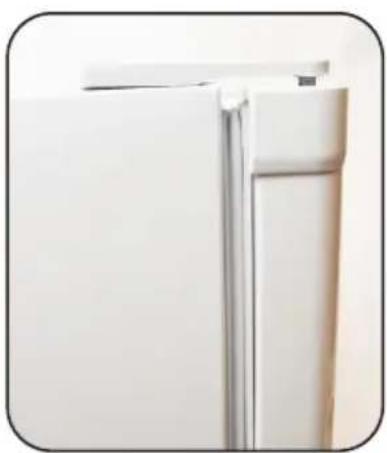
natural_image
Close-up of a white refrigerator with metal frame and side panel (no visible text or symbols)6. UTILISATION
4. ANSCHLUSS
Achtung:
natural_image
White appliance with two black arrows pointing left and right, no visible text or symbols on the device itself.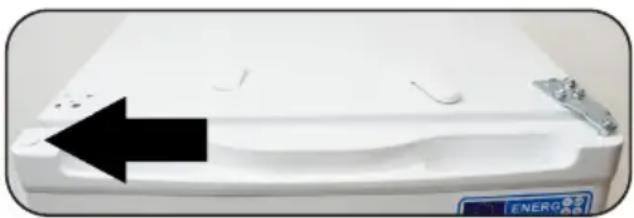
natural_image
White electronic device casing with a black arrow pointing to its side (no visible text or symbols)natural_image
Close-up of a metallic electrical connector with three screws and a mounting base (no text or symbols visible)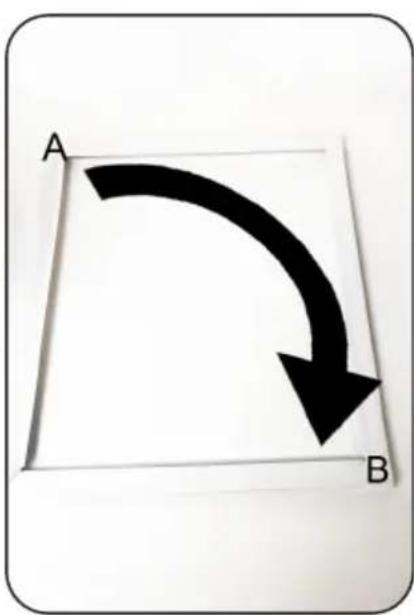
natural_image
Simple geometric diagram showing a curved arrow from point A to point B on a square plane (no text or symbols)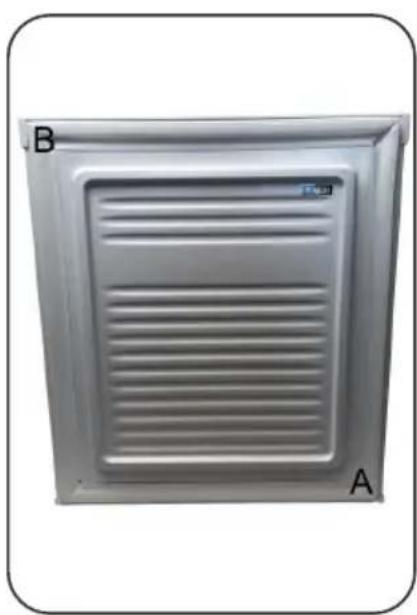
natural_image
Exterior view of a white ventilation grille with horizontal slats, labeled A and B (no text or symbols on the grille itself)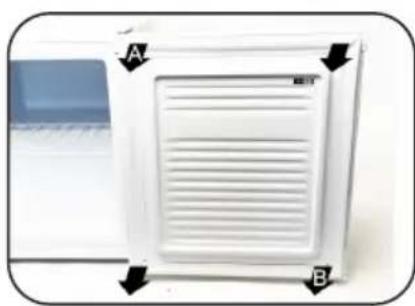
natural_image
White air vent or fan device with ventilation slots and labeled corners A and B (no text or symbols on the device itself)natural_image
Close-up of a metallic mechanical component with circular features and directional arrows indicating rotation (no text or symbols)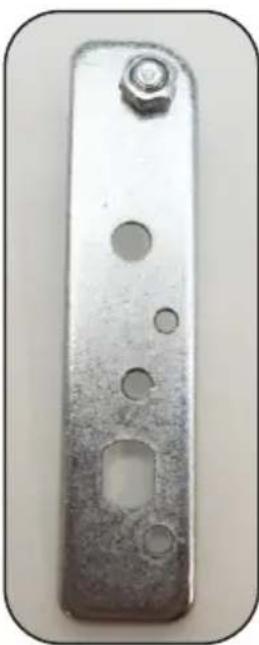
natural_image
Metal plate with holes and a hexagonal bolt, no visible text or markings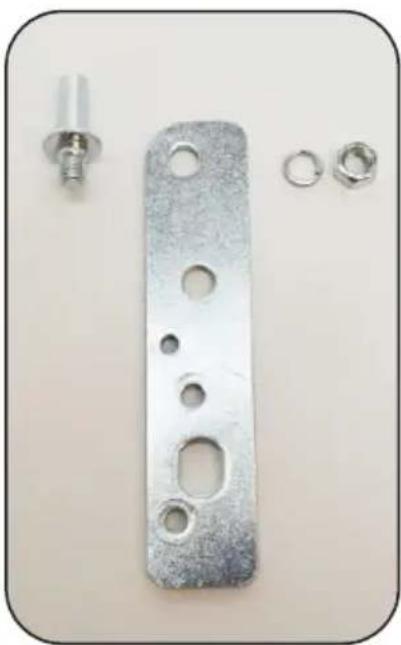
natural_image
Metal mechanical component with multiple holes and small bolts, shown on a plain background (no text or symbols)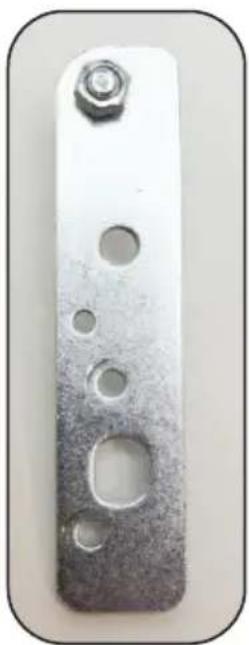
natural_image
Metal plate with circular holes and a hexagonal bolt, shown in a rounded corner (no text or symbols)natural_image
Exterior view of a white electronic device with black and white panels, no visible text or symbolsnatural_image
Close-up of a metallic mechanical component with four bolts, mounted on a white base (no text or symbols visible)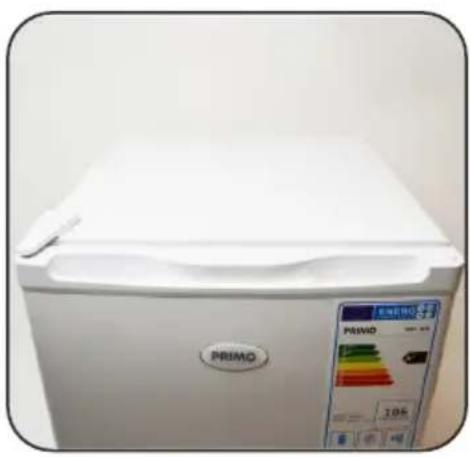
natural_image
Front view of a white PRIMO refrigerator with a digital display showing color scale (no visible text or symbols on the device itself)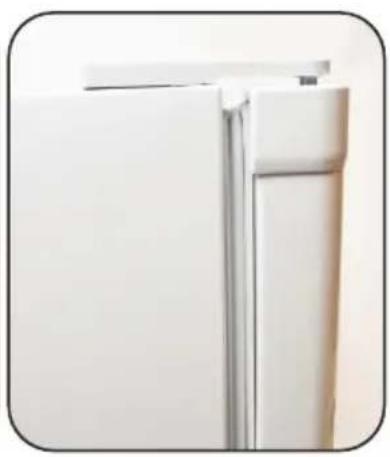
natural_image
Close-up of a white refrigerator front panel with metal trim (no visible text or symbols)6. GEBRAUCH
All of our products are always submitted to a strict quality control before they are sold to you. Should you nevertheless experience problems with your device, we sincerely regret this.
In that case, we kindly request you to contact our customer service.
Our staff will gladly assist you.

www.primo-elektro.be
Monday – Thursday: 8.30 – 12.00 and 13.00 – 17.00
Friday: 8.30 – 12.00 and 13.00 – 16.30
This appliance has a two year warranty period. During this period the manufacturer is responsible for any failures that are the direct result of construction failure. When these failures occur the appliance will be repaired or replaced if necessary. The warranty will not be valid when the damage to the appliance is caused by wrong use, not following the instructions or repairs executed by a third party. The guarantee is issued with the original till receipt. All parts, which are subject to wear, are excluded from the warranty. If your device breaks down within the 2-year warranty period, you can return the device together with your receipt to the shop where you purchased it. The guarantee on accessories and components that are liable to wear-and-tear is only 6 months.
The guarantee and responsibility of the supplier and manufacturer lapse automatically in the following cases:
- If the instructions in this manual have not been followed.
- In case of incorrect connection, e.g., electrical voltage that is too high.
• In case of incorrect, rough or abnormal use.
• In case of insufficient or incorrect maintenance. - In case of repairs or alterations to the device by the consumer or non-authorised third parties.
- If the customer used parts or accessories that are not recommended or provided by the supplier / manufacturer.
2. SAFETY INSTRUCTIONS
To ensure safety, you must read this manual thoroughly. This appliance is made for domestic use and should only be used according to the instructions described below.
- This device may be used by children from the age of 8 years and by persons with a physical sensory or mental limitations or lack of experience and knowledge if these persons are supervised have been given supervision or instruction concerning the use of the appliance in a safe manner and that they also know the hazards involved in using the device.
• Children must not play with the appliance. - Maintenance and cleaning of the appliance must not be done by children, unless they are older than 8 years of age and are supervised.
- Keep the appliance and cord out of the reach of children under the age of 8.
- If the electrical cord is damaged, it must replaced by the manufacturer, its after-sales service or a similarly qualified person person in order to avoid any accident.
- Caution: the appliance must not be used with an external timer or remote control.
- This device is suitable for use in the household environment and in similar environments such as :
- Kitchen corner for staff of stores, offices and
other similar professional environments.
- Farm houses.
- Hotel and motel rooms and other environments with a residential character.
- Guest rooms, or similar.
- Before use, check that the voltage listed on the appliance matches the voltage of your home's electrical system.
- Do not leave the cord hanging on a hot surface or over the edge of a table or countertop.
- Close supervision is necessary when the appliance is used by or near children.
- Use of accessories not recommended or sold by the manufacturer may cause fire, electric shock or injury.
- Unplug the appliance when not in use, before assembling or disassembling parts, and before cleaning. Unplug the power cord by the plug itself. Never pull on the cord to unplug the unit.
- Do not use the appliance outdoors.
- Use the appliance only for its intended purpose.
- Before first use, remove all packaging materials and any promotional stickers.
- This appliance is heavy. Be careful when moving it.
- Do not make any adjustments to the device, this could be dangerous. If electrical work must be done to install the appliance, it must be done by a qualified electrician or competent person.
- Only store edible foods in the freezer.
• After installation, let the appliance stand for 3 hours
before turning it on. This will allow the refrigerant to settle.
- WARNING! Never put this unit on or near a gas fire or electric fire or in a place where it could come in contact with a heat source. There are flammable materials on the back of the appliance.
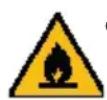
- Pay attention to the "fire hazard - flammable material" symbol located on the back of the appliance.
- The appliance must not be used with an extension cord or power strip.
Follow the instructions below to prevent food contamination:
- Opening the door for long periods of time can significantly increase the temperature in the appliance's compartments.
- Clean surfaces that may come in contact with food regularly. Keep the condensation channel and drain hole at the back of the appliance clean.
- Store raw meat and fish in suitable containers in the refrigerator so that it does not come in contact with or drip on other food.
- If the appliance is left empty for a long time, you should turn it off, defrost and clean it. Let it dry and leave the door open to prevent mold from growing inside the appliance.
- This freestanding appliance should not be built-in.
Install the appliance in a dry and well-ventilated area. The appliance is intended for use in an area where the ambient temperature falls within the following class depending on the climate class found on the rating plate on the back of the appliance.
| Climate class Ambient temperature | |
| SN Between 10°C and 32°C | |
| N Between 16°C and 32°C | |
| ST Between 18°C and 38°C | |
| T Between 18°C and 43°C | |
SAVE THIS MANUAL FOR FUTURE REFERENCE
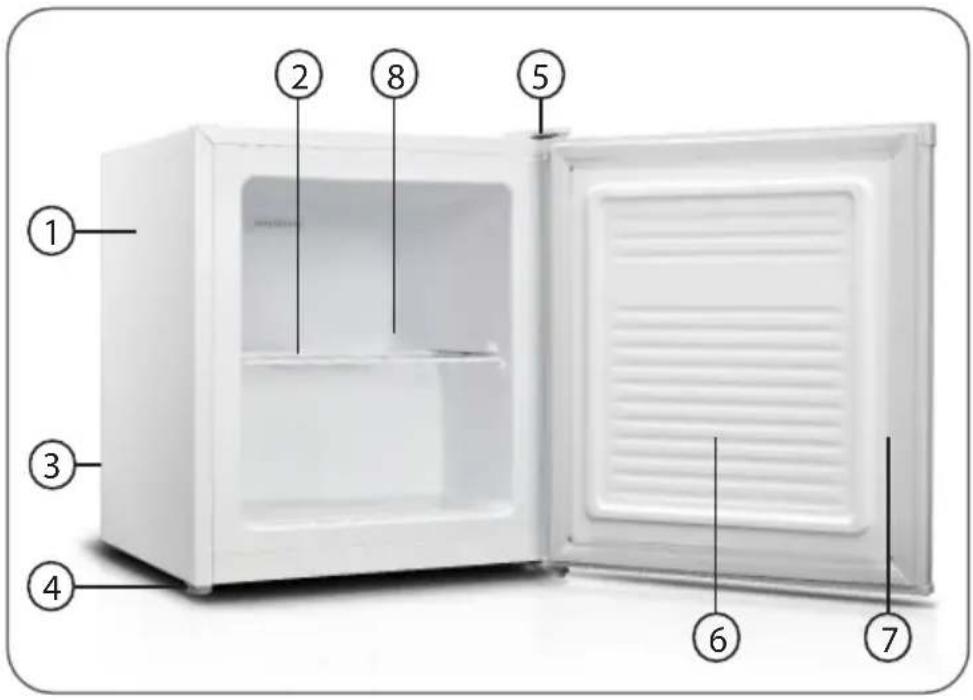
3. PARTS
- Freezer
- Removable rack
- Thermostat knob (on the back)
- Adjustable feet
- Cover plate for door hinge
- Door
- Intermediate layer
- Temperature sensor
4. INSTALLATION
Caution:
- Make sure the unit is not standing on the electrical cord.
- Parts that get hot should not be exposed. If possible, place the back of the unit close to a wall, but leave the required distance open for ventilation.
• After installation, let the unit stand for 3 hours before turning it on. This will allow the refrigerant to settle.
This unit is designed to operate in ambient temperatures between 16^ C and 38^ C. If the ambient temperature falls outside this range, the appliance will not operate correctly. The food may then spoil.
For proper operation, the unit must be installed:
• in a dry environment
• away from direct sunlight
- away from extreme temperatures (and therefore not next to a hob or other heat sources)
• on a strong, stable floor
Ventilation
A clearance of 50 mm must be maintained above the freezer.
If no free space is possible above the appliance, 25 mm of free space should be kept on the sides of the appliance.
Levelling
The freezer must be completely straight and level so that it does not wobble: Set the appliance straight and check that the 2 adjustable feet are firmly on the ground when the appliance is straight and level. If necessary, adjust the feet by screwing them in or out of the unit. Caution: This unit is heavy, please be careful.
PACKING FROZEN FOOD
To prevent food from losing its flavour or drying out, place food in airtight packaging.
- Place food in packaging.
- Remove air.
- Seal the wrapping.
- Label packaging with contents and dates of freezing
Suitable packaging: Plastic film, tubular film made of polyethylene, aluminium foil, freezer containers.
RECOMMENDED STORAGE TIMES OF FROZEN FOOD IN THE FREEZER
These times vary depending on the type of food. The food that you freeze can be preserved from 1 to 12 months (minimum at -18°C).
| Food Storage time | |
| Bacon, casseroles, milk 1 month | |
| Bread, ice cream, sausages, pies, prepared shellfish, oily fish | 2 months |
| Non-oily fish, shellfish, pizza, scones and muffins 3 months | |
| Ham, cakes, biscuits, beef and lamb chops, poultry pieces | 4 months |
| Butter, vegetables (blanched), eggs whole and yolks, cooked crayfish, minced meat (raw), pork (raw) | 6 months |
| Fruit (dry or in syrup), egg whites, beef (raw), whole chicken, lamb (raw), fruit cakes | 12 months |
Never forget:
- When you freeze fresh foods whit a 'use by /best before/best by/' date, you must freeze them before the expiry of this date.
- Check that the food was not already frozen. Indeed, frozen food that has thawed completely must not be refrozen.
- Once defrosted, food should be consumed quickly.
5. CHANGING THE DIRECTION OF DOOR ROTATION
You can change the direction of rotation of the door. If you wish to do so, proceed as follows:
Attention : Make sure that the appliance is not live!
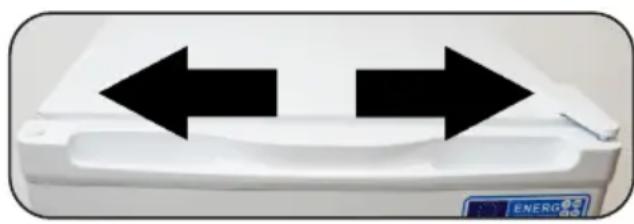
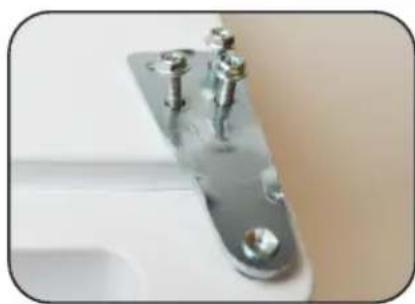
- Remove the protective cap from the hinge and the cover plate on the other side. In the door, remove the cover cap at the top.
natural_image
White electronic device with two black arrows pointing left and right, no visible text or symbols on the device itself.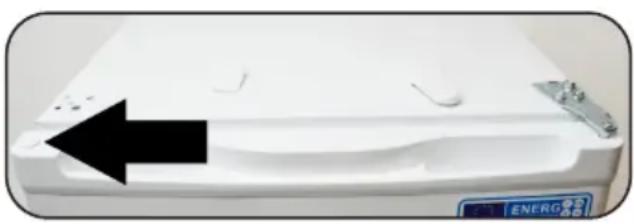
natural_image
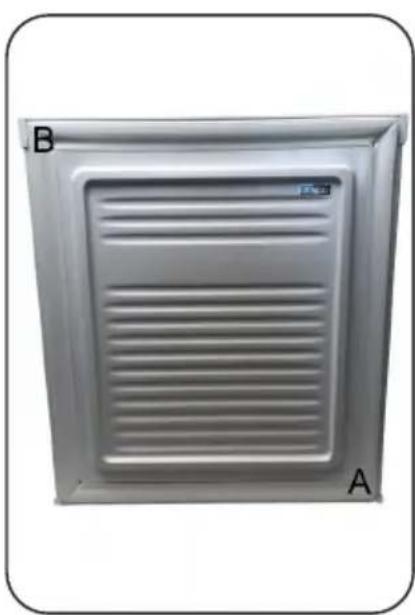
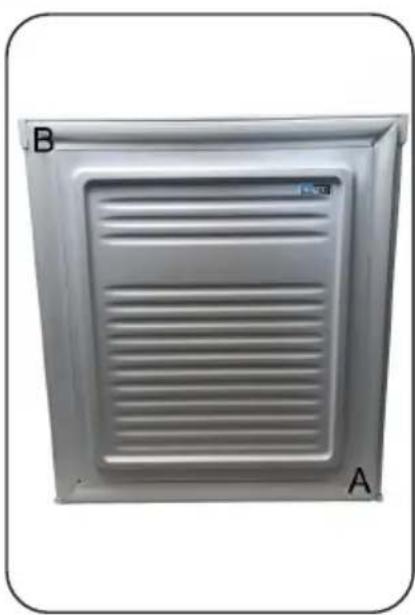
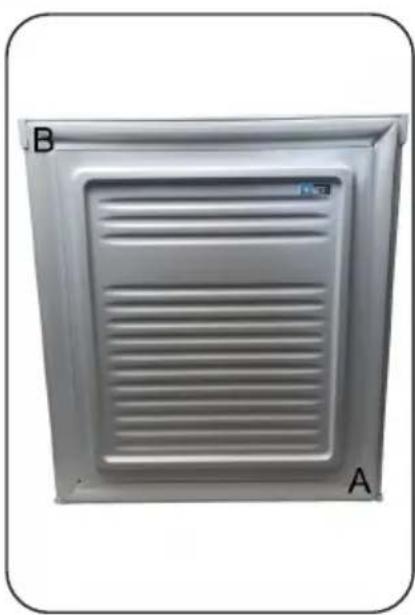
White appliance with black arrow pointing to a side panel, no visible text or symbols on the body- Remove the 3 screws located in the upper hinge. Remove the upper hinge. Then you can lift the door out of the lower hinge. Put them in a place where you can store them scratch-free. When you change the direction of rotation of the door, we recommend that you rotate the rubber seal as shown in the picture. This will allow the door to seal perfectly when you replace it.
natural_image
Close-up of a metallic electrical connector with screws and a mounting hole (no text or symbols visible)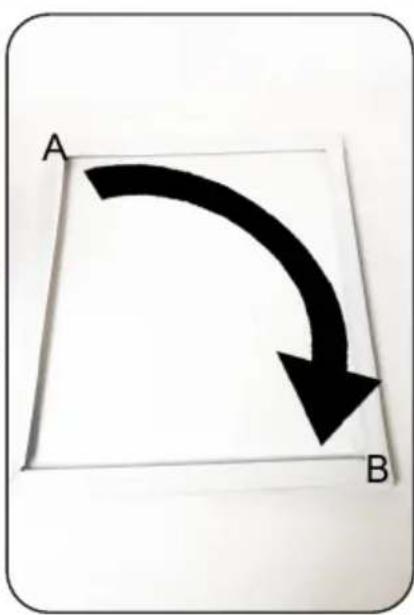
natural_image
Exterior view of a white ventilation grille with slats and ventilation slots, labeled A and B (no text or symbols on the grille itself)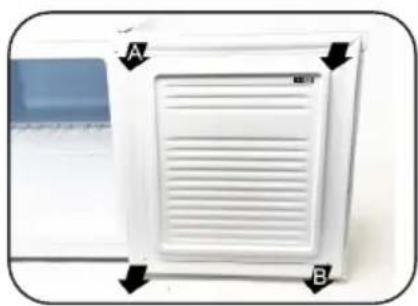
natural_image
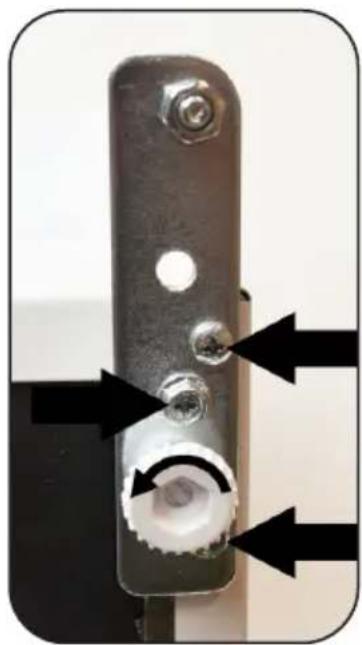
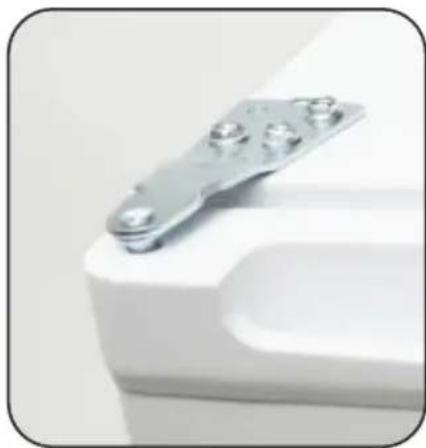
White air vent or vent unit with ventilation slots and directional arrows labeled A and B (no text or symbols on the device itself)- Tilt the unit, unscrew the feet and remove the 3 screws located in the lower hinge. Then remove the hinge. Loosen the nut and washer, mirror the metal plate horizontally, and reassemble as shown in the photo.
natural_image
Close-up of a metallic mechanical component with circular ports and arrows indicating direction (no text or symbols)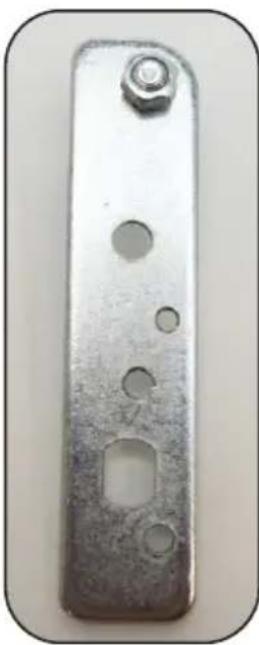
natural_image
Metal bracket with holes and a bolt, no visible text or symbols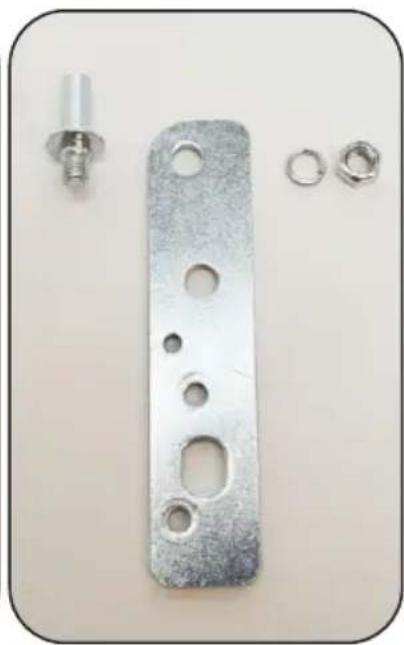
natural_image
Metal mechanical component with multiple holes and small bolts, shown on a plain surface (no text or symbols visible)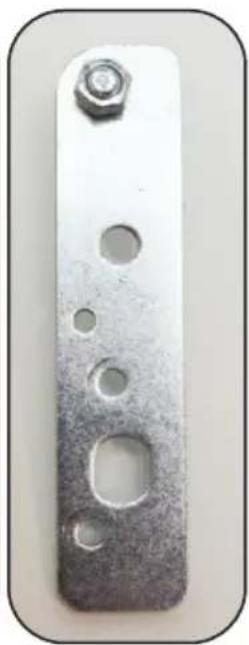
natural_image
Metal plate with circular holes and a hexagonal bolt, shown in a plain white frame (no text or symbols)- Attach the metal plate to the other side of the refrigerator with 3 screws. Screw the feet into the openings provided for this purpose.
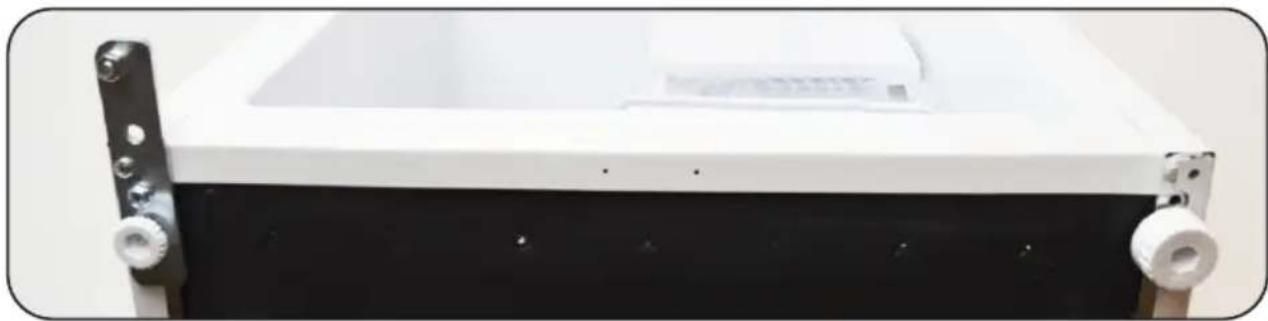
natural_image
Exterior view of a white electronic device with black casing and metallic connectors (no visible text or symbols)- Next, place the unit back on its feet. After this, you can place the door on the lower hinge. Attach the door to the upper hinge. To do this, screw 3 screws into the holes provided. Cover the upper hinge and the screw holes with the hinge cover. Make sure that the rubber seal seals nicely. If this is not the case, repeat step 2.
natural_image
Close-up of a metallic mechanical component with four bolts, resting on a white surface (no text or symbols visible)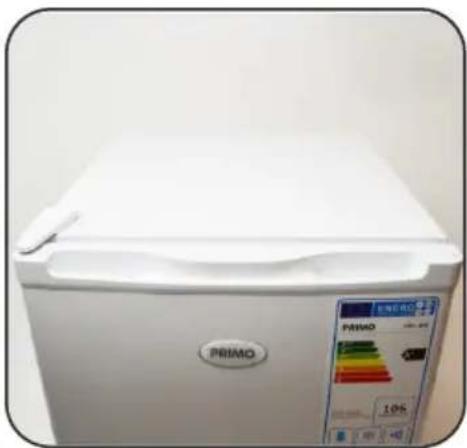
natural_image
Front view of a white PRIMO refrigerator with a digital display showing color scale (no text or symbols on the device itself)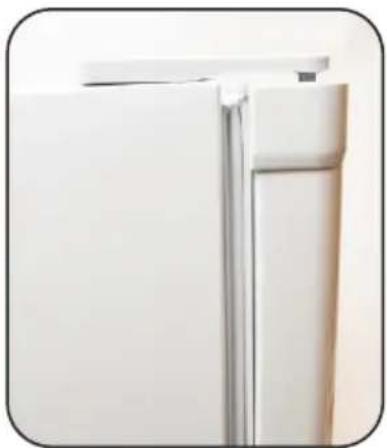
natural_image
Close-up of a white refrigerator with metal frame (no visible text or symbols)6. USE
Remove all packaging materials and any promotional stickers before use. Clean the inside of the unit with lukewarm water and some bicarbonate of soda (5ml for 0.5l of water). Do not use soap or detergent as the smell may linger. Dry the appliance thoroughly
Temperature Control
The thermostat is located on the back of the appliance and can be set to MIN (cold), NORMAL (colder) and MAX (coldest).
The temperature is affected by:
• The room temperature
• How often the door is opened
• How much is in the freezer
• The position of the appliance
Start-up
- Wait 3 hours after installation to start up the freezer.
- Plug in the power cord.
- Turn the thermostat to the desired temperature setting.
- Wait about 4 hours until the desired temperature is reached before putting food in the freezer.
Caution:
- Do not refreeze food if it has already been defrosted.
- Do not put beverages with bubbles in the freezer.
- Be careful when consuming popsicles just out of the freezer to avoid freezer burns.
- Do not take anything out of the freezer with wet hand.
Tips
- The freezer makes noise when the compressor pumps the refrigerant around. This is normal.
- Do not put hot foods in the freezer.
• Make sure the food is covered. - Do not compress the food too much; air should still be able to circulate around it.
- Do not leave the door open too long. Also make sure that the door is always closed properly again.
- Label the food with the date to check the shelf life in the freezer.
7. MAINTENANCE AND CLEANING
Always unplug the appliance before cleaning.
Inside
- Clean the inside and accessories with warm water and bicarbonate of soda. Rinse and dry thoroughly.
- Do not use detergents, caustic powders, perfumed cleaning products, floor polish or cleaning products containing bleach or alcohol.
Exterior
- Wash the exterior with warm soapy water.
- Do not use caustic or abrasive products.
- Be careful of the sharp edges on the bottom of the unit.
- Once or twice a year, remove dust from the compressor with a brush or vacuum cleaner, as the accumulation of dust can affect the performance and energy consumption of the unit.
Defrosting
- Empty the freezer.
- Unplug it from the electrical outlet.
- Open the door.
- Place a suitable container to collect the thawing water.
- After defrosting, clean the inside and dry thoroughly.
- Plug in the power cord
Caution: Do not use sharp objects to scrape the ice off the freezer walls.
Long-term non-use
When the appliance is not in use for a long period of time, unplug the outlet, empty the freezer, defrost and leave the door ajar to avoid odors.
- FREQUENTLY ASKED QUESTIONS
| Problem Solution | |
| The device is not working. | The unit is not receiving power, check that the power supply is OK.Check that the plug is plugged in.Check that the correct voltage is used. |
| The device jumps up too often. | Is the door closed properly?Have you put hot food in the appliance, causing the appliance to work harder to cool?The door has been open too often or too long.The appliance is getting the wrong voltage.The appliance is too close to a heat source or direct sunlight. |
| The inside temperature of the appliance is too hot. | Check that the unit has power.Check that the plug is plugged in.The door has been left open too long or too often.The air supply is blocked.Check that the appliance is getting the correct voltage.The appliance is too close to a heat source or the sun. |
| The device is making a strange noise. | The device is not standing straight.The device is placed against another object or against the wall. Move the device. |
9. ENVIRONMENTAL GUIDELINES
This symbol on the product or on its packaging indicates that this product may not be treated as household waste. Instead it must be brought to the applicable collection point for recycling of electrical and electronic equipment. By ensuring this product is disposed of correctly, you will help prevent potential negative consequences for the environment and human health, which could otherwise be caused by inappropriate waste handling of this product. For more detailed information about recycling of this product, please contact your local city office, your household waste disposal service or the shop where you purchased the product.

The packaging is recyclable. Please treat the packaging ecologically.
10. WEBSHOP

ving accessories have 6 months warranty,

an be easily ordered using the link below.
WWW.PRIMO-ELEKTRO.BE

| OMSCHRIJVING / DESCRIPTION / BESCHREIBUNG / DESCRIPTION | REF |
| Verstelbaar voetje (lang)Pied réglable (long)Stellfuß (lang)Adjustable foot (long) | DV2-FOOT |
| Verstelbaar voetje (kort)Pied réglable (court)Verstellbarer Fuß (kurz)Adjustable foot (short) | DV2-SF |
WWW.PRIMO-ELEKTRO.BE
- INSTALLATIE
- Opgelet:
- DIEPVRIESPRODUCTEN BEWAREN
- GEBRUIK
- INSTALLATION
- Attention:
- UTILISATION
- ANSCHLUSS
- Achtung:
- GEBRAUCH
- SAFETY INSTRUCTIONS
- To ensure safety, you must read this manual thoroughly. This appliance is made for domestic use and should only be used according to the instructions described below.
- PARTS
- Caution:
- Ventilation
- Levelling
- PACKING FROZEN FOOD
- RECOMMENDED STORAGE TIMES OF FROZEN FOOD IN THE FREEZER
- Never forget:
- CHANGING THE DIRECTION OF DOOR ROTATION
- USE
- Temperature Control
- Start-up
- Tips
- MAINTENANCE AND CLEANING
- Inside
- Exterior
- Defrosting
- Long-term non-use
- ENVIRONMENTAL GUIDELINES
- WEBSHOP
- WWW.PRIMO-ELEKTRO.BE
Brand : PRIMO
Model : PR106DV
Category : Freezer