
Commander 7x50 - Binoculars Steiner - Free user manual and instructions
Find the device manual for free Commander 7x50 Steiner in PDF.
| Product Type | Marine Binoculars |
| Brand | Steiner |
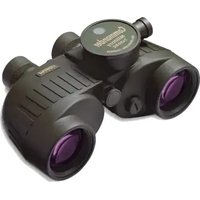
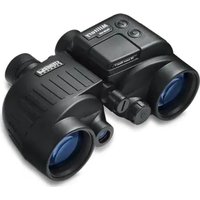
| Model | Commander 7x50 |
| Magnification | 7x |
| Objective Lens Diameter | 50 mm |
| Exit Pupil Diameter | 7.1 mm |
| Field of View | 390 ft at 1000 yds (approx. 130 m at 1000 m) |
| Focus | Sports Auto-Focus with Memory Eyecup |
| Compass | Integrated, illuminated, 40 mm diameter, calibrated for Northern Hemisphere |
| Rangefinder Reticle | Yes, for distance measurement |
| Optical Technology | XP with high-definition (HD) coating and Nano® protection |
| Exterior Coating | Rhino rubber armor, special NBR on premium models |
| Filling | Pressurized nitrogen (NPS) anti-fog |
| Eyecups | Ergonomic folding soft silicone |
| Compass Power | 2 x 1.5V type 350 batteries (non-magnetic) |
| Approximate Weight | 1.1 kg |
| Dimensions (approx.) | 200 x 140 x 70 mm |
| Warranty | 30 years (Commander XP model) |
| Included Accessories | Carrying strap, protective caps, rain protector, cleaning cloth |
| Maintenance | Clean lenses with soft cloth, rubber armor with damp cloth |
| Spare Parts | Interchangeable eyecups, straps, caps available at steinerpartsdirect.com |
| Reparability | After-sales service via www.steiner-binoculars.com/service/ |
Frequently Asked Questions - Commander 7x50 Steiner
User questions about Commander 7x50 Steiner
0 question about this device. Answer the ones you know or ask your own.
Ask a new question about this device
Download the instructions for your Binoculars in PDF format for free! Find your manual Commander 7x50 - Steiner and take your electronic device back in hand. On this page are published all the documents necessary for the use of your device. Commander 7x50 by Steiner.
USER MANUAL Commander 7x50 Steiner
A NEW ERA OF INNOVATION
Binocular Instruction Manual
L'INNOVATION ENTRE DANS UNE NOUVELLE ERE
The Binocular-Specialists!
STEINER

GERMANY
The Binocular-Specialists!

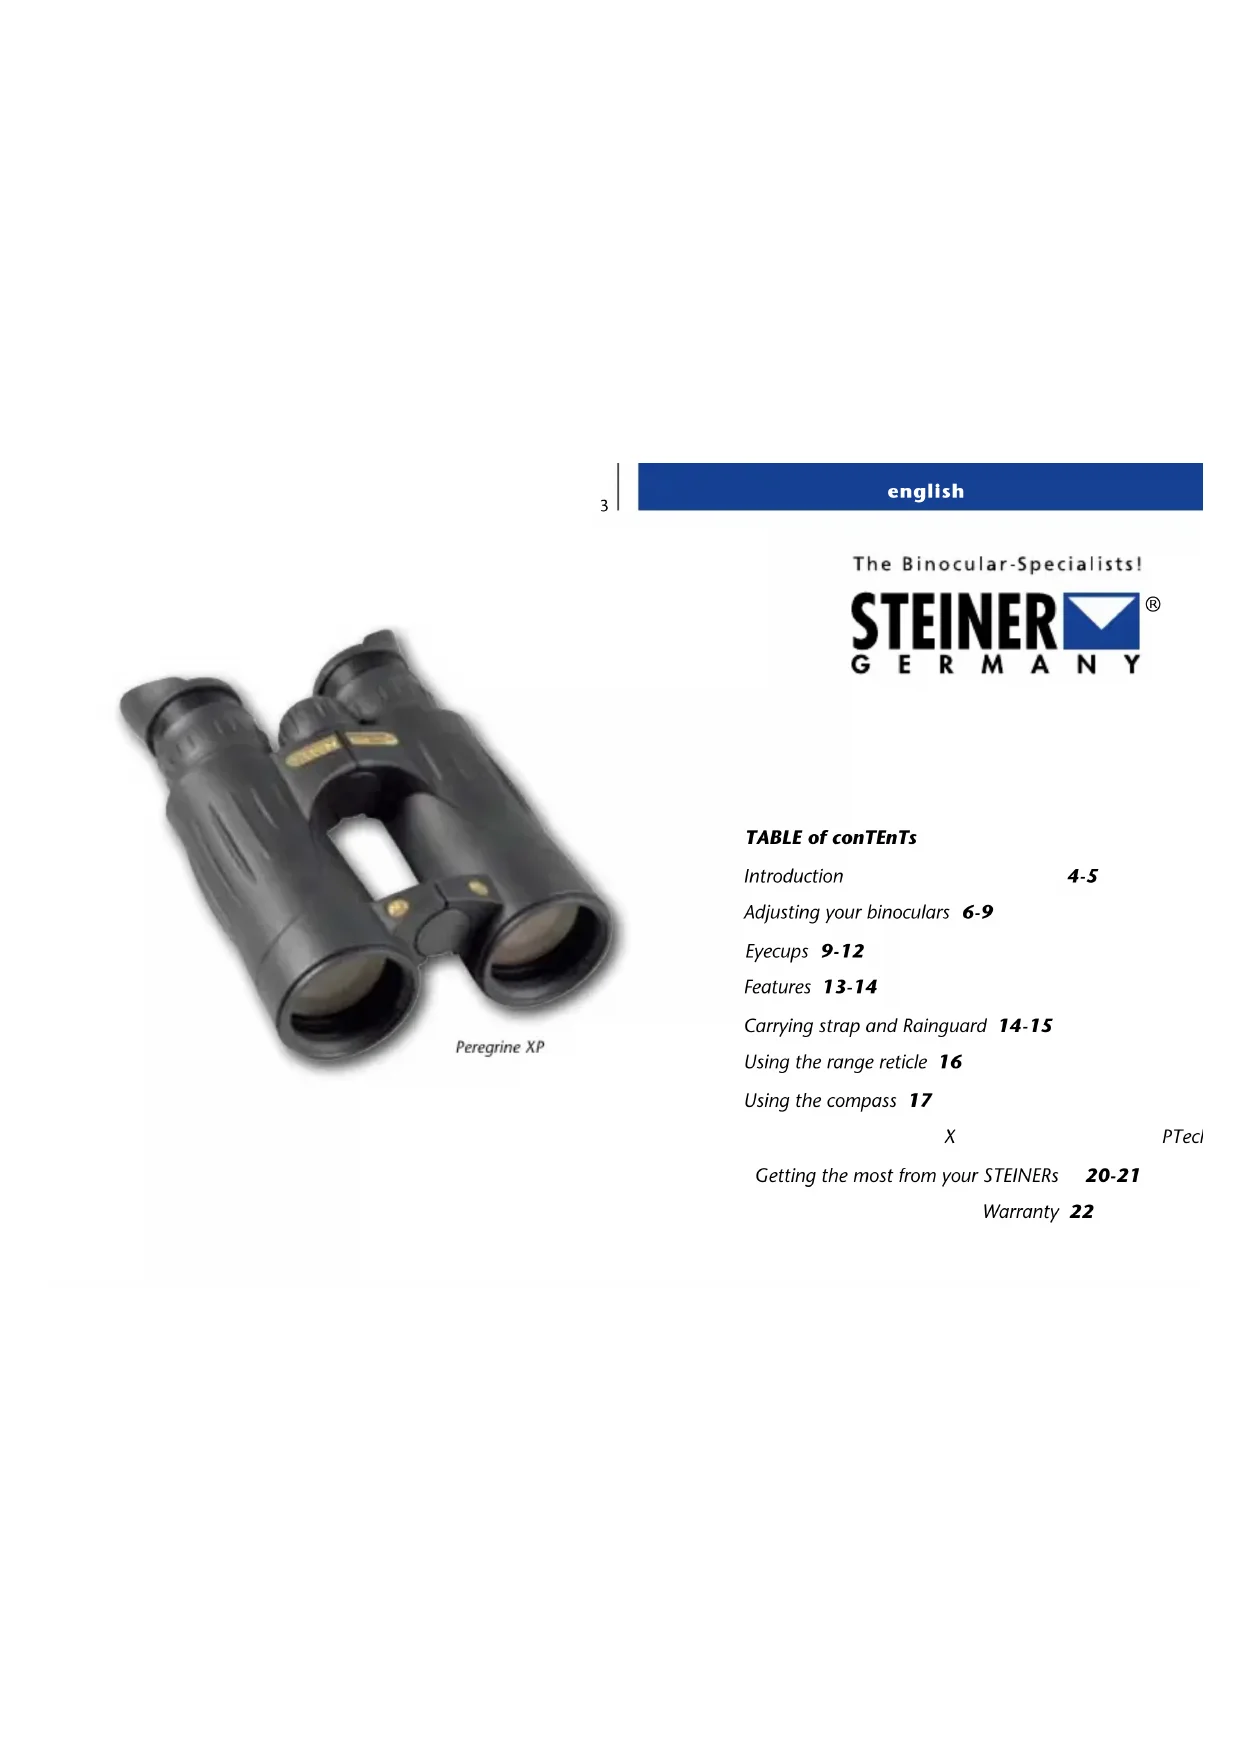
TABLE of conTEnTs
Introduction
4-5
Adjusting your binoculars 6-9
Eyecups 9-12
Features 13-14
Carrying strap and Rainguard 14-15
Using the range reticle 16
Using the compass 17
X
PTech
Getting the most from your STEINERs 20-21
Warranty 22
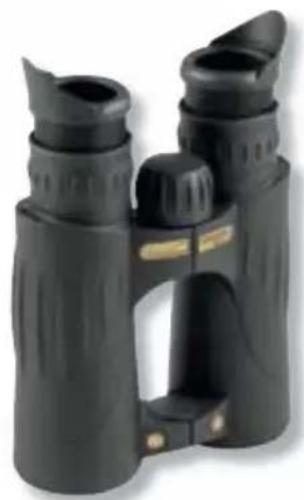
Congratulations,
You have purchased one of the finest binoculars in the world.
Designed into this product are six decades of experience in manufacturing binoculars for the highest demands as well as years of dedicated research. This manual will provide you with all the necessary instructions and tips to ensure you the maximum use and enjoyment of your new STEINERs.
english
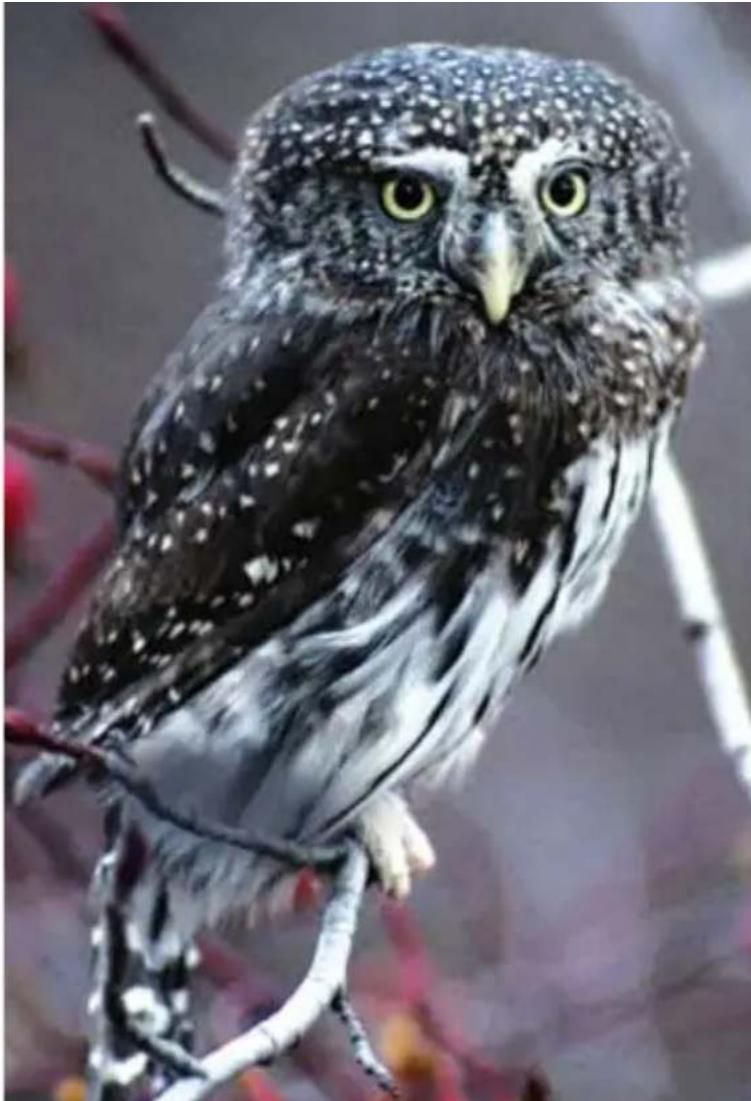
Dear nature and OutDOoR enthustlast,
Forests, plains, deserts and mountains all have their secrets. Those who are looking to unlock these secrets, for adventure or to just enjoy nature have a need to know what is out there. This is what it takes to make your hike,
birding adventure or hunt an unforgettable experience. The eye is the key: We can act to only what we see.
STEINER has been producing binoculars for over 60 years in Bayreuth, Germany. Founded by Karl Steiner in 1947, STEINER has become the largest manufacturer of binoculars in Europe. Today, STEINER is the only company in the world to specialize solely in binocular development.

excellence and high optical performance that is required to build a truly optimal binocular for our customers. You need to know the user specific requirements as well as the unique environmental characteristics of where the
binoculars will be used. Binoculars need to be customized to the situation, whether there are birds flying or animals hidden in cover, which are almost invisible to the eye, or whether glistening sunlight distorts the colors of nature.
STEINER is passionately committed to the user's requirements. We have combined six decades of experience and research and development, for professionals and amateurs alike with a deep understanding of
This focus has made STEINER binoculars synonymous with the highest standard of quality worldwide. STEINER's goal is to continue building the toughest and most weather resistant binocular available. We deliver unsurpassed brightness and clarity using space age materials and the latest in optical technology. However, we at STEINER are convinced that it is more than technical
their needs. That's why fellow hunters, hikers, bird watchers and naturalists can be confident when having a STEINER binocular in their hands.
We congratulate you for selecting these binoculars, we thank you for the trust you have placed in STEINER Optik, and we wish you great times with your STEINER binoculars.
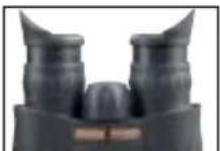
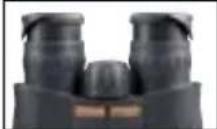
aDjusting anD using yOur binOCulars
Adjusting the binoculars begins by setting the interpupillary distance. This is the distance between the pupils of your eyes. The bino cular tubes pivot on a hinge, moving the tubes

closer or further apart. Pivot the binocular tubes until you see a single image when looking through the binoculars. When you don't require glasses in your daily life (or wear contact lenses), the binocular is now ready for use. All STEINER binoculars are suited for wearers of glasses. Please refer to the following pages for detailed instructions.
hOW tO use the spOrts auto-FOCUS
All our individual focus models feature Sports Auto-Focus. The advantage to this feature is that - once set to your eyes - it allows you to view images from 20 yards to infinity without having to refocus for different distances. Higher power models (10x or more) will be in focus from
- Look through the binocular with both eyes open.
On the side not covered, turn the ocular's diopter setting ring until the image appears clear and sharp. - Uncover the lens and repeat the procedure with the opposite lens.
When viewing through both lenses, all images from 20 yards to infinity will be bright, clear and in focus. Higher power models (10x-20x) may require higher initial focus distance.
Make note of your diopter setting, as it can be unique to each user. Some models feature the new Memory Ocular, a device that saves your individual setting. See the following section for detailed instructions.
HOW TO USE THE MEMORY OCULARS
Some models, such as the Commander XP, feature Sports Auto-Focus along with the Memory Oculars. Use the previously described steps to focus the binocular for your eyes. Follow the steps below to set the memory on the eyepieces:
Press the two tabs on the lower side of the focus ring while gently pulling up on the eyepiece.
Next turn the memory indicator, which is the small white arrow shape, to the line on the eyepiece. This is your individual setting.
Gently push the focus ring back down in place and release the tabs.
Whenever someone else might change the setting, you can now quickly check your focus and reset it to your individual mark if needed.
Center FOCus instruCtOns
Especially for close range glassing at distances below 20 yards we recommend our binoculars with Fast-Close-Focus. Just a quick turn of the large center focus wheel and everything is in focus - up to the most minor detail. The proper way to initially set a Fast-Focus binocular to your eyes is:
Choose an image, sign or a tree at least 100 yards away to view.
- Cover the left objective lens with your hand or the objective cover (if included). Look through the binocular with both eyes open.
ENGLISH
The Peregrine XP features a diopter setting on the left side ocular. Do not attempt to turn the right side ring.
Turn the center focus wheel to make the image appear clear and sharp. Uncover left lens.
Now cover the right objective lens with your hand or the objective cover (if included). Look through the bino cular with both eyes open.
Turn the left ocular's diopter setting ring until the image appears clear and sharp.
With both eyes open you can now use the center focus wheel to focus the binoculars for different distances.
Make note of your diopter setting, as it can be unique to each user. Do not force the diopter wheel or center focus
Important!
Preset the binoculars focus in daylight conditions. That way in darkness they'll be in focus and offer the highest depth of field.
wheel beyond the noticeable stop limits; this can cause internal damage.
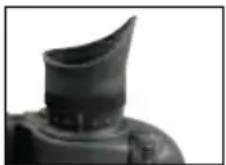
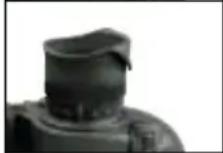
ERGONOMICALLY CONTOURED EYECUPS
Standard feature to almost every STEINER binocular, these eyecups are especially contoured to eliminate any unwanted sidelight. Your view will be brighter by eliminating sidelight. For maximum comfort these eyecups are made out of soft silicone material. As an additional
benefit, the soft material allows for the ergonomic part to be folded down to form a cylindrical shape. Eyeglass wearers fold the eyecups down all the way to have a full field of view.
Many STEINER models, such as the Peregrine XP, Nighthunter XP or Predator Xtreme models are equipped with ergonomic Twist up/down eyecups.
They play an important part in creating the unique STEINER viewing experience. As twist-up / twist-down eyecups they easily adapt to your individual preferences, whether you wear glasses or not.
Eyeglass wearers
Wearing glasses you have already created the necessary distance be
tween the binoculars' oculars and your eyes. Contrary to users without glasses (or with contact lenses) you usually don't need to artificially create this distance and you can use your binoculars with both eyecups fully retracted.
To retract the eyecups simply use your thumb and index finger to twist them in the direction indicated by the arrows. Then fold down the sidelight screen. When looking through your binoculars you can put your glasses directly onto the eyecups - the soft silicone material prevents scratching.


ENGLISH
Different types of eyeglasses might vary the distance between the eye and the lens and it's possible that your eyes are too close to the ocular. You will see some black areas when looking through the binoculars. In this case you need to increase the distance by slightly twisting the eyecup upwards (usually just a few millimeters) until you see a complete image.
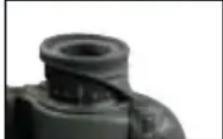
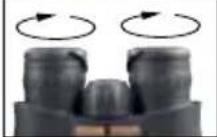
Wearing contact lenses or no eye glasses
You need to create a distance between your eyes and the binoculars' ocular lenses. Use the binoculars only with eyecups in the up position. On both eyecups you will also find small wings that prevent sidelight to enter and increase image clarity. To turn the eyecups simply use your thumb and index finger and twist the eyecups down. To twist them up, turn them in the other direction until you can feel the noticeable stop limit - after that you will only be able to minimally turn the eyecup. This play is necessary to adjust the sidelight screen for different users' interpupillary distances.
ULTRA-SHARP
FOCUSBINOCULARS
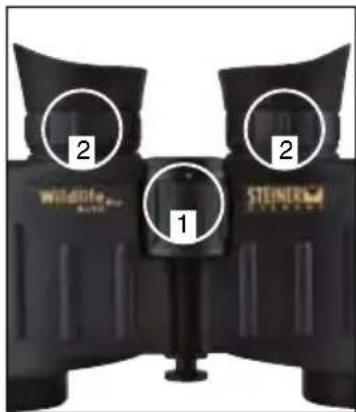
Some STEINER Binocular models like the 8x30 Wildlife Pro feature Ultra-sharp focusing adjustment. The adjustment allows the user to custom fit the binocular for their
eyes, whether using eyeglasses or not, for optimal image sharpness.
To adjust these binoculars, first set the center-focus wheel (1) to the MIDDLE of the adjustment range. Next, follow the SPORTS AUTO-FOCUS focusing adjustments (found on page 6) by viewing an object at 100 yards distance and adjusting each diopter ring (2) to a sharp image for each eye. Once individually set, you may again use the center focus wheel for close-in distance or extreme far distances, or in between whenever increased sharpness is required.
CHANGING EYECUPS
Many Steiner models allow for fast owner replacement of binocular eyecups. The eyecups are either a soft, pliable rubber or a rubber cup with a solid base. Please visit www.steinerpartsdirect.com to order extra eyecups for your binocular, be sure to have the binocular model, size and approximate age ready when you visit the website or make contact. Certain models, such as binoculars with twist up/ down eyecups will require the parts do be installed by our service department, please go to www.steiner-binoculars. com for return instructions.
Comfort-Balance® Grip
The innovative grip areas of the Peregrine XP series combine maximum grip with state-of-the-art ergonomic comfort. Especially during long glassing sessions the GelPad Grips relieve pressure from your hands and thumbs and enable an optimal balance of your binocular.
ENGLISH
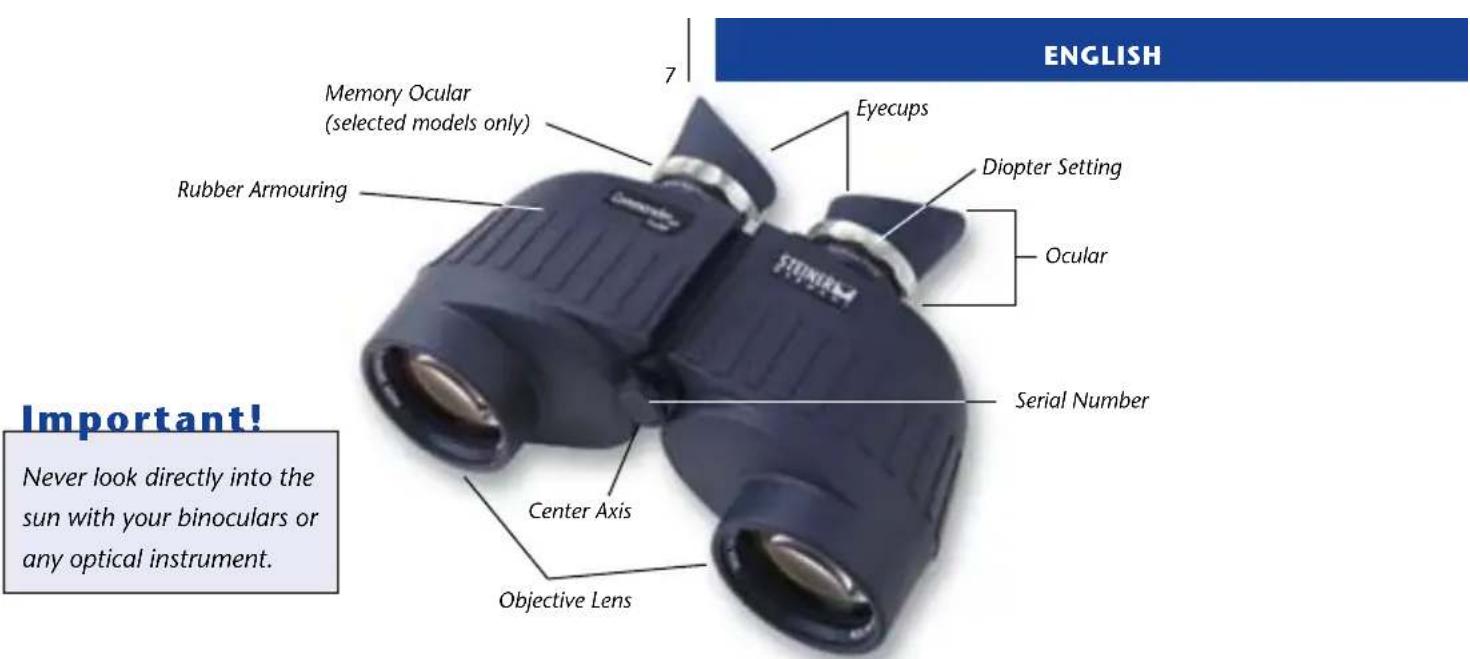
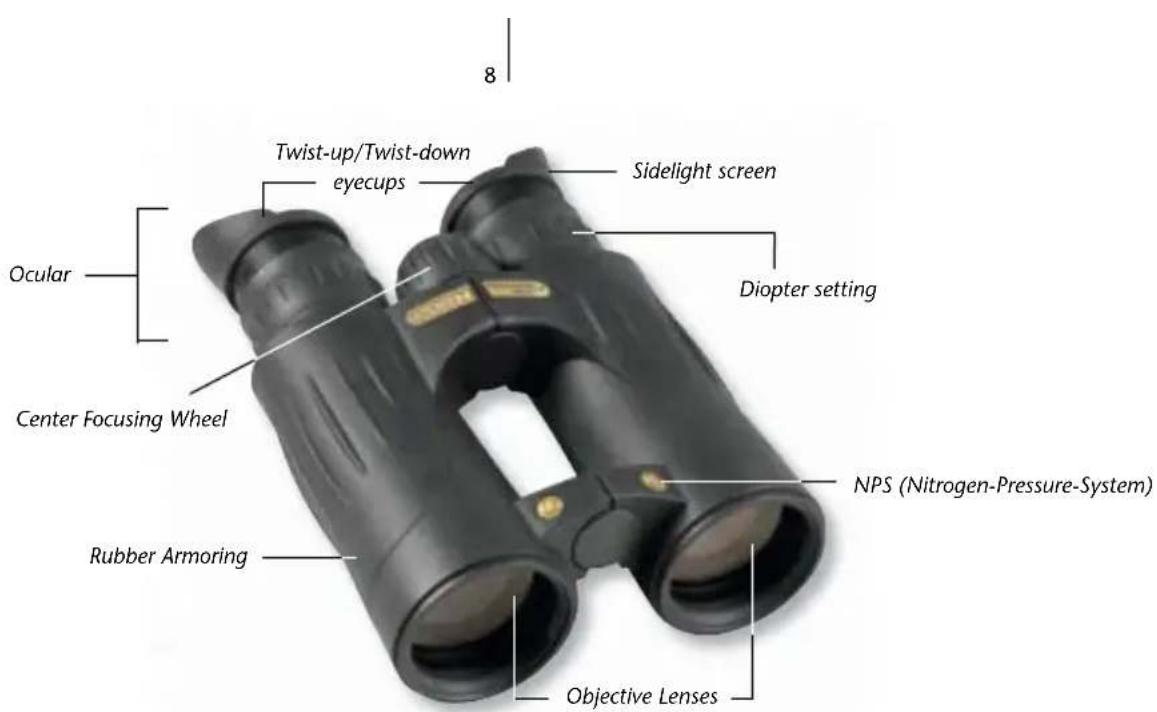
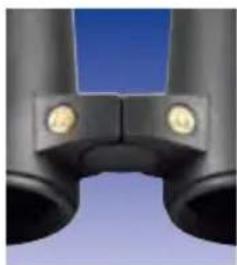
Serial number:
Every STEINER binocular has a serial number. This allows us to track when your binoculars were produced and allows you a way to identify your binoculars in case of loss or
theft. Serial numbers are located at the front objective (large) lens of the binocular on the center axis or on the underside of the center bridge for some smaller models. The serial number for the Peregrine XP is behind the right hand view objective lens towards the top of the binocular.
NPS
Many STEINER binoculars feature a Nitrogen-Pressure-System. This internal dry-nitrogen filling prevents internal fogging in case of extreme tem
perature changes. Only STEINER's two-valve technology provides a filling process that is gentle to all seals and
reduces the oxygen content within the binoculars to an absolute minimum.
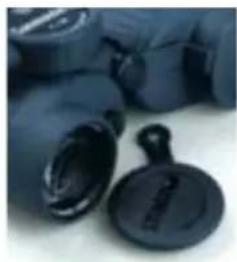
Lens Caps
The lens caps will protect your binocular from moisture and prevent dirt from collecting on the objective lenses. Using the caps will result in less frequent cleaning of the lenses.
Rubber Armoring:
All STEINER binoculars come standard with rhino tough rubber armor. Not only does this protect the binoculars from shock and damage, but it is also soft and comfortable in your
hands. Premium models feature STEINER's inno va tive NBR Longlife Armor formula, initially developed for increased durability under extreme conditions at sea and military applications. Clean all rubber armor only with damp cloth.

NANO Protection Optics®
Protects the optical lenses especially from environmental impacts. It is highly water-repellent (hydrophobic) and
allows for maximum visibility even in the worst weather conditions. NANO Protection Optics are featured on all STEINER XP models.
Rain and Dust Protection Cover
To prevent rainwater or dirt to collect on the oculars in adverse weather conditions most STEINER binoculars are equipped with a removable rainguard (1). All PeregrineXP models feature our innovative water-repellent Neoprene Rainguard (2). Installing the rainguard will also increase your binoculars' protection when stored.
The rainguard should be installed before installing the strap to the bino cular. Simply thread the strap through the attachments on the rainguard and then attach the strap.
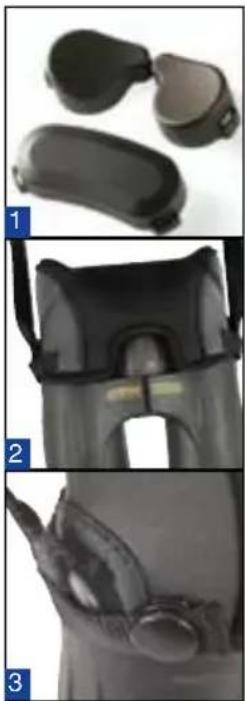
The closed loop on one side will prevent loss of the part. To install the Neoprene Rainguard on the Peregrine XP, slip the cover over the ocular side of your binoculars. As you attach the carrying strap make sure that it goes through the rainguard's loop (3). This way you can carry the strap around your neck and keep the oculars dry. Once you want to use the binoculars just open one of the rainguard's buttons and slip the cover off the binoculars. The rainguard is still attached to the
carrying strap on the other side and will prevent you from losing it by accident.
ENGLISH
Carrying Strap:
Your binocular is equipped with a carrying strap that might vary between our different model series. Please refer to your respective type similar to the images shown here:
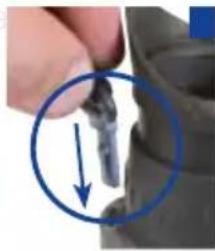
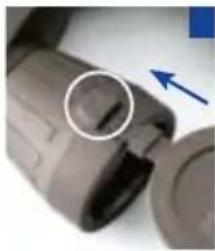
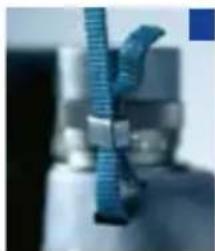
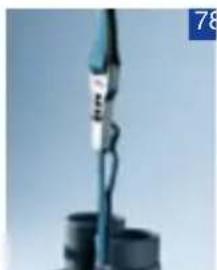
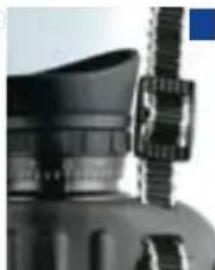
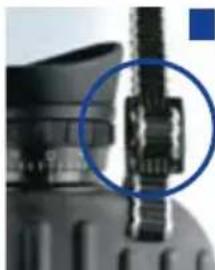
ClicLoc System (1 + 2) for fast removal and reattachment: To install the strap insert the clip - with the little nose pointing away from the binocular - into the side attachment right next to the ocular until you feel it positively click. The strap will hold firmly. To remove the strap push the circular shaped button or the ribbed release button. While pushing the button firmly pull the strap insert out of the attachment. The same technique is used to remove the lens caps on many models (3). Use the strap slider to fasten the caps when removed from the lenses (4 + 5) .
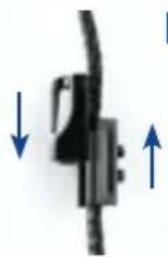
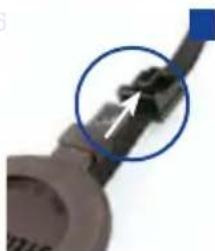
Without ClicLoc System (6-7): Place the binocular on a firm, level surface with the two slits in the rubber armoring facing you. Now thread one side of the strap through the buckle,
then through the top of the binocular body and out through the bottom (8). Now loop the strap upwards toward the buckle and thread the loose end through the back of the buckle (9).
Important!
Always keep the rainguard attached to the strap in order to prevent losing it by accident.
how to use the range reticle:
Many STEINER marine binoculars feature a precision reticle that helps users to determine the distance to objects. If you know the height or length of what you are glassing it's easy to determine the range. Two examples demonstrate how fast and easy it functions
Example: While boating, another boat is crossing your course. How far away is it? If you estimate the mast height of that boat to be 50 feet and the vertical scale reads 25, the distance results from the actual height (50) divided by the scale height (25) multi plied by 1000: 50 / 25 = 2 × 1000 = 2000 feet.
Another Example: You're making a landfall on an island at night. You see the high point of the island in the moonlight, which reads 1200 feet on your chart. In your reticle the height reads 20. Range: 1200 / 20 = 60 × 1000 making it 60,000 feet or approximately 11.4 miles away. Be certain that the initial point of reference is lined up at sea level to assure accurate measurement.

Formula for use of the Reticle:
Distance: actual height scale height × 1000
Actual Height: distance x scale height 1000
ENGLISH
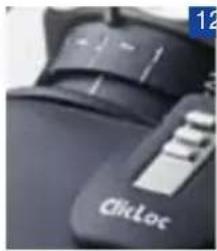
HOW TO USE THE COMPASS:
Not only did STEINER invent the compass binocular, our Commander XP models are the most advanced marine binoculars in the world. All 7x50 compass models feature the largest compass currently available in marine binoculars (Ø 40 mm) as well as illumination. This allows reading bearings even under extreme conditions. Your compass is pre-set for the magnetic field in the northern hemisphere (zone 2).
To read a bearing line up the object to which you would like to get the bearing on the vertical scale and read from the compass scale beneath. The bearing is illuminated by day light and can be illuminated by a touch of the button on the side of the compass at night.
Wearing a hat while using the compass binocular might cover the illumination window of the compass and can obstruct reading the bearing. Just push the illumination buton and you will instantly be able to read your current bearing.
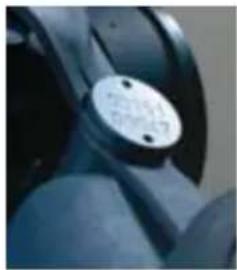
Batteries are used to illuminate the compass. Before you do anything else, try changing the batteries if the light does not work. Do the following: Use a coin to open the
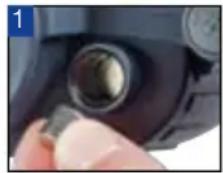
battery case by turning it counterclockwise. Exchange used round cell batteries with new ones.
Battery types:
7x30 models: 1x 3V CR 1225. 7x50 models: 2x 1,5V 350.
Place the new battery with plus pole towards the top into the battery compartment. Then close the cover by turning to the right (clockwise).
Note: The batteries used here have a non-magnetic property. This way, the compass is not affected and extremely precise navigation is guaranteed.
Never dispose of your product with other household waste.

Please inform yourself about the local rules on the separate collection of electrical and electronic products.
what really Matters:
One of the most important parameters of a high-performance binocular is its light transmission, which means the amount of light that ultimately reaches the human eye.
In low light conditions such as in rain, dusk or dawn a higher light transmission can make a decisive difference. However, light transmission does not always equal brightness. Each binocular has many different values for light transmission, depending upon the wavelength of light (color). Conventional binoculars tend to deliver limited peak values only at a certain wavelength (for example: blue) but lose other colors' transmission (for example: red) of up to 30% . The result of such transmission peaks, are color distortions - therefore high peak values will not improve your binoculars but are actually counterproductive for a true bright color image.
However behind this relatively simple sounding issue lies a substantial challenge. Optical lens coatings deliver high transmission values only for a very specific wavelength. At the same time, however, it can have adverse effects at other wavelengths on light transmission, image sharpness and depth of field. This is why higher quality binoculars require multiple layers of lens coating that together result in good performance for the most important colors.
ENGLISH
REVOLUTIONARY XP TECHNOLOGY:
With our new XP Technology - the result of many years of research - STEINER solved the puzzle. It allows for the first time to bring all key optical performance parameters to maximum levens at the same time, without compromise. To produce these complex optical coating systems our engineers have developed a new production processes and developed a unique high-vacuum, broad band coating chamber. The end result is a true optical revo lution - which you can now see.
Unique in light transmission and color fidelity:
The XP Technology's unique High Definition (HD) coating formula allows for light transmission that remains equally
high over the entire visible light range. This assures outstanding light transmission, high image contrast and truest color rendition. These are advantages that you will instantly see with your STEINER XP Binoculars.
Crystal clear image and outstanding depth of field:
At the same time this new optical system delivers a crystal clear, sharp image. The innovative lens design results in the highest depth of field ever seen in a roof-prism binocular. The benefit is less focusing.
Our revolutionary XP Optics are available with selected models only, such as the Peregrine XP, Commander XP, or Nighthunter XP.

GETTING THE MOST FROM YOUR STEINERS
Several factors determine the optical performance of a binocular. They perform to the maximum only when all these parameters are optimally calibrated and in harmony with each other.
Magnification
The value indicates how much closer an object appears through the binocular. The higher the magnification, the closer the object appears. However, similar to a photographic zoom lens, a higher magnification narrows the field of view. With an 8x44 binocular, objects will appear to be eight times closer than with your naked eyes.
Objective lens diameter
This number affects the objective lens surface area through which light enters the binocular. The larger the objective lens, the more light that is able to get into the binocular. Your image will be brighter in low light conditions. With an 8x44 binocular the objective lens diameter is 44 millimeters.
Field of view
The size of a binocular's field of view is stated in feet or as an angle and uses the value of reference at 1,000 yards. If your binoculars offer you a field of view of 390, then you will be able to see a 390 feet wide image at the distance of 1,000 yards.
Exit pupil
Look through your binoculars and then move it about 12 inches away from your eyes. You will see a bright circle within the oculars. This dictates how much light that gets to your eye. The exit pupil is measured in millimeters (mm) and is a crucial indicator for low-light performance of a binocular. A human pupil can open up to 7mm in low light and accordingly, binoculars that are used in low-light condi
tions should offer a large exit pupil.
Formula for Exit pupil:
Objective lens Diameter Exit pupil = Magnification
storage
When not using your STEINER binoculars you should store them in a cool dry spot. Avoid storage in spaces exposed to direct sunlight (i.e. in a car) or with extreme temperature changes.
Cleaning
Clean your binoculars by wiping the rubber armoring with a damp cloth. More stubborn dirt may require a light soap and water solution on a damp cloth. Clean the lenses of your binocular only when necessary and never use any acid based cleaning solutions. The NANO Protection Optics® of your XP binoculars repels dirt or water to form on the lenses - simply rinse with water or wipe the objective or ocular lenses gently with the cleaning cloth that came in the original box.
STEINER binoculars, guaranteed to satisfy:
The trust of our customers confirms the precision, robustness and functionality of our products. The 10/30 year limited warranty is valid for the worldwide use of our products and begins with the delivery of the binocular on the day of purchase.
The Warranty registration card must be completed and filled in at the time of purchase. Keep your original sales receipt as proof of purchase.
Important!
Keep your original sales receipt as proof of purchase.
For binocular repairs or for warranty service, please go to www.steiner-binoculars.com/service/service.html for specific return instructions or call (970) 356-1670 in USA or (905) 436-9077 in Canada, for specific return instructions. The binoculars should be shipped to: see back of Manual
Please understand that we cannot guarantee basic "wear and tear" and for expendable parts like rubber.
armoring, eyecups, carrying straps, bags or lens caps.
The following models feature
a 10-year warranty:
Predator® Pro + Predator® Xtreme
■ Merlin® + Merlin® Pro ■ Police
Rallye Marine
Safari®Pro Navigator+Navigator®Pro
Military/Marine 假 Observer
Tactical Outfitter
The following models feature
a 30-year warranty:
PeregrineXP
CommanderXP
Commander V
Nighthunter®XP
Wildlife Pro®


L'INNOVATION ENTRE DANS UNE NOUVELLE ERE
JUMELLES AVEC MISE AU POINT ULTRA PRECISE.
Prise comfort balancer®
c/o Burris Company Inc.
331 East 8th Street
Greeley, CO 80631
USA
Ph: 970-356-1670
Toll Free: (888) 228-7747
Fax: 970-356-8702
E-mail: info@steiner-binoculars.com
www.steiner-binoculars.com
Canada:
STEINER Binoculars
c/o STOEGER CANADA (1990) LTD
1801 Wentworth St Unit 1
Whitby Ontario
Canada
L1N 8R6
Ph: 905-436-9077
Fax: 905-436-9079
E-mail: info@stoegercanada.ca

STEINER is a Beretta Holding company
The Binocular-Specialists!


- A NEW ERA OF INNOVATION
- L'INNOVATION ENTRE DANS UNE NOUVELLE ERE
- TABLE of conTEnTs
- Congratulations,
- english
- Dear nature and OutDOoR enthustlast,
- aDjusting anD using yOur binOCulars
- hOW tO use the spOrts auto-FOCUS
- HOW TO USE THE MEMORY OCULARS
- Center FOCus instruCtOns
- Important!
- ERGONOMICALLY CONTOURED EYECUPS
- Eyeglass wearers
- Wearing contact lenses or no eye glasses
- ULTRA-SHARP
- FOCUSBINOCULARS
- CHANGING EYECUPS
- Comfort-Balance® Grip
- Serial number:
- NPS
- Lens Caps
- Rubber Armoring:
- NANO Protection Optics®
- Rain and Dust Protection Cover
- Carrying Strap:
- how to use the range reticle:
- Formula for use of the Reticle:
- HOW TO USE THE COMPASS:
- Battery types:
- what really Matters:
- REVOLUTIONARY XP TECHNOLOGY:
- Unique in light transmission and color fidelity:
- Crystal clear image and outstanding depth of field:
- GETTING THE MOST FROM YOUR STEINERS
- Magnification
- Objective lens diameter
- Field of view
- Exit pupil
- storage
- Cleaning
- STEINER binoculars, guaranteed to satisfy:
- The following models feature
- a 10-year warranty:
- a 30-year warranty:
- JUMELLES AVEC MISE AU POINT ULTRA PRECISE.
- Prise comfort balancer®
Brand : Steiner
Model : Commander 7x50
Category : Binoculars