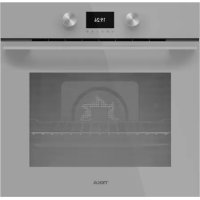
USER MANUAL HLB 8600 SM TEKA
User Manual
HLB / HLBP
ES PT EN
FR DE NL
EL
Spanish

Before using your oven for the first time, please read the installation and maintenance instructions for your oven carefully.
Depending on the model, the accessories included with your oven may vary from those shown in the images.
French

PROGRAM THE TEKA HYDROCLEAN® FUNCTION

WARNING
Description of the oven

1 Control panel 2 Lock/door switch (only for pyrolytic models) 3 Grill element 4 Tray runners 5 Grid shelf 6 Tray 7 Hinge 8 Inner pane 9 Air cooling outlet 10 Door switch
(only for NON-pyrolytic models) 11 Cabinet mounting 12 Light 13 Back wall panel 14 Fan 15 Oven seal 16 Door
Control Panel

1 Dial to scroll through the menus on the left side of the screen. Cooking mode dial. 2 Display screen. 3 Dial to scroll through the menus on the right side of the screen. Cooking settings dial. 4 Keys.

Switching the oven On/Off.

Access to the Personal Cooking Assistant (PCA)

Access to the timing and programming settings.

Altering the oven temperature.

Activation / Deactivation of the keypad / door lock depending on the model.

Confirm button.
Switching the inner light on/off.
Switching on and setting the time
When plugging the oven in for the first time, the logo will appear followed by 12:00 flashing on the screen.
You must set the time in order to use the oven.
To do this select the hour with the left control and the minutes with the right one.
Confirm the settings by pressing the Ⓞ button or waiting a few seconds.
An audible signal will be heard confirming that the time has been set on the screen.
To change the time:
With the oven in standby (start screen), hold the ⏻ button until the time begins to flash. Follow these steps to change the time:

WARNING
The sensitivity of the touch controls continuously adapts to the ambient conditions. Make sure the glass surface of the control panel is clean and free of any obstacles when plugging in the oven.
If the clock does not respond correctly when you touch the glass, unplug the oven for a few seconds and then plug it in again. Doing this causes the sensors to adjust automatically and they will react again to finger touch.
DEMO MODE (Special function for shop floors)
With the DEMO mode activated, you can control the oven without heating.
Activating this mode is recommended if the oven is to be plugged in at a showroom.
Activating DEMO mode
Before setting the clock, press the buttons simultaneously until "DEMO Mode ON" appears on the screen.
Then, set the time on the oven.
The word “DEMO” will be shown permanently on the panel and the oven will work as normal, but without heating up.
To deactivate DEMO mode, unplug the oven from the socket.

WARNING
In the event of a power failure, your electronic clock/timer settings will be erased.
The time 12:00 will appear.
You can set the time as described above.
If the oven door was locked before the power cut, the locked symbol will appear until it is unlocked.
This may take several minutes, depending on the temperature inside the oven, and during this period you cannot reset the time.
Once the door is unlocked, you can set the time as described above.
Description of the control panel
Information that you will find on the display screen of your oven and how this will be displayed is outlined below.
START SCREEN/STANDBY
This screen will appear when the oven is not working, but is still plugged in.
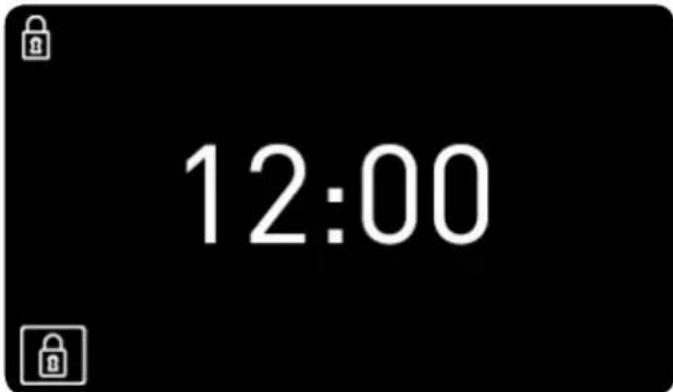
If the keypad or door locks are activated, the 🔒 and 🔒 symbols will appear on the left side of the screen.
If a timer has been programmed, the screen will stop showing the time and show a countdown, as can be seen in the image.

SELECTION SCREEN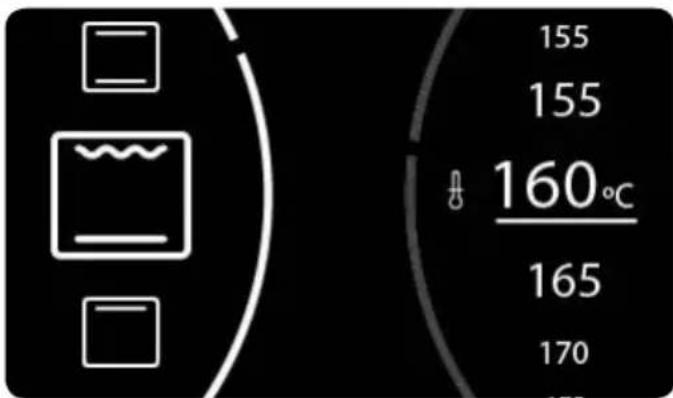
Selecting functions.
When selecting a cooking function, automatic recipe or timer programme the screen will be split into two sections:
LEFT SECTION. This part of the screen shows available cooking settings, automatic recipes and timer programmes.
To select any one of these, turn the left dial until the desired function appears and confirm the selection with the button OK (if you do not press any buttons, the oven will confirm this automatically after a few seconds).
RIGHT SECTION. This part of the screen shows the values that can be set according to the selected mode: temperature, weight, duration, finish time...
To select a value, turn the right dial until the desired value appears and confirm the selection with the button OK (if you do not press any buttons, the oven will confirm this automatically after a few seconds).
COOKING INFORMATION SCREEN
During cooking, the oven's status information appears on the screen around two central circles:
Inner temperature circle. In red. Represents the selected temperature on a scale.
Outer time circle.
When showing how long the food has been cooking, the circle is red. A white dot appears every 2 minutes.
When showing how much time is left for the cooking time to finish (countdown), the circle is blue. A white dot disappears every 2 minutes.
Inside these circles, the following cooking information is shown:
- Selected temperature. The symbol ° C flashes until the selected temperature is reached and whenever the oven is transmitting heat to the food.
2. Cooking time.
- If the timer has not been programmed, the elapsed cooking time is shown and a red circle appears around the time.
- If the timer has been set, the time left until cooking ends (countdown) is shown and the circle is blue.
- If the oven has been programmed but is set to delay (cooking has not yet started), the total programmed cooking time is shown.
3. Cooking settings or automatic recipe selection.
Outside the circles, the following information on additional settings is shown:
RIGHT SIDE OF THE SCREEN. If time settings have been programmed, information relevant to these is shown on the right side of the screen.
- Timer. Countdown with audible signal to indicate the cooking time has finished.
- → Finish time.
LEFT SIDE OF THE SCREEN. Information on activated safety settings.
- ☎ Keypad lock. The child-safety lock will light up when activated.
- Door lock. ONLY FOR PYROLYTIC MODELS. Will light up when the manual door lock is activated.
Traditional cooking functions
OVEN FUNCTIONS

ORMATION
For a description of the use of each of these functions, please consult the cooking guide included with your oven.

ON / OFF BUTTON

CONVENTIONAL

CONVENTIONAL WITH FAN

GRILL AND BOTTOM HEAT

MAXIGRILL

GRILL

BOTTOM HEAT

PIZZA

TURBO

ECO

SLOW COOKING

RISING DOUGH

DEFROSTING

HYDROCLEAN

PYROLYSIS (according to model)

Settings with fast preheating
COOKING WITH TRADITIONAL FUNCTIONS

Selecting functions.
Turn the oven on by pressing the ⏻ button.
Turn the left dial until the desired function has been reached.
The recommended temperature for the function chosen will then appear on the right.
If desired, the temperature can be changed by turning the right dial.
Confirm your choice with the OK button.
The oven will begin cooking.
At any time during the cooking process you can:
Change the cooking function by turning the left dial.
Change the cooking temperature by turning the right dial.
Programme the cooking timer or a duration/finish time by pressing the ⏻ button.
Modify programmed timers or duration/finish times by pressing the ⏻ button.

To set or modify a programme, consult the "Timed cooking programmes" section which can be found further on in this users manual.
AUTOMATIC FAST PREHEATING
The functions indicated incorporate fast preheating.
During fast preheating the ⬤ symbol lights up. We recommend waiting until this symbol goes away before putting in the food.
Cooking with the Personal Cooking Assistant (PCA)
AUTOMATIC OVEN RECIPES
| POULTRY |  |  |  |
 | DUCK | |
 | GOOSE | |
 | TURKEY | |
 | DRUMSTICKS | |
| MEAT | |  | SUCKLING PIG | |
 | BEEF | |
 | LAMB | |
 | CHOPS | |
| FISH | |  | HAKE | |
 | SALMON | |
| BREAD | |  | BREAD | |
 | BROWN BREAD | |
 | WHOLEMEAL BREAD | |
| PIZZA | |  | THICK CRUST | |
 | THIN CRUST | |
| DESSERTS | |  | CAKES IN A MOULD | |
 | LARGE FRUITCAKE | |
 | SMALL PIE | |
 | CAKES ON TRAYS | |
Recipes that require preheating the oven while empty.
○ Recipes that require turning the food.
COOKING WITH THE PERSONAL COOKING ASSISTANT
Turn the oven on by pressing the ⏻ button. Tap the 📋 button.
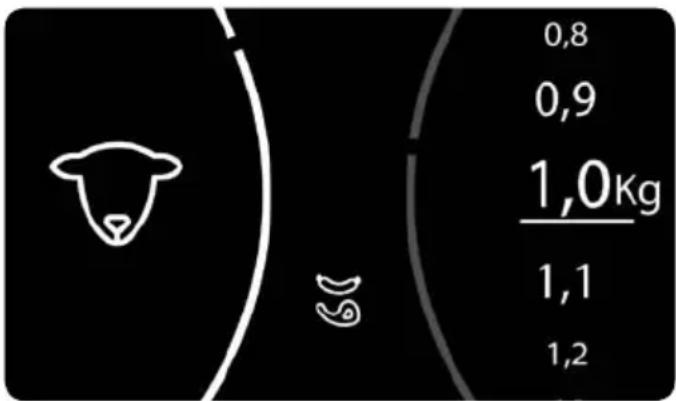
Turn the left dial until the type of food that you want to cook is shown.
Available recipes for the selected food type will appear on the left side of the screen. With the right dial select the desired recipe and confirm it with the OK button.
Then, on the right section of the screen, the information that the oven needs to programme the cooking will appear.
Depending on the recipe selected, the oven will ask you to key in:
THE WEIGHT OF THE FOOD: Select with the right dial and confirm with the OK button.
THE TEMPERATURE: Confirm the suggested temperature for the recipe or select another with the right dial and confirm with the OK button.
LEVEL OF BROWNNESS: For some recipes, you can select the finish:
HIGH: Well browned
MEDIUM: Medium browned
LOW: Lightly browned
When all settings have been chosen, confirm with the OK button.
The oven will start cooking and the cooking screen will appear in place of the selection screen, showing the following information:
Selected cooking temperature
Remaining cooking time
Recipe selected
When the cooking time has finished an audible signal will sound for approximately 90 seconds and the cooking symbol will flash on the screen. Press any button to turn off the audible signal.
The oven will turn off automatically.

In the first 10 minutes of cooking, you will be able to change the weight and level of brownness, or set a finish time.
After this time, these settings will be set and cannot be changed.
To change these cooking settings, tap the button 📋 and the oven will revert to the selection screen.
Follow the instructions above.
At any time during the cooking process you can:
Change the cooking temperature by touching the button ⏻. Confirm with the ⏻ button.
Set the timer by pressing the ⏻ button.
Change the existing timer by pressing the ⏻ button.
To set or modify a programme, consult the “Timed cooking programmes” section which can be found further on in this user manual.
PREHEATING WHILE EMPTY

For recipes indicated in the table by the symbol ⚠↑, the oven must be preheated before any food is put in.
When you select one of these recipes, the ⬆ symbol will appear on the screen as cooking begins. When the oven reaches the cooking temperature, the symbol will flash and an audible signal will sound to notify you that the food can now be put into the oven.
When the door is opened to put in the food the audible signal will switch off automatically, and the remaining time will show on the cooking screen.
TURNING FOOD

For recipes indicated in the table by the symbol ○, food must be turned during cooking.
The oven will notify you when to do this with an audible signal and the ⬽ symbol will appear on the cooking screen.
Opening the oven door to turn the food will cause the audible signal to turn off automatically.
Oven timer settings
TIMER OPTIONS
You can use the following timer options to programme cooking:
Timer: An audible signal will sound when the programmed time finishes. Cooking will NOT stop when the timer sounds. The timer can also be set when the oven is not cooking.

You can set a timer at any time regardless of whether or not the oven is cooking.
The rest of the timer options are available only when the oven is cooking.
→ Cooking Time: Allows you to select for how long the oven will cook.
An audible signal will sound at the end of the programmed time, the → symbol will flash and the oven will stop heating automatically.
Tap any button to stop the audible signal and turn the oven off.
→ Cooking Finish Time: Allows you to set the time for when the oven will stop cooking.
An audible signal will sound when the set time is reached, the → symbol will flash and the oven will stop heating automatically.
Tap any button to stop the audible signal and turn the oven off.
Starting delayed cooking (→) Cooking Duration + → Finish Time): Allows you to
programme the oven to start cooking automatically and switch off automatically once the programmed time has ended.

To programme this option, set the Cooking Duration and Finish Time consecutively.
You can access the programming options at any time during cooking.
Similarly, you can change an existing programme.

If you have chosen an automatic recipe, the oven will automatically determine the cooking time so this option will not be available.
However, you can:
Programme the Finish Time during the first ten minutes of cooking.
Set the timer at any time.
PROGRAMMING THE TIMER OPTIONS

Programming during cooking.
- Press the ⏻ button to access the timer options menu.
- Turn the left dial to select the desired programme option.
- Turn the right dial to choose the duration or finish time depending on the chosen option.

The oven will not allow you to select a finish time before the time it is now.
When programming a finish time, the centre section will show the current time to help you choose.
- Confirm your choice with the OK button.
- The cooking screen will then be shown again. You will be able to see programmed timers to the right of the central circle.
Safety instructions
CHILD SAFETY LOCK (CONTROL PANEL LOCK)
This feature can be activated at any time:
With the oven switched off. The child lock will not allow the oven to be switched on when the ① button is touched.
With the oven in use. If the feature is activated while the oven is cooking or set to delay, the keypad will not respond and it will not be possible to use the dials or change the cooking settings.
To activate this feature press and hold the button until you hear a beep and the symbol
appears on the screen. The control panel is now locked.
To deactivate this feature touch and hold the 🔒 button again until you hear a beep and the 🔒 symbol disappears.
LOCKING THE DOOR MANUALLY
Only available for pyrolytic models.
For pyrolytic models, the child safety lock includes a door lock which prevents it from being opened.
To open the door, the child safety lock must be deactivated following the above-mentioned instructions.

WARNING
Before activating the lock, be sure that the oven door is closed properly. If the door is not properly closed, it will not lock, an audible signal will sound and the symbol will flash on the screen 🔒.
If this happens, close the door until the warning disappears and the lock works.
If you do not want to lock the door, deactivate the child safety lock.
Teka Hydroclean® function
This feature helps to clean any grease and other deposits from the sides of the oven.
Avoid letting deposits build up to make cleaning easier. Clean the oven often.
PROGRAMMING THE TEKA HYDROCLEAN® FUNCTION

WARNING
Do not pour water into the hot oven as this can damage the enamel.
Always run the cycle when the oven is cold. Results may be affected if you do so while the oven is too hot and in addition can damage the enamel.
First remove the trays and all accessories from inside the oven, including the tray runners and telescopic guide rails.
To clean these, follow the instructions in the Installation and Maintenance booklet that comes with your oven.
- With the oven cold, spread a cloth on the bottom of the oven.

- Slowly pour 200 ml of water onto the bottom of the oven.

For best results, add a teaspoon of mild washing-up detergent to a glass of water before pouring it onto a cloth.
- Switch the oven on, turning the left dial to select the ⏻ function and confirm with the Ⓞ button.

- An audible signal will be heard confirming that the Teka Hydroclean® feature has been activated.
On the screen the ⏻ symbol will appear as will the remaining time the cycle needs to finish.


Important
The duration of this cycle cannot be changed. To stop before the completion of the cycle, turn the oven off by pressing the button ①.
- When the cycle ends, the oven will turn itself off, an audible signal will sound and the symbol will flash quickly.

Important
Do not open the oven door until the Hydroclean® cycle has ended completely.
The cooling cycle is necessary for this feature to work properly.
- Press any button with your fingertip to stop the audible signal and to turn off the symbol.
- The oven will turn off automatically.
- The oven is ready for dirt deposits and excess water to be removed with the cloth.
The Hydroclean® feature works at low temperatures. However, cooling times can vary according to room temperature.

Warning
Before touching the inner surface of the oven directly, make sure that the temperature is not too hot.
If a deeper clean is required after running the Hydroclean® feature, use neutral detergents and non-abrasive sponges.
Pyrolytic self-cleaning function

WARNING
Before carrying out the pyrolytic cleaning cycle, carefully read the safety instructions found at the beginning of the Installation and Maintenance booklet.
This feature allows you to run the pyrolytic cleaning cycle during which built-up grease deposits are burned off by the high temperatures inside the oven.
Generally, a pyrolytic cycle is recommended after every 4-5 uses; choose the most suitable programme depending on how dirty your oven is. For very dirty ovens, choose a longer cycle.
During the pyrolytic cycle the light inside the oven will remain off.
PROGRAMMING THE PYROLYTIC FUNCTION

IMPORTANT
Before carrying out the pyrolytic cleaning cycle, remove all accessories and dishes from the oven, including the shelf runners and/or telescopic guide rails. To clean these follow the instructions in the Installation and Maintenance booklet that comes with your oven.

WARNING
Clean any spillages or excess dirt, as during the pyrolytic cleaning cycle these can ignite and become a fire hazard.

WARNING
Before running the pyrolytic cycle, ensure that the oven is properly closed.
- Turn the oven on and select the Pyrolysis feature using the left dial.

- Use the right dial to choose the most suitable pyrolytic programme depending on how dirty your oven is:
P1: Gentle pyrolysis. Lasts 1 hour.
P2: Medium pyrolysis. Lasts 1.5 hours.
P3: Intensive pyrolysis. Lasts 2 hours.
- Confirm your choice with the OK button. Immediately afterwards, the door will lock automatically.

WARNING
If the door is not properly closed, the pyrolysis cycle will not begin. An audible signal will sound and the symbol will flash on the screen 🔒.
If this occurs, close the door properly to activate the lock and start the pyrolytic cycle.
- When the door is locked the 🔒 symbol will light up on the clock display and the time remaining until the end of the cycle will be shown.


Important
The oven is programmed and the pyrolytic cleaning cycle is under way.
In the first 10 minutes you can delay the start of the pyrolysis by programming an end time. To do so, press the button ⏻ to access the timer options menu. Once the end time has been selected confirm it using the button OK.
During the pyrolytic cycle you cannot select a different timer option. If you wish, you can activate the child safety lock.
Do not try to open the oven door as this may interrupt the cleaning process.
- When the pyrolytic cleaning cycle ends, an audible signal will sound, the 📄 symbol will flash and 00:00 will appear on the screen.
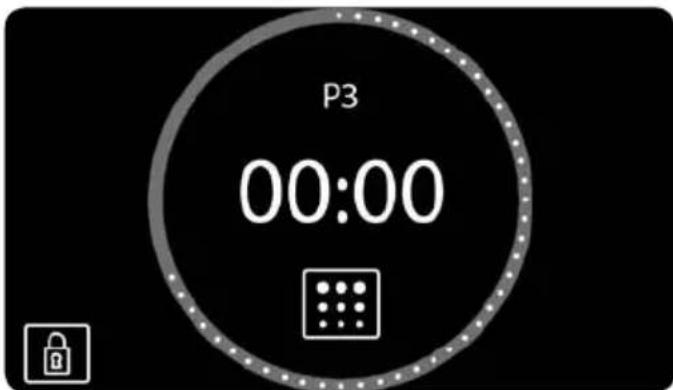
- Press any key to disable the audible signal.
- The oven will turn off automatically.
- The oven's heating process has ended, however the oven is extremely hot and cannot be used.
The cooling motor will operate and the symbol will remain on until the oven cools down.

Important
The cooling process may vary according to room temperature because of the high temperatures inside the oven.
- Once your oven has cooled the 🔒 symbol will go off and the door will unlock.
- Open the oven door and wipe the inside with a damp cloth, cleaning up the ash produced during the cleaning cycle. Hard-to-reach areas in the oven will need to be cleaned with a non-metal fibre scourer.
- Once the oven is clean, do not forget to replace the runners and accessories.
- The oven is now ready to be used again.

Important
If you have any problems with the programming and use of this feature, consult the Installation and Maintenance booklet included with your oven.
CANCELLING THE PYROLYSIS
Pyrolysis is an automatic function and as such, can only be activated using the timer programme. To cancel the pyrolysis the oven has to be reset, following the instructions below:
- Press the Ⓐ button.
The pyrolysis will stop.
- Two situations can arise in relation to the inside temperature of the oven:
a) Dangerous inside temperature: In this case, the door will remain locked until the temperature falls to a safe level. The symbol will appear on the screen.
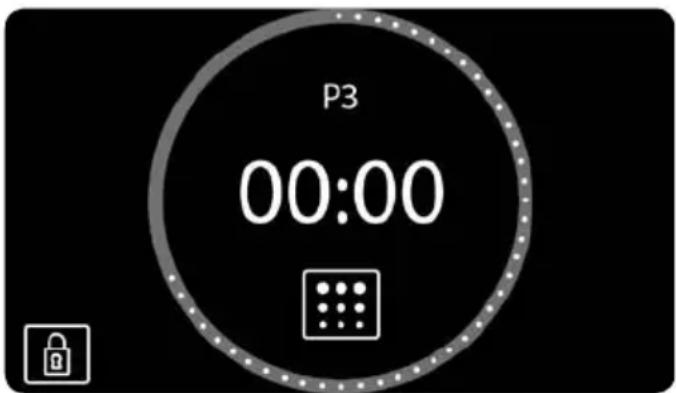
When the door is unlocked and can be opened, the 🔒 symbol will disappear and the time will be shown again on the clock display.
b) Safe inside temperature: If the inside temperature of the oven is safe, it will unlock immediately.
- Safe inside temperature: If the inside temperature of the oven is safe, it will unlock immediately and the oven will revert to the standby screen.

Special Functions
SABBATH FUNCTION
Only available in certain models.
The Sabbath function permits a constant temperature to be maintained inside the oven for a maximum of 72 hours, allowing food to be warmed up in the oven during this time.
TO USE THE SABBATH FUNCTION
Switch on the oven by pressing Ⓐ.
Turn the left knob until function ⭕ is highlighted.
If you wish, you can change the temperature by turning the right control in a temperature range from 60 °C to 95 °C.
Confirm the selection by pressing OK.
The oven will start to heat up and the control panel lock will be activated.
During the Sabbath function, the interior oven light remains off.
The Sabbath function cannot be timed. The time is displayed on the screen.
The control panel remains locked and the selected temperature cannot be modified.
To switch off the Sabbath function, switch off the oven by pressing Ⓞ.