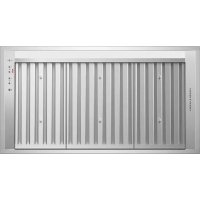
HPB361912 - Fan Fisher & Paykel - Free user manual and instructions
Find the device manual for free HPB361912 Fisher & Paykel in PDF.


| Product type | Built-in range hood |
| Brand | Fisher & Paykel |
| Model | HPB361912 |
| Width | 91.4 cm (36 inches) |
| Weight | Approximately 30 kg (depending on model) |
| Power supply | 120 V, 60 Hz |
| Number of speeds | 5 speeds |
| Lighting | Adjustable LED |
| Thermal protection | Heat sensor with automatic start/stop |
| Delayed shut-off | Up to 25 minutes |
| Remote control | Included on some models or optional |
| Filter cleaning reminder | Red indicator light |
| Filters | Dishwasher safe, removal by handles |
| Surface cleaning | Soft cloth, warm water and mild detergent |
| Installation | By a qualified professional, comply with local codes |
| Recommended use | General residential ventilation only |
| Exhaust | To the outside with metal duct |
| Filter dimensions | 200 mm x 225 mm or 400 mm x 300 mm depending on model |
| Warranty | See provided care and warranty manual |
| Country of origin | New Zealand (brand) |
Frequently Asked Questions - HPB361912 Fisher & Paykel
User questions about HPB361912 Fisher & Paykel
0 question about this device. Answer the ones you know or ask your own.
Ask a new question about this device
Download the instructions for your Fan in PDF format for free! Find your manual HPB361912 - Fisher & Paykel and take your electronic device back in hand. On this page are published all the documents necessary for the use of your device. HPB361912 by Fisher & Paykel.
USER MANUAL HPB361912 Fisher & Paykel
Introduction 3
Safety and warnings 4
Special features 8
For best performance 9
Operating instructions 10
Cleaning and maintenance 14
Troubleshooting 17
Parts and accessories 18
Service and warranty 19
IMPORTANT!
SAVE THESE INSTRUCTIONS
The models shown in this User guide may not be available in all markets and are subject to change at any time. For current details about model and specification availability in your country, go to our website fisherpaykel.com or contact your local Fisher & Paykel dealer.
Registration
Register your product with us so we can provide you with the best service possible.
To register your product visit our website: fisherpaykel.com
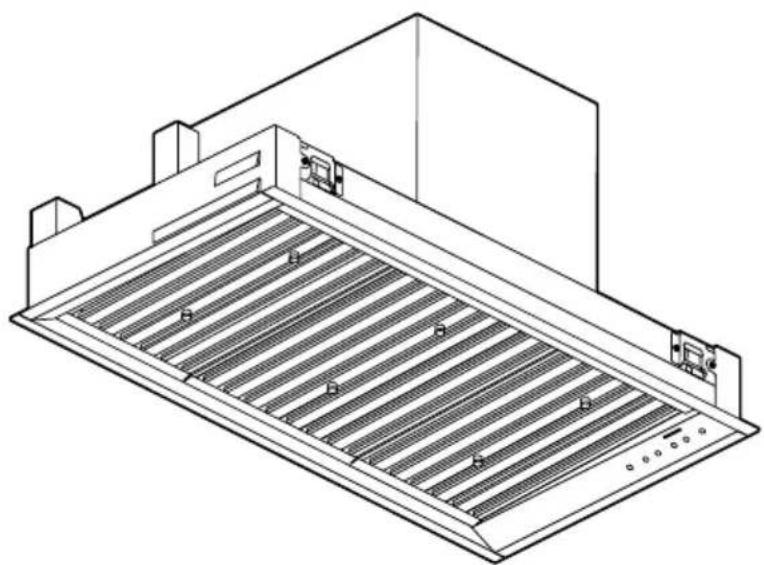
Welcome to the family of Fisher & Paykel appliances. Our team has spent thousands of hours designing, engineering and testing this insert range hood to ensure you get the perfect product for your home. For more information on your product please visit fisherpaykel.com or contact our customer care team.
natural_image
Technical line drawing of a mechanical ventilation duct with grating and mounting brackets (no text or symbols)! WARNING!
Weight Hazard
The appliance is heavy. Please ensure adequate care is taken when installing the appliance to prevent personal injury.
Weight of the products are:
HPB3011-4 = 36lb (17kg)
HPB3011-6 = 36lb (17kg)
HPB3019-6 = 46lb (21kg)
HPB3611-4 = 41lb (19kg)
HPB3611-6 = 41lb (19kg)
HPB3619-6 = 51lb (23kg)
HPB3619-12 = 68lb (31kg)
HPB4819-12 = 77lb (35kg)
WARNING!
Electric Shock Hazard
Always disconnect the appliance from the mains power supply before carrying out any maintenance or repairs.
Installation work and electrical wiring must be done by qualified person(s) in accordance with all applicable codes and standards, including fire-rated construction.
Failure to do so can result in death, electric shock, fire or injury to persons.
IMPORTANT SAFETY INSTRUCTIONS
READ THE ENTIRE SET OF INSTRUCTIONS BEFORE INSTALLING OR USING THIS APPLIANCE. A copy of the user guide and installation guide for this product can also be found at fisherpaykel.com.
- CAUTION: For general ventilating use only. Do not use to exhaust hazardous or explosive materials and vapors.
-
WARNING: To reduce the risk of fire, electric shock, or injury to persons, observe the following:
-
Use this unit only in the manner intended by the manufacturer. If you have questions, contact the manufacturer. For residential use only.
- Before servicing or cleaning unit, switch power off at service panel and lock the service disconnecting means to prevent power from being switched on accidentally. When the service disconnecting means cannot be locked, securely fasten a prominent warning device, such as a tag, to the service panel.
- Installation work and electrical wiring must be done by qualified person(s) in accordance with all applicable codes and standards, including fire-rated construction.
- Sufficient air is needed for proper combustion and exhausting of gases through the flue (chimney) of fuel burning equipment to prevent back drafting. Follow the heating equipment manufacturer's guideline and safety standards such as those published by the National Fire Protection Association (NFPA), and the American Society for Heating, Refrigeration and Air Conditioning Engineers (ASHRAE), and the local code authorities.
- When cutting or drilling into wall or ceiling, do not damage electrical wiring and other hidden utilities.
- Ducted fans must always be vented to the outdoors.
-
This unit must be grounded.
-
CAUTION: To reduce the risk of fire and to properly exhaust air, be sure to duct air outside. Do not vent exhaust air into spaces within walls or ceilings or into attics, crawl spaces, or garages.
- WARNING: To reduce the risk of fire, use only metal ductwork.
- WARNING: To reduce the risk of fire or electric shock, do not use this fan with any solid-state speed control device.
-
WARNING: To reduce the risk of a range top grease fire:
-
Never leave surface units unattended at high settings. Boilovers cause smoking and greasy spillovers that may ignite.
- Heat oils slowly on low or medium settings.
- Always turn hood ON when cooking at high or when flambéing food (ie Crepes Suzette, Cherries Jubilee, Peppercorn Beef Flambé)
- Clean ventilating fans frequently. Grease should not be allowed to accumulate on fan or filter.
- Use proper pan size. Always use cookware appropriate for the size of the surface element.
- WARNING: To reduce the risk of injury to persons in the event of a range top grease fire, observe the following:*
- Smother flames with a close-fitting lid, cookie sheet, or metal tray, then turn off the burner. Be careful to prevent burns. If the flames do not go out immediately, evacuate and call the fire department.
- Never pick up a flaming pan — you may be burned.
- Do not use water, including wet dishcloths or towels—a violent steam explosion will result.
-
Use an extinguisher only if:
-
You know you have a Class ABC extinguisher, and you already know how to operate it.
- The fire is small and contained in the area where it started.
- The fire department is being called.
- You can fight the fire with your back to an exit.
- WARNING: Unplug or disconnect the appliance from the power supply before servicing or cleaning.
IMPORTANT!
- This device complies with Industry Canada's licence-exempt RSSs. Operation is subject to the following two conditions:
(1) This device may not cause interference; and
(2) This device must accept any interference, including interference that may cause undesired operation of the device.
FCC CAUTION: Any changes or modifications not expressly approved by the party responsible for compliance could void the user's authority to operate the equipment.
This device complies with Part 15 of FCC Rules. Operation is Subject to following two conditions:
(1) This device may not cause harmful interference, and
(2) This device must accept any interference received including interference that cause undesired operation.
This equipment has been tested and found to comply with the limits for a Class B digital device, pursuant to part 15 of the FCC Rules. These limits are designed to provide reasonable protection against harmful interference in a residential installation. This equipment generates, uses and can radiate radio frequency energy and, if not installed and used in accordance with the instructions, may cause harmful interference to radio communications. However, there is no guarantee that interference will not occur in a particular installation. If this equipment does cause harmful interference to radio or television reception, which can be determined by turning the equipment off and on, the user is encouraged to try to correct the interference by one or more of the following measures:
- Reorient or relocate the receiving antenna.
- Increase the separation between the equipment and receiver.
- Connect the equipment into an outlet on a circuit different from that to which the receiver is connected.
- Consult the dealer or an experienced radio/TV technician for help.
This equipment complies with FCC radiation exposure limits set forth for an uncontrolled environment. This equipment should be installed and operated so there is at least 8 inches (20cm) between the radiator and your body. This device and its antenna(s) must not be co-located or operated in conjunction with any other antenna or transmitter.
IC Notice
This device contains licence-exempt transmitter(s)/receiver(s) that comply with Innovation, Science and Economic Development Canada's licence-exempt RSS(s). Operation is subject to the following two conditions:
(1) This device may not cause interference.
(2) This device must accept any interference, including interference that may cause undesired operation of the device.
This equipment complies with IC RSS-102 radiation exposure limits set forth for an uncontrolled environment. This equipment should be installed and operated so there is at least 8 inches (20cm) between the radiator and your body. This device and its antenna(s) must not be co-located or operated in conjunction with any other antenna or transmitter.

WARNING: Chemical Burn Hazard. Keep batteries away from children.
This product contains a lithium button/coin cell battery. If a new or used lithium button/coin cell battery is swallowed or enters the body, it can cause severe internal burns and can lead to death in as little as 2 hours. Always completely secure the battery compartment. If the battery compartment does not close securely, stop using the product, remove the batteries, and keep it away from children. If you think batteries might have been swallowed or placed inside any part of the body, seek immediate medical attention. Even used cell batteries may cause injury so ensure they are kept away from children and disposed of properly.
READ AND SAVE THESE INSTRUCTIONS
Remote control
Selected models have a remote control provided with the range hood. This remote can also be purchased as an optional accessory for other models of this range hood. The remote is designed to make your range hood easier to use. It allows you to adjust the fan speed and brightness of lighting without touching the range hood.
Clean filter reminder
The clean filter reminder light will illuminate to remind you to clean the filters. Refer to the ‘Cleaning and maintenance’ section of this user guide for details of how to clean your filters.
Delayed shut off
This feature allows you to delay the shut off on the range hood for up to 25 minutes. This enables you to continue to remove steam and cooking odors after cooking is complete.
Heat guard
When excessive heat is detected in the cooking area, a sensor will automatically turn the fan on at speed 5 and illuminate both fan speed buttons on the control panel. Once the heat decreases the fan speed will gradually reduce and return to the original fan speed selected.
This range hood should be turned on for a few minutes before cooking in order to establish air currents upward through the range hood. This will also enable hot air removal from your kitchen and keep the range hood surface cool. When heat, smoke, moisture, grease and cooking odors are produced, they will be carried outside instead of drifting into other rooms.
Use the low fan speeds for normal use and the higher fan speeds for high heat, strong odors or fumes.
Range hood width
- The range hood width is recommended to be no less than the width of the cooktop.
• A wider range hood can be used to increase the capture area if space is not restricted. - The range hood should ideally be centered above the cooktop for proper performance.
Induction cooking considerations
Induction cooktops use energy efficient technology that only heats the contents of a cooking pot. Unlike gas or traditional electric cooktops, the surrounding air does not get heated when using an induction cooktop. As a result, range hood filters, splashbacks and surrounding cabinetry do not get warmed up, increasing the likelihood of condensation on these cooler surfaces. Other factors like ambient temperature, humidity, natural ventilation of the room, size of the cookware and how the induction cooktop is being used also influence condensation.
For example, aggressive boiling on high cooktop heat settings like PowerBoost increases the rate at which water is evaporated, increasing the likelihood of condensation. It is important to understand that neither the range hood nor the induction cooktop are faulty as a result of this phenomenon.
Condensation can be minimized by:
• Installing the range hood at the maximum height above the cooktop.
• Using the range hood on a lower speed setting when boiling.
• Using the induction cooktop on a lower heat setting when boiling.
- Switching the range hood on 5 minutes before cooking and letting it run for at least 5 minutes after cooking. Refer to the 'Delayed shut off' section for details on how to use the timed shut off feature of this range hood.
Gas cooking considerations
Using a powerful gas cooktop or multiple gas burners operating at the same time can cause the range hood surfaces to become hot. This effect can be reduced by:
- Using the maximum speed setting to enable hot air to be extracted quickly.
- Installing the range hood at the maximum recommended height.
- Using the maximum speed setting to enable hot air to be extracted quickly. - Installing the range hood at the maximum recommended height.
Consult the cooktop installation and user guide for details on the installation height of the range hood.
OPERATING INSTRUCTIONS
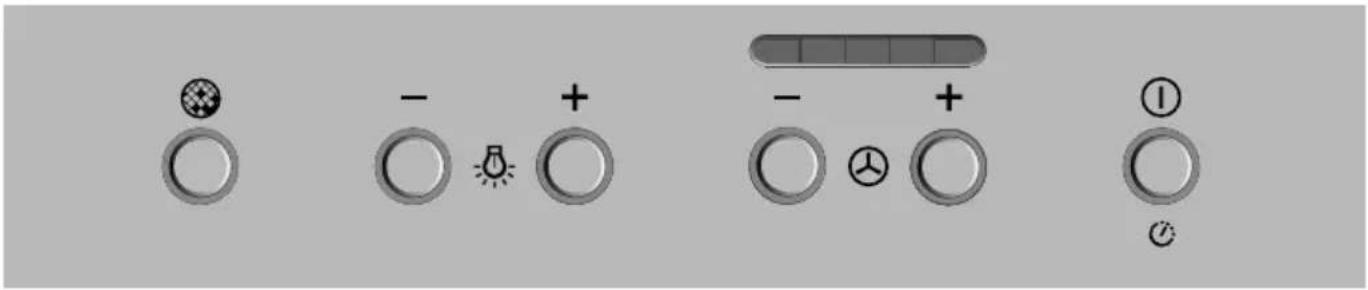
RANGE HOOD CONTROL PANEL FEATURES
 | Power Turns your range hood ON and OFF. Also allows you to delay shut off. | |
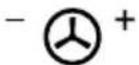 | Fan speed Allows you to change the fan speed. | |
| 1 | 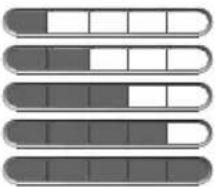 | Fan speed indicator Indicates the current speed of the fan. 1 is the lowest fan speed and 5 the highest. |
| 2 | ||
| 3 | ||
| 4 | ||
| 5 | ||
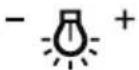 | Light Allows you to adjust the level of lighting. | |
 | Clean filter reminder Button will illuminate red indicating when your filters require cleaning. |
Power
On/Off
Use the ① button to turn your range hood ON and OFF. When you turn your range hood on it will remember the last setting used for your fan speed and lighting level with the following exceptions:
• If the fan was off, it will turn on at fan speed 1.
• If the lighting was off, it will turn on at the lowest lighting level.
Note: The fan and lighting can be turned off independently.
Delayed shut off
To use delayed shut off:
- Press and hold the I button, the light around the button will blink.
- The fan speed will operate for 5 minutes, starting at the current speed and then at each decreasing speed before turning OFF (the fan will stop and the light will go out).
- To increase the delayed shut off time, press and hold the ① button again, you will hear a beep. Each beep indicates the delayed shut off time has been increased by 5 minutes. The maximum delayed shut off time is 25 minutes.
To cancel delayed shut off:
- Press the ⏻ button once.
Fan speed
• To turn the fan ON, press the+button.
- Press the +button to increase the fan speed.
- To go straight to the MAX fan speed, press and hold the + button. The fan will go straight to speed 5.
- To decrease the fan speed press the—button.
• To turn the fan OFF, press and hold the—button.
Light
• To turn the light ON, press the+button.
- Press the +button again to increase the brightness of the lighting.
- Press and hold the +button to go straight to the brightest lighting.
- Press the —button to decrease the brightness of the lighting.
- To turn the light OFF, press and hold the—button.
Clean filter reminder
The clean filter 📋 button will blink red for 3 seconds when the range hood is turned on, then remain illuminated red until the filters are cleaned and the clean filter reminder is reset.
To reset the clean filter reminder:
Once the filters have been cleaned and replaced in the range hood the clean filter reminder should be reset.
- Press and hold the button.
Note: Refer to 'Filter cleaning' for details on how to remove and replace your filters.
Remote control (selected models or optional extra)
Selected models have a remote control provided with the range hood. This remote can also be purchased as an optional accessory for other models of this range hood. The remote is designed to make your range hood easier to use. It allows you to adjust the fan speed and brightness of lighting without touching the range hood.
| REMOTE CONTROL FEATURES | ||
 | Fan speed Allows you to adjust the speed of the fan. | |
 | Light Allows you to adjust the level of lighting. | |
 | Battery indicator Illuminates when the battery is running low. | |
 | Signal indicator | Indicates if the remote control is paired with the range hood. |
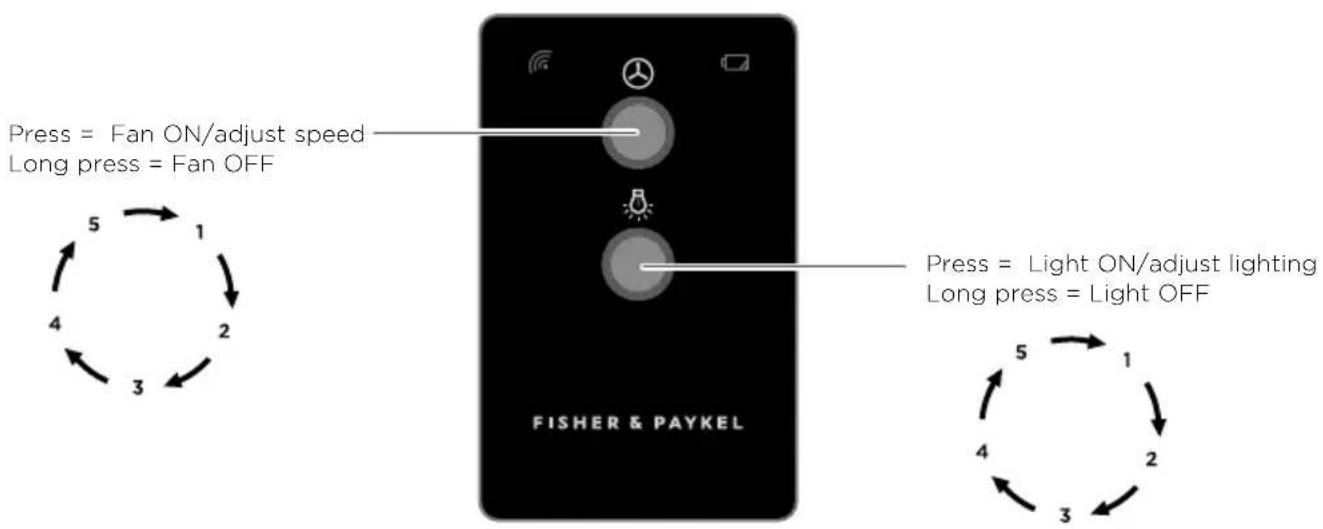
Fan speed
• To turn the fan ON, press the 🔊 button once.
- Press the ⏻ button to increase/decrease the fan speed. The fan speed will increase with each button press until it reaches fan speed 5, at the next button press it will return to fan speed 1.
• To turn the fan OFF, press and hold the button.
Light
• To turn the light ON, press the button once.
- To increase/decrease the brightness press the button. The light brightness will increase with each button press until it reaches its highest level, at the next button press it will return to the lowest level.
• To turn the light OFF, press and hold the button.
Battery indicator
The battery indicator will illuminate when the battery is running low and needs to be replaced.
Signal indicator
The signal indicator will illuminate when your range hood is paired with the remote. The remote can then be used to control the fan speed and brightness of the lighting.
Remote pairing
- For selected models your remote will be paired with your range hood in the factory prior to delivery.
- All other models, where the remote has been purchased as an optional extra, the remote will be paired by your Fisher & Paykel trained service technician after they install the remote receiver in your range hood.
WARNING!
- Before servicing or cleaning your range hood, switch the power off at the control panel and disconnect the power to prevent power from being switched on accidentally.
- Allow the appliance to cool after the power has been turned off before servicing.
IMPORTANT!
- Wear gloves to protect against sharp edges.
Clean your range hood regularly to avoid the build-up of grease. Grease deposits are corrosive and may damage the range hood. Use warm water with a mild liquid detergent and a clean soft cloth to wipe down all surfaces of the range hood.
Do NOT use the following to clean your range hood, they will damage and/or discolor the surfaces:
• Corrosive chemicals.
- Abrasive cleaning products.
• Citrus-based cleaning products.
• Hard brushes and steel wool.
Note: In areas of high humidity or coastal environments, cleaning should be carried out more frequently.
Filter cleaning
IMPORTANT!
- The filters can cause damage and/or injury if dropped. Ensure you use two hands to remove and replace the filters.
To remove the filters:
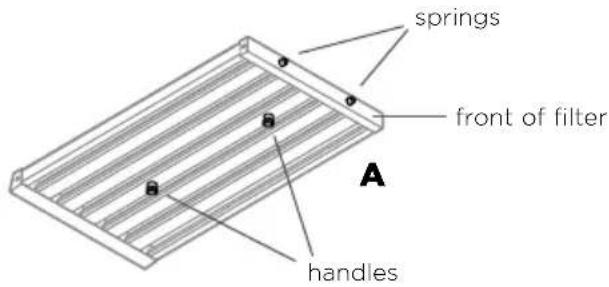
① Use the handles to hold the filter (refer to A).
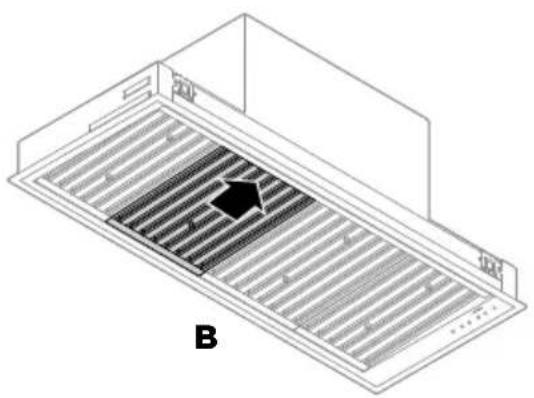
② Pull the filter toward you, pushing against the springs to release the back of the filter from the range hood (refer to B).
③ Lower the back of the filter and remove from the front of the range hood (refer to C).
natural_image
Isometric technical diagram of a ventilation duct with slats and a labeled component (B), no text or symbols present.
natural_image
Diagram of a ventilation duct system with labeled component 'c' and directional arrows indicating flow (no text or symbols beyond label)Clean the filters at least once a month. Filters may need to be cleaned more frequently depending on the cooking methods used and frequency of use. The clean filter reminder will illuminate to remind you to clean the filters.
To clean your filters:
- Remove the filters with two hands.
- Wash with a mild liquid detergent and hot water or in the dishwasher. If washed in the dishwasher, the filters should be placed in an upright position.
• After cleaning and drying, refit the filters.
Note: Do NOT operate the range hood without the filters in place. The filters help prevent damage to the inside of the range hood.
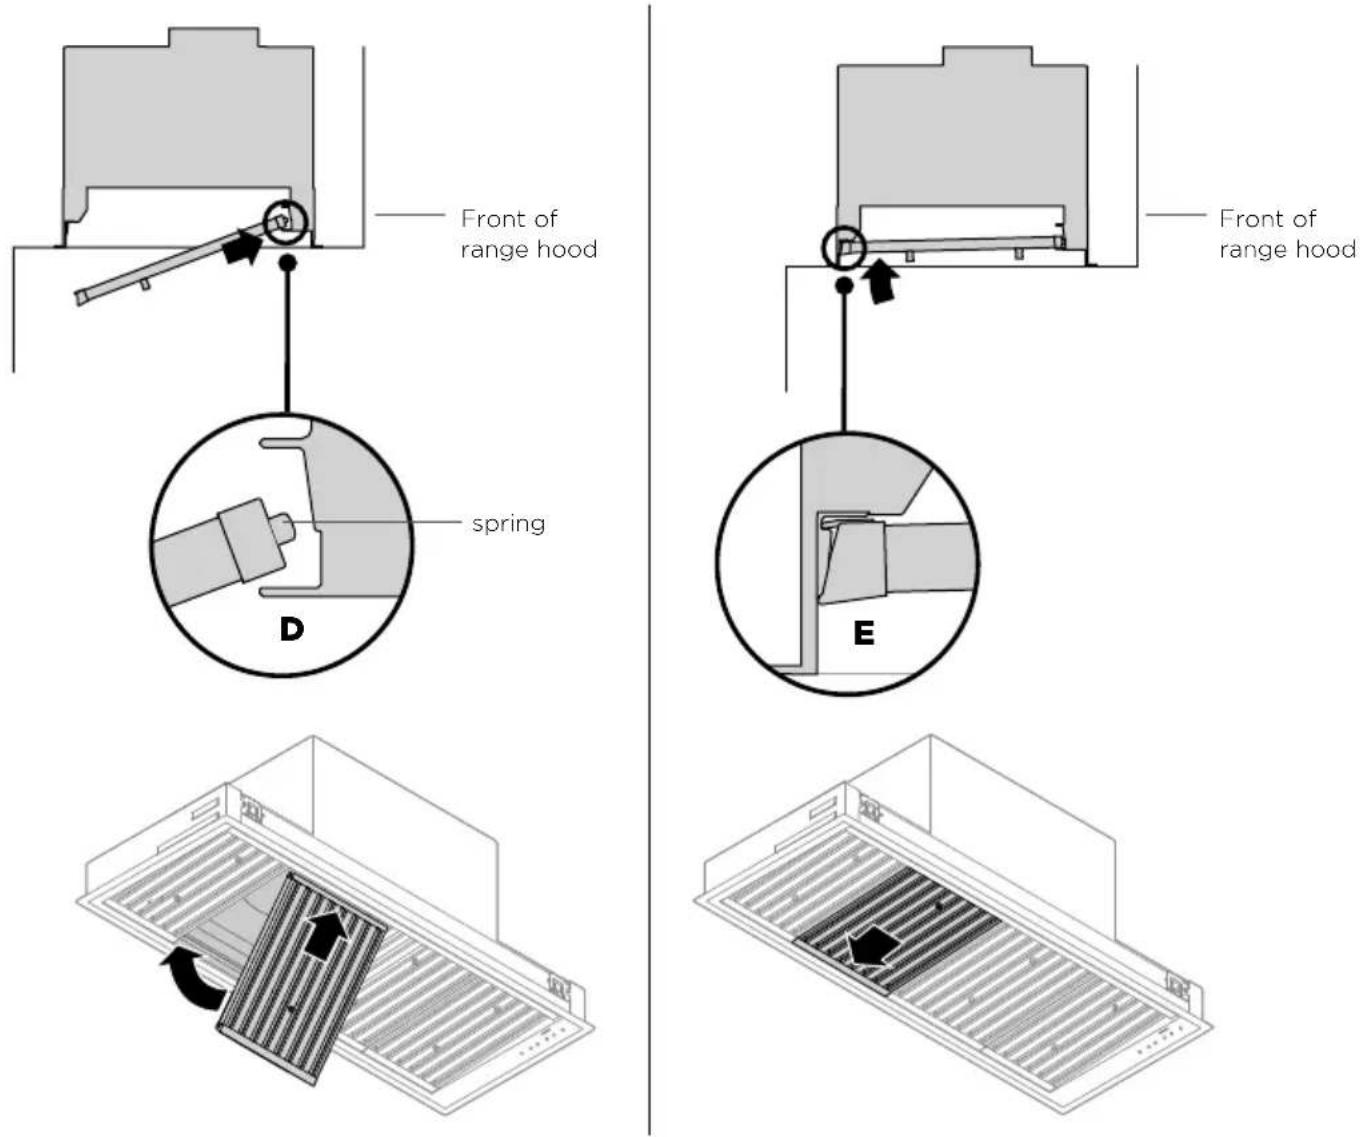
To replace the filters:
① Place the front end of the filter on the ledge above the LED strip, against the inside front of the range hood (refer to D), pull the filter toward you and push the back up into the range hood (refer to E) until it firmly seats into place.
Replacing the LED lights
To replace the LED lights please contact your Fisher & Paykel trained and supported service technician. Refer to fisherpaykel.com or your separate service and warranty book provided with your range hood for contact details.
| PROBLEM POSSIBLE CAUSES WHAT TO DO | ||
| Fan has turned off automatically.Fan, light and power buttons will illuminate red. | This blower is equipped with a sensor to automatically turn OFF the fan when excessive heat is detected by the range hood. | Remove the source of heat, wait until the control panel buttons are no longer illuminated before attempting to restart the range hood. |
| Fan has turned on automatically.The fan speed buttons will illuminate red. | The heat guard sensor has activated. The range hood has detected high temperature and has turned the fan on automatically. | To override press the fan speed buttons or turn the range hood on/off. We recommend leaving the range hood on to remove excess cooking heat.Refer to ‘Heat guard’ for further details. |
| Filter will not fit back into the range hood | The filter has been inserted the wrong way around. | Turn the filter the other way round and try to insert again following the steps detailed in ‘To replace the filters’. |
| Filter alert button is lit red | Filters require cleaning. Turn off the range hood, remove the filters, clean filters and replace.Refer to ‘Filter cleaning’ for further details. | |
| Grease is dripping from the range hood | The filters are saturated with grease and need to be cleaned. | Turn off the range hood, remove the filters, clean filters and replace.Refer to ‘Filter cleaning’ for further details. |
| Excessive condensation appears on the range hood surfaces | Using an induction cooktopHigh ambient temperature, humidity or low natural ventilation in the roomHeight of rangehood installation. | Condensation can be minimized, refer to ‘For best performance’ for details. |
| The lighting is too dim | Lighting brightness needs to be increased. | Press the + button to increase the brightness of the lighting.Press and hold the + button to go straight to the brightest lighting.Refer to ‘Light’ for further details on adjusting the brightness. |
| Range hood surfaces discolored | Incorrect cleaning product has been used. | Refer to ‘Cleaning and maintenance’. |
Parts
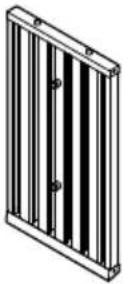
Filters
• 7 7/8" × 8 7/8" (200mm × 225mm)
• 7 7/8" x 11 7/8" (200mm x 300mm)
• 15 3/4" x 8" (400mm x 225mm)
• 15 3/4" x 11 7/8" (400mm x 300mm)

natural_image
Technical line drawing of a mechanical component with a square base, circular top, and bolted screw (no text or symbols)Duct adapter including 5/16" (8mm) T20 drive screws (4)
- HPB3619-12, HPB4819-12, have 10" (254mm) outlet
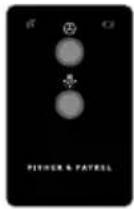
Remote control
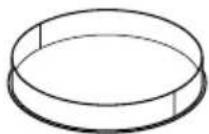
Adapter ring including 5/16" (8mm) T20 drive screws (4)
- HPB3011-6, HPB3019-6, HPB3611-6 and HPB3619-6 have 8" (203mm) outlet.
Accessories


Remote control kit—Remote control (1), Wireless receiver (1)
For details of your manufacturer's warranty and contacts for servicing, please refer to your separate service and warranty book provided with your range hood.
Complete and keep for safe reference:
Model
Serial No. ____
Purchase Date ____
Purchaser
Dealer
City ____
State ____
Zip ____
Country ____
Introduction 23
natural_image
Technical line drawing of a mechanical ventilation duct with grating and mounting brackets (no text or symbols)MISE EN GARDE!

HPB3011-4 = 36 lb (17 kg)
HPB3011-6 = 36 lb (17 kg)
HPB3019-6 = 46 lb (21 kg)
HPB3611-4 = 41lb (19kg)
HPB3611-6 = 41 lb (19 kg)
HPB3619-6 = 51 lb (23 kg)
HPB3619-12 = 68 lb (31 kg)
HPB4819-12 = 77 lb (35 kg)
MISE EN GARDE!
natural_image
Isometric technical diagram of a ventilation duct with a black arrow indicating a component, labeled 'B' (no text or symbols on the diagram itself)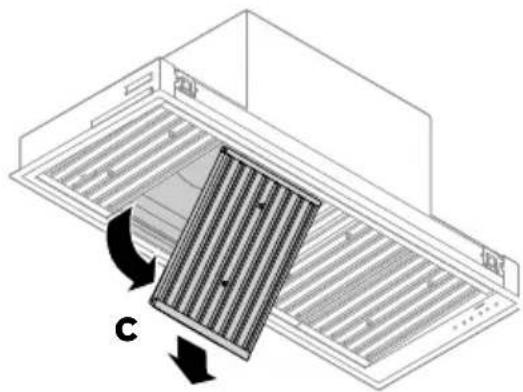
natural_image
Diagram of a ventilation duct system with airflow arrows and component labels (no text or symbols)natural_image
Technical line drawing of a mechanical component with a circular housing, a bolt, and a star-shaped connector (no text or symbols)© Fisher & Paykel Appliances 2019. All rights reserved.
The product specifications in this document apply to the specific products and models described at the date of issue. Under our policy of continuous product improvement, these specifications may change at any time. You should therefore check with your Dealer to ensure this booklet correctly describes the product currently available.
- IMPORTANT!
- SAVE THESE INSTRUCTIONS
- Registration
- ! WARNING!
- WARNING!
- IMPORTANT SAFETY INSTRUCTIONS
- IC Notice
- Remote control
- Clean filter reminder
- Delayed shut off
- Heat guard
- Range hood width
- Induction cooking considerations
- Condensation can be minimized by:
- Gas cooking considerations
- OPERATING INSTRUCTIONS
- Power
- On/Off
- To use delayed shut off:
- To cancel delayed shut off:
- Fan speed
- Light
- To reset the clean filter reminder:
- Remote control (selected models or optional extra)
- Battery indicator
- Signal indicator
- Remote pairing
- Filter cleaning
- To remove the filters:
- To clean your filters:
- To replace the filters:
- Replacing the LED lights
- Parts
- Filters
- Accessories
- MISE EN GARDE!
Brand : Fisher & Paykel
Model : HPB361912
Category : Fan