
Euroset 5005 - Phone GIGASET - Free user manual and instructions
Find the device manual for free Euroset 5005 GIGASET in PDF.
| Product type | Corded landline phone |
| Brand | Gigaset |
| Model | Euroset 5005 |
| Dimensions (L x H x D) | 22 x 20 x 10 cm |
| Weight | 500 g |
| Power supply | Via telephone line (RJ11 socket) |
| Display | Backlit LCD screen |
| Phonebook | Up to 50 contacts |
| Main functions | Call waiting, call list, redial, mute |
| Caller ID | Yes |
| Key repeat | Yes, programmable duration |
| Ring volume adjustment | Multiple levels (high, medium, low) |
| Handset volume adjustment | Yes, wheel or keys |
| Hold function | Yes |
| Memory keys | 3 programmable keys |
| Keypad | Numeric, large keys |
| Connections | 1 telephone socket (RJ11), 1 handset socket (RJ9) |
| Maintenance and cleaning | Clean with a soft, dry cloth; do not use abrasive products |
| Safety | Do not expose to moisture or heat sources; unplug before cleaning |
| Spare parts and repairability | Handset, line cord and spiral cord available; repair by authorized center |
| General information | Manufactured by Gigaset Communications GmbH; indoor use only |
Frequently Asked Questions - Euroset 5005 GIGASET
User questions about Euroset 5005 GIGASET
0 question about this device. Answer the ones you know or ask your own.
Ask a new question about this device
Download the instructions for your Phone in PDF format for free! Find your manual Euroset 5005 - GIGASET and take your electronic device back in hand. On this page are published all the documents necessary for the use of your device. Euroset 5005 by GIGASET.
USER MANUAL Euroset 5005 GIGASET
Gigaset Communications GmbH is the legal successor to Siemens Home and Office Communication Devices GmbH & Co. KG (SHC), which in turn continued the Gigaset business of Siemens AG. Any statements made by Siemens AG or SHC that are found in the user guides should therefore be understood as statements of Gigaset Communications GmbH.
We hope you enjoy your Gigaset.
Gigaset Communications GmbH is a trademark
licensee of Siemens AG
© Gigaset Communications GmbH 2008
All rights reserved.
Subject to availability. Rights of modifications reserved.
www.gigaset.com
Gigaset
CSVážení zákazníci,
1 Table top operation
2 Wall mount
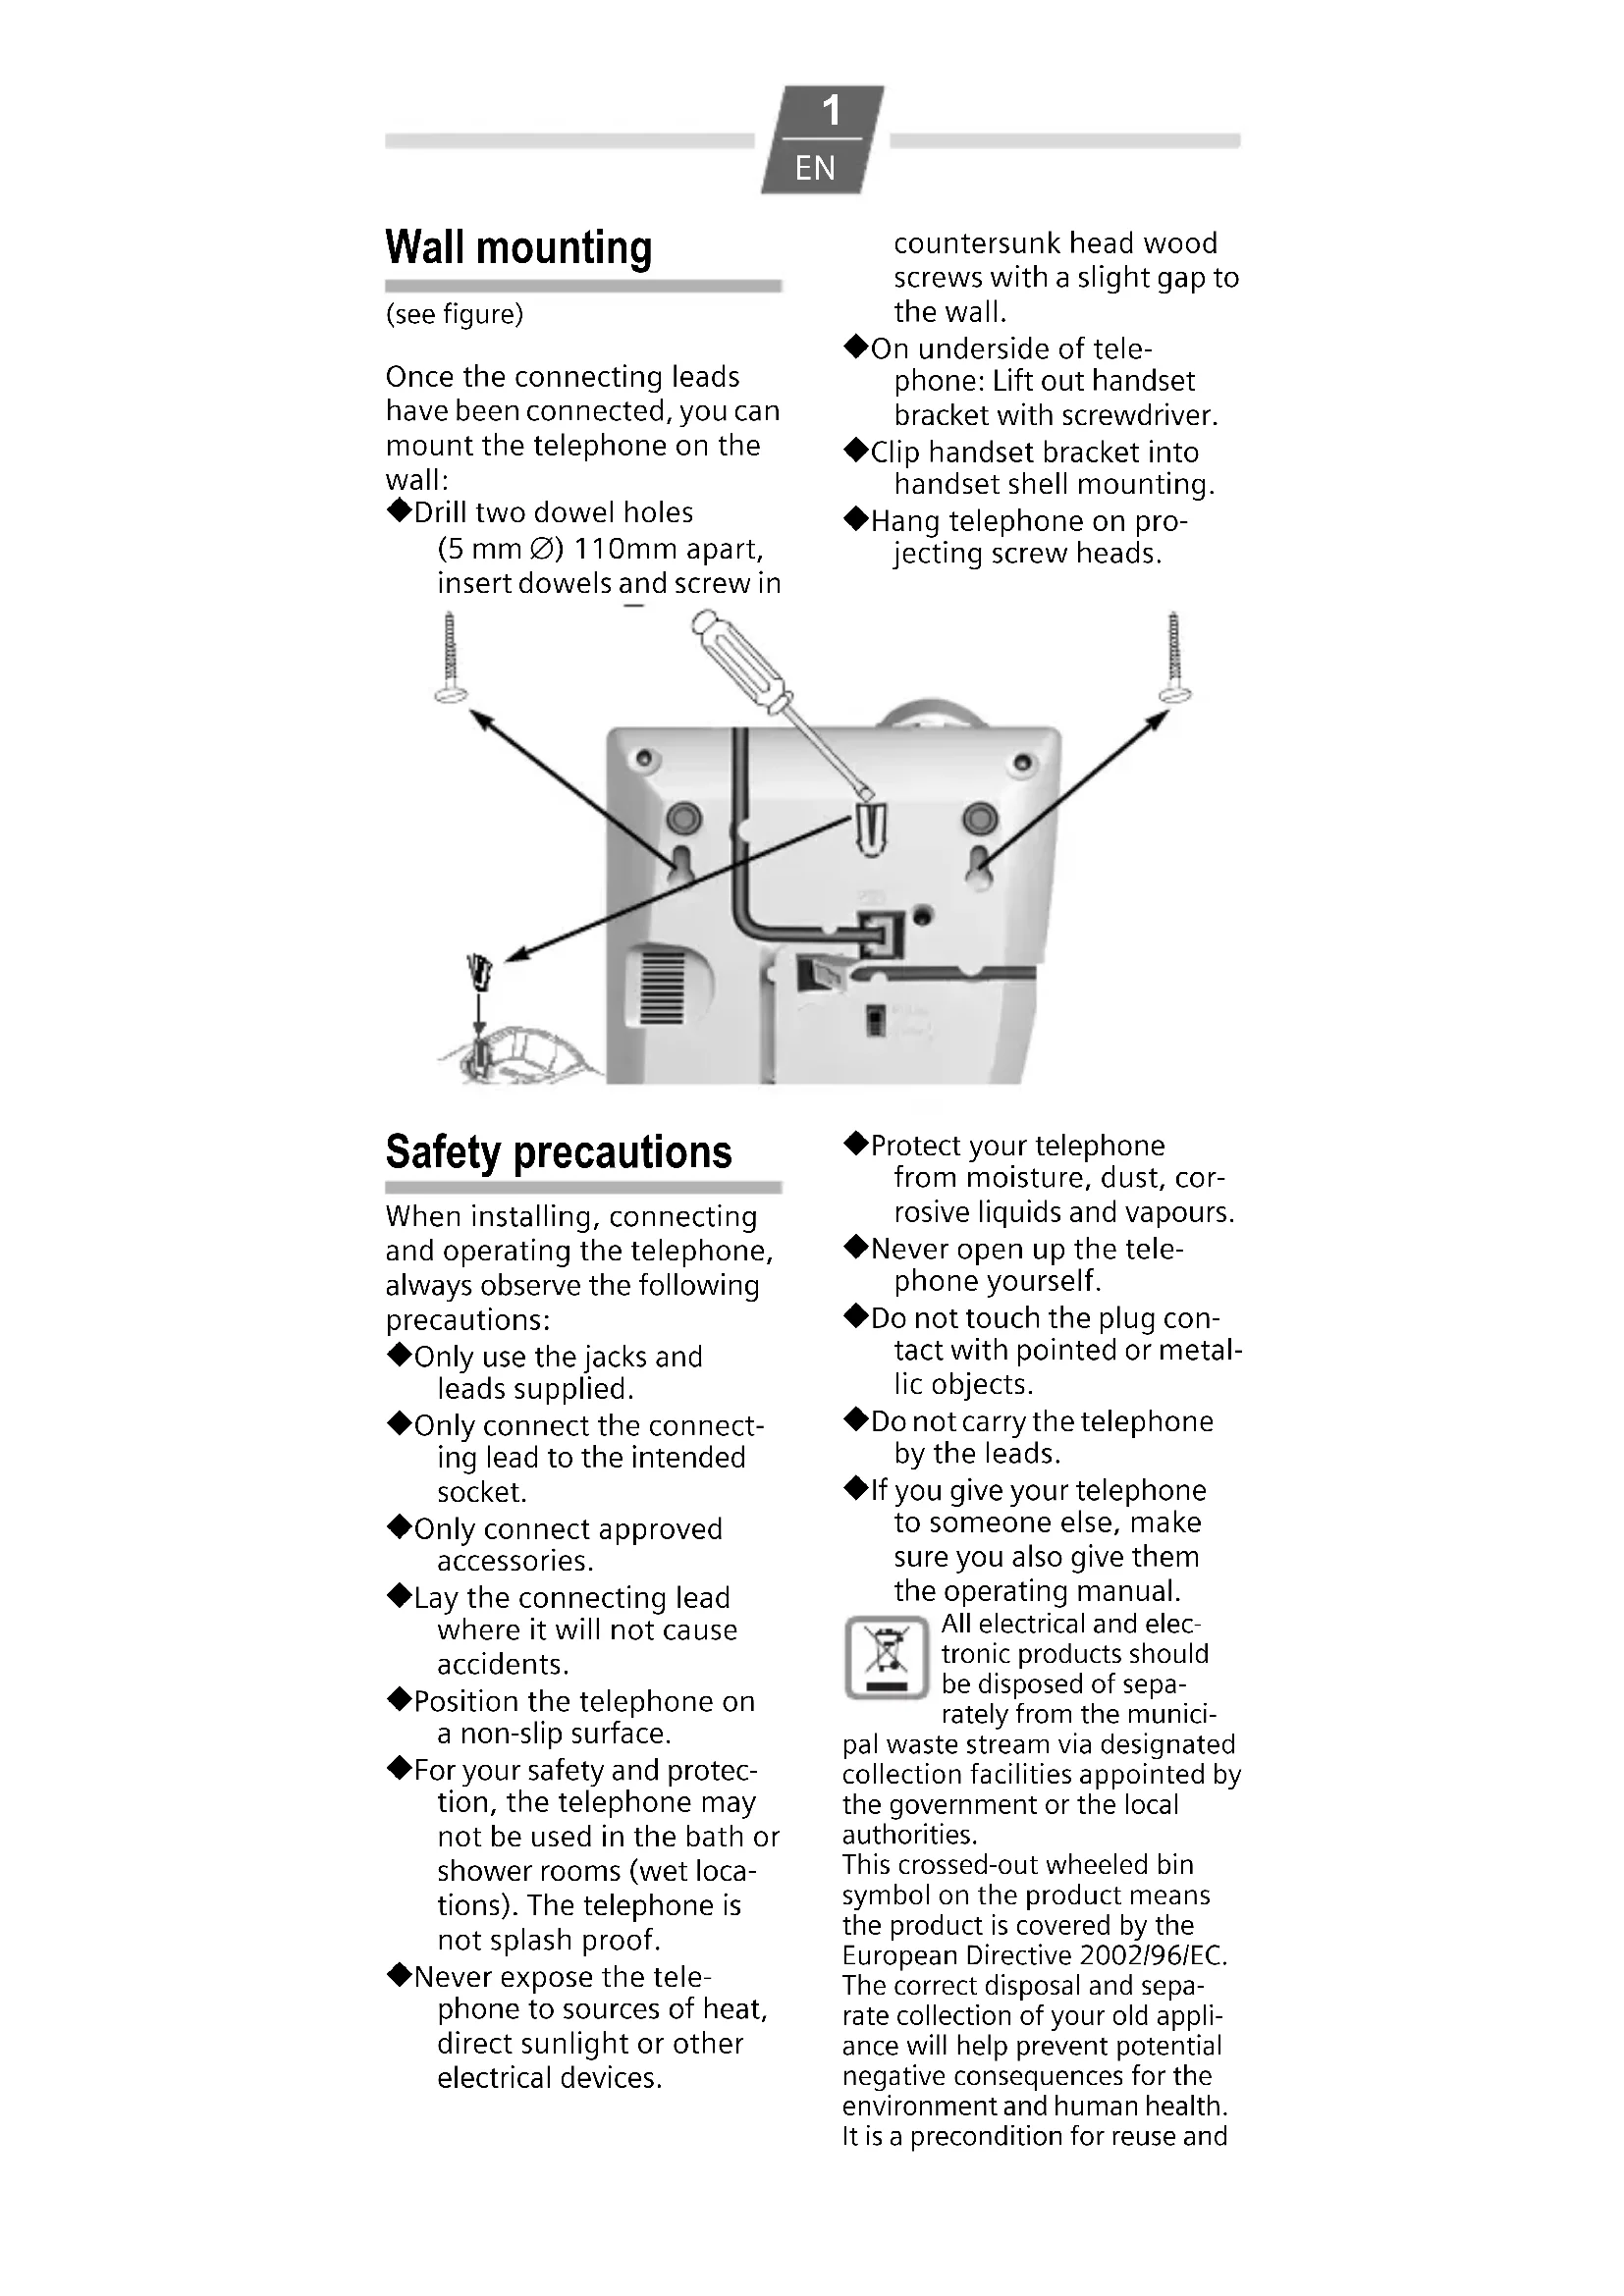
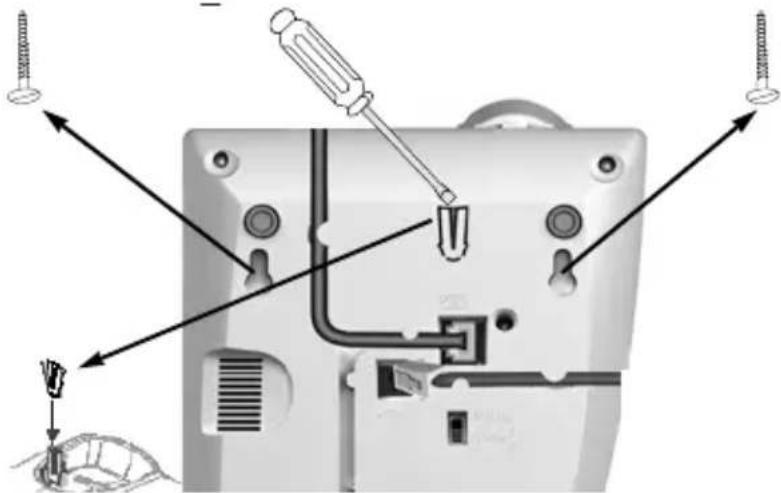
Once the connecting leads have been connected, you can mount the telephone on the wall:
◆Drill two dowel holes (5 mm ∅) 110mm apart, insert dowels and screw in
countersunk head wood screws with a slight gap to the wall.
◆On underside of telephone: Lift out handset bracket with screwdriver.
◆Clip handset bracket into handset shell mounting.
◆Hang telephone on projecting screw heads.
Safety precautions
When installing, connecting and operating the telephone, always observe the following precautions:
◆Only use the jacks and leads supplied.
◆Only connect the connecting lead to the intended socket.
◆Only connect approved accessories.
◆Lay the connecting lead where it will not cause accidents.
◆Position the telephone on a non-slip surface.
◆For your safety and protection, the telephone may not be used in the bath or shower rooms (wet locations). The telephone is not splash proof.
◆Never expose the telephone to sources of heat, direct sunlight or other electrical devices.
◆Protect your telephone from moisture, dust, corrosive liquids and vapours.
◆Never open up the telephone yourself.
◆Do not touch the plug contact with pointed or metallic objects.
◆Do not carry the telephone by the leads.
◆If you give your telephone to someone else, make sure you also give them the operating manual.

All electrical and electronic products should be disposed of separately from the municipal waste stream via designated collection facilities appointed by the government or the local authorities.
This crossed-out wheeled bin symbol on the product means the product is covered by the European Directive 2002/96/EC.
The correct disposal and separate collection of your old appliance will help prevent potential negative consequences for the environment and human health. It is a precondition for reuse and
recycling of used electrical and electronic equipment. For more detailed information about disposal of your old appliance, please contact your city office, waste disposal service or the shop where you purchased the product.
Setting up the telephone for use
Recommended installation of telephone
◆Do not expose the telephone to direct sunlight or other sources of heat.
◆Operate at temperatures of between +5°C and +40°C.
◆Maintain a distance of at least one metre between the telephone and radio equipment, e.g. radio telephones, radio paging equipment or TV sets. Otherwise, telephone communication could be impaired.
◆Do not install the telephone in dusty rooms as this can limit the service life of the telephone.
◆Furniture lacquer and polish can be adversely affected by contact with parts of the unit (e.g. feet).
Dialling and saving numbers
Dialling a number


Lift handset, dial number.
Last number redial
The last number dialled is automatically saved.

→→ Lift handset, press last number redial key.
Repertory and speed dial
You can save 4 numbers (max. 21 digits) as repertory numbers on the 4 repertory keys □ and 10 numbers as speed dial numbers on the number keys (max. 21 digits).
Saving (or saving with notebook function)


Lift handset, (or with notebook function: during a call) press Set key.
either ... As repertory

Press repertory key;

As speed dial 0 ... WXYZ 9


Press speed dial key and speed dial number (number key);

Enter number for repertory or speed dial.


Press Set key, (or after the call:) replace handset.
Dialling a repertory number

☐ Lift handset, press repertory key.
You can also dial any additional digits.
Dialling a speed dial number

Lift handset, press speed dial key.

... WXYZ 9 Press speed dial number (number key).
Notes on saving and deleting repertory and speed dial numbers

and # are saved
regardless of the set dialling mode but are only dialled with DTMF dialling.
The following steps delete numbers saved to the repertory or speed dial keys:
◆The number entered is longer than 21 digits
◆Saving a number will delete the previous content of the memory
Dialling pauses
One or more dialling pauses (not at 1st digit) can be entered using P. Pauses are transferred to the memory and are necessary for certain extension systems (e.g.: 0 P 2368).
◆Dialling a dialling pause within the first 5 digits: The entire number saved is dialled, including the 2-second dialling pause.
◆Dialling a dialling pause after the first 5 digits: The portion of the number saved after the pause is only dialled after pressing the Ⓟ key.
Adjusting the telephone
Setting the handset volume
The handset volume can be set to 2 levels.
+/- Press Handset vol- ume control key.
Mute
You can deactivate the telephone's microphone.
During a call:
Press mute key.
To reactivate microphone: Press the mute key again.
Setting the ringer
You can set the ringer frequency and volume to 9 levels (factory default: level 6) or turn it off.
Lift the handset, press the Set key.
Press the hash key.
0 ... 9 Press one of the
Press Set key.
Operation on a PABX
Special functions/Recall key
During an external call, you can make an enquiry or forward the call. To do this, press the recall key R. The subsequent procedure depends on your PABX. By default, the recall key is set to flash time 1 (pulse/tone switch in "Tone 1" position). For connection to a PABX, it may be necessary to change the flash time (e.g. pulse/tone switch to "Tone 2"). To do this, please refer to the operating instructions for your PABX.
Changing the dialling mode
By default, your telephone is set to tone dialling mode (Tone 1). Depending on the dialling mode of your PABX, you may need to set the telephone to pulse dialling (DP). Slide switch on underside of unit:
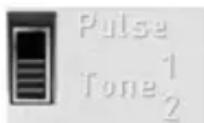
Pulse: Pulse dialling mode (DP)
Tone 1: Tone dialling mode, flash time 100 ms
Tone 2: Tone dialling mode, flash time 280 ms
Temporary DTMF switching in "Pulse" position
To use functions that require DTMF (e.g. remote control of answering machine), you can set the telephone to DTMF for the duration of the call with- out adjusting the switch.
After the connection is established:
* Press the star key.
After the connection is broken, the setting reverts to DP.
Operation on public telephone systems
Public telephone systems - in some cases by special order/ request – offer you a range of useful additional services (e.g. call divert, call back on busy, three-party conference etc.). These services can be selected using specified key combinations, which your network provider will notify you of.
You can save the entire key combination, including the number of a fixed call divert destination, to your repertory or speed dial keys just like a normal number.
Recall key
In public telephone systems, the recall key is required to use certain additional services; e.g. for "Call back on busy". By default, your telephone is set to tone dialling with a flash time of 100 ms (Tone 1). You may need to adjust the flash time using the slide switch on the underside of the telephone.
Appendix
Care
To clean, wipe with a moist or antistatic cloth only, never with a dry cloth (risk of electrostatic charging and discharge) or strong cleaning agent.
If your telephone is not working perfectly
Lift handset, no dialling tone: Is the connecting lead correctly plugged into the telephone and the telephone socket?
Dialling tone audible but telephone will not dial: The connection is OK. Is the dial-ling mode set correctly?
The other party cannot hear you: Mute activated?
Regular pulse noises can be heard during a call: The connection is receiving metering pulses from the exchange, which the telephone cannot interpret. Contact your network operator.
Insert strips
Blank insert strips for the rep- ertory keys can be found on the Internet at http://www.siemens.com/euroset.
Contacts
If you should encounter any problems when operating the telephone connected to a communication system with analogue network access, please contact the network operator responsible or your dealer.
Authorisation
The telephone you have purchased is designed for operation in your country, as marked on the packaging and on the unit.
The CE mark attests to the phone's compliance with the essential requirements of the R&TTE directive.
Bezpečnostní pokyny
Excerpt from the original declaration
Hereby, Siemens Home and Office Communication Devices GmbH & Co. KG, declares that this Euroset 5005 is in compliance with the essential requirements and other relevant provisions of Directive 1999/5/EC.
The Declaration of Conformity (DoC) has been signed. In case of need a copy of the original DoC can be made available via the company hotline.
CE 0682
Issued by
Siemens Home and Office Communication Devices GmbH & Co. KG Schlavenhorst 66
D-46395 Bocholt
© Siemens Home and Office Communication Devices GmbH & Co. KG 2005
All rights reserved. Subject to availability.
Rights of modification reserved.
- Gigaset
- CSVážení zákazníci,
- Safety precautions
- Setting up the telephone for use
- Recommended installation of telephone
- Dialling and saving numbers
- Dialling a number
- Last number redial
- Repertory and speed dial
- Saving (or saving with notebook function)
- either ... As repertory
- Dialling a repertory number
- Dialling a speed dial number
- Notes on saving and deleting repertory and speed dial numbers
- Dialling pauses
- Adjusting the telephone
- Setting the handset volume
- Mute
- Setting the ringer
- Operation on a PABX
- Special functions/Recall key
- Changing the dialling mode
- Temporary DTMF switching in "Pulse" position
- Operation on public telephone systems
- Recall key
- Appendix
- Care
- If your telephone is not working perfectly
- Insert strips
- Contacts
- Authorisation
- Bezpečnostní pokyny
- Excerpt from the original declaration
Brand : GIGASET
Model : Euroset 5005
Category : Phone