
RCD 1500 BT - Radio GRUNDIG - Free user manual and instructions
Find the device manual for free RCD 1500 BT GRUNDIG in PDF.
| Product type | Clock radio with CD, Bluetooth and USB player |
| Brand | Grundig |
| Model | RCD 1500 BT |
| Dimensions (W x H x D) | 245 x 139 x 245 mm |
| Weight | 1.6 kg |
| Mains power supply | 230 V ~, 50/60 Hz |
| Battery power supply | 6 x 1.5 V IEC type R14/UM2/C |
| Power consumption (on) | 14 W |
| Standby consumption | 0.5 W |
| Audio output power | 2 x 1.5 W (music), 2 x 1 W (sine) |
| Headphone jack | 3.5 mm stereo jack |
| Radio bands | FM (VHF) |
| Bluetooth | Version unspecified, typical range 10 m, max power 2 dBm |
| Compatible CD formats | CD-DA, CD-R, CD-RW (MP3, WMA, WAV) |
| USB port | USB 2.0 compatible FAT32/16 |
| Number of radio presets | 20 |
| Ultra Bass function (UBS) | Yes |
| Automatic shut-off | Yes (standby after 15 min in stop mode) |
| Maintenance and cleaning | Clean with a soft, dry cloth; do not use chemical products |
| Safety | Class 1 laser product; do not open the casing; avoid exposure to moisture |
| Spare parts and repairability | No spare parts provided; entrust repair to a professional |
| General information | Manual available for download; compliant with European directives |
Frequently Asked Questions - RCD 1500 BT GRUNDIG
User questions about RCD 1500 BT GRUNDIG
0 question about this device. Answer the ones you know or ask your own.
Ask a new question about this device
Download the instructions for your Radio in PDF format for free! Find your manual RCD 1500 BT - GRUNDIG and take your electronic device back in hand. On this page are published all the documents necessary for the use of your device. RCD 1500 BT by GRUNDIG.
USER MANUAL RCD 1500 BT GRUNDIG
natural_image
Black musical note symbol on white background (no text or numbers)RCD 1500 BT / GRB 3000 BT
CLASS 1 LASERPRODUKT
FM In Radio-Modus: FM (VHF)
Automatic Tuning System (ATS)
FM 87.5 ...108.0 MHz
Konnektivität
Bluetooth V.5.0
Please read this user manual first!
Dear Valued Customer,
Thank you for preferring this Grundig appliance. We hope that you get the best results from your appliance which has been manufactured with high quality and state-of-the-art technology. For this reason, please read this entire user manual and all other accompanying documents carefully before using the appliance and keep it as a reference for future use. If you handover the appliance to someone else, give the user manual as well. Follow the instructions by paying attention to all the information and warnings in the user manual.
Remember that this user manual may also apply to other models. Differences between models are explicitly described in the manual.
Meanings of the Symbols
Following symbols are used in various sections of this user manual:

Important information and useful hints about usage.

WARNING: Warnings against dangerous situations concerning the security of life and property.
To ensure that this device provides you with long-term satisfaction and enjoyment, please observe the following instructions.
This device is designed for the playback of audio signals. Any other use is expressly prohibited.
■ Protect the device and the CDs from rain, moisture (dripping or splashing water), sand and heat. Do not leave it next to heaters or inside parked cars in the sun.
■ Make sure there is adequate ventilation when positioning the device. There must be a free space of at least 10 cm behind the device. Do not place objects on the ventilation slots.
- Do not place any objects containing liquids (for example, vases) on the device. Do not insert any foreign bodies in the CD compartment of the device.
- Do not place any objects such as burning candles on the device.
■ Bringing the device in from the cold can cause condensation on the CD lens, which prevents it from playing. Give the device time to warm up.
■ Only use the device in a moderate climate.
■ The CD unit contains self-lubricating bearings, which must not be oiled or greased.
■ Thunderstorms are a danger to all electrical devices. Even if the device is switched off, it can be damaged by a lightning strike to the mains. Always remove the mains plug during an electrical storm.
If malfunctions occur due to static electricity charges or fast transient (burst), reset the device. To do this, pull out the power plug and connect it again after a few seconds.
- Do not use any cleaning agent, as this may damage the casing. Clean the device with a clean, moist leather cloth.
Please note when deciding where to put the device that furniture surfaces are covered by various types of lacquer and plastic, most of which contain chemical additives. These may cause corrosion to the feet of the device, thus resulting in stains on the surface of the furniture which can be difficult or impossible to remove.
■ Never open the device casing under any circumstances. No warranty claims are accepted for damage resulting from improper handling.
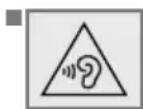
Prolonged listening at loud volumes with the earphones can damage your hearing.
■ The only way to completely disconnect the device from the mains is to unplug the mains cable.
General information on laser devices
You will find a symbol similar to the one shown here on the bottom of the device.
CLASS 1 LASER PRODUCT
CLASS 1 LASER PRODUCT means that the laser is designed in such a way as to ensure that the maximum permissible emission value can-
not be exceeded under any circumstances.
If operating devices or methods other than those specified here are employed, it may lead to dangerous exposure to emissions.
Invisible laser radiation is emitted if the CD compartment is opened and the safety locking mechanism is shorted. Do not expose yourself to this radiation.
See the figure on page 3.
Controls
General information
| BT/CD/USB/RADIO | Switches between BLUETOOTH, CD, USB and RADIO input sources. |
| ON/OFF | Switches off or on the device |
| ON | Operation indicator. Lights up red during operation. |
VOLUME Adjusts the volume.
UBS Switches the ultra Bass system on and off.

Headphone jack for connecting a headphone set with a 3.5mm jack plug
AC\~ Socket for connecting the power cord (on the back of the device).
Radio unit
ANTENNA Telescopic antenna for FM (VHF) reception.
MODE/ Switches between mono and stereo
MONO/ST reception.
UP ▶ Press briefly to change the frequency up and down in steps.
DOWN ▶ Press and hold down to start a forward or reverse search
PROG/ MEM/STOP Press briefly for saving radio stations on presets. Press and hold to start the automatic station search.
ALBUM Selects the next preset position.
MEMORY UP Selects the next preset number when saving radio stations.
ALBUM Selects the previous preset position. MEMORY Selects the previous preset number DN when saving radio stations.
CD unit OPEN/CLOSE Opens and closes the CD compartment.
PLAY/PAUSE Starts and pauses playback.
UP >> Press briefly to select the next or previous track. DOWN >> Press and hold down to start a forward or reverse search.
■ STOP/MEM/PROG Ends playback, deletes track memories.
At stop mode, press briefly for saving tracks when creating a memory.
ALBUM In MP3/USB mode: selects the MEMORY UP next album.
ALBUM MEMORY DN In MP3/USB mode: selects the previous album.
MODE/MONO/ST In CD-DA mode: for repeating a track or the entire CD. In MP3/USB mode: for repeating a file or track, all the files on an album or all the files. Selects the function random.
USB unit
PLAY/PAUSE Starts and pauses playback.
UP ▶▶▶ Press briefly to select the next or previous file.
DOWN 🖼️ Press and hold down to start a forward or reverse search.
■/MEM/PROG. Ends playback, deletes file memories.
At stop mode, press briefly for saving files when creating a memory.
ALBUM selects the next album.
MEMORY UP
ALBUM selects the previous album.
MEMORY DN
MODE/MONO/ST. For repeating a file, all the files on an album or all the files. Selects the function random.
Bluetooth unit
PLAY/PAUSE Starts and pauses playback. Press and hold to set Bluetooth discoverable mode.
UP ▶️ Press briefly to select the next or DOWN ◀️ previous track.
Display
MEMMP3
ALBUMRND ⬇ ALL
∞
FM


MHz
00000
In radio mode: shows the frequency,
In radio mode: an FM stereo station
shows the preset number.
is being received.
In CD-DA mode: shows the total number of tracks and the current track.
In MP3/USB mode: displays the total number of files, current album and current file.
MHz In radio mode: in combination with the FM frequency indicator.
FM In radio mode: FM (VHF) frequency
band indicator.

In CD mode: indicates playback, flashes when paused.
MEM In radio mode: lights up when a ra-
dio station is saved, or when tuned to a stored radio station.
In CD mode: flashes when a track memory is created, and lights up when the memory is played back.
MP3
In MP3/USB mode: indicates that a MP3 file is in use.
ALBUM
In MP3/USB mode: shows the album level.
RND In CD/USB mode: the tracks or files
are played back in random order.

In CD mode: flashes when a track is
repeated.
In MP3/USB mode: flashes when a file is repeated.
for repeat album, both the repeat and ALBUM icons are on.

ALL In CD mode: lights up when the
whole CD is repeated.
In MP3/USB mode: lights up when all files are repeated.
Mains operation
Note:
- Check that the mains voltage on the type plate corresponds to your local mains supply.
■ If this is not the case, contact your specialist dealer.
1 Plug the mains cable supplied into the »AC \~« socket on the radio (back of device).
2 Plug the mains cable into the wall socket.
Caution:
■ The device is connected to the mains with the power plug. To fully disconnect the device from the mains, pull out the plug.
■ The mains plug is used to disconnect the device. It shall remain readily operable and should not be obstructed during intended use.
Battery operation
1 Open the battery compartment by pressing the catch and removing the lid.
2 Insert six batteries (6 x 1.5 V/type IEC R14/UM2/C-size), observing the polarity marked on the lid of the battery compartment.
3 Close the battery compartment.
Notes:
- Do not expose the batteries to extreme heat, caused for example by direct sunlight, heaters or fire.
■ Remove the batteries when they are flat or when you know that the device will not be used for a long period of time.
■ The manufacturer accepts no liability for damage resulting from leaking batteries.
■ The batteries are switched off during mains operation.
Environmental note:
■ Batteries, including those which contain no heavy metal, may not be disposed of with household waste. Please dispose of used batteries in an environmentally sound manner. Find out about the legal regulations which apply in your area.
GENERAL FUNCTIONS
Switching on and off
1 Press and release the ON/OFF button to switch on the device or off.
Selecting the input source
1 Power on by pressing the ON/OFF button the device.
2 Select the input source (BT, CD, USB or RADIO) using »BLUETOOTH/CD/USB/RADIO«.
Adjusting the volume
1 Adjust the volume with »VOLUME«.Knob
Switching the Ultra Bass System on and off
This function boosts the bass frequencies.
1 Switch the Ultra Bass System on and off with »UBS« Button
Listening with headphones
1 Connect the headphones to the »♡« headphone jack (ø 3.5 mm).
- This switches off the loudspeakers.
Note:
■ Excessive sound pressure from the earphones or headphones can cause hearing loss.
Automatic shutdown
If the device is in the "Stop" position for more than 15 minutes it automatically switches to off mode. For further using switch on the device again.
Bluetooth Mode
Connect to mobile device with Bluetooth
1 Switching on the device with "ON/OFF" button;
2 Move the (BLUETOOTH/CD/USB/RADIO) switch to the >>BLUETOOTH<< position.
3 The "bt" will be flashing on LCD;
4 Go to your mobile device, and find the "Grundig RCD 1500, Grundig GRB 3000" from the available Bluetooth device list. Then press to connect to the radio.
5 When device has been connected to the mobile device, the "bt" announcement will stop flashing.
Playback control via Bluetooth
1 Press the "ON/OFF" button to switch on the device;
2. Move the ( BLUETOOTH/CD/USB/RADIO) switch to the >>BLUETOOTH<< position.
3 Connect the RCD1500 BT, GRB 3000 BT to mobile device via Bluetooth;
4 Press the PLAY/PAUSE button to toggle the music playback in between play or pause status;
5 Press the DOWN button to skip back to previous played songs
6 Press the UP ▶ button to skip to the next songs;
Pairing mode
1 Press the "ON/OFF" button to switch on the device;
2 Move the BLUETOOTH/CD/USB/RADIO switch to the >>BLUETOOTH<< position.
3 If the RCD1500 BT, GRB 3000 BT is connecting to any mobile device via Bluetooth, press and hold the PLAY/PAUSE button to disconnect the current Bluetooth connection.
4 The RCD1500 BT, GRB 3000 BT will be in Bluetooth pairing mode with flashing the "bt".
5 You can repeat the steps in "Connect to mobile device with Bluetooth" for a new Bluetooth connection.
Power saving in Bluetooth
If there is no Bluetooth connection from the radio to any mobile devices, the RCD1500 BT, GRB 3000 BT will switch to off mode after 15 minutes.
Antennas
1 For FM stations (VHF) extend the telescopic antenna.
Note:
If the FM signal is too strong, it is advisable to push in the telescopic antenna.
Selecting the radio input source
1 Press the ON/OFF button briefly to power on the device
2 Move the »Bluetooth/CD/USB/RADIO« switch to the »RADIO« position.
Setting and storing radio stations
Automatic tuning station (ATS)
1 Activate the ATS by pressing PROG/MEM/STOP button until the frequency display changes to rapid run through.
- The device searches for up to 20 radio stations and then saves them. After the search has finished, the station stored in position 01 can be heard.
Automatic station search
1 Activate the station search by pressing »DOWN« or »UP« until the frequency display changes to rapid run-through.
- The search stops when a station is found.
Manual station search
1 To move the frequency backward/forward in steps, briefly press »DOWN« or »UP» several times.
- The frequency changes in steps of 50 kHz.
Storing stations on station positions
Up to 20 stations in the FM band can be stored.
1 Press »DOWN « or »UP » to select the station.
2 Press »PROG/MEM/STOP« button briefly to activate the memory function.
3 Select the desired station position with »ALBUM MEMORY UP« or »ALBUM MEMORY DOWN«.
4 Press »PROG/MEM/STOP« button again to save the station
5 To store more stations, repeat steps 1 to 4.
Note:
- You can replace a station on a preset with a new one by carrying out steps 1 to 4 as described above.
Selecting a preset position
1 Select the station preset position with »ALBUM/MEMORY/UP« or »ALBUM/MEMORY/DN«.
Stereo/mono reception
If the device receives an FM stereo station, »OD« appears in the display. However, if the signal from the FM stereo station is weak, you can improve the sound quality by switching to mono reception.
1 Switch to mono reception by pressing »MODE/ MONO/ST.«.
2 Switch to stereo reception by pressing this button again.

The device is suitable for music CDs displaying the logo shown here (CD-DA) and for CD-Rs and CD-RWs with audio data.
When burning CD-R and CD-RWs
with audio files, various problems may arise which could lead to interference in playback. This can be caused by faulty software or hardware settings or by the CD being used. Should such problems arise, contact the customer services of your CD burner or software manufacturer or look for relevant information, for example on the Internet. When you are making audio CDs, observe all legal guidelines and ensure that the copyright of third parties is not infringed.
Always keep the CD compartment closed to prevent dust from collecting on the laser optics. Do not attach adhesive labels to CDs. Keep the surfaces of CDs clean. You can play standard 12 cm CDs as well as 8 cm CDs on your device. An adapter is not necessary.
Selecting the CD input source
1 Turn on the device by pressing the POWER button briefly.
2 Move the BLUETOOTH/CD/USB/RADIO switch to the >>CD<< position.
3 Press »OPEN/CLOSE« to open the lid of the CD compartment.
4 Insert a CD in the compartment with its label facing upwards.
5 Press the »OPEN/CLOSE« to close the lid of the CD compartment.
- The device reads the content of the CD. The total number of tracks appears in the display.
CD playback
1 Press »PLAY/PAUSE« to start playback.
- Playback begins with the first track.
- Display: the current track number.
- Playback stops at the end of the CD.
2 Press »PLAY/PAUSE« to pause playback
3 Press »PLAY/PAUSE « to resume playback
4 Press »PROG/MEM/STOP« button for the first time, the system will remember the last played position of the track. If you want to resume the playback again, press the PLAY/PAUSE button to continue the last playback.
5 To fully erase the CD resume, press the PROG/MEM/STOP button for the second time.
6 Press OPEN/CLOSE to open the CD compartment and take out the CD.
7 Close the CD compartment.
Repeating the current track
1 During playback, press the MODE/MONO/ST. button once. The track will be repeated from the beginning.
Selecting another track
1 During playback, keep pressing »DOWN « or »UP »until the number of the track you want to hear appears in the display.
- Playback of the selected track starts automatically.
Note:
- You can also select tracks in the stop position. However, you must then start playback of the track with »PLAY/PAUSE«.
In stop mode you can press and hold down »DOWN« or »UP« to select tracks more quickly.
Searching for a passage within a track
1 During playback, press »DOWN « or »UP »« and hold it down until you find the passage you want to hear.
- Playback starts when you release »DOWN« or »UP«.
Note:
■ During the search the volume is reduced.
Repeating a track (Repeat One)
1 During playback, press MODE/MONO/ST. button once. The current track is repeated and the repeat icon is flashing.
2 To terminate the function, press this button three times.
Repeating all tracks (Repeat All)
1 During playback, press MODE/MONO/ST. button twice until the repeat all icon appears. The whole CD played repeatedly.
2 To terminate the function, press this button twice
Random play
1 During playback, press MODE/MONO/ST. button three time until the display showing RND. The tracks of the disc will be played in random order.
2 To terminate the function, press this button once.
Creating a track memory
You can create a track memory of up to 20 tracks for the current CD in any order you choose and then play them back in that sequence. A track may be stored more than once. Program is only possible in the stop position.
Selecting and storing tracks
1 Press »PROG/MEM/STOP« to call up the function. in stop mode.
2 Select the track by pressing »DOWN« or »UP» button
3 Press »PROG/MEM/STOP« button to save the track into the program list.
4 To store more tracks, repeat steps 2 to 3.
Playing back a track memory
1 Start the track memory by pressing »PLAY/PAUSE«.
- Playback begins with the first programmed file or track.
2 Press »PROG/MEM/STOP .« button to end playback.
3 To play the track memory again, press »PROG/MEM/STOP« button once, then press »PLAY/PAUSE «.
Changing the track selection
1 In stop mode, keep briefly pressing »PROG/MEM/STOP« button until program number you want to replace appears in the display.
2 Select the number of the new track by pressing »DOWN« or »UP «.»
3 Press »PROG/MEM/STOP« to save the new track.
Adding tracks
1 In stop mode, press »PROG/MEM/STOP« until the last program number is shown in the display.
2 Select the number of the new track by pressing »DOWN« or »UP« button
3 Press »PROG/MEM/STOP« to save the new track.
Deleting the track memory
The device must be in the stop position.
1 Press »OPEN/CLOSE« to open the CD compartment or and hold the »PROG/MEM/STOP« button while programming.

The device is suitable for CD-Rs and CD-RWs with MP3 and WMA formats.
In MP3 mode, the terms "album" and "file" are very
important. "Album" corresponds to a folder on a PC, "File" to a file on a PC or a CD-DA track. The device reads MP3 files with a maximum of 255 files per album. An MP3 CD may not contain more than 512 files or albums in total.
When burning CD-R and CD-RWs with audio files, various problems may arise which could lead to interference in playback. This can be caused by faulty software or hardware settings or by the CD being used. Should such problems arise, contact the customer services of your CD burner or software manufacturer or look for relevant information, for example on the Internet. When you are making audio CDs, observe all legal guidelines and ensure that the copyright of third parties is not infringed.
Selecting albums and files
1 Select the album during playback by pressing »ALBUM MEMORY UP« or »ALBUM MEMORY DOWN«.button
2 Select the file you want by pressing »DOWN« or »UP«. - Playback of the selected file starts automatically after a short time.
Notes:
- You can also select albums and files in the stop position. However, you must then start playback of the file with »PLAY/PAUSE«.
■ The root album is shown as number 1. However, you can only select an album if it actually contains MP3 files.
Repeating a file (Repeat 1)
1 During playback, press »MODE/MONO/ST« once.
- The current file is repeated.
2 To quit the function, press »MODE/MONO/ST« until the repeat indicator goes out.
Repeating all the files in an album (Repeat Album)
1 During playback, press »MODE/MONO/ST« button twice.
- All the files on the current album are played back repeatedly.
2 To quit the function, press »MODE/MONO/ST« until the repeat indicator goes out.
Repeating all files (Repeat All)
1 During playback, press »MODE/MONO/ST« button until repeat all icon appears in the display.
- The whole CD is played back repeatedly.
2 To quit the function, press »MODE/MONO/ST« button until the repeat indicator goes out.
Playing back files in random order (Random)
1 In stop mode or during playback, press »MODE/MONO/ST« until the »RND« icon appears in the display.
2 Press »PLAY/PAUSE « to start random playback.
- All files on the CD are played back once in random order.
3 To end this function, press »MODE/MONO/ST«. button
Creating a track memory
You can store and then play back up to 20 titles from various albums on the disc or USB memory stick in a set order. A track may be stored more than once. Program is only possible in the stop position.
Selecting and storing files
1 Press »PROG/MEM/STOP« to call up the function.
- Display: »POI« for the first preset position, »MEM« icon flashes.
2 Select the album by pressing »ALBUM MEMORY DOWN« or »ALBUM MEMORY UP«.button
3 Select the file you want by pressing »DOWN« or »UP«
4 Press »PROG/MEM/STOP« to save the file.
- Display: »PO2« for the second preset position,
»MEM« in display flashes.
5 To save more files, repeat steps 2 to 4.
Playing back titles in random order (Random)
1 In stop mode, keep pressing »MODE/MONO/ST« until »RND« appears in the display.
2 Press »PLAY/PAUSE« to start random playback.
- All tracks on the CD are played back once in random order.
3 To terminate the function, press »MODE/MONO/ST« again.
Playing back a track memory
1 Start the track memory by pressing »PLAY/PAUSE«.
- Playback begins with the first programmed file.
2 Press »PROG/MEM/STOP « button to end playback.
3 To play the track memory again, press »PROG/MEM/STOP « button and afterwards »PLAY/PAUSE«.button
Changing the file selection
1 In stop mode, keep pressing »PROG/MEM/STOP« until the program number you want to replace appears in the display.
2 Select the number of the new file or track by pressing »DOWN« or »UP «button
3 Press »PROG/MEM/STOP « to save the new file or track.
Adding files
1 In stop mode, keep pressing »PROG/MEM/STOP« button until the last program is shown in the display.
2 Select the number of the new file by pressing »DOWN« or »UP «.button
3 Press »PROG/MEM/STOP « button to save the file.
Deleting the track memory
The device must be in the stop position.
1 Press »OPEN/CLOSE« to open the CD compartment; or press and hold »PROG/MEM/STOP « button while programming.
The device supports most MP3 Player or USB memory sticks.
Note:
■ The device must be switched off while the USB connection is being made. If it is not switched off, data can be lost.
Connecting a MP3 Player or an USB memory stick
1 Press the ON/OFF button to power off the device.
2 Connect the USB interface of the MP3 player to the »USB« socket on the device using a standard USB cable;
or
insert the USB plug of the USB memory stick in the »USB« socket on the device.
Notes:
■ To remove the MP3 player or the USB memory stick, switch off the device and pull out the cable for the data medium.
■ The USB socket on the device does not support a connection for a USB extension cable and is not designed for directly connecting to a computer.
Selecting the USB input source
For MP3/WMA mode with MP3 player or USB memory stick, the same playback and search functions are available as for MP3 mode (see MP3 Mode section).
1 Power on the device by pressing the ON/OFF button.
2 Press »▶II« to start playback.
- Playback begins with the first track.
3 Press »PROG/MEM/STOP « to end playback.
Notes:
The USB socket of this device is a standard socket. Due to rapid development in technology and new manufacturers appearing every day, the compatibility of USB memory sticks can only be partially guaranteed. If USB operation is impaired or is not possible, this does not indicate a malfunction of the device.
Caution:
■ Bi-directional data transfer as defined for ITE devices in EN 55022/EN 555024 is not possible.
■ USB transfer is not in itself an operating mode. It is only an additional function.
■ Never remove and USB devices during operation. This can damage the USB device and the device. This type of damage will invalidate your warranty.
Compliance with the WEEE Directive and Disposing of the Waste Product:
This product complies with EU WEEE Directive (2012/19/EU). This product bears a classification symbol for waste electrical and electronic equipment (WEEE).

This symbol indicates that this product shall not be disposed with other household wastes at the end of its service life. Used device must be returned to official collection point for recycling of electrical and electronic devices. To find these collection systems please contact to your local authorities or retailer where the product was purchased. Each household performs important role in recovering and recycling of old appliance. Appropriate disposal of used appliance helps prevent potential negative consequences for the environment and human health.
Compliance with RoHS Directive
The product you have purchased complies with EU RoHS Directive (2011/65/EU). It does not contain harmful and prohibited materials specified in the Directive.
Package information

Packaging materials of the product are manufactured from recyclable materials in accordance with our National Environment Regulations. Do not dispose of the packaging materials together with the domestic or other wastes. Take them to the packaging material collection points designated by the local authorities.
Technical data
This device is noise-suppressed according to the applicable EU directives.
This device is noise-suppressed according to the applicable EU directives.
This product fulfils the European directives 2014/53/EU, 2009/125/EC and 2011/65/EU.
Never open the device casing. The manufacturer will not accept any liability for damage resulting from improper handling.
You can find the CE declaration of conformity for the device in the form of a pdf file on the Grundig Homepage www.grundig.com/downloads/doc.
The type plate is located on the bottom of the device.
Power supply
Mains operation: 230 V \~, 50/60 Hz
Battery operation: 6 x 1.5 V IEC
(R14/UM2/C-Size)
Max. power consumption
Operation: 14 W
Standby: 0.5W
Output
DIN 45324, 10 % THD
Music signal power: 2 x 1.5 W
Sine wave power: 2 x 1 W
Stereo headphone jack: 3.5 mm ∅
Radio unit Frequency bands
FM 87.5 ...108.0 MHz
Connectivity
Bluetooth V.5.0
BT maximum transmitted power:2dBm
BT Frequency: 2402MHz - 2480MHz
CD unit
Frequency response: 20 Hz ... 16 kHz
Noise voltage ratio: ≥ 65 dB
MP3 features
Playback format: MP3, WMA, WAV
File system / file management: ISO 9660 Level 1 compatible
USB
FAT32/16 file is compatible with USB 2.0
Dimensions and weight
W x H x L: 245 x 139 x 245 mm
Weight: 1.6 kg
Technical and design modifications reserved.
CLASSE 1 PRODUIT LASER
FM 87,5 ...108,0 MHz
Connectivité
Bluetooth V.5.0
FM 87.5 ...108.0 MHz
Conectividad
Bluetooth V.5.0

- CLASS 1 LASERPRODUKT
- Automatic Tuning System (ATS)
- Konnektivität
- Please read this user manual first!
- Meanings of the Symbols
- General information on laser devices
- CLASS 1 LASER PRODUCT
- Controls
- Radio unit
- USB unit
- MEMORY UP
- MEMORY DN
- Bluetooth unit
- Display
- Mains operation
- Note:
- Caution:
- Battery operation
- Notes:
- Environmental note:
- GENERAL FUNCTIONS
- Switching on and off
- Selecting the input source
- Adjusting the volume
- Switching the Ultra Bass System on and off
- Listening with headphones
- Automatic shutdown
- Bluetooth Mode
- Playback control via Bluetooth
- Pairing mode
- Power saving in Bluetooth
- Antennas
- Selecting the radio input source
- Setting and storing radio stations
- Automatic tuning station (ATS)
- Automatic station search
- Manual station search
- Storing stations on station positions
- Selecting a preset position
- Stereo/mono reception
- Selecting the CD input source
- CD playback
- Repeating the current track
- Selecting another track
- Searching for a passage within a track
- Repeating a track (Repeat One)
- Repeating all tracks (Repeat All)
- Random play
- Creating a track memory
- Selecting and storing tracks
- Playing back a track memory
- Changing the track selection
- Adding tracks
- Deleting the track memory
- Selecting albums and files
- Repeating a file (Repeat 1)
- Repeating all the files in an album (Repeat Album)
- Repeating all files (Repeat All)
- Playing back files in random order (Random)
- Selecting and storing files
- Playing back titles in random order (Random)
- Changing the file selection
- Adding files
- Connecting a MP3 Player or an USB memory stick
- Selecting the USB input source
- Compliance with the WEEE Directive and Disposing of the Waste Product:
- Compliance with RoHS Directive
- Package information
- Technical data
- Power supply
- Max. power consumption
- Output
- Radio unit Frequency bands
- Connectivity
- CD unit
- MP3 features
- USB
- Dimensions and weight
- CLASSE 1 PRODUIT LASER
- Connectivité
- Conectividad
Brand : GRUNDIG
Model : RCD 1500 BT
Category : Radio