
MBFS5017 - Multi-cooker MIDEA - Free user manual and instructions
Find the device manual for free MBFS5017 MIDEA in PDF.
| Brand | Midea |
| Model | MBFS5017 (MB-FS5017) |
| Product type | Multi-cooker (electric rice cooker) |
| Power supply | 120 V~60 Hz |
| Power | 800 W (estimated) |
| Raw rice capacity | 2 to 10 cups (approx. 0.36 to 1.8 L) |
| Cooking functions | White rice, Quick rice, Brown rice, Congee, Baby porridge, Porridge, Soup, Steam, Stew, Slow cook, Reheat |
| Timer | Yes, adjustable up to 24 h delayed programming |
| Keep warm | Automatic after cooking, up to 12 h (recommended < 5 h) |
| Included accessories | Rice paddle, ladle, measuring cup, steam basket |
| Inner pot material | Non-stick coating (aluminum) |
| Dimensions (estimated) | 30 x 30 x 30 cm |
| Weight (estimated) | 3.5 kg |
| Cleaning | Removable inner lid plate, detachable steam valve; do not immerse body |
| Safety instructions | Flat surface, do not touch hot parts, keep children away, do not use outdoors, short cord |
| Usage | Household only, on worktop |
Frequently Asked Questions - MBFS5017 MIDEA
User questions about MBFS5017 MIDEA
0 question about this device. Answer the ones you know or ask your own.
Ask a new question about this device
Download the instructions for your Multi-cooker in PDF format for free! Find your manual MBFS5017 - MIDEA and take your electronic device back in hand. On this page are published all the documents necessary for the use of your device. MBFS5017 by MIDEA.
USER MANUAL MBFS5017 MIDEA
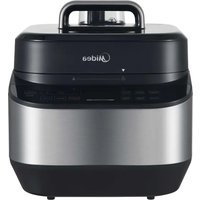
natural_image
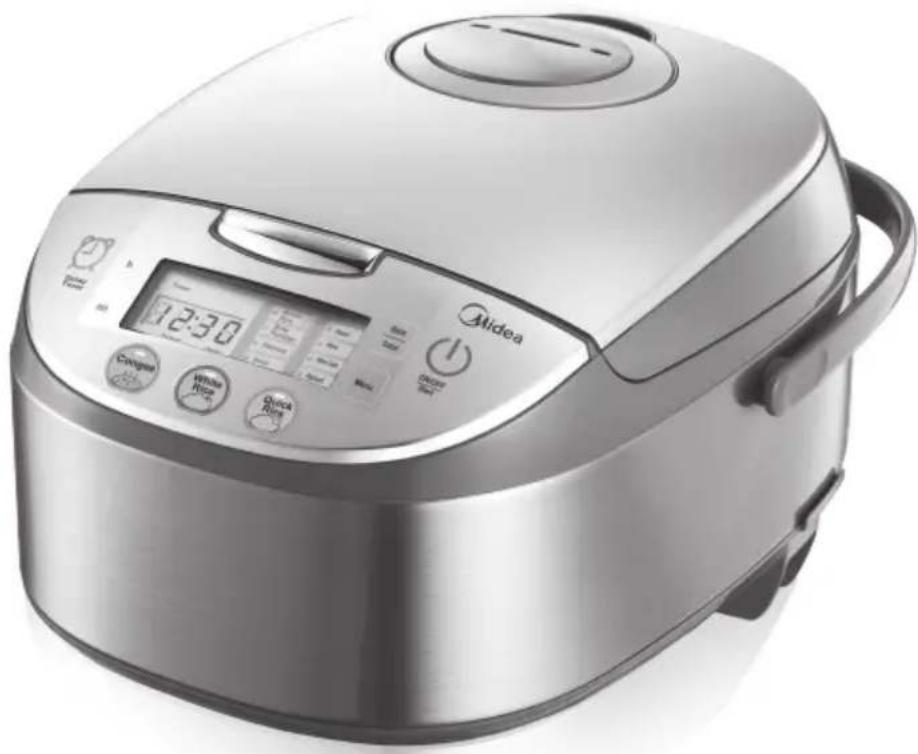
Exterior view of a modern rice cooker with digital display and control buttons (no visible text or symbols on main body)Model No.:MB-FS5017
Thank you for purchasing the Midea Electric Rice Cooker. Please read the Operation Instructions carefully before using and keep it cautiously after reading for future reference. Pictures are for reference only, subject to our available products.

IMPORTANT SAFEGUARDS
Basic safety precautions should always be followed when using electrical appliances, including the following:
- Important: Read all instructions carefully before first use.
- Do not touch hot surfaces. Use the handles or knobs.
- Use only on a level, dry and heat-resistant surface.
- To protect against fire, electric shock and injury to persons, do not immerse cord, plug or the appliance in water or any other liquid. See instructions for cleaning.
- Close supervision is necessary when the appliance is used by or near children.
- Unplug from outlet when not in use and before cleaning. Allow unit to cool before putting on or taking off parts and before cleaning the appliance.
- Do not operate any appliance with a damaged cord or plug or after the appliance malfunctions or has been damaged in any manner. Contact Midea customer service for examination, repair or adjustment.
- The use of accessory attachments not recommended by Midea Housewares may result in fire, electrical shock or injury.
- Do not use outdoors.
- Do not touch hot surfaces or let the cord hang over the edge of a counter or table.
- Do not place on or near a hot gas or electric burner or in a heated oven.
- Do not use the appliance for other than its intended use.
- Extreme caution must be used when moving the appliance containing rice, hot oil or other liquids.
- Do not touch, cover or obstruct the steam vent on the top of the rice cooker as it is extremely hot and may cause scalding.
- Use only with a 120V AC power outlet.
- Always unplug from the base of the wall outlet. Never pull on the cord.
- The rice cooker should be operated on a separate electrical circuit from other operating appliances. If the electrical circuit is overloaded with other appliances, the appliance may not operate properly.
-
Always make sure the outside of the inner cooking pot is dry prior to use. If the inner pot is returned to the cooker when wet, it may damage or cause the product to malfunction.
-
Use extreme caution when opening the lid during or after cooking. Hot steam will escape and may cause scalding.
- Rice should not be left in the inner cooking pot with the Keep-Warm function on for more than 12 hours.
- To prevent damage or deformation, do not use the inner cooking pot on a stovetop or burner.
- To disconnect, turn any control to OFF, then remove the plug from the wall outlet.
- CAUTION: To reduce the risk of electrical shock, cook only in the removable inner cooking pot provided.
- Intended for countertop use only.
- WARNING: Spilled food can cause serious burns. Keep appliance and cord away from children. Never drape cord over edge of counter, never use outlet below counter, and never use with an extension cord.
- Household Use Only.
- Do Not Immerse In Water.
- Do not use the handle to move the cooker when any food is in it.
THIS APPLIANCE IS FOR HOUSEHOLD USE ONLY. SAVE THESE INSTRUCTIONS
Short Cord Instructions
A short power-supply cord is used to reduce the risk resulting from it being grabbed by children, becoming entangled in, or tripping over a longer cord.

Polarized Plug
This appliance has a polarized plug (one blade is wider than the other); follow the instructions below:
To reduce the risk of electric shock, this plug is intended to fit into a polarized outlet only one way If the plug does not fit fully into the outlet, reverse the plug. If it still does not fit, contact a qualified electrician. Do not attempt to modify the plug in any way.
If the supply cord is damaged, it must be replaced by the manufacturer, its service agent or a similarly qualified person in order to avoid hazard.
Product Instructions
Accessories
Scoop

Spoon

Measuring cup

Steamer

Usage Instructions
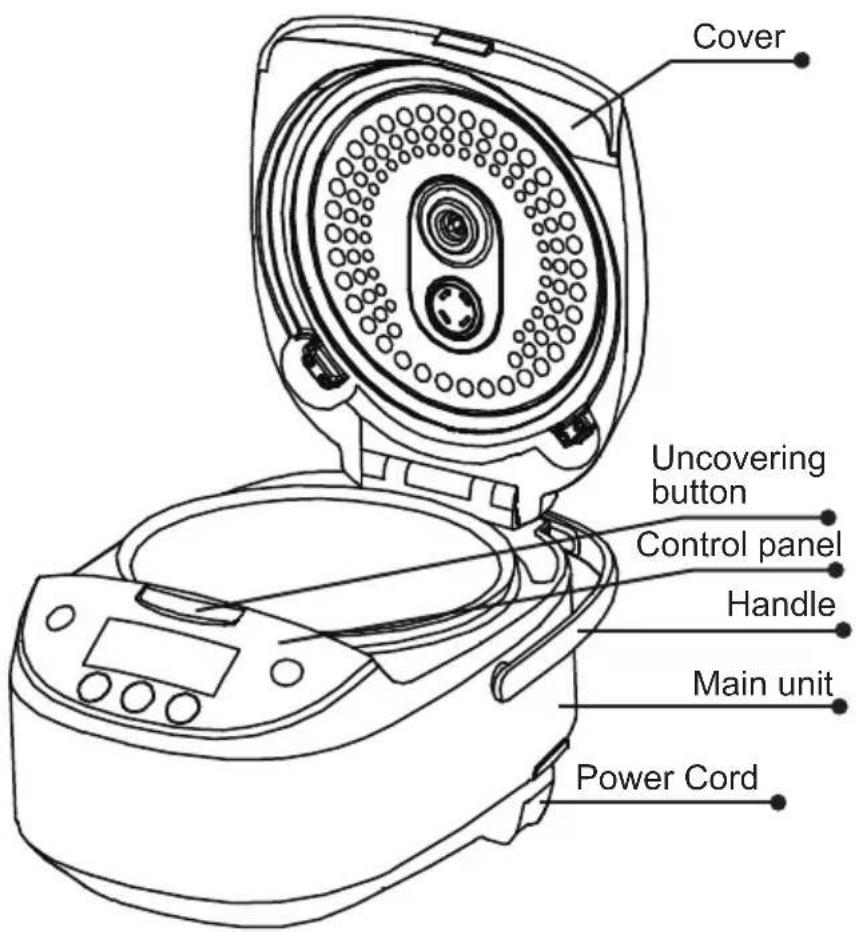
Dry the external surface of the inner pot with fabric, put it into the cooker, please turn the inner pot for 2-3 times to make it perfectly contact the heating tray; then press the cooker cover till it makes "Click" sound.
natural_image
Illustration showing a hand holding a bowl and a close-up of its lid with arrows indicating rotation (no text or symbols)- Avoid heating the inner pot on other stoves, otherwise, it may cause distortion under high temperature; it is not allowed to substitute the inner pot with other containers on the heating tray.

- Press the function button to select the desired function, then press the "Start" button to enter into the working state, or press corresponding function button to directly enter into the working state.
Use of the Functional Buttons
LED
Supply power, press “on / off start” button, the cooker switch on and standby LED displays “----”, “Start” indicator flashes, the electric rice cooker keeps at the Standby state.
Warm/Cancel button
- Under the Standby state, press the "Warm/Cancel" button to enter into WARM. As shown in Drawing
- Under the Working state: press the "Warm/Cancel" button to exit the work state and return the Standby state.
- After cooking, the cooker will automatically enter into the WARM state, during the WARM process, the time displays from 0-12h, if it exceeds 12h, LED displays “----”, and the cooker keeps WARM, the suggested WARM time is less than 5h for avoiding rice color or taste changing.
ON/OFF Start button
Plug in the power, press "on / off start" button, the cooker switch on and standby. Under the standby state, press "on / off start" button the cooker switch off. On standby state, choose the functions and press the "on / off start" button to enter the working process of the function.)
Use of the Functional Buttons
Menu button
Under the Standby state, press the "Menu" button to select the function.
The function is circulated as: Brown Rice - Baby Porridge - Oatmeal - Soup
-Steam - Stew- Slow Cook - Reheat.
Quick Cook button
Under the Standby state, press the “Quick Cook” button, “Quick Cook” indicator lights on, press the “Start” button to enter into the “Quick Cook” work program.
White Cook button
Under the Standby state, press the “White Cook” button, “White Cook” indicator lights on, press the “Start” button to enter into the “White Cook” work program.
Congee button
Supply power, press the “Congee” button, “Congee” indicator lights on, the LED flashes and displays “2:00”, and then press the “Start” button to enter into the “White Cook” work program.
Delay Timer button
Select the reserving function, press the "Delay Timer" button, "Delay
Timer" indicator lights on, after setting the time, press the "Start" button. The set reserving time is the time to stop reserving.
h and min buttons
Press the "h" or "min" button to adjust the clock.
Select the reserving set state, press the "h" or "min" button to set the time of stopping reserving.
Press "h" once to increase 1h, press "min" once to increase 10min.
Usage Instructions
Quick Rice
- Under the Standby state, press the "Quick Rice" button, "Quick Rice" indicator lights on.
- Press the "Start" button to start the "Quick Rice" function, the "Start" and "Quick Rice" indicators light on, LED displays.
- Quick Rice function will automatically enter into rice stewing stage when finishing cooking, and then start countdown of rice cooking.
| Function | Specification | Proportion | Min Rice Amount | Max Rice Amount | Cooking Time | |
| Rice (Cup) | Water (Mark) | |||||
| Quick Rice MB-FS5017 | 2 | 2 | 2 cups | 10 cups | About 45min | |
Note: Water (Mark) is the water level mark on the inner pot.
Usage Instructions
White Rice
- Under the Standby state, press the "White Rice" button, "White Rice" indicator lights on.
- Press the "Start" button to start the "White Rice" function, the "Start" and "White Rice" indicators light on, LED displays.
- White Rice function will automatically enter into rice stewing stage when finishing cooking, and then start countdown of rice cooking.
| Function | Specification | Proportion | Min Rice Amount | Max Rice Amount | Cooking Time | |
| Rice (Cup) | Water (Mark) | |||||
| White Rice | MB-FS5017 | 2 | 2 | 2 cups | 10 cups About 55min | |
Note: Water (Mark) is the water level mark on the inner pot.
Usage Instructions
Congee
- Under the Standby state, press the "Congee" button, "Congee" indicator lights on.
- Press the "Start" button to start the "Congee" function, the "Start" and "Congee" indicators light on, LED displays 2:00 hour, and then starts countdown.
| Function | Specification | Proportion | Min Rice Amount | Max Rice Amount | Cooking Time | |
| Rice (Cup) | Water (Mark) | |||||
| Congee MB-FS5017 | 2 | 2 | 2 cups | 2 cups About | 2 hours | |
Note: Water (Mark) is the water level mark on the inner pot.
Usage Instructions
Brown Rice
- Under the Standby state, press the "Menu" button and select "Brown Rice" function, "Brown Rice" indicator lights on.
- Press the "Start" button to start the "Brown Rice" function, the "Start" and "Brown Rice" indicators light on, LED displays ....
- Brown Rice function will automatically enter into rice stewing stage when finishing cooking, and then start countdown of rice cooking.
| Function | Specification | Proportion | Min Rice Amount | Max Rice Amount | Cooking Time | |
| Rice (Cup) | Water (Mark) | |||||
| Brown Rice | MB-FS5017 | 2 | 2 | 2 cups | 10cups About | 80 min |
Note: Water (Mark) is the water level mark on the inner pot.
Usage Instructions
Baby Porridge
- Under the Standby state, press the "Menu" button and select "Baby Porridge" function, the "Baby Porridge" indicator lights on.
- Press the "Start" button to start the "Baby Porridge" function, the "Start" and "Baby Porridge" indicators light on, LED displays .
Oatmeal
- Under the Standby state, press the "Menu" button and select "Oatmeal" function, the "Oatmeal" indicator lights on.
- Press the "Start" button to start the "Oatmeal" function, the "Start" and "Oatmeal" indicators light on, LED displays 40 minutes, and then starts countdown.
Soup
- Under the Standby state, press the "Menu" button and select "Soup" function, the "Soup" indicator lights on.
- Press the "Start" button to start the "Soup" function, the "Start" and "Soup" indicators light on, LED displays 2:00 hours, and then starts countdown.
Steam
- Under the Standby state, press the "Menu" button and select "Steam" function, the "Steam" indicator lights on. LED min flashes 5.
- Press the "Start" button to start the "Steam" function, the "Start" and "Steam" indicators light on, LED displays, and then starts countdown. After boiling the water, LED displays the countdown time.
Usage Instructions
Stew
- Under the Standby state, press the "Menu" button and select "Stew" function, the "Stew" indicator lights on.
- Press the "Start" button to start the "Stew" function, the "Start" and "Stew" indicators light on, LED displays 2:00 hours, and then starts countdown.
Slow Cook
- Under the Standby state, press the "Menu" button and select "Slow Cook" function, the "Slow Cook" indicator lights on.
- Press the "Start" button to start the "Slow Cook" function, the "Start" and "Slow Cook" indicators light on, LED displays 2:00 hours, and then starts countdown.
Reheat
- Under the Standby state, press the "Menu" button and select "Reheat" function, the "Reheat" indicator lights on.
- Press the "Start" button to start the "Reheat" function, the "Start" and "Reheat" indicators light on, LED displays .
Set the cooking time
- Set the time for cooking Oatmeal, Congee, Soup, Steam, Stew, and Slow Cook.
Time of cooking Oatmeal: default is 40min, adjustable from 20min - 2h. Press "h" to increase by 1h, press the "min" to increase by 5min.
Time of cooking Congee: default is 2h, adjustable from 1.5h - 4h. Press "h" to increase by 1h, press the "min" to increase by 10min.
Time of cooking Soup: default is 2h, adjustable from 1.5h - 4h. Press "h" to increase by 1h, press the "min" to increase by 10min.
Time of cooking Steam: default is 5min, adjustable from 5min – 30min. Press “h” to increase by 1min, press the “min” to decrease by 1min.
Time of cooking Stew: default is 2h, adjustable from 45min - 2h. Press "h" to increase by 1h, press the "min" to increase by 5min.
Time of cooking Slow Cook: default is 2h, adjustable from 2h - 10h. Press "h" to increase by 1h, press the "min" to increase by 10min.
- After setting the cooking time, press the "Start" button to start the work program of corresponding function.
Set the reserving function
- Select the reserving function, press the "Delay Timer" button, "Delay Timer" indicator flashes and the electric rice cooker enters into the reserving set state. Press "h" or "min" button to set the time of stopping reserving. Press "h" once to increase by 1h, press "min" once to increase by 10min. Hold it to automatically increase the time.
- Press the "Start" button to start the reserving function work program. LED displays the time of stopping reserving and starts countdown.
- The default time of stopping reserving is 2h, adjustable from 2h - 24h.
Note: The suggested reserving time is less than 12h for avoiding color and taste changing.
Cleaning and Maintenance
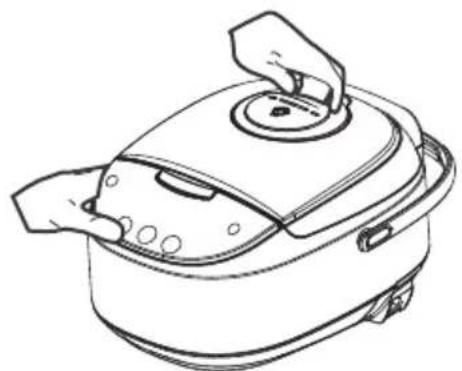
● Wipe the WARM panel with wet fabric, do not directly flush it with water.
natural_image
Technical line drawing of a mechanical component with no visible text or symbolsCleaning and Maintenance
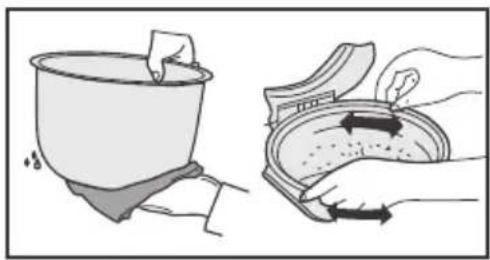
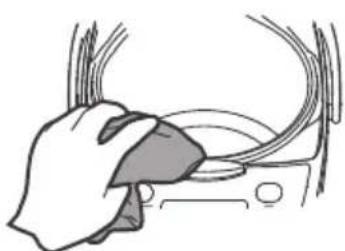
- Remove the rice from the front part with toothpick or dishcloth.
natural_image
Illustration of a hand cleaning a car window with visible brush (no text or symbols)- Please remove the water and rice from the surface and bottom of the inner pot.

natural_image
Illustration of a hand holding a rectangular object (no text or symbols)● Dry the water storage tank with dry dishcloth.

natural_image
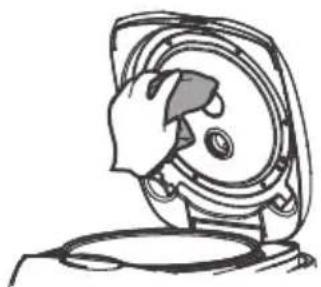
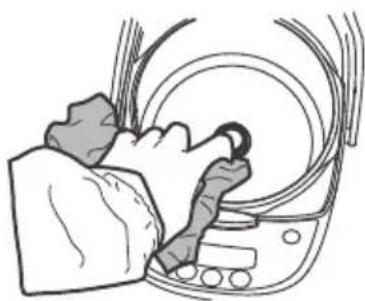
Illustration of a hand using a tool to press or install a circular component (no text or symbols visible)- Please dry the water on the heating tray with dishcloth, clean the burnt rice from the heating tray with steel wire or sand paper.
natural_image
Line drawing of a person cleaning a car interior with a curved handle (no text or symbols)Method of disassembling and cleaning the cover plate
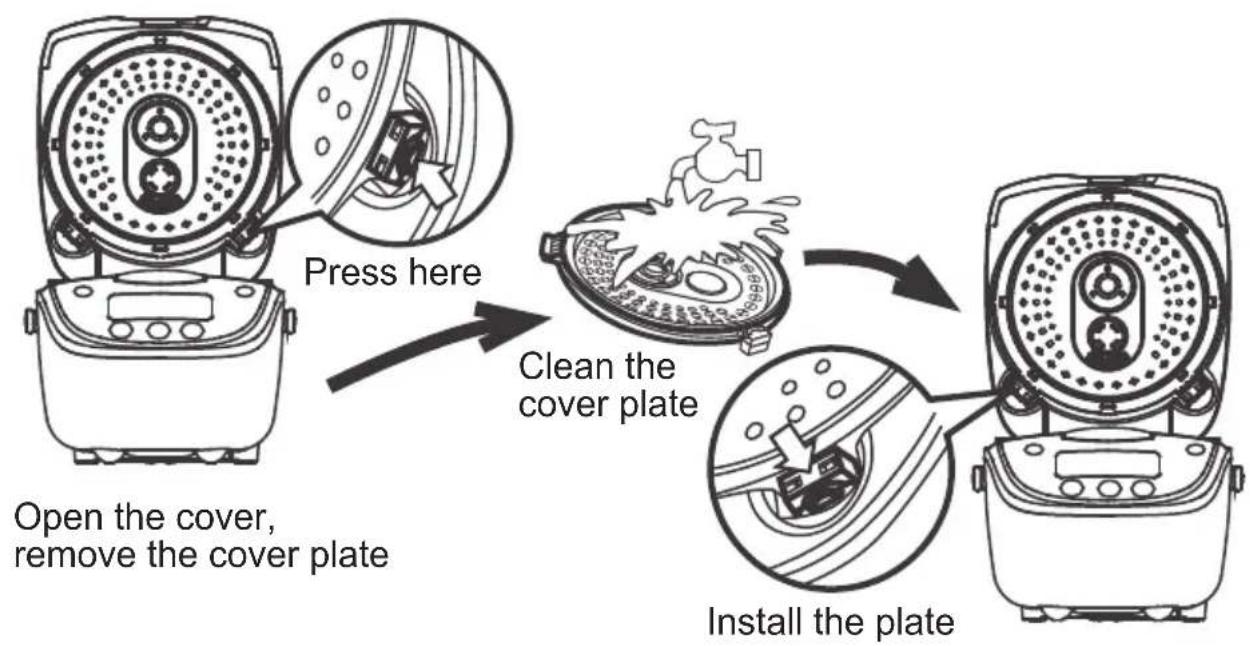
flowchart
graph TD
    A["Press here"] --> B["Clean the cover plate"]
    B --> C["Install the plate"]
    C --> D["Open the cover, remove the cover plate"]
Cleaning and Maintenance
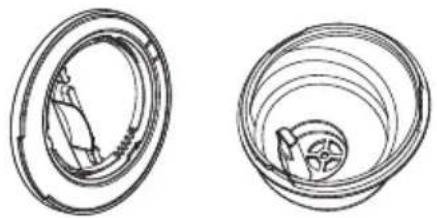
Disassembling, cleaning and installing the steam valve Note: It is suggested to clean the steam valve frequently to ensure smooth steam outlet, please clean it after cooling for avoiding scald.
- Hold the handle of the steam valve and lift it up.
natural_image
Line drawing of a cooking pot with lid and side handles (no text or symbols)As shown in Drawing, turn anticlockwise to open it.

natural_image
Diagram of concentric circular layers with a scale and pointer, no text or symbols presentCleaning and Maintenance
● Drawing of opening it. Clean it with water after opening.
natural_image
Two technical line drawings of mechanical components, one showing a circular opening and the other a spiral grooves (no text or symbols)
natural_image
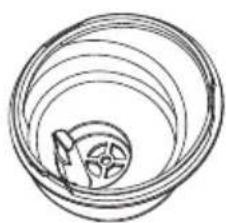
Cross-sectional diagram of a mechanical component with internal structure (no text or symbols)As shown in drawing: turn clockwise, it means the steam valve is well installed when it makes one sound. Note: aim at the valve cover and base pointer before installing.
natural_image
Simple line drawing of a circular mechanical component with a central gear-like feature (no text or symbols)- Press it down to install the steam valve.

natural_image
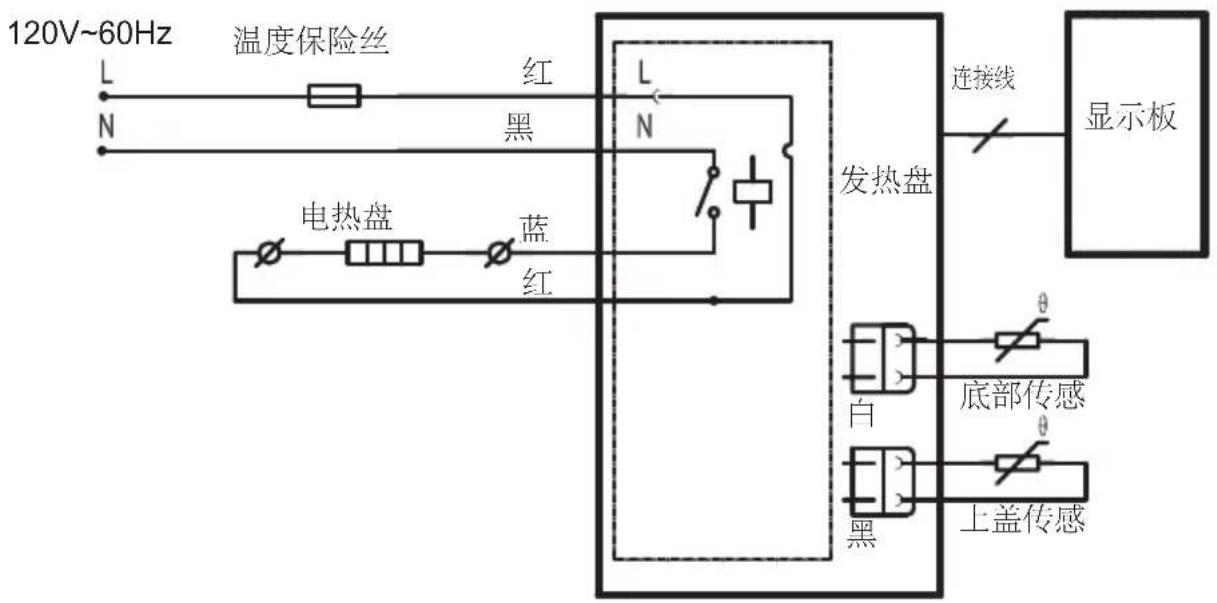
Line drawing of a hand holding a circular device with a small icon, no text or symbols presentSchematic circuit diagram
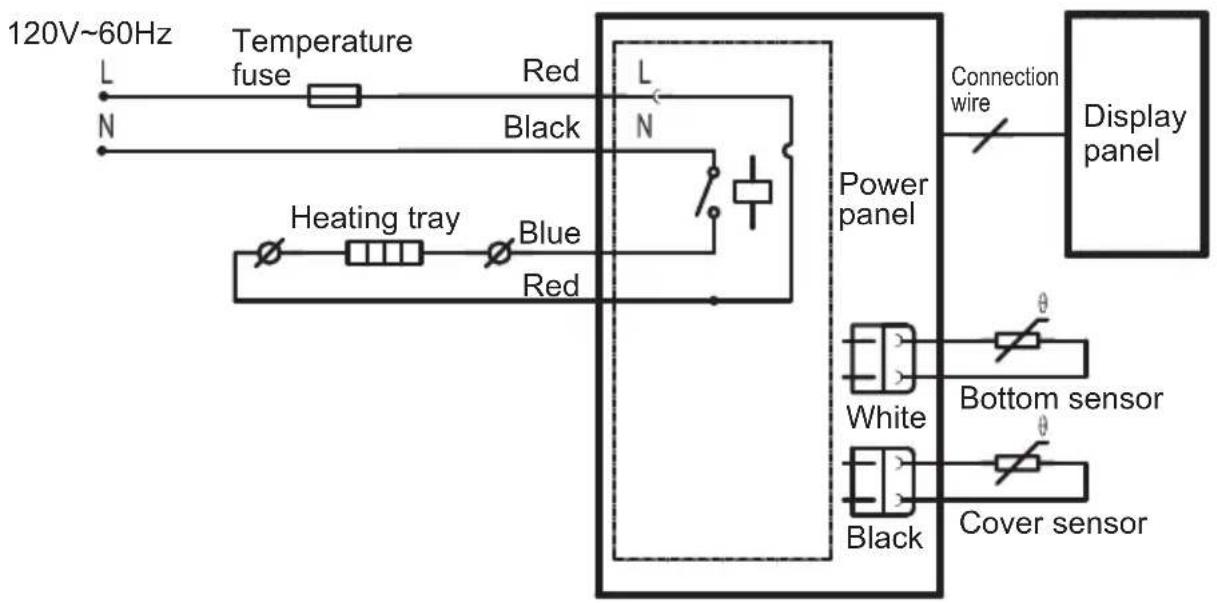
Midea
natural_image
Exterior view of a modern rice cooker with digital display and control buttons (no visible text or symbols on main body)Model NO.:MB-FS5017
natural_image
Illustration showing a hand placing a lid into a container with arrows indicating rotation (no text or symbols)Brown Rice—Baby Porridge—Oatmeal—Soup—Steam—Stew—Slow Cook—Reheat
Quick Cook键
natural_image
Technical line drawing of a mechanical component with no visible text or symbols
natural_image
Illustration of a hand using a tool to lift a circular component (no text or symbols visible)清洁保养
● 前面如果有米粒 请用牙签或抹布清除
natural_image
Illustration of a hand cleaning a car's wheel rim (no text or symbols)natural_image
Line drawing of a person cleaning a car interior with a curved object (no text or symbols)
natural_image
Illustration of a hand holding a rolled-up document or paper (no text or symbols visible)盖板拆洗方法

flowchart
graph TD
    A["打开上盖,取下盖板"] --> B["按压此处"]
    B --> C["清洗盖板"]
    C --> D["安装好盖板"]
清洁保养
蒸汽阀的拆卸、清洗、安装。
natural_image
Line drawing of a cooking pot with lid and handle (no text or symbols)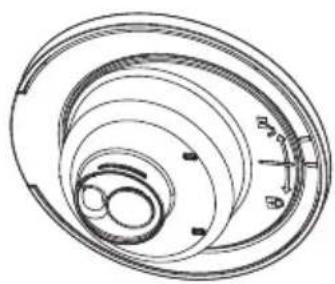
natural_image
Technical line drawing of a spiral mechanical component with concentric rings and mounting holes (no text or symbols)清洁保养
● 打开示意图

natural_image
Two technical line drawings of a mechanical component, one showing internal structure and the other showing a spiral or spiral pattern (no text or symbols)natural_image
Diagram of a mechanical component with a lever and circular base (no text or symbols)natural_image
Diagram of concentric circular layers with a central star-like object inside (no text or symbols)● 用力向下按,安装好蒸汽阀

natural_image
Line drawing of a hand holding a circular device with a button, no text or symbols present电路原理图
natural_image
Line drawing of a rice cooker with control panel and buttons (no text or symbols)natural_image
Illustration showing a hand holding a bowl and a close-up of its lid with arrows indicating rotation (no text or symbols)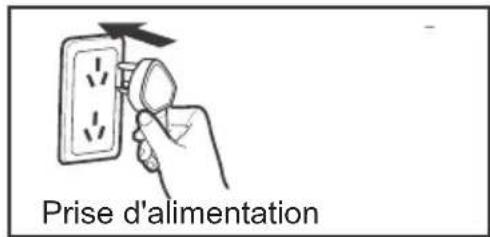
natural_image
Technical line drawing of a mechanical component with no visible text or symbolsnatural_image
Illustration of a hand using a tool to adjust or install a circular component (no text or symbols visible)natural_image
Illustration of a hand cleaning a car's seat area with visible brush (no text or symbols)natural_image
Illustration of a person cleaning a large bowl with a curved handle (no text or symbols)natural_image
Illustration of a hand holding a rolled-up document or paper (no text or symbols visible)natural_image
Line drawing of a cooking pot with lid and handle (no text or symbols)natural_image
Technical line drawing of a spiral mechanical component with concentric rings and mounting holes (no text or symbols)natural_image
Two technical line drawings of a mechanical component, one showing internal structure and the other with concentric grooves (no text or symbols)natural_image
Cross-sectional diagram of a mechanical component with internal parts (no text or symbols)natural_image
Simple line drawing of a spiral mechanical component with a central gear-like feature (no text or symbols)natural_image
Line drawing of a hand holding a digital device with a circular dial and control panel (no text or symbols)


- IMPORTANT SAFEGUARDS
- Basic safety precautions should always be followed when using electrical appliances, including the following:
- THIS APPLIANCE IS FOR HOUSEHOLD USE ONLY. SAVE THESE INSTRUCTIONS
- Short Cord Instructions
- Polarized Plug
- Product Instructions
- Accessories
- Usage Instructions
- Use of the Functional Buttons
- LED
- Warm/Cancel button
- ON/OFF Start button
- Menu button
- Quick Cook button
- White Cook button
- Congee button
- Delay Timer button
- h and min buttons
- Quick Rice
- White Rice
- Congee
- Brown Rice
- Baby Porridge
- Oatmeal
- Soup
- Steam
- Stew
- Slow Cook
- Reheat
- Set the cooking time
- Set the reserving function
- Cleaning and Maintenance
- Method of disassembling and cleaning the cover plate
- Schematic circuit diagram
- Midea
- Quick Cook键
- 清洁保养
- 盖板拆洗方法
- 电路原理图
Brand : MIDEA
Model : MBFS5017
Category : Multi-cooker