
OCEACVG2000B - Electric heater OCEANIC - Free user manual and instructions
Find the device manual for free OCEACVG2000B OCEANIC in PDF.
| Product type | Electric convector with glass front |
| Brand | Oceanic |
| Model | OCEACVG2000B |
| Manufacturer reference | SPG05B-20E2 |
| Rated power | 2000 W |
| Power supply | 230-240 V~, 50-60 Hz |
| Protection rating | IP24 |
| Heating modes | Comfort, ECO, Frost protection, P1/P2/P3 programs |
| Comfort temperature range | 5-35 °C |
| ECO temperature range | 1-31 °C |
| Timer | 0-24 hours |
| Open window function | Yes, automatic heating shutdown |
| Display | Digital screen with light indicators |
| Installation type | Portable on feet |
| Material | Glass front |
| Pre-programmed schedules | P1 (Mon-Sun), P2 (Mon-Fri and Sat-Sun), P3 (adjustable) |
| Safety distance | 1 m from flammable materials |
| Maintenance | Soft damp cloth or low-power vacuum cleaner |
| Warranty | 24 months |
| Repairability | Power cord replaceable by a professional |
| Recommended use | Insulated rooms or occasional use |
| Standby consumption | 0.0004 kW |
Frequently Asked Questions - OCEACVG2000B OCEANIC
User questions about OCEACVG2000B OCEANIC
0 question about this device. Answer the ones you know or ask your own.
Ask a new question about this device
Download the instructions for your Electric heater in PDF format for free! Find your manual OCEACVG2000B - OCEANIC and take your electronic device back in hand. On this page are published all the documents necessary for the use of your device. OCEACVG2000B by OCEANIC.
USER MANUAL OCEACVG2000B OCEANIC
natural_image
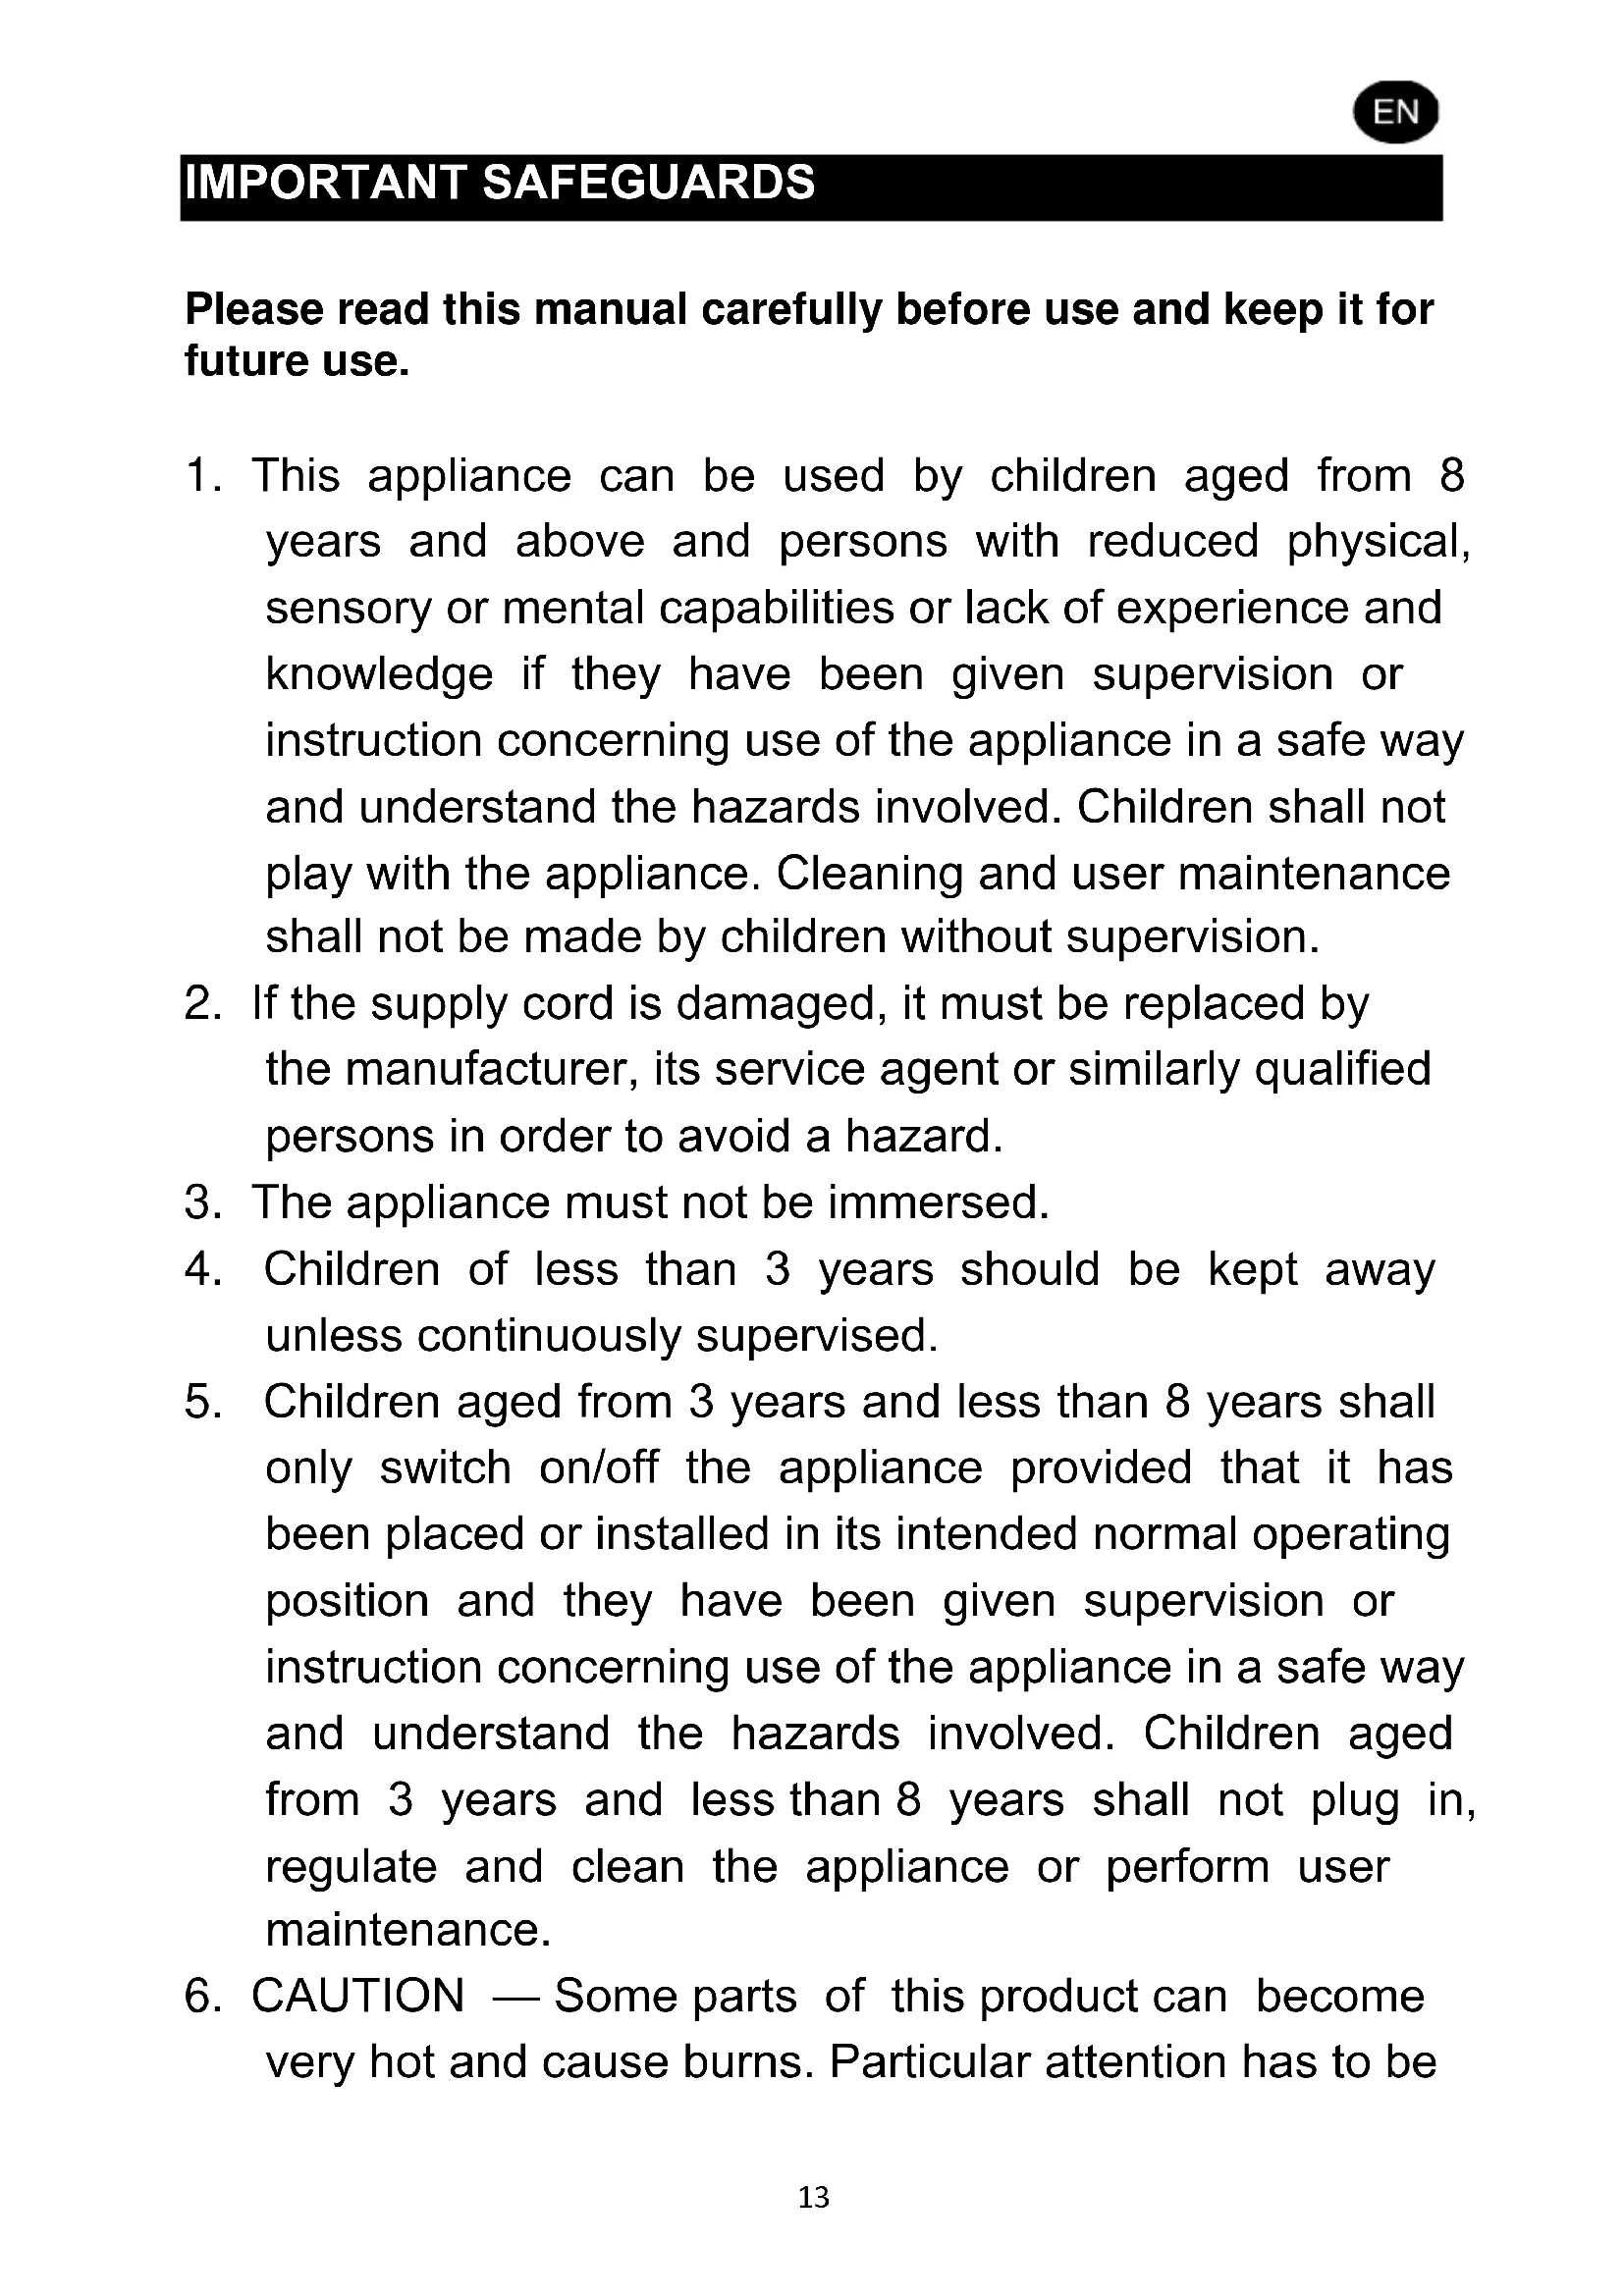
Line drawing of a flat-screen monitor with two side legs (no text or symbols)Glass panel convector 1
Pieds Feet 2
Vis Screw 4
CONSIGNES IMPORTANTES DE SÉCURITÉ
natural_image
Simple line drawing of a rectangular object with an arrow indicating rotation (no text or symbols)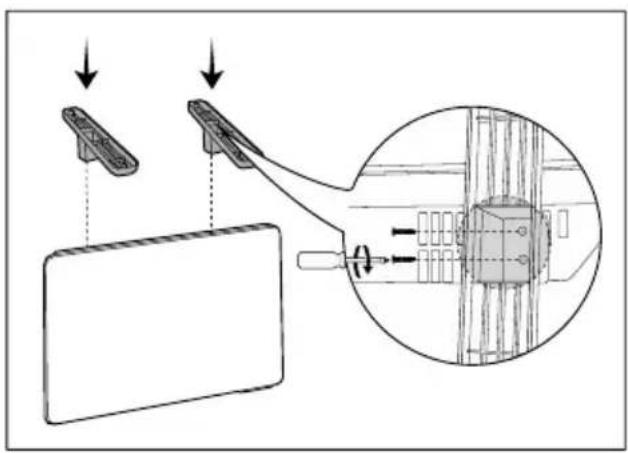
COMMENT UTILISER L'APPAREIL
Tableau de commande
CONDITIONS DE GARANTIE
Instruction manual version: V1
Please read this manual carefully before use and keep it for future use.
- This appliance can be used by children aged from 8 years and above and persons with reduced physical, sensory or mental capabilities or lack of experience and knowledge if they have been given supervision or instruction concerning use of the appliance in a safe way and understand the hazards involved. Children shall not play with the appliance. Cleaning and user maintenance shall not be made by children without supervision.
- If the supply cord is damaged, it must be replaced by the manufacturer, its service agent or similarly qualified persons in order to avoid a hazard.
- The appliance must not be immersed.
- Children of less than 3 years should be kept away unless continuously supervised.
- Children aged from 3 years and less than 8 years shall only switch on/off the appliance provided that it has been placed or installed in its intended normal operating position and they have been given supervision or instruction concerning use of the appliance in a safe way and understand the hazards involved. Children aged from 3 years and less than 8 years shall not plug in, regulate and clean the appliance or perform user maintenance.
- CAUTION — Some parts of this product can become very hot and cause burns. Particular attention has to be
given where children and vulnerable people are present.
- The heater must not be located immediately below a socket-outlet.
- The appliance is for household use only. Do not use outdoors.

9. WARNINGS : In order to avoid overheating, do not cover the heater.
-
Only used as portable appliance.
-
Do not use this heater in the immediate surroundings of a bath, a shower or a swimming pool;
- Do not use this heater if it has been dropped;
- Do not use if there are visible signs of damage to the heater;
-
Use this heater on a horizontal and stable surface or fix it to the wall, as applicable.
-
WARNING: Do not use this heater in small rooms when they are occupied by persons not capable of leaving the room on their own, unless constant supervision is provided.
-
WARNING: To reduce the risk of fire, keep textiles, curtains, or any other flammable material a minimum distance of 1 m from the air outlet.
-
Refer to the paragraph "Installing the support" for the final installation of the radiator before use.
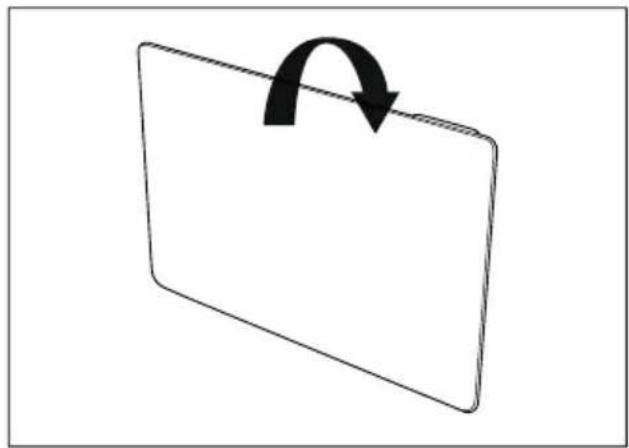
INSTALLATION
Put the heater on a flat, dry and clean surface. Install the feet as shown on the
below drawing.
natural_image
Simple line drawing of a folded paper or folder with an arrow indicating rotation (no text or symbols)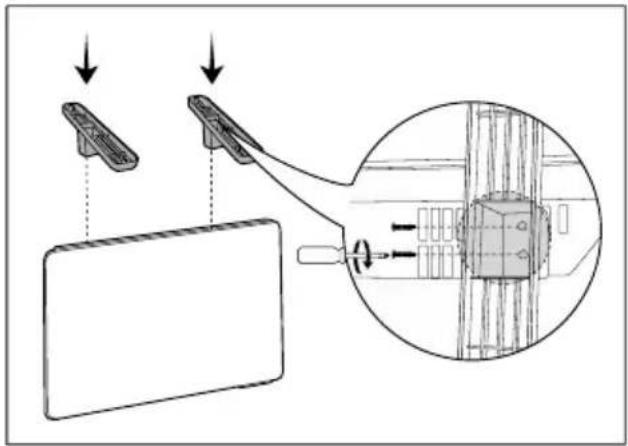
HOW TO USE
Control panel
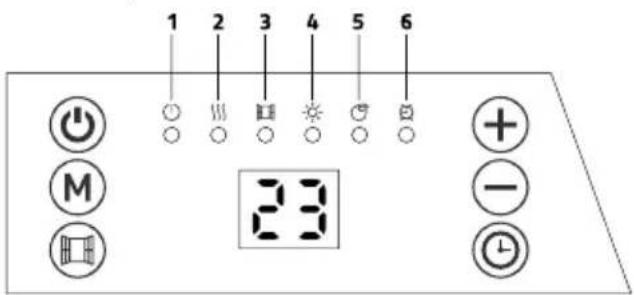
① On/ Stand by
② Heating condition
③ Open window function
④ Comfort mode
⑤ ECO mode
⑥ Timer
| On/ Stand by | |
| Mode selection | |
| Open window function | |
| Increase | |
| Decrease | |
| Timer |
How to use:
- Plug the appliance to AC 230-240V 50-60Hz socket, turn on the main switch at the side of control box. The indicator light is on with a beep sound.
- Press to turn on the heater, which is in state of factory default when first time use.
Factory default:
Heating mode: comfort mode
Target temperature setting: 22 °C
Date: 1(Monday); Time: 00:00 (Off)
Window open function: Off
Timer: Off
- To stop the heater working, press to turn off the heater,
- Unplug the product when it's not in use.
Clock and day of week setting:
- Press down 3 secs to enter clock and day of week setting
- The screen display ⚫, press ⊕ and ⊖ to choose day from 1-7.
| 1 | Monday |
| 2 | Tuesday |
| 3 | Wednesday |
| 4 | Thursday |
| 5 | Friday |
| 6 | Saturday |
| 7 | Sunday |
- Press to confirm day setting and enter the clock hour setting, with the screen display:
- Press and to set the current hour
- Press to confirm hour setting and enter the minute setting, with the screen display:
- Press and to set the current minute
- Press to confirm all settings
Note: The clock and calendar will be reset to factory default if without power supply.
Heating mode:
- Press Ⓜ to enter mode selection. By pressing Ⓜ, heating mode runs in a continuous cycle as below:
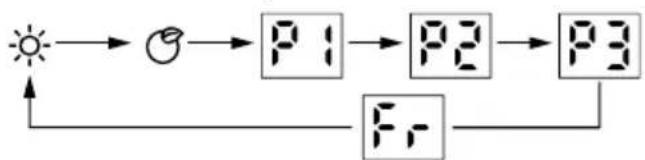
flowchart
graph LR
    A["Sun"] --> B["Moon Icon"]
    B --> C["P1"]
    C --> D["P2"]
    D --> E["P3"]
    E --> F["F_r"]
    F --> A
- Comfort mode: Press and to set the temperature from 5-35°C.
- ECO mode: Press + and - to set the temperature from 1-31°C.
Note: ECO mode=Comfort mode - 4°C
- Anti-frost mode: the screen display Fr. The target temperature is 7°C. The temperature can't be adjusted.
- P1/P2/P3: Pre-set heating program.
Note: If the clock and day setting are not finished, the first time to enter P1/P2/P3 program setting, it is requested to set day and clock setting in advance.
P1: (Monday-Sunday) unadjustable program

P2:(Monday-Friday) unadjustable program

P2:(Saturday-Sunday) unadjustable program

P3:(Monday-Friday) Adjustable program

P3:(Saturday-Sunday) Adjustable program

- P3 adjustable program setting
- When under P3 mode, press M over 3 secs to enter day setting.
-
The screen displays d1, press + and - to set from d1-d7 (Monday-Sunday). Press Ⓜ to confirm and enter hour setting
-
The screen displays , press and to set from 00-24). Press to choose heating mode for every hour (Comfort mode or ECO mode )
-
Repeat the operation until you have completed the schedule of every hour and every day.
Note: After setting heating mode for hour 23, press ⊕ to come back to day setting. Note: when screen displays d7, press ⊕ finish all setting with display of P3.
Timer off function
- Press one time, the indicator light is on. And the screen display "OH" and keeps flashing. press and to set timer from 0-24 hours. Press again to confirm setting.

Open window function
- Press one-time and the indicator light is on. If open window function is activated, the indicator light keeps flashing and stops heating.
- Press 📄 again to quit open window function and back to previous working situation.
CLEANING & MAINTENANCE
- Switch off and unplug from the power supply before cleaning.
- Using a soft, moist cloth, with or without a mild soap solution, carefully clean the exterior surface of the product.
- CAUTION: Allow the product to completely cool before handling or cleaning it.
- Do not allow water or other liquids to run into the interior of the product, as this could create a fire and/or electrical hazard.
- We also recommend the periodic cleaning of this appliance by lightly running a vacuum cleaner nozzle over the guards to remove any dust or dirt that may have accumulated inside or on the unit.
- CAUTION: Do not use harsh detergents, chemical cleaners or solvents as they may damage the surface finish of the plastic components.
WARRANTY TERMS
Your device is guaranteed by the manufacturer for a period of 24 months from the date of purchase (Use the dated invoice as proof).
EXCLUSIONS:
The warranty does not cover wear parts of the product, or problems or damage resulting from:
(1) surface damage due to normal product wear
(2) defects or deterioration due to contact of the product with food or liquids and due to corrosion caused by rust
(3) any incident, abuse, misuse, unauthorized modification, disassembly or repair
(4) improper maintenance, use not in accordance with product instructions, or connection to incorrect voltage
(5) any use of accessories not supplied or approved by the manufacturer.
Information: The warranty will be invalidated if the nameplate and/or the serial number of the product are missing.
REPAIR SERVICES
In the event of a malfunction during the period of the manufacturer's warranty: any request for support must be made to the professional retailer from whom you purchased your product. It is therefore guaranteed for 2 years from the date of purchase. Keep your receipt which will serve as proof of purchase.
In the event of a malfunction, you must return your product to your point of sale.
TECHNICAL SPECIFICATION
Item reference: OCEACVG2000W/OCEACVG2000B
Model: SPG05B-20E2
230-240V\~ 50-60Hz
Rated Power: 2000W
Index of protection: IP24
Instruction manual version: V1
Information requirements for electric local space heaters
| Model identifier(s): SPG05B-20E2 (Ref : OCEACVG2000W/OCEACVG2000B) | |||||
| Item Item Unit Symbol Value | Unit | ||||
| Heat output | Type of heat input, for electric storage local space heaters only (select one) | ||||
| Nominal heat output | P_nom | 2.0 | kW | Manual heat charge control, with integrated thermostat | |
| Minimum heat output (indicative) | P_min | 2.0 | kW | Manual heat charge control with room and/or outdoor temperature feedback | |
| Maximum continuous heat output | P_max,c | 2.0 | kW | Electronic heat charge control with room and/or outdoor temperature feedback | |
| Auxiliary electricity consumption | Fan assisted heat output | ||||
| At nominal heat output | eI_max | [no] | kW | Type of heat output/room temperature control (select one) | |
| At minimum heat output | eI_min | [no] | kW | Single stage heat output and no room temperature control | |
| In standby mode | eI_sb | 0.0004 | kW | Two or more manual stages, no room temperature control | |
| With mechanic thermostat room temperature control | |||||
| With electronic room temperature control | |||||
| Electronic room temperature control plus day timer | |||||
| Electronic room temperature control plus week timer | |||||
| Other control options (multiple selections possible) | |||||
| Room temperature control, with presence detection | |||||
| Room temperature control, with open window detection | |||||
| With distance control option | |||||
| With adaptive start control | |||||
| With working time limitation | |||||
| With black bulb sensor | |||||
| Contact details OCEANIC120-126 Quai de Bacalan CS 1158433000 Bordeaux | |||||
CORRECT DISPOSAL OF THIS PRODUCT
This marking indicates that this product should not be disposed with other household wastes throughout the EU. To prevent possible harm to the environment or human health from uncontrolled waste disposal, recycle it responsibly to promote the sustainable reuse of material resources. To return your used device, please use the return and collection systems or contact the retailer where the product was purchased. They can take this product for environmental safe recycling.
OCEANIC
120-126 Quai de Bacalan
CS 11584
33000 Bordeaux
IMPORT BY:
A.M.C.
123, QUAI JULES GUESDE
94400 VITRY SUR SEINE
France
oceanic
- CONSIGNES IMPORTANTES DE SÉCURITÉ
- COMMENT UTILISER L'APPAREIL
- CONDITIONS DE GARANTIE
- Please read this manual carefully before use and keep it for future use.
- WARNINGS : In order to avoid overheating, do not cover the heater.
- INSTALLATION
- HOW TO USE
- Control panel
- How to use:
- Clock and day of week setting:
- Heating mode:
- Timer off function
- Open window function
- CLEANING & MAINTENANCE
- WARRANTY TERMS
- EXCLUSIONS:
- REPAIR SERVICES
- TECHNICAL SPECIFICATION
- CORRECT DISPOSAL OF THIS PRODUCT
- OCEANIC
- IMPORT BY:
Brand : OCEANIC
Model : OCEACVG2000B
Category : Electric heater