
ERGC53 - Razor PANASONIC - Free user manual and instructions
Find the device manual for free ERGC53 PANASONIC in PDF.
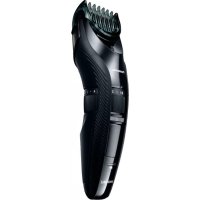



| Product type | Rechargeable hair and beard trimmer |
| Brand | Panasonic |
| Model | ER-GC53 |
| Power supply | AC adapter (100-240 V) and built-in rechargeable Ni-MH battery |
| Motor voltage | 1,2 V DC |
| Charging time | Approximately 8 hours |
| Operating time | Approximately 40 minutes (at 20-30 °C) |
| Cutting height with comb A | 1 to 10 mm (in 0.5 mm increments) |
| Cutting height without comb | Approximately 0.5 mm |
| Cleaning | Washable with water (body, blade, comb) |
| Lubrication | Panasonic WES003 oil recommended, before and after each use |
| Replaceable blade | Yes, part number WER9605 |
| Battery | Built-in Ni-MH, replacement only by an authorized service center |
| Sound level | 60 dB(A) |
| Use | Household use only |
| Included accessories | Comb A (1-10 mm), cleaning brush, oil, AC adapter |
Frequently Asked Questions - ERGC53 PANASONIC
User questions about ERGC53 PANASONIC
0 question about this device. Answer the ones you know or ask your own.
Ask a new question about this device
Download the instructions for your Razor in PDF format for free! Find your manual ERGC53 - PANASONIC and take your electronic device back in hand. On this page are published all the documents necessary for the use of your device. ERGC53 by PANASONIC.
USER MANUAL ERGC53 PANASONIC
Operating Instructions
(Household use) AC/Rechargeable Hair Clipper
Model No. ER-GC71/ER-GC63/ER-GC53
| English 3 | Português 125 | Česky 247 | |
| Deutsch | 21 | Svenska 145 | Slovensky 267 |
| Français | 43 | Dansk 165 | Magyar 287 |
| Italiano | 63 | Norsk 185 | Română 309 |
| Español | 83 | Suomi 205 | Türkçe 329 |
| Nederlands | 105 | Polski 225 | |
Panasonic
Operating Instructions
(Household use) AC/Rechargeable Hair Clipper
Model No. ER-GC71/ER-GC63/ER-GC53
Contents
Safety precautions......6
Important information ......9
Parts identification ....10
Preparation....11
Using the clipper ......12
Maintenance ....15
Troubleshooting 17
Blade life....18
Battery life 18
Removing the built-in rechargeable battery ....18
Specifications ......19
Thank you for purchasing this Panasonic product.
Before operating this unit, please read these instructions completely and save them for future use.
Warning
- This appliance can be used by children aged from 8 years and above and persons with reduced physical, sensory or mental capabilities or lack of experience and knowledge if they have been given supervision or instruction concerning use of the appliance in a safe way and understand the hazards involved. Children shall not play with the appliance. Cleaning and user maintenance shall not be made by children without supervision.
- The supply cord cannot be replaced. If the cord is damaged, the AC adaptor should be scrapped.
- The following symbol means suitable for cleaning under an open water tap.

- Do not clean with water when the AC adaptor is attached.
- Do not use anything other than the supplied AC adaptor for any purpose. Also, do not use any other product with the supplied AC adaptor. (See page 10.)
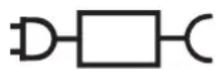
- The following symbol indicates that a specific detachable power supply unit is required for connecting the electrical appliance to the supply mains. The type reference of power supply unit is marked near the symbol. (One of the power supply unit specified is provided with this appliance.)
Safety precautions
To reduce the risk of injury, loss of life, electric shock, fire, and damage to property, always observe the following safety precautions.
Explanation of symbols
The following symbols are used to classify and describe the level of hazard, injury, and property damage caused when the denotation is disregarded and improper use is performed.

DANGER
Denotes a potential hazard that will result in serious injury or death.

WARNING
Denotes a potential hazard that could result in serious injury or death.

CAUTION
Denotes a hazard that could result in minor injury or property damage.
The following symbols are used to classify and describe the type of instructions to be observed.

This symbol is used to alert users to a specific operating procedure that must not be performed.

This symbol is used to alert users to a specific operating procedure that must be followed in order to operate the unit safely.

WARNING
▶ This product
This product has a built-in rechargeable battery. Do not throw into flame or heat.

- Doing so may cause fluid leak, overheating, or explosion.

Do not modify or repair.
- Doing so may cause fire, electric shock, or injury. Contact an authorized service centre for repair (battery change, etc.).

Never disassemble except when disposing of the product.
- Doing so may cause fire, electric shock, or injury.
▶ In case of an abnormality or malfunction Immediately stop using and remove the adaptor if there is an abnormality or malfunction.
- Failure to do so may cause fire, electric shock, or injury.
•The main body or AC adaptor is deformed or abnormally hot.
•The main body or AC adaptor smells of burning.
•There is abnormal sound during use or charging of the main body or AC adaptor.
- Immediately request inspection or repair at an authorized service centre.

WARNING
▶ Power supply

Do not connect or disconnect the adaptor to a household outlet with a wet hand.
- Doing so may cause electric shock or injury.
Do not immerse the AC adaptor in water or wash with water.
Do not place the AC adaptor over or near a water-filled sink or bathtub.
Never use the appliance if the AC adaptor is damaged or if the power plug fits loosely in a household outlet.

Do not damage the cord or power plug.
- Do not deface, modify, forcefully bend or pull the cord or power plug.
Also, do not place anything heavy on, twist or pinch the cord.
- Doing so may cause electric shock or fire due to a short circuit.

Do not use in a way exceeding the rating of the household outlet or the wiring.
- Exceeding the rating by connecting too many plugs to one household outlet may cause fire due to overheating.

Always ensure the appliance is operated on an electric power source matched to the rated voltage indicated on the AC adaptor. Fully insert the adaptor.
- Failure to do so may cause fire or electric shock.

Always unplug the adaptor from a household outlet when cleaning.
- Failure to do so may cause electric shock or injury.
Regularly clean the power plug and the appliance plug to prevent dust from accumulating.

- Failure to do so may cause fire due to insulation failure caused by humidity.
→Disconnect the adaptor and wipe with a dry cloth.
▶ Preventing accidents
Do not store within the reach of children or infants. Do not let them use it.

- Putting parts or accessories in the mouth may cause an accident or injury.
If the oil is consumed accidentally, do not induce vomiting, drink a large amount of water, and contact a physician.

If the oil comes into contact with eyes, immediately wash thoroughly with running water, and contact a physician.
- Failure to do so may result in physical problems.

CAUTION
▶ Protecting the skin
Do not press the blade strongly on your lip or skin.
Do not use this product for any purpose other than trimming beard and hair.
Do not directly apply the blades on ears or rough skin (such as swellings, injuries or blemishes).
- Doing so may cause skin injury.

Check that the blades are not damaged or deformed before use.
Failure to do so may cause skin injury.
▶Note the following precautions
Do not allow metal objects or trash to adhere to the power plug or the appliance plug.
- Doing so may cause electric shock or fire due to a short circuit.

Do not drop or hit against other objects.
- Doing so may cause injury.
Do not wrap the cord around the adaptor and main body when storing.

- Doing so may cause the wire in the cord to break with the load, and may cause fire due to short circuit.
Disconnect the adaptor from the household outlet when not using.

- Failure to do so may cause electric shock or fire due to electrical leakage resulting from insulation deterioration.

Disconnect the adaptor or the appliance plug by holding onto the adaptor or the appliance plug instead of the cord.
- Failure to do so may cause electric shock or injury.
Handling of the removed battery when disposing

DANGER
The rechargeable battery is exclusively for use with this appliance. Do not use the battery with other products.
Do not charge the battery after it has been removed from the product.
Do not throw into fire or apply heat. Do not solder, disassemble, or modify the battery.

Do not let the positive and negative terminals of the battery get in contact with each other through metallic objects.
Do not carry or store the battery together with metallic jewellery such as necklaces and hairpins.
Never peel off the tube.
- Doing so may cause fluid leak, overheating, or explosion.

DANGER

The battery contains alkaline fluid. If it comes in contact with the eyes, do not rub the eyes, and thoroughly rinse with clean water, such as tap water.
- Failure to do so may cause loss of vision.
→Consult a physician immediately.

WARNING
After removing the rechargeable battery, do not keep it within reach of children and infants.

- The battery will harm the body if accidentally swallowed.
→If this happens, consult a physician immediately.

The battery contains alkaline fluid. If it comes in contact with the skin or clothes, rinse off with clean water, such as tap water.
- Failure to do so may cause skin injury.
Important information
- Before using an attachment, check that it has been installed correctly. Failure to do so may cause hair to be cut too short.
- The appliance should not be used on animals.
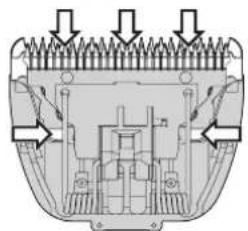
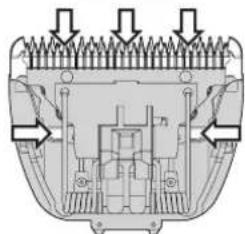
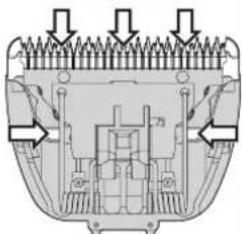
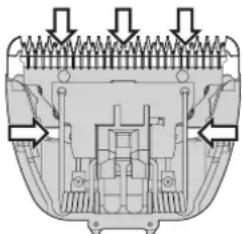
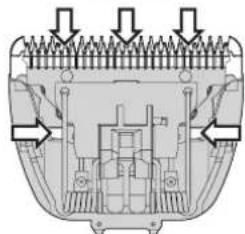
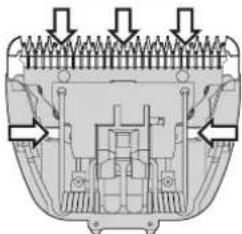
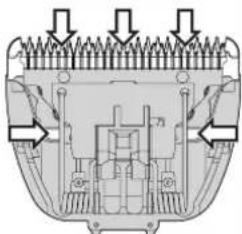
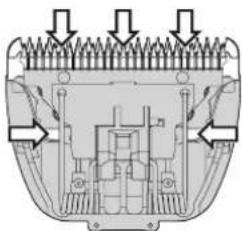
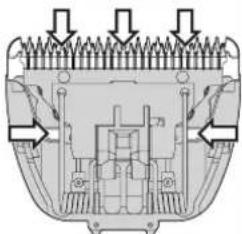
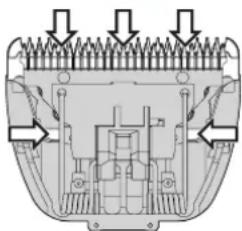
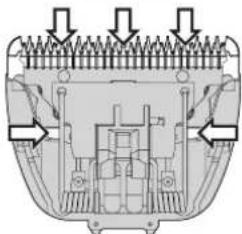
- Before and after each use, apply oil at the places marked with arrows. (See page 17.)
Failure to apply the oil may cause the following problems.
- The blade has become blunt.
- Shorter operating time.
- Louder sound.
- Store the main body in a place with low humidity after use. Failure to do so may cause malfunction due to condensation or rust.
- The appliance may become warm during operation and/or charging. This is normal.
- Charge the appliance correctly according to these Operating Instructions. (See page 11 "Charging".)
- This appliance contains battery that is only replaceable by skilled persons. Please contact an authorized service centre for the details of repair.
Parts identification
A
B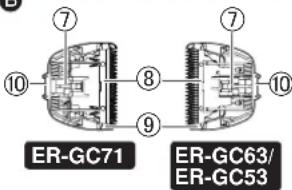
C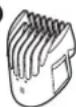
D
E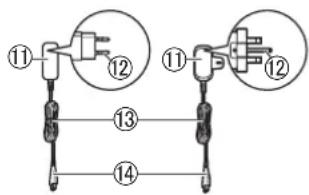
F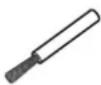
G
H
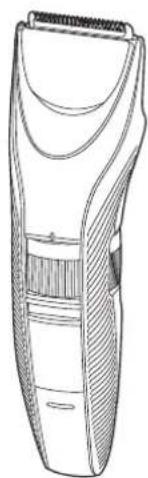
A Main body
① Trimming height indication mark ② Dial (Height adjustment control) ③ Power switch [∅] ④ Charge indicator lamp ⑤ Appliance socket ⑥ Water inlet
B Blade
ER-GC71
ER-GC63/ER-GC53
⑦ Cleaning lever ⑧ Moving blade
⑨ Stationary blade ⑩ Mounting hook
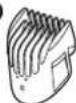
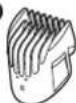
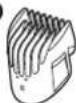
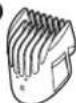
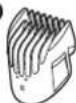
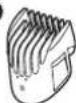
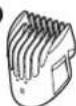
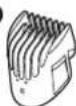
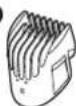
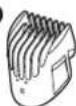
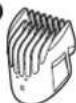
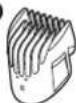
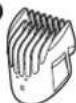
© Comb attachment [A] (1 mm to 10 mm)
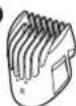
D Comb attachment [B]
ER-GC71/ER-GC63
(11 mm to 20 mm)
AC adaptor (RE9-49/RE9-52/RE9-86)
- The shape of the AC adaptor differs depending on the area.
- One of the power supply units specified is provided with this appliance.
⑪ Adaptor ⑫ Power plug ⑬ Cord ⑭ Appliance plug
Accessories
F Cleaning brush © Oil H Pouch ER-GC71
Preparation
Charging
• Make sure that the clipper is turned off.
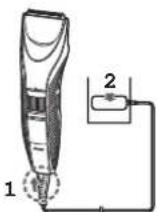
1 Connect the appliance plug to the appliance socket. 2 Plug in the adaptor into a household outlet.
- Charging is completed after approx. 8 hours.
- Check that the charge indicator lamp (→) glows.
3 Disconnect the adaptor after charging is completed.
(for safety and to reduce energy usage) The charge indicator lamp (→) continues to glow after charging is complete. There is no indication to show that "charging is complete".
Notes
• Keeping the battery charging will not affect battery performance. - If there is crackling noise on radios or other devices while charging, charge the clipper using a different household outlet. - When the appliance is not used for 6 months or more, the battery will weaken (leak battery fluid, etc.). Fully charge the battery once every 6 months. - When charging the clipper for the first time or when it has not been in use for more than 6 months, the charging time may change or the lamp on the main body may not glow for a few minutes. Please charge it for more than 16 hours in such cases. - Recommended ambient temperature for charging is 0 °C – 35 °C. Battery performance may decrease outside of the recommended temperature. - A full charge supplies enough power for approximately 40 minutes of use. (Based on dry using at 20°C - 30°C.) The operating time may differ depending on the frequency of use, the operating method and the ambient temperature. - You can charge the battery before it is completely discharged. However, it is recommended to charge when the battery is completely discharged. The battery life depends strongly on factors such as how it is used and stored.
AC operation
If you connect the AC adaptor to the clipper in the same way as for charging, and turn on the power, you can use it.
- If the remaining battery is too low, the blades may move slowly or stop, even with the AC operation. In this case, charge the battery for 3 minutes or more.
- The battery will be discharged, even with the AC operation.
Using the clipper
- Make sure that the clipper is turned off.
- Apply the oil to the clipper before and after each use. (See page 17.)
- The appliance may not operate in an ambient temperature approximately 0°C or lower.
1 Mount the desired comb attachment and adjust the trimming height as needed. (See pages 12 and 13.)
- It can also be used without the comb attachment. (Trimming height: approx. 0.5 mm)
2 Slide the power switch on the main body to the “|” position to turn on the power.
Trimming hair (→ pages 13 and 14.) Trimming beard → (See pages 14 and 15.)
Removing and mounting the comb attachments
- Take care not to injure hands, etc., with the blade when removing or mounting the attachment.
Removing the comb attachment
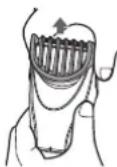
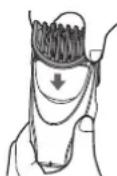
Hold the main body securely and remove the comb attachment from the main body.
Mounting the comb attachment
Mount the comb attachment to the main body until it clicks.
- If the comb attachment is not attached correctly, it may shift and end up cutting too much during use.
How to adjust the trimming height
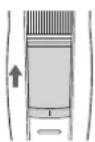
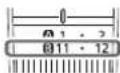
- Make sure that the clipper is turned off. Turn the dial and adjust the trimming height indication mark (@) to the desired height.
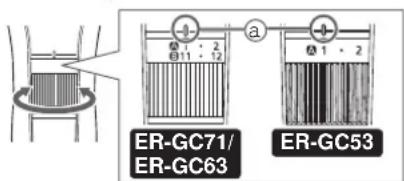

▶Comb attachment
[A]
Trimming height (estimate):
1 mm to 10 mm
ER-GC71/ER-GC63![PANASONIC ERGC53 - [A] - 1](/content/2026/03/502579/images/1d566b4441e87c1342bb101a0d7bf8735746f7cde71dac3e51eeb7b6525c02da.jpg)
ER-GC53![PANASONIC ERGC53 - [A] - 2](/content/2026/03/502579/images/ffdafd2bb866ab44fa5ca34bb79dcb286185c3e7ad2bc6c6dae8f1e6a0eed6f1.jpg)
| Indicator 1 2 3 4 | 5 | ||||||||||
| Trimming height (mm) (estimate) | 1 | 1.5 | 2 | 2.5 | 3 | 3.5 | 4 | 4. | 5 | 5 | 5.5 |
| Indicator 6 7 8 9 | 10 | · | · | · | · | ||||
| Trimming height (mm) (estimate) | 6 | 6.5 | 7 | 7.5 | 8 | 8.5 | 9 | 9.5 | 10 |
![PANASONIC ERGC53 - [A] - 3](/content/2026/03/502579/images/cd195fef1493b88684e02f34aec9b329655511f10288cd11c746a6ace47d1de8.jpg)
▶Comb attachment [B]
ER-GC71/ER-GC63
Trimming height (estimate):
11 mm to 20 mm
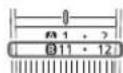
| Indicator 11 12 13 | 14 | 15 | · | · | · | · | ||||
| Trimming height (mm) (estimate) | 11 | 11.5 | 12 | 12.5 | 13 | 13.5 | 14 | 14.5 | 15 | 15.5 |
| Indicator | 16 | 17·18 | 19 | · | 20 | · | · | ||
| Trimming height (mm) (estimate) | 16 | 16.5 | 17 | 17.5 | 18 | 18.5 | 19 | 19.5 | 20 |
Notes
- Actual hair length will be a little longer than the height you set.
- Setting of 10.5 mm is unavailable.
- It can also be used without the comb attachment. (Trimming height: approx. 0.5 mm)
Trimming hair
- Do not use when the hair is wet. A wet hair may stick to the skin or bunch up, making it difficult to trim.
- To maintain sharpness, remove hair trimmings between usages. • Before trimming, comb your hair with a comb.
Adjusting the length around the ears and sides
Holding the clipper with the power switch facing outwards, trim around the ears and sides by lifting the tip of the comb attachment little by little from the hairline. - Trim your hair while holding down your ear with one hand.
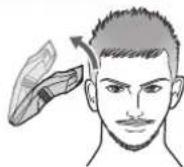
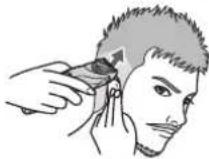
How to align the length at the neckline and at the back of your head
Holding the clipper with the power switch facing outwards, trim from the neckline to the back of your head by lifting the tip of the comb attachment little by little from the hairline.
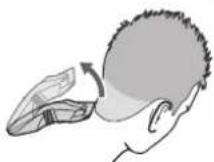
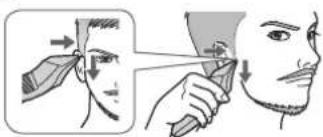
13
Shaping your sideburns
Without comb attachment
Holding the clipper with the power switch at the bottom, keep the blade at an angle of 90° against the sideburns and move the clipper from top to bottom along the skin to trim the sideburns.
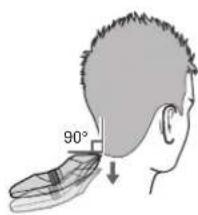
Trimming the downy hair around the neckline
Without comb attachment
Holding the clipper with the power switch at the bottom, touching the blade perpendicular to the area of downy hair, and move the clipper downward along the skin.
Trimming to an even length
Holding the clipper with the power switch facing outwards, trim slowly while crisscrossing from various directions to avoid missing any spots.
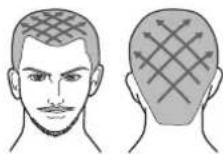
Notes
- It is recommended to ask someone else to trim around your own ears and neckline.
- The desired results may not be achieved if hair is too long. In this case, trim the hair to a length of about 2 cm before using the clipper.
Trimming beard
- Do not use with shaving foam applied or when the beard is wet. A wet beard may stick to the skin or bunch up, making it difficult to trim.
- Before trimming, comb your moustache with a comb.
Trimming to an even length
Holding the clipper with the power switch facing outwards, trim by bringing the blade in contact with the skin and moving the clipper against the flow of the beard.
Hair trimmings may collect inside the comb attachment when a large volume of beard is cut, so discard hair trimmings after each use.
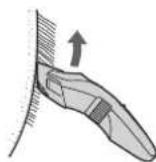
Trimming the downy hair
Without comb attachment
Holding the clipper with the power switch facing outwards, trim by bringing the blade in contact with the skin.
The clipper cannot trim hair to lengths less than 0.5 mm.
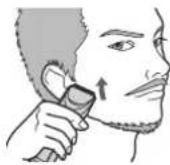
Maintenance
- Clean the clipper and the blade after each use. (If not cleaned, the motion will become poor and the sharpness will worsen.) Make sure that the clipper is turned off.
- Remove the clipper from the AC adaptor.
- Do not use thinner, benzine, alcohol or other chemicals. Doing so may cause failure, cracking or discoloration of the main body. Clean the main body only with a soft cloth slightly dampened with tap water or soapy tap water.
Cleaning with water
Main body, blade and comb attachment
To remove light dirt
- Remove the comb attachment and turn the clipper on.
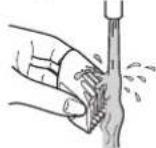
- Run water down the water inlet at the front of the main body, rinse thoroughly for approximately 20 seconds, and then turn the clipper off.
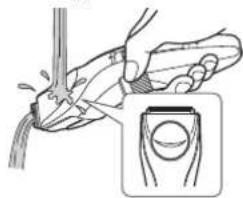
Remove heavy dirt
- Remove the comb attachment and blade.
- Clean the clipper, the blade and the comb attachments with running water.
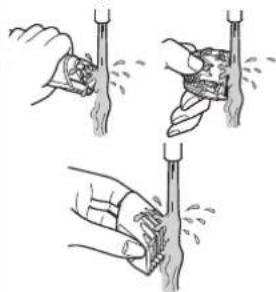
- Shake up and down several times to remove the water.
- Be careful not to hit the main body on the sink or any other object while draining the water. Failure to do so may cause malfunction.
- Wipe off the water with a towel and let it dry naturally.
- It will dry faster with the blade removed.
- Apply the oil to the blade after drying. (See page 17.)
- Attach the blade and attachment to the main body.
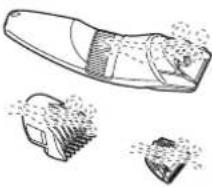
Cleaning with the brush
Main body and blade
- Remove the blade. (See this page.)
- Brush off any hair trimmings from the main body and from around the blade.
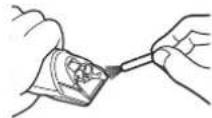
- Brush off the hairs from the blade edge.
- Brush any hair trimmings out from between the stationary blade and the moving blade while pressing down the cleaning lever (a) to raise the moving blade.
- Apply the oil to the blade. (See page 17.)
- Attach the blade and attachment to the main body.
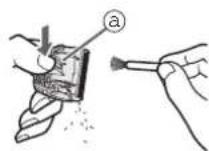
Removing and mounting the blade
Removing the blade
Hold the clipper with the switch facing upward and push the blade with your thumb while catching the blade in your other hand.
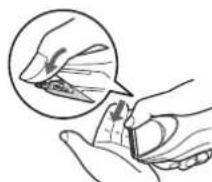
Mounting the blade
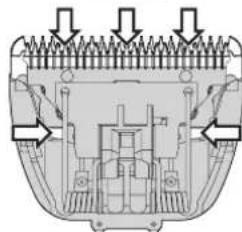
Fit the mounting hook (B) into the blade mounting (A) on the clipper and then push in until you hear a click.
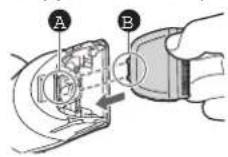
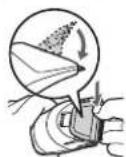
Lubrication
- Apply the oil to the clipper before and after each use.
- Make sure that the clipper is turned off.
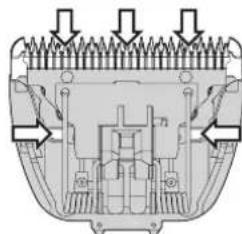
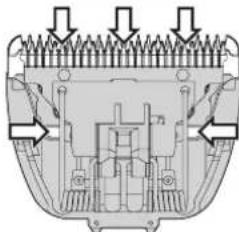
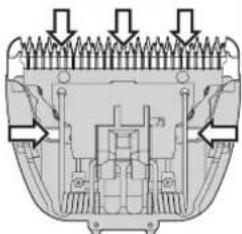
1. Remove the blade. 2. Apply a drop of the oil to each indicated point. 3. Attach the blade to the main body, turn on the power and allow to run for approximately 5 seconds.
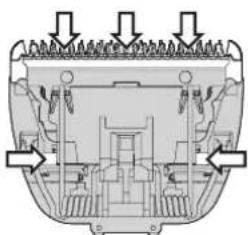
ER-GC71

ER-GC63/ER-GC53
▶ Replacement parts
Replacement parts are available at your dealer or Service Centre.
| Replacement parts for ER-GC71/ER-GC63/ER-GC53 | Blade | ER-GC71:WER9615ER-GC63/53:WER9605 |
| Oil WES003 | ||
- Do not use any blade other than the one dedicated as it may cause defect in performance. • We recommend Panasonic oil WES003.
Troubleshooting
Perform the following actions. If the problems still cannot be solved, contact the store where you purchased the unit or a service centre authorized by Panasonic for repair.
Problem Action
| The blade has not been cleaned properly. | When the clipper is very dirty, remove the blade and wash with water. (See page 15.) |
| Makes a loud sound. | Confirm that the blade is properly attached. |
| The clipper has become blunt. | Replace the blade. (See page 16.) |
| Clean the blade and apply oil. (See pages 15 to 17.) |
Problem Action
Clipper stopped functioning.
Operating time is short.
The clipper cannot be charged.
Clipper can be used for only about 10 minutes even after charging.
Charge the clipper.
Or use with the AC operation. (See pages 11 and 12.)
Charge the battery for approximately 16 hours continuously to rejuvenate it. If few uses remain even after charging, the battery has
reached the end of its life. (Fluid may be leaking due to degradation at the end of battery life.)
Contact an authorized service centre for repair.
Push the appliance plug into the main body all the way and make sure the charge indicator lamp glows.
Charge within the recommended charging temperature of 0 °C to 35 °C.
Have the battery replaced by an authorized service centre.
Blade life
Blade life varies according to the frequency and period of use of the clipper.
For example, the blade life is approximately 2 years when using the clipper for 20 minutes twice a month.
Replace the blades if cutting efficiency reduces substantially despite proper maintenance.
Battery life
Battery life will vary according to the frequency and length of use. If the battery is charged once a month, the service life will be approximately 3 years. If the operating time is significantly shorter even after a full charge, the battery has reached the end of its life.
Removing the built-in rechargeable battery
Remove the built-in rechargeable battery before disposing of the clipper.
The battery is to be disposed of safely.
Please make sure that the battery is disposed of at an officially designated location if there is one.
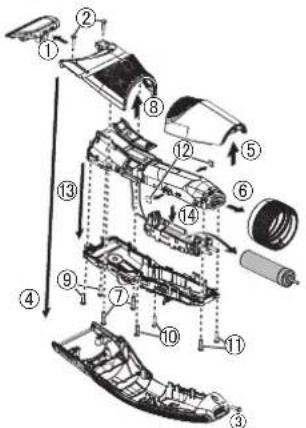
This figure must only be used when disposing of the clipper, and must not be used to repair it. If you dismantle the clipper yourself, it will no longer be waterproof, which may cause it to malfunction.
- Remove the clipper from the AC adaptor.
- Slide the power switch to turn on the power and then keep the power on until the battery is completely discharged.
- Perform steps ① to ⑭ and lift the battery, and then remove it.
- Take care not to short-circuit the positive and negative terminals of the removed battery, and insulate the terminals by applying tape to them.
For environmental protection and recycling of materials
This clipper contains a Nickel-Metal Hydride battery. Please make sure that the battery is disposed of at an officially assigned location, if there is one in your country.
Specifications
| Power source | See the name plate on the AC adaptor.(Automatic voltage conversion) |
| Motor voltage | 1.2 V--- |
| Charging time Approx. 8 hours | |
| Airborne Acoustical Noise | 60 (dB (A) re 1 pW) |
This product is intended for household use only.
Disposal of Old Equipment and Batteries Only for European Union and countries with recycling systems
These symbols on the products, packaging, and/or accompanying documents mean that used electrical and electronic products and batteries must not be mixed with general household waste.
For proper treatment, recovery and recycling of old products and used batteries, please take them to applicable collection points in accordance with your national legislation.
By disposing of them correctly, you will help to save valuable resources and prevent any potential negative effects on human health and the environment.
For more information about collection and recycling, please contact your local authority.
Penalties may be applicable for incorrect disposal of this waste, in accordance with national legislation.
Note for the battery symbol (bottom symbol)
This symbol might be used in combination with a chemical symbol. In this case it complies with the requirement set by the Directive for the chemical involved.
Panasonic
Bedienungsanleitung
B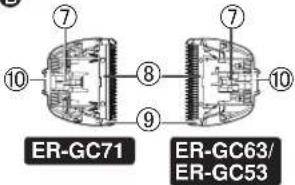
©
D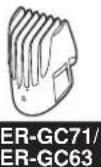
E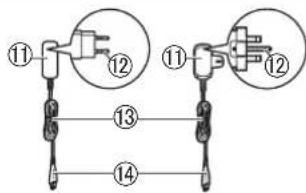
F
G
H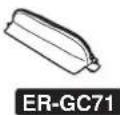
Hair clipper

▶ Comb attachment
Cutting length
(estimate):
1 mm to 10 mm
ER-GC71/ER-GC63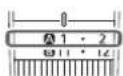
ER-GC53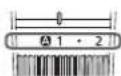
ER-GC71
ER-GC63/ER-GC53
▶ Spare parts
▶ Accident prevention
B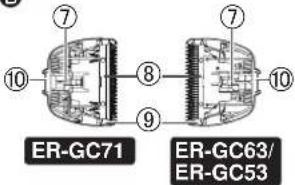
©
D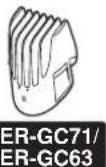
E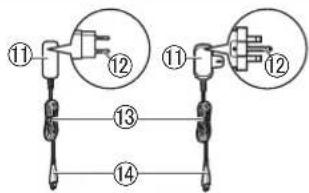
F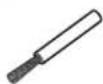
G
H French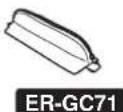
A Main body
French

▶ SaboA[ ]
Main body and blade
ER-GC71
ER-GC63/ER-GC53
French
B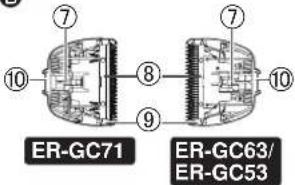
©
D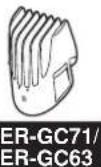
E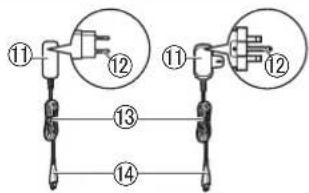
F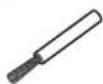
G
H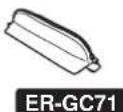
A Main body
ER-GC71
ER-GC63/ER-GC53
▶ Spare parts
B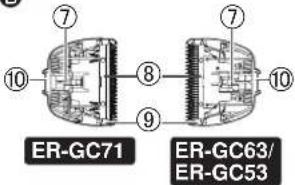
©
D ER-GC71/ER-GC63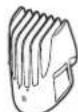
E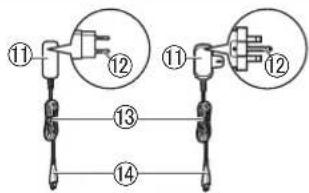
F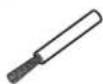
G
H ER-GC71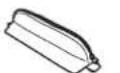
A Main body

ER-GC71/ER-GC63
Cutting length
(estimate):
from 11 mm to 20 mm
ER-GC71
ER-GC63/ER-GC53
Model No ER-GC71/ER-GC63/ER-GC53
Contents
Specifications....124
G
H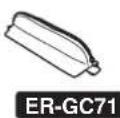
A Main unit
E AC adapter
(RE9-49/RE9-52/RE9-86)

▶ Comb attachment
Mounting the blade
ER-GC71
ER-GC63/ER-GC53
▶ Replacement parts
B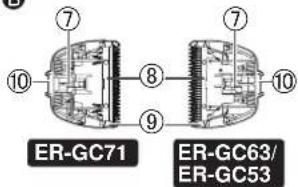
©
D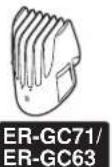
E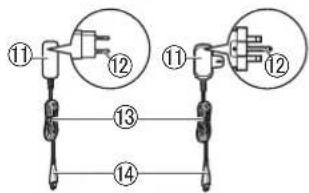
F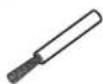
G
H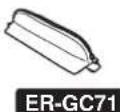
Main body
ER-GC71 ER-GC63/ER-GC53
▶ Comb attachment
[A]
Cleaning with the brush
Blade assembly
ER-GC71
ER-GC63/ER-GC53
B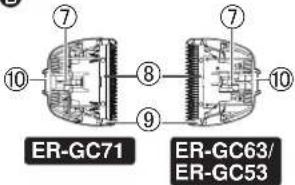
©
D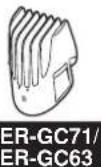
E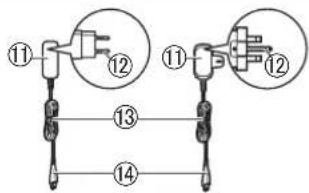
F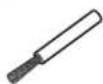
G
H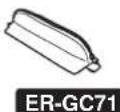
A Main unit

▶ Comb attachment [ ]
ER-GC71
ER-GC63/ER-GC53
▶ Replaceable parts
B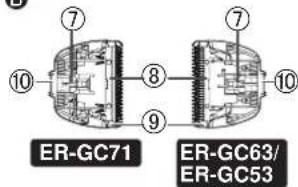
©
D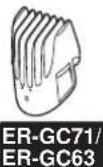
E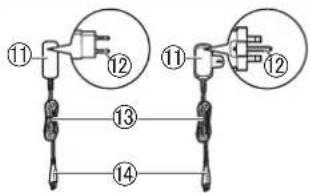
F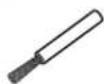
G
H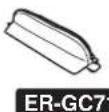
Appliance body

Mounting the blade
ER-GC71
ER-GC63/ER-GC53
Spare parts can be purchased from your dealer or service center.
| Reservedele tilER-GC71/ER-GC63/ER-GC53 | Blad | ER-GC71:WER9615ER-GC63/53:WER9605 |
| Olie WES003 | ||
B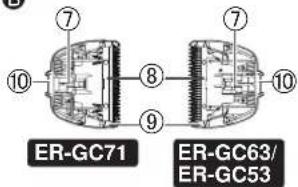
©
D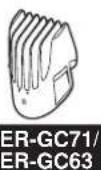
E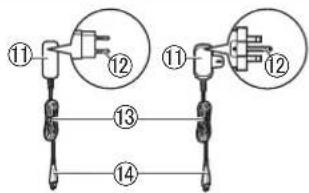
F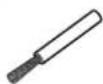
G
H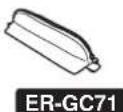
A Main cover

ER-GC71
ER-GC63/ER-GC53
▶ Spare parts
Spare parts are available from the dealer or a service center.
| Reservedeler for ER-GC71/ER-GC63/ER-GC53 | Blad | ER-GC71:WER9615ER-GC63/53:WER9605 |
| Olje WES003 | ||
Model ER-GC71/ER-GC63/ER-GC53
Contents
Safety precautions......208
Important information 212
Parts....213
Preparation 214
B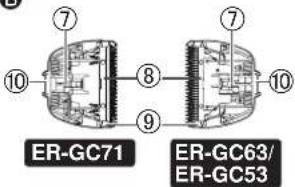
©
D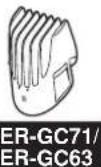
E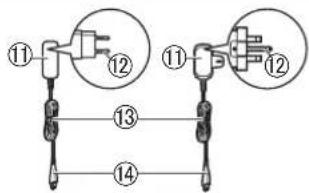
F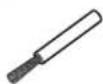
G
H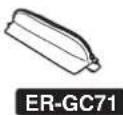
A Body

▶ Blade unit[ ]
Cutting height
(approx.):
1–10 mm
![PANASONIC ERGC53 - ▶ Blade unit[ ] - 1](/content/2026/03/502579/images/3c291f54d653b9a95123124ace2c3ea73782b9b87ea0b89c1ca70ca89bdbba5f.jpg)
ER-GC71/
ER-GC63
![PANASONIC ERGC53 - ▶ Blade unit[ ] - 2](/content/2026/03/502579/images/6088500ccc299346d2c5d46f81d774444ae0b817aed1d4a632ecc8edcd06e060.jpg)
ER-GC53
Cleaning with brush
Body and blade
ER-GC71
ER-GC63/ER-GC53
▶ Spare parts
B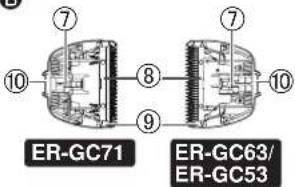
©
D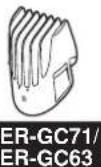
E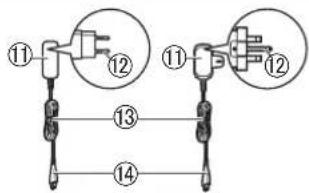
F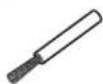
G
H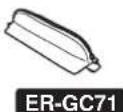
Polish
A Body

ER-GC71
ER-GC63/ER-GC53
▶ Spare parts
B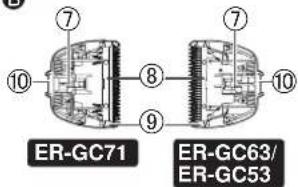
©
D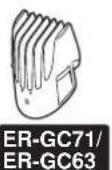
E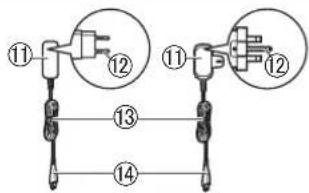
F
G
H Czech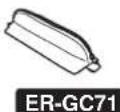
A Main part

Blade attachment
ER-GC71

ER-GC63/ER-GC53
▶ Spare parts
Model No. ER-GC71/ER-GC63/ER-GC53
Contents
B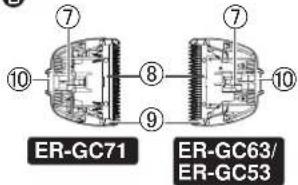
©
D ER-GC71/ER-GC63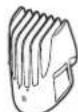
E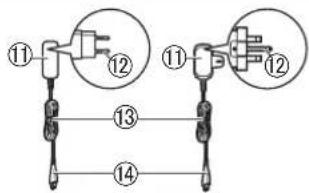
F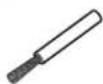
G
H ER-GC71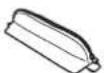
A Main unit
① Cutting length dial ② Rotary switch (height adjustment control) ③ Main switch [○ / I ] ④ Charging indicator light ⑤ Plug inlet ⑥ Water inlet
B Blade
ER-GC71
ER-GC63/ER-GC53
⑦ Cleaning lever
⑧ Movable blade
Slovak

Cleaning with brush
Main unit and blade
• Remove the blade. (See this page.)
ER-GC71
ER-GC63/ER-GC53
▶ Spare parts
B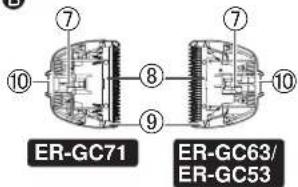
©
D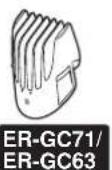
E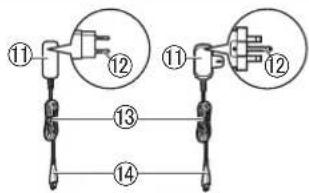
F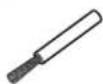
G
H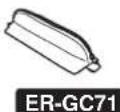
A Appliance test

▶ Comb side A[ ]
Cutting length
(estimated):
1 mm - 10 mm
![PANASONIC ERGC53 - ▶ Comb side A[ ] - 1](/content/2026/03/502579/images/9f8b11187d904d120e9fc9e4be851a251fd0eee1988afd835809f9170f12b188.jpg)
ER-GC71/
ER-GC63
![PANASONIC ERGC53 - ▶ Comb side A[ ] - 2](/content/2026/03/502579/images/abcf9b667f630ec7a7d127b597d5103c422ce2d03e7a7b17b863e7b802a0d184.jpg)
ER-GC53
Hungarian
ER-GC71
ER-GC63/ER-GC53
▶ Spare parts
- The main body or the AC adapter smells burnt.
B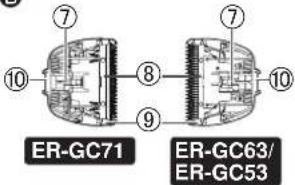
©
D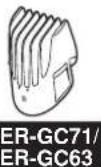
E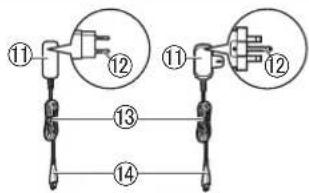
F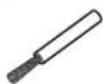
G
H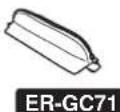
A Main body

▶ Comb attachment [A]
ER-GC71
ER-GC63/ER-GC53
▶ Spare parts
Model No. ER-GC71/ER-GC63/ER-GC53
Contents
B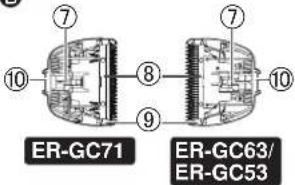
©
D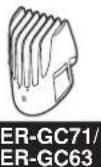
E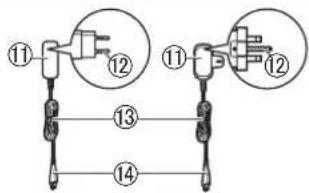
F
G
H
Main body

▶ Comb attachment [ ]
Attaching the blade
ER-GC71
ER-GC63/ER-GC53
▶ Spare parts
33, Wanbao North Street, Wanbao Industry Zone, Zhongcun, Panyu District, Guangzhou City,
Guangdong Province, China
AUTHORIZED REPRESENTATIVE
Importer:
Tesan İletişim A.Ş.


- PANASONIC
- CONTENTS
- WARNING
- SAFETY PRECAUTIONS
- EXPLANATION OF SYMBOLS
- DANGER
- CAUTION
- THIS PRODUCT
- DO NOT MODIFY OR REPAIR
- POWER SUPPLY
- PREVENTING ACCIDENTS
- IMPORTANT INFORMATION
- PARTS IDENTIFICATION
- A MAIN BODY
- B BLADE
- ER-GC
- ER-GC63/ER-GC
- ER-GC71/ER-GC
- PREPARATION
- CHARGING
- NOTES
- AC OPERATION
- USING THE CLIPPER
- REMOVING AND MOUNTING THE COMB ATTACHMENTS
- REMOVING THE COMB ATTACHMENT
- MOUNTING THE COMB ATTACHMENT
- HOW TO ADJUST THE TRIMMING HEIGHT
- COMB ATTACHMENT
- [A]
- COMB ATTACHMENT [B]
- TRIMMING HAIR
- ADJUSTING THE LENGTH AROUND THE EARS AND SIDES
- HOW TO ALIGN THE LENGTH AT THE NECKLINE AND AT THE BACK OF YOUR HEAD
- SHAPING YOUR SIDEBURNS
- WITHOUT COMB ATTACHMENT
- TRIMMING THE DOWNY HAIR AROUND THE NECKLINE
- TRIMMING TO AN EVEN LENGTH
- TRIMMING BEARD
- TRIMMING THE DOWNY HAIR
- MAINTENANCE
- CLEANING WITH WATER
- MAIN BODY, BLADE AND COMB ATTACHMENT
- TO REMOVE LIGHT DIRT
- REMOVE HEAVY DIRT
- CLEANING WITH THE BRUSH
- MAIN BODY AND BLADE
- REMOVING AND MOUNTING THE BLADE
- REMOVING THE BLADE
- MOUNTING THE BLADE
- LUBRICATION
- REPLACEMENT PARTS
- TROUBLESHOOTING
- PROBLEM ACTION
- BLADE LIFE
- BATTERY LIFE
- REMOVING THE BUILT-IN RECHARGEABLE BATTERY
- FOR ENVIRONMENTAL PROTECTION AND RECYCLING OF MATERIALS
- DISPOSAL OF OLD EQUIPMENT AND BATTERIES ONLY FOR EUROPEAN UNION AND COUNTRIES WITH RECYCLING SYSTEMS
- NOTE FOR THE BATTERY SYMBOL (BOTTOM SYMBOL)
- HAIR CLIPPER
- SPARE PARTS
- SABOA[ ]
- A MAIN UNIT
- E AC ADAPTER
- (RE9-49/RE9-52/RE9-86)
- MAIN BODY
- ER-GC71 ER-GC63/ER-GC
- BLADE ASSEMBLY
- COMB ATTACHMENT [ ]
- REPLACEABLE PARTS
- APPLIANCE BODY
- A MAIN COVER
- A BODY
- BLADE UNIT[ ]
- CLEANING WITH BRUSH
- BODY AND BLADE
- A MAIN PART
- BLADE ATTACHMENT
- MAIN UNIT AND BLADE
- A APPLIANCE TEST
- COMB SIDE A[ ]
- COMB ATTACHMENT [A]
- ATTACHING THE BLADE
- AUTHORIZED REPRESENTATIVE
Brand : PANASONIC
Model : ERGC53
Category : Razor