USER MANUAL DCR-HC15 SONY
Camera Operations Guide
Read this first
Digital Video Camera Recorder
HANDYCAM
DCR-HC14E/HC15E
Mini

Digital
Video
Cassette

InfoLITHIUM
M TM

SERIES

Cassette
Memory

English
Before operating the unit, please read this manual thoroughly, and retain it for future reference.
Welcome!
Congratulations on your purchase of this Sony Handycam. With your Handycam you can capture life's precious moments with superior picture and sound quality.
Your Handycam is loaded with advanced features, but at the same time it is very easy to use. You will soon be producing home video that you can enjoy for years to come.
WARNING
To prevent fire or shock hazard, do not expose the unit to rain or moisture.
To avoid electrical shock, do not open the cabinet.
Refer servicing to qualified personnel only.
NOTICE ON THE SUPPLIED AC POWER ADAPTOR FOR CUSTOMERS IN THE UNITED KINGDOM
A moulded plug complying with BS1363 is fitted to this equipment for your safety and convenience.
Should the fuse in the plug supplied need to be replaced, a fuse of the same rating as the supplied one and approved by ASTA or BSI to BS1362 (i.e., marked with 📄 or ⚙ mark) must be used.
If the plug supplied with this equipment has a detachable fuse cover, be sure to attach the fuse cover after you change the fuse. Never use the plug without the fuse cover. If you should lose the fuse cover, please contact your nearest Sony service station.
For the customers in Europe ATTENTION
The electromagnetic fields at the specific frequencies may influence the picture and sound of this camcorder.
This product has been tested and found compliant with the limits set out in the EMC Directive for using connection cables shorter than 3 meters (9.8 feet).
Notice
If static electricity or electromagnetism causes data transfer to discontinue midway (fail), restart the application or disconnect and connect the USB cable again.
Français
Checking supplied accessories
Make sure that the following accessories are supplied with your camcorder.
1 AC-L15A/L15B AC Adaptor (1), Mains lead (1) (p. 21)
2 NP-FM30 rechargeable battery pack (1) (p. 20)
3 A/V connecting cable (1) (p. 54)
4 Wireless Remote Commander (1) (DCR-HC15E only, p. 81)
5 R6 (size AA) battery for Remote Commander (2) (DCR-HC15E only, p. 190)
6 Lens cap (1) (p. 186)
7 Shoe cover (1)
8 USB cable (1)
9 CD-ROM (SPVD-012 USB Driver) (1)
10 Cleaning cloth (1) (p. 174)
11 21-pin adaptor* (1) (p. 55)
* The models with C€ mark printed on their bottom surfaces only.
Contents of the recording cannot be compensated if recording or playback is not made due to a malfunction of the camcorder, storage media, etc.

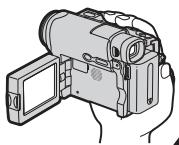
Refer also to other operating instructions supplied with your camcorder:
- Editing images with your computer
→ Computer Applications Guide
Capturing images on the computer
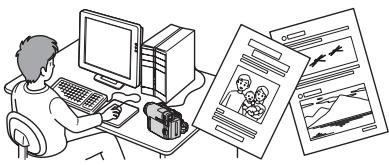
Other uses
Functions for adjusting exposure during recording
- Back light (p. 41)
• NightShot (p. 42)
• PROGRAM AE (p. 68)
• Manual exposure (p. 70)
- Flexible Spot Meter (p. 71)
Functions for giving images more impact
• Digital zoom (p. 39)
The default setting is OFF. (To zoom greater than 10×, select the digital zoom power in D ZOOM in the menu settings.)
• Fader (p. 64)
• Picture effect (p. 67, 80)
- Title (p. 116)
Functions for giving a natural appearance to your recordings
• PROGRAM AE (p. 68)
- SPORTS
- LANDSCAPE
- Manual focus (p. 72)
- Spot Focus (p. 74)
Functions for using after recording
• End search/Edit search/Rec Review (p. 44)
- Data code (p. 48)
- Zero set memory* (p. 81)
- Title search* (p. 83)
• Digital program editing (p. 94)
* DCR-HC15E only
Before you start reading this manual and operating your camcorder, check the model number by looking at the bottom of your camcorder. The DCR-HC15E is the model used for illustration purposes. Otherwise, the model name is indicated in the illustrations. Any differences in operation are clearly indicated in the text, for example, “DCR-HC15E only.”
Autres fonctions
Checking supplied accessories.... 3
Main Features 4
Quick Start Guide ...... 12
Getting Started
Using this manual 16
Step 1 Preparing the power source..... 20
Installing the battery pack...... 20
Charging the battery pack...... 21
Checking status of battery pack – Battery Info 24
Connecting to a wall socket ...... 25
Step 2 Setting the date and time ...... 26
Step 3 Using the touch panel ...... 28
Recording – Basics
Recording a picture 31
Shooting backlit subjects
– Back light function ...... 41
Shooting in the dark
– NightShot .... 42
Checking recordings
– End search/Edit search/Rec
Review ...... 44
Playback – Basics
Playing back tape 46
To display the screen indicators – Display function ...... 48
Viewing a recording on TV 54
Advanced Recording Operations
Photo recording 56
Self-timer recording 58
Adjusting the white balance manually 60
Using the wide mode 62
Using the fader function 64
Using special effects - Picture effect .. 67
Using PROGRAM AE 68
Adjusting the exposure manually ..... 70
Using spot light-metering function
– Flexible Spot Meter .... 71
Focusing manually 72
Using spot focus function
- Spot Focus .... 74
Interval Recording 75
Frame by frame recording
– Frame recording .... 77
Using the viewfinder 78
Advanced Playback Operations
Playing back tape with picture effect 80
Quickly locating a scene – Zero set memory (DCR-HC15E only)...... 81
Searching the boundaries of recorded tape by title – Title search (DCR-HC15E only) 83
Searching a recording by date – Date search (DCR-HC15E only) ...... 85
Searching for a photo
- Photo search/Photo scan (DCR-HC15E only) 88
Editing
Dubbing tape 91
Dubbing only desired scenes
– Digital program editing.... 94
Recording video or TV programmes (DCR-HC15E only).... 107
Inserting a scene from a VCR – Insert editing (DCR-HC15E only) ...... 110
Audio dubbing 112
Superimposing a title on a cassette with Cassette Memory .... 116
Making your own titles 119
Labelling a cassette on a cassette with Cassette Memory .... 121
Erasing all the data in Cassette Memory 123
Customizing Your Camcorder
Changing the menu settings...... 124
Troubleshooting
Types of trouble and how to correct trouble 142
Self-diagnosis display 148
Warning indicators 149
Warning messages 150
Usable cassettes 160
About the "InfoLITHIUM" battery pack 164
About i.LINK 168
Using your camcorder abroad ..... 171
Maintenance information and precautions 172
Specifications 181
Quick Reference
Identifying parts and controls...... 185
Index 193
Refer also to other operating instructions supplied with your camcorder:
- Editing images with your computer
→ Computer Applications Guide
Connecting the mains lead (p. 21)
Use the battery pack when using your camcorder outdoors (p. 20).

2
Inserting the cassette
1
Slide OPEN/
▲EJECT in the direction of the arrow and open the lid.


2
Push the centre of the cassette back to insert the cassette. Insert the cassette straight as far as possible into the cassette compartment with the window facing up.

3
Close the cassette compartment by pressing PUSH on the cassette compartment. After the cassette compartment goes down completely, close the lid until it clicks.

To eject the cassette
Follow the procedures above, and take out the cassette after the cassette compartment opens completely in step ②.
Note
Do not press the cassette compartment down forcibly. Doing so may cause a malfunction.
How to hold your camcorder

Fastening the grip belt
Fasten the grip belt firmly.

3
Recording a picture on the tape (p. 31)
1 Remove the lens cap (p. 31, 186).
3 Press OPEN to open the LCD panel. The picture appears on the screen.
Viewfinder
When the LCD panel is closed, pull out the viewfinder and look at the picture in it. Adjust the viewfinder lens to your eyesight (p. 38).

2 Set the POWER switch to CAMERA while pressing the small green button.

4 Press REC START/STOP. Your camcorder starts recording. To stop recording, press REC START/STOP again.

When you purchase your camcorder, the clock setting is set to off. If you want to record the date and time for a picture, set the clock setting before recording (p. 26).
4
Monitoring the playback picture on the LCD screen (p. 46)
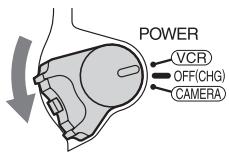
1 Set the POWER switch to PLAYER*/VCR** while pressing the small green button.

2 Press ◀◀◀ of the touch panel to rewind the tape.

3 Press ▶ II of the touch panel to start playback.

Note
When using the touch panel, press operation buttons lightly with your finger supporting the LCD panel from the back side of it. Do not press the LCD screen with sharp objects.
* DCR-HC14E
** DCR-HC15E
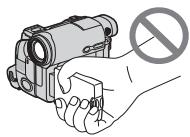
Do not pick up your camcorder by holding parts as illustrated.

Viewfinder
LCD panel

Battery pack
1
2
3
3
Viseur

Panneau LCD

Batterie
Using this manual
The instructions in this manual are for the 2 models listed in the table below. Before you start reading this manual and operating your camcorder, check the model number by looking at the bottom of your camcorder. The DCR-HC15E is the model used for illustration purposes. Otherwise, the model name is indicated in the illustrations. Any differences in operation are clearly indicated in the text, for example, "DCR-HC15E only."
As you read through this manual, buttons and settings on your camcorder are shown in capital letters.
After "Advanced Recording Operations" section of this manual, position of the POWER switch is shown by the icons below.
When you carry out an operation, you can hear a beep to indicate that the operation is being carried out.
Types of differences
| DCR- | HC14E | HC15E |
| Remote Commander | Not provided | Provided |
| DV jack | Output only | Input/output |
Note on Cassette Memory
Your camcorder is based on the DV format. You can use only mini DV cassettes with your camcorder. We recommend that you use a cassette with Cassette Memory CIII.
Cassettes with Cassette Memory have the CIII (Cassette Memory) mark.
Note on TV colour systems
TV colour systems differ depending on the country/region. To view your recordings on a TV, you need a PAL system-based TV.
Copyright precautions
Television programmes, films, video tapes, and other materials may be copyrighted. Unauthorised recording of such materials may be contrary to the copyright laws.
Note on connecting other equipment
When you connect your camcorder to other video equipment or a computer using the USB cable or i.LINK cable, observe the shape of the jack.
If you forcibly insert the plug, the jack may be damaged and they may result in a malfunction of your camcorder.
Precautions on camcorder care
Lens and LCD screen/finder
- The LCD screen and the finder are manufactured using extremely high-precision technology, so over 99.99% of the pixels are operational for effective use. However, there may be some tiny black points and/or bright points (white, red, blue or green in colour) that constantly appear on the LCD screen and the finder. These points are normal in the manufacturing process and do not affect the recording in any way.
- Do not let your camcorder get wet. Keep your camcorder away from rain and sea water. Letting your camcorder get wet may cause your camcorder to malfunction. Sometimes this malfunction cannot be repaired [a].
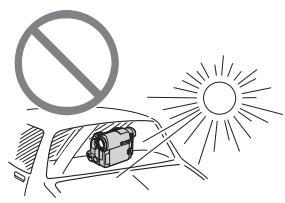
- Never leave your camcorder exposed to temperatures above 60°C (140°F), such as in a car parked in the sun or under direct sunlight [b].
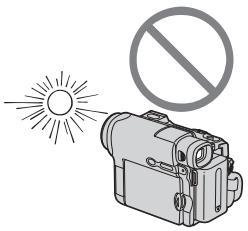
- Be careful when placing the camera near a window or outdoors. Exposing the LCD screen, the finder or the lens to direct sunlight for long periods may cause malfunctions [c].
- Do not directly shoot the sun. Doing so might cause your camcorder to malfunction. Take pictures of the sun in low light conditions such as dusk [d].
[b]
[c]

[d]
Step 1 Preparing the power source
Installing the battery pack
(1) Lift up the viewfinder.
(2) Slide the battery pack down until it clicks.
To remove the battery pack
(1) Lift up the viewfinder.
(2) Slide the battery pack out in the direction of the arrow while pressing BATT down.
If you use the viewfinder when a large capacity battery pack is installed
If you install the NP-QM71/QM71D/QM91/QM91D battery pack on your camcorder, extend the viewfinder, and lift up the viewfinder to a comfortable angle.
Step 1 Preparing the power source
Charging the battery pack
Use the battery pack after charging it for your camcorder.
Your camcorder operates only with the "InfoLITHIUM" battery pack (M series).
See page 164 for details of "InfoLITHIUM" battery pack.
(1) Install the battery pack on your camcorder.
(2) Connect the AC Adaptor supplied with your camcorder to the DC IN jack with the ▲ mark on the DC plug facing the battery.
(3) Connect the mains lead to the AC Adaptor.
(4) Connect the mains lead to a wall socket.
(5) Set the POWER switch to OFF (CHG). The CHG lamp lights up when charging begins. After charging is completed, the CHG lamp goes out (full charge).
After charging the battery pack
Disconnect the AC Adaptor from the DC IN jack on your camcorder.
Step 1 Preparing the power source
Note
Prevent metallic objects from coming into contact with the metal parts of the DC plug of the AC Adaptor. This may cause a short-circuit, damaging the AC Adaptor.
When you use the AC Adaptor
Place the AC Adaptor near a wall socket. While using the AC Adaptor, if any trouble occurs with this unit, disconnect the plug from a wall socket as soon as possible to cut off the power.
Note on the CHG lamp
The CHG lamp flashes in the following cases:
- The battery pack is not properly installed.
- Something is wrong with the battery pack.
Charging time/Temps de charge
| Battery pack/Batterie | Full charge/Pleine charge |
| NP-FM30 (supplied/fournie) | 145 |
| NP-FM50 | 150 |
| NP-QM71/QM71D | 260 |
| NP-QM91/QM91D | 360 |
Approximate minutes at 25° C ( 77° F) to charge an empty battery pack.
The charging time may increase if the battery's temperature is extremely high or low because of the ambient temperature.
Approximate minutes when you use a fully charged battery pack
* Approximate number of minutes when recording while you repeat recording start/stop, zooming and turning the power on/off. The actual battery life may be shorter.
Approximate minutes when you use a fully charged battery pack
Note
Approximate recording time and continuous playing time at 25° C ( 77° F). The battery life will be shorter if you use your camcorder in a cold environment.
Step 1 Preparing the power source
Checking status of battery pack – Battery Info
(1) Set the POWER switch to OFF (CHG).
(2) Press OPEN to open the LCD panel.
(3) Press DSPL/BATT INFO.
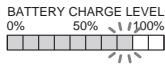
The battery charge level (the percentage of remaining battery time) and remaining battery time when using the LCD screen or viewfinder are displayed for about 7 seconds.
If you keep pressing DSPL/BATT INFO, the indicators will be displayed for about 20 seconds.
3
DSPL/BATT INFO

[a]
BATTERY INFO
REC TIME AVAILABLE
LCD SCREEN: 72 min
VIEWFINDER: 100 min

[b]

REC TIME AVAILABLE
LCD SCREEN: 90 min
VIEWFINDER: 125 min
[a] During charging
[b] Fully charged
Notes
- The BATTERY INFO indicator may not be displayed in the following cases:
– The battery pack is not installed.
– Something is wrong with the battery pack.
– The battery is exhausted.
- The BATTERY INFO indicator will not appear when you press DISPLAY on the Remote Commander when the POWER switch is set to OFF (CHG) (DCR-HC15E only).
Battery Info
The number displayed as Battery Info is the approximate recording time.
[a] Pendant la charge
[b] Pleine charge
Remarques
Step 1 Preparing the power source
While the remaining battery time is being calculated
"CALCULATING BATTERY INFO ..." is displayed.
If you press DSPL/BATT INFO with the LCD panel closed
The battery information appears on the viewfinder for about 7 seconds.
Connecting to a wall socket
You can use your camcorder without worrying about the power shortage.
Connect the AC Adaptor in the same way as you do when charging the battery pack.
PRECAUTION
The set is not disconnected from the AC power source (mains) as long as it is connected to the wall socket, even if the set itself has been turned off.
Notes
- The AC Adaptor can supply power from a wall socket even if the battery pack is attached to your camcorder.
- The DC IN jack has “source priority.” This means that the battery pack cannot supply any power if the mains lead is connected to the DC IN jack, even when the mains lead is not plugged into a wall socket.
Step 2 Setting the date and time
Set the date and time when you use your camcorder for the first time. The “CLOCK SET” indicator will appear each time you set the POWER switch to CAMERA unless you set the date and time settings.
If you do not set the date and time, “-- -- ----” and “--:--:--” are recorded on the tape as the data code.
If you do not use your camcorder for about 4 months, the date and time settings may be released (bars may appear) because the built-in rechargeable battery installed in your camcorder will have been discharged (p. 175). In this case, charge the built-in rechargeable battery, then set the year, the month, the day, the hour and the minute.
(1) Set the POWER switch to CAMERA.
(2) Press OPEN to open the LCD panel.
(3) Press FN (Function) to display PAGE1 (p. 28).
(4) Press MENU to display the menu.
(5) Press ↓/↑ to select ☐, then press EXEC.
(6) Press / to select CLOCK SET, then press EXEC.
(7) Press ↓/↑ to select a desired year, then press EXEC.
(8) Set the month, day and hour with the same procedure as step 7.
(9) Press / to set the minute, then press EXEC by the time signal. The clock starts to move.
Step 2 Setting the date and time


To return to FN (Function)
Press EXIT.
Note on the time indicator
The internal clock of your camcorder uses a 24-hour cycle.
Step 3 Using the touch panel
Your camcorder has operation buttons on the LCD screen.
Touch the LCD screen directly with your finger to operate each function.
(1) Set the POWER switch to CAMERA to record, or PLAYER (DCR-HC14E)/VCR (DCR-HC15E) to play back.
(2) Press OPEN to open the LCD panel.
(3) Press FN. Operation buttons on PAGE1 are displayed on the LCD screen.
(4) Press PAGE2/PAGE3 to display PAGE2/PAGE3. Operation buttons on PAGE2/PAGE3 are displayed on the LCD screen.
(5) Press a desired operation item. See relevant pages of this manual for each function.
[a] When the POWER switch is set to CAMERA
To return to FN
Press EXIT.
To execute settings
Press ➕ OK. The display returns to PAGE1/PAGE2/PAGE3.
Step 3 Using the touch panel
To cancel settings
Press → OFF. The display returns to PAGE1/PAGE2/PAGE3.
To make screen indicators disappear
Press DSPL/BATT INFO.
When the POWER switch is set to CAMERA
| PAGE1 | SPOT FOCUS, MENU,FOCUS, FADER, END SCH,SPOT METER, EXPOSURE |
| PAGE2 | SELFTIMER, LCD BRT, VOL |
When the POWER switch is set to PLAYER (DCR-HC14E)/VCR (DCR-HC15E)
| PAGE1 | MENU, LCD BRT, VOL, END SCH |
| PAGE2 | DATA CODE |
| PAGE3 | V SPD PLAY, A DUB CTRL, REC CTRL (DCR-HC15E only) |
Notes
- When using the touch panel, press operation buttons lightly with your finger, supporting the LCD panel from the back side of it.
- Do not press the LCD screen with sharp objects such as a pen.
- Do not press the LCD screen too hard.
- Do not touch the LCD screen with wet hands.
- If FN is not on the LCD screen, touch the LCD screen lightly to make it appear. You can turn on or off the display with DSPL/BATT INFO on your camcorder.
Step 3 Using the touch panel
When executing each item
The green bar appears above the item.
If the items are not available
The colour of the items changes to grey.
When using the viewfinder
You can also operate with the touch panel (p. 78).
Perform Step 1 (p. 20) and Step 2 (p. 26) in advance.
(1) Remove the lens cap.
(2) Prepare the power source (p. 20) and insert the cassette (p. 12).
(3) Set the POWER switch to CAMERA while pressing the small green button. This sets your camcorder to standby.
(4) Press OPEN to open the LCD panel. The picture appears on the screen.
(5) Press REC START/STOP. Your camcorder starts recording. The REC indicator appears. The camera recording lamp located on the front of your camcorder lights up. To stop recording, press REC START/STOP again.
Note
Avoid touching the microphone when you are recording.
Note on recording
Your camcorder records and plays back in the SP (standard play) mode and in the LP (long play) mode. Select SP or LP in ☐ in the menu settings (p. 130). In the LP mode, you can record 1.5 times as long as in the SP mode. When you record the tape in the LP mode on your camcorder, we recommend playing back the tape on your camcorder.
To enable smooth transition
Transition between the last scene you recorded and the next scene is smooth as long as you do not eject the cassette even if you turn off your camcorder.
However, check the following:
- Do not mix recordings in the SP and LP modes on one tape.
- When you change the battery pack, set the POWER switch to OFF (CHG).
If you leave your camcorder on standby for 5 minutes while the cassette is inserted
Your camcorder automatically turns off. This is to save battery power and to prevent battery pack and tape wear. To return to standby, set the POWER switch to OFF (CHG) and then back to CAMERA. However, your camcorder does not turn off automatically while the cassette is not inserted.
When you record in the SP and LP modes on one tape or you record in the LP mode
- The transition between scenes may not be smooth.
- The playback picture may be distorted or the time code may not be written properly between scenes.
Self-timer recording
You can record images on the tape with the self-timer. See page 58 for details.
Remarque
Indicators displayed during recording
Indicators are not recorded on the tape.
1 Remaining battery time
2 Cassette Memory
This appears when using a cassette with Cassette Memory.
3 Recording mode
4 STBY/REC
5 Time code/Tape counter
6 Remaining tape
This appears after you insert and run the cassette for a while (p. 130).
7 FN button
Press this button to display operation buttons on the LCD screen.
8 Time
The time appears about 5 seconds after the power is turned on.
9 Date
The date appears about 5 seconds after the power is turned on.
Remaining battery time indicator during recording
The remaining battery time indicator roughly indicates the continuous recording time. The indicator may not be correct, depending on the conditions in which you are recording. When you close the LCD panel and open it again, it takes about 1 minute for the correct remaining battery time in minutes to be displayed.
Time code
The time code indicates the recording or playback time, "0:00:00" (hours : minutes : seconds) in CAMERA and "0:00:00:00" (hours : minutes : seconds : frames) in PLAYER (DCR-HC14E)/VCR (DCR-HC15E). You cannot rewrite only the time code later.
Recording data
The recording data (date/time or various settings when recorded) are not displayed during recording. However, they are recorded automatically on the tape. To display the recording data, press DATA CODE during playback. You can also use the Remote Commander for this operation (DCR-HC15E only, p. 50).
After recording
(1) Close the lens cap.
(2) Set the POWER switch to OFF (CHG).
(3) Close the LCD panel.
(4) Eject the cassette.
(5) Remove the power source.
Adjusting the LCD screen
When you adjust the LCD panel, make sure that the LCD panel is opened up to 90 degrees.
When monitoring on the LCD screen
You can turn the LCD panel over and move it back to your camcorder body with the LCD screen facing out.
Notes
- When using the LCD screen except in the mirror mode, the viewfinder automatically turns off.
- If you turn the LCD panel over and move it back to your camcorder body when recording or recording standby, LCD B.L. (panel brightness) is fixed to “BRT NORMAL.”
Remarques
Shooting with the mirror mode
This feature allows the camera subject to view him- or herself on the LCD screen. The subject uses this feature to check his or her own image on the LCD screen while you look at the subject in the viewfinder.
(1) Extend the viewfinder.
(2) Rotate the LCD panel 180 degrees.
Picture in the mirror mode
The picture on the LCD screen is a mirror-image. However, the picture will be normal when recorded.
Image en mode Miroir
Adjusting the brightness of the LCD screen
(1) When the POWER switch is set to CAMERA, press FN and select PAGE2. When the POWER switch is set to PLAYER (DCR-HC14E)/VCR (DCR-HC15E), press FN to display PAGE1.
(2) Press LCD BRT. The screen to adjust the brightness of the LCD screen appears.
(3) Adjust the brightness of the LCD screen using - (to dim)/+ (to brighten).
(4) Press ➕ OK to return to PAGE1/PAGE2 in Step 1.

To return to FN
Press EXIT.
LCD screen backlight
You can change the brightness of the backlight when using the battery pack. Select LCD B.L. in ☐ in the menu settings (p. 128).
Even if you adjust LCD BRT or LCD B.L.
The recorded picture is not affected.
Shooting using the viewfinder is recommended when:
- You cannot see the picture clearly on the LCD screen.
- You want the battery pack to last longer.
Adjusting the viewfinder
If you record pictures with the LCD panel closed, check the picture with the viewfinder. Adjust the viewfinder lens to your eyesight so that the images in the viewfinder come into sharp focus.
Extend the viewfinder and move the viewfinder lens adjustment lever.
Viewfinder backlight
You can change the brightness of the backlight when using the battery pack. Select VF B.L. in ☐ in the menu settings (p. 128).
Even if you adjust VF B.L.
The recorded picture is not affected.
Using the zoom feature
Move the power zoom lever a little for a slower zoom. Move it further for a faster zoom.
Using the zoom sparingly results in better-looking recordings.
W : Wide-angle (subject appears farther away)
T : Telephoto (subject appears closer)
To use zoom greater than 10×
Zoom greater than 10× is performed digitally. Digital zoom can be set to 20× or 640× .
To activate digital zoom, select the digital zoom power in D ZOOM in ☐ in the menu settings (p. 127). The digital zoom is set to OFF as the default setting. Because the picture is processed digitally, the picture quality deteriorates.
[a] The right side of the bar shows the digital zooming zone.
The digital zooming zone appears when you select the digital zoom power in the menu settings.
When you shoot close to a subject
If you cannot get a sharp focus, move the power zoom lever to the "W" side until the focus is sharp. You can shoot a subject that is at least about 80 cm (about 2 5/8 feet) away from the lens surface in the telephoto position, or about 1 cm (about 1/2 inch) away in the wide-angle position.
When you shoot a subject with the light source behind the subject or a subject with a light background, use the back light function.
(1) Set the POWER switch to CAMERA.
(2) Press BACK LIGHT.
The 📄 indicator appears on the screen.
Press BACK LIGHT again.
When shooting backlit subjects
If you press MANUAL of EXPOSURE (p. 70) or SPOT METER (p. 71), the back light function will be cancelled.
Shooting in the dark – NightShot
The NightShot enables you to shoot a subject in the night or in a dark place.
When recording with the NightShot, the picture may be recorded in incorrect or unnatural colours.
(1) Set the POWER switch to CAMERA.
(2) Slide NIGHTSHOT to ON.
The ☐ and "NIGHTSHOT" indicators flash on the screen.
Slide NIGHTSHOT to OFF.
Using NightShot Light
The picture will be clearer with the NightShot Light on. To enable the NightShot Light, set N.S. LIGHT in ☐ to ON in the menu settings. (The default setting is ON.)
- Do not use NightShot in bright places (e.g. the outdoors in the daytime). This may cause a malfunction.
- If focusing is difficult during recording with NightShot, focus manually.
- Do not cover the infrared rays emitter during recording with NightShot.
While using NightShot, you cannot use the following functions:
- White balance
- PROGRAM AE (The indicator flashes.)
- Manual exposure
- Flexible Spot Meter
NightShot Light
NightShot Light rays are infrared and so are invisible. The maximum shooting distance using the NightShot Light is about 3 m (10 feet).
Remarques
Checking recordings – End search/Edit search/Rec Review
You can use these buttons to check the recorded picture or shoot so that the transition between the last recorded scene and the next scene you record is smooth.
End search
You can go to the end of the recorded section after you record.
(1) Set the POWER switch to CAMERA.
(2) Press FN to display PAGE1.
(3) Press END SCH.
The last 5 seconds of the recorded section are played back and your camcorder returns to standby.
To return to FN
Press EXIT.
To cancel end search
Press END SCH again.
End search
When you use a cassette without Cassette Memory, end search does not work once you eject the cassette after you have recorded on the tape. If you use a cassette with Cassette Memory, end search works even once you eject the cassette.
End search (recherche de fin)
If the tape has a blank portion between recorded portions
End search may not work correctly.
Edit search
You can search for the next recording start point. You cannot monitor the sound.
(1) Set the POWER switch to CAMERA.
(2) Press FN to display PAGE1.
(3) Press MENU to display the menu.
(4) Select EDITSEARCH in 📄, then press EXEC (p. 127).
(5) Select ON, then press EXIT.
(6) Hold down ☑/- or +. The recorded portion is played back.
Release ☑/- or + to stop playback. If you press REC START/STOP, recording begins from the point you released ☑/- or +.
☐/- : To go backward
+: To go forward
Rec Review
You can check the last recorded section.
(1) Set the POWER switch to CAMERA.
(2) Press FN to display PAGE1.
(3) Press MENU to display the menu.
(4) Select EDITSEARCH in 📄, then press EXEC (p. 127).
(5) Select ON, then press EXIT.
(6) Press ⚙/– momentarily.
The section you have stopped most recently will be played back for a few seconds, and then your camcorder will return to standby.
You can monitor the recorded tape on the LCD screen. If you close the LCD panel, you can monitor the playback picture in the viewfinder. You can also control playback using the Remote Commander supplied with your camcorder (DCR-HC15E only).
(1) Set the POWER switch to PLAYER (DCR-HC14E)/VCR (DCR-HC15E) while pressing the small green button.
(2) Press OPEN to open the LCD panel.
(3) Press ◀◀◀ to rewind the tape.
(4) Press ▶ II to start playback.
(5) Adjust the volume following the steps below.
① Press FN to display PAGE1.
② Press VOL. The screen to adjust the volume appears.
③ Press – (to turn down the volume)/+
(to turn up the volume).
④ Press ➕ OK to return to PAGE1.
Press ◀◀ during playback stop.
To fastforward the tape
Press ▶▶▶ during playback stop.
To view a still image ( playback pause)
Press ▶Ⅱ during playback. To resume playback, press ▶Ⅱ again. If the playback pause lasts more than 5 minutes, the camcorder automatically switches to the stop mode.
If you leave the power on for a long time
Your camcorder gets warm. This is not a malfunction.
Pour revenir à FN
Appuyez sur EXIT.
Press DSPL/BATT INFO on your camcorder, or DISPLAY on the Remote Commander supplied with your camcorder (DCR-HC15E only).
The indicators disappear from the screen. To make the indicators appear, press DSPL/BATT INFO or DISPLAY on the Remote Commander (DCR-HC15E only) again.
About date/time and various settings
Your camcorder automatically records not only images on the tape but also the recording data (date/time or various settings when recorded) (Data code).
Follow the steps below to display the data code using the touch panel or the Remote Commander (DCR-HC15E only).
Using the touch panel
(1) Set the POWER switch to PLAYER (DCR-HC14E)/VCR (DCR-HC15E), then play back the tape.
(2) During playback, press FN and select PAGE2.
(3) Press DATA CODE.
(4) Select CAM DATA or DATE DATA, then press ↩ OK.
(5) Press EXIT.
[a] Tape counter or time code
[b] SteadyShot off
[c] Exposure
[d] White balance
[e] Gain
[f] Shutter speed
[g] Aperture value
Using the Remote Commander (DCR-HC15E only)
Press DATA CODE on the Remote Commander during playback.
The display changes as follows:
date/time → various settings (SteadyShot off, exposure, white balance, gain, shutter speed, aperture value) → (no indicator) → date/time → ...
To prevent the various data from being displayed
Select DATE in DATA CODE in ETC in the menu setting (p. 132).
Each time you press DATA CODE on the Remote Commander, the display changes as follows:
data/time ↔ (no indicator)
Note
If you press DATA CODE on the Remote Commander when the POWER switch is set to OFF (CHG), no indicator appears (DCR-HC15E only).
Various settings
Various settings show your camcorder's recording information at the time of recording. During tape recording standby, the various settings will not be displayed.
When you use data code, bars (-- -- --) appear if:
– A blank portion of the tape is being played back.
– The tape is unreadable due to tape damage or noise.
– The tape was recorded by a camcorder without the date and time set.
Data code
When you connect your camcorder to a TV, the data code also appears on the TV screen.
Various playback modes
To operate video control buttons, set the POWER switch to PLAYER (DCR-HC14E)/VCR (DCR-HC15E).
Using the touch panel
(1) Press FN and select PAGE3.
(2) Press V SPD PLAY to display video control buttons.
To change the playback direction
Press ◀◀◀ during playback to reverse the playback direction.*
To locate a scene while monitoring the picture (picture search)
Keep pressing ◀◀◀ or ▶▶▶ during playback. To resume normal playback, release the button.
To monitor the high-speed picture while fastforwarding or rewinding the tape (skip scan)
Keep pressing ▶ while fastforwarding or ◀ while rewinding the tape. To resume fastforwarding or rewinding, release the button.
To view the picture at slow speed (slow playback)
Press ▶ during playback.*
For slow playback in the reverse direction, press ◀◀◀◀, then press ▶▶.*
To view the picture at double speed
Press × 2 during playback.* For double speed playback in the reverse direction, press |< , then press × 2 .*
Divers modes de lecture
To view the picture frame-by-frame
Press ▶▶ during playback pause.**
For frame-by-frame playback in the reverse direction, press ◀◀<.**
To search the last scene recorded (END SEARCH)
Press END SCH on PAGE1 during stop. The last 5 seconds of the recorded section are played back then your camcorder stops.
* Press ▶ II to pause playback. Press ▶ II to resume normal playback.
**Press ▶ II to resume normal playback.
Marks on your camcorder are different from those on the Remote Commander supplied with your camcorder (DCR-HC15E only).
On your camcorder:
▶ II To play back or pause the tape
To stop the tape
To rewind the tape
▶▶▶▶ To fastforward the tape
▶ To play back the tape slowly
▶ To forward one frame at a time
To rewind one frame at a time
× 2 To play back the tape at double speed
On the Remote Commander (DCR-HC15E only):
▶ To play back the tape
To pause the tape
■ To stop the tape
◀ To rewind the tape
▶▶ To fastforward the tape
▶ To play back the tape slowly
||► To forward one frame at a time
◀II< To rewind one frame at a time
×2 To play back the tape at double speed
In the various playback modes
- Sound is silenced.
- The previous picture may remain as a mosaic image during playback.
When you play back the tape in reverse
Horizontal noise may appear at the centre, or the top and bottom of the screen. This is not a malfunction.
Slow playback
Slow playback can be performed smoothly on your camcorder. However, this function does not work for an output signal from the DV Interface.
Viewing a recording on TV
Connect your camcorder to a TV with the A/V connecting cable supplied with your camcorder to watch the playback pictures on the TV screen. You can operate the playback control buttons in the same way as when you view playback pictures on the LCD screen. When viewing the playback picture on the TV screen, we recommend that you power your camcorder from a wall socket using the AC Adaptor. Refer to the operating instructions of your TV.
Open the jack cover. Connect your camcorder to the TV with the A/V connecting cable. Then set the TV/VCR selector on the TV to VCR to be able to view images from your camcorder.
If your TV is already connected to the VCR
Connect your camcorder to the LINE IN input on the VCR with the A/V connecting cable supplied with your camcorder. Set the input selector on the VCR to LINE.
If your TV or VCR is a monaural type
Connect the yellow plug of the A/V connecting cable to the video input jack and the white or the red plug to the audio input jack on the VCR or the TV.
If you connect the white plug, the sound is L (left) signal. If you connect the red plug, the sound is R (right) signal.
If your TV/VCR has a 21-pin connector (EUROCONNECTOR)
The models with mark printed on their bottom surfaces only.
Use the 21-pin adaptor supplied with your camcorder.
This adaptor is exclusive to an output.
If the equipment to be connected has an S video jack
- Pictures can be reproduced more faithfully by using an S video cable (optional). With this connection, you do not need to connect the yellow (video) plug of the A/V connecting cable. However, you need to connect the red and white (audio) plugs. Connect the S video cable (optional) to the S video jacks on both your camcorder and the TV or the VCR. This connection produces higher quality DV format pictures.
- There is no sound output when connecting only with an S video cable (optional).
To display the screen indicators on TV
Set DISPLAY in ETC to V-OUT/LCD in the menu settings (p. 132). To make the screen indicators disappear, press DSPL/BATT INFO on your camcorder.
You can record still images such as photographs. You can record about 510 images in the SP mode and about 765 images in the LP mode on a 60-minute tape.
The POWER switch should be set to
CAMERA.
(1) Keep pressing PHOTO lightly until a still image appears. The CAPTURE indicator appears. Recording does not start yet.
To change the still image, release PHOTO, select a still image again, and then press and hold PHOTO lightly.
(2) Press PHOTO deeply.
The still image displayed on the screen when you pressed PHOTO deeply is recorded for about 7 seconds. The sound during those 7 seconds is also recorded. The still image is displayed on the screen until the recording is completed.
- During Tape Photo recording, you cannot change the mode or setting.
- When recording a still image, do not shake your camcorder. The image may fluctuate.
- The Tape Photo recording function does not work when the fader function is on.
If you record a moving subject with the Tape Photo recording function
When you play back the still image on other equipment, the image may fluctuate.
When you press PHOTO on the Remote Commander (DCR-HC15E only)
Your camcorder immediately records the image that is on the screen when you press the button.
To record still images on a tape during tape recording
You cannot check an image on the screen by pressing PHOTO lightly.
Press PHOTO deeply. The still image is recorded for about 7 seconds and your camcorder returns to tape recording standby.
Remarques
Self-timer recording
You can record still images and moving pictures using the self-timer recording feature. You can also use the Remote Commander for this operation (DCR-HC15E only).
Recording moving pictures
The POWER switch should be set to
CAMERA.
Operate by touching the panel.
(1) During standby, press FN and select PAGE2.
(2) Press SELFTIMER.
The ⬇ (self-timer) indicator appears on the screen.
(3) Press EXIT to return to FN.
(4) Press REC START/STOP.
The self-timer starts counting down from about 10 while beeping. In the last 2 seconds of the countdown, the beep gets faster, then recording starts automatically.
To stop the countdown for recording on the tape
Press REC START/STOP. To restart the countdown, press REC START/STOP again.
Recording still images
The POWER switch should be set to
CAMERA.
Operate by touching the panel.
(1) Follow steps 1 to 3 in "Recording moving pictures."
(2) Press PHOTO deeply.
To cancel the self-timer
During standby, press SELFTIMER and the ⏻ (self-timer) indicator disappears from the screen. You cannot cancel the self-timer using the Remote Commander.
Note
You cannot stop the countdown for self-timer recording of still images.
When self-timer recording is finished
The self-timer recording is automatically cancelled.
Setting up a recording using the self-timer
You can set up a recording using the self-timer only in recording standby mode.
Adjusting the white balance manually
Normally white balance is automatically adjusted.
The POWER switch should be set to
CAMERA.
Operate by touching the panel.
(1) Press FN to display PAGE1.
(2) Press MENU to display the menu.
(3) Select WHT BAL in ☐, then press EXEC (p. 126).
When recording a single-coloured subject or background
OUTDOOR (●):
- When recording a sunset/sunrise, just after sunset, just before sunrise, neon signs, or fireworks
• Under a colour matching fluorescent lamp
INDOOR (☀️):
- When lighting conditions change quickly
- In too bright places such as photography studios
- Under sodium lamps or mercury lamps
To return to FN
Press EXIT.
Adjusting the white balance manually
To return to the automatic white balance
Set WHT BAL to AUTO in the menu settings.
If the picture is being taken in a studio lit by TV lighting
We recommend that you record in the INDOOR mode.
When you record under fluorescent lighting
Select AUTO or HOLD.
Your camcorder may not adjust the white balance correctly in the INDOOR mode.
If you did the followings in the AUTO mode
- You remove the battery pack for replacement.
- You bring your camcorder from indoors to outdoors holding the exposure, or vice versa.
Point your camcorder at the white subject for about 10 seconds after setting the POWER switch to CAMERA to get better adjustment.
If you did the followings in the HOLD mode
- You change the mode of PROGRAM AE.
- You bring your camcorder from indoors to outdoors, or vice versa.
Set WHT BAL to AUTO and reset to HOLD after few seconds.
You can record a 16:9 wide picture to watch on the 16:9 wide-screen TV (16:9WIDE).
Black bands appear on the screen during recording in the 16:9WIDE mode [a]. The picture during playing back in the 4:3 mode on a wide-screen TV [b] or a normal TV [c]* are compressed in the widthwise direction. If you set the screen mode of the wide-screen TV to the full mode, you can watch pictures of normal images [d].
* The picture played back in the wide mode on a normal TV appears the same as the picture played back in the wide mode on your camcorder [a].
The POWER switch should be set to
CAMERA.
Operate by touching the panel.
(1) During recording standby, press FN to display PAGE1.
(2) Press MENU to display the menu.
(3) Select 16:9WIDE in 📄, then press EXEC (p. 127).
(4) Select ON, then press EXEC.
To cancel the wide mode
Set 16:9WIDE to OFF in the menu settings.
Notes
- In the wide mode, you cannot activate BOUNCE (fader).
- Pictures recorded on the tape in wide mode cannot be returned to normal size.
You can fade in or out to give your recording a professional appearance.
MOSC. (mosaic) FADER


BOUNCE


[b]
STBY
REC
MONOTONE
When fading in, the picture gradually changes from black-and-white to colour.
When fading out, the picture gradually changes from colour to black-and-white.
Notes on the BOUNCE mode
MONOTONE
The POWER switch should be set to
CAMERA.
Operate by touching the panel.
(1) When fading in [a]
Press FN to display PAGE1 during recording standby.
When fading out [b]
Press FN to display PAGE1 during recording.
(2) Press FADER. The screen to select the fader mode appears.
(3) Press a desired mode.
(4) Press OK to return to PAGE1.
(5) Press EXIT to return to FN.
The fader indicator you selected flashes.
(6) Press REC START/STOP. After the fade in/out is carried out, your camcorder automatically returns to the normal mode.
To cancel the fade in/out
Before pressing REC START/STOP, press ➔ OFF on the FADER screen to return to PAGE1. Press EXIT to return to FN.
You cannot use the following functions while using fader. Also, you cannot use fader while using following functions:
- Interval Recording
- Frame recording
During BOUNCE is on, you cannot use the following functions:
-Zoom
– Picture effect
- Manual exposure
- Flexible Spot Meter
- Manual focus
- Wide mode
-PROGRAM AE
Using special effects – Picture effect
NEG. (negative) ART [a]:
The colour and brightness of the picture are reversed.
SEPIA : The picture is sepia.
B&W : The picture is monochrome (black-and-white).
SOLARIZE [b]: The picture looks like an illustration with strong contrast.
PASTEL [c]: The picture looks like a pale pastel drawing.
MOSAIC [d]: The picture is mosaic.
NEG. (negative) ART [a]:
The POWER switch should be set to
CAMERA.
Operate by touching the panel.
(1) Press FN to display PAGE1.
(2) Press MENU to display the menu.
(3) Select P EFFECT in ☐, then press EXEC (p. 126).
To cancel picture effect
Set P EFFECT to OFF in the menu settings.
Note
While using picture effect, you cannot use BOUNCE (fader).
This mode prevents people's faces, for example, from appearing excessively white when shooting subjects lit by strong light in the theatre.
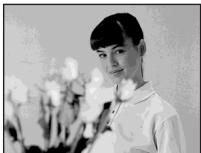
PORTRAIT (soft portrait)
This mode brings out the subject while creating a soft background for subjects such as people or flowers.
SPORTS (sports lesson)*
This mode minimises shake on fast-moving subjects such as in tennis or golf.
BEACH&SKI*
This mode prevents people's faces from appearing dark in strong light or reflected light, such as at a beach in midsummer or on a ski slope.
c SUNSETMOON (sunset & moon)**
This mode allows you to maintain atmosphere when you are recording sunsets, general night views, fireworks displays and neon signs.
LANDSCAPE**
This mode is for when you record distant subjects such as mountains. Also it prevents your camcorder from focusing on glass or metal mesh in windows when you record a subject behind glass or a screen.


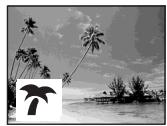


* Your camcorder focuses only on subjects in the middle to far distance.
**Your camcorder focuses only on distant subject.
The POWER switch should be set to
CAMERA.
Operate by touching the panel.
(1) Press FN to display PAGE1.
(2) Press MENU to display the menu.
(3) Select PROGRAM AE in ☐, then press EXEC (p. 126).
Set PROGRAM AE to AUTO in the menu settings.
Notes
- The following functions do not work in PROGRAM AE:
- BOUNCE (fader)
- Spot Focus
- PROGRAM AE does not work if NIGHTSHOT is set to ON. (The indicator flashes.)
Adjusting the exposure manually
We recommend that you adjust the exposure manually in the following cases:
– When the subject is backlit
- When the subject is too bright against the background
- When recording dark pictures (e.g. night scenes) faithfully
The POWER switch should be set to
CAMERA.
Operate by touching the panel.
(1) Press FN to display PAGE1.
(2) Press EXPOSURE. The screen to adjust the exposure appears.
(3) Press MANUAL.
(4) Adjust the exposure using - (to dim) /+ (to brighten).
(5) Press ↩ OK to return to PAGE1.
To return to the automatic exposure
Press ↩ AUTO on the EXPOSURE screen to return to PAGE1.
Note
When you adjust the exposure manually, the back light function does not work.
Pour revenir à FN
Appuyez sur EXIT.
You can take a picture with the appropriate exposure automatically for just the point you want to focus on and with its exposure fixed. Use Flexible Spot Meter in the following cases:
- The subject is backlit.
- When there is strong contrast between the subject and background such as with a subject that is on stage and lit by a spotlight.
The POWER switch should be set to
CAMERA.
Operate by touching the panel.
(1) Press FN to display PAGE1.
(2) Press SPOT METER. The SPOT METER screen appears.
(3) Press the desired area in the frame. The SPOT METER indicator flashes on the screen. The exposure of the point you selected is adjusted.
(4) Press → OK to return to PAGE1.
To return to the automatic exposure
Press ↩ AUTO on the SPOT METER screen to return to PAGE1.
Note
The following functions do not work during Flexible Spot Meter:
- Back light
- Spot Focus
Pour revenir à FN
Appuyez sur EXIT.
You can gain better results by manually adjusting the focus in the following cases. Normally, focus is automatically adjusted.
- The autofocus mode is not effective when shooting:
– Subjects through glass coated with water droplets
- Horizontal stripes
– Subjects with little contrast with backgrounds such as walls or the sky
- Shooting a stationary subject when using a tripod
- When you want to change the focus from a subject in the foreground to a subject in the background

The POWER switch should be set to
CAMERA.
Operate by touching the panel.
(1) Press FN to display PAGE1.
(2) Press FOCUS.
(3) Press MANUAL. The screen to adjust the focus appears.
(4) Press ⚙ ← or → ▲ to sharpen focus.
(5) Press ➕ OK to return to PAGE1.
To return to the autofocus
On the FOCUS screen, press ↩ AUTO to return to PAGE1.
To focus precisely
It is easier to focus on the subject if you adjust the zoom to shoot at the “W” (wide-angle) position after focusing at the “T” (telephoto) position.
When you shoot close to the subject
Focus at the end of the "W" (wide-angle) position.
changes as follows:
▲ when recording a distant subject
when the subject is too close to focus on
Pour revenir à FN
Appuyez sur EXIT.
Using spot focus function – Spot Focus
You can take a picture with the appropriate focus automatically for just the point you want to focus on and with its focus fixed.
The POWER switch should be set to
CAMERA.
Operate by touching the panel.
(1) Press FN to display PAGE1.
(2) Press SPOT FOCUS. The SPOT FOCUS screen appears.
(3) Press the desired area in the frame. The SPOT FOCUS indicator flashes on the screen. The focus of the point you selected is adjusted.
(4) Press ➕ OK to return to PAGE1.
To return to the autofocus
On the SPOT FOCUS screen, press ↩ AUTO to return to PAGE1.
Notes
- Spot Focus does not work while PROGRAM AE is on.
- The back light function does not work during Spot Focus.
Pour revenir à FN
Appuyez sur EXIT.
You can make time-lapse recordings by setting your camcorder to automatically record and standby sequentially. You can achieve excellent recordings of flowers blooming, insects hatching, etc. with this function.
Example
![1 s [a] 9 min 59 s 1 s [a] 9 min 59 s [b] 10 min 10 min [b]](/content/2019/09/48927/images/eabcf0fd9395eb738eccd69117effb0a6c0d267edbc7c8968f875a8a457d1d1f.jpg)
[a] REC TIME
[b] INTERVAL
There may be a discrepancy in recording time of up to +/-6 frames from the selected time.
The POWER switch should be set to
CAMERA.
Operate by touching the panel.
(1) Press FN to display PAGE1.
(2) Press MENU to display the menu.
(3) Select INT. REC in ☐, then press EXEC (p. 130).
(4) Select SET, then press EXEC.
(5) Select INTERVAL, then press EXEC.
(6) Select a desired interval time, then press EXEC.
The time: 30SEC ↔ 1MIN ↔ 5MIN ↔ 10MIN
(7) Select REC TIME, then press EXEC.
[a] REC TIME
[b] INTERVAL
5

7

(8) Select a desired recording time, then press EXEC.
The time: 0. 5 SEC 1 SEC 1. 5 SEC 2 SEC
(9) Press → RET.
(10) Select INT. REC to ON, then press EXEC.
(11) Press EXIT to return to FN.
The INTERVAL TAPE indicator flashes on the screen.
(12) Press REC START/STOP to start Interval Recording.
The INTERVAL TAPE indicator lights up during Interval Recording.
To cancel Interval Recording
Set INT. REC to OFF in the menu settings.
Frame by frame recording – Frame recording
You can make a recording with a stop-motion animated effect using frame recording. To create this effect, alternately move the subject a little and make frame recording. We recommend that you use a tripod, and operate your camcorder using the Remote Commander (DCR-HC15E only) to avoid camera-shake.
The POWER switch should be set to
CAMERA.
Operate by touching the panel.
(1) Press FN to display PAGE1.
(2) Press MENU to display the menu.
(3) Select FRAME REC in ☐, then press EXEC (p. 130).
(4) Select ON, then press EXEC.
(5) Press EXIT to return to FN.
The FRAME REC indicator lights up.
(6) Press REC START/STOP to start frame recording. Your camcorder makes a recording for about 6 frames, and returns to recording standby.
(7) Move the subject, and repeat step 6.
To cancel frame recording
Set FRAME REC to OFF in the menu settings.
Note
The proper remaining tape time is not indicated if you use frame recording continuously.
When using frame recording
The last recorded frame is longer than other frames.
Using the viewfinder
You can operate camera brightness and fader on the touch panel when looking at the viewfinder. Turn the LCD panel over and move it back to your camcorder body with the LCD screen facing out to do this operation.
The POWER switch should be set to
CAMERA.
Operate by touching the panel.
(1) Turn the LCD panel over and move it back to your camcorder body with the LCD screen facing out, then extend the viewfinder.
(2) Press OFF. The PANEL OFF indicator appears on the screen.
(3) Press OK. The LCD screen is turned off.
(4) Using the viewfinder, press the LCD screen. EXPOSURE, OK, ON and FADER appear.
(5) Press the LCD screen and select a desired item, then press ⬇ OK.
EXPOSURE:
Adjust the exposure by pressing -/ +.
FADER:
Press FADER until a desired fader mode appears.
The indicator changes as follows:
![graph TD A["FADER"] --> B["M. FADER"] B --> C["BOUNCE"] D["(no indicator)"] <--_E["MONOTONE"] C --> E](/content/2019/09/48927/images/7c834bd004d96e937e12719459dcdcc97504104fc9ab802fd7436a5eb5bdec73.jpg)
ON:
The LCD screen lights up.
Press ↩ OK.
Note
When the POWER switch is set to PLAYER (DCR-HC14E)/VCR (DCR-HC15E), you cannot operate with the touch panel using the viewfinder.
To operate the items that do not appear
Set the LCD panel and the viewfinder back to the previous position. Operate the items using the LCD screen.
Available recording time
This is the time when you record pictures using the viewfinder (p. 23).

Playing back tape with picture effect
The POWER switch should be set to
PLAYER (DCR-HC14E)/VCR (DCR-HC15E).
Operate by touching the panel.
(1) During playback or playback pause, press FN to display PAGE1.
(2) Press MENU to display the menu.
(3) Select P EFFECT in ☐, then press EXEC (p. 126).
(4) Select a desired mode, then press EXEC. You can use NEG. ART, SEPIA, B&W and SOLARIZE.
See page 67 for details of each mode.
To return to FN
Press EXIT.
To cancel picture effect
Set P EFFECT to OFF in the menu settings.
Notes
- You cannot process externally input scenes using picture effect.
- You cannot record images on the tape on your camcorder while you are processing the image using picture effect. Record images on a VCR using your camcorder as a player.
Pictures processed by picture effect
These pictures are not output through the i, DV Interface.
Quickly locating a scene – Zero set memory (DCR-HC15E only)
Your camcorder automatically searches for a desired scene having the tape counter value of "0:00:00." Use the Remote Commander for this operation.
The POWER switch should be set to VCR.
(1) During playback, press ZERO SET MEMORY on the Remote Commander at the point you want to locate later. The tape counter shows "0:00:00," then starts counting. The ZERO SET MEMORY indicator flashes. If the indicators do not appear, press DISPLAY.
(2) Press ■ when you want to stop playback.
(3) Press ◀◀ to rewind the tape to the tape counter's zero point. The tape stops automatically when the tape counter reaches approximately zero.
(4) Press ▶. Playback starts from the counter's zero point.
Quickly locating a scene - Zero set memory (DCR-HC15E only)
Notes
- When you press ZERO SET MEMORY before rewinding the tape, the zero set memory function will be cancelled.
- There may be a discrepancy of several seconds between the time code and the tape counter.
- The ZERO SET MEMORY indicator disappears when you press FN.
If the tape has a blank portion in the recorded sections
The zero set memory function may not work correctly.
Searching the boundaries of recorded tape by title – Title search (DCR-HC15E only)
Use the cassette with Cassette Memory for this operation.
Use the Remote Commander for this operation.
Before operation
Set CM SEARCH in [CIII] to ON in the menu settings. (The default setting is ON.)
The POWER switch should be set to VCR.
(1) Press SEARCH MODE on the Remote Commander repeatedly, until the TITLE SEARCH indicator appears.
The title search screen appears.
The indicator changes as follows:
![graph TD A["TITLE SEARCH"] --> B["DATE SEARCH"] C["(no indicator)"] --> D["PHOTO SCAN"] D --> E["PHOTO SEARCH"]](/content/2019/09/48927/images/98cf066f932651c328378b9f527a567e4da2c0cb81de1c3571f744ab82025ddc.jpg)
(2) Press ◀◀◀ or ▶▶◀ on the Remote Commander to select the title for playback.
Your camcorder automatically starts playback of the scene having the title that you selected.
[a] Actual point you are trying to search for
[b] Present point on the tape
[a] Actual point you are trying to search for
[b] Present point on the tape
Searching the boundaries of recorded tape by title – Title search (DCR-HC15E only)
To cancel searching
Press ■ on the Remote Commander.
If the tape has a blank portion between recorded portions
Title search may not work correctly.
To superimpose a title
See page 116.
Searching a recording by date – Date search (DCR-HC15E only)
- DATE SEARCH using Cassette Memory
→ Select the date from the list of recording dates displayed on the screen
- DATE SEARCH without using Cassette Memory
→ Search for the point where the recording date changed
Use the Remote Commander for this operation.
Searching for the date by using Cassette Memory
Before operation
- You can use this function only when playing back the cassette with Cassette Memory.
- Set CM SEARCH in [CIII] to ON in the menu settings. (The default setting is ON.)
The POWER switch should be set to VCR.
(1) Press SEARCH MODE on the Remote Commander repeatedly, until the DATE SEARCH indicator appears.
The date search screen appears.
The indicator changes as follows:
![graph TD A["TITLE SEARCH"] --> B["DATE SEARCH"] C["(no indicator)"] --> D["PHOTO SCAN"] D --> E["PHOTO SEARCH"]](/content/2019/09/48927/images/238e1daaa4d60c2ae45f0643f5fc00c8ee260cdd9725bb9bd5d4e472374719d8.jpg)
(2) Press ◀◀◀ or ▶▶◀ on the Remote Commander to select the date for playback.
Your camcorder automatically starts playback at the beginning of the selected date.
Searching a recording by date – Date search (DCR-HC15E only)
[a] Actual point you are trying to search for
[b] Present point on the tape
To cancel searching
Press ■ on the Remote Commander.
Searching for the date without using Cassette Memory
The POWER switch should be set to VCR. Operate by touching the panel.
(1) Press FN to display PAGE1.
(2) Press MENU to display the menu.
(3) Select CM SEARCH in [CIII], then press EXEC (p. 129).
(4) Select OFF, then press EXEC.
(5) Press SEARCH MODE on the Remote Commander repeatedly, until the DATE SEARCH indicator appears.
Searching a recording by date – Date search (DCR-HC15E only)
(6) Press ◀◀◀ on the Remote Commander to search for the previous date or press ▶▶▶ on the Remote Commander to search for the next date. Your camcorder automatically starts playback at the point where the date changes. Each time you press ◀◀◀ or ▶▶▶, your camcorder searches for the previous or next date.
To cancel searching
Press ■ on the Remote Commander or □ on your camcorder.
Note
If one day's recording is less than 2 minutes, your camcorder may not accurately find the point where the recording date changes.
If the tape has a blank portion between recorded portions
Date search may not work correctly.
Cassette Memory
The cassette with Cassette Memory can hold 6 recording date data. If you search the date among 7 or more data, see “Searching for the date without using Cassette Memory.”
Searching for a photo – Photo search/Photo scan (DCR-HC15E only)
You can search for a still image you have recorded on a tape (PHOTO SEARCH). You can also search for still images one after another and display each image for 5 seconds automatically regardless of the Cassette Memory (PHOTO SCAN). Use the Remote Commander for these operations. Use this function to check or edit still images.
Searching for a photo by using Cassette Memory
Before operation
- You can use this function only when playing back a tape with Cassette Memory.
- Set CM SEARCH in [CIII] to ON in the menu settings. (The default setting is ON.)
The POWER switch should be set to VCR.
![graph TD A["TITLE SEARCH"] --> B["DATE SEARCH"] C["(no indicator)"] --> A D["PHOTO SCAN"] <--_E["PHOTO SEARCH"]](/content/2019/09/48927/images/0be6604670f82eed262f32dbdf708378861dc01f8f0be94a931052aaa48fd6b3.jpg)
(2) Press ◀◀◀ or ▶▶◀ on the Remote Commander to select the date for playback. Your camcorder automatically starts playback of the photo having the date that you selected.
Searching for a photo – Photo search/Photo scan (DCR-HC15E only)
[a] Actual point you are trying to search for
[b] Present point on the tape
To stop searching
Press ■ on the Remote Commander.
Searching for a photo without using Cassette Memory
The POWER switch should be set to VCR. Operate by touching the panel.
(1) Press FN to display PAGE1.
(2) Press MENU to display the menu.
(3) Select CM SEARCH in [CIII], then press EXEC (p. 129).
(4) Select OFF, then press EXEC.
(5) Press SEARCH MODE on the Remote Commander repeatedly, until the PHOTO SEARCH indicator appears. The indicator changes as follows:
![graph TD A["DATE SEARCH"] --> B["(no indicator)"] B --> C["PHOTO SCAN"] C --> D["PHOTO SEARCH"] D --> C](/content/2019/09/48927/images/d331a51ffb5d89da65c65d7610e3ff823db4ad29621e14d2a05c6968e259c6bc.jpg)
(6) Press ◀◀◀ or ▶▶◀ on the Remote Commander to select the photo for playback. Each time you press ◀◀◀ or ▶▶◀, your camcorder searches for the previous or next photo.
Your camcorder automatically starts playback of the photo.
To stop searching
Press ■ on the Remote Commander or □ on your camcorder.
Searching for a photo – Photo search/Photo scan (DCR-HC15E only)
Scanning photo
The POWER switch should be set to VCR.
(1) Press SEARCH MODE on the Remote Commander repeatedly, until the PHOTO SCAN indicator appears. The indicator changes as follows:
![graph TD A["TITLE SEARCH*"] --> B["DATE SEARCH"] C["(no indicator)"] --> D["PHOTO SCAN"] D --> E["PHOTO SEARCH"]](/content/2019/09/48927/images/12b5a7f27f7640416473eea3a0d397f87b9f47d740a01b9909339dbc87415f81.jpg)
* TITLE SEARCH appears only when CM SEARCH is set to ON in the menu settings.
(2) Press ◀◀◀ or ▶▶◀ on the Remote Commander.
Each photo is played back for about 5 seconds automatically.
To stop scanning
Press ■ on the Remote Commander or □ on your camcorder.
If a tape has a blank section between recorded sections
PHOTO SEARCH and PHOTO SCAN may not work correctly.
The available number of photos that can be searched using the Cassette Memory
The available number is up to 12 photos. However, you can search 13 photos or more using the photo scan function.
You can dub or edit on the VCR connected to your camcorder using your camcorder as a player.
You can connect either the A/V connecting cable (supplied) or i.LINK cable (optional). If you connect with the i.LINK cable (optional), video and audio signals are transmitted in digital form for high-quality editing.
With the A/V connecting cable
Raccordement
If you are connecting the VCR with the A/V connecting cable
- Set DISPLAY in ETC to LCD in the menu settings. (The default setting is LCD.)
- If a search indicator is displayed, press SEARCH MODE on the Remote Commander to turn it off (DCR-HC15E only).
- If you want to dub the data code, display it on the screen.
- If you want to dub the title, set TITLE DSPL in [CIII] to ON in the menu settings. (The default setting is ON.)
If you are connecting the VCR with the i.LINK cable
- Recording of only the picture or sound cannot be done.
- Titles, screen indicators and Cassette Memory contents cannot be recorded.
The POWER switch should be set to
PLAYER (DCR-HC14E)/VCR (DCR-HC15E).
(1) Insert a blank tape (or the tape you want to record over) into the VCR, and insert the recorded tape into your camcorder.
(2) Prepare the VCR for recording. If the VCR has an input selector, set it to input.
Refer to the operating instructions of the VCR.
(3) Play back the recorded tape on your camcorder.
(4) Start recording on the VCR.
Refer to the operating instructions of your VCR.
When you have finished dubbing the tape
Press ■ on both your camcorder and the VCR.
Copie
You can edit on VCRs that support the following systems:
8 mm 8, Hi8 Hi8, Digital8 1), VHS VHS, S-VHS SVHS, VHSC VHSC, S-VHSC SVHS C, Betamax 3, mini DV Mini D, DV D and MICROMV MICROVM
If your VCR is a monaural type
Connect the yellow plug of the A/V connecting cable to the video input jack and the white or the red plug to the audio input jack on the VCR or the TV. When the white plug is connected, the left channel audio is output, and when the red plug is connected, the right channel audio is output.
If your VCR has an S video jack
See page 55 for details.
About i.LINK
See page 168 for details.
Pictures processed by picture effect
These are not output through the DV Interface.
If you record a paused playback picture
- The recorded picture becomes rough with the i DV Interface.
- The picture may jitter when you play back the picture using other video equipment.
Dubbing only desired scenes – Digital program editing
You can duplicate selected scenes (programmes) for editing onto the tape without operating the VCR.
Scenes can be selected by frame. You can set up to 20 programmes.
Before operating Digital program editing
Step 1 Connecting to the VCR (p. 95)
Step 2 Setting the VCR to operate (p. 95)
Step 3 Adjusting the synchronisation of the VCR (p. 100)
When you dub using the same VCR again, you can skip steps 2 and 3.
Dubbing only desired scenes – Digital program editing
Using Digital program editing
Operation 1 Making a programme (p. 102)
Operation 2 Performing Digital program editing (Dubbing the tape) (p. 105)
Note
When editing digital video, the operation signals to the VCR cannot be sent with the LANC jack.
Step 1: Connecting to the VCR
You can connect either the A/V connecting cable or the i.LINK cable.
Connect the devices as illustrated on page 91.
Step 2: Setting the VCR to operate
When you are connecting the camcorder and VCR using the A/V connecting cable, the signal is emitted from the infrared rays emitter of your camcorder to the remote sensor on the VCR to control the VCR.
The POWER switch should be set to
PLAYER (DCR-HC14E)/VCR (DCR-HC15E).
Operate by touching the panel.
(1) Turn the power of the connected VCR on. If the VCR has an input selector, set it to input.
When you connect a video camera recorder, set its power switch to VCR/VTR.
(2) Press FN to display PAGE1.
Dubbing only desired scenes – Digital program editing
(3) Press MENU to display the menu.
(4) Select VIDEO EDIT in ETC, then press EXEC (p. 133).
(5) Press EDIT SET.
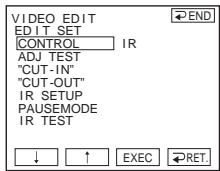
(6) Select CONTROL, then press EXEC.
(7) When connecting with the A/V connecting cable, select IR, then press EXEC.
When connecting with the i.LINK cable, select i.LINK, press EXEC, then go to "Step 3: Adjusting the synchronisation of the VCR" on page 100.
(8) Select IR SETUP, then press EXEC.
(9) Select the IR SETUP code of your VCR, then press EXEC. Check the code in "About the IR SETUP code" (p. 99).
5
6

8

Dubbing only desired scenes – Digital program editing
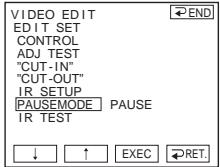
(10) Select PAUSEMODE, then press EXEC.
(11) Select the mode to cancel recording pause on the VCR, then press EXEC. The correct button depends on your VCR. Refer to the operating instructions of your VCR.
11
(12) Locate the infrared rays emitter of your camcorder and face it towards the remote sensor of the VCR about 30 cm (12 in.) apart.
Dubbing only desired scenes – Digital program editing
(13) Insert a recordable tape into the VCR, then set the VCR to recording pause.
(14) Select IR TEST, then press EXEC.
(15) Select EXECUTE, then press EXEC. If the VCR starts recording, the setting is correct.
The indicator you selected to cancel recording pause on the VCR flashes on the screen. When finished, the indicator changes to COMPLETE.
15

Note
When you connect with the i.LINK cable, you may not be able to operate the dubbing function correctly, depending on the VCR. Set CONTROL to IR in the menu settings of your camcorder.
Remarque



