
RPI 346 AUS - Cooker ROSIERES - Free user manual and instructions
Find the device manual for free RPI 346 AUS ROSIERES in PDF.
| Product type | Built-in induction hob |
| Brand | Rosieres |
| Model | RPI 346 AUS |
| Number of cooking zones | 3 induction cooking zones |
| Total power | 7200 W |
| Power supply | 220-240 V~ 50/60 Hz or 400 V 50/60 Hz |
| Dimensions (W x D x H) | 590 x 520 x 55 mm |
| Cut-out dimensions (W x D) | 560 x 490 mm |
| Weight (approx.) | Approximately 10 kg |
| Cooking functions | Boost (max 5 min), Keep warm, Simmer (level 1), Medium (level 8), High (level 15) |
| Timer | Programmable from 1 min to 9 h 59 min, adjustable in steps |
| Memory function | Records up to 10 power variations over 8 hours |
| Child safety | Control panel lock (display shows « Loc ») |
| Residual heat indicator | Indicator 'H' displayed as long as the zone is hot |
| Automatic safety shut-off | According to power level (1 to 8 hours) |
| Overheating protection | Internal sensor, automatic shut-off in case of overheating |
| Surface type | Ceramic glass |
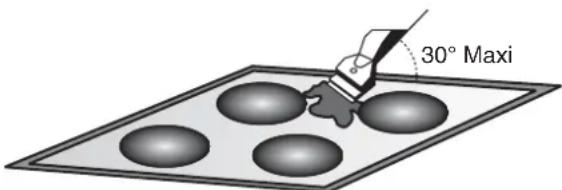
| Care and cleaning | Specific products for ceramic glass, scraper with blade at 30° angle |
| Compatible cookware | Magnetic base (cast iron, enameled steel, ferritic stainless steel) – min. diameter 140 mm |
| Rating plate | Located under the lower casing of the hob |
| Warranty | Warranty certificate provided with the product |
| After-sales service | Technical assistance available – contact for any intervention |
| Standards and directives | Directives 2006/95/EC and 2004/108/EC, WEEE directive 2002/96/EC |
Frequently Asked Questions - RPI 346 AUS ROSIERES
User questions about RPI 346 AUS ROSIERES
0 question about this device. Answer the ones you know or ask your own.
Ask a new question about this device
Download the instructions for your Cooker in PDF format for free! Find your manual RPI 346 AUS - ROSIERES and take your electronic device back in hand. On this page are published all the documents necessary for the use of your device. RPI 346 AUS by ROSIERES.
USER MANUAL RPI 346 AUS ROSIERES
INSTRUCTIONS FOR USE AND INSTALLATION
GB
TABLES DE CUISSON
NOTICE D'EMPLOI ET D'INSTALLATION
FR
IHCTPyKzIa3 EKcIyATAuT Ta IIDKlIOUeHHra
BБУДОВАНО I IHДУКЦIйHOI NOBEPXHI
U
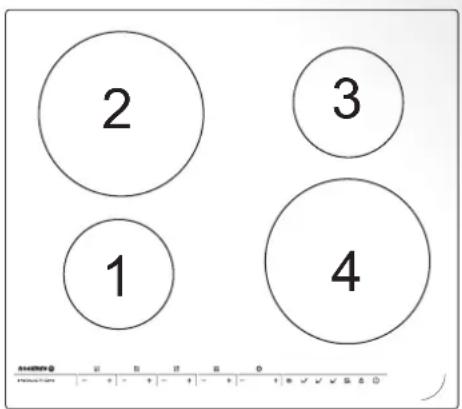
Model:RPI430 / RPIF430 / RPI430MM
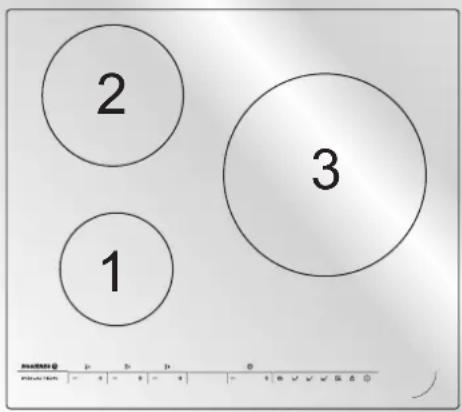
Model: RPI342 / RPIF342 / RPI342MM / RPI346
READ THE INSTRUCTIONS BOOKLET CAREFULLY TO MAKE THE MOST OF YOUR HOB.
We recommend you keep the instructions for installation and use for later reference, and before installing the hob, note its serial number below in case you need to get help from the after sales service.
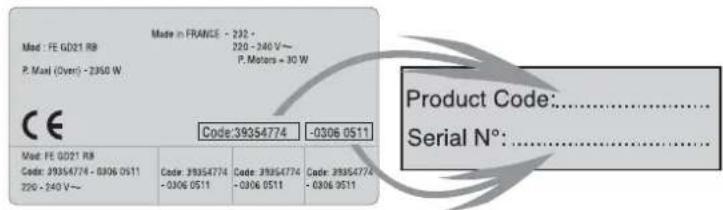
Identification plate (located under the hob's bottom casing)
It is strongly recommended to keep children away from the cooking zones while they are in operation or when they are switched off, so long as the residual heat indicator is on, in order to prevent the risks of serious burns.
- When cooking with fats or oils, take care always to watch the cooking process as heated fats and oils can catch fire rapidly.
- The hob's control area is sensitive, do not place hot containers on it.
- Aluminium foil and plastic pans must not be placed on heating zones.
- After every use, some cleaning of the hob is necessary to prevent the build up of dirt and grease. If left, this is recooked when the hob is used and burns giving off smoke and unpleasant smells, not to mention the risks of fire propagation.
- Do not left metallic objects such as knives, forks, spoons or lids on the induction zone, because if they are too large or too heavy, they could become hot.
- Never cook food directly on the glass ceramic hob. Always use the appropriate cookware.
Always place the pan in the centre of the unit that you are cooking on.
- Do not use the surface as a cutting board.
- Do not slide cookware across the hob.
- Do not store heavy items above the hob. If they drop onto the hob, they may cause damage.
- Do not use the hob as a working surface.
- Do not use the hob for storage of any items.
- In the unlikely event of a surface crack appearing, do not use the hob. Immediately disconnect the hob from the electrical power supply and call the After Sales Service.
This appliance is not intended for use by persons (including children) with reduced physical, sensory or mental capabilities, or lack of experience and knowledge, unless they have been given supervision or instruction concerning use of the appliance by a person responsible for their safety.
Children should be supervised to ensure that they do not play with the appliance.

Warning: this appliance complies with current safety regulations and electromagnetic compatibility regulations. Nevertheless, people with a pacemaker should not use this appliance. It is impossible to guarantee that all such devices found on the market comply with current safety regulations and electromagnetic compatibility regulations, and that dangerous interference will not occur. It is also possible that people with other types of device, such as a hearing aid, could experience some discomfort.
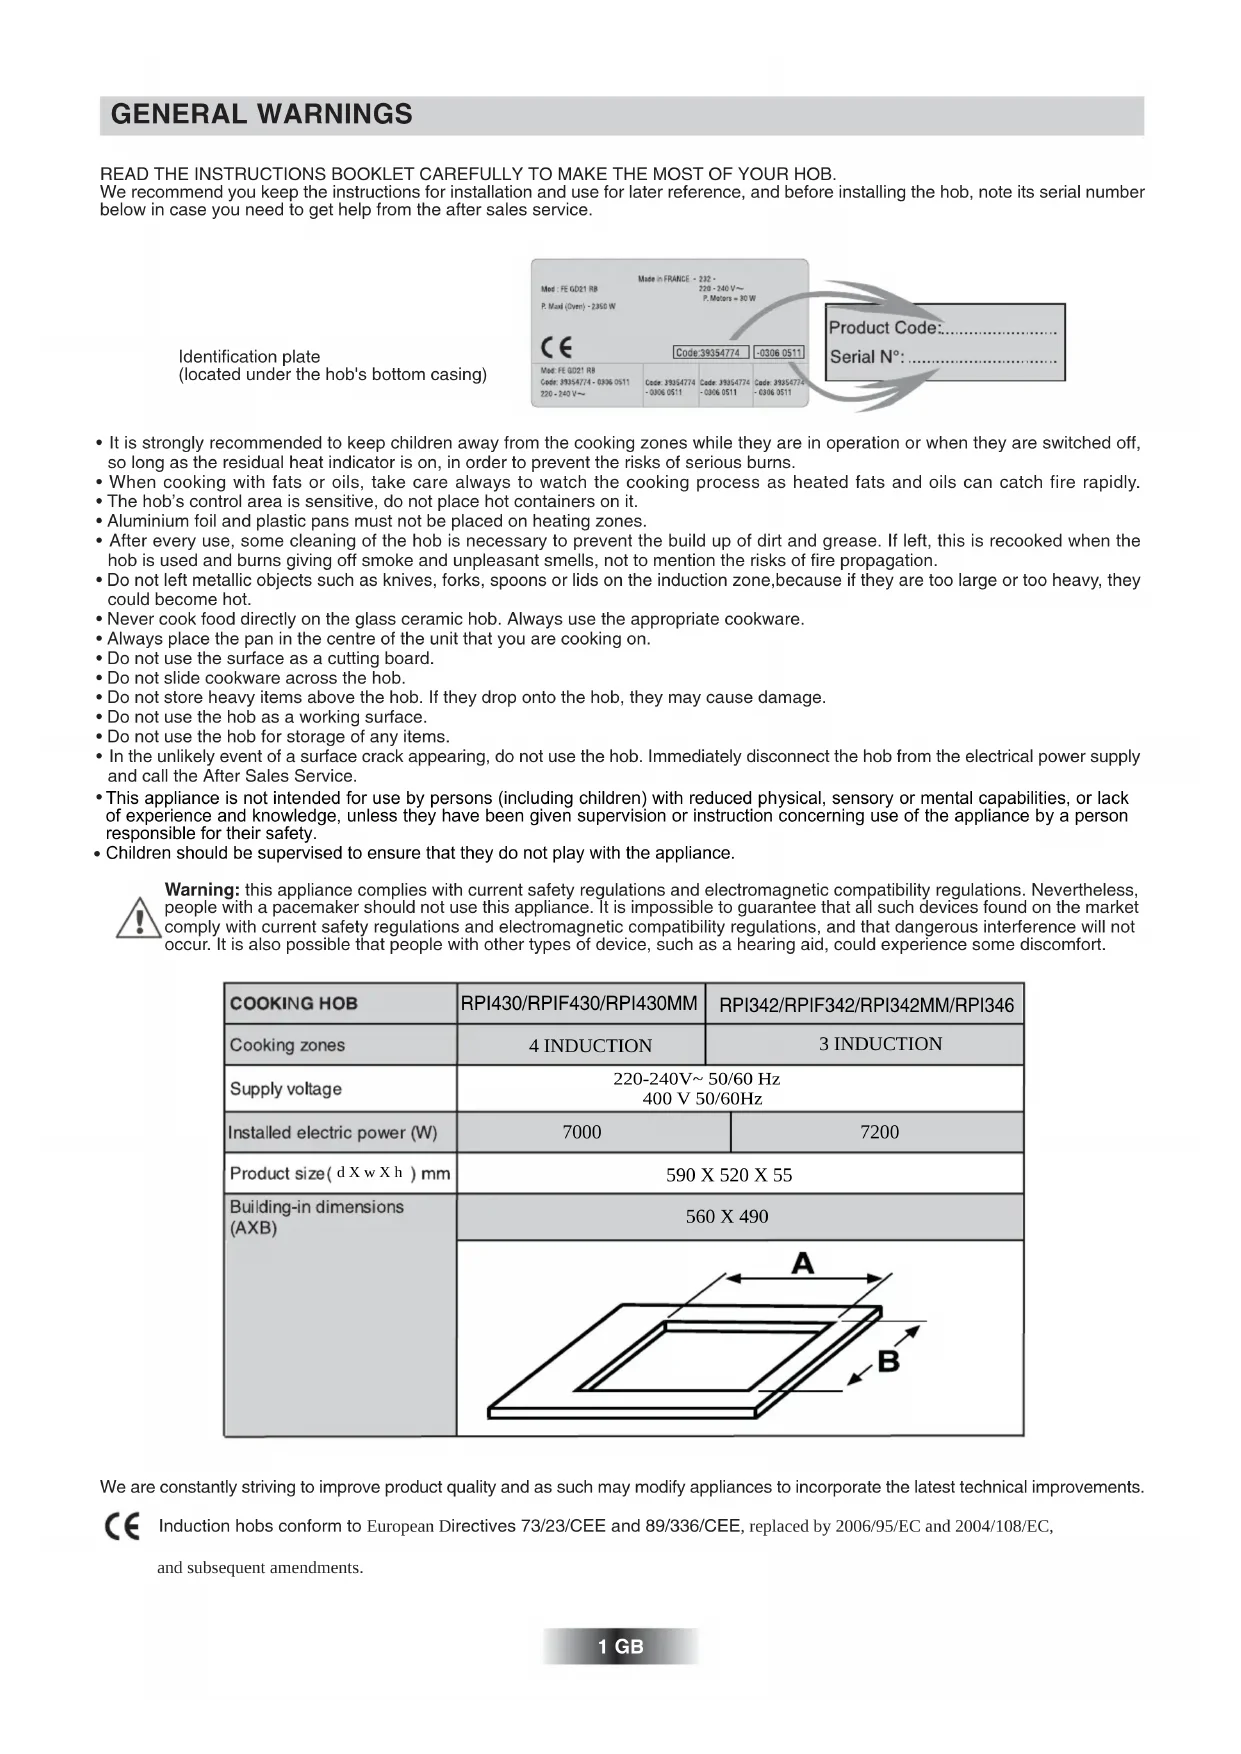
| COOKING HOB | RPI430/RPIF430/RPI430MM | RPI342/RPIF342/RPI342MM/RPI346 |
| Cooking zones | 4 INDUCTION | 3 INDUCTION |
| Supply voltage | 220-240V~50/60 Hz 400 V 50/60Hz | |
| Installed electric power (W) | 7000 | 7200 |
| Product size(d X w X h ) mm | 590 X 520 X 55 | |
| Building-in dimensions (AXB) | 560 X 490 | |
| A B | ||
We are constantly striving to improve product quality and as such may modify appliances to incorporate the latest technical improvements.

Induction hobs conform to European Directives 73/23/CEE and 89/336/CEE, replaced by 2006/95/EC and 2004/108/EC.
and subsequent amendments.
INSTALLATION
Instalng a domestic apian can be a compled operation which if not carried out cctly, can seriously affect consumer safety. It is for this reason that the task should be undertaken by a professionaly qualitied person who will carry it out in accordance with the technical regulations in force. In the event that this advice is ignored and the installation is carried out by an unqualified person, the manufacturer declines all responsibility for any technical failure of the product whether or not it results in damage to goods or injury to individuals.
BUILT-IN
The furniture in which your hob will be installed and all adjacent furniture, should be made from materials that can withstand high temperatures. In addition, all decorative laminates should be fixed with heat-resistant glue.
Installation:
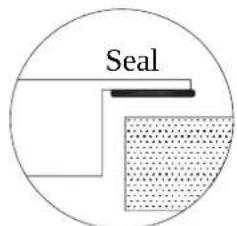
- A watertight seal is supplied with the hob.
Before fitting:
- turn the hob upside down, with the glass surface facing downwards.
Make sure the glass is protected.
fit the seal round the hob. - make sure that it is correctly fitted to avoid any leakage into the supporting cabinet.
- It it important to fit the hob on a level supporting surface.
- Deformations caused by incorrect fitting can alter the specifications of the worktop and the performance of the hob.
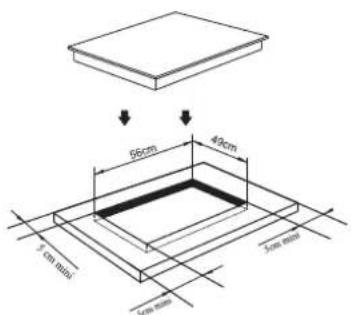
- Leave a gap of at least 5cm between the appliance and any neighbouring vertical surfaces.
It is absolutely essential that the recess conforms with the dimensions indicated. - Cut a hole in the worktop of the dimension shown in the diagram below. A minimum of 50mm space should be left around the hole.
- The worktop should be at least 30mm thick and made of heat-resistant material. As shown in the Figure(1)
- You can not build the hob in above an oven with no fan, a dishwasher, fridge, freezer or washing machine.
It is essential that the induction hob is well ventilated and that the air intake and exit are not blocked.
Make sure the hob is correctly installed as shown in Figure(2).
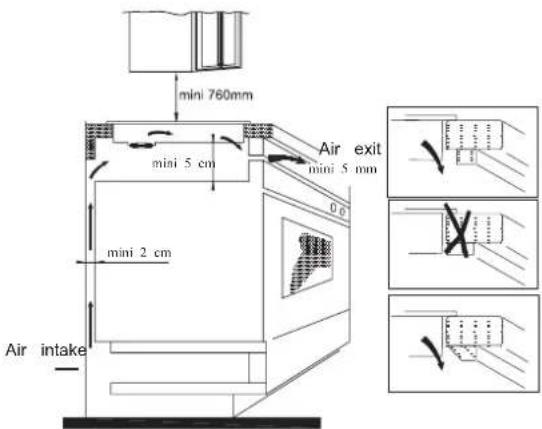
NB: For safety, the gap between the hob and any cupboard above it should be at least 760mm.
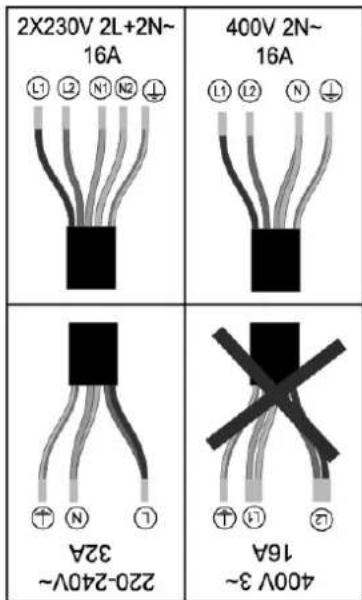
ELECTRICAL CONNECTION
"The installation must conform to the standard directives." The manufacturer declines all responsibility for any damage that may be caused by unsuitable or unreasonable use.
Warning :
- Always check before any electrical operation, the supply tension shown on the electricity meter, the adjustment of the circuit breaker, the continuity of the connection to earth to the installation and that the fuse is suitable.
- The electrical connection to the installation should be made via a socket with a plug with earth, or via an omnipole cut-out switch with an opening gap of at least 3mm .
If the appliance has a socket outlet, it must be installed so that the socket outlet is accessible.
- The yellow/green wire of the power supply cable must be connected to the earth of both power supply and appliance terminals.
- The manufacturer cannot be held responsible for any accidents resulting from the use of an appliance which is not connected to earth, or with a faulty earth connection continuity.
- Any queries regarding the power supply cord should be referred to After Sales Service or a qualified technician.
- if the cable is damaged or to be replaced, the operation must be carried out the by sale agent with dedicated tools to avoid any accident.
Connection to power supply
The socket shall be connected in compliance with the relevant standard, to a single-pole circuit breaker. The method of connection is shown in Figure(3):
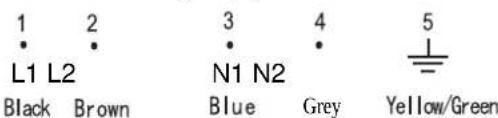
The cable must not be bent or compressed.
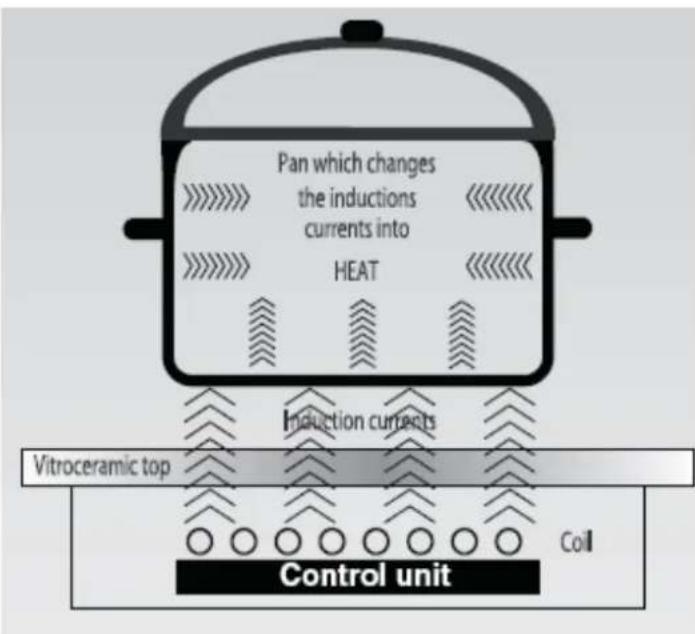
INDUCTION
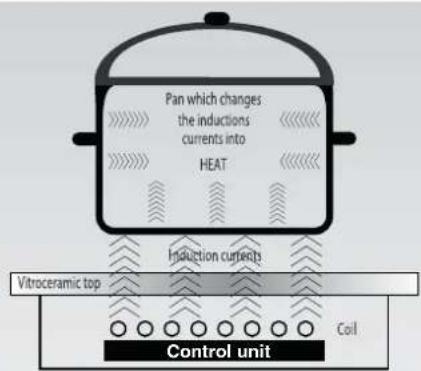
USE PROCEDURE
An electronic generator powers a coil located inside the appliance. This coil creates a magnetic field, so that when the pan is placed on the hob, it is permeated by the induction currents.
These currents make the pan into a real heat transmitter, while the glass ceramic hob remains cold.
This system is designed for use with magnetic-bottomed pans.
Put simply, induction technology has two main advantages :
- as heat is emitted only by the pan, heat is maintained at its maximum level and cooking takes place without any heat loss.
- There is no thermal inertia, as cooking automatically starts when the pan is placed on the hob and stops when it is removed.
A HIGH SAFETY APPLIANCE
Protection from over-Temperature
A sensor monitors the temperature in the cooking zones. When the temperature exceeds a safe level, the cooking zone is automatically switched off.
- Residual heat warning
When the hob has been operating for some time, there will be some residual heat. The letter "H" appears to warn you to keep away from it.
- Auto shutdown
Another safety feature of the induction hob is auto shutdown. This occurs whenever you forget to switch off a cooking zone. The default shutdown times are shown in the table below.
| Power level | The heating zone shut down automatically after |
| 1~5 | 8 hours |
| 6~10 | 4 hours |
| 11~14 | 2 hours |
| 15 | 1hours |
When the pan is removed from the cooking zone, it stops heating immediately and switches itself off after the buzzer sounded for one minute.
RE
the guidance of the doctor.
ma er shall use this product underThe pa
- Always use good quality cookware with perfectly flat and thick bases : using this type of cookware will prevent hot spots that cause food to stick. Thick metal pots and pans will provide an even distribution of heat.
- Ensure that the base of the pot or pan is dry : when filling pans with liquid or using one that has been stored in the refrigerator, ensure that the base of the pan is completely dry before placing it on the hob. This will help to avoid staining the hob.
- Use pans whose diameter is as large as the graphic of the zone selected. Using a pot a slightly wider energy will be used at its maximum efficiency. If you use smaller pot efficiency could be less than expected. Pot less than 140mm could be undetected by the hob.
The following information will help you select the pans best adapted to obtain good results.
| Induction zone | |
| Mark on kitchen utensils | On the label, check the mark which shows if the pan is compatible with induction. |
| Use magnetic pans (enamelled iron sheet, cast-iron ferritic stainless steel) apply a magnet on the bottom of the pan (it must stick). | |
| Stainless steel | Non detectable |
| Excepted stainless steel ferromagnetic. | |
| Aluminium | Non detectable |
| Cast-iron | Good performance |
| Enamelled steel | Good performance |
| Glass | Non detectable |
| Porcelain | Non detectable |
| Copper bottom | Non detectable |
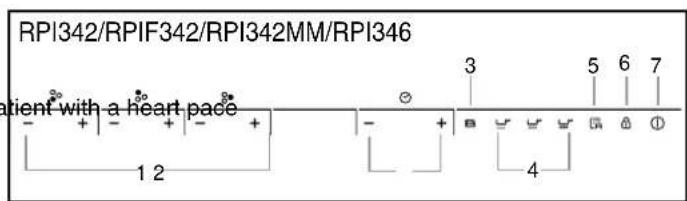
Schematic diagram of the control panel
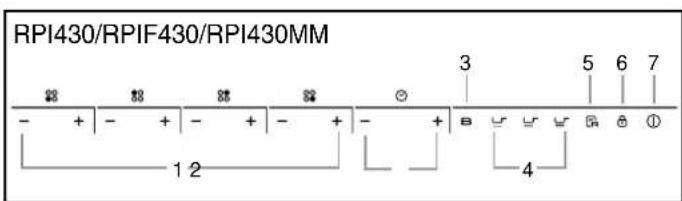
HOB COOKWARE ADVICE
Using good quality cookware is critical for setting the best performance from your hob.

- Power regular key
- Timer regular key
- Booster
- Special function
- Memory
- Lock
- On/Off
Instructions for Use
When the power is switched on, the buzz wince and all the indicators will come one second and then go out. The hob is inostandby mode place the pan in the centre of the cooking zone.
Operating instructions
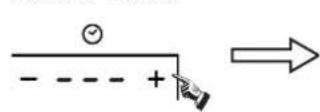
- Press the "①" key, all the indicators show "--".


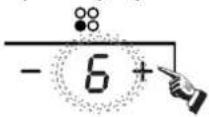
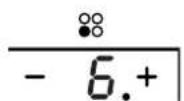
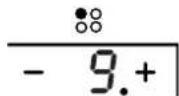
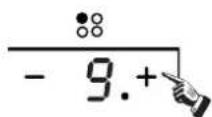
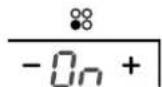
Select the power level by pressing the "+" or "-" key for the relevant hotplate. To begin with the indicator shows "8" or "1" by pressing the "+" or "-" key. Adjust up or down by pressing the "+" or "-" key.
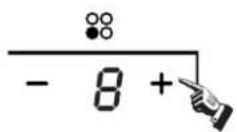
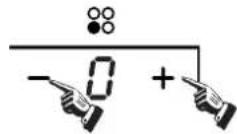
If you press the "+" and "-" keys simultaneously, the power setting returns to "0" and the cooking zone switches off.
NB: When the "①" key is pressed, the induction hob returns to standby mode if no other operation is carried out within two minutes.
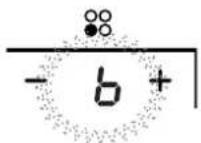
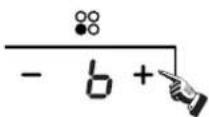
Boost function
Press the "B" key, the power level indicator showing "b"

Warning:
- The boost function only operates for 5 minutes, after which the cooking zone will revert to its original setting.
- The boost function works on the all cooking zone.
- As the boost function of the 1st cooking zone is activated, the 2nd cooking zone is limited under level 2 automatically, vice versa. As the boost function of the 3rd cooking zone is activated, the 4th cooking zone is limited under level 2 automatically, vice versa.
Cancelling the "BOOST" mode
Cancel the "Boost" mode by pressing the "+" or "-" key of the corresponding zone.
Timer function
If more than 1 zone is switch on :
- activate the selected zone by pushing "+" or "-" key of that zone, the corresponding digits will be flashing.
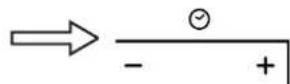
then press the "+" or "-" timer key power level indicator flashing and showing "t" and the timer indicator flashes
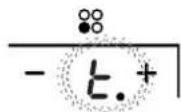
To begin with the indicator shows "0: 10", set the time by pressing the "+" or "-" key. After setting the time, you can select the power level of the cooking zone.
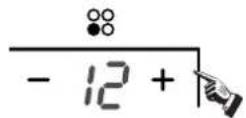
O Then set the time for between 1 minute and 9 hours 59 minutes by pressing the "+" or "-" key.
Press the "+" key once increases the time by one minute; hold down the "+" key increases the time by 10 minutes; When the time exceeds 1 hour, hold down the "+" key increases the time by 30 minutes.
Press the "-" key once decreases the time by one minute; hold down the "-" key decreases the time by 10 minutes; When the time exceeds 2 hours, hold down the "-" key decreases the time by 30 minutes.
- You can set the power level during the timer mode.
If the timer is set on more than 1 zone:
- Timer can be set on all 4 cooking zones. When you set the time for several cooking zones simultaneously, decimal dots of the relevant cooking zones are on.
On the timer display will be shown the timer than will expire first. The dot of the corresponding zone will be on but flashing.Once the countdown timer expires the corresponding zone will be switch off. Then it will be shown the new first expiring timer and the corresponding zone will have the dot flashing.
If the timer is set but not active on any zone, it will work simply as timer countdown.
Note:
- When the timer is 0 minute, the timer is cancelled.
- When time elapses, the relevant cooking zone is switched off.
- After setting the timer, the timing indicator has been flashing for 5 seconds, the set time will be automatically confirmed.
Instructions for Use
- In timer mode, pressing the "+" or "-" key of the timer simultaneously, timer setting returns to "0", time is cancelled.
Safety mode
To ensure the safety of children, the induction hob is fitted with an interlock device.
Lock:
In working mode, press the " 1 " key, the hob then goes into the lock mode, timer will display "Loc" and the rest of the keys are disabled except the " ① " key.

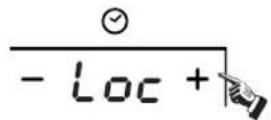
In standby mode, press the "lock" key, the hob then goes into the lock mode, the timer shows "Loc" and the rest of the keys are disabled. The timer shows "Loc" for a while and then goes out.
If you press the ① key, "I_oc" will be displayed for a while.
Unlock:
Hold down the"Lock" key for 3 second, and the lock function will be deactivate.
Keep warm mode
This function will allow to keep the food warm for up to 2 hours.
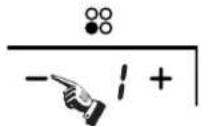
Activate the selected zone by pushing the "-" or "+" button

Press the "-" till when you reach the level between 0 and 1, you will see the keep warm level. "I" will appear under the area selected.
Cancelling the Keep warm mode
To exit for the keep warm function, set any other power level
Special function

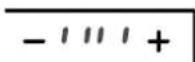
SIMMERING key (level 1)

MEDIUM key (level 8)

HIGH key (level 15)
Ativate the selected zone by pushing "+" or "-"

press the SIMMERING key, the indicator will be show "11"

press the MEDIUM key, the indicator will be show "11

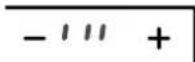
press the HIGH key, the indicator will be show "111


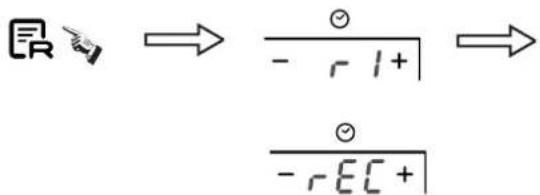
Memory function
You can use the memory function to store the power level settings and duration for one zone.

Recording
- Select the desired cooking zone by pressing the "+" or "-" key, with the power level indicator of that zone flashing,
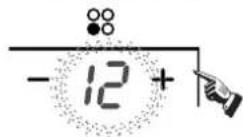
press the" key, with the timer indictor showing "r0", "r0"means "no cooking cycle in memory". hold down the memory key for 3 seconds, with the timer indicator show "rEC", recording is started.


the power level indicator showing "0n" and power level alternately.
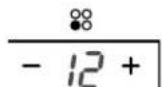
The maximum number of operations is 10 power level variations in 8 hours. Any power level variation lasting less than 15 seconds will not be recorded.
Stop recording
Press again the memory key, "rEC" will be no more display on the timer display and the cooking cycle will be stored

Instructions for Use
OR
Switch off the corresponding cooking zone by pressing "+" and "-" simultaneously or by setting the power level to 0, "REC" will be no more display on the timer display and the cooking cycle will be stored.

OR
Remove the pan from the corresponding cooking zone. When the zone detects missing pan, then "EC" will be no more display on the timer display and the cooking cycle will be stored
OR
Do more than 10 power level setting variations, "R EC" will be no more display on
OR
switch off the hob,in that case the recording of the cooking cycle is automatically aborted.
OR
switch off the a recorded cooking zone before 15 second since the starting of the recording in that case the recording of the cooking cycle is automatically aborted.
Execute a recorded cooking cycle
Press the memory key, the timer indicator displays "r",key for 5 seconds, then displays"PLy. The zone corresponding at the recorded cooking cycle will switch on and starts performing the cycle.

If the corresponding zone was already on, the recorded cooking cycle will take the priority and be performed.
If during the execution of a recorded cooking cycle on the corresponding zone ^+ or - key, the recorded cooking cycle is aborted and normal managing is restored.anyway the stored cooking cycle is kept in memory.
How to record one new cooking cycle if we have already recorded one:
Activate the cooking zone we want to record by pressing" ^+ " or "-
Hold down the" key for a while, and the "r1" will appear. "r1" means "cooking zone stored in memory".
Then the" r ^n will be displayed, the recording of the cycle on the selected zone starts.
The maximum power of cooking zones is as follows:
| Heating zone | RPI430 / RPIF430 / RPI430MM | |
| Normal | Boost | |
| 1 | 1200 | 1500 |
| 2 | 2300 | 3000 |
| 3 | 1200 | 1500 |
| 4 | 2300 | 3000 |
| Heating zone | RPI342 / RPIF342 / RPI342MM | |
| Normal | Boost | |
| 1 | 1200 | 1500 |
| 2 | 2300 | 2600 |
| 3 | 3000 | 4200 |
| Heating zone | RPI346 | |
| Normal | Boost | |
| 1 | 1200 | 1500 |
| 2 | 2300 | 2600 |
| 3 | 3000 | 4600 |
The above may vary according to the material it is made from
of the pan and
CLEANING AND MAINTENANCE
- Before carrying out any maintenance work on the hob, allow it to cool down.
- Only products, (creams and scrapers) specifically designed for glass ceramic surfaces should be used. They are obtainable from hardware stores.
- Avoid spillages, as anything which falls on to the hob surface will quickly burn and will make cleaning more difficult.
- It is advisable to keep away from the hob all substances which are liable to melt, such as plastic items, sugar, or sugar-based products.
MAINTENANCE:
- Place a few drops of the specialised cleaning product on the hob surface.
- Rub any stubborn stains with a soft cloth or with slightly damp kitchen paper.
- Wipe with a soft cloth or dry kitchen paper until the surface is clean.
If there are still some stubborn stains:
- Place a few more drops of specialised cleaning fluid on the surface.
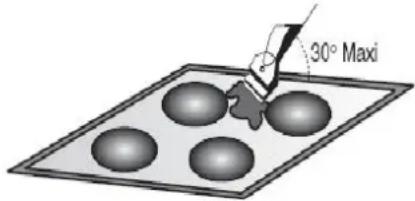
- Scrape with a scraper, holding it at an angle of 30^ to the hob, until the stains disappear.
- Wipe with a soft cloth or dry kitchen paper until the surface is clean.
- Repeat the operation if necessary.
A FEW HINTS:
Frequent cleaning leaves a protective layer which is essential to prevent scratches and wear. Make sure that the surface is clean before using the hob again. To remove marks left by water, use a few drops of white vinegar or lemon juice. Then wipe with absorbent paper and a few drops of specialised cleaning fluid. The glass ceramic surface will withstand scraping from flat-bottomed cooking vessels, however, it is always better to lift them when moving them from one zone to another.
NB:
Do not use a sponge which is too wet.
Never use a knife or a screwdriver.
A scraper with a razor blade will not damage the surface, as long as it is kept at an angle of 30^ .
Never leave a scraper with a razor blade within the reach of children.
Never use abrasive products or scouring powders.
AFTERCARE
Before calling out a Service Engineer please check the following:
that the plug is correctly inserted and fused;
If the fault cannot be identified:
switch off the appliance — do not tamper with it — call the Aftercare Service Centre. The appliance is supplied with a guarantee certificate that ensures that it will be repaired free of charge at the Service Centre.
PROBLEM SOLVING
The induction hob gives shorings out.
Normal. The cooking fan of the electronic components is on.
The induction hob gives a light whistling out.
- Normal. According to the working frequency of the inductors, a light whistling can occur when using several cooking zones on maximum power.
Cooking zones that do not maintain a rolling boil or a fast enough frying rate.
-
You must use pans which are absolutely flat.
-
Pan bottoms should closely match the diameter of the heat zone selected.
Foods cook slowly.
- Improper cookware being used. Pan bases should be flat, fairly heavy-weight and the same diameter as the heat zone selected.
Tiny scratches (may appear as cracks or abrasions) on the glass surface of the hob.
- Incorrect cleaning methods, cookware with rough bases, or coarse particles (salt or sand) trapped between the cookware and the surface of the hob.
Use recommended cleaning procedures, be sure cookware bases are clean before use and use cookware with smooth bases.
Metal markings (may appear as scratches).
- Do not slide aluminium cookware across the surface. Use recommended cleaning procedure to remove marks.
- Incorrect cleaning materials have been used, spillage or grease stains remain on the surface, use a razor scraper and recommended cleaning product.
Dark streaks or specks.
- Use a razor scraper and recommended cleaning product.
Areas of discoloration on cooktop.
- Marks from aluminium and copper pans as well as mineral deposits from water or food can be removed with the cleaning cream.
Hot sugar mixtures / plastic melted to the surface.
See the Glass Hob Cleaning section.
The hob is out of order, or some heat zones do not work.
- The shunt bars are not properly fitted on the terminal block. Check the connection is made in conformity with the instructions page 2.
The hob does not operate.
- The control panel is locked. Press the "Locking" button to release.
The hob does not cut off
- The control panel is locked. Press the "Locking" button to release.
Refer to the section, page 5.
The hob stops automatically
- The cooking zones stop automatically if they are left on for too long. Refer to the section, page 3.
Frequency of on/off operations for cooking zones
- The on-off cycles vary according to the required heat level:
- low level: short operating time,
- high level: long operating time.
This appliance is marked according to the European directive 2002/96/EC on Waste Electrical and Electronic Equipment (WEEE). By ensuring this product is disposed of correctly, you will help prevent potential negative consequences for the environment and human health, which could otherwise be caused by inappropriate waste handling of this product. The symbol on the product indicates that this product may not be treated as household waste.

Instead it shall be handed over to the applicable collection point for the recycling of electrical and electronic equipment Disposal must be carried out in accordance with local environmental regulations for waste disposal.
For more detailed information about treatment, recovery and recycling of this product, please contact your local city office, your household waste disposal service or the shop where you purchased the product.
INSTRUCTIONS GENERALES
- Power regular key
- Timer regular key
- Booster
- Special function
- Memory
- Lock
- On/Off
Hikon He roTyTe iXy Ha kepaunHi noBepxHi, 3aBKn BnKOpncToBye BiNoBiHni NoCyd.
3aBKnCTaBteKaCTpyNHOHacepeDnHy 3oHnHarpiBy.
He BnKOpNCTOByTe naneBЯk o6pO6Hy dOwky.
He TaHHTb KxOHHn NocyD no NOBepxHi.
HecknaaTe BaKki npeMeTN HaN naHEnIIO, KIO BOHN BnAdyTb, TO MOKyTb II NOnKOdNTN.
He BnKOpncToBnyTe BapnIbHy naHEnb Byakocti po6ooyi nobepxhi.
He BnKOpncTObynte nolni dna 36epirAHn 6ydb-ynx npedmetrib.
Ha naheI He noBHHo 6yTu TpiuHn, kUO BOHN 3'ABTbcra, BID'eHaHTe eNeKtpoxNbHeHn i 3BepHtbcra do cepBicHOrO ceHTpy.
TEXHIUHIXAPAKTEPNUKIN
Ka6eIb He NOBHeH MaTn 3rNHiB a60 yTHcKIB.
IHyKciA
CnOciB BnKOpNCTAHH
EeKtpoHHn rehepatop KINBHeHHa 3haxoDntbca BcepeHnipnAyn.
LcKOTyWka CTBOPOE MaHIThe none, TAK 00, KOJI N KaCTpyJl
3hAXOHTbcra Ha BORHI, BOHA npOHn3Ha HdyKUJEIO CTpyMIB.
Li cTpyMN nepeDAIoTB tenNo TaKIM YHOM, 00 cTpaBa HarpIbaETbcra, a
KAcTpyJla 3aJIiWsaTeBCra XoJOnHOIO.
La cncTeMa npn3HaueHa Ia KaCtpyIb 3 MarHITHM dHOM. IpocTiWe kaKyuH, iNdykuinH TeXHoNOri MaOTb DBI OCHOBHI nepeBaru: TaKaT KTeNo BUnBInbHaTeBcTa TINk KaCtpyIeHO, To BHKOpNCTOByEtbcNoroMaKcUmAlbHa KInbKiCTb.
HemaepmaIbHOI iHepui, TaK TEIO BnBilbHReTcB TINK KOI KAcTpYJI 3axOuITbcra Ha HarpBaIbHi 3OHi, i 3ynHReTbcra KOI KAcTpYII npniHHTn.
PnCTPIIINBUNSEHOIBE3NEKNI
3axucm biD nepehaepiaaHa
Cencop nperynioTo TemnpaTyHarpibaIbHex 30H. KoI
TEMnepaTpa nepeBmUyE DonyctMMy HOpMy, Harpibalha 30Ha ABTomatuHOBUNKaETbCra.
NonepdkeHH 3auuKoo20 menna.
KoI NaHEnb BnKOpNCTOByETcB npOTaROM DeKaROr Qacy, 3'ABNTcBc3 aIINkoB TeNo. 3'ABNTcBc lIePa «H», 06 nonepdntu Bac npo ue. Aomamuuhe BumkHeHH
Ie OINBnD 6e3neKn BapInbHOi NaHEni -ABTO BmKHeHHa.BoHO cnpa2bOBye KOIN Bu 3a6yBaTe BmKHyTH HarpiaBbHy 3OHy.
3a 3aMOyBaHHnpeioHnHcTB BnMKHeHHn HabeDeHO HnKue B Ta6nui:
| Ровenvnotужност | Конфоркавимкаоста авTomатчно піся |
| 1-58 roД. | |
| 6-104 roД. | |
| 11-142 roД. | |
| 15 | 1 roД. |
KactpyH np6paTn 30Hn HarpBy BOHa ABTomuHOBUMKaETbCn HarpiB, i nCn XBNHHORO 3BOHnKa ABTomaTHHO BmNKAeTbc
YHSEHHRA EKCINLYATAI
Ipeed BnKoHaHHam 6yDb-aknx po6iHa naHeni, daNe Te oxoNoHyTN.
CnD BnKOpncTOBByBatn TiIbKn npOdyKciio (KpeM i Wkpe6Kn) npN3HaueHy dAe KepaMiyHx NOBepXohb.
YHnKaIe po3nIBi, RaIO Te 0 nonaDe Ha naHeB WbNkO 3rOpntb, Ue yckLnAdHtBu HnEHHA.
BaxaHO TpMaTHn odaJI BiD naneI TaK peOBNH, kI MOKytb po3nlaBntncra, taK I NaactMaca, yKOp, TapeOBHH Ha yKpOBI oCHOBI.
Ekcnnyatauia
IdaTe KInbKa Kpanelb CneuiAIBHO MIOOHO 3aO6y Ha NOBepxHIO naHeJI.
3MouiB CTiKi PIAIM M'RAKO TKAHHO, a6o BOIOrM KxOHHM napeom.
IpoTnpaTe M'koIO TkaHnHO, a6o cyxIM KxOHHm nanePOM, dOKN nobepxHr He 6yde cyxoIO.
KaO3aNNnncraKicb cTki narnm:
IdaTe 1e KeiNbKa Kpanel cneiaJbHoro MmHOrO 3acoby.
NoWKpe6bIb WKpe6KOM nIy Kytom 30 rpaDyciB no nIaMl, DOKN BOHa He 3HnKHe.
IpoTnpaTe M'koIO TkaHNOIO, a6o cyxNM KxyOHNM napeom,doKIO nobepxHr He 6yde uCToIO.
Nobtopitb onepaui, kkuo he06xidno.
DAKIIbKA IOPA:
HacTa YnCTka 3aIIuAe 3axIcHNI shap, AkiN Heo6xIDHn IINr 3anO6irAHnnoDpynn H 3Hocy. PepeKoHaTecra, 0n naHb NcTa nepeh NaCtynHM BnKOpncTahm. U6 no36ytnca po3BODIB npotpiYkycom a6o LIMOHm cokom. Notim npotpi TcneiaJbHm nOrInhaOum manepom Ta CneiaJIbHm MInOuHm 3acobom. CKnlokepaMUnHa NobepxH 3axuAe BiD noDpynnH, ODAHk, KpaJe nepectabTN KAcTpynIO BOnH II 3OHn BInH, YmnpepTaryBatn.
3anaMaTaHte:
He BnKOpncToBvIe rSy6Ky, YaHaHaTOr BoNOra.
HikOJI He BnKOpNCTOByIe HIX a6o BnKpyTKy.
Ckpe6ok 3 Je3om He npn3Bede do nowkoJKeHb nobepxHi, kIo noIrO TpMaTH niKD KytOM 30 rpaDyciB.
Hikon He 3aIuaTe cKe6ok 3 ne3om B MeKax DoCkHocTi dite.
Hikoli He BnKOpNCTOByTe a6pa3nBHi MaTepiAIn a6o NcTayi nopOuKn.
UCYHEHHH HECNPABHOCTEIN
PEMOHT
IpeepBnKlnkOM Maictpa nepeBipTe HactynHe:
Hn npabnlbHO BCTaBHe BAIIb B po3eKy. RaIIO HeCnpabHicb He MOxHa BImHaHTN, To BmKHiB I npnaI 3 po3eTK i 3BepHItcA y cepBicn HcHTp. PnIaI npOdaTbc3 rapaHTiIM CepTioKATOM, Oo O3Haue, Oo Bam NOrO BiDpeMOHTyOt6eKoWTOBHO.
PIUHEHHIPOBJIEMN
IHykuiHa BapnIbHa NoBepxHa dae IerKn CBnCT: HopMaIbHo. BiIOBIOHO 3 pOboHO qactoTOIO IHdyKTopa, IerKn CBnCT MoKe BnHnKHT npn BNkopnstAHi KeIbKOx 3OH npriOTyBaHH Ha MaKcMaIbHi nOtYKHOcti.
CtapBn NobilbHO roTyIbTaBc: BnkOpncTObyETbca He nixOxmaN Nocyd. HIO KAcTpyni MaE 6yTN NLOCKM, He dyXke BaKKM, a diaMeTp MaE BiJNObiATn diAMetpy HarpiBaJIbHoI 30HN.
3'ABJIHObCMAJIeHbKi NODpAHHN (TPIUHN): He npabInbHI MeToOnu HENH, NOcyd i3 rpy6m dHOM, a6o BeJIki cactKu cykpy a6o ncky noTpapani mixn ocydomi naHJIIO. BIKOPINCTOByTe peKOMEHDOBahi MNUOci 3ac06n, uChtn Nocyd i3 rIaNKM dHOM.
Metanebi MapkyBaHHa (MOKytb 3'ABNTcRA NOpnnH). He TaHITb AIIOMiHIEBNIocyD no naheI.
BnKOpncToByIe peKomeHDoBaHI 3acO6n, uo6 BnDaJIHTm MapkyBaHHa.
TemHi cmYn a6o nIaMn: BnKOpncTOByte peKomeHDoBaHI 3ac6bN dIy NuaeHHA.
3ne6apBHeHHa nahei: CiiDn Bi, aHOMHIEBHX a6o MiHNX KAcTpynb, TaK cMo Rk i BAnHrHn HaIT, MoKHb BiUnCTHTN 3a Donomoroo cneiaJIbHorO Kpemy.
Ha naheli po3nnabnBcra ykop a6o nlaactMaca: NbiBtbcB po3di «NueHHA
PAnHeB BnWbIa 3 IaMy a6o DeaKl HarpBaIbHi 3OHN He npauioToB.: He npabNbHO nID'EDHaHn TePMHaBn 6LoK.
BapnIbHa nobepxHHe npaioe: BapnIbHa naheIb 3a6IoKoBaHa. HATNCiHt b KhoNky Ira po36IoKoYBaHHA.
Pahelb ABtOMaTHNO BmMkaETbc3: 30Ha npriOTyBaHHA ABtOMaTHNO BmMkaETbc3, kUO BOHa HADTo DOBRO pauioe.
3actepexhen: Yci 3a3haeHbIe ykoJKeHH CTocyIOb cecTeuHoro Bnry BapNbHO nobepxhi i He BNINBAHO bHa II fynkiohybaHH. Taki ykoKeHH He niIraotb rapaHTiHOMy o6cnyrobybaHHo.
YMOBNI TAPAHTIHORO OBCLYROBYAHNRA
TepmiH IIII rapaHTiI cKaIaIe 12 MicuIb 3 DaTH npOdaKy.
Iiud rapaHTiHoro nepioy 6ydb-akn peMOHT MOKe 6yt BuKoHaHH tInbKn KBaIipikOBaHH faxibcem cepBichoro uehtpy.
Ipeaonatkom pemont npnaed tpe6a biKIOHTB iD eektpomekki, 3nBUN 3anobiknA aO BNTHBYBUN HHP KINBEHHN 3 po3eKn. Henpopeciue BTPyAHNA Ta peMOHT anapaty He6e3neuH, BOHN MOkyb BNKKnATn BpaXeHHN eEKeTPnuHm CTPyOM Ta KopoTke 3AMNKAH;OTke, He HamaraTeCA yCyHTN HeCnpabHocTI cAmOTyKNN. 3aNIwTe 10po6oTy cneuaJIcTAM aO bpeCTaBHnKam cepBicHOU CEHTpy. Raio y po6ti anapaty BnHKn Ickb He3NaHni np6bEmn, nepeBiPe 3a DonomoroIO HAcTyNHx IHCTpyKui, Y 3dATHi Bu npopatncs 3 HMM cami. BiNT cneiaJntca 13 ABTOpnsOBAHO rceBichoro ceHTpy NobHHe 6Tu ONLauEHM Bam, kkuo 6yde BCTahOBLeHo, 10 npnilad He npauoe ueep3 HeHaJeKHe nn He6aBe BnKOpNCtAHN. 36epiraTe IHCTpyKuo TAKNM YHOM, 106 BOHa 3abHn66yla niD pykoYo pa3i notpe6n; Rko nepeDaBaTMme npnaad IHwi oco6i, nepedaTe TAKOK i IHCTpyKuo.
yMOBN:
Ceptnphiikat
TapaHTia DIIcHAtiBKn npn HArBHOcti DiChHOro TapaHTIHORO CeptNphiKATy.
TapaHnHcepTnphiKaT He iinChn npn HaeBHOCTi B HbOMy NOMINLOK, BnnpaBJIeHb YHeBIIOBIDHOCTe.
B Ceptnikati Maotb 6itn 3anobHeni NyHKTN: Ha3Ba Bnpo6y, MoDenb, cepiHnn Homep Bnpo6y, data npodaxy, ninnnc npodaua, neaTb toproBoi oprahiaui. Pn BiCyTHOCTI datn npodaKy tepmiR rapaHTII ABOTMaTHNO BnuNCIOEcb 3 DaTn BuroTOBHeHH npictpo.
TpaHcnpotybaHHi 36epirAHn
Будь-и DiФeКTN Bnpo6y, cnpuHHeH He6aBnBnM TpaHcnpTyBaHHm i 36epiraHHm Bnpo6y, He nIiJaIOTb 6e3KoWTOBHomrapaHTiHOMy peMOHTy;
YctaHOBKa Ta eKcnnyataia
B3KoTobHn rapaHTiHn peMOHT He npOoDHTbC, Akuo DeΦeKT BpuO6y BklnKaHn:
- HenpaBnblHM nikHoueHHm BnpOy do dKepea eEeKtpo-, BOo-i raONocTauHH, a TAKOH HeBIDNOBIDHcTb npaMeTpib BnueBk3aAHnx dKepe npaMeTpam, 0 npE'RAHHTbC6OB'3KOBHMn DePkaBHMMn cTahdaptAm Ta I HCTpyKciEO 3 Ecknnyataui.
- EknpnyatauBnpo6B, nkiKIOueHnx Do MepeX 220B 6e3 3aemIeHHa TAKoN NIKIOUeHNx Do JKepeNa BOJOnocTauHHa 6e3 OKpemoro KpaHny noaui BoN Do Bnpo6y-e cyTTeBnM npuyehnM IHCTpykii 3 eknpnyatauTa MoKe 6yTu NICTABHO Dn 3HHTBnPo6y 3 rapaHtiHorO 6cnyroByBaHHa.
BnKOpNCTAHn npHnady He B BiIDNoBIDHOCTI do IHcTpyKci, a TAKoX HnPabNbHIO EKcnNyataeIO, 0o BNKnKaLo nOBy MexaHiHX Ta iHnx BnDIB DeEkeTb;
BnKOpncTaNbO6y He B BiNobiHocTi 3 NOro npaMM npnaHaueHHaM a60 He B DomaHix nOTpe6ax. - Pn npuyenHH nIom6yBaHn Ta 3 IHnx npuHn, kki He 3aJIeKaTb BiD 3aOda-Bnpo6Hnka.
He6aNocti npn 36epirAHHI, ekCnIyatauT Ta TpaHcnpTyBaHHI BlaChHKOM, TropROHO a6o TpaHcnpTHOOpraHIsaueIO. - Y BnnaDky BtpaTn rapaHTiHoro TaIOnHa 6a ueKa, BnachNK No36abIeTBcR npaba Ha 6eKoWTOBHe cepBicHe o6cLyroByBaHHra.
- Y pa3i niiKIOHeHHaTexHIn He ceptnioBaHm cepBicHM ueHTpOM, Bnpi 3HaMaetb3 rapaHTII.
PeMOHT
Be3KoHTOBHn rapaHTiHH npMOHT He npOBoNDtbc, kku Bnpi6:
Maé cnidctopohnhboro BtpyuaHHa6o peMOHTy He ynoHBoXeHmN oc6amn;
MaHe caHKIOHOBaHi fipMOIO 3MiHN KOHCTpyKu i a6o HenpuiHHaTHI KOMNKeTHyOci;
Maonokdohenn, Bnkkanahi Heneped6aayBaHmnyBnam i diam CTnxi;
MaonokdokeHHBnKnKaHBI,BNOpncTahHmHeCTaHApTHMaTepiAIBipNCtpoib;
MaonokdkeHH, BKNKnKaHi nonaHaHm BcepeHnHy Bnpo6y CToPOHHix npedMeTb, TBapn a6o KOMax;
He Maé cepiHoro Homepy a6o Noro HEmoxnBO BCTaHOBHT;
MaekomnIeKTHicb nicna noro npodaKy;
MaemexaHiHnokxehn (ckJHt nactKOBi Bnp6n)
TapaHTia He po3noBcIOyKeTbCra Ha po3xIDHi MaTepiAHI i AkceCyapn.
BidnoibdaIbHicTb
ΦipMa He Hece BiIDNobIDaIbHocTi 3a 36ntKN npuHHei Bam nn OTOyUOUM B 3B'3Ky 3 HeiDnOBIDHM BkOpNCtAHNM npnaNy.
BBeHeHH Bnpo6y B EKcnlyatauio I Dopo6ky Mepek eEeKtpo-, BOO- i Ra3onocTaauHHaN Hn cymicHcTi 3 Bnpo6om He e 30HOIO BiINOBiJaIbHocTi FipMn N FipMoIO He onNaUyETbcra.
B BnnaKBy BNHHKHeHH 6yIb-aknx npo5em 3 Baunm npuaDom, nepeTUM K BnKlnkaT MaNCTpa, nepeBipTe npabnHicTB yCTaHOBKn i yHKIOHyBaHH B BiINOBIHDocTI do INCTpykci. ONnaty BnKInky MaICTpa Bn 6yTe npoBDtN 3a Cbi paxyHOK, kio Bnpi6 6yB Bpo6oyomy cTahi a60 6yB HnPaBnBHo BCTaHOBHeHn, a60 HnPaBnBHo BnKOpNCTOBYABcR.
3a kicrbapaHTiHoro pemOnTy BiINOBiAdIbHiCtB Hece 06cnyrobyoqa opraHiaqra(cnyk6a cepbcy).
IODATKOBY IHΦOPMALUIO UOIO IPODyKUII MAPKN ROSIERES BN MOKETE OTPMATN HA CAITI
WWW.ROSIERES.IN.UA, WWW.ROSIERES.FR
YN 3A TEJIPOHOM TAPQOI LIHIIII
0443834425
0800501509
- READ THE INSTRUCTIONS BOOKLET CAREFULLY TO MAKE THE MOST OF YOUR HOB.
- INSTALLATION
- BUILT-IN
- Installation:
- Before fitting:
- ELECTRICAL CONNECTION
- Warning :
- Connection to power supply
- INDUCTION
- USE PROCEDURE
- A HIGH SAFETY APPLIANCE
- Schematic diagram of the control panel
- HOB COOKWARE ADVICE
- Instructions for Use
- Operating instructions
- Boost function
- Warning:
- Cancelling the "BOOST" mode
- Timer function
- If the timer is set on more than 1 zone:
- Note:
- Safety mode
- Keep warm mode
- Special function
- Memory function
- Recording
- Stop recording
- OR
- Execute a recorded cooking cycle
- How to record one new cooking cycle if we have already recorded one:
- CLEANING AND MAINTENANCE
- MAINTENANCE:
- If there are still some stubborn stains:
- A FEW HINTS:
- Do not use a sponge which is too wet.
- AFTERCARE
- Before calling out a Service Engineer please check the following:
- PROBLEM SOLVING
- The induction hob gives shorings out.
- The induction hob gives a light whistling out.
- Cooking zones that do not maintain a rolling boil or a fast enough frying rate.
- Foods cook slowly.
- Tiny scratches (may appear as cracks or abrasions) on the glass surface of the hob.
- Metal markings (may appear as scratches).
- Dark streaks or specks.
- Areas of discoloration on cooktop.
- The hob does not cut off
- The hob stops automatically
- Frequency of on/off operations for cooking zones
- INSTRUCTIONS GENERALES
- TEXHIUHIXAPAKTEPNUKIN
- CnOciB BnKOpNCTAHH
- PnCTPIIINBUNSEHOIBE3NEKNI
- YHSEHHRA EKCINLYATAI
- DAKIIbKA IOPA:
- 3anaMaTaHte:
- UCYHEHHH HECNPABHOCTEIN
- PEMOHT
- PIUHEHHIPOBJIEMN
- YMOBNI TAPAHTIHORO OBCLYROBYAHNRA
- TepmiH IIII rapaHTiI cKaIaIe 12 MicuIb 3 DaTH npOdaKy.
- yMOBN:
- Ceptnphiikat
- TpaHcnpotybaHHi 36epirAHn
- YctaHOBKa Ta eKcnnyataia
- BidnoibdaIbHicTb
Brand : ROSIERES
Model : RPI 346 AUS
Category : Cooker