
GVSW4364TWHC07 - Washing machine CANDY - Free user manual and instructions
Find the device manual for free GVSW4364TWHC07 CANDY in PDF.
Download the instructions for your Washing machine in PDF format for free! Find your manual GVSW4364TWHC07 - CANDY and take your electronic device back in hand. On this page are published all the documents necessary for the use of your device. GVSW4364TWHC07 by CANDY.
USER MANUAL GVSW4364TWHC07 CANDY
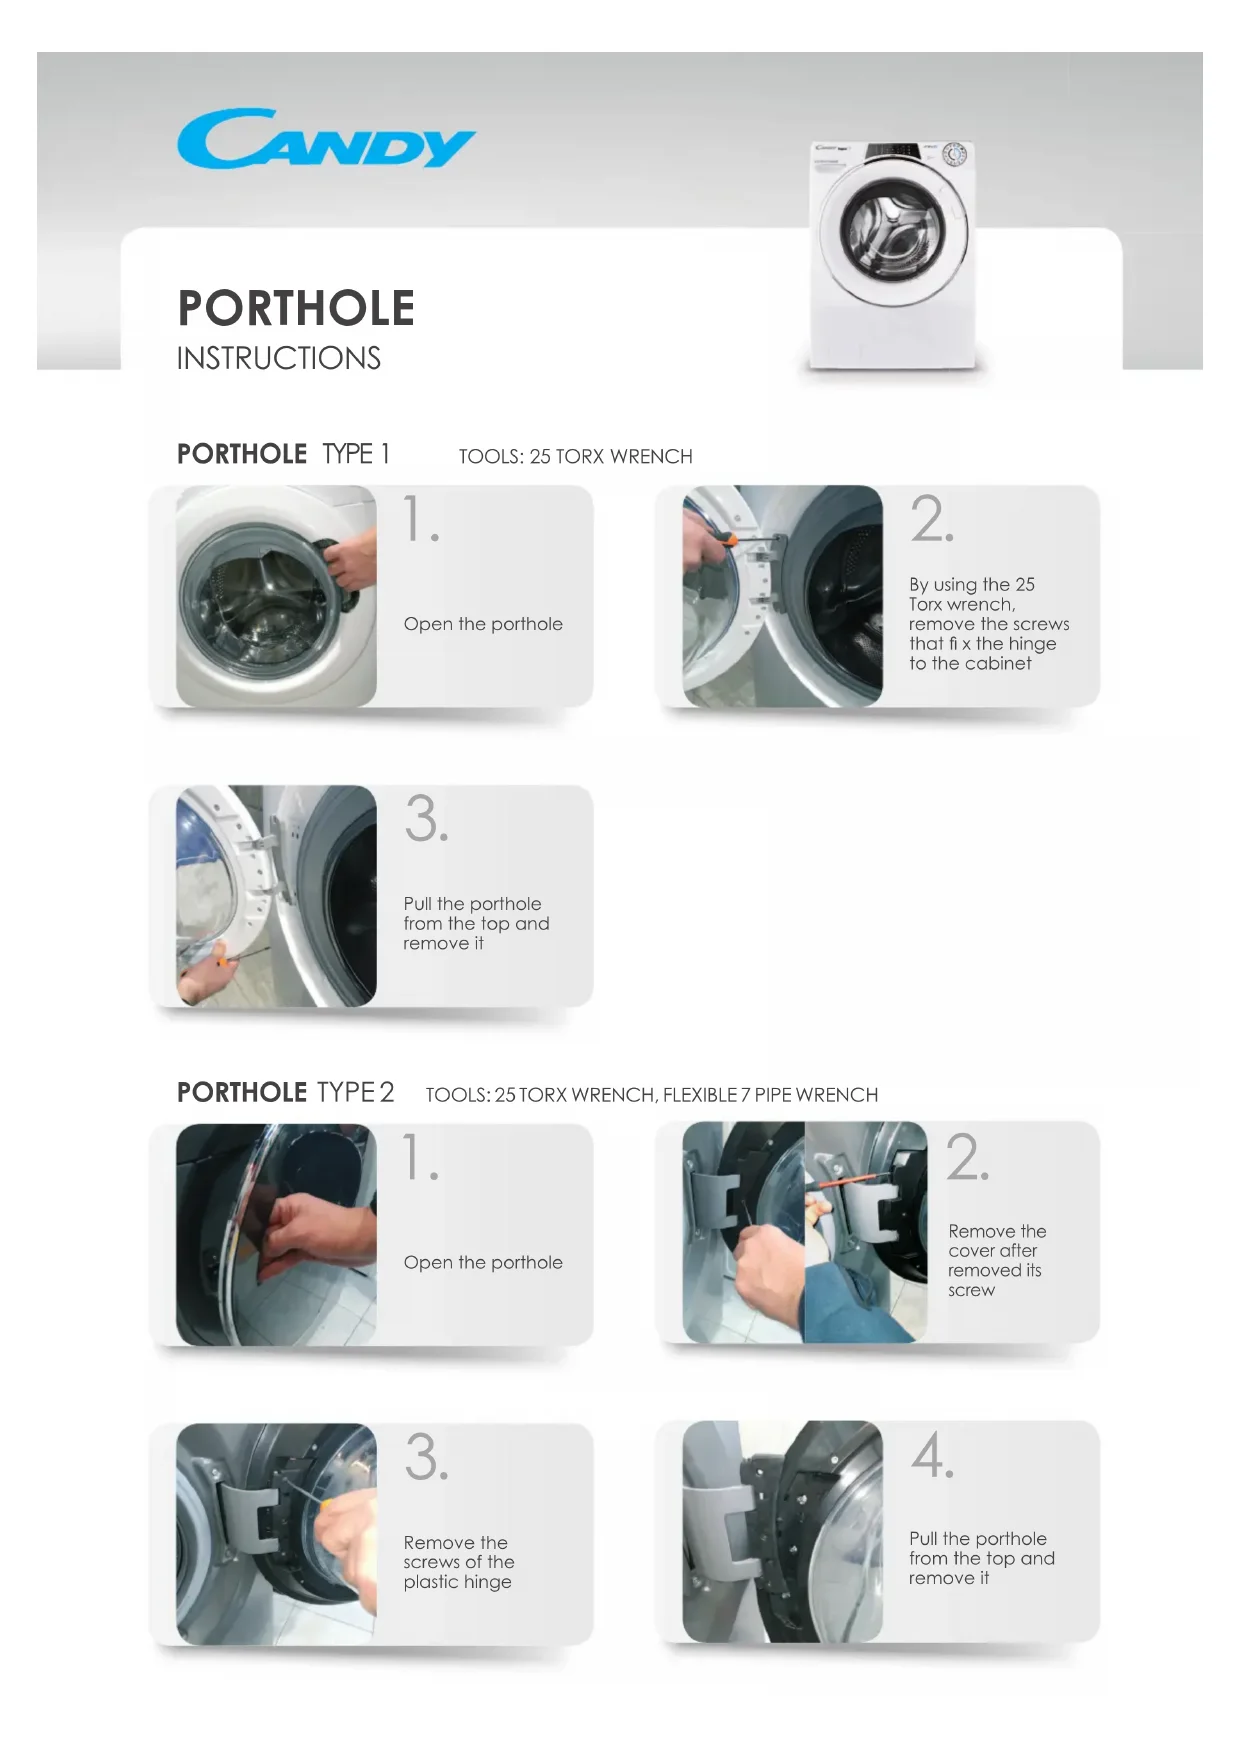
PORTHOLE TYPE 2 TOOLS: 25 TORX WRENCH, FLEXIBLE 7 PIPE WRENCH PORTHOLE INSTRUCTIONS1. Open the portholeRemove the cover after removed its screw Remove the screws of the plastic hinge Pull the porthole from the top and remove it
Open the portholePull the porthole from the top and remove it By using the 25 pipe wrench, remove the screws that fi x the hinge to the cabinet
Remove all the screws of the portholeReplace the hinge, taking care not to lose the bushes Separate the frame from the counter frame
Remove the door clip Once the strap is removed, detach the fl ap from the gasket, to allow access to the inside of the product Remove the external screws from the hinge Remove the screws inside the cabinet with the 7 pipe wrench.Remove the hinge HINGE TYPE 2 TOOLS: 25 TORX WRENCH, FLEXIBLE 7 PIPE WRENCH
HINGE TYPE 1 TOOLS: 25 TORX WRENCH
HINGE INSTRUCTIONS1. Open the portholeUse the fl at screwdriver for leverage, and remove the external clamp Once the clamp is removed, detach the fl ap from the gasket, to allow access to the inside of the product By using Torx wrench, remove the fi xing screws of the door lock
Open the portholeOnce the clamp is removed, detach the fl ap from the gasket, to allow access to the inside of the product Use the fl at screwdriver for leverage, and remove the external clamp
By using Torx wrench, remove the fi xing screws of the door lock, and press its buckle.Disconnect the wiring, in case of “faston”, pay attention to do not invert the wiring Remove the door lock
Disassemble the work top and trims Disassemble the dispenser and bezel Remove the door lock
Remove the water protection Replace the door lock by paying attention to mechanical linkage of emergency opening and electrical connections DOOR LOCK TYPE 2 TOOLS: CROSS-HEADED SCREWDRIVER, TONG, FLAT SCREWDRIVER DOOR LOCK TYPE 1 TOOLS: CROSS-HEADED SCREWDRIVER, TONG, FLAT SCREWDRIVER DOOR LOCK INSTRUCTIONSOpen the portholeUse the fl at screwdriver for leverage, and remove the external clamp Once the clamp is removed, detach the fl ap from the gasket, to allow access to the inside of the product Remove the gasketPlace the new gasket, paying attention to the positioning notches Insert wiring clamp on the tube side Tighten the clamp fl ush on the tube by using the tooling
Fit the gasket on the cabinet.Fix the external clamp and tighten it (if needed with tong)By using fl at screwdriver, remove the clamp on the tube
INSTRUCTIONSOpen the detergent drawer By using two hands, pull it out fi rmly
Unhook the mask from the detergent drawer, being careful not to break the hooks