GD8 Tablet GEMQ7851S - Tablet GEMINI - Free user manual and instructions
Find the device manual for free GD8 Tablet GEMQ7851S GEMINI in PDF.



| Product type | Touchscreen tablet |
| Brand | Gemini |
| Model | GD8 Tablet GEMQ7851S |
| Screen | Multi-touch capacitive |
| Internal storage capacity | 4 GB, 8 GB or 16 GB (depending on version) |
| Memory expansion | Micro SD card up to 32 GB |
| Wi-Fi connectivity | 802.11b/g standard |
| Bluetooth | Optional Bluetooth keyboard |
| Camera | Front and rear |
| Power supply | Included power adapter, rechargeable battery |
| Operating system | Android |
| Included applications | Browser, Email, Gallery, Clock, Music |
| HDMI output | Mini HDMI (on models with HDMI) |
| Bluetooth keyboard | Optional |
| Maintenance | Avoid humidity, dust, shocks. Clean screen with soft cloth. |
| Safety | Do not open the case, use the included power adapter. |
| Factory reset | Possible via settings: Backup & reset > Factory data reset |
Frequently Asked Questions - GD8 Tablet GEMQ7851S GEMINI
User questions about GD8 Tablet GEMQ7851S GEMINI
0 question about this device. Answer the ones you know or ask your own.
Ask a new question about this device
Download the instructions for your Tablet in PDF format for free! Find your manual GD8 Tablet GEMQ7851S - GEMINI and take your electronic device back in hand. On this page are published all the documents necessary for the use of your device. GD8 Tablet GEMQ7851S by GEMINI.
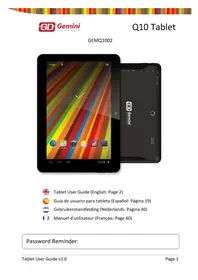
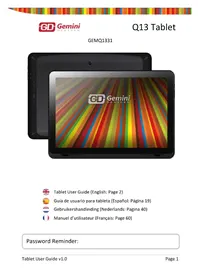
USER MANUAL GD8 Tablet GEMQ7851S GEMINI
GEMQ7851S/GEMQ7851BK

Tablet User Guide (English: Page 2)

Buttons and Connections 3
Charging the Battery. 3
Unlocking and Powering On and Off. 3
Using the Touch Screen 4
Connecting to the Internet (WiFi) 4
Using Android 5
The Home Screen 5
Changing the Wallpaper 6
Camera 7
Using the Keyboard. 8
Settings 10
Storage 11
Connecting to a PC 11
Managing Applications 12
Arrange & work with Apps 12
Adding & Removing Applications 13
Using Folders 13
Included Applications 14
Browser 14
Email 16
Video Player 17
Clock 17
Music 17
Bluetooth Keyboard Case (Optional) 18
Pairing your Keyboard with your Tablet 18
Charging the Battery 18
Troubleshooting 19
Resetting your device to Factory Defaults 19
Getting further help and support. 19
Recommendations
- Remove the protective film from the screen before use. This is for protection during transit only and will affect performance of the touch screen.
- To avoid touch screen interference do not use the device whilst charging via the mains charger.
- Please keep the device away from moisture, dust and high temperatures.
- Do not drop or strike the device.
- To reduce the risks of Electric Shock do not open the outer casing.
Getting Started
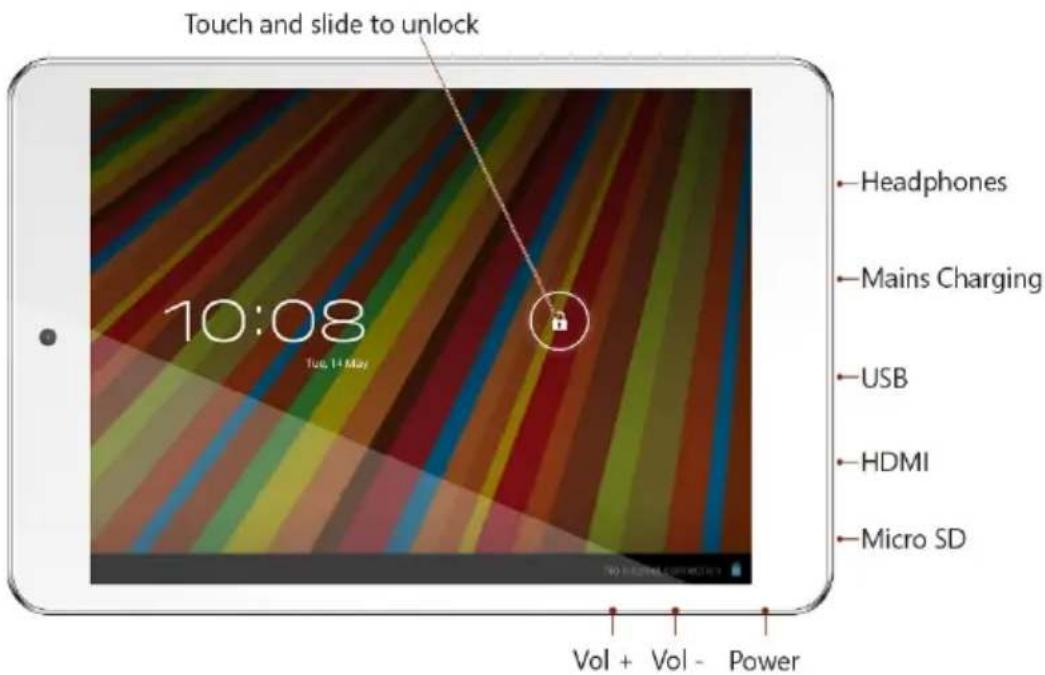
Buttons and Connections
Charging the Battery
You can only charge your tablet using the included mains charger. We recommend charging for a good 8 hours before first use.
Unlocking and Powering On and Off
To Power On press and hold the power button until the screen lights up. To power off hold down the power button until a menu appears asking what you
would like to do. To wake the tablet from sleep or put it back to sleep click the power button once.
Unlocking the Screen
You will need to unlock the screen before using your Tablet. To do this, place your finger on the padlock icon and drag towards the other side of the screen.
Locking the Screen
By default the tablet locks itself automatically after 1 minute if unused. To manually lock the screen, press the power button. The screen will go blank and your device will be locked.
Using the Touch Screen
The capacitive touch screen gives a fluid and responsive touch experience without the need to apply pressure to the screen.
- Touch and slide your finger up and down the screen to scroll web pages.
- Tap an icon to start apps or visit web page links.
- Multi Touch technology allows you to use more than one finger at a time, for example in the web browser you can pinch to zoom in.
Connecting to the Internet (WiFi)
Your tablet can connect to any router that supports the 802.11b/g standard. To connect to your wireless network:
- Touch Settings, Wireless & Networks then Wi-Fi.
- Touch the Wi-Fi Off/On toggle.
- Touch your network name from the list.
- Input your password.
If you are not sure what your password is it can normally be found on the side/underneath of your router. This is normally case sensitive so please enter it exactly as shown. If you are unsure please call your ISP who should be able to remind you of your password. If you have problems connecting to your Wi-Fi try changing the router security settings to WPA/WPA2.
Using Android
The Home Screen
The home screen is the first screen you see after unlocking your device. You can use up to 5 screens to store shortcuts to your favourite apps or widgets.
At the bottom left corner of the screen you will find 3 navigation buttons.
| Icon | Name | Description |
| ← | Back | Opens the previous screen you were working in, even if it was in a different app. Once you back up to the Home screen, you can't go back any further in your history. |
| Home | Opens Home. If you're viewing a left or right Home screen, opens the central Home screen. | |
| Recent Apps | Opens a list of thumbnail images of apps you've worked with recently. To open an app, touch it. To remove a thumbnail from the list, swipe it left or right. |
After a short time without being used, these buttons may shrink to dots or fade away. To bring them back, touch their location.
At the top right corner of the screen, notice the All Apps icon.

Touch it to see all your apps and widgets.
The middle of your Home screen can hold app and widget icons, plus folders.
To open an app, folder, or widget, touch its icon.
To see additional Home screens, swipe your finger quickly left or right.
At the bottom right corner of the screen, you'll see something like this:

Status icons to the left of the clock tell you which apps have sent you notifications—for example, that a message has arrived, or it's time for a meeting.
- To see your notifications, touch the clock or the icons on either side of it.
System icons to the right of the clock display the current wireless and network connection strength, battery level, and sometimes more.
At the top left corner of the screen you'll find Google Search, which lets you search your tablet or the Internet. Touch Google to type your search terms, or to speak them.
Changing the Wallpaper
Wallpapers are images from Gallery (pictures you shot with Camera,ynced from Picasa,and so on),still images included with the system,and live images (such as an animation or a map that centres on your location). They take the place of the default background for your Home screens.
- Touch & hold anywhere on a Home screen that's not occupied. A list of options appears.
- Touch a wallpaper source: Gallery. Choose from pictures that you've taken with Camera or downloaded to your device.
Live Wallpapers. Choose from a scrolling list of animated wallpapers. Wallpapers. Choose from thumbnails of default images, or touch a thumbnail for a larger version.
You can download additional wallpapers on Google Play.
- To set a wallpaper image, touch Set wallpaper or, for Gallery images, determine the cropping and touch Crop.
Camera
The Camera app is a combination camera and camcorder that actually consists of two cameras, one facing back (toward you) and one facing forward (away from you).
You can view photos and videos you take with Camera in the Gallery app.

To take pictures and videos, first touch the Camera icon All Apps screen.
on a Home or
When Camera opens, you can
Take a picture: Touch the blue button.
View the most recently taken picture: Touch the thumbnail near the blue button.
You can now share the picture by touching the Gmail or other icons displayed along one side of the image.
To view this picture and others in the Gallery app, touch the picture.
While Camera is open, you can also touch these icons to adjust its settings:
| Icon | Name | Description |
| Mode | Switch among camera & video modes. | |
| Switch Camera | Toggles between cameras on the front and back of your tablet (where available). | |
| Zoom | Touch & hold, then slide to zoom in or out. | |
| Settings | Reveals additional icons that you can use to set exposure, white balance, and other settings. |
Using the Keyboard
You can enter text using the onscreen keyboard. Some apps open it automatically. In others, you open it by touching where you want to type.
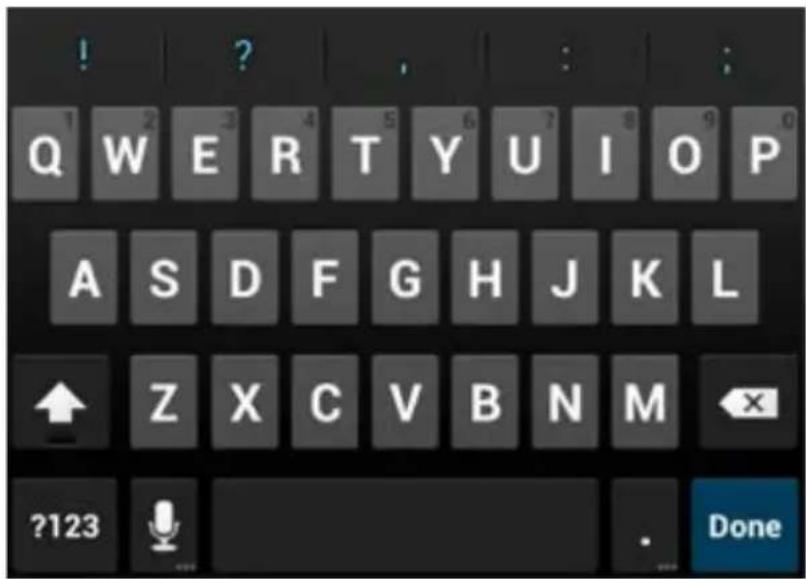
As you type, the keyboard displays suggestions above the top row of keys. To accept a suggestion, touch it.
Basic Editing
- Move the insertion point: Touch where you want to type.
The cursor blinks in the new position, and a green tab appears below it. Drag the tab to move the cursor.
- Select text: Touch & hold or double-tap within the text.
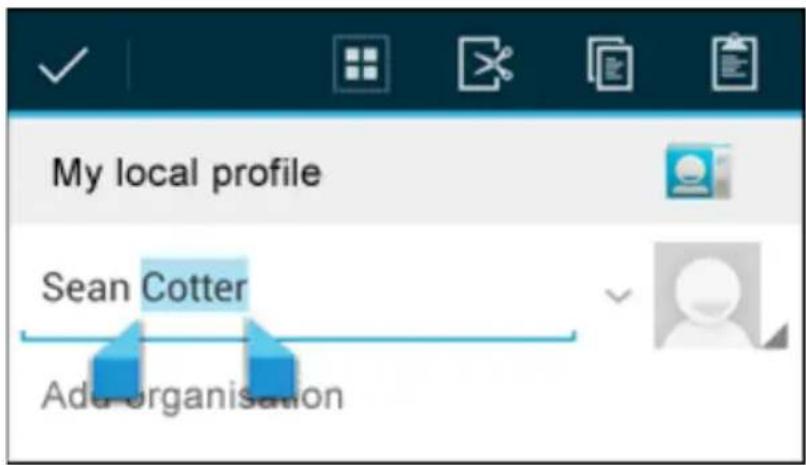
The nearest word highlights, with a tab at each end of the selection. Drag the tabs to change the selection.
The tab disappears after a few moments, to get out of your way. To make it reappear, touch the text again.
-
Delete text: Touch to delete selected text or the characters before the cursor.
-
Cut, copy, paste: Select the text you want to manipulate. Then touch
the Paste , Cut , or Copy button:
To make the keyboard go away, touch Done.
Tips and Shortcuts
- Type capital letters: Touch the Shift key once to switch to capital letters for one letter.
Or touch & hold the Shift key while you type. When you release the key, the lowercase letters reappear.
- Turn caps lock on: Double-tap or touch & hold the Shift key , so it changes to . Touch the Shift key again to return to lowercase.
- Show numbers or symbols: Touch the ?123 key. To see more choices, touch the = \< key.
- Quickly access common punctuation and symbols: Touch & hold the key to the right of the space bar (period key).
- Type special characters: Touch & hold the Shift key while you touch a key with a small grey character in its corner to enter the grey character. Touch & hold any key to see alternative letters, symbols, or numbers, which you can then touch to type.
- Change input language or keyboard: Touch & hold the key to the left of the space bar (with ... in the lower-right corner), and then release it. The Input options menu appears. Choose the option you want to adjust.
Settings
The settings screen can be accessed by touching the settings icon under applications or on the status bar at the bottom right of the home screen.
These options allow you to configure your device to your requirements.
The following options are available:
| Menu Item | Details |
| Wi-Fi ON | Setup and connect to wireless networks |
| Sound | Change volume, notification and feedback sounds |
| Display | Brightness, rotation settings, screen time-out & G Sensor options |
| Storage | Information on available and used storage space |
| Battery | Battery usage information |
| Apps | Manage installed Apps (uninstall, force stop etc) |
| Accounts & sync | Manage your Accounts and Sync settings |
| Location services | Change location service options |
| Security | Set screen lock settings, passwords etc. |
| Language & input | Select language, dictionary and keyboard options |
| Backup & reset | Backup your data and reset your device (see page 4) |
| Date & time | Set the date and time and related options |
| Accessibility | Manage accessibility options such as talk back |
Please note that you can get to application specific settings by touching the settings icon in the status bar whilst you are in an application.
Storage
Built in Storage
Your tablet comes complete with either 4GB, 8GB or 16GB of built in storage. However the Android operating system divides this space up into 2 sections, internal storage and internal flash storage.
The Internal storage is reserved for use by applications and the operating system. You may not see all of the space available for use as the rest is used by Android. You cannot access this area from your computer. The Internal flash storage shows the rest of the free space. This is the storage that you see when you plug your tablet into your computer and should be used to hold your movies and music etc.
Using a Micro SD Card
Available storage can be expanded using a Micro SD card of up to 32GB in capacity.
To use a Micro SD Card:
- Insert the Micro SD card into the slot shown in the front of this guide. You may need to use a pen or similar implement to push the card fully into place.
- The tablet will automatically prepare the card for use.
To eject the card:
- Push the end of the card inwards again until it clicks then release. The card will pop out from the slot.
Connecting to a PC
To copy files to and from your device via your PC:
- Connect the device to the computer using the supplied USB cable. You will see a notification in the status bar that USB is connected.
- Touch the USB icon.
- Touch the "USB Connected" option.
-
Touch "Turn on USB storage"
-
You should see a pop up on your computer asking you if you want to browse the device. You can also see the device under "My Computer".
-
To copy files you can now drag and drop files to and from your device.
-
To disconnect from your computer repeat step 2 above then touch "Turn off USB storage".
Managing Applications
Arrange & work with Apps
To see all your apps, touch the All Apps icon on any Home screen.
The main All Apps screen opens. This is where you can see all your apps, including those downloaded on Google Play. You can move app icons to any of your Home screens.
From All Apps, you can
-
Move between screens: Swipe left or right.
-
Launch an app: Touch its icon.
-
Place an app icon on a Home screen: Touch & hold the app icon, slide your finger, and lift your finger to drop the icon in place.
Explore your widgets: Touch the Widgets tab at the top of any All Apps screen.
- Get more apps. Touch the Google Play icon in the list of app icons, or the Shop icon at the upper right.
Adding & Removing Applications
Adding Applications
To download apps you need a Google account. You can login or setup a new account after you have started the Google Play application. A simple wizard guides you through this process.
Uninstalling Applications
To remove an app icon from the Home screen, touch and hold it, slide your finger toward the top of the screen, and drop the app over the Remove icon.
Using Folders
You can combine several app icons in a folder. Drop one app icon over another on a Home screen, and the two icons will be combined.
From any Home screen, you can
- Open a folder: Touch it.
The folder opens:
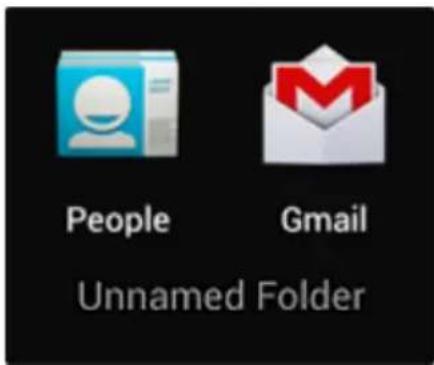
- Rename a folder: Touch its name.
- Move icons around your Home screens: Touch, hold, and slide.
Included Applications
There are many applications included with your tablet. Below you will find information on how to use the main applications.
Browser
From a Home or All Apps screen, touch the Browser icon.

Browser opens to the last webpage you were viewing. If you haven't used it recently, it opens to your homepage.
Browser also opens when you touch a web link—for example, in an email or chat.
The web address (URL) of the current page is displayed at the top of the screen, unless the address box (also called omnibus) scrolls off the top. If this happens, swipe down to show it again.
Open a webpage or search the web
- Touch the omnibus at the top of the page.
- Type the address of a webpage or terms to search for.
As you type, a list of matching suggestions appears. Icons in the list help identify the type of match:
The Favorites icon

identifies items from your bookmarks.
The Search icon

cifies related searches.
The History icon identifies items from your search history. To add a suggestion to the omnibus, touch the arrow to its right. You can then keep on typing or choose further suggestions.
- To search for the contents of the omnibus or open a specific web address it contains, touch the Gokey in the lower right corner of the keyboard.
OR
To search for a suggestion or go to a suggested web page, touch it.
The Browser opens either the specified webpage or a list of search results.
To set which search engine you want to use for searches from the Omnibus, go to Menu > Settings > Advanced > Set search engine.
Navigate within a webpage
Webpages that aren't optimized for mobile devices typically open with the page zoomed out, to give you the big picture.
To change this behaviour, go to Menu > Settings > Advanced > Open pages in overview. Uncheck the option to zoom in on new webpages automatically.
While viewing most webpages, you can:
- Scroll. Swipe the screen in any direction.
- Zoom: To zoom out, touch the screen with two fingers and pinch them together. To zoom in, spread them apart.
OR
Double-tap the place where you want to zoom in. To return to the original zoom level, double-tap again. You can control the way double-tap works with the Auto-fit setting, described below.
Find text. Touch Menu > Find on page and type.
As you type, the first word on the page with matching characters highlights, and subsequent matches are boxed. To move between matches, touch the up and down arrows at the top right.
Auto-fit behaviour for double-tap is controlled by the option Menu > Settings > Advanced > Auto-fit pages:
- With Auto-fit checked, double-tapping a column of text causes Browser to fit the text to the screen; and double-tapping again returns to the original view.
- With Auto-fit unchecked, double-tapping just zooms in and out without regard for the text layout.
When a page doesn't zoom: Websites that are optimized for mobile devices typically open to a size appropriate for the device, and may not permit zooming and scrolling. In some cases you may prefer to view the desktop (non-mobile) version of a site. Most mobile-optimized sites provide a link that allows you to switch to the desktop version.
Bookmark a webpage
- Open the webpage.
- Touch
- Edit the bookmark label and address if necessary, or choose a different account.
- To specify a different place to store the bookmark, touch the name displayed beside Add to, and choose a Bookmarks folder, the top-level list of bookmarks, or the Home screen.
- When you're done, touch OK.
The bookmark is added to your list of bookmarks.
Open a bookmark
- Touch the Bookmarks icon
A set of three tabs appears, with Bookmarks on the left.
To show or hide an account's bookmarks, touch the email address for the account.
- To open a bookmark in the current tab, touch it.
OR
To open a bookmark in a new tab, touch & hold it, then choose Open in new tab.
The bookmarked page opens.
You can enter one or several email accounts to your tablet.
Adding an email account
- Touch the email icon.
- In the account interface touch Next.
- In the e-mail address box enter your email address.
- Enter your password in the password box.
- Touch OK.
- Manual settings (optional) – The device should detect your other settings automatically, however should you need to enter them manually click Manual settings to make any required changes.
-
Touch Next.
-
Enter an account name.
If you have problems connecting to the account please check all of your settings with your email service provider.
Video Player
You can view photos and videos with the Gallery app.

The Gallery app finds all of your media and arranges it in a thumbnail view. It shows folders on the first screen. Touch the folder you would like to open to go into it and the app will show all of the files in that folder.
Touch the file you would like to play.
Playing back through your HD TV (on models with HDMI)
- Connect your tablet to your TV using a Mini HDMI to HDMI lead.
- Switch to the relevant input source on your TV.
- Your tablet will automatically start displaying its output to your TV.
Clock
Touch the Clock icon to view the current date and time.
Setting an Alarm
You can set several alarms at the same time.
- From the clock app press menu - Add alarm clock.
- Set the time you would like the Alarm to go off (if you do not select repeat the alarm will delete automatically after the time of the alarm).
- Touch enable alarm clock.
- Touch OK.
Music
- Touch the Music icon.
- Select your desired music to play from the music/album/artist/playing list.
- Use the Previous-Pause-Next icons to control the playback.
- To return to the previous screen press the back icon in the navigation area or to return to the home screen press the home icon.
Bluetooth Keyboard Case (Optional)
Pairing your Keyboard with your Tablet
- Turn on the keyboard using the power switch. The Bluetooth indicator light will flash once.
- Press the Connect button. The Bluetooth light will blink. The
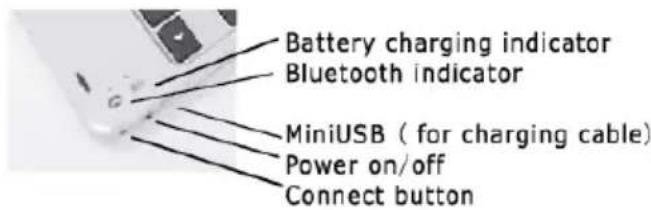
keyboard is now ready to be connected to your Tablet.
- Turn on and unlock your Tablet. Enter the Android settings menu.
- Under the heading Wireless & Networks touch Bluetooth to turn on the connection.
- Touch the keyboard found on the right to connect.
- Enter the password as displayed on the screen. Your keyboard will now be connected and you can start to use it.
Charging the Battery
You can charge the Keyboard by connecting the cable supplied with your Tablet.
Troubleshooting
Resetting your device to Factory Defaults
If you need to reset your device to the factory default settings for any reason please follow the process below:
WARNING!!!
Please be aware any information currently on the device will be permanently erased by following this procedure.
- Go to applications screen and touch the settings button.
- Touch the Backup & reset option.
- Select Factory data reset.
- Leave the erase SD card option unticked & touch "Reset tablet".
- Touch "erase everything".
- The unit will now reset itself back to factory reset and any previous information/data will have been permanently erased.
Getting further help and support
Please see our support site below for further help and support with your device including how to install software updates if available and much more:
http://www.geminidevices.com/support.html
GEMQ7851S/GEMQ7851BK

Tablet User Guide (English: Page 2)
Whenever a情况进行 the first time, you will be able to find the information about the Navegador.

http://www.geminidevices.com/support.html
GEMQ7851S/GEMQ7851BK
Tablet User Guide (English: Page 2)
| Menu Item | Details |
| Wi-Fi ON | Setup and connect to wireless networks |
| Sound | Change volume, notification and feedback sounds |
| Display | Brightness, rotation settings, screen time-out & G Sensor options |
| Storage | Information on available and used storage space |
| Battery | Battery usage information |
| Apps | Manage installed Apps (uninstall, force stop etc) |
| Accounts & sync | Manage your Accounts and Sync settings |
| Location services | Change location service options |
| Security | Set screen lock settings, passwords etc. |
| Language & input | Select language, dictionary and keyboard options |
| Backup & reset | Backup your data and reset your device (see page 4) |
| Date & time | Set the date and time and related options |
| Accessibility | Manage accessibility options such as talk back |
http://www.geminidevices.com/support.html
GEMQ7851S/GEMQ7851BK
Tablet User Guide (English: Page 2)
Applications founies 77
| Menu Item | Details |
| Wi-Fi ON | Setup and connect to wireless networks |
| Sound | Change volume, notification and feedback sounds |
| Display | Brightness, rotation settings, screen time-out & G Sensor options |
| Storage | Information on available and used storage space |
| Battery | Battery usage information |
| Apps | Manage installed Apps (uninstall, force stop etc) |
| Accounts & sync | Manage your Accounts and Sync settings |
| Location services | Change location service options |
| Security | Set screen lock settings, passwords etc. |
| Language & input | Select language, dictionary and keyboard options |
| Backup & reset | Backup your data and reset your device (see page 4) |
| Date & time | Set the date and time and related options |
| Accessibility | Manage accessibility options such as talk back |
Applications fournies
http://www.geminidevices.com/support.html

- Using Android 5
- Managing Applications 12
- Included Applications 14
- Bluetooth Keyboard Case (Optional) 18
- Troubleshooting 19
- Recommendations
- Getting Started
- Buttons and Connections
- Charging the Battery
- Unlocking and Powering On and Off
- Unlocking the Screen
- Locking the Screen
- Using the Touch Screen
- Connecting to the Internet (WiFi)
- Using Android
- The Home Screen
- Changing the Wallpaper
- Camera
- Using the Keyboard
- Basic Editing
- Tips and Shortcuts
- Settings
- Storage
- Built in Storage
- Using a Micro SD Card
- Connecting to a PC
- Managing Applications
- Arrange & work with Apps
- Adding & Removing Applications
- Adding Applications
- Uninstalling Applications
- Using Folders
- Included Applications
- Browser
- Open a webpage or search the web
- Navigate within a webpage
- Bookmark a webpage
- Open a bookmark
- Adding an email account
- Video Player
- Playing back through your HD TV (on models with HDMI)
- Clock
- Setting an Alarm
- Music
- Bluetooth Keyboard Case (Optional)
- Pairing your Keyboard with your Tablet
- Troubleshooting
- Resetting your device to Factory Defaults
- WARNING!!!
- Getting further help and support
- Applications founies 77
- Applications fournies
Brand : GEMINI
Model : GD8 Tablet GEMQ7851S
Category : Tablet