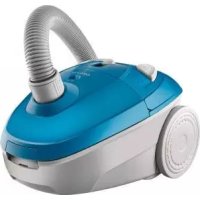
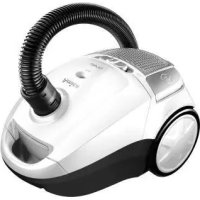
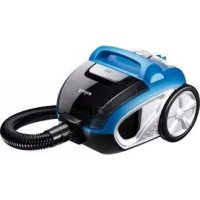
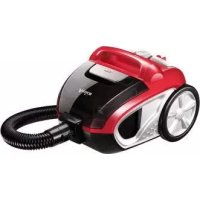
Yugo VM 1045 - Vacuum Cleaner AMICA - Free user manual and instructions
Find the device manual for free Yugo VM 1045 AMICA in PDF.
Download the instructions for your Vacuum Cleaner in PDF format for free! Find your manual Yugo VM 1045 - AMICA and take your electronic device back in hand. On this page are published all the documents necessary for the use of your device. Yugo VM 1045 by AMICA.
USER MANUAL Yugo VM 1045 AMICA
- If the power cord or plug is damaged, it should be re- placed by a professional repair shop in order to avoid hazard.
- This appliance is not intended for use by persons (including children) with physical, men- tal or sensory handicaps, or by persons inexperienced or unfamiliar with the appliance, unless under supervision or in accordance with the instruc- ons as communicated to them by persons responsible for their safety. Children shall not play with the appliance.
- This appliance can be used by children aged 8 years and old- er or by persons with physical, mental or sensory handicaps, or by those who are inexperi- enced or unfamiliar with the appliance, provided they are supervised or have been in- structed how to safely use the appliance and are familiar with risks associated with the use of the appliance. Ensure that chil- dren do not play with the ap- pliance. Do not allow children to clean and maintain the ap- pliance unless they are 8 years or older and are supervised by a competent person.
- Do not use the appliance if it shows any signs of damage to the power cord, or if the appli- ance has been dropped on the oor.
- Do not expose the appliance to rain or humidity, and do not use it outdoors. Do not oper- ate the appliance with wet hands.
- This appliance is not intended for use at altude greater than 2000 metres above sea level
- If you want to turn o the ap- pliance completely, pull the plug out of the wall outlet. In accordance with European Direcve 2012/19/EU and Polish legislaon regarding used electrical and electronic goods, this appliance is marked with the symbol of the crossedout waste container. This marking indicates that the appliance must not be disposed of together with oth- er household waste aer it has been used. The user is obliged to hand it over to waste collecon centre collect- ing used electrical and electronic goods. The collectors, including lo- cal collecon points, shops and local authority departments provide recycling schemes. Proper handling of used electrical and electronic goods helps avoid environmental and health hazards resulng from the presence of dangerous components and the inappropriate stor- age and processing of such goods. Carefully read this instrucon before using the appliance. This appliance is for household use only. Note! Packaging materials (bags, polyethylene, polystyrene, etc.) should be kept away from children during unpacking. Children do not realize the dangers that can arise when using elec- trical appliances; therefore keep the appliance out of reach of chil- dren. Do not immerse the body of the appliance in water or other liquids. Immersing in water may cause an electric shock. If water spills on the external components of the appliance, dry it thoroughly before switching back on. Do not touch wet surfaces in contact with the appliance connected to power supply, immediately disconnect it from the mains. When pulling out the plug from the wall outlet, never pull by the cord, only the plug, holding the socket with your other hand. Do not aempt to remove any parts of the housing. Using aachments that were not supplied with the product may cause damage to the appliance. Never place the appliance on hot surfaces. Do not place the cord over sharp edges or near hot surfaces. Before you put the plug into the wall outlet, make sure your hands are dry. Do not put any objects inside the appliance. Make sure that the voltage indicated on the nameplate corresponds to that of your home electrical mains. Alternang current must be used, typically marked ~. This appliance is intended for use at home or in facilies, such as kitchen for employees; in shops, oces and other working environ- ments, use by the customers of hotels, motels and other residenal facilies, in rural residenal buildings, in the accommodaon facil- ies. Pull the plug from the wall outlet before replacing accessories. Do not pull the vacuum cleaner or move it by the cord, do not use the cord as a handle, do not close the door squeezing the cord, do not place the cord over sharp edges or near hot surfaces. Be careful not to move the vacuum cleaner on the cord. Do not insert any objects into the openings in the vacuum cleaner. Do not use the vacuum cleaner when any opening is blocked, dis- pose of dust, lint, hair and anything that may restrict air ow. Keep hair, loose clothing parts, ngers and other body parts away from the openings and moving parts. Do not use the vacuum cleaner to collect ammable substances such as petrol, and do not use it in places where similar substances may be present. If the appliance has a winder, hold the plug while winding up the cord. Do not let the plug was le loose during retracng. Do not collect any items that burn or smoke, such as cigarees, matches or hot ashes. EN7 Do not use the vacuum cleaner without a dust bag and/or lters. If the opening, which sucks air, hose or telescopic tube are clogged, you should immediately turn o the vacuum cleaner Before restart- ing the vacuum cleaner, rst remove the blocking item. Do not use the vacuum cleaner too close to heaters, radiators, cig- aree bus, etc. Before using the vacuum cleaner, remove sharp objects from the oor to avoid damaging the dust bag. Do not collect ne parcles such as: our, gypsum, printer toners, etc., as this may clog lters and damage the vacuum cleaner. Make sure that extension tube is fully withdrawn before you put away your vacuum cleaner either in vercal or horizontal posion. SPECIFICATION: Power specicaon: AC 220240V / 50Hz Nominal power: 850W Maximum power: 900W Net weight: 5 kg YOUR APPLIANCE:
3. 2in1 crevice and book aachment
Assemble the appliance Always unplug the appliance before aaching or removing aach- ments!
- Insert the end of the hose into the inlet opening. Push unl the end falls into place with an audible click.
- Remove the hose press buons on the hose end, unlatch and remove the hose from the inlet port.
- Connect the telescopic tube with the hose and the brush.
- Extend the telescopic tube to the desired length.
- Before you start vacuuming, extend power cord cable to su- cient length and insert the plug into the wall socket. The yel- low mark on the power cord indicates it is extended almost all the way. When you see the red mark do not pull the power cord any further.
- Use the on/o buon to turn on the appliance. When you have nished using the appliance, press the on/o buon to turn o the vacuum cleaner.
- Unplug the cord from the wall outlet.
- Wind up the connecng cord by pressing the power cord re- tract buon. To do this hold the cord to prevent it from tan- gling or bumping the plug on the vacuum cleaner housing. Note! Figures are for illustrave purposes only Individual models may vary.
- Available on selected models8
- Disconnect the sucon aachment — cleaning head from the tube and disconnect the telescopic tube from the hose.
- Close the telescopic tube. The vacuum cleaner may be stored in a vercal or horizontal po- sion. The hose can remain aached to the vacuum cleaner, but please be careful not to bend it too much during storage.
Replace the dust bag Before replacing the dust bag, remove the power cord plug from the wall outlet. Always use the vacuum cleaner with a ed dust bag. If you forget to insert a dust bag or it is ed incorrectly, the cover cannot be closed completely align the posion of a dust bag and close the cover
- Aer disconnecng exible hose, open the front cover by li- ing it upwards.
- Release the dust bag lock and remove the bag from the guides, if lled with dust.
- Insert an empty or new dust bag by sliding it into the guides.
- Close the cover by pressing it down unl it clicks. Clean and replace the inlet lter
- Before cleaning the lter, remove the power cord plug from the wall outlet.
- The lter shall be cleaned when there are visible stains on it, wash the lter in warm water with no detergent. Use it only when completely dry.
- Always use the vacuum cleaner with a lter in place.
- Failure to install the lter may result in motor damage.
1. Remove the dust bag.
2. Remove the lter by sliding it out of the guides upwards.
3. Clean the lter or replace with a new one.
4. Reinstall the lter by placing it back into the guides. Ensure the
lter is completely dry before inserng it. If the dust bag full indicator comes on, check whether the sucon brush, hose or tube is blocked with large items stopping the air ow. Aer removing the items, if present, restart the vacuum cleaner if the dust bag full indicator is sll red, replace the dust bag with a new one. Clean and replace the HEPA12 exhaust lter
- Before cleaning the lter, remove the power cord plug from the wall outlet.
- Clean the lter when it is clearly soiled. Shake dirt o the l- ter and then brush it with a so bristle brush. Then rinse the lter in lukewarm water and do not use any detergent. Do not direct strong jet of water onto the lter. Use it only when completely dry. If the lter is too dirty or damaged replace the lter with a new one.
- Depending on the intensity of use, it is recommended that you clean the lter once a month and replace it with a new one every six months.
- Always use the vacuum cleaner with a lter in place.
- It is recommended that you only use original Amica lters for your vacuum cleaner.
1. Open the air exhaust cover.
2. Remove the lter, clean it or replace it with a new one.
3. Close the air exhaust cover.
Cleaning lters Rinse the lter with warm water and let dry completely. Note! Figures are for illustrave purposes only Individual models may vary.9
In the event of any fault:
- Turn o the appliance:
- Unplug the appliance from power
- By following the instrucons given in the table below, you can correct some minor issues. Please check all points in the table before you refer the repair to customer service. Problem Reason Remedy
does not work No power Check the circuit breaker, reset if tripped, replace a blown fuse