
BBwarm - Bottle warmer ALFA - Free user manual and instructions
Find the device manual for free BBwarm ALFA in PDF.
| Product type | Bottle warmer |
| Brand | ALFA |
| Model | BBwarm |
| Mains power supply | 220-240 V ~ 50/60 Hz, 120 W |
| Car power supply | 12 V, 60 W (adapter included) |
| Bottle capacity | 125 ml, 260 ml, 330 ml |
| Baby food jar capacity | 80 g, 130 g, 190 g |
| Main functions | Bottle heating, baby food jar heating, automatic keep warm (20 min for bottle, 1 h for baby food jar), automatic shut-off |
| Sound signal | Emits 4 beeps at the end of the cycle; power-on beep |
| Light indicator | Red light on during heating, flashes at end of cycle and during keep warm |
| Maintenance and descaling | Every 4 weeks: citric acid (10 g in 200 ml water) or white vinegar (50 ml + 100 ml water) |
| Safety | Do not immerse, hot surfaces, unplug before cleaning, do not use outdoors, keep out of reach of children |
| Included accessories | 12 V car adapter, removal tongs |
| Bellows material | Silicone |
| Use in car | Possible with 12 V adapter, engine running, do not use while moving |
Frequently Asked Questions - BBwarm ALFA
User questions about BBwarm ALFA
0 question about this device. Answer the ones you know or ask your own.
Ask a new question about this device
Download the instructions for your Bottle warmer in PDF format for free! Find your manual BBwarm - ALFA and take your electronic device back in hand. On this page are published all the documents necessary for the use of your device. BBwarm by ALFA.
USER MANUAL BBwarm ALFA
Please read through the entire manual before using your Electric Bottle and baby food warmer for the first time. Please keep these instructions for future reference.
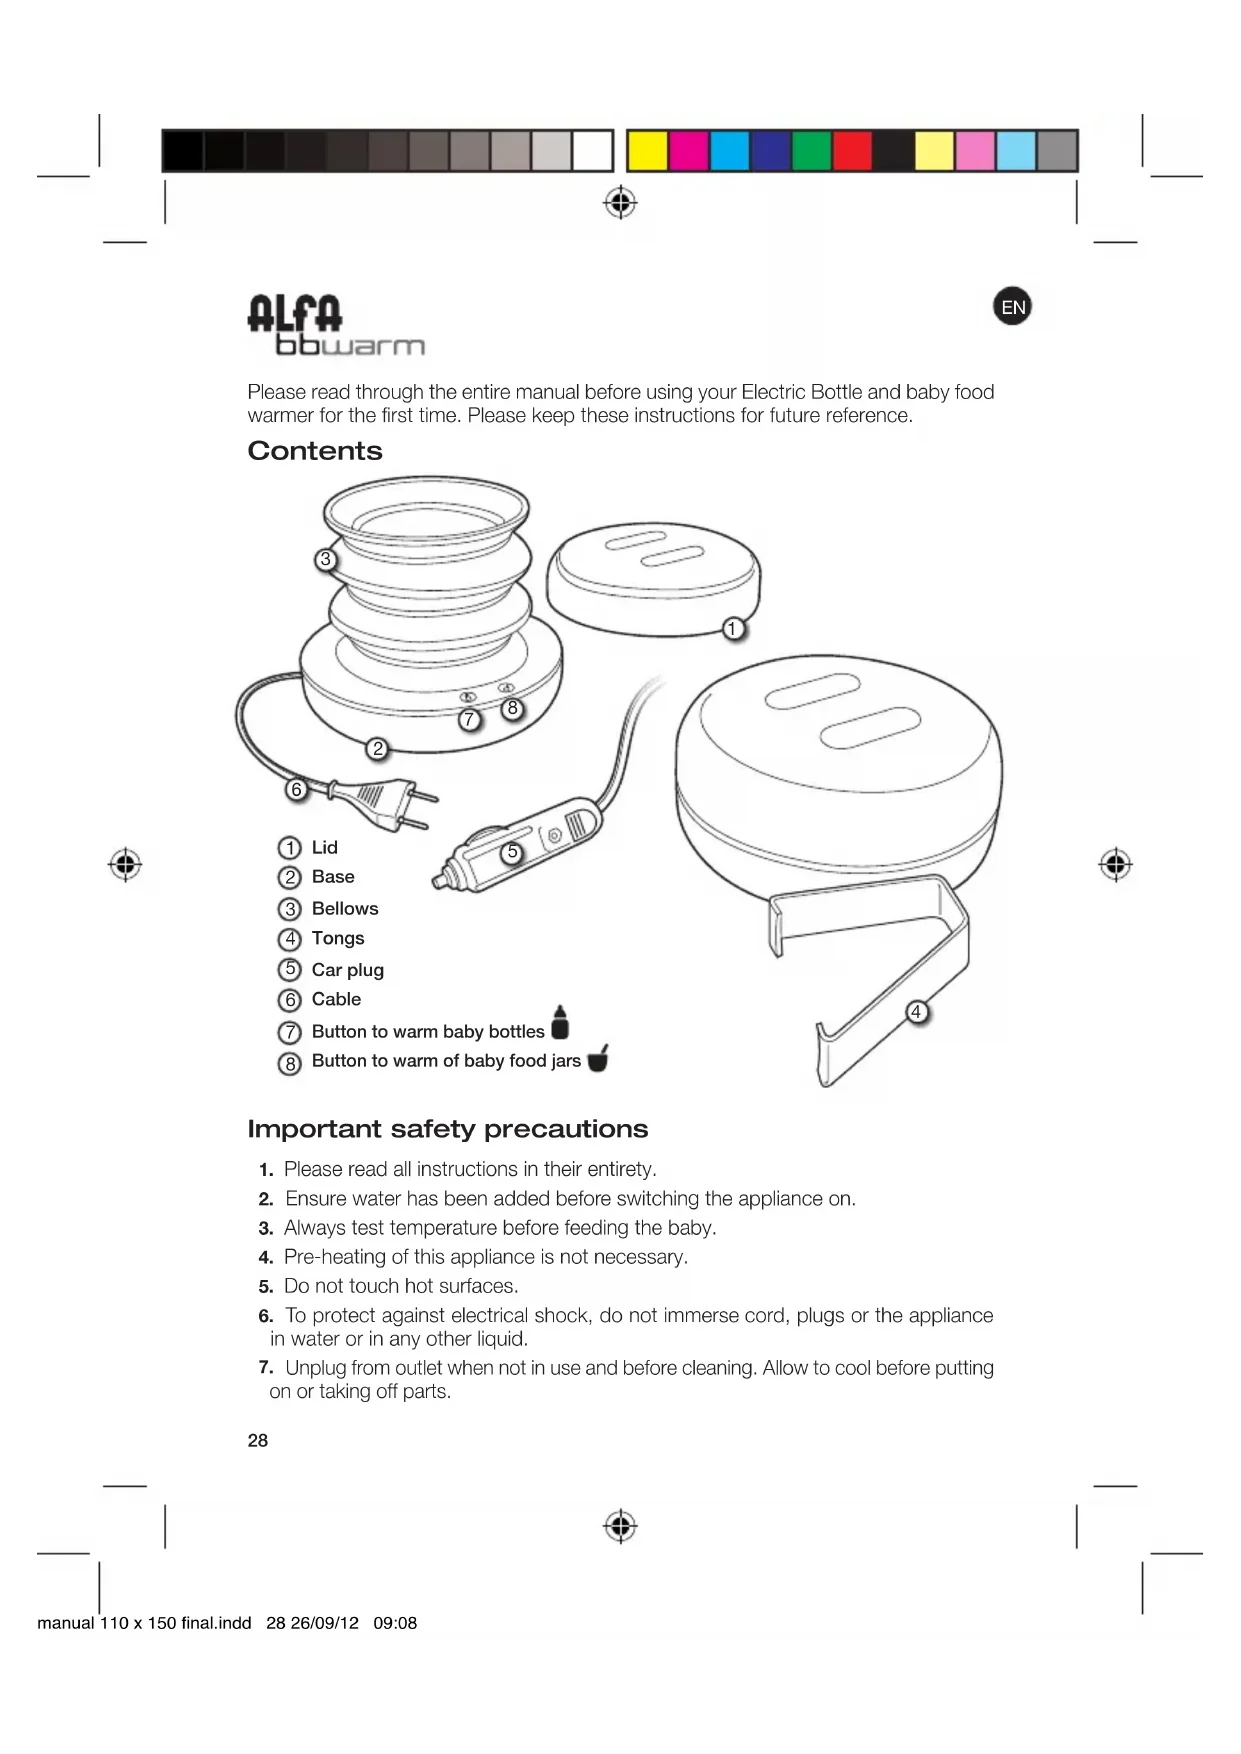
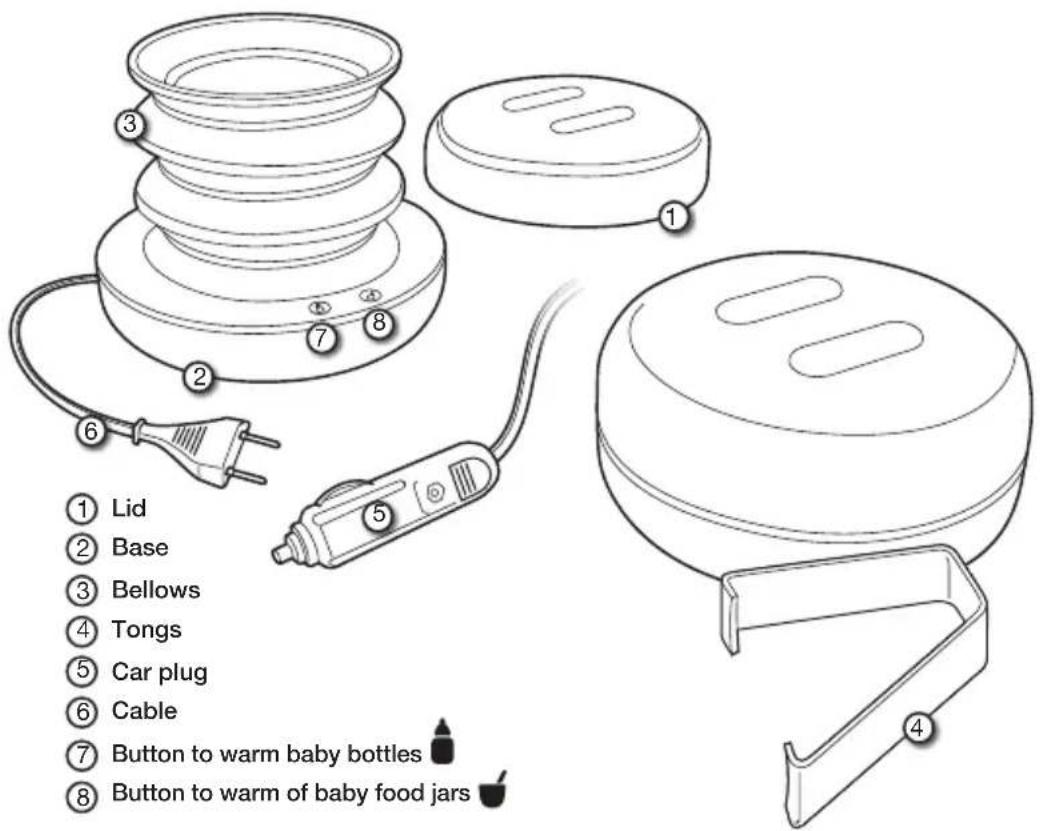
Contents
Important safety precautions
- Please read all instructions in their entirety.
- Ensure water has been added before switching the appliance on.
- Always test temperature before feeding the baby.
- Pre-heating of this appliance is not necessary.
- Do not touch hot surfaces.
- To protect against electrical shock, do not immerse cord, plugs or the appliance in water or in any other liquid.
- Unplug from outlet when not in use and before cleaning. Allow to cool before putting on or taking off parts.

ALFA bbwarm

- Do not operate the appliance if the cord or plug are damaged, the appliance malfunctions or has otherwise been damaged in any way. Return the appliance to the nearest authorised service centre for inspection, repair or adjustment.
- The use of accessory attachments not recommended by the appliance manufacturer may cause injuries.
- Do not use the appliance outdoors.
- Do not let cord hang over the edges of tables or countertops or touch hot surfaces.
- Unplug from wall outlet after use.
- Do not use the appliance for other purposes than its intended use.
- Ensure that the appliance is placed on a firm level surface when in use.
- Never open the unit when in use.
- Always keep out of reach of children.
- Never place items on top of the appliance.
- To stop the appliance at any time during a cycle, unplug at the electrical outlet.
- Be careful when opening the appliance as steam can burn.
20.Use in car:
20.1 Never use the appliance while the vehicle is in motion. In order not to drain the car battery, leave the engine running whilst using the baby bottle warmer.
20.2 The car adapter has been specially designed for this Baby Bottle Warmer: never use with other models.

ALFA bbwarm

Instructions for use
For feeding bottles:
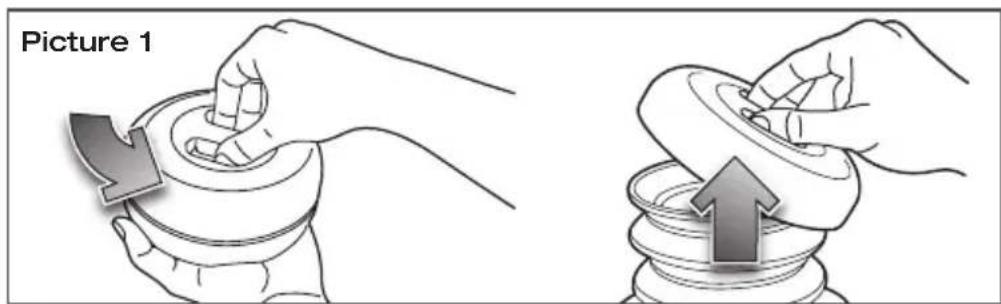
- Open the upper lid, and then the silicon bellow itself will pop upwards. (Picture 1)
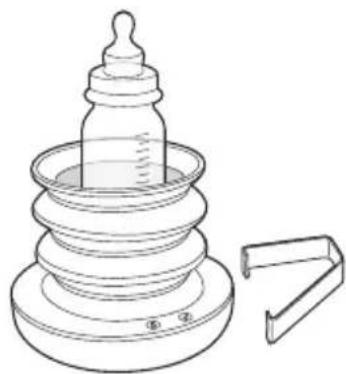
- Place the assembled and filled bottle into the warmer.
- For 125ml bottles, fill the warmer with water to just above the level of milk in the bottle.
- For larger bottles (260ml), fill the warmer to 15mm below the rim of the warmer (bellow).
- Never let the water level rise above the neck of the bottle or spill over the edge of the warmer.
- Plug the unit into an electrical outlet. Once plugged in the warmer will beep.
- Press the bottle warming mode button indicated by the icon "bottle".
- The light will light up to indicate that the warmer is working.
- When it is warming, the light is RED.
- After several minutes of operation, the appliance will emit 4 beeps, (for 2 minutes) and the red light will flash on and off, which indicates the completion of the warming cycle. Then the warmer will keep warm automatically (it is not running a cycle, it is using heat transfer) for approximately 20 minutes.
- To switch off the appliance at any given moment simply press the bottle button or baby food button to complete the warming cycle.
- Remove the bottle with the tongs (to avoid burns) and dry it.
- Shake the baby bottle gently and test the temperature of the milk, by sprinkling a few drops onto your wrist before feeding your baby.
For baby food jars:
- Open the upper lid, then the bellow itself will pop upwards.
- Place the baby food jar into the warmer.
- Remove the lid from the baby food jar.
- Fill the warmer with water to 15mm below the top of the jar.
- Plug the appliance into an electrical outlet. Once plugged in the warmer will beep.
- Press the jars warming mode button indicated by the icon "jar".
- The RED light will light up, which indicates the warmer is on.
- After approximately 5 minutes check the temperature of the food. If the food is at

ALFA bbwarm
the correct temperature, switch off the applian ce. If the temperature is still too cold, continue the warming cycle and check the temperature often.
(Picture 3)
- To switch off the appliance at any given moment simply press the bottle button or baby food jar button to complete the warming cycle.
- When the appliance emits 4 beeps (for 2 minutes), the RED light will flash on and off and then the warming cycle is complete.
- The appliance will maintain the temperature for 1 hour, and then it switches off automatically. (When keeping warm, the light flashes on and off.)
- Remove the food jar using tongs in order to avoid being scalded by the water surrounding the jars or tins.
- Stir the food and test it yourself using a spoon to ensure that it is not too hot for your baby.
Our electric bottle and baby food warmer can also be used in the car. It includes 12V car-plug adapter.

(Picture 3)
These times are for informational purposes only. The speed at which the warmer heats the milk or food will depend on the size of the bottle or baby food jar and the starting temperature. Always test the temperature of food before feeding your baby.
Temperature of food before warming
20^ C

125ml/4oz

/9oz

330ml / 11oz

80gr 130g

190gr

4 min 5
min 6 min
4,5 mir
5,5 min
6 min
Cleaning
You should de-scale your electric bottle and baby food warmer every four weeks to ensure it continues to work at 100% efficiency.
To that end, either. Mix one sachet of citric acid (10 grams) with 200ml of water. Pour solution into the warmer and heat for 10 minutes. After 10 minutes have lapsed, unplug the appliance from the wall socket and leave the solution to stand for 30 minutes before emptying the warmer. Rinse thoroughly and wipe the warmer using a damp cloth. Citric acid is available from most pharmacies.
OR. Pour 50ml of vinegar (white) mixed with 100 ml of cold water into the warmer. Allow the liquid to stand in the unit until any limescale has dissolved. Empty the unit by rinsing thoroughly and wiping the warmer with a damp cloth.
Technical specifications
220-240V-50/60Hz Power120W
12V Power 60W
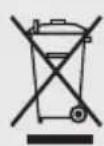
RESPONSIBLE DISPOSAL
You can help us save the environment!
Do not forget to obey local legislation: take electronic equipment to a suitable waste collection centre.
ALFA bbwarm

Brand : ALFA
Model : BBwarm
Category : Bottle warmer