
PZ2974 - Barbecue TRISTAR - Free user manual and instructions
Find the device manual for free PZ2974 TRISTAR in PDF.
| Product type | Electric table barbecue / pizza oven |
| Brand | TriStar |
| Model | PZ2974 |
| Usage | Indoors only, on stable and flat surface |
| Power supply | Electric, standard wall socket |
| Power | Approximately 1200 W (estimated) |
| Dimensions (L x W x H) | Approximately 40 x 40 x 30 cm (estimated) |
| Weight | Approximately 4 kg (estimated) |
| Temperature setting | Thermostat with 5 positions: 0 (off), 110°C, 150°C, 200°C, 230°C, 280°C |
| Cooking surface type | Pizza pan with non-stick coating |
| Included accessories | Lid handle, fixing base, removable thermostat |
| Maintenance and cleaning | Clean with mild detergent and a damp cloth; never immerse in water |
| Safety | Do not touch hot surfaces, use handles; unplug after use; do not use outdoors |
| Warranty | 24 months from date of purchase |
| Pan material | Non-stick coating |
| Max temperature | 280°C |
| Temperature indicator | Yes, turns on and off during cooking |
| Spare parts and repairability | Removable thermostat; accessories not recommended by the manufacturer void the warranty |
| General information | Domestic use only; first use may release odor and smoke |
Frequently Asked Questions - PZ2974 TRISTAR
User questions about PZ2974 TRISTAR
0 question about this device. Answer the ones you know or ask your own.
Ask a new question about this device
Download the instructions for your Barbecue in PDF format for free! Find your manual PZ2974 - TRISTAR and take your electronic device back in hand. On this page are published all the documents necessary for the use of your device. PZ2974 by TRISTAR.
USER MANUAL PZ2974 TRISTAR
natural_image
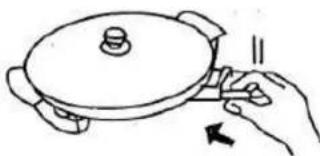
Black cylindrical portable stove with lid and front panel, mounted on a metal stand (no text or symbols visible)NL Gebruikershandleiding HR Korisnički priručnik
UK User manual NO Brukermanual
Thermostat connection Base
natural_image
Geometric diagram showing two intersecting triangles with labeled point A (no text or symbols beyond label)Operation and maintenance
Remove all packaging of the device.
Check if the voltage of the appliance corresponds to the main voltage of your home. Rated voltage: AC220-240V 50Hz. Only connect this appliance to an earthed socket.
First use
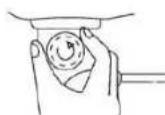
Was the cover(no.2) thoroughly with hot water, use some detergent if required. Attach the handle(no.1) on the cover with the supplied screw.
Clean the Inside of the pizzapan with a damp cloth and dry them well. Never immerse the appliance in water!
At the first use the appliance can spread some smell and smoke, this is normal. Always place the device in a well ventilated area and on a stable surface.
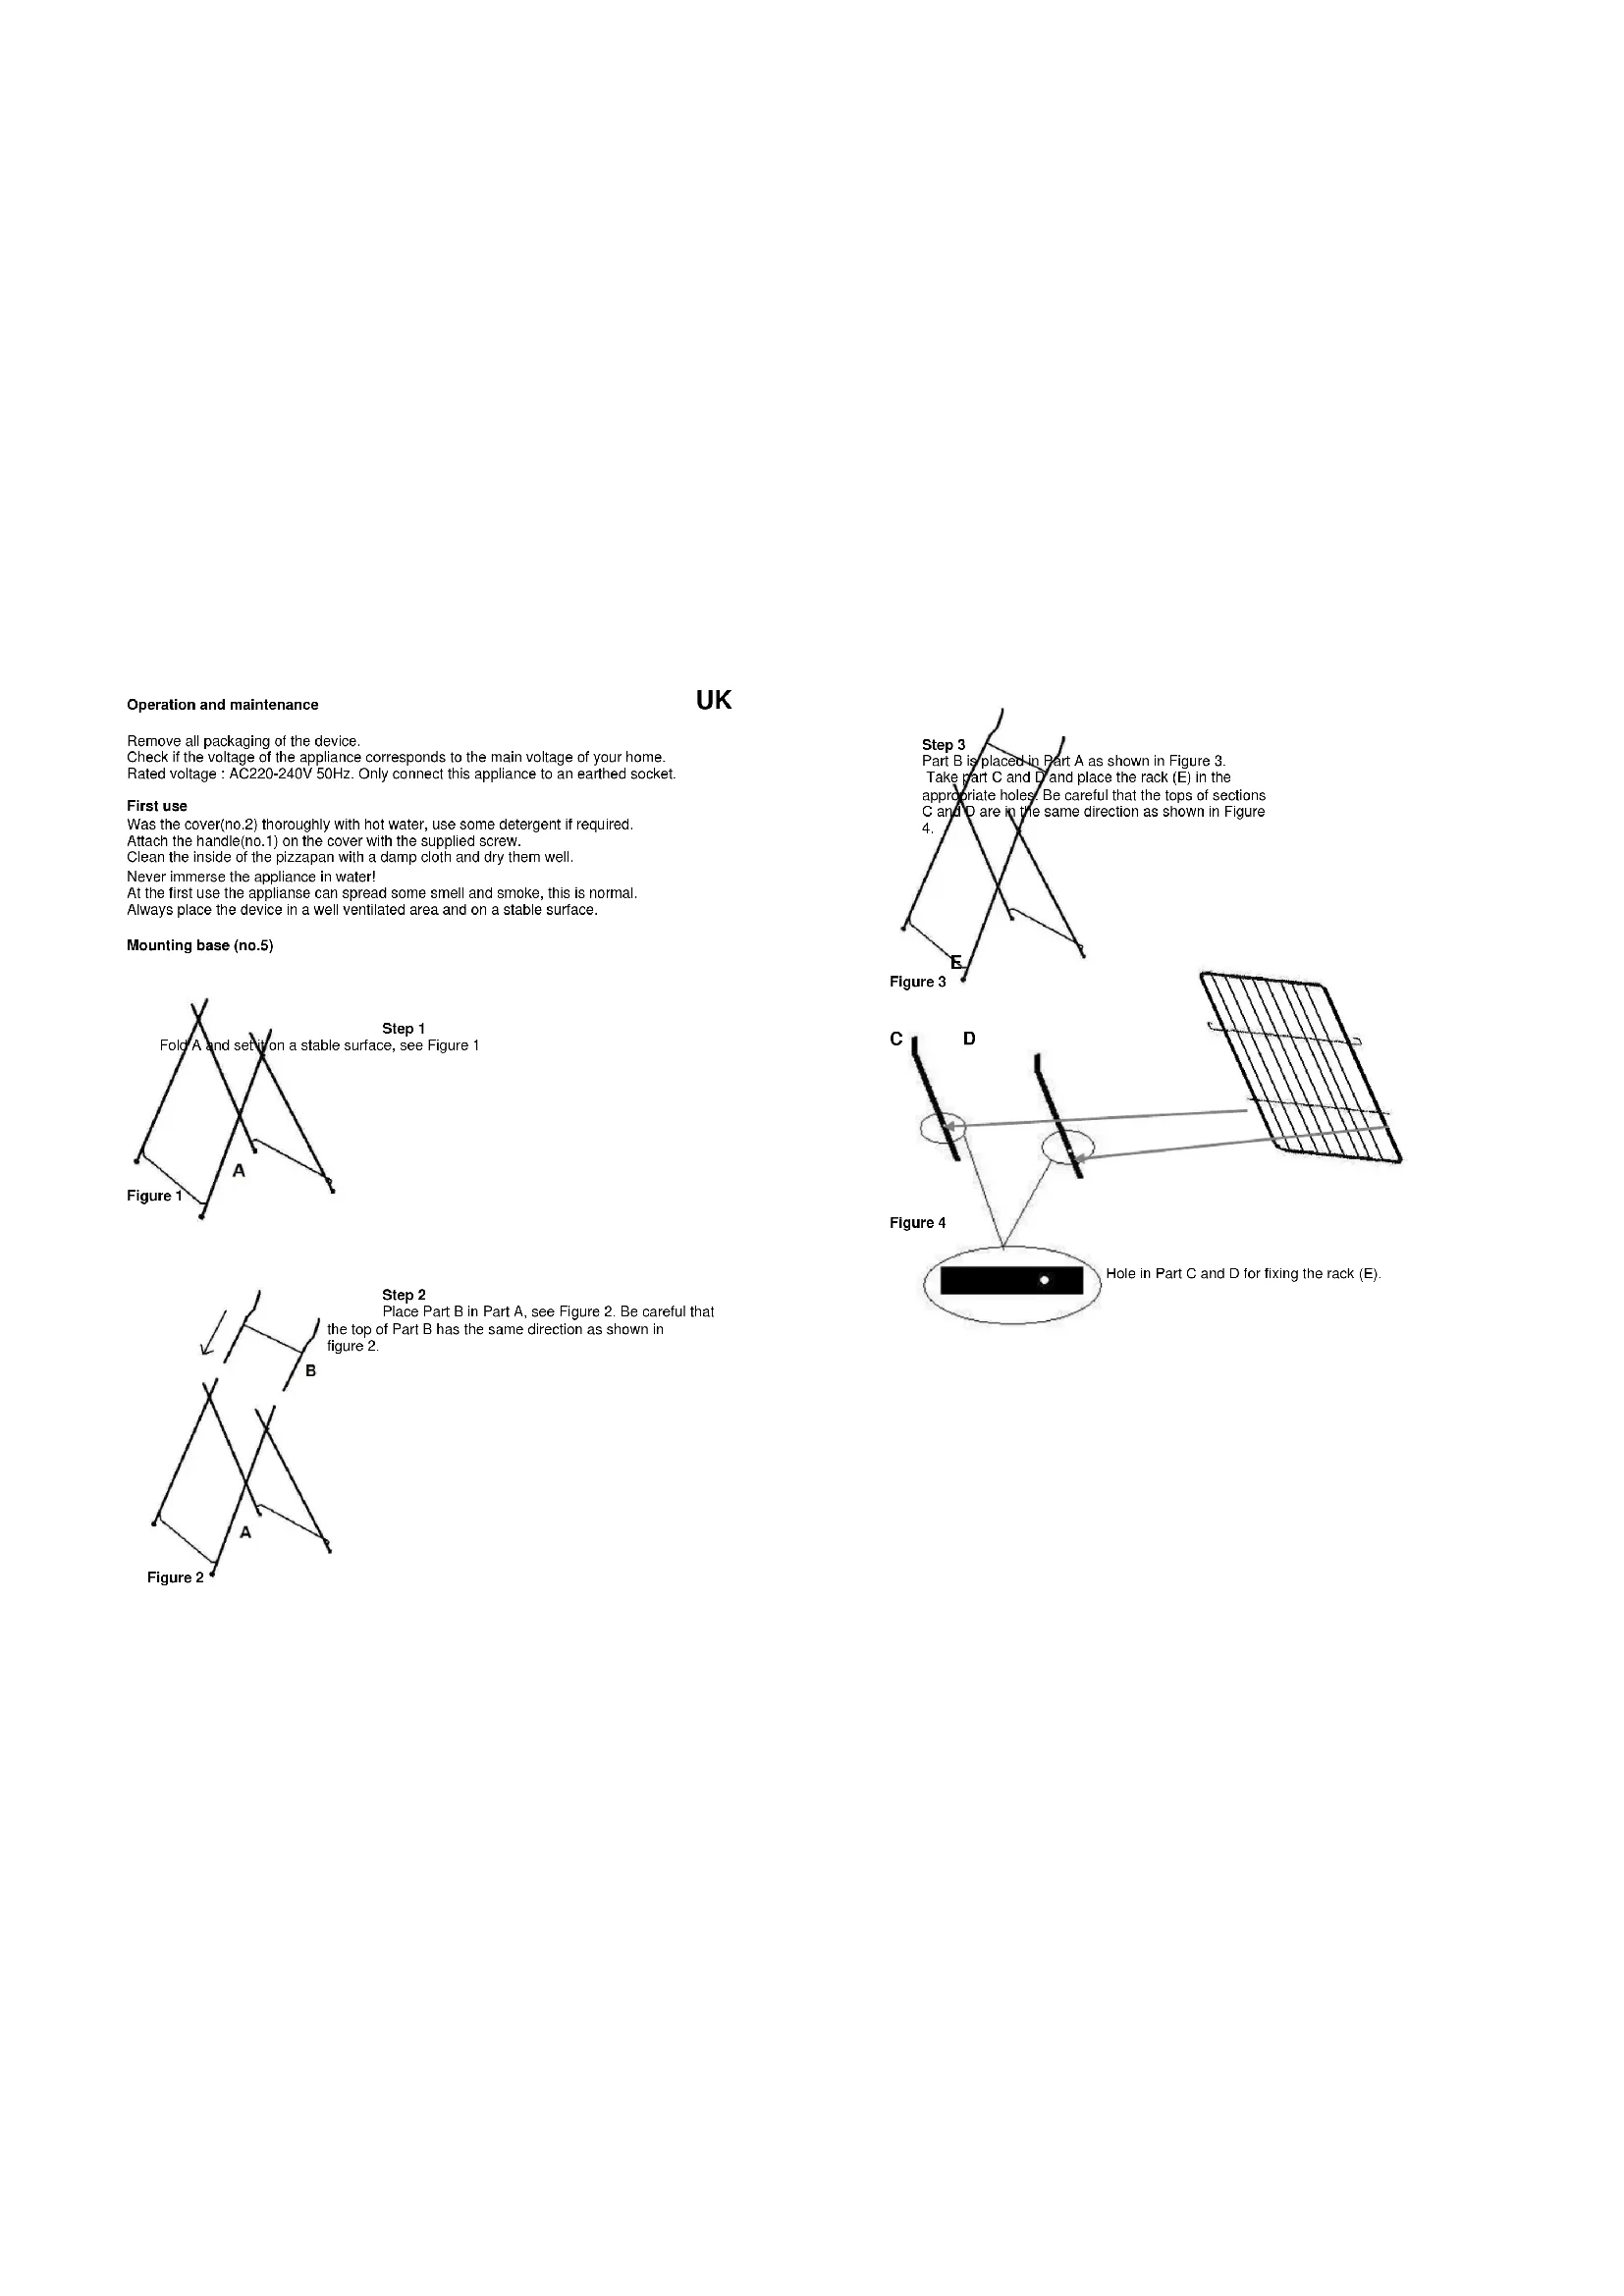
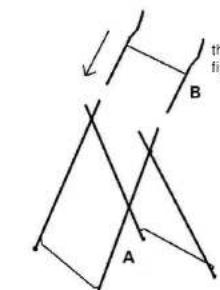
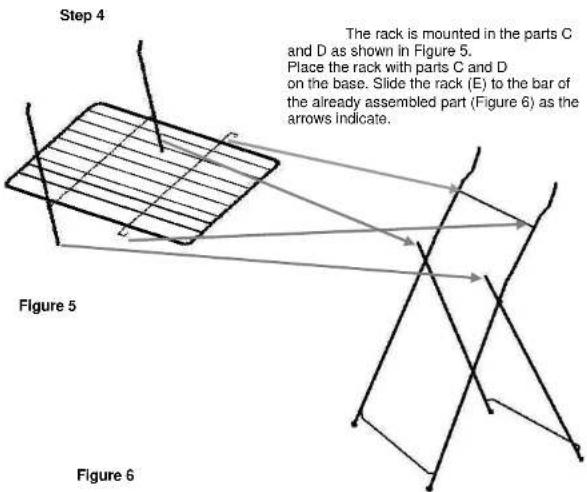
Mounting base (no.5)
Step 1
Fold A and set it on a stable surface, see Figure 1
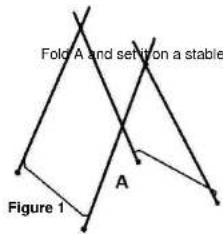
Step 2
Place Part B in Part A, see Figure 2. Be careful that the top of Part B has the same direction as shown in figure 2.
Figure 2
UK
natural_image
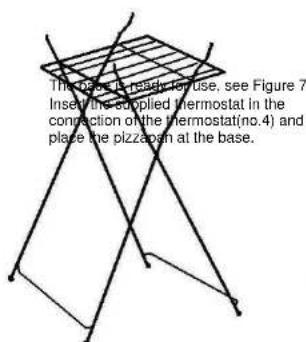
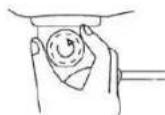
Hand holding a cooking pot with a lid and side handles, no text or symbols visibleFigure 7
Step 5
Figure 8
Use
With the control knob of the thermostat you can set the desired temperature.
Position
0 UIT For a lower position turn
1 110°C
2 150°C
3 200°C
4 230°C
5 280°C
The thermostat regulates a constant temperature. During baking, the temperature light turns on and out, this is normal, the set temperature is constantly adjusted.
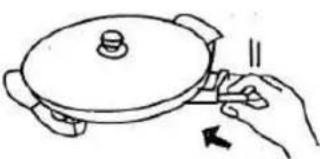
Set the desired position and add some olive oil or butter in the pizzapan, place your to prepare pizza in the pan and put the lid on the pan. The cooking time depends on the ingredients and the selected temperature.
The pizzapan is also extremely suitable as a snack pan for all kinds of dishes.
Never use sharp objects in the pan. It will damage the non-stick layer.
Cleaning of the device
Remove before cleaning the power cord from the wall outlet and wait until the device is fully cooled. Never pour cold water in the pizzapan to the earlier cooling, this can damage the device and can cause splashing hot water.
Clean the pizzapan with a mild detergent and a damp cloth
Never use harsh and abrasive cleaners, steel wool or a sanding sponge, which could damage the non-stick layer. Never immerse the device in water or other liquid.
IMPORTANT SAFEGUARDS


- Read all instructions before use.
- Do not touch hot surfaces. Use handles or knobs.
• To protect against electric shock, do not immerse cord, plug or appliance in water or any other liquid. - Unplug from outlet when not in use and before cleaning. Allow the device to cool before putting on or taking off parts. Do not operate any appliance with a damaged cord or plug or after the appliance malfunctions, or has been damaged in any manner.
- The use of accessory attachments not recommended by the appliance manufacturer may cause injuries and invalidate any warranty you may have.
- Do not use outdoors, or on or near direct heat sources
- Do not let cord hang over edge of table or counter, or touch hot surfaces or come into contact with the hot parts or allow the product to be situated underneath or close to curtains, window coverings etc.
• This appliance is for household use only and only for the purpose it is made for.
• The appliance must be placed on a stable, level surface. - This appliance is an attended appliance, and as such should never be left ON or whilst hot without adult supervision.
- This appliance is not intended for use by persons (including children) with reduced physical, sensory or mental capabilities, or lack of experience and knowledge, unless they have been given supervision or instruction concerning use of the appliance by a person responsible for their safety.
• Children should be supervised to ensure that they do not play with the appliance.
SAVE THESE INSTRUCTIONS FOR FUTURE REFERENCE
Guarantee
- The device supplied by our Company is covered by 24 month guarantee starting on the date of purchase (receipt).
- During the life of the guarantee any fault of the device or its accessories to material or manufacturing defects will be eliminated free of charge by repairing or, at our discretion, by replacing it. The guarantee services do not entail an extension of the life of the guarantee nor do they give rise to any right to a new guarantee!
• Proof of the guarantee is provided by the proof of purchase. Without proof of purchase no free replacement or repair will be carried out. - If you wish to make a claim under the guarantee please return the entire machine in the original packaging to your dealer together with the receipt.
- Damage to accessories does not mean automatic free replacement of the whole machine. In such cases please contact our hotline. Broken glass or breakage of plastic parts are always subject to a charge.
- Defects to consumables or parts subject to wearing, as well as cleaning, maintenance or the replacement of said parts are not covered by the guarantee and hence are to be paid!
• The guarantee lapses in case of unauthorized tampering. - After the expiry of the guarantee repairs can be carried by the competent dealer or repair service against the payment of the ensuing costs.
Guidelines for protection of the environment
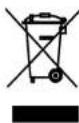
This appliance should not be put into the domestic garbage at the end of its useful life, but must be disposed of at a central point for recycling of electric and electronic domestic appliances. This symbol on appliance, instruction manual and packaging puts your attention to this important issue. The materials used in this appliance can be recycled. By recycling used domestic appliances you contribute an important push to the protection of our environment. Ask your local authorities for information regarding the point of recollection
Packaging
The packaging is 100% recyclable, return the packaging separated.
Product
This device is equipped with a mark according to European Directive 2002/96/EC on Waste Electrical and Electronic Equipment (WEEE). By ensuring that the product correctly as waste is processed, it helps you may have adverse consequences for the environment and human health.
EC declaration of conformity
This device is designed, manufactured and marketed in accordance with the safety objectives of the Low Voltage Directive "No 73/23/EEC, the protection requirements of the EMC Directive 89/336/EC "Electromagnetic Compatibility" and the requirement of Directive 93/68/EEC.
natural_image
Simple line drawing of a folding table with no text or symbolsFigure 7
natural_image
Hand holding a cooking pot with a lid and handle, showing a pan (no text or symbols)Figure 8
Utilisation
natural_image
Geometric diagram showing two intersecting lines with labeled point A, no text or symbols presentSchritt 1
natural_image
Simple line drawing of a folding table with intersecting legs and a grid on top (no text or symbols)Schritt 5
natural_image
Hand holding a cooking pot with a lid and handle, showing a rotation arrow (no text or symbols)Abb. 8
Inbetriebnahme
natural_image
Geometric diagram showing intersecting lines with labeled point A, no text or symbols presentPaso 1
natural_image
Simple line drawing of a folding table with intersecting legs and a grid on top (no text or symbols)Figura 7
Paso 5
natural_image
Illustration of a hand holding a cooking pot with a lid and handle, showing a rotation arrow (no text or symbols)Figura 8
Utilización
natural_image
Geometric diagram showing two intersecting lines with labeled point A, no text or symbols presentPasso 1
natural_image
Simple line drawing of a folding table with intersecting legs and a grid on top (no text or symbols)natural_image
Hand holding a cooking pot with a lid and handle, showing a right-hand rule (no text or symbols)Figura 7
Figura 8
Uso
natural_image
Simple line drawing of a folding table with no text or symbolsFigura 7
Passo 5
natural_image
Hand holding a cooking pot with a lid and handle, no text or symbols visibleFigura 8
Utilização
natural_image
Line drawing of a folding table with diagonal lines and a grid on top (no text or symbols)natural_image
Hand holding a cooking pot with a lid and side handles, showing a hand pressing down (no text or symbols)Figur 8
Använd
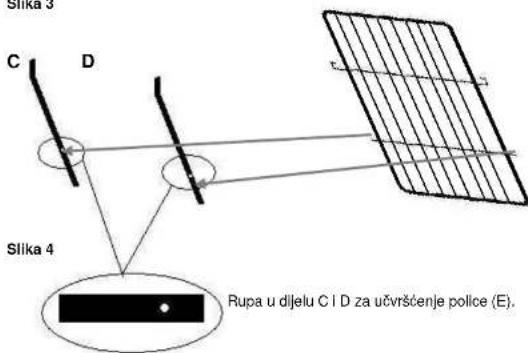
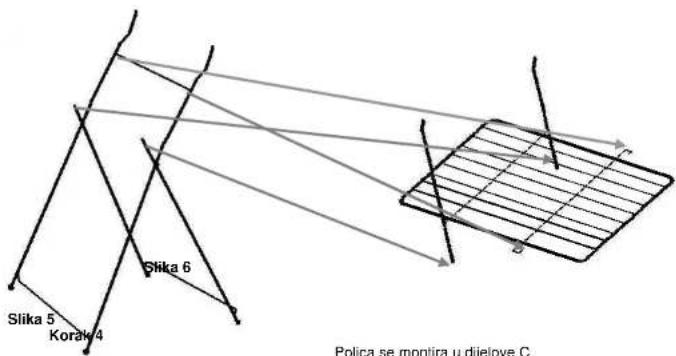
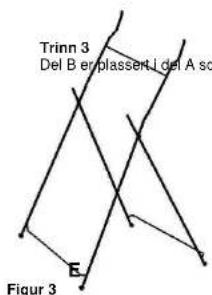
Dio B postavlja se na dio A kao što je i prikazano na slici 3.
Uzmite dio C i D te ih stavite na policu (E) u
odgovarajuće rupe.
Pazite da vrhovi dijelova C i D budu okrenuti jednako kao na slici 4.
natural_image
Simple line drawing of a folding table with no text or symbolsSlika 7
Korak 5
Baza je spremna za korištenje, pogledajte sliku 7. Umetnite isporučeni termostat u priključak za termostat (br. 4) i Stavite pizzomat na bazu.
natural_image
Hand holding a cooking pot with a lid and handle, no text or symbols visibleSlika 8
Korištenje
Gumbom regulatora na termostatu možete odrediti željenu temperaturu.
Položaj
0 UIT Za niži položaj okrenite
1 110°C Gumb udesno
2 150°C
3 200°C
4 230°C
5 280°C
Termostat održava konstantnu temperaturu. Za vrljeme pečenja svjetlo regulatora temperature će se uključivati i isključivati, to je normalno jer tako se zadana temperatura održava konstantnom.
Postavite željeni položaj i dodajte nešto maslinovog ulja u pizzomat, stavite pripremljenu pizzu u posudu i zaklopite je poklopcem. Vrijeme pripremanja će ovisiti o sastojcima i izabranoj temperaturi.
Plzzomat je također iznlmno prikladan kao posuda za prlpremanje brze hrane svih vrsta. Nikad ne koristite oštre predmete u posudi jer ćete njima oštetiti neprianjajući premaz.
Čiščenje uređaja
Kabel električnog napajanja prije čišćenja iskopčajte iz zidne utičnice i pričekajte da se aparat ohladi. Nikad ne ulijevajte hladnu vodu u pizzomat radi njegova hlađenja jer time možete oštetiti uređaj i dovesti do prskanja vručom vodom.
Pizzomat očistite blagim deterdžentom i vlažnom krpom.
Nikad ne koristite oštra sredstva za čišćenje,čeličnu vunu i spužvu s pijeskom jer njima možete oštetiti premaz koji ne prianja. Nikada nemojte potapati aparat u vodu ili druge tekućine.
VAŽNE MJERE SIGURNOSTI


- Prije korištenja pročitajte sve upute.
• Nemojte dodirivati vruće površine. Koristite se samo drškama ili ručicama. - Radi zaštite od električnog udara, nemojte uranjati kabel, utikač ili uređaj u vodu ili neku drugu tekućinu.
- Iskopčajte uređaj iz utičnice kad ga ne koristite ili prije čišćenja. Uređaja ostavite da se ohladi prije nego u njega budete stavljali ili vadili dijelove. Nemojte uređajem rukovati ako je oštećen kabel, utikač, nakon kvara ili se na bilo koji način oštetio.
- Upotreba pribora kojeg ne preporučuje proizvođač uređaja može dovesti do ozljeda i eventualno jamstvo za njegov rad učiniti nevažećim.
• Nemojte ga koristiti na otvorenom prostoru ili u blizini neposrednih izvora topline - Ne ostavljajte kabel da visi preko ruba stola ili police, da dodiruje vruće površine ili dolazi u kontakt s vručim dijelovima i nemojte ga postavljati ispod ili blizu zavjesa, prozorskih obloga, isl..
- Ovaj aparat je predviđen samo za kučnu upotrebu i tako ga treba i koristiti.
- Aparat se uvijek mora postaviti na ravnu i stabilnu površinu.
- Ovaj aparat se smije koristiti samo uz prisutnost osoba i kao takav se nikad ne smije ostaviti bez nadzora odrasle osobe dok je uključen (ON) ili dok je vruć.
- A kerámia alkatrészek törésére nem vonatkozik a garancia.
SPREMITE OVE UPUTE ZA BUDUĆE POTREBE
Jamstvo
Figur 2
NO
natural_image
Simple line drawing of a folding table with intersecting legs and a grid on top (no text or symbols)Figur 7
Trinn 5
natural_image
Hand holding a cooking pot with a lid and handle, showing a hand pressing down (no text or symbols)Figur 8
Bruk
natural_image
Simple line drawing of a folding table with intersecting legs and a grid on top (no text or symbols)natural_image
Simple line drawing of a folding table with intersecting legs and a grid on top (no text or symbols)- ábra
5. lépés
natural_image
Hand holding a cooking pot with a lid and handle, showing a hand pressing down (no text or symbols)- ábra
Használat
natural_image
Simple line drawing of a folding table with intersecting legs (no text or symbols)Obrázek 7
natural_image
Hand holding a cooking pot with a lid and handle, showing a hand pressing down (no text or symbols)Obrázek 8
Použití
natural_image
Geometric diagram showing two intersecting triangles with labeled point A (no text or symbols beyond label)Rysunek 1
Krok 1
natural_image
Simple line drawing of a folding table with intersecting legs and a grid on top (no text or symbols)Rysunek 7
Krok 5
natural_image
Hand holding a cooking pot with a lid and side handles, showing a right-hand rule (no text or symbols)Rysunek 8
Obstuga
natural_image
Geometric diagram showing two intersecting triangles with labeled point A, no text or symbols presentPasul 1
Figura 3
natural_image
Simple line drawing of a folding table with intersecting legs and a grid on top (no text or symbols)Figura 7
natural_image
Hand holding a cooking pot with a lid and handle, showing a hand pressing down (no text or symbols)Figura 8
natural_image
Simple line drawing of a folding table with diagonal lines and a grid on top (no text or symbols)natural_image
Hand holding a cooking pot with a lid and side legs, showing a hand pressing down (no text or symbols)Σχήμα 7
Σχήμα 8
Χρήση
natural_image
Simple line drawing of a folding table with intersecting lines (no text or symbols)Şekil 7
Adim 5
natural_image
Hand holding a cooking pot with a lid and handle, showing a hand pressing down (no text or symbols)Şekil 8
Kullanım


- Operation and maintenance
- First use
- Mounting base (no.5)
- UK
- Use
- Position
- Cleaning of the device
- IMPORTANT SAFEGUARDS
- SAVE THESE INSTRUCTIONS FOR FUTURE REFERENCE
- Guarantee
- Guidelines for protection of the environment
- Packaging
- Product
- EC declaration of conformity
- Utilisation
- Schritt 1
- Inbetriebnahme
- Paso 1
- Paso 5
- Utilización
- Passo 1
- Uso
- Passo 5
- Utilização
- Använd
- Korištenje
- Položaj
- Čiščenje uređaja
- VAŽNE MJERE SIGURNOSTI
- SPREMITE OVE UPUTE ZA BUDUĆE POTREBE
- Jamstvo
- Trinn 5
- Bruk
- lépés
- Használat
- Použití
- Krok 1
- Krok 5
- Obstuga
- Pasul 1
- Χρήση
- Adim 5
- Kullanım
Brand : TRISTAR
Model : PZ2974
Category : Barbecue