
HMG200X - Microwave Oven HOOVER - Free user manual and instructions
Find the device manual for free HMG200X HOOVER in PDF.
| Product type | Built-in microwave oven |
| Brand | Hoover |
| Model | HMG200X |
| Interior volume | 25 liters |
| Microwave power | 900 W |
| Grill power | Not applicable |
| Number of power levels | 5 |
| Control type | Electronic with digital display |
| Timer | Yes, up to 95 minutes |
| Defrost function | Yes, by weight or by time |
| Turntable | Yes, 25 cm diameter |
| Interior lighting | Yes, incandescent lamp |
| Dimensions (H x W x D) | 388 x 595 x 400 mm |
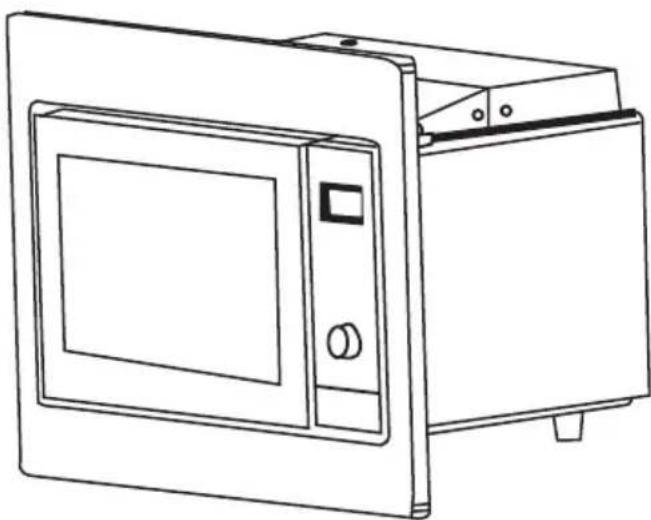
| Cabinet dimensions (H x W x D) | 450 x 560 x 550 mm (minimum) |
| Net weight | 18 kg |
| Power supply | 230 V, 50 Hz, 10 A |
| Power consumption | 900 W (microwave) |
| Door type | Side opening with handle |
| Interior material | Stainless steel |
| Maintenance and cleaning | Clean with a damp cloth and mild detergent. Do not use abrasive products. |
| Child safety lock | Yes, key lock |
| Automatic shut-off | Yes, in case of overheating |
| Spare parts and repairability | Available through Hoover customer service. Repairability score: 7.5/10 |
| General information | CE compliant. 2-year warranty. |
Frequently Asked Questions - HMG200X HOOVER
User questions about HMG200X HOOVER
0 question about this device. Answer the ones you know or ask your own.
Ask a new question about this device
Download the instructions for your Microwave Oven in PDF format for free! Find your manual HMG200X - HOOVER and take your electronic device back in hand. On this page are published all the documents necessary for the use of your device. HMG200X by HOOVER.
USER MANUAL HMG200X HOOVER
Installation Instructions
Please Read the Manual Carefully Before Installation
Please Note
Electrical connection
The oven is fitted with a plug and must be only connected to a properly installed earthed socket. In accordance with the appropriate regulations, the socket must only be installed and the connecting cable must only be replaced by a qualified electrician.
If the plug is no longer accessible following installation and all-pole isolating switch must be present on the installation side with a contact gap of at least 3mm .
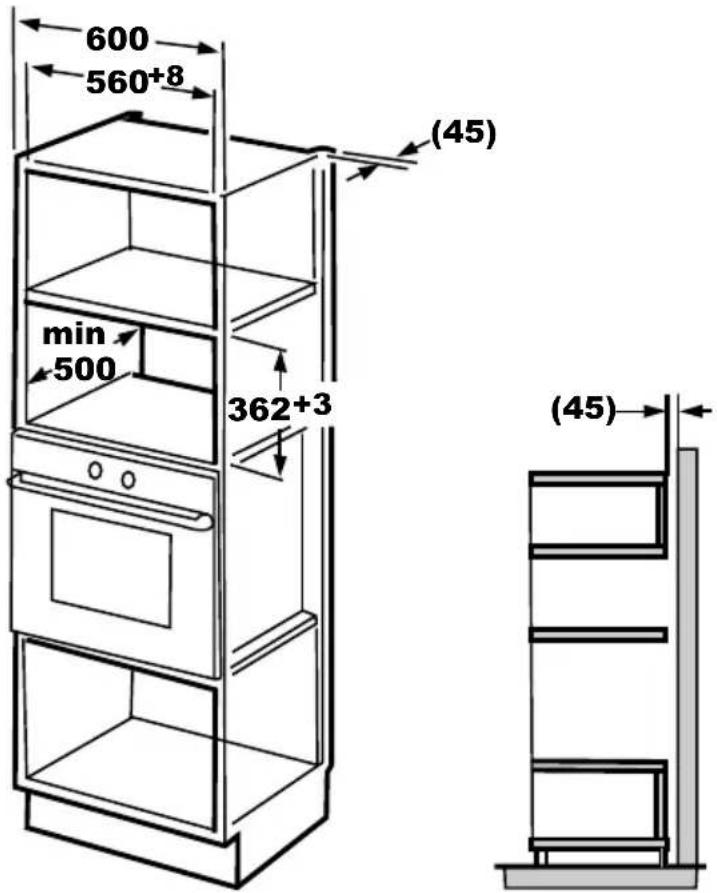
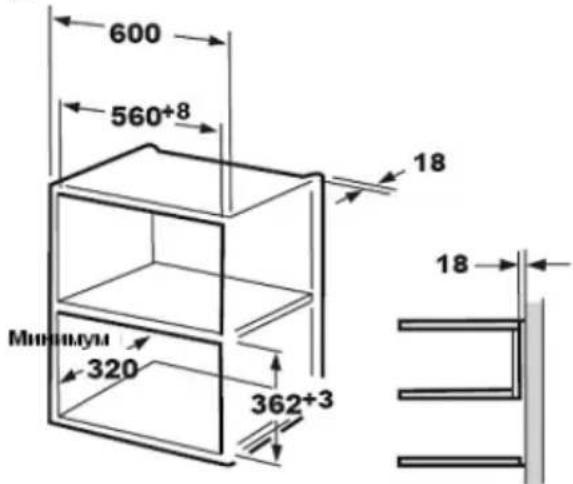
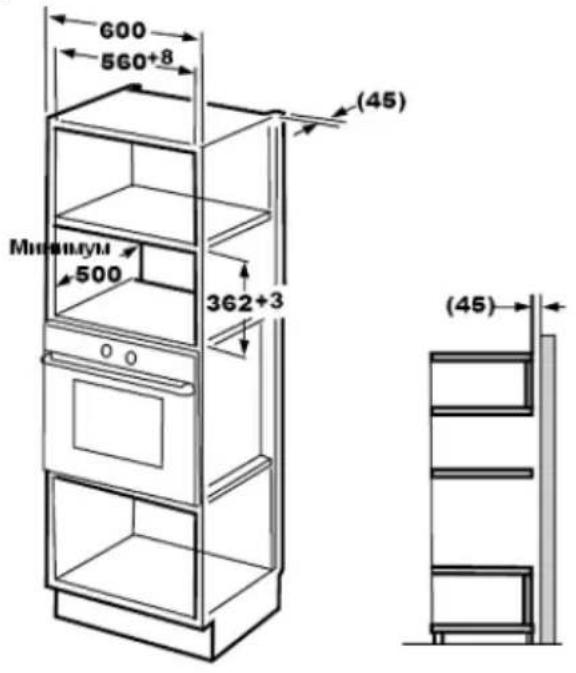
A. Built-in furniture
The built-in cabinet shall not have a rear wall behind the appliance.
Minimum installation height is 85cm.
Do not cover ventilation slots and air intake points.
1.

2.
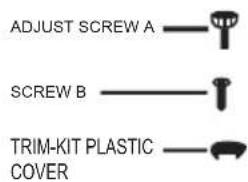
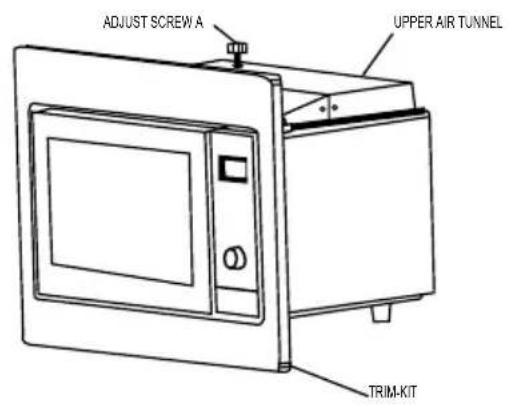
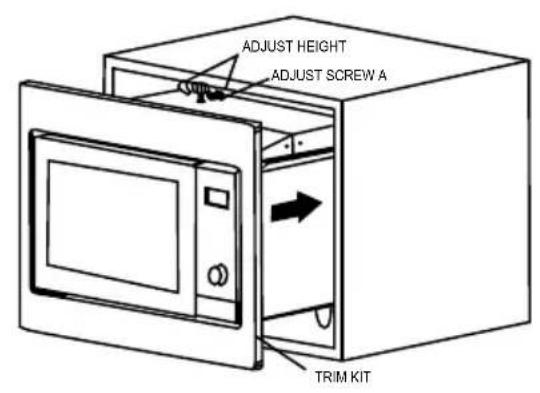
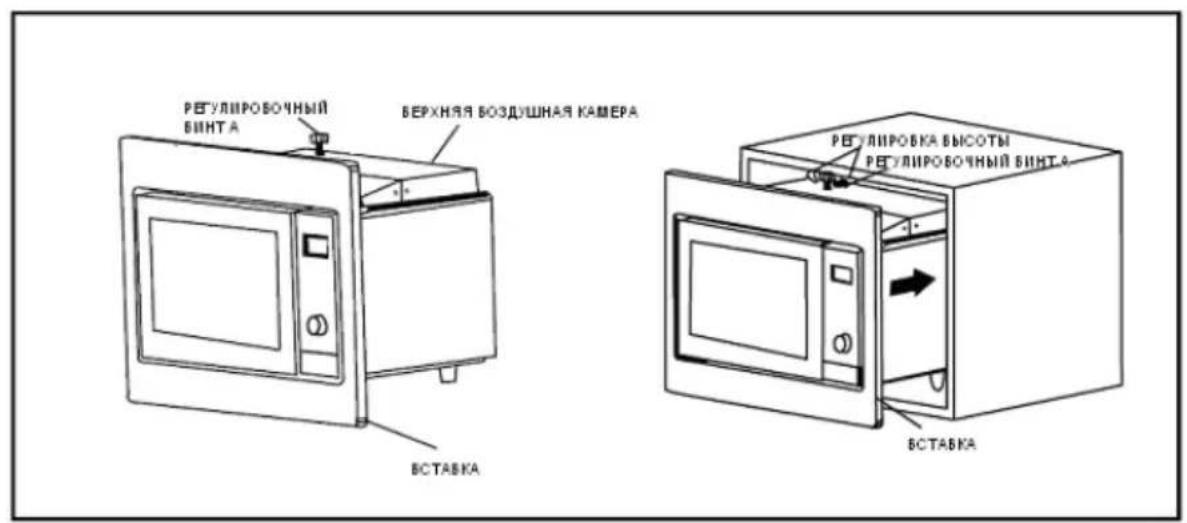
B. Install the Oven
-
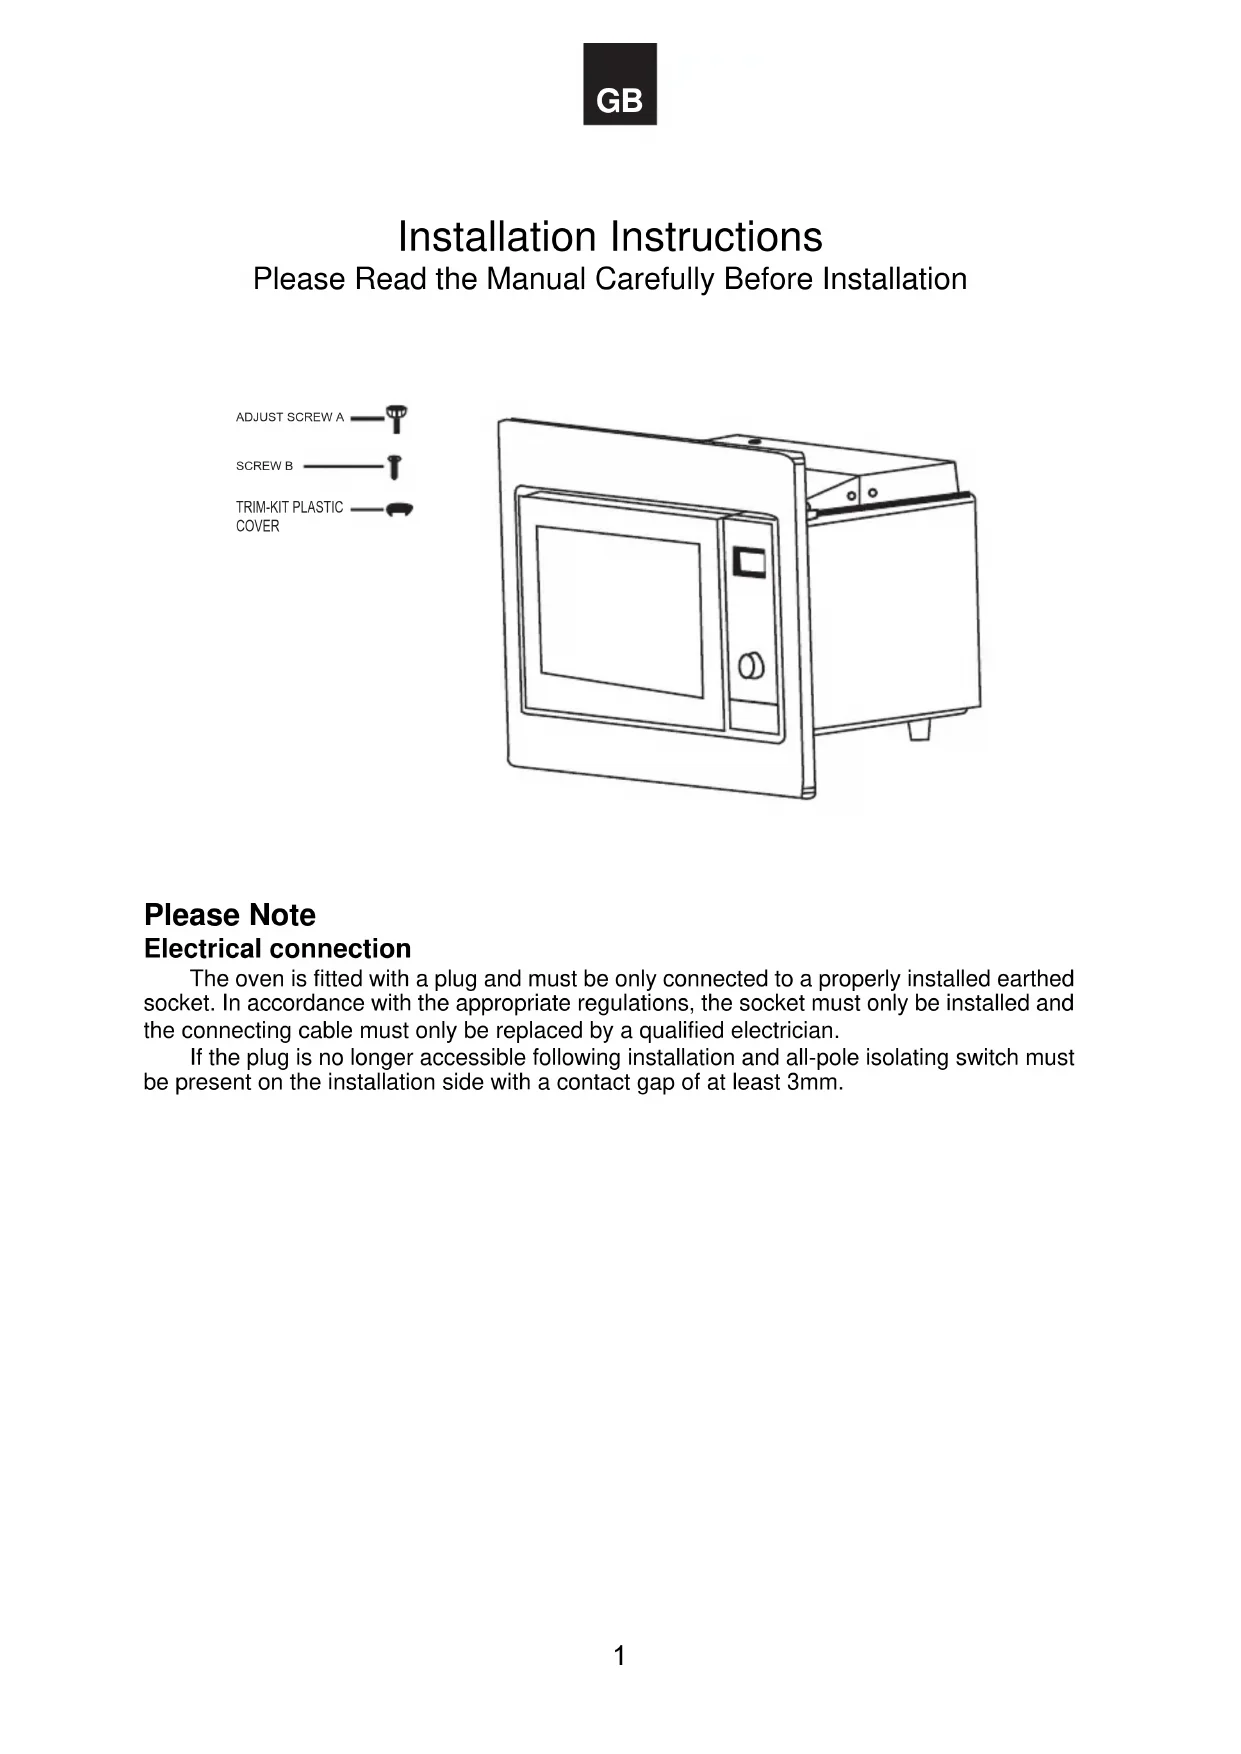
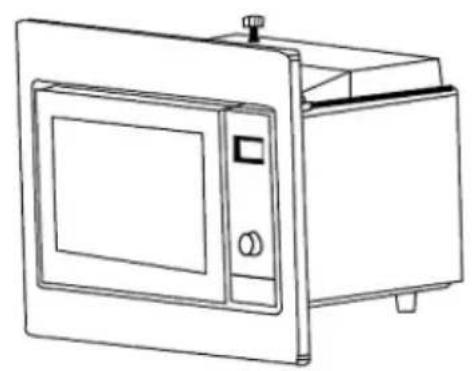
Fix ADJSUTSCREW A on the UPPER AIR TUNNEL of the oven, and then install the oven into the cabinet.
-
Adjust the height of ADJUST SCREW A to keep 1mm gap between the ADJUST SCREW A and the top plane of cabinet.
- Do not trap or kink the power cord.
- Make sure that the oven is installed in the center of the cabinet.
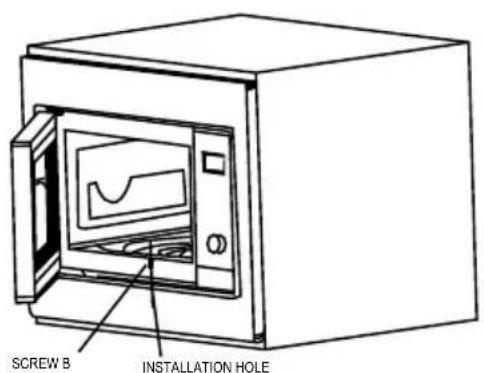
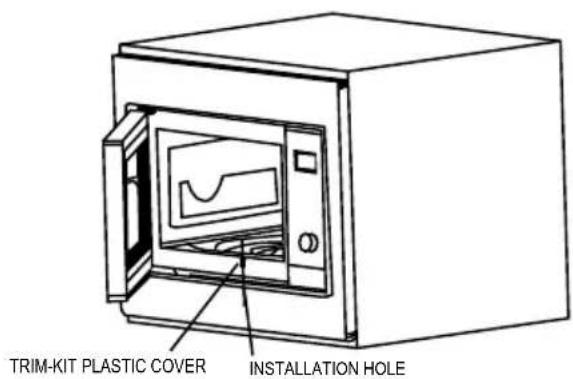
- Open the door; fix the oven to the cabinet with SCREW B at the INSTALLATION HOLE of TRIM KIT. Then fix the TRIM-KIT PLASTIC COVER to the INSTALLATION HOLE.
A. BctpoeHHa yCTaHOBka
He yctHaBnBaIte yCTpoNCTBO TaK, YTO6bI 3aHnaJeNb yCTpoNCTBa OKa3aJIacb BnnotHyIO npixkatoK CTeHe IkaΦa.
MHHMaJIbHaB YbcOta yCTaHOBKn CoCTaJIraeT 85 cm.
Cneinte 3a Tem, yTO6bI BEHTnIaIOHHbIe OTBepCTnI OTBepCTnI NOCTyINHeNBAO3dyxa OCTaBAJIncs CBO6oHbIMN.
1.

2.
B. YctaHObKa neu
- YctaHOBnTe PEYJINPOBOOHbI BnHT AHa BEPXHEI BO3dUHoi KAMEPE 3aTeM yCTaHOBnTe neyb B uKaΦ.
C nOmoIbIO PEYJNPOBOUHO BnHTA A oTperynpyTe BbcOTy TaK, YTo6bl 3a3Op MeKdy PEYJNPOBOUHbIM BNHTOM A n pacnoJoxeHHoB Bblse noIKoN uKaFa coCTaBn1 1 MM.
- Y6eIntecb, yTO ka6eJIb nITaHnA He nepeXaT n He ckpyuH.
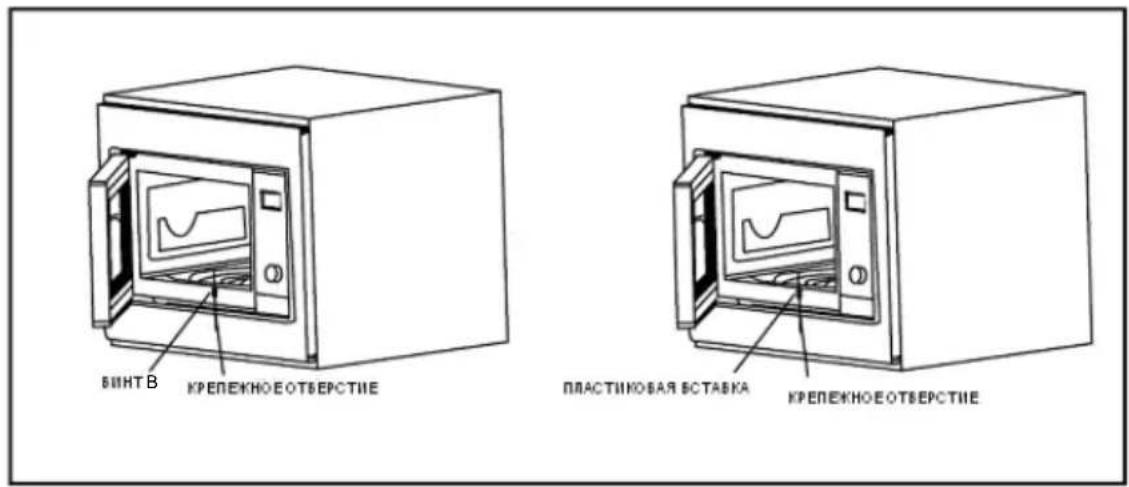
- ⑧Кроче Деру; поруносте BИНТ черз KРЕДЖHOЕ OTBEPCTNE BO BCTABKE и поркpenite New k wkaФу. 3aTeM 3akpenite ПЛACTNKOBYIO BCTABKY в КРЕДЖHOM OTBEPCTN.
PN:16170000A15441


Brand : HOOVER
Model : HMG200X
Category : Microwave Oven