XL6050 - Sewing machine BROTHER - Free user manual and instructions
Find the device manual for free XL6050 BROTHER in PDF.


| Product type | Sewing machine |
| Brand | Brother |
| Model | XL6050 |
| Power supply | 110-120V or 220-240V AC, 50/60 Hz (depending on region) |
| Lamp power | 15-watt bulb |
| Sewing speed | Variable by rheostat foot pedal |
| Available stitches | Straight stitch, zigzag (several widths), blind hem, picot, elastic, reinforced, scallop, decorative, elastic overlock, feather stitch, triple zigzag stitch, automatic 1-step or 4-step buttonhole, button |
| Stitch length | Adjustable from 0 to 4 mm, SS position (fixed 2.5 mm) for stretch stitches |
| Zigzag stitch width | Adjustable from 1.5 mm to 5 mm |
| Threading | Manual upper and lower (bobbin) threading |
| Bobbin | Vertical type, standard capacity |
| Included accessories | Zipper foot, 3 spare bobbins, needle set (3 x size 14), twin needle, buttonhole foot, spool caps (large, small), brush, extra spool pin, screwdriver, thread cutter, darning plate, dust cover |
| Optional accessories | Walking foot (dual feed), spring-loaded quilting foot, 1/4" quilting foot |
| Foot pedal | Model N, with rheostat |
| Dimensions (approx.) | Approximately 40 x 20 x 30 cm (including table) |
| Weight (approx.) | Approximately 8 kg |
| Maintenance | Regular cleaning of the feed dogs and shuttle hook; do not oil the hook |
| Safety | Main switch, unplug before maintenance, do not use extension cords, turn off before changing accessories |
| Use | Household |
Frequently Asked Questions - XL6050 BROTHER
User questions about XL6050 BROTHER
0 question about this device. Answer the ones you know or ask your own.
Ask a new question about this device
Download the instructions for your Sewing machine in PDF format for free! Find your manual XL6050 - BROTHER and take your electronic device back in hand. On this page are published all the documents necessary for the use of your device. XL6050 by BROTHER.
USER MANUAL XL6050 BROTHER
ANSCHLIESSEN AN DAS STROMNETZ
ACHTUNG
"BEWAAR DEZE INSTRUCTIES"
If this machine is fitted with a 3 pin non-rewireable BS plug then please read the following.
IMPORTANT (in the United Kingdom)
Main supply (AC 230/240V\~, 50Hz)
DO NOT cut off the main plug from equipment. If the plug fitted is not suitable for the power point in your home or the cable is too short to reach a power point, then obtain an appropriate safety approved extension lead or consult your dealer.
BE SURE to replace the fuse only with an identical approved type, as originally fitted and to replace the fuse cover.
If none the less the main plug is cut off be sure to remove the fuse and dispose of the plug immediately, to avoid a possible shock hazard by inadvertent connection to the main supply.
IMPORTANT (in the other countries)
If the available socket outlet is not suitable for the plug supplied with this equipment, it should be cut off and an appropriate three pin plug fitted. With alternative plugs an approved fuse must be fitted in the plug.
NOTE: The plug severed from the main leads must be destroyed as a plug with bared flexible cords is hazardous if engaged in a live socket outlet. In the event of replacing the plug fuse, use a fuse approved by ASTA to BS 1362, i.e. carrying the mark, rating as marked on plug.
Always replace the fuse cover. Never use plugs with the fuse cover omitted.
WARNING: DO NOT CONNECT EITHER WIRE TO THE EARTH TERMINAL WHICH IS MARKED WITH THE LETTER 'E', BY THE EARTH SYMBOL OR COLOURED GREEN OR YELLOW.
The wires in this main lead are coloured in accordance with the following code:
Blue Neutral
Brown Live
As the colours of the wiring in the main lead of this appliance may not correspond with the coloured markings identifying the terminals in your plug, proceed as follows:
The wire which is coloured blue must be connected to the terminal which is marked with the letter 'N' or coloured black or blue.
The wire which is coloured brown must be connected to the terminal which is marked with the letter 'L' or coloured red or brown.
Connecting Plugs and Main Power / Sewing Light Switch
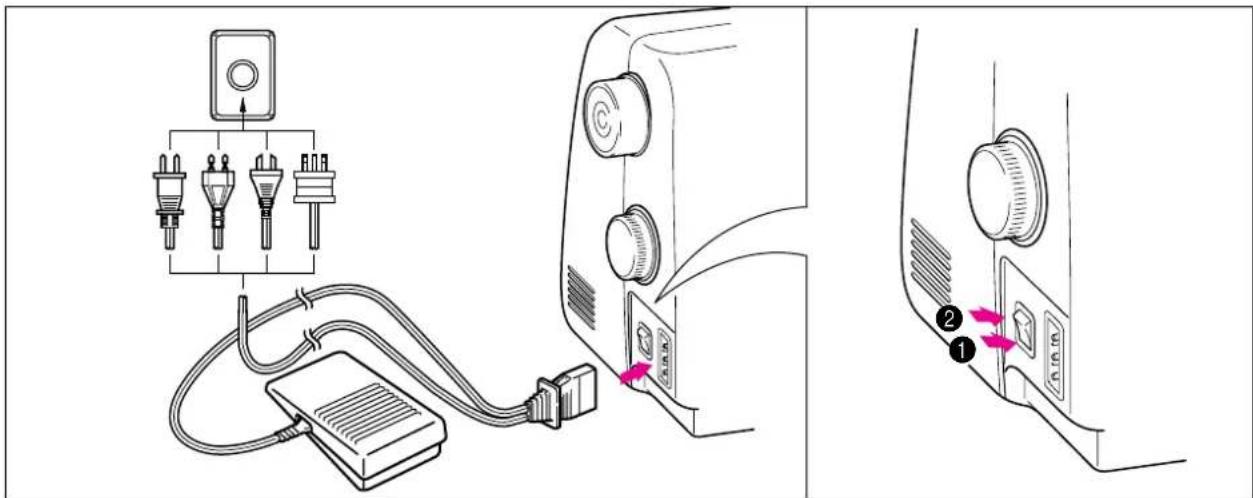
- Connect the three-prong plug into the machine.
- Connect the electrical supply plug into a wall outlet.
- When leaving the machine unattended, the main switch of the machine should be switched off or the plug must be removed from the socket outlet.
Turn on or off the switch for the main power and sew-light.
①Turn on
②Turn off
- When servicing the machine, or when removing covers or changing bulbs, the machine or the electrical set must unplugged.
HEFTEN UND APPLIZIEREN
Patchwork (Assemblage) 52
KNOOPSGATEN EN KNOPEN
Een knoopsgat maken
TOEBEHOREN EN APPLICATIONS
natural_image
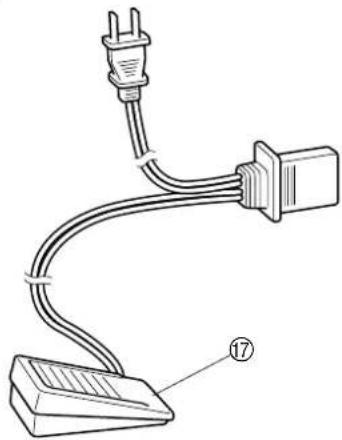
Line drawing of a cable with a plug and connector, labeled with number 17 (no text or symbols on the diagram itself)HAUPTBESTANDTEILE
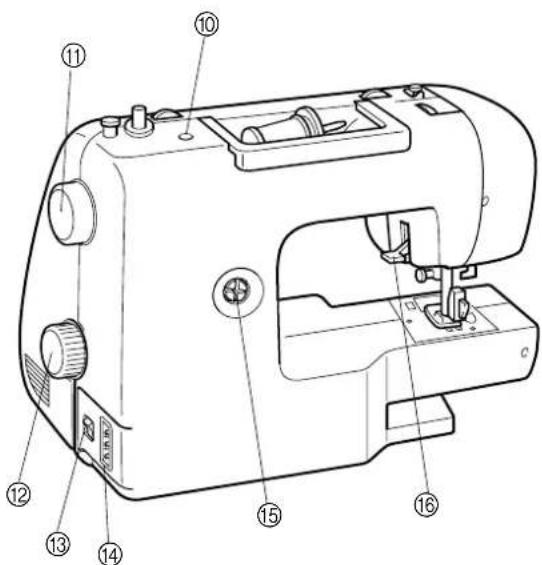
①SPULER (Seite 28)
⑰VOETPEDAAL (Pagina 8)
(XL-6060, XL-6061, XL-6062, XL-6063, XL-6050, XL-6051, XL-6052, XL-6053)
X59369-251
(XL-6040, XL-6041, XL-6042, XL-6043)
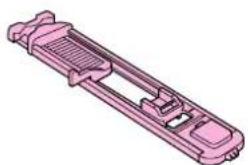
natural_image
3D rendered image of a pink mechanical component with no visible text or symbols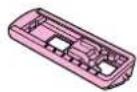
⑥130012-054 ⑦130013-054
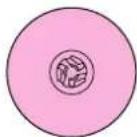

⑧X59476-051 ⑨130920-051
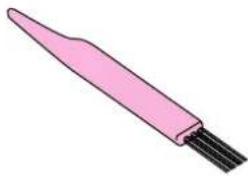
natural_image
Illustration of a pink pen-like tool with black bands (no text or symbols)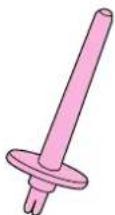
⑩X55467-051 ⑪X54243-001

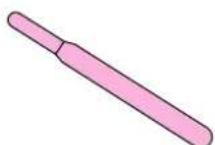
⑬X53984-054⑫XA3442-151
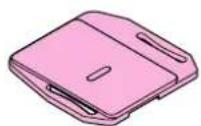
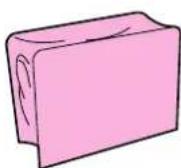
①SA107
XA8319-002
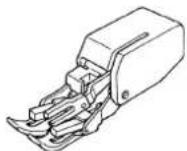
②SA129
X81021-002
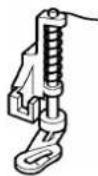
③SA125
X80980-002
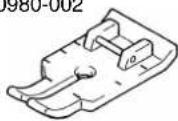
ZUBEHÖR
XL-6060, XL-6061, XL-6062, XL-6063, XL-6050, XL-6051, XL-6052,
XL-6053, XL-6040, XL-6041, XL-6042, XL-6043.
Fußanlasser
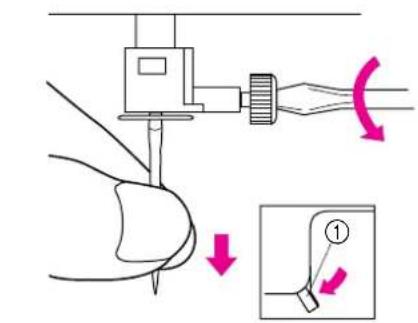
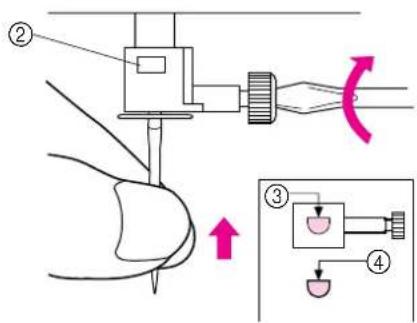
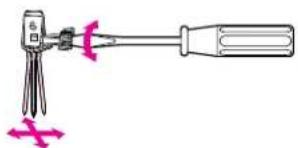
natural_image
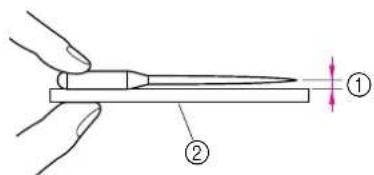
Diagram of a screwdriver tool with a drill bit and pink motion arrows indicating movement (no text or symbols)Nadel prüfen
natural_image
Two-step illustration of a sewing machine needle being adjusted, showing the process from base to top (no text or symbols)Nähfuß wechseln
VORSICHT
natural_image
Diagram of a sewing machine's base panel with a pink fabric cover, showing no text or symbolsPlateau
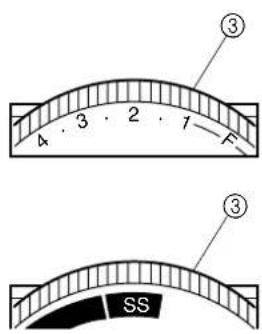
VERSCHIEDENE REGLER
Stichmuster-Einstellrad
VORSICHT
(Modell XL-6060, XL-6061, XL-6062, XL-6063, XL-6050, XL-6051, XL-6052, XL-6053)
NOTIZEN:
(Model XL-6060, XL-6061, XL-6062, XL-6063, XL-6050, XL-6051, XL-6052, XL-6053)
OPMERKING:
(Model XL-6050, XL-6051, XL-6052, XL-6053)
| PATROON STEEK | INGESTELDEBREEDTEIN HANDLEIDING [mm (inch)] | AANBEVOLEN PAGINA INLENGTE [mm (inch)] HANDLEIDING | |
| AUTOMATISCH KNOOPSGAT 5 F-1,5IN 1 STAPPEN (3/16) (1/64-1/16) | 56 | ||
| RECHTE STEEK(Links) (1/16-3/16) | — | 1-4 | |
| RECHTE STEEK(Midden) (1/16-3/16) | — | 1-4 | |
| ZIGZAGSTEEK | 1,5 F-4(1/16) (1/64-3/16) | ||
| ZIGZAGSTEEK | 3,5 F-4(1/8) (1/64-3/16) | ||
| ZIGZAGSTEEK | 5 F-4(3/16) (1/64-3/16) | ||
| BLINDE ZOOMSTEEK | 3 F-2(1/8) (1/64-1/16) | ||
| SCHELP-RIJGSTEEK | 5 F-3(3/16) (1/64-1/8) | ||
| ELASTISCHE STEEK | 5 F-2,5(3/16) (1/64-3/32) | ||
| BLINDZOOM STRETCHSTEEK | 4 F-1,5(3/16) (1/64-1/16) | ||
| SCHELPSTEEK | 5 F-1,5(3/16) (1/64-1/16) | ||
| DOBBELE ACTIESTEEKRIMPELSTEEK 49VERBINDINGSSTEEK | 5 F-3(3/16) (1/64-1/8) | ||
| DRIEVOUDIGE STRETCHSTEEK(Links) 2,5 (3/32) | — | SS Vast | |
| DRIEVOUDIGE STRETCHSTEEK(Midden) 2,5 (3/32) | — | SS Vast | |
| DRIEVOUDIGE 1,5ZIGZAGSTEEK | (1/16) | SS Vast2,5 (3/32) | |
| DRIEVOUDIGE 3,5ZIGZAGSTEEK | (1/8) | SS Vast2,5 (3/32) | |
| DRIEVOUDIGEZIGZAGSTEEK | 5(3/16) | SS Vast2,5 (3/32) | |
| ELASTISCHE OVERLOCK | 3(1/8) | SS Vast2,5 (3/32) | |
| ELASTISCHE OVERLOCK | 5(3/16) | SS Vast2,5 (3/32) | |
| TAKSTEEK | 5(3/16) | SS Vast2,5 (3/32) | |
| KAMSTEEK | 4(3/16) | SS Vast2,5 (3/32) | |
| DECORATIEVE STEEK | 5(3/16) | SS Vast2,5 (3/32) | |
| FAGOTSTEEK | 5(3/16) | SS Vast2,5 (3/32) | |
| DECORATIEVE STEEK | 5(3/16) | SS Vast2,5 (3/32) | |
| DECORATIEVE ZOOMSTEEK | 5(3/16) | SS Vast2,5 (3/32) | |
AANBEVOLEN STEEKLENGTEN
(Model XL-6040, XL-6041, XL-6042, XL-6043)
| PATROON STEEK | INGESTELDEBREEDTEIN HANDLEIDING [mm (inch)] | AANBEVOLEN PAGIN LENGTHE [mm (inch)] HANDLEIDING | NA IN | |
| AUTOMATISCH KNOOPSGAT 5 F-1,5IN 4 STAPPEN (3/16) (1/64-1/16) | 58 | |||
| RECHTE STEEK(Links) (1/16-3/16) | — | 1-4 | 42, 66, 67 | |
| RECHTE STEEK(Midden) (1/16-3/16) | — | 1-4 | 42, 66, 67 | |
| ZIGZAGSTEEK | 1,5 F-4(1/16) (1/64-3/16) | 45, 64, 68, 70 | ||
| ZIGZAGSTEEK | 3,5 F-4(1/8) (1/64-3/16) | 45, 64, 68, 70 | ||
| ZIGZAGSTEEK | 5 F-4(3/16) (1/64-3/16) | 45, 64, 68, 70 | ||
| BLINDE ZOOMSTEEK | 3 F-2(1/8) (1/64-1/16) | 46 | ||
| SCHELP-RIJGSTEEK | 5 F-3(3/16) (1/64-1/8) | 47 | ||
| ELASTISCHE STEEK | 5 F-2,5(3/16) (1/64-3/32) | 48 | ||
| DRIEVOUDIGE STRETCHSTEEK(Links) 2,5 (3/32) | — | SS Vast | 42 | |
| DRIEVOUDIGE STRETCHSTEEK(Midden) 2,5 (3/32) | — | SS Vast | 42 | |
| DRIEVOUDIGE 1,5ZIGZAGSTEEK | (1/16) | SS Vast2,5 (3/32) | 54 | |
| DRIEVOUDIGE 3,5ZIGZAGSTEEK | (1/8) | SS Vast2,5 (3/32) | 54 | |
| DRIEVOUDIGEZIGZAGSTEEK | 5(3/16) | SS Vast2,5 (3/32) | 54 | |
| SCHUINE OVERLOCK | 3(1/8) | SS Vast2,5 (3/32) | 53 | |
| ELASTISCHE OVERLOCK | 5(3/16) | SS Vast2,5 (3/32) | 53 | |
| TAKSTEEK | 5(3/16) | SS Vast2,5 (3/32) | 54 | |
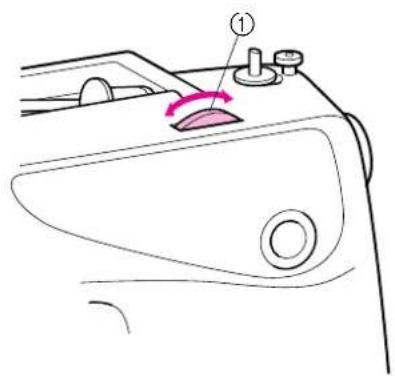
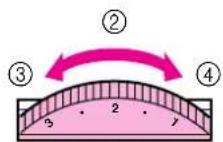
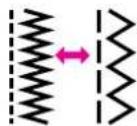
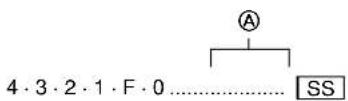
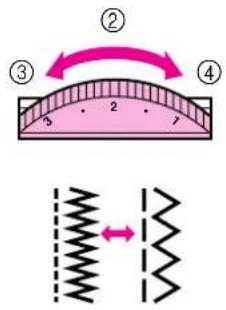
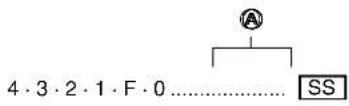
natural_image
Line drawing of a hand operating a sewing machine with a pink tool on the handle (no text or symbols)Umbau auf Freiarm
natural_image
Line drawing of a sewing machine's internal components with no text or symbolsENFILAGE DE LA MACHINE
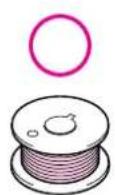
①
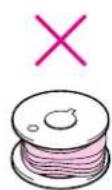
②
②
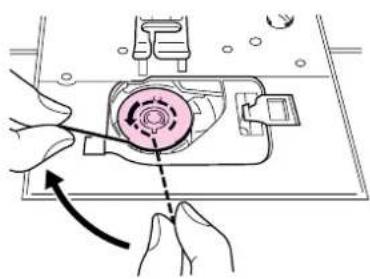
natural_image
Diagram of hands operating a device with a circular component and directional arrow (no text or symbols)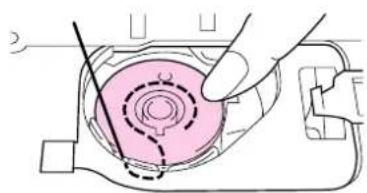
natural_image
Diagram of a mechanical component with a highlighted circular area and tool, no text or symbols present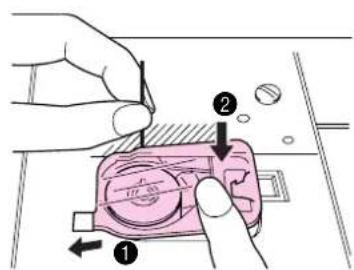
Unterfadenführung
▲ VORSICHT
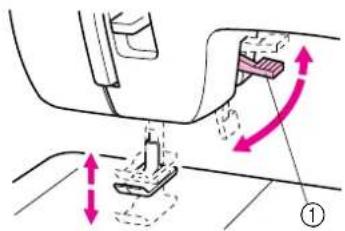
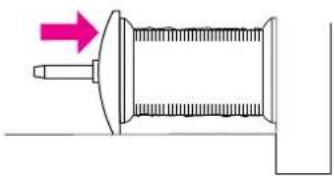
natural_image
Pure mechanical diagram showing a shaft and housing with a pink arrow indicating direction (no text or symbols)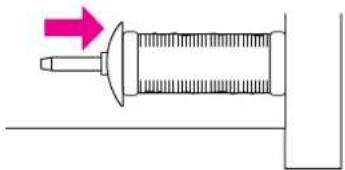
natural_image
Pure mechanical diagram showing a shaft and nut assembly with a pink arrow indicating direction (no text or symbols)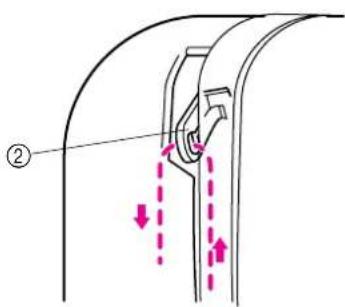
natural_image
Technical line drawing of a sewing machine needle and base (no text or symbols)Oberfadenführung
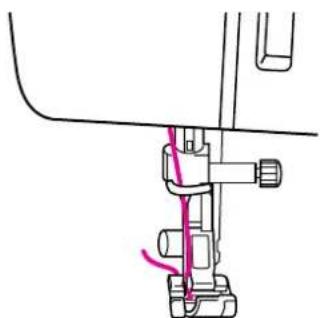
natural_image
Line drawing of a sewing machine with hands operating the base (no text or symbols)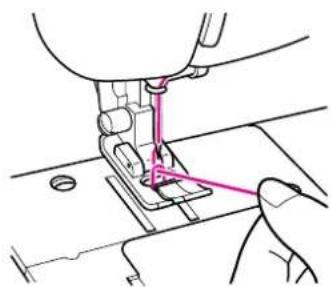
natural_image
Line drawing of a sewing machine needle stitching fabric (no text or symbols)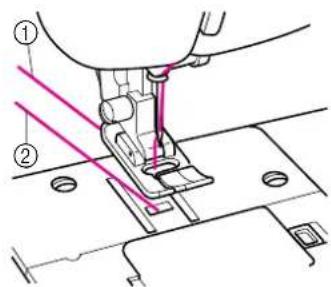
natural_image
Diagram of a cylindrical mechanical component with internal dashed lines and dimension arrows (no text or symbols)B
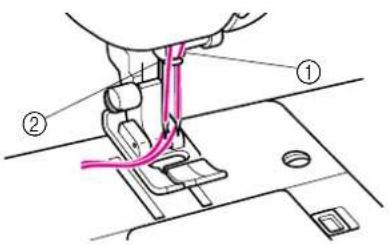
MISE EN PLACE DE L'AIGUILLE JUMELEE
B
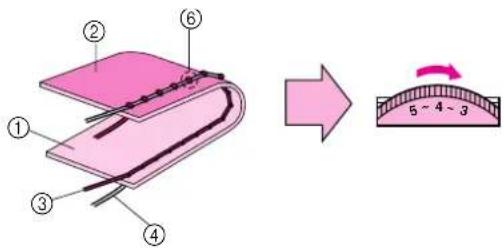
C
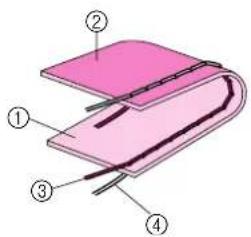
Tension des fils
natural_image
Line drawing of a sewing machine needle and foot (no text or symbols)Point droit
natural_image
Technical line drawing of a sewing machine needle and foot (no text or symbols)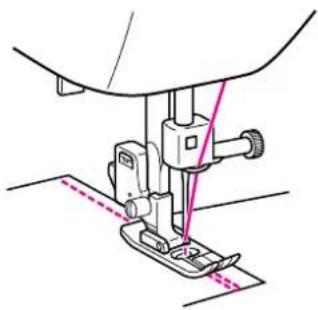
natural_image
Line drawing of a sewing machine needle and foot (no text or symbols)POUR MODIFIER LE SENS DE LA COUTURE
POUR RETIRER LE TISSU DE LA MACHINE
- Arrêter la machine.
natural_image
Line drawing of a sewing machine needle stitching on a pair of hands (no text or symbols)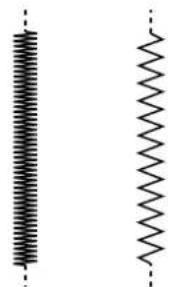
natural_image
Two vertical spring symbols with dashed lines indicating measurement or alignment (no text or labels)Zickzackstich
natural_image
Line drawing of a sewing machine needle stitching on a hand (no text or symbols)Blindsaumstich
natural_image
Line drawing of a sewing machine needle stitching fabric (no text or symbols)Point picot
natural_image
Pure geometric L-shape diagram with no text, numbers, or symbolsB
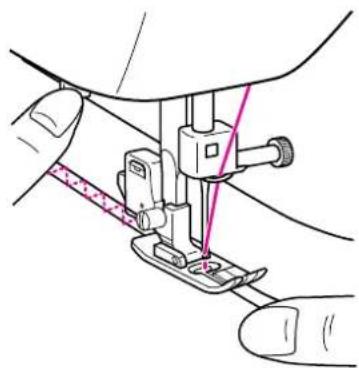
natural_image
Line drawing of a sewing machine needle stitching on a hand (no text or symbols)C
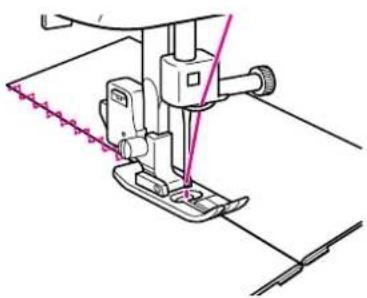
natural_image
Line drawing of a sewing machine needle stitching a thread (no text or symbols)Point élastique
STOF AAN ELKAAR NAAIEN
flowchart
graph TD
    A["Step 1: Folded structure"] --> B["Step 2: Stabilized assembly"]
    B --> C["Step 3: Stabilized assembly with wavy lines"]
    C --> D["Step 4: Stabilized assembly with zigzag lines"]
    D --> E["Final grid pattern"]
Point renforcé
natural_image
Line drawing of a sewing machine needle stitching fabric, with a pink wavy line indicating fabric stroke (no text or symbols)Feston
natural_image
Two-step illustration of a sewing machine needle stitching on fabric, showing thread and stitching details (no text or symbols)Points décoratifs
Patchwork (Assemblage)
natural_image
Line drawing of a sewing machine needle and base (no text or symbols)B
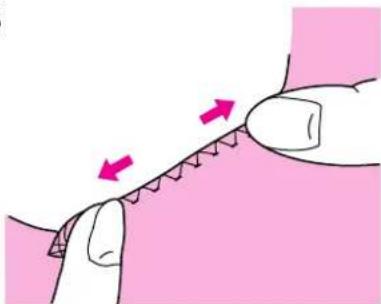
natural_image
Illustration of a hand pressing down on a pink fabric with serrated edge (no text or symbols)C
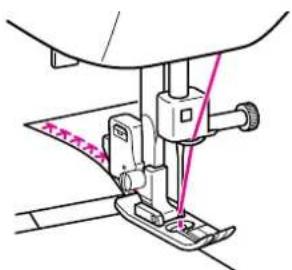
natural_image
Line drawing of a sewing machine needle and foot (no text or symbols)Overlock élastique
natural_image
Simple line drawing of scissors cutting a curved blade with pink zigzag pattern (no text or symbols)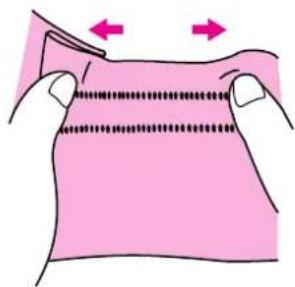
natural_image
Illustration of hands holding a pink fabric with dotted lines indicating seam allowance (no text or symbols)Point plume
B
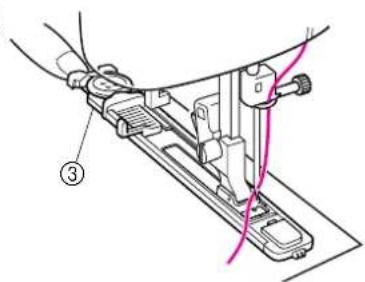
natural_image
Technical line drawing of a sewing machine needle and base (no text or symbols)C
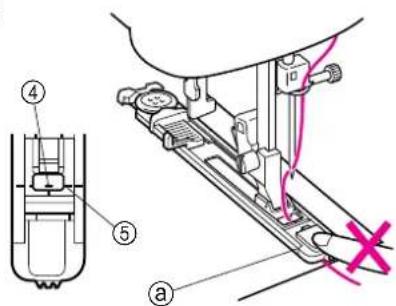
D
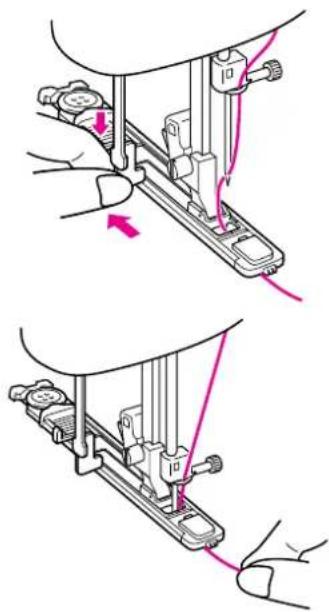
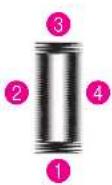
(Modell XL-6060, XL-6061, XL-6062, XL-6063, XL-6050, XL-6051, XL-6052, XL-6053)
(Model XL-6060, XL-6061, XL-6062, XL-6063, XL-6050, XL-6051, XL-6052, XL-6053)
natural_image
Illustration of a hand holding a pen with a pink clip, no text or symbols present(Modèle XL-6060, XL-6061, XL-6062, XL-6063, XL-6050, XL-6051, XL-6052, XL-6053, XL-6040, XL-6041, XL6042, XL-6043)
COMMENT ARRETER LA COUTURE ET OUVRIR LA BOU- TONNIERE
B
natural_image
Illustration of a sewing machine needle stitching a pair of fabric strips, with no text or symbols present.
natural_image
Illustration of two hands holding a pink background with a dashed pink line crossing through the center (no text or symbols)natural_image
Diagram showing hands inserting a device into a device with arrows indicating direction (no text or symbols)B
natural_image
Line drawing of a sewing machine needle stitching a grid-patterned surface (no text or symbols)Stopfen
natural_image
Illustration of a sewing machine needle stitching a pink fabric (no text or symbols)
natural_image
Pink tulip-shaped graphic with dotted outline (no text or symbols)Applizieren
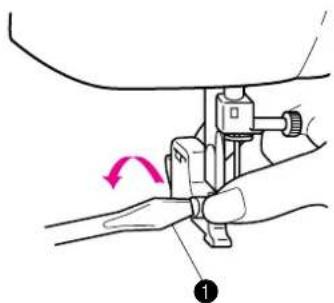
natural_image
Diagram of a sewing machine needle insertion mechanism, showing angle and measurement (no text or symbols)B
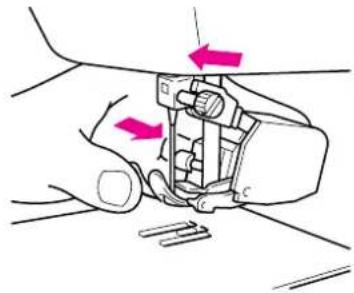
natural_image
Illustration of a hand holding a mechanical device with directional arrows indicating motion (no text or symbols)C
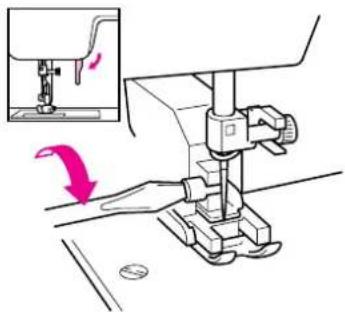
natural_image
Diagram of a sewing machine needle stitching, showing base and workpiece movement (no text or symbols)OPTIONALES ZUBEHÖR
B
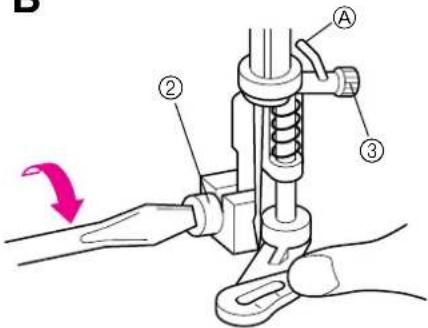
C
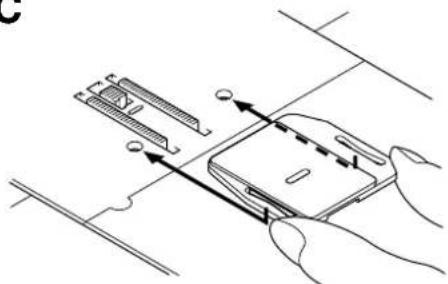
natural_image
Diagram of hands holding a smartphone with directional arrows indicating movement or force (no text or symbols present)D
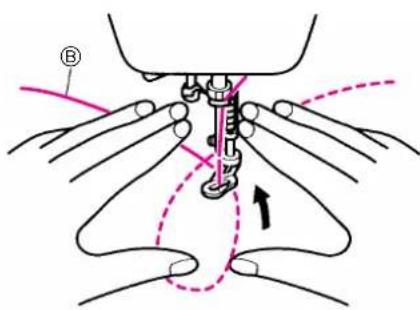
OPTIONALES ZUBEHÖR
flowchart
graph TD
    A["Rectangular Component"] --> B["Downward Arrow"]
    B --> C["Vertical Component with Dashed Line"]
    style A fill:#f9f,stroke:#333
    style C fill:#bbf,stroke:#333
C

OPTIONALES ZUBEHÖR
natural_image
Simple line drawing of a mechanical device with a screw and directional arrows indicating motion (no text or symbols)B
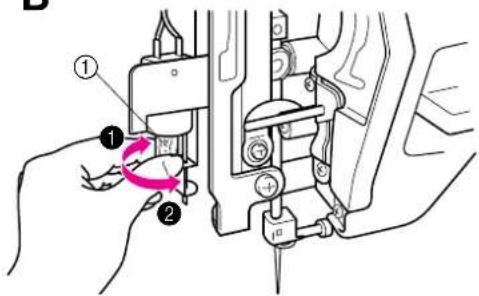
C
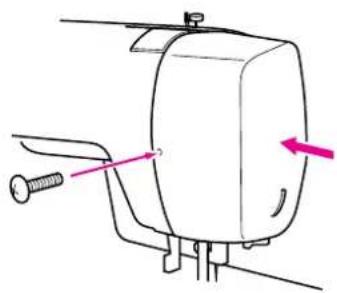
natural_image
Technical line drawing of a mechanical device with no visible text or symbolsnatural_image
Line drawing of a sewing machine needle stitching a person's arm, with no text or symbols present.B
C
natural_image
Illustration of a sewing machine needle stitching an electronic component (no text or symbols visible)D
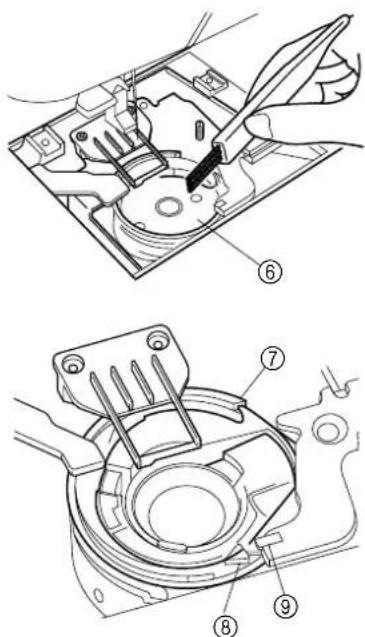
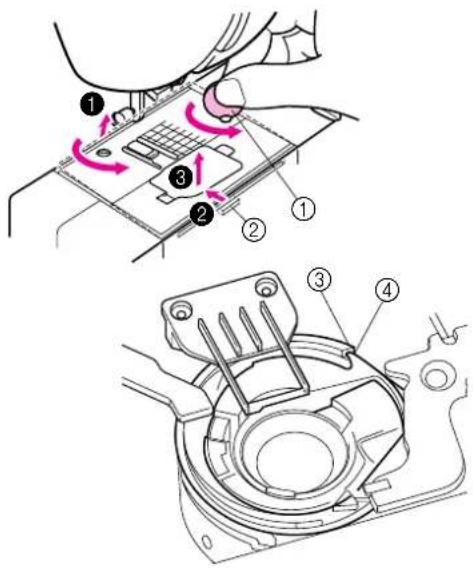
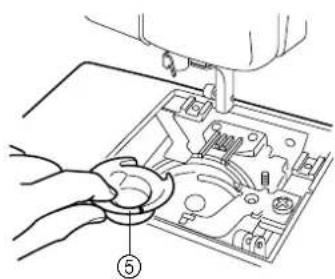
Reinigung

VORSICHT
natural_image
Line drawing of a sewing machine with a rectangular base and a separate block nearby (no text or symbols)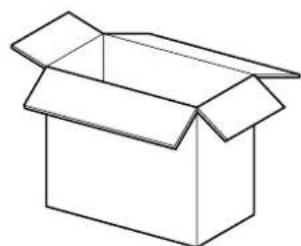
natural_image
Simple line drawing of an open cardboard box (no text or symbols)Maschine verpacken
Patchwork (Assemblage) 52
Pied quilting 1/4" 4,76
- ANSCHLIESSEN AN DAS STROMNETZ
- ACHTUNG
- "BEWAAR DEZE INSTRUCTIES"
- IMPORTANT (in the United Kingdom)
- IMPORTANT (in the other countries)
- WARNING: DO NOT CONNECT EITHER WIRE TO THE EARTH TERMINAL WHICH IS MARKED WITH THE LETTER 'E', BY THE EARTH SYMBOL OR COLOURED GREEN OR YELLOW.
- Connecting Plugs and Main Power / Sewing Light Switch
- HEFTEN UND APPLIZIEREN
- KNOOPSGATEN EN KNOPEN
- TOEBEHOREN EN APPLICATIONS
- HAUPTBESTANDTEILE
- ZUBEHÖR
- Fußanlasser
- Nadel prüfen
- Nähfuß wechseln
- VORSICHT
- Plateau
- VERSCHIEDENE REGLER
- Stichmuster-Einstellrad
- NOTIZEN:
- OPMERKING:
- AANBEVOLEN STEEKLENGTEN
- Umbau auf Freiarm
- ENFILAGE DE LA MACHINE
- Unterfadenführung
- ▲ VORSICHT
- Oberfadenführung
- MISE EN PLACE DE L'AIGUILLE JUMELEE
- Tension des fils
- POUR MODIFIER LE SENS DE LA COUTURE
- POUR RETIRER LE TISSU DE LA MACHINE
- Zickzackstich
- Blindsaumstich
- Point picot
- Point élastique
- STOF AAN ELKAAR NAAIEN
- Point renforcé
- Feston
- Patchwork (Assemblage)
- Overlock élastique
- Point plume
- COMMENT ARRETER LA COUTURE ET OUVRIR LA BOU- TONNIERE
- Stopfen
- Applizieren
- OPTIONALES ZUBEHÖR
- Reinigung
- Maschine verpacken
Brand : BROTHER
Model : XL6050
Category : Sewing machine