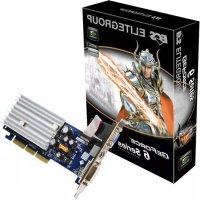
GeForce 6200 - Graphic card ECS - Free user manual and instructions
Find the device manual for free GeForce 6200 ECS in PDF.


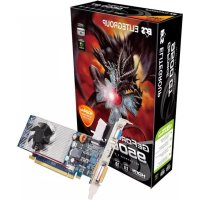
| Product Type | Graphics card |
| Brand | ECS (Elitegroup Computer Systems) |
| Model | GeForce 6200 |
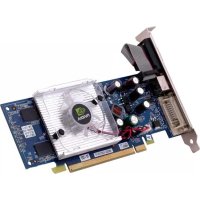
| Interface | AGP or PCI Express (depending on version) |
| Graphics Processor | NVIDIA GeForce 6200 |
| Video Memory | 128 MB or 256 MB (depending on model) |
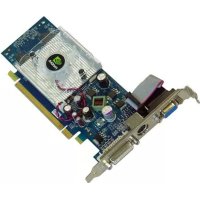
| Video Outputs | VGA, DVI, S-Video (depending on model) |
| Dimensions | Approximately 170 x 100 x 20 mm |
| Weight | Approximately 200 g |
| Required Power Supply | 300 W power supply recommended, additional power connector possible |
| Minimum System Requirements | 800 MHz processor, 128 MB RAM, 100 MB hard disk space, CD-ROM drive |
| Supported Operating Systems | Windows 2000/XP/2003/VISTA |
| Main Features | nView multi-display support, SLI technology, color correction, temperature monitoring, desktop management, screen rotation |
| Care and Cleaning | Clean with a soft, dry cloth. Handle with care to avoid static electricity. Do not use liquid or abrasive products. |
| Safety | Disconnect power before installation. Discharge static electricity. Do not plug/unplug while powered on. Use the correct slot (AGP or PCIe). |
| Spare Parts and Repairability | No user-serviceable parts. If problems occur, contact technical support. |
| General Information | ECS GeForce 6200 series graphics card. User manual available in PDF format. |
Frequently Asked Questions - GeForce 6200 ECS
User questions about GeForce 6200 ECS
0 question about this device. Answer the ones you know or ask your own.
Ask a new question about this device
Download the instructions for your Graphic card in PDF format for free! Find your manual GeForce 6200 - ECS and take your electronic device back in hand. On this page are published all the documents necessary for the use of your device. GeForce 6200 by ECS.
USER MANUAL GeForce 6200 ECS
©2005 Elitegroup Computer Systems Co., Ltd. All rights Reserved.
No part in this manual may be reproduced in any form by any organization and individual without written consent of Elitegroup Computer Systems Co., Ltd. (ECS).
Trademark Recognition
All the trademarks, signals and logos used in this manual are the properties of Elitegroup Computer Systems Co., Ltd. The trademarks and logos are authorized by ECS to use publicly. All other company and product names used in this manual are the properties of the respective companies and products.
NVIDIA and “NVIDIA” marks presented on the related products are trademarks and/or registered trademarks of NVIDIA Corporation
Disclaimer
The information in this document is subject to change without notice.
Federal Communications Commission (FCC)
This equipment has been tested and found to comply with the limits for a Class B digital device, pursuant to Part 15 of the FCC Rules. These limits are designed to provide reasonable protection against harmful interference in a residential installation. This equipment generates, uses, and can radiate radio frequency energy and, if not installed and used in accordance with the instructions, may cause harmful interference to radio communications. However, there is no guarantee that interference will not occur in a particular installation. If this equipment does cause harmful interference to radio or television reception, which can be determined by turning the equipment off and on, the user is encouraged to try to correct the interference by one or more of the following measures:
- Reorient or relocate the receiving antenna
- Increase the separation between the equipment and the receiver
- Connect the equipment onto an outlet on a circuit different from that to which the receiver is connected
- Consult the dealer or an experienced radio/TV technician for help
Shielded interconnect cables and a shielded AC power cable must be employed with this equipment to ensure compliance with the pertinent RF emission limits governing this device. Changes or modifications not expressly approved by the system's manufacturer could void the user's authority to operate the equipment.
Preface
1. Introducing the Product ....1
System Requirements....1
2. Hardware Installation.... 2
2.1. Package Contents....2
2.2. Hardware Installation....2
3. Software Installation....3
3.1. Install Motherboard Drive Utility....3
3.2. Install DirectX....4
3.3. Install the Video Card Driver....5
3.3.1. Uninstall the Old Drivers....5
3.3.2. Install the Video Card Driver . 6
3.3.3. Update the Video Card Driver Program....9
4. Software Setup....11
4.1. Adjust the Screen Resolution and Color Quality......11
4.2. Adjust the Monitor Refresh Rate.... 11
4.3. Information on Video Card....12
4.4. Screen Adjustment....12
4.5. nView Display Settings.... 13
4.6. Display Mode Timing.... 13
4.7. Performance and Quality Settings....14
4.8.Color Correction....14
4.9. Overlay Controls ...... 15
4.10. Tools....15
4.11.NVRotate....16
4.12. Temperature Settings....16
4.13. Screen Resolution and Refresh Rate....17
4.14. Desktop Management....17
4.15. Screen Menu Editing....18
4.16.SLI Multi-GPU....18
Multi-Language Translation
1. Introducing the Product
Thank you for choosing this ECS VGA card. We are pleased that you have selected one of the best-engineered VGA cards with enhanced functions available today. We recommend that you read through this User's manual before installing your video card to ensure that the installation process goes smoothly.
System Requirements
• 800 MHz processor or higher
- At least 128 MB system memory
• AGP or PCI Express slot
• CD-ROM or DVD-ROM drive
• Microsoft Windows 2000/XP/2003/VISTA
- At least 100 MB free HD drive space
2. Hardware Installation
2.1. Package Contents
- VGA Card with NVIDIA Graphics Engine
- Software and Driver CD
- Quick Installation Guide
- Cable Adapter

The model name and illustrations used in this User's Manual are for reference only, and may be slightly different from your card.
2.2. Hardware Installation
- Shut down your PC and unplug the system power connector.
- Take the case cover off. If there is any homogeneous device, please remove them (To avoid damage from static electricity, make sure that you have discharge the static electricity before installation).
- Take the VGA card out from the static-proof bag and install it on the motherboard carefully (Some cards have an additional power cable; if your card has one, make sure that the cable is connected with the power supply, or the card may not work properly!).
- Put on the case cover and connect the monitor cable to the rear Video output port of the VGA card.
- Reboot your PC.

- Please do not Plug and Play the VGA card cable while you computer is still running, or you may damage the VGA card components easily.
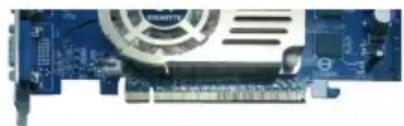
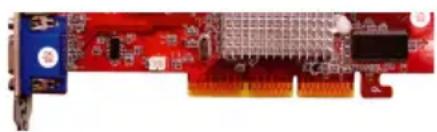
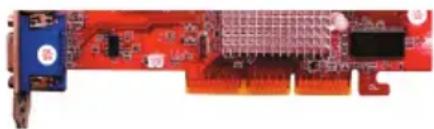
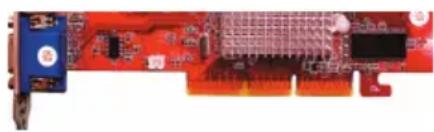
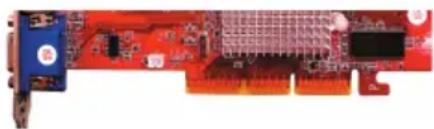
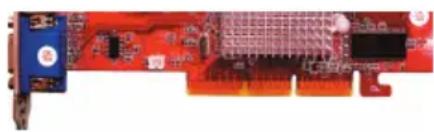
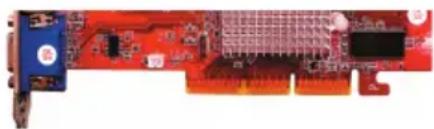
- Ensure you insert the VGA card in the correct slot. PCI-Express cards differ from AGP cards (Please refer to the pictures below!). Make sure that you locate the correct slot or you could cause damage to your PC.
natural_image
Close-up of a blue computer motherboard with a central fan and heatsink (no visible text or symbols)PCI Express
natural_image
Close-up of a red computer motherboard with visible components and connectors (no text or symbols)AGP
- Motherboard could possibly come with two PCI-Express slots, please refer to your motherboard manual for the correct slot location for use with a single card system.
3. Software Installation
Insert the Software and Driver CD into your CD-ROM, the ECS VGA INSTALLER program will run automatically (If your system does not come up this program, please run the Install CD.exe in the sub-menu).
3.1. Install Motherboard Drive Utility
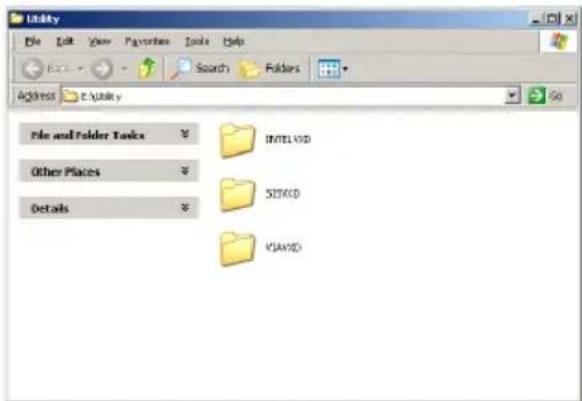
Motherboard drive utility should be installed first if you are not using Intel chipset.
Step 1:
Select
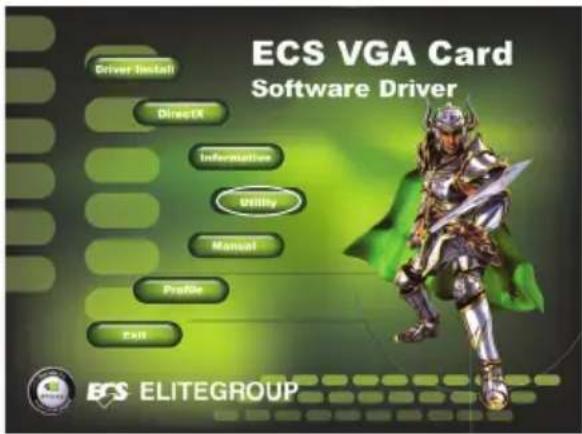
Step 2:
In the following window, select the correct chipset category of your motherboard and then install the driver.
3.2. Install DirectX
DirectX maximizes your VGA cards' performance, stability and security. You can skip this step if your operation system is Windows XP SP2 or above.
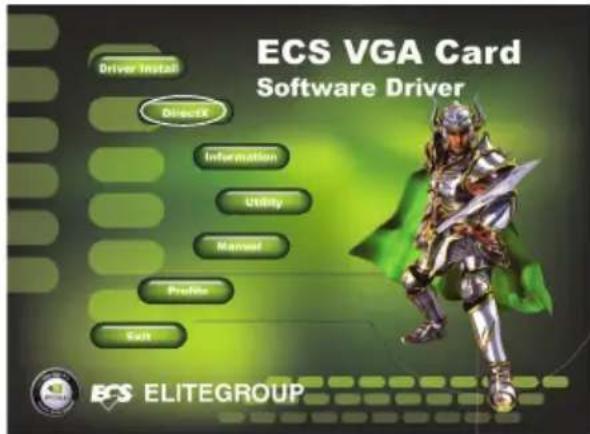
Step 1:
Select < DirectX> in the Main Menu.
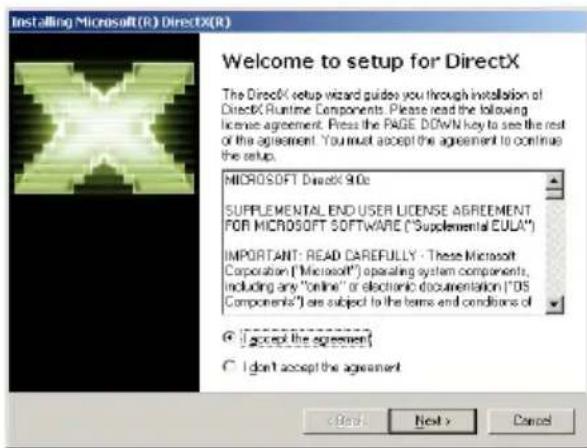
Step 2:
Install DirectX step by step according to the instructions on the screen.
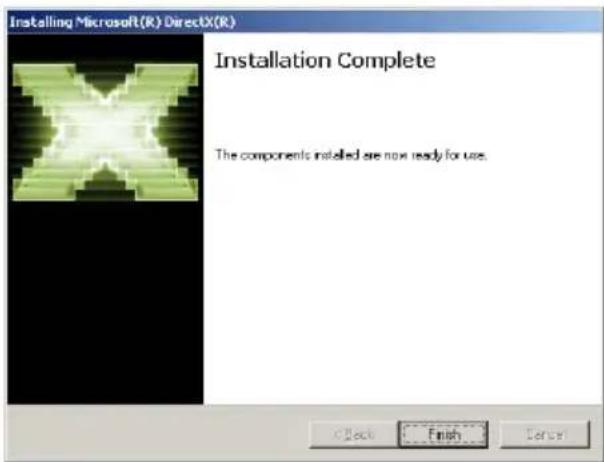
Step 3:
Restart your computer when the installation is completed.
3.3 Install VGA Card Driver
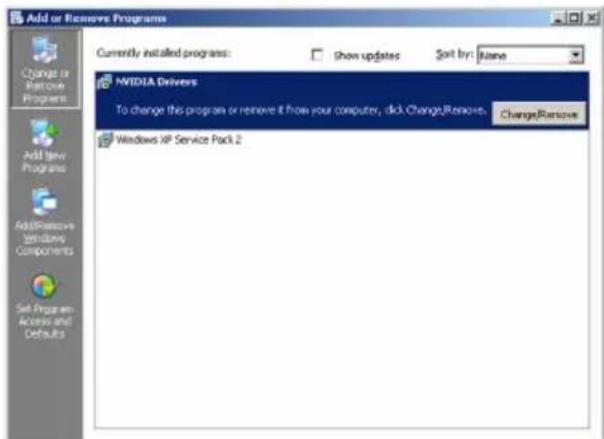
3.3.1. Uninstall the Old Drivers
If you have drivers installed on your system already, remove these drivers before installing the new one.
Step 1:
Select Add/Remove Programs in Control Panel window.
Step 2:
Select
3.3.2. Install the VGA Card Driver
You may install the VGA card driver through either of the following two approaches.
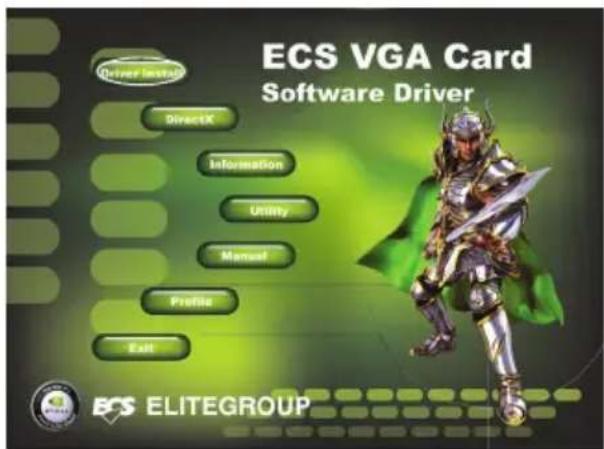
Approach 1: Auto-Installation of ECS VGA INSTALLER Program.
Step 1:
Select
Step 2:
The Installation Program runs automatically
Step 3:
Install the Driver following the instructions on the screen.
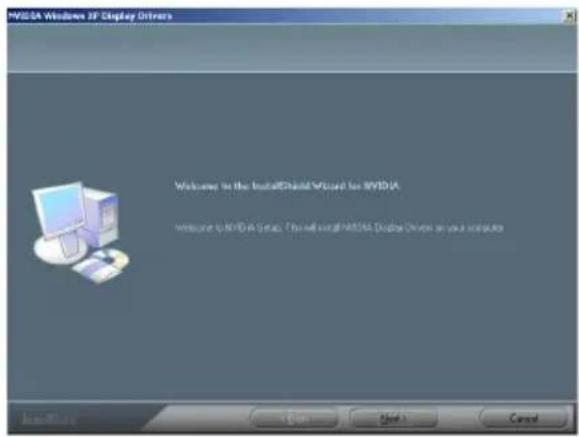
Step 4:
Click
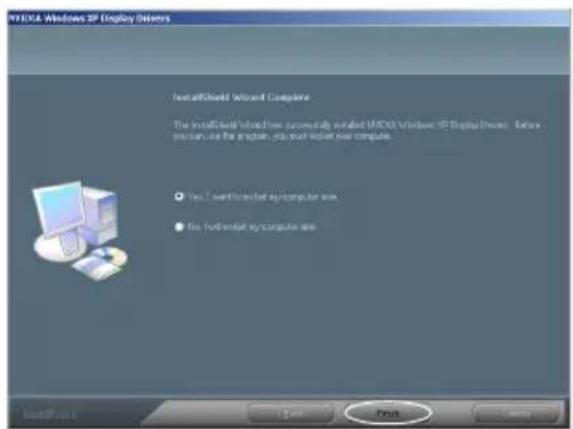
Approach 2: System Finds New Hardware Device
Start the computer after you finish the installation. The Found New Hardware window will appear. Insert the installation CD that came with your graphics card package into your CD-ROM. Now you can also select
Step 1:
Select
![Found New Hardware Wizard This wizard helps you install software for: Video Controller (MGA Compatible) If your hardware come with an installation CD or floppy disk, insert it now. What do you want the wizard to do? Install the software automatically [Recommended] Install from a list or specific location [Advanced] Click Next to continue. < Back Next > Cancel](/content/2026/02/368530/images/beb3c8a7874211cc2891de7aef46ca2f87bdc3a3538edd91afdf46f30ed3f67d.jpg)
Step 2:
The system searches for the Software and Driver CD driver program and install automatically. (Please make sure the driver disk is in your CD-ROM)
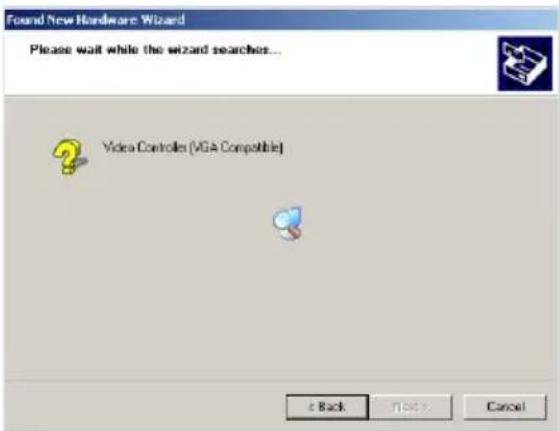
Step 3:
Finish the installation and restart your computer.
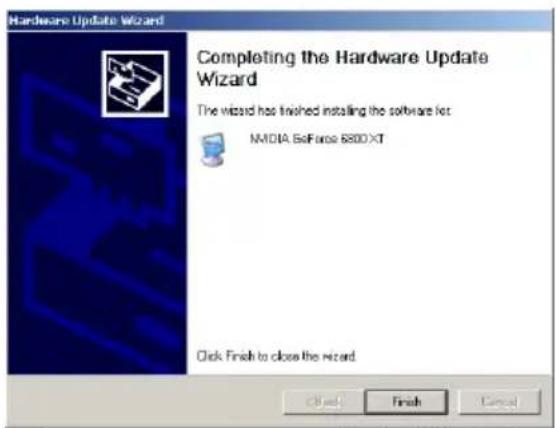
3.3.3. Update the VGA Card Driver Program
ECS Website (www.ecs.com.tw) will update Video Driver Program in time. Please log on the site and download the latest program to maximize the system performance. You can update the program through the following two approaches.
Approach 1: Download the updating program and install directly.
Download and execute the updating program. For the details you can refer to the installation of VGA card driver program.
Approach 2: Update the drive program manually.
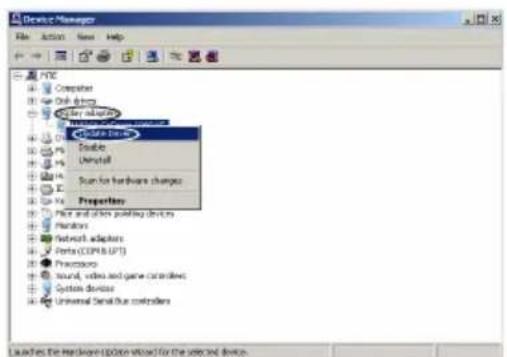
Step 1:
Select System in Control Panel, and select Hardware tab and click < Device Manager> in the new window
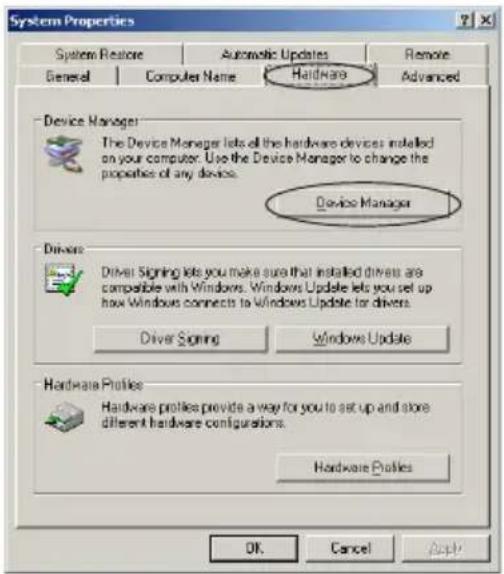
Step 2:
Double-click
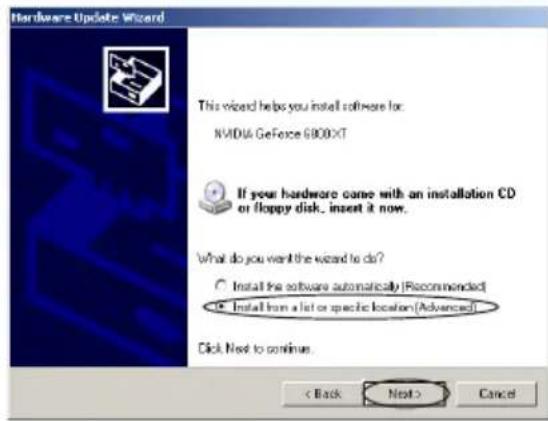
Step 3:
In
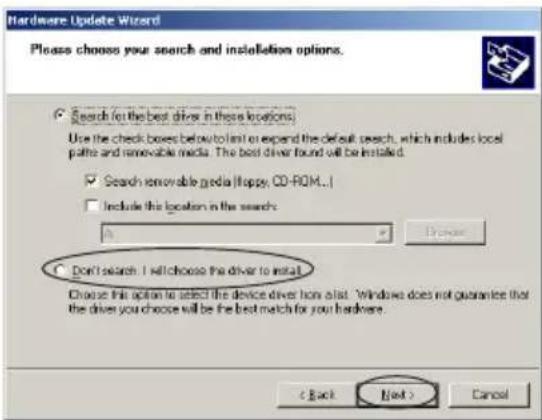
Step 4:
Select the option
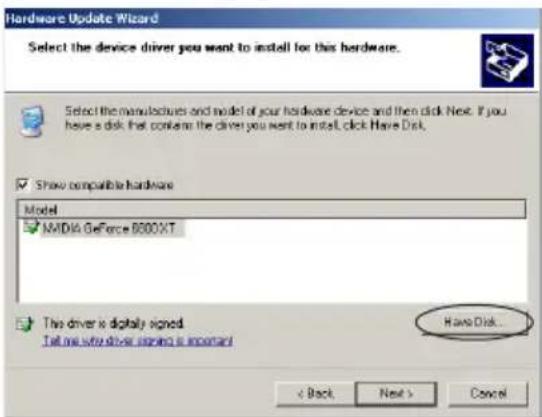
Step 5:
In
4. Software Setup
After you have installed the driver and any additional features, you may want to configure the display settings.

Not all the functions described below are supported by your card. VGA card functions differ by the Graphics Engines!
4.1 Adjust the Screen Resolution and Color Quality
Step 1:
Right-click your mouse anywhere on an empty space on your Windows desktop and select
Step 2:
Select the Settings tab, and now you can set the desired screen resolution by using your mouse to move the slider to either increase the resolution (move the slider left towards less). You can also change the color quality by clicking on the Colors pull-down menu. It is recommended that you set this at highest setting possible (Picture 1).
4.2 Adjust the Monitor Refresh Rate
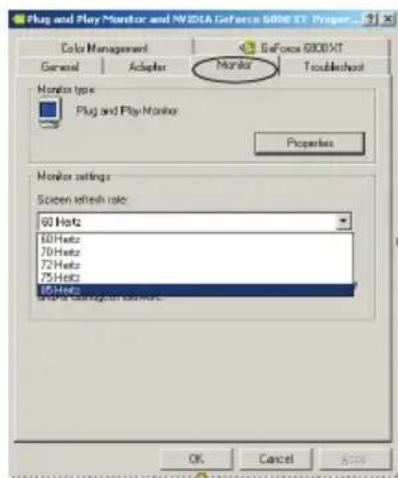
Click the Advanced button in the Display Properties window, select the Monitor tab, and you can now choose the refresh rate form the Refresh Frequency pull-down menu (Picture 2).
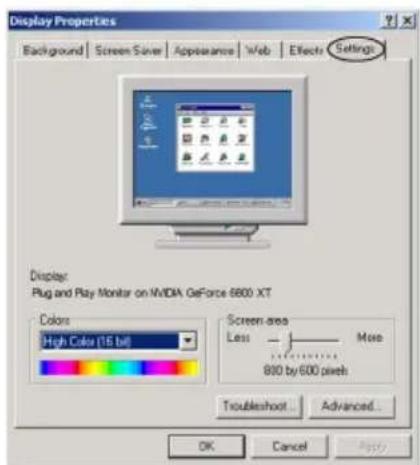
Picture 1
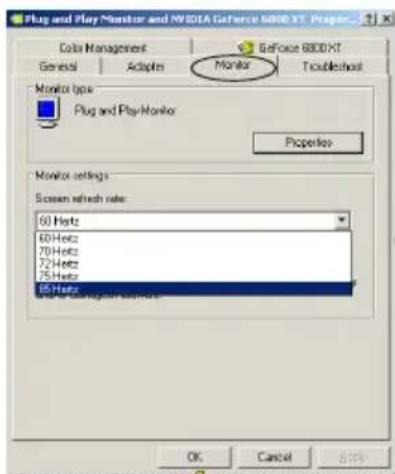
Picture 2
4.3 Information on VGA Card
The item
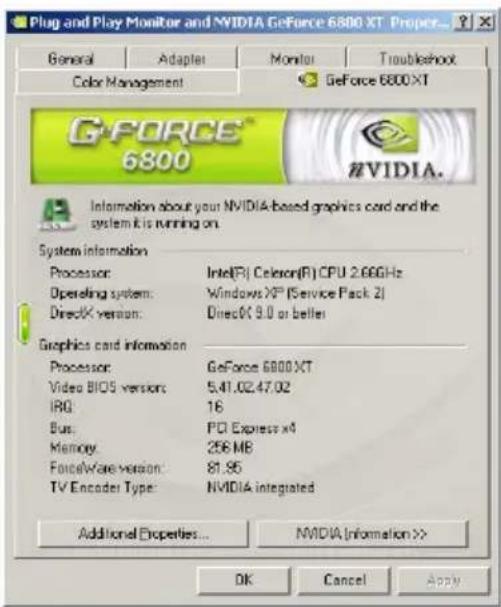
4.4. Screen Adjustment
Click the arrow icon on the image on the desktop can adjust the location of the screen.
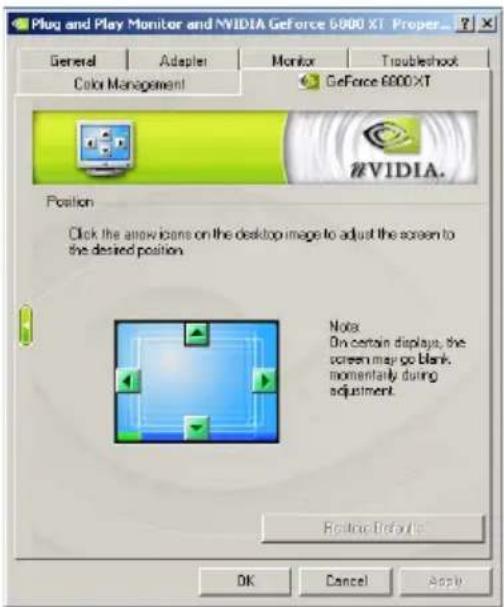
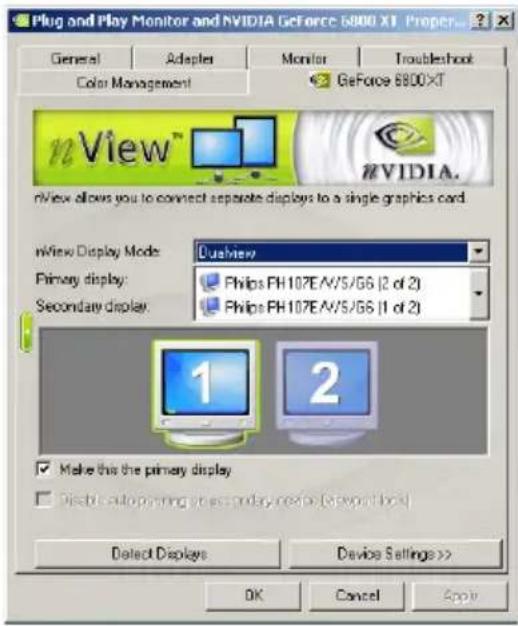
4.5. nView Display Settings
The nView display mode allows you to connect the VGA card to two display devices (including digital display and TV). nView includes five modes: Single-Monitor, Duplication, Horizontal Span, Vertical Span, or Simultaneous Display.
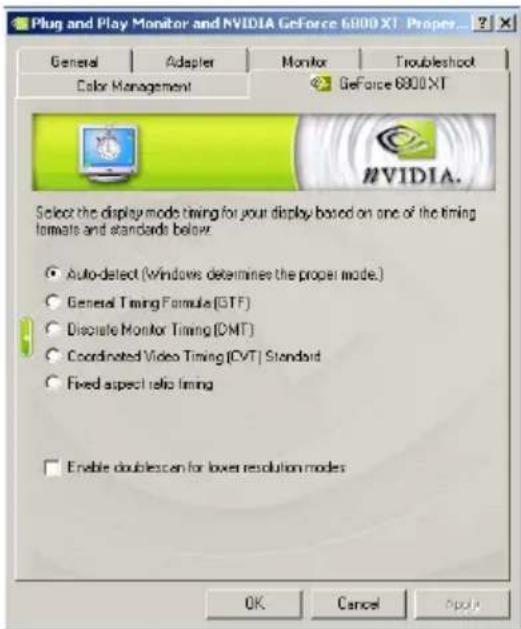
4.6. Display Mode Timing
This item allows you to set the display mode timing for the monitor.
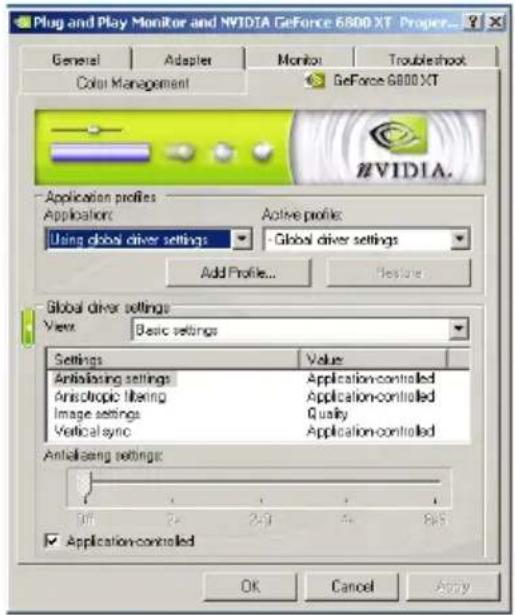
4.7. Performance and Quality Settings
The performance and quality function allows you to create custom profiles depending on different software needs. The NVIDIA Utility comes loaded with a large selection of profiles for popular games. All profiles can be customized with the available options.
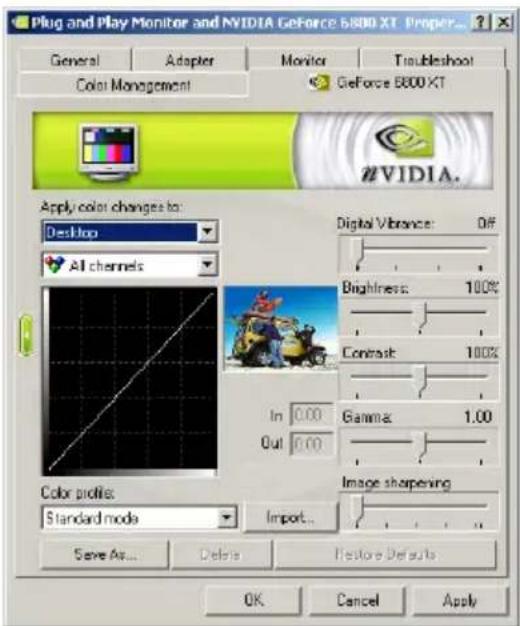
4.8. Color Correction
You can change a number of color related options in the color correction tab. Profiles can also be altered, saved and imported for different needs. The five default settings of your card are Digital Vibrance, Brightness, Contrast, Gamma and Image Sharpening.
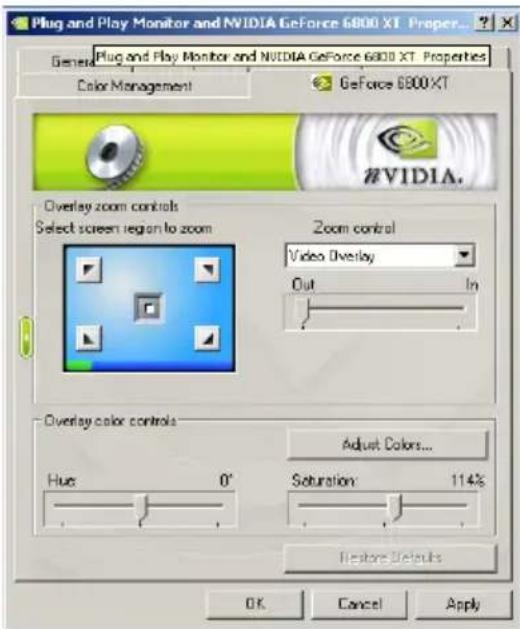
4.9. Video Overlay Settings
The Video Overlay Settings function is used to adjust the way video looks on your display when playback software is using hardware overlay.
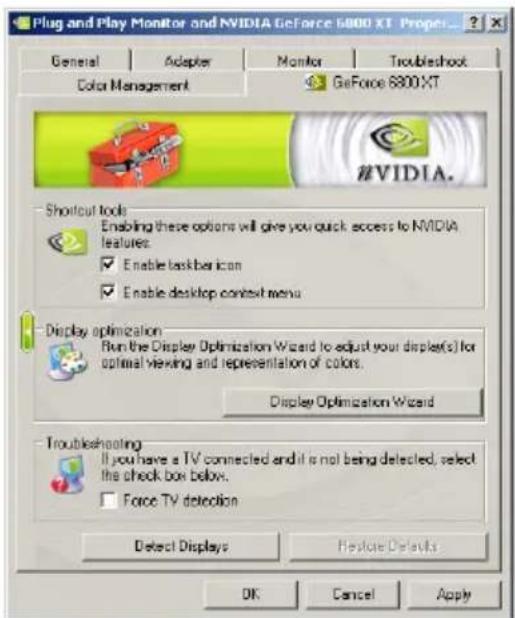
4.10. Tools
This item enables you to detect connected TV devices and reset default settings.
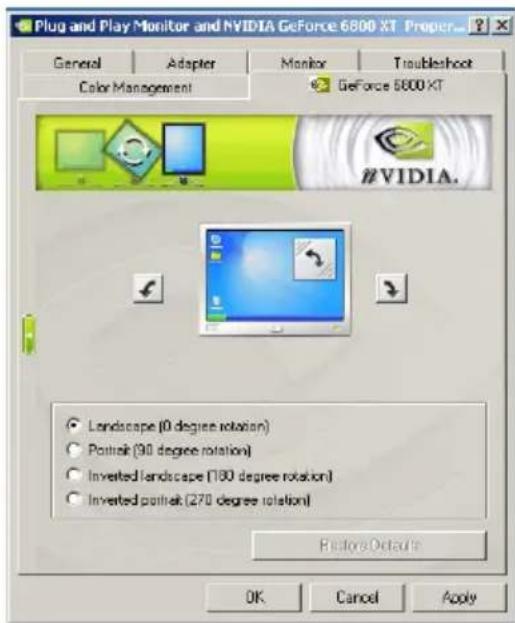
4.11. NVRotate
The NVRotate function allows you to rotate your display area. This is useful for monitors that can be used in both landscape and portrait modes. Select between modes using the arrow keys
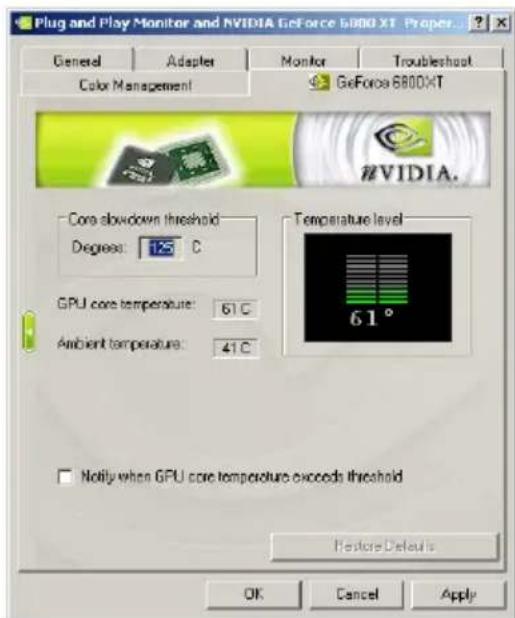
4.12. Temperature Settings
The Temperature Settings function shows the temperature of your graphics card and has an alarm function in case your card is in danger of overheating.
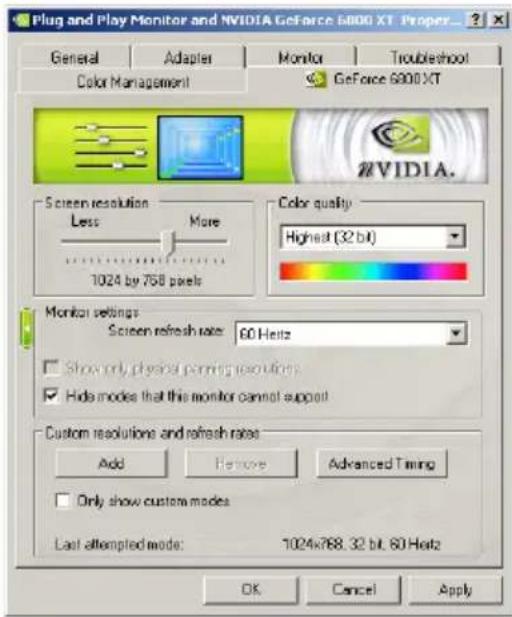
4.13. Screen Resolutions and Refresh Rates
This item allows you to quickly adjust resolution, color quality and screen refresh rate of your monitor.
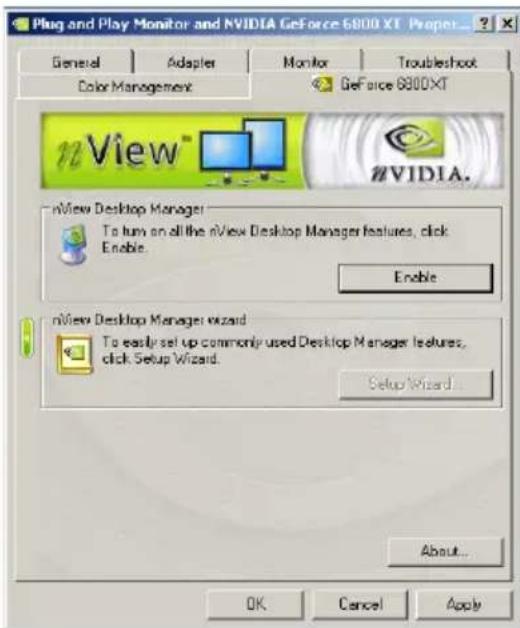
4.14. Desktop Management
The Desktop Management function is an easy-to-use function allowing you to fine tune many display settings.
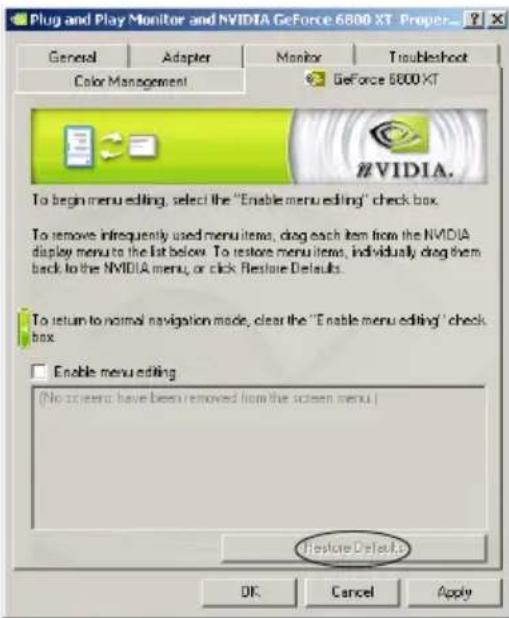
4.15. Screen Menu Editing
This function allows user to define tools tab. To delete the menu items not used frequently, you can pull them down from NVIDIA monitor menu to the below list. To recover, pull them back to the menu one by one, or click
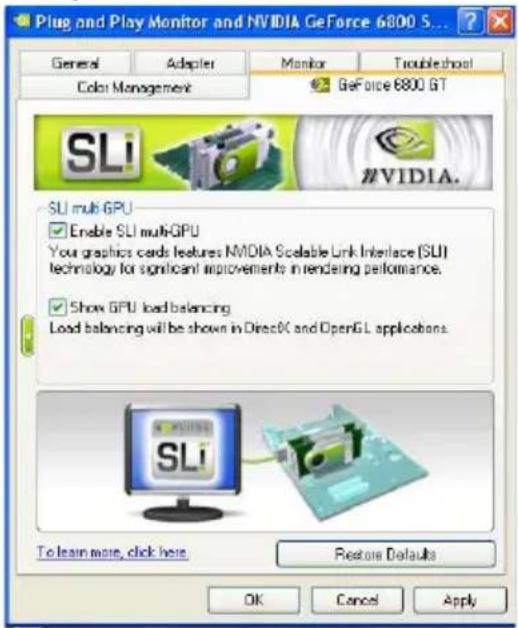
4.16.SLI Multi-GPU
SLI (Scalable Link Interface) technology can improve the rendering performance dramatically.
natural_image
Close-up of a blue computer motherboard with a fan and heatsink (no visible text or symbols)PCI Express
natural_image
Close-up of a red computer motherboard with visible components and connectors (no text or symbols)AGP
Etape 2 :
3.2. Installer DirectX
Etape 2 :
Etape 3 :
Etape 2 :
Etape 4 :
Etape 2 :
Etape 3 :
Etape 2 :
Etape 3 :
Etape 4 :
Etape 5 :
Figure 1
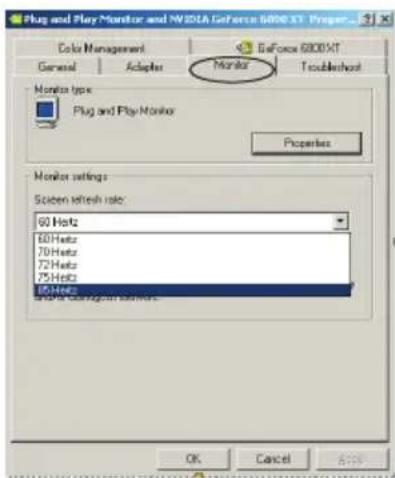
Figure 2
4.10. Outils
4.11. NVRotate
4.16.SLI Multi-GPU

natural_image
Close-up of a blue computer motherboard with a central fan and heatsink (no visible text or symbols)PCI Express
natural_image
Close-up of a red computer motherboard with visible components and connectors (no text or symbols)AGP
Schritt 2:
Schritt 2:
Schritt 3:
3.3 Installation des VGA-Kartentreibers
Schritt 2:
Schritt 4:
Schritt 2:
Schritt 3:
Schritt 2:
Schritt 3:
Schritt 4:
Schritt 5:
Abbildung 1
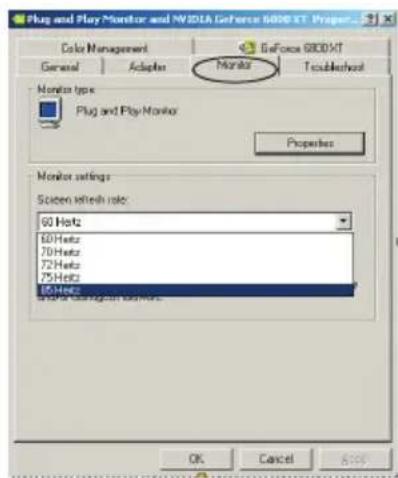
Abbildung 2
4.8. Farbkorrektur
4.10. Werkzeuge
4.11. NVRotate
4.14. Desktop-Management
4.16. SLI Multi-GPU
natural_image
Close-up of a blue computer motherboard with a circular fan and heatsink (no visible text or symbols)PCI Express
natural_image
Close-up of a red computer motherboard with visible components and connectors (no text or symbols)AGP
Paso 2:
3.2.Instalar DirectX
Paso 2:
Paso 3:
3.3 Instalar Driver de la Tarjeta VGA
3.3.1. Desinstalar los Drivers Viejos
Paso 2:
Paso 4:
Paso 2:
Paso 3:
Paso 2:
Paso 3:
Paso 4:
Paso 5:
4. Setup de Software
Gráfica 1
Gráfica 2
4.4. Ajuste de Pantalla
4.10. Herramientas
4.11. NVRotate
4.16. SLI Multi-GPU

natural_image
Close-up of a blue computer motherboard with a central fan and heatsink (no visible text or symbols)PCI Express
natural_image
Close-up of a red computer motherboard with visible slots and connectors (no text or symbols)AGP
Passo 2:
Passo 2:
Passo 3:
Passo 2:
Passo 4:
Passo 2:
Passo 3:
Passo 2:
Passo 3:
Passo 4:
Passo 5:
Figura 1
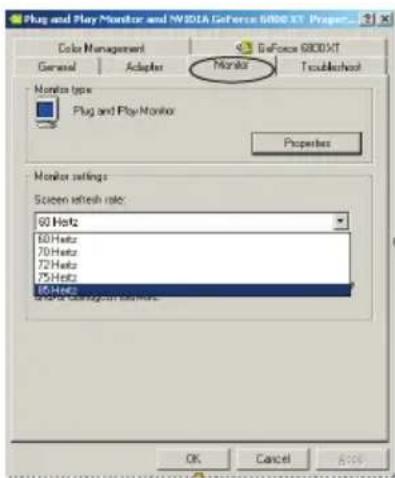
Figura 2
4.4. Ajuste do ecrã
4.10. Ferramentas
4.11. NVRotate
4.16. SLI Multi-GPU
natural_image
Close-up of a blue computer motherboard with a circular fan and card slot (no visible text or symbols)PCI Express
natural_image
Close-up of a red computer motherboard with visible slots and ports (no text or symbols)AGP
War 2:
3.2. Установка DirectX
War 2:
War 3:
War 2:
War 4:
War 2:
War 3:
War 2:
War 3:
War 4:
War 5:
Рисунок 1
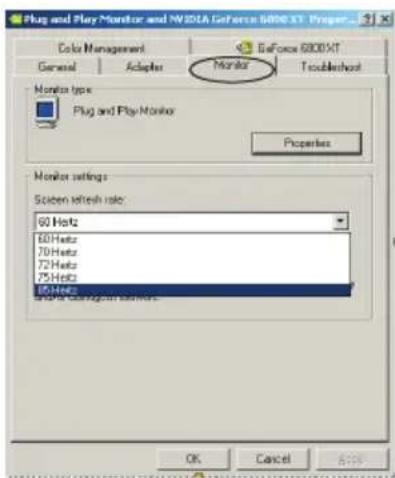
Рисунок 2
4.5. Насмройка nView display
4.10. Инструменты
4.11. NVRotate
4.12. Температура
- Trademark Recognition
- Disclaimer
- Federal Communications Commission (FCC)
- Preface
- Introducing the Product ....1
- Hardware Installation.... 2
- Software Installation....3
- Software Setup....11
- Multi-Language Translation
- Introducing the Product
- System Requirements
- Hardware Installation
- Package Contents
- Hardware Installation
- Software Installation
- Install Motherboard Drive Utility
- Step 1:
- Step 2:
- Install DirectX
- Step 3:
- Install VGA Card Driver
- Uninstall the Old Drivers
- Install the VGA Card Driver
- Step 4:
- Approach 2: System Finds New Hardware Device
- Update the VGA Card Driver Program
- Step 5:
- Software Setup
- Adjust the Screen Resolution and Color Quality
- Adjust the Monitor Refresh Rate
- Information on VGA Card
- Screen Adjustment
- nView Display Settings
- Display Mode Timing
- Performance and Quality Settings
- Color Correction
- Video Overlay Settings
- Tools
- NVRotate
- Temperature Settings
- Screen Resolutions and Refresh Rates
- Desktop Management
- Screen Menu Editing
- 4.16.SLI Multi-GPU
- Etape 2 :
- Installer DirectX
- Etape 3 :
- Etape 4 :
- Etape 5 :
- Outils
- Schritt 2:
- Schritt 3:
- Installation des VGA-Kartentreibers
- Schritt 4:
- Schritt 5:
- Farbkorrektur
- Werkzeuge
- Desktop-Management
- SLI Multi-GPU
- Paso 2:
- 3.2.Instalar DirectX
- Paso 3:
- Instalar Driver de la Tarjeta VGA
- Desinstalar los Drivers Viejos
- Paso 4:
- Paso 5:
- Setup de Software
- Ajuste de Pantalla
- Herramientas
- Passo 2:
- Passo 3:
- Passo 4:
- Passo 5:
- Ajuste do ecrã
- Ferramentas
- War 2:
- Установка DirectX
- War 3:
- War 4:
- War 5:
- Насмройка nView display
- Инструменты
- Температура
Brand : ECS
Model : GeForce 6200
Category : Graphic card