
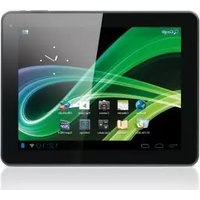
Xenta 7c - Tablet Yarvik - Free user manual and instructions
Find the device manual for free Xenta 7c Yarvik in PDF.

| Brand | Yarvik |
| Model | Xenta 7c |
| Product type | Touchscreen tablet |
| Screen | 7 inches (approx. 17.8 cm) |
| Operating system | Android with Luna interface |
| Wireless connectivity | Wi-Fi 802.11b/g/n |
| Power supply | AC power adapter (Yarvik original recommended) |
| Battery | Integrated rechargeable lithium-ion |
| Approximate dimensions | 190 x 120 x 10 mm |
| Approximate weight | 300 g |
| Main functions | Internet browsing, apps, widgets, media playback, Wi-Fi |
| Maintenance and cleaning | Slightly damp cotton cloth (water only, no cleaner) |
| Safety | Do not disassemble, avoid moisture and shocks, use a grounded adapter |
| Spare parts and repairability | Use only Yarvik accessories; battery replaceable by a qualified technician |
| General information | Compliant with R&TTE, EMC, LVD, and RoHS standards |
Frequently Asked Questions - Xenta 7c Yarvik
User questions about Xenta 7c Yarvik
0 question about this device. Answer the ones you know or ask your own.
Ask a new question about this device
Download the instructions for your Tablet in PDF format for free! Find your manual Xenta 7c - Yarvik and take your electronic device back in hand. On this page are published all the documents necessary for the use of your device. Xenta 7c by Yarvik.
USER MANUAL Xenta 7c Yarvik
natural_image
Black-and-white photo of a foldable tablet device displaying a bird's head and wings, with no visible text or symbols on the device itself.Xenta 7c

Xenta 7c
Start guide
3 Getting on the Internet 18
Internet instellen / Zugriff auf das Internet / Accès à Internet / Cómo acceder a Internet / Aceder à internet / ۲ączenie z Internetem / Připojení k internetu / Pripojenie k internetu / At komme på internettet / Gå ut på Internet / Σύνδεση στο Internet / Collegamento a Internet / Подключение к Интернету / Koble til Internett / Kako se povezati na internet / Підключення до Интернету / كابدخول Enَتَرِنْ Kapcsolódás az Intemetre / Свързване към Интернет / Conectare la Internet / Spajanje na Internet
4 When a Problem Occurs 24
Problemen oplossen / Problembehandlung / Dépannage / Si se produce un problema / Quando ocorre um problema / W razie problemów / Při vzniku problévyskytne problém / Når der opstår et problem / Når ett problem uppstår / ́Отαν Συμβεί Κάποιο Πρόβλημα / Se si verifica un problema / При возникновении / Når det oppstår problemer / Ko se pojavi težava / У разі виникнення проезд حدought مشكلة / Hiba esetén / При проблеми / În cazul în care apare o problemă / Kad se pojavi problem
Soft Reset via Reset Button 26
Soft Reset via Reset Button / Soft Reset über Reset-Taste / Réinitialisation logicielle à l'aide du bouton RESET / Restablecimiento parcial mediante el botón Reset (Restablecer) / Reinicialização parcial através do botão Reiniciar / Ponowne uruchamiai przyciskiem Reset / Částečný reset pomocí tlačítka Vymazat / Mäkký reset pomocou tlačidla Reset / Softwarenulstilling via knappen Reset [Nulstil] / Mjuk återställning via återställningsknapp / Етпавафорá ЛоYGМКОЙМЕСТОУ ПЛНКТРОУ Reset / Soft reset tramite il pulsante Reset / Программный сброс посредством кнопки сброса / Omstart med Reset-knappen / Mehka ponastavitev preko gumba za ponastavitev / Програмне скидання за допомогою кнопки скидання / إ Goalية ضبط البرامج عن طريق زرإعادة الضبط / Szoftveres visszaallitás a Visszaallitás gombbal / Софтуерно нулиране чрез Бутон за нулиране / Resetare funcțională cu ajutorul butonului de resetare / Softverski reset pomoću tipke za resetiranje
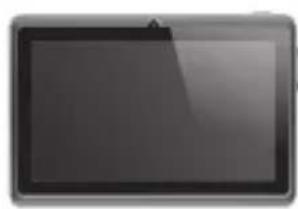
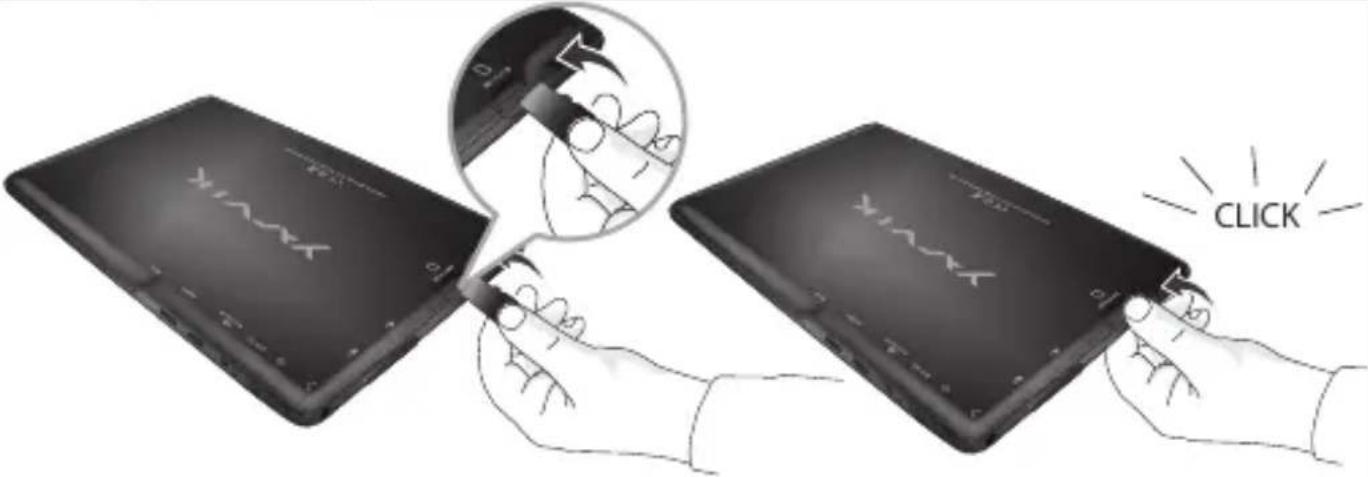
1 Package Content
Inhoud doos / Verpackungsinhalt / Contenu de l'emballage / Contenido de la caja / Conteúdo da embalagem / Zawartość opakowania / Obsah balení / Obsah balenia / Pakkens indhold / Paketets innehåll / Перієхóμενο Συσκευασίας / Contenuto della confezione / Содержимое упаковки / Pakkens innhold / Vsebina paketa / Розпакування / محتوى العبوة / A csomag tartalma / Съдържание на опаковката / Conținutul ambalajului / Sadržaj paketa
natural_image
Front view of a flat-screen tablet device (no visible text or symbols)1x
| Xenta 7" tablet |
| Xenta 7" tablet |
| Xenta 7" Tablet |
| Tablette 7" Xenta |
| Tableta de 7" Xenta |
| Tablet de 7" Xenta |
| Tablet 7" Xenta |
| Xenta 7" tablet |
| Xenta 7" tablet |
| Xenta 7" tablet |
| Xenta 7" platta |
| Taμπλέτα 7" Xenta |
| Tablet da 7" Xenta |
| Планшет 7" Xenta |
| Xenta 7" nettbrett |
| Tablični računalnik Xenta 7" |
| Планшет 7" Xenta |
| Xenta جهاز لوحی 7 بوصę |
| 7" Tablet gép Xenta |
| 7" Таблет Xenta |
| Tabletă cu ecran de 7" Xenta |
| Xenta 7" tablet |
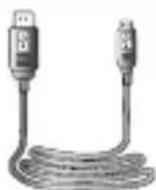
1x
- USB cable
- USB kabel
- USB Kabel
- Câble USB
- USB cable
- Cabo USB
- USB kabel
- USB kabel
- USB kábel
- USB-kabel
- USB-kabel
-Καλώδιο USB
- Cavo USB
-USB-кабель
- USB-kabel
- Kabel USB
-USB-кабель
- USB کبل
- USB kábel
- USB кабел
- Cablu USB
- USB kabel
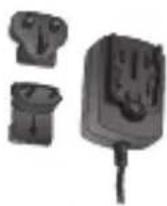
1x
- Power adapter
- Voedingsadapter
- Netzteil
- Adaptateur d'alimentation
- Adaptador de corriente
- Adaptador de corrente
- Zasilacz
- Napájecí adaptér
- Napájací adaptér
- Strømadapter
- Nätadapter
- Τροφοδοτικό ρεύματος
-
Alimentatore
-
Адаптер питания
- Strømforsyning
- Napajalnik
- Адаптер живлення
- محول الطافة
- Hálózati adapter- Захранващ адаптер
- Adaptor de alimentare
- Naponski adapter- Захранваш адаптер
- Adaptor de alimentare
- Naponski adapter
1x
- Start guide
- Snelstart handleiding
- Schnellstartanleitung
- Guide de Démarrage
- Guía de Inicio
- Guia de iniciação
- Przewodnik Uruchamiania
- Návod k Použití
- Stručný návod na obsluhu
- Startvejledning
- Startguide
-
Οδηγός έναρξης
-
Guida di avvio
- Краткое руководство пользователя
- Startveiledning
- Aloitusopas
- Короткий посібник користувача
دليل البدء - - Használati útmutató
- Ръководство за старт
- Ghid de pornire
- Brzi vodič
1x
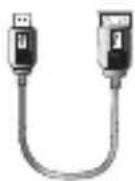
- USB host cable
- USB host kabel
- USB Host Kabel
- Câble USB hôte
- Host USB cable
- Cabo de anfitrião USB
- Hosta USB kabel
- USB host kabel
-
USB host kábel
-
USB-værtskabel
- USB-värdkabel
- Καλώδιο κεντρικού υπολογιστή (host) USB
- Cavo host USB
- USB-кабель для подключения внешних устройств
-
USB vertskabel
-
Gostiteljski kabel USB
- USB-кабель підключення зовнішніх пристроїв
- USB كبل
- USB host kábel
- USB хост кабел
- Cablu host USB
- USB kabel za domaćina
- You can find the manual in the Tablet App menu
- De handleiding is te vinden in het Tablet Appmenu
2 Buttons & Connections
Knoppen & Aansluitingen / Tasten & Anschlüsse / Boutons et connexions / Botones y conexiones / Botões e ligações / Przyciski i złącza / Tlačitka a připojeni / Tlačidlá a pripojenia / Knapper & tilslutninger / Knappar & Anslutningar / Плήκτρα & Συνδέσεις / Pulsanti e collegamenti / Кнопки и разъемы / Knapper og tilkoblinger / Gumbi in Povezave / Кнопки та роз'єми / كازRAR والتوصيلات / Gombok és csatlakozások / Бутони и връзки / Butoane și conexiuni / Tipke i veze

| On/Off | ||
| - Hold 3 sec. for On or Off- 3 sec. indrukken voor Aan of Uit- Zum Ein-/Ausschalten 3 Sek. drücken- Appuyez pendant 3 s pour allumer ou éteindre- Pulse durante 3 s para encender o apagar el dispositivo- Mantenha premido durante 3 segundos para ligar ou desligar- Naciśnij i przytrzymaj przez 3 sek., aby włączyć lub wyłączyć- Přidržením po dobu 3 s zapínáte nebo vypínáte- Podržte 3 sek. pre zapnutie alebo vypnutie- Hold 3 sek. for On [Til] eller Off [Fra]- Håll ned 3 sekunder för På eller Av- Кратήστε 3 δευτ. για ενεργοποίηση (On) ή απενεργοποίηση (Off) | - Tenere premuto 3 sec. per l'accensione o lo spegnimento.- Удерживайте в течение 3 с для включения или выключения- Trykk 3 sek. for på eller av- Držite 3 sek. za vklop ali izklop- Утримуйте протягом 3 с для увімкнення або вимкнення- ثبت لددة 3 ثوان للتشغيل أو الإي Mic- Nyomja 3 mp-ig a be- vagy kikapcsoláshoz- Задръжте 3 сек. за включване или изключване- Pentru activare sau dezactivare, mențineți apăsarea timp de 3 sec.- Držite 3 sek. za uključivanje ili isključivanje | |
| Sleep/Wake | ||
| - Press 1 sec. for Sleep or Wake- 1 sec. indrukken voor Slaapstand of uit Slaapstand- Für Betriebszustand 1 Sek. drücken- Appuyez pendant 1 s pour la mise en veille ou le réveil- Pulse 1 s para que la tableta entre en el estado de inactividad o activarla- Pressione 1 seg. para suspensão ou Wake segundos para ligar ou desligar- Naciśnij przez 1 sek., aby przełączyć w stan uśpienia lub wybudzić- Stisknutím po dobu 1 s spustíte režim spánku nebo probuzení- Stlačte 1 sek. pre spánok alebo prebudenie- Tryk på 1 sek. til slumre-eller Wake- Tryck på 1 sek. för att sova eller Wake- Патήστε 1 δευτερόλεπτο. για την κατάσταση νάρκης ή Wake | - Premere 1 sec. per la funzione Sleep o Wake (Sveglia).- Нажимайте в течение 1 с для перехода в спящий режим или продолжения работы- Trykk 1 sek. for standby eller gå ut av standby- Pritisnite 1 sek. za spanje ali bujenje- Натискайте протягом 1 с для переходу у сплячий режим або продовження роботи- اضغط لددة 1 ثаниye للنوم أو البحظة- Nyomja 1 mp-ig az alváshoz vagy felébresztéshez- Натиснете 1 сек. за заспиване или събуждане- Pentru stare de repaus sau reactivare, apăsați timp de 1 sec.- Pritisnite 1 sek. za spavanje ili buđenje uređaja | |
| Volume - + | - Volume up or Down- Volume harder of zachter- Leiser oder laute- Augmentez ou baissez le volume- Subir o bajar volumen- Aumentar ou diminuir volume- Zwiększanie lub zmniejszanie poziomu głośności- Zvýšení nebo snížení hlasitosti- Zvýšenie alebo zníženie hlasitosti- Lydstyrke op eller ned- Justera volymen uppât eller nedât- Aúξηση ή μείωση της έντασης ήχου | - Aumento o abbassamento del volume- Переключатель увеличения или уменьшения громкости- Volum opp eller ned- Jakost - +: Povečanje ali zmanjšanje jakosti- Клавіша гучності- رفع الصوت أو خفضه- Hangerő fel vagy le- Усилване или намаляване силата на звука- Creşterea sau reducerea volumului- Glasnoća + i – | |
 | Built-in Camera | - Built -in Camera- Ingebouwde Camera- Integrierte Kamera- Caméra intégrée- Cámara integrada- Cámara incorporada- Wbudowana kamera- Zabudovaný fotoaparát- Zabudovaný fotoaparát- Indbygget kamera- Inbyggd kamera- Ενσωματωμένη Κάμε | - Fotocamera integrata- Встроенная камера- Innebygget kamera- Vgrajena kamera- Вбудована камера- کاميرا مدمجة- Beépített kamera- Вградена камера- Cameră încorporată- Slušalice- Ugrađena kamera |
 | Built-in Microphone | - Built-in Microphone- Ingebouwde microfoon- Integriertes Mikrofon- Microphone intégré- Micrófono integrado- Microfone incorporado- Wbudowany mikrofon- Zabudovaný mikrofon- Zabudovaný mikrofón- Indbygget mikrofon- Inbyggd mikrofon- Ενσωματωμένο Μικρόφωνο- Microfono integrato- Встроенный микрофон- Innebygget mikrofon | - Vgrajeni mikrofon- Вбудований мікрофон- ميكروفون مدمح- Beépített mikrofon- Вграден микрофон- Microfon încorporat- Ugrađeni mikrofonn |
 | Speaker | - Built-in Speaker- Ingebouwde speaker- Integrierter Lautsprecher- Haut-parleur intégré- Altavoz integrado- Alto-falante embutido- Wbudowany głośnik- Zabudovaný reproduktor- Zabudovaný reproduktor- Indbygget højttaler- Inbyggd högtalare- Evσωματωμένο ηχείο | - Altoparlante integrato- Встроенный динамик- Innebygget høyttaler- Zvočnik Mono: Vgrajeni zvočnik- Вбудований динамік- س-meące mędmje- Beépített hangszóró- Bграден високоговорител- Difuzor încorporat- Ugrađeni zvučnik |
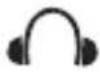 | Headphones3.5 mm | - Headphones- Hoofdtelefoon- Kopfhörer- Casque- Auricular- Auscultadores- Słuchawki- Sluchátka- Slúchadlá- Hovedtelefoner- Hörlurar | - Акоστικά- Cuffie- Наушники- Hodetelefoner- Slušalke- Навушники- س-meące r ās- Fejhallgató- Слушалки- Căşti- Slušalice |
 | USB | - Micro USB Port- Micro USB Poort- Micro USB Anschluss- Port micro USB- Micro USB puerto- Porta micro USB- Port micro USB- Micro USB portu- Micro USB portu- Micro USB port- Mikro-USB-port | - Micro USB θύρα- Micro porta USB- Micro USB port- Micro USB-port- Mikro USB- Micro USB port- Micro USB port- Micro USB port- Micro USB port- Micro USB port- Micro USB port |
 | MicroSDUp to 32 GB | - MicroSD Slot- MicroSD Slot- MicroSD-Einschub- Emplacement carte MicroSD- Ranura para tarjetas MicroSD- Ranhura para cartão MicroSD- Gniazdo karty MicroSD | - Slot pro MicroSD- Slot na Micro SD kartu- MicroSD-stik- MicroSD-kortplats- Упобохή MicroSD- Slot per MicroSD- Разъем для карты MicroSD |
 | MicroSDUp to 32 GB | - MicroSD spor- Reža za MicroSD- Гніздо для карти пам'ятіMicroSD- MicroSD فتحة | - MicroSD nyilás- Слот за MicroSD карта- MicroSD Slot- MicroSD utor |
 | |||
 MicroSDHCTM 32 GB FAT32For more information about MicroSD formatting see forum.yarvik.com MicroSDHCTM 32 GB FAT32For more information about MicroSD formatting see forum.yarvik.com | |||
| HDMI | 1080p | - Mini HDMI Out- Mini HDMI Uit Mini- HDMI-Ausgang- Sortie mini HDMI- Salida mini HDMI- Saída Mini HDMI- Wyjście mini HDMI- Minivýstup HDMI- Mini HDMI výstup- Mini-HDMI-udgang- HDMI-utgång- 'Εξοδος Mívı HDMI | - Uscita mini HDMI- Выход Mini HDMI- Mini HDMI ut- Izhod Mini HDMI- Вихід Mini HDMI- Mini HDMI Out مخرج- Mini HDMI kimenet- Mini HDMI Извод- leşire Mini HDMI- Mini HDMI izlaz |
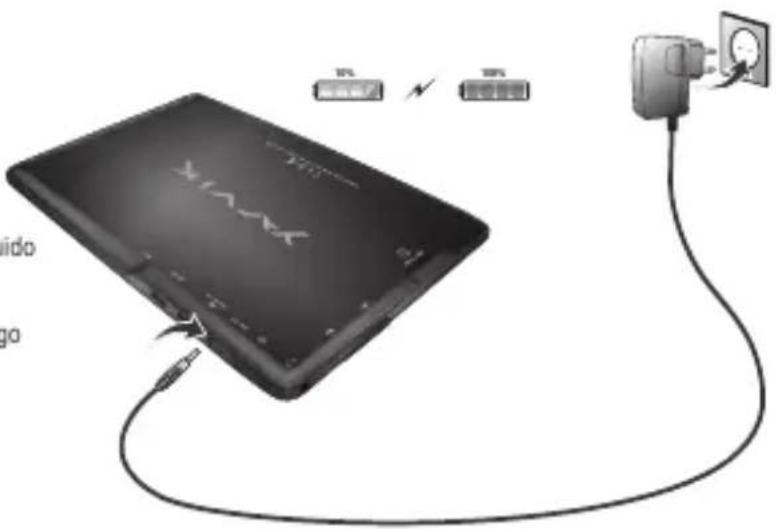
Charging
Opladen / Laden / Chargement / Carga / Carregamento / Ladowanie / Nabijeni / Nabijanie / Opladning / Laddning / Фóption / Carica / Зарядка / Lading / Polnjenje / Зарядження акумулятора / الشHN / Töltés / Зареждане / İncârcare / Punjenje
* Use only the supplied AC adapter
* Gebruik alleen de bijgeleverde AC adapter
* Verwenden Sie ausschließlich das mitgelieferte Netzteil
* Utilisez seulement l'adaptateur CA fourni
* Use exclusivamente el adaptador de corriente de CA incluido
* Utilize apenas o adaptador de CA fornecido
* Korzystaj tylko z dostarczonego zasilacza prądu zmiennego
* Použivejte pouze dodaný AC adaptér
* Použivajte iba dodaný siečový adaptér
* Brug kun den medfølgende AC-adapter
* Använd endast den medföljande nätadaptern
* Χρησιμοποιήστε μόνο το παρεχόμενο τροφοδοτικό ΑС
* Utilizzare solo l'adattatore CA fornito.
* Используйте только входящий в комплект сетевой адаптер
* Bruk bare medfølgende AC*adapter
* Uporabite le priloženi napajalnik AC
* Використовуйте тільки той блок живлення, що входить до комплекту постачання
- On the bottom of the Luna screen you can always find the status bar. The status bar contains both system information and function buttons.
NL
3 Getting on the Internet
Internet instellen / Zugriff auf das Internet / Accès à Internet / Cómo acceder a Internet / Aceder à internet / Łączenie z Internetem / Pripojení k internetu / Pripojenie k internetu / At komme på internettet / Gå ut på Internet / Σύνδεση στο Internet / Collegamento a Internet / Подключение к Интернету / Koble til Internett / Kako se povezati na internet Підключення до Интернету / دخول الإنترت / Kapcsolódás az Intemetre / Свързване към Интернет / Conectare la Internet / Spajanje na Internet
- Slide the lock bar (A) to the right (B) to unlock
- Schuif de vergrendeling (A) naar rechts (B) voor ontgrendelen
- Sperrsymbol (A) zum Entsperren nach rechts (B) schieben
- Faites glisser la barre de verrouillage (A) vers la droite (B) pour déverrouiller.
- Deslice la barra de bloqueo (A) hacia la
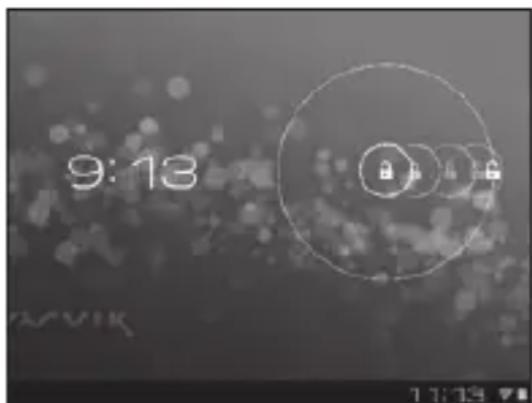
derecha (B) para desbloquear el dispositivo
- Arraste o cadeado (A) para a direita (B) para desbloquear
- Przeciagnij pasek blokady (A) do prawej (B), aby odblokować
- Přetažením zamykací lišty (A) směrem doprava (B) odemkněte zařízení
- Posušte lištu uzamknutia (A) doprava (B) a odomknite
- Glid låsebjælken (A) til højre (B) for at låse op
- Skjut låslist (A) till höger (B) för att låsa upp
- Σύρετε τη γραμμή κλειδώματος (Α) προς τα δεξιά (Β) για ξεκλείδωμα
- Fare scorrere la barra di blocco (A) verso destra (B) per sbloccare.
- Перетяните бегунок (А) вправо (В) для разблокировки
- Stryk låselinjen (A) mot høyre (B) for å låse opp
- Povlecite zaklepno vrstico (A) v desno (B) in odklenite
- Перетягніть повзунок (А) праворуч (В) для розблокування
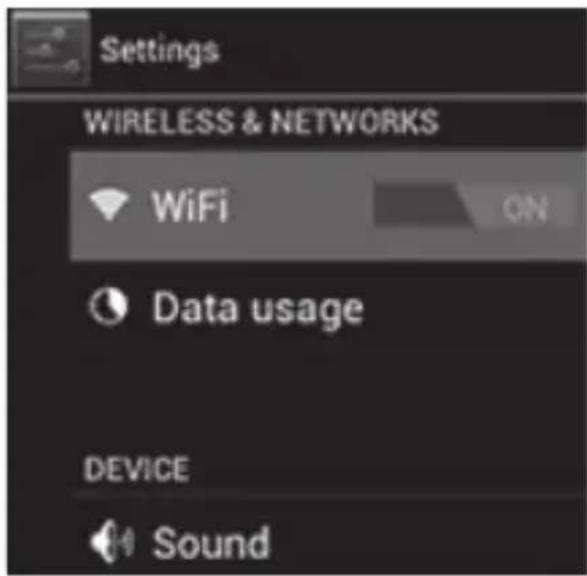
- Press the app and widget button
natural_image
Blurred grayscale image of a crowd with indistinct shapes and no visible text or symbols- Nyomja meg a Settings (Beállítások) menüt
- Натиснете меню Settings (Настройки)
- Apăsați pe meniul Settings (Setări)
- Pritisnite izbornik Settings (Postavke)
3 Slide the On/Off button to "On"
- Schuif de Aan/uit-knop op "Aan"
Ein/Aus-Schaltfläche auf „On“ („An“) schieben.
Faites glisser le bouton marche/arrêt pour l'allumer.
Deslice el botón On/Off (Activado/Desactivado) hasta la posición "On" (Activado)
Deslize o botão On/Off (Ligar/Desligar) para a posição "On" ("Ligado") - Przeciagnij przełącznik do pozycji „On” („Wł.“)
- Přetáhněte tlačítko Zap./Vyp. na „On“ („Zap.“)
Posuňte vypínač do polohy „On“ („Zap.“)
Glid knappen On/Off [Til/fra] til "On" [Til] - Skjut På/Av-knappen till "På"
Σύρετε το κουμπί Οη/Οφ στη θέση "Οη" - Fare scorrere il pulsante di accensione/spegnimento su "On".
Перетяните кнопку On/Off (Выкл./Вкл.) на «On» («Вкл.») - Sett på/av-knappen til "On"
Povlecite gumb Vklop/Izklop na »On« (»Vklop«) - Перетягніть клавішу On/Off (Вимк./Увімк.) на «On» («Увімк.»)
(On) - حرك زر التشفيل/الإيقاف (On/Off) إلى "التشغيل" - Állítsa a On/Off (Be/Ki) gombot „On” („Be”) állásba
Плъзнете бутона On/Off (Вкл/Изкл) към „On” („Вкл”)
Glisați butonul On/Off (Activare / Dezactivare) spre „On” („Activat”)
Kliznite gumb On/Off (Uklj./Isklj.) na „On“ (Uklj.)
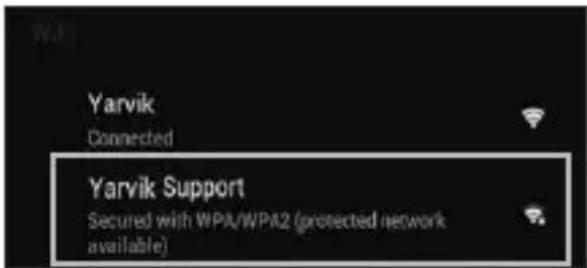
- Choose your Wireless Network.
- Izberite svoje Wireless Network (Brezžično omrežje)
4.1. Non secured, Tap the network of your choice.
4.2. Secured Network, Type password then press Connect.
- Beveiligd netwerk, vul wachtwoord in en klik op Connect (Verbinden).
- Bei gesichertem Netzwerk Kennwort eingeben und Connect (Verbinden) drücken.
- Réseau sécurisé, tapez le mot de passe puis appuyezsur « Connect » (Connector).
- Si la red está protegida, escriba la contraseña y pulse Connect (Conectar).
- Se for uma rede protegida, digite a palavra-passe e depois prima Connect (Ligar).
- Zabezpieczona sieć; wprowadź Password (Hasło) i naciśnij Connect (Połącz).
- Zabezpečená síť, napište Password (Heslo), poté stiskněte Connect (Připojit).
- Zabezpečená sieť, napíšte Password (Heslo) a potom stlačte Connect (Pripojit').
- Sikret netværk. Indtast adgangskode, og tryk derefter på Connect [Tilslut].
- Skyddat nätverk, ange lösenordet och tryck sedan på Connect (Anslut).
- Δίκτυο με ασφάλεια, πληκτρολογήστε τον κωδικό πρόσβασης και πατήστε Connect (Σύνδεση).
- Rete protetta, digitare la password, quindi premere Connect (Connetti).
- Если сеть Secured (защищена), введите пароль, а затем нажмите кнопку Connect
(подключения).
5. Check Wi-Fi connection.
- Controleer Wi-Fi verbinding.
- WLAN-Verbindung überprüfen.
- Vérifiez la ae la conexión Wi-Fi.
- Verifique a ligação Wi-Fi.
- Sprawdź stan połączenia Wi-Fi.
- Kontrola Wi-Fi připojení.
- Skontrolujte pripojenie Wi-Fi.
- Kontroller Wi-Fi-tilslutning.
- Kontrollera Wi-Fi-anslutning.
- Ελέγξτε τη σύνδεση Wi-Fi.
- Controllare la connessione Wi-Fi
- Проверьте Wi-Fi-соединение.
- Sjekk den trådløse tilkoblingen.
-
Preverite Wi-Fi povezavo.
-
Перевірте Wi-Fi-підключення.
- Wi-Fi. - خفق من اتصال
- Ellenőrizze a Wi-Fi kapcsolatot.
- Проверка на Wi-Fi връзка.
- Verificați conexiunea Wi-Fi.
- Provjerite Wi-Fi vezu.

- With The Browser App you can now browse the internet.
-
Met de Browser App kunt u nu het internet op.
-
Mit dem Browser-App können Sie im Internet surfen.
- Avec l'application du navigateur, vous pouvez maintenant naviguer sur Internet.
- Con la aplicación Browser (Navegador) podrá navegar por Internet.
- Com a aplicação Browser (Navegador), pode então navegar na internet.
- Za pomocą aplikacji Browser (Przeglądarka) możesz surfować po Internecie.
- Pomocí Browser (Prohlížeče) aplikací můžete brouzdat po internetu.
- Pomocou aplikácie Browser (prehliadača) si môžete teraz prezerat internetové stránky.
- Med browser-app'en kan du navigere på internettet.
-
Med webbläsarappen kan du nu surfa på Internet.
-
Με την εφαρμογή Browser μπορείτε πλέον να εξερευνήσετε το Internet.
- Con la app Browser ora è possibile navigare su Internet.
- Теперь с помощью Browser (браузера) можно приступить к обзору Интернета.
- Med Browser-applikasjonen (nettleseren) kan du nå surfe på Internett.
- Z aplikacijo brskalnika lahko zdaj brskate po internetu
- Тепер можна розпочати перегляд веб-сайтів в Інтернеті за допомогою Browser (браузера). Browser - چکنک تصفح الإ턴ت آن باستخدام تطبيق
- A Browser (Böngésző) alkalmazásokkal nem böngészhet az Interneten.
- Сега можете да сърфирате в Интернет с Browser (Браузъра).
- Cu aplicația Browser puteți acum să navigați pe Internet.
- Pomoću aplikacije Browser (Preglednik) sada možete pregledavati internetske sadržaje.
4
When a Problem Occurs
Problemen oplossen / Problembehandlung / Dépannage / Si se produce un problema / Quando ocorre um problema / W razie problemów / Při vzniku problému / Ak sa vyskytne problém / Når der opstår et problem / Når ett problem uppstår / یταν Συμβεί Κάποιο Πρόβλημα / Se si verifica un problema / При возникновении проблемы / Når det oppstår problemer / Ko se pojavi težava / У разі виникнення проблем / ۱۶۰۹۷۰۲۳۶۴۵۸۶۱۶۲۱۶۲۱۶۲۱۶۲۱۶۲۱۶۲۱۶۲۱۶۲۱۶۲۱۶۲۱۶۲۱۶۲۱۶۲۱۶۲۱۶۲۱۶۲۱۶۲۱۳۱۶۲۱۶۲۱۶۲۱۶۲۱۶۲۱۶۲۱۶۲۱۶۲۱۶۲۱۶۲۱۶۲۱۶۲۱۶۲۱۶۲۱۶۲۱۶ 1950/1951/1952/1953/1954/1955/1956/1957/1958/1959/1960/1961/1962/1963/1964/1965/1966/1967/1968/1969/1970/1971/1972/1973/1974/1975/1976/1977/1978/1979/1980/1981/1982/1983/1984/1985/1986/1987/1988/1989/1990/1991/1992/1993/1994/1995/1996/1997/1998/1999/2000/2001/2002/2003/2004/2005/2006/2007/2008/2009/2010/2011/2012/2013/2014/2015/2016/2017/2018/2019/2020/2021/2022/2023/2024/2025/2026/2027/2028/2029/2030/2031/2032/2033/2034/2035/2036/2037/2038/2039/2040/2041/2042/2043/2044/2045/2046/2047/2048/2049/2050/2051/2052/2053/2054/2055/2056/2057/2058/2059/2060/2061/2062/2063/2064/2065/2066/2067/2068/2069/2070/2071/2072/2073/2074/2075/2076/2077/2078/2079/2080/2081/2082/2083/2084/2085/2086/2087/2088/2089/2090
EN
Your Tablet acts much slower than normal, doesn't react well or freezes. Restart the tablet using the On/Off button. All data/settings will be saved, the tablet will only shutdown. Afterwards hold the On/Off button until the tablet starts up again.
NL
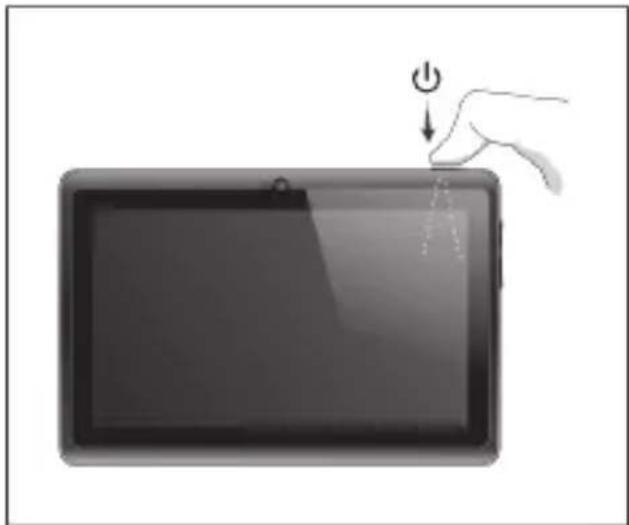
1 Hold for 10 seconds
- 10 seconden ingedrukt houden
- 10 Sekunden gedrückt halten
- Appuyez pendant 10 secondes
- Mantenga pulsado durante 10 segundos
- Mantenha premidos durante 10 segundos
- Przytrzymaj przez 10 sekundy
- Přidržte po dobu 10 sekund
- 10 sekundy podržte
- Hold i 10 sekunder
- Håll ned i 10 sekunder
- Κρατήστε για 10 δευτερόλεπτα
- Tenere premuto 10 secondi.
- Удерживайте в течение 10 секунд.
- Hold inne i 10 sekunder.
- Držite 10sekunde
- Утримуйте протягом 10 секунд.
- في ناث 10 قدمل تبحث
- Tartsa 10 másodpercig
natural_image
Illustration of a tablet device with a hand pressing a button (no text or symbols)- Задръжте за 10 секунди.
- Aşteptați 10 secunde.
- Držite 10 sekundi.
Start up after Soft Reset
- To Start up: Hold for 5 seconds, tablet will start up
- Tablet weer opstarten: 5 seconden indrukken, Tablet start op
- Einschalten: 5 Sekunden gedrückt halten; das Tablet startet
- Pour démarrer : appuyez pendant 5 s, la tablette se met en marche
- Para iniciar el dispositivo: mantenga pulsado el botón durante 5 segundos y la tableta se encenderá
- Para arrancar: Mantenha premido durante 5 segundos e o tablet arranca
- Aby uruchomić: Naciśnij i przytrzymaj przez 5 sekundy; tablet uruchomi się
- Spuštění: Přidržte po dobu 5 sekund, tablet se spustí
- Spustenie: Podržte 5 sekundy a tablet sa spustí
- Start: Hold i 5 sekunder, og tablet'en vil starte
- För att starta: Håll intryckt i 5 sekunder, och surfplattan kommer att starta
- Για Εκκίνηση: Κρατήστε πατημένο για 5 δευτερόλεπτα και η ταμπλέτα θα εκκινήσει
- Per l'avvio: tenere premuto 5 secondi, il tablet si avvia.
- Начало работы: удерживайте в течение 5 секунд, чтобы включить планшет.
- For å starte: Hold inne i 5 sekunder, tableten starter opp
- Držite gumb vklop/izklop 5 sekunde in tablični računalnik se bo zagnal
- Розпочати роботу: утримуйте протягом 5 с для увімкнення планшета.
لبلدء: ثبت لدة 5 ثوان وسوف يبدأ نشفيل الك Diversity -
- Az indításhoz: Tartsa 5 másodpercig, hogy a tábla elinduljon
- За да стартирате: Задръжте за 5 секунди, таблета ще стартира
- Pentru a demara: menținând apăsat timp de 5 secunde, tableta se va activa.
- Za pokretanje: Držite 5 sekunde, tablet će se pokrenuti

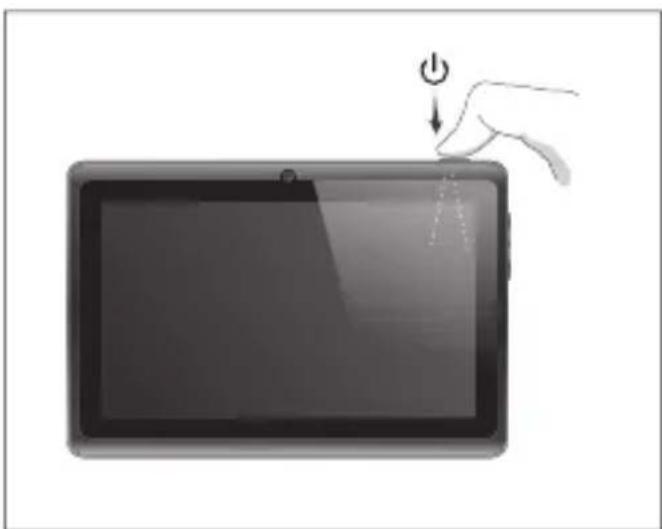
natural_image
Illustration of a hand pressing down on a tablet device with a power button (no text or symbols)EC Declaration of Conformity
We,
YARVIK
Ampereweg 3
2627 BG Delft
The Netherlands
Declare under our sole responsibility that the product:
Brand name : YARVIK
Model no. : TAB07-210, TAB07-211, TAB07-212
Product description : Xenta 7" Tablet
Compliance with the essential requirements of the following Directives is declared:
- EMC DIRECTIVE : 2004/108/EC
- LVD DIRECTIVE : 2006/95/EC
- R&TTE DIRECTIVE : 1999/5/EC
- ROHS DIRECTIVE : 2011/65/EU
To which this declaration is based on with full conformance to the following European norms and standards:
Tablet
- EMC : EN 55022:2006 + A1:2007
EN 55024:1998 + A1:2001 + A2:2003
EN 61000-3-2:2006
EN 61000-3-3:2008
Signed, Delft, 25-07-2013
YARVIK

R. Ramaekers,
Purchase Director
Important information
CE!
Wireless LAN-Regulatory information
Depending on the model, the wireless LAN built-in into tablet devices can only be used in the following countries: Austria, Belgium, Bulgaria, Czech Republic, Denmark, Finland, France, Germany, Greece, Hungary, Iceland, Ireland, Italy, Luxembourg, the Netherlands, Norway, Poland, Portugal, Romania, Slovakia, Slovenia, Spain, Sweden, Switzerland, Turkey and the United Kingdom.
Conditions of use
When using the IEEE 802.11b/g/n Wireless LAN standard, channels 1 to 13 (2.4 GHz ...2.4835 GHz) are selectable for both indoor and outdoor use, however with restrictive conditions applying in France, Italy and Norway, as follows:
- France: When using this product indoor, all channels can be used without restrictions. Outdoor only channels 1 to 6 are allowed. This means that in Peer-to-Peer, the WLAN feature can only be used outside if the peer sets up the communication on an authorized channel (i.e., between 1 & 6). In infrastructure mode, please make sure the access point is configured to a channel from 1 to 6 before setting up the connection.
- Italy: Use of the RLAN network is governed: Disposal of Old Electrical & Electronic
- with respect to private use, by the Legislative Decree of 1.8.2003, no. 259 ("Code of Electronic Communications"). In particular Article 104 indicates when the prior obtainment of a general authorization is required and Art. 105 indicates when free use is permitted;
- with respect to the supply to the public of the WLAN access to telecom networks and services, by the Ministerial Decree 28.5.2003, as amended, and Art. 25 (general authorization for electronic communications networks and services) of the Code of electronic communications.
- Norway: Use of this radio equipment is not allowed in the geographical area within a radius of 20 km from the centre of Ny-Ålesund, Svalbard.
WEEE Symbol Information
Correct Disposal of This product (Waste Electrical & Electronic Equipment).
(Applicable in the European Union and other European countries with separate collection systems).
This marking shown on the product or its literature indicates that it should not be disposed with other household wasted at the end of its working life. To prevent possible harm to the environment or human health from uncontrolled waste disposal, please separate this from other types of wastes and recycle it responsibly to promote the sustainable reuse of material resources. Household users should contact either the retailer where they purchased this product, or their
local government office, for details of where and how they can take this item for environmentally safe recycling.
Business users should contact their supplier and check the terms and conditions of the purchase contract. This product should not be mixed with other commercial wastes of disposal.
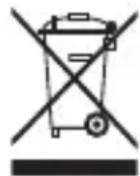
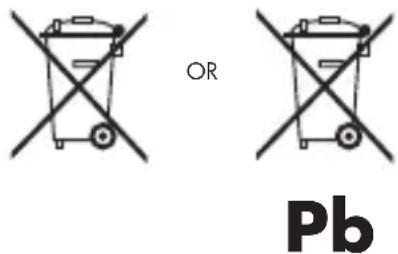
Disposal of waste batteries (applicable in the European Union and other European countries with separate collection systems)
Either of the symbols shown next may appear on the battery or on the packaging to indicate that the battery provided with this product shall not be treated as household waste. On certain batteries this symbol might be used in combination with a chemical symbol. The chemical symbols for mercury (Hg) or lead (Pb) are added if the battery contains more than 0.0005% mercury or 0.004% lead. By ensuring these batteries are disposed of correctly, you will help prevent potentially negative consequences for the environment and human health which could otherwise be caused by inappropriate waste handling of the battery. The recycling of the materials will help to conserve natural resources. In case of products that for safety, performance or data integrity reasons require a permanent connection with an incorporated battery, this battery should be replaced by qualified service staff only. To ensure that the battery will be treated properly, hand over the product at end-of-life to the applicable collection point for the recycling of electrical and electronic equipment.
For all other batteries, please view the section on how to remove the battery from the product safely. Hand the battery over to the applicable collection point for the recycling of waste batteries. For more detailed information about recycling of this product or battery, please contact your local Local government Office, your household waste disposal service or the shop where you purchased the product.
When travelling to and within the United States of America, please be aware that the U.S.
Department of Transportation (DOT) recently published new regulations that apply to passengers travelling with lithium metal batteries and lithium-ion batteries.
For detailed information, visit http://safetravel.dot.gov/whats_new_batteries.html.
Safety Information
Yarvik Tablet device
- Yarvik is not responsible for any interference that you may experience or that may be caused when operating this device.
- Warning: We strongly advise to connect this device to a earthed wall socket when charging.
- Opening or dismantling the main unit or any of its accessories, for whatever reason, could lead to damages that are not covered by the guarantee.
- To avoid electrical shock, do not open the cabinet. Refer servicing to qualified personnel only.
- To prevent fire or shock hazard, do not expose your tablet device or any of its accessories to rain or moisture.
- Do not use or store your tablet device in a location subject to heat sources, such as radiators or air ducts; direct sunlight; excessive dust; moisture or rain; mechanical vibration or shock; strong magnets or speakers that are not magnetically shielded; excessively high and low temperatures; and high humidity.
- Turning off your tablet device with the power button does not disconnect the device completely from mains voltage. To disconnect it completely, unplug the AC adapter or the power cord from mains. The socket-outlet shall be installed near the equipment and shall be easily accessible.
- Audio and picture distortion may occur if this equipment is positioned in close proximity to any equipment emitting electromagnetic radiation.
- This apparatus is also designed for IT power system with phase to phase voltage 230V, for customers in Norway.
- Observe the following precautions to provide adequate air circulation and to ensure normal reliable operation:
- Do not use the tablet device and/or the AC adapter while covered or wrapped in cloth. Ensure the AC adapter operates in a clear environment.
- Turn off the tablet device before putting the device into a bag or a carrying case.
- Do not use your tablet device directly on your lap. The temperature of the base of the unit will rise during normal operation and over time could result in discomfort or burns.
- Do not use your tablet device while walking. Listening to music with headphones or watching the LCD screen while walking may lead to an unexpected accident and result in personal injuries.
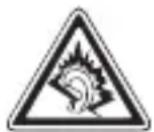
- Using connected headphones on the tablet device for too long and/or setting the audio volume up too high when using headphones may cause serious hearing damage.
- Avoid strong beating of or to the product.
- Don't operate the touch screen of the tablet device with sharp objects, as this may result in scratching the screen surface.
- Only use permitted batteries, chargers and accessories with your tablet device. The use of any other products with the device can be dangerous and may violate the warranty regulations.
- Only use a slightly wet cotton cloth to clean the device, and only use water to wetten the cotton cloth. The tablet device should not be cleaned with any sort of (glass) cleaning aid.
Wireless functionality
- If radio interference with other devices occurs while using your tablet device, do not use the wireless functionality. Use of the wireless functionality may cause a malfunction of the devices, resulting in an accident.
- In some situations or environments, the use of the wireless functionality might be restricted by the proprietor of the building or responsible representatives of the organization, for example on board airplanes, in hospitals or in any other environment where the risk of interference with other devices or services is perceived or identified as harmful. If you are uncertain about the policy applying to the use of wireless functionality in a specific organization or environment, you are encouraged to first ask for authorization prior to switching it on. Consult your physician or the manufacturer of personal medical devices (pacemakers, hearing aids, etc.) regarding any restrictions on the use of wireless functionality.
- If using wireless functionality near a pacemaker, make sure it is at least 19 inches / 50 cm away from the pacemaker.
- Due to the transmission and reception properties of wireless communications, data can occasionally be lost or delayed. This can be due to the variation in radio signal strength that results from changes in the characteristics of the radio transmission path. Yarvik will not be held responsible for damages of any kind resulting from the delays or errors in data transmitted or received via wireless functionality, or failure of wireless functionality to transmit or receive such data.
- If the equipment does cause harmful interference to radio/TV reception, which can be determined by turning the equipment off and on, the user is encouraged to try to correct the interference by one or more of the following measures: reorient or relocate the receiving antenna, increase the distance between the sender and the receiver, consult the dealer or an experienced radio/TV technician for help. Yarvik will not be responsible for any radio/TV interference nor for any other undesired effect.
Wireless LAN Security
Creating security settings for the Wireless LAN is extremely important. Yarvik assumes no responsibility for any security problems that may arise from the use of the Wireless LAN.
Battery pack
Do not charge the battery pack in any way other than as described in the Start guide or as designated by Yarvik in writing.
AC adapter
- It is highly recommended that you use a genuine Yarvik AC adapter supplied by Yarvik for your product.
- This AC adapter is intended for use with the tablet device IT products only.
- Do not place the AC adapter in contact with your skin. Remove the AC adapter away from your body if it becomes warm and causes discomfort.
RoHS
This products has been certified as RoHS Compliant.
Dimensions, specifications, images & illustrations
All dimensions, specifications, images and illustrations are subject to change without prior notice.
Please consult the legal information available on your Tablet under
Settings – About device – Legal information
or visit http://source.android.com/source/licenses.html for more information
(internet connection required)
Please visit our website for CE declaration: www.yarvik.com

facebook.com/yarvik

twitter.com/yarvikce

youtube.com/yarvikce

forum.yarvik.com


- Xenta 7c
- Getting on the Internet 18
- When a Problem Occurs 24
- Soft Reset via Reset Button 26
- Package Content
- Buttons & Connections
- Charging
- NL
- Getting on the Internet
- Slide the On/Off button to "On"
- Secured Network, Type password then press Connect.
- Check Wi-Fi connection.
- 4
- When a Problem Occurs
- EN
- Start up after Soft Reset
- EC Declaration of Conformity
- Tablet
- Important information
- Wireless LAN-Regulatory information
- Conditions of use
- WEEE Symbol Information
- (Applicable in the European Union and other European countries with separate collection systems).
- Disposal of waste batteries (applicable in the European Union and other European countries with separate collection systems)
- Safety Information
- Yarvik Tablet device
- Wireless functionality
- Wireless LAN Security
- Battery pack
- AC adapter
- RoHS
- Dimensions, specifications, images & illustrations
Brand : Yarvik
Model : Xenta 7c
Category : Tablet