Azur Performer Plus GC4520 - Iron PHILIPS - Free user manual and instructions
Find the device manual for free Azur Performer Plus GC4520 PHILIPS in PDF.
Download the instructions for your Iron in PDF format for free! Find your manual Azur Performer Plus GC4520 - PHILIPS and take your electronic device back in hand. On this page are published all the documents necessary for the use of your device. Azur Performer Plus GC4520 by PHILIPS.
USER MANUAL Azur Performer Plus GC4520 PHILIPS
Specifications are subject to change without notice
© 2014 Koninklijke Philips N.V.
All rights reserved.
Always there to help you3 4
356 ENGLISH Introduction
Congratulations on your purchase and welcome to Philips!
To fully benefit from the support that Philips offers,
register your product at www.philips.com/welcome.
Product overview (Fig. 1)
c. Auto steam setting
5 Steam boost trigger
6 Safety auto-off light (specific types only)
8 Temperature indicator light
10 Temperature dial with Auto steam control
Read the separate important information leaet and this user manual
carefully before you use the appliance. Keep both documents for future
Filling the water tank
Note: Your appliance has been designed to be used with tap water. If you
live in an area with hard water, fast scale build-up may occur. Therefore, it is
recommended to use 100% distilled or demineralized water to prolong the
lifetime of your appliance.
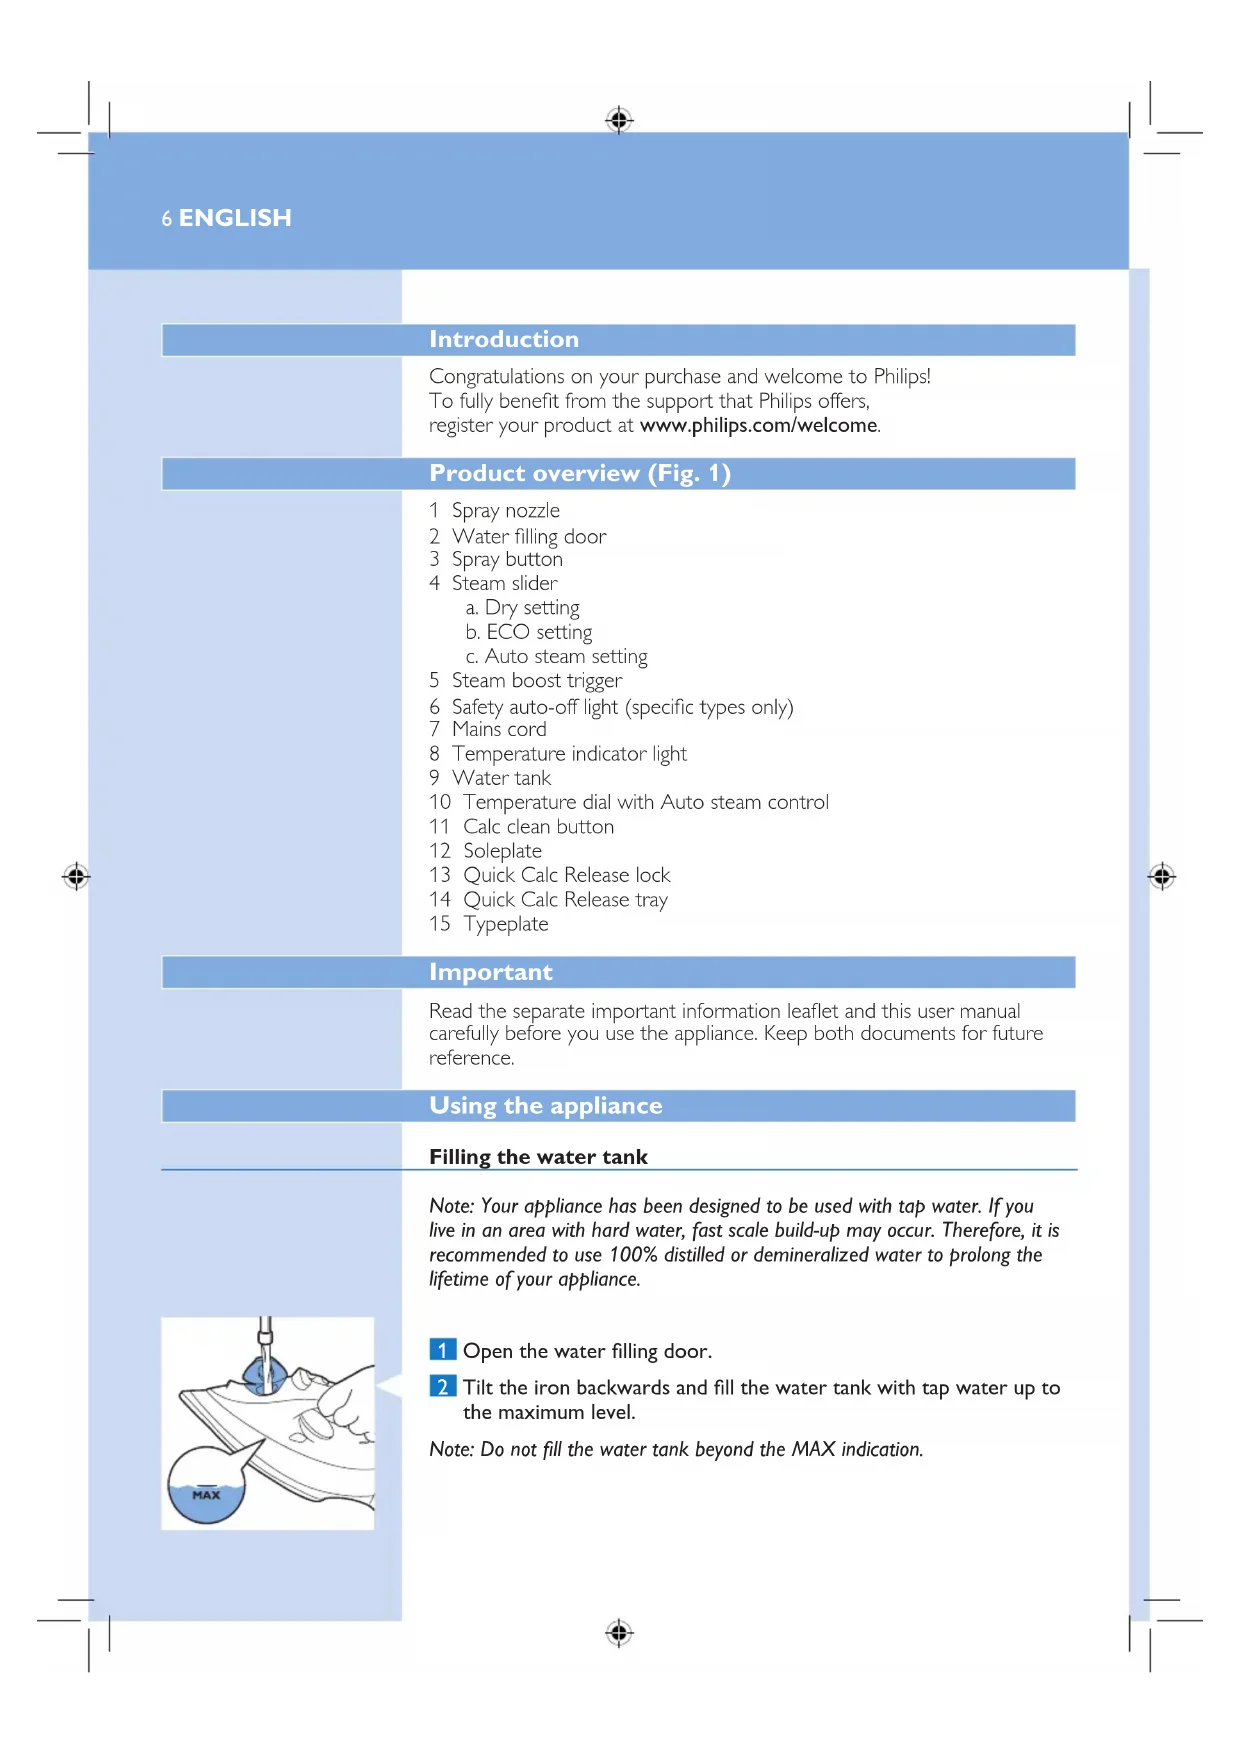
1 Open the water lling door.
2 Tilt the iron backwards and ll the water tank with tap water up to
Note: Do not ll the water tank beyond the MAX indication.Do not put perfume, vinegar, starch, descaling agents, ironing aids or
other chemicals in the water tank.
3 Close the water lling door ( ‘click’).
Temperature and steam setting
Warning: Do not use steam or steam boost at low temperature, as indicated
in the below table. Otherwise, hot water may leak from the iron.
Fabric type Temperature
(e.g. acrylic, nylon,
polyamide, polyester)
1 Consult table 1 to set the temperature dial to the appropriate
setting for your garment.
2 Select Auto steam setting in the steam slider.
This iron is equipped with Auto steam control. According to the
temperature you select, the iron automatically provides the optimal
amount of steam for the best result.
3 Put the iron on its heel and plug it in. The temperature light goes on
to indicate that the iron is heating up.
4 When the temperature light goes out, the iron has reached the
correct temperature and you could start ironing.
- Press the spray button to moisten the article to be ironed. This helps
to remove stubborn creases.
Steam boost function
- Press and release the steam boost trigger for a powerful boost of
steam to remove stubborn creases.
Ironing with extra steam
- For extra steam during ironing, press and hold the steam boost trigger.
- You can use the steam boost function when you hold the iron
in vertical position for removing creases form hanging clothes,
Eco steam setting / Dry ironing
- In stead of Auto steam, you could choose ECO setting in the steam
slider to save energy, yet to achieve satisfactory ironing results.
- To iron without steam, select dry setting in the steam slider.
ENGLISH8Safety auto-off (specic types only)
The safety auto-off function automatically switches off the iron if it has not
been used for 30 seconds resting on its soleplate or 8 minutes resting on
its backplate. The auto-off light will light up.
- To let the iron heat up again, pick up the iron or move it slightly.
The auto-off light goes out.
Cleaning and maintenance
1 Unplug the iron and let it cool down.
2 Pour any remaining water out of the water tank from the water
3 Wipe akes and any other deposit off the soleplate with a damp
cloth and a non-abrasive (liquid) cleaning agent.
To keep the soleplate smooth, avoid hard contact with metal objects.
Never use a scouring pad, vinegar or other chemicals to clean the
IMPORTANT: To prolong the life time of your appliance and to maintain good
steaming performance, use Quick Calc Release function once every 1 month.
If water in your area is very hard, use this function more frequently.
Note: Make sure that the iron has been unplugged for at least 1 hour and has
completely cooled down, before you use Quick Calc Release.
1 Put the iron on a levelled surface and push up the Quick Calc
Release lock at the back of the iron.
2 Take out the Quick Calc Release tray.
3 Pour out scales in the tray into a sink or dustbin. Clean the tray
using tap water. Remove any excess water from the tray.
ENGLISH 9Do not pour water, vinegar, descaling agents or other chemicals into the
iron from the opening of the Quick Calc Release.
Do not use vinegar, descaling agents or other chemicals to wash the tray.
4 Wipe off the scales in the opening of the Quick Calc Release tray
5 Insert the tray back into the iron.
6 Push down the Quick Calc Release lock.
Do not use the iron when the Quick Calc Release tray is not locked.
If you break or lose the tray, contact a consumer care center in your
country (see the worldwide guarantee leaet for contact details).
IMPORTANT: Besides Quick Calc Release function, you should also perform
calc-clean once every 1 month to prolong the life of your iron. If water in your
area is very hard, or you see scales coming out from the soleplate during
ironing, use this function more frequently.
1 Make sure the iron is unplugged and the steam slider is set to dry
2 Fill the water tank to the MAX indication.
Do not pour vinegar or other descaling agents into the water tank.
3 Plug in the iron and set the temperature dial to MAX.
4 Unplug the iron when the temperature light goes out.
5 Hold the iron over the sink. Keep pushing the calc clean button and
gently shake the iron forth and back until all water in the water tank
Scales is ushed out, steam and boiling water also come out of the soleplate.
Note: Repeat steps 2 to 5 if the water that comes out of the iron still contains
6 Take out the Quick Calc Release tray, empty the water in the tray.
Hold the iron vertically to allow small amount of water to ow out.
7 Insert the tray back to the iron and lock it.
8 Plug in the iron and let the iron heat up to dry the soleplate.
9 Unplug the iron when the temperature indicator light goes out.
10 Move the iron gently over a piece of cloth to remove any water
stains on the soleplate.
1 Unplug the iron and empty the water tank. Let it cool down in a safe
2 Wind the mains cord around the backplate of the iron and store it
This chapter summarises the most common problems you could
encounter with the appliance. If you are unable to solve the problem with
the information below, visit www.philips.com/support for a list of
frequently asked questions or contact the Consumer Care Centre in your
country (see the worldwide guarantee leaet for contact details).
Problem Possible cause Solution
You have used the steam
boost function too often
within a very short period.
Wait for a few seconds before you use the steam
boost function again.
You have used the steam
boost function at a too low
Set an ironing temperature at which the steam
Scales are formed inside the
Use the Calc-clean funtion (see chaper ‘Cleaning
You have overfilled the water
Do not fill the water tank beyond the MAX
indication. Pour excess water out of the water
You have not locked the Quick
Calc release tray properly.
Take out the Quick Calc Release tray and clean
it using tap water. Use a piece of cloth to wipe
off scales in the opening of the back part of the
iron. Put back the tray and lock it. (See chapter
“cleaning and maintenance, section ”Quick calc
The Quick Calc release tray is
Contact a consumer care center in your country
(see the world wide guarantee leaet for contact