
GVN210D2512I - Graphic card GIGABYTE - Free user manual and instructions
Find the device manual for free GVN210D2512I GIGABYTE in PDF.

| Product Type | Graphics card |
| Brand | Gigabyte |
| Model | GVN210D2512I |
| Video memory | 512 MB DDR2 |
| Interface | PCI Express 2.0 x16 |
| Connectors | 1x DVI, 1x VGA, 1x HDMI |
| Maximum resolution | 2560 x 1600 pixels |
| Dimensions (approx.) | 17.5 x 10.5 x 2.0 cm |
| Weight (approx.) | 120 g |
| Power requirement | 30 W, powered by PCIe slot |
| Main features | 3D graphics acceleration, DirectX 10.1 support, multi-display output |
| Maintenance and cleaning | Dust off with a blower, avoid moisture and solvents |
| Safety | Disconnect the computer before installation, avoid electrostatic discharges |
| Spare parts and repairability | No spare parts provided, card not user-serviceable |
| Supported operating systems | Windows 7, Vista, XP; some limitations on Windows 2000/98/ME |
Frequently Asked Questions - GVN210D2512I GIGABYTE
User questions about GVN210D2512I GIGABYTE
0 question about this device. Answer the ones you know or ask your own.
Ask a new question about this device
Download the instructions for your Graphic card in PDF format for free! Find your manual GVN210D2512I - GIGABYTE and take your electronic device back in hand. On this page are published all the documents necessary for the use of your device. GVN210D2512I by GIGABYTE.
USER MANUAL GVN210D2512I GIGABYTE
Graphics Card Installation
Guide
Languages included in this guide are:
- English
- German
- Spanish
- Portuguese
- French
- Italian
- Russian
- Swedish
- Polish
- Turkish
- Romanian
- Bulgarian
- Hungarian
- Greek
- Czech
-
Serbian
-
Traditional Chinese
- Simplified Chinese
- Japanese
- Korean
- Vietnamese
- Indonesian
- Thai
- Arabic
- Persian

CAUTION
- Before installing the graphics card, make sure your graphics card is compliant with the slot on your motherboard.
- Before installing the graphics card, be sure to turn off your computer. Unplug the power cord from the power outlet to prevent damage to the graphics card.graphics card..

The appearance of the graphics card may differ by model.
- Based on the instruction from Microsoft, some new drivers may not fully support Windows 2000/98/ME.
Refer to the user's manual included for detailed graphics card specifications.

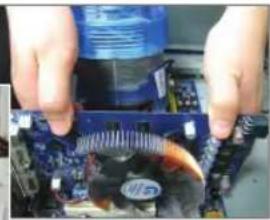
Installation of a Graphics Card
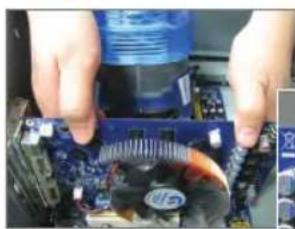
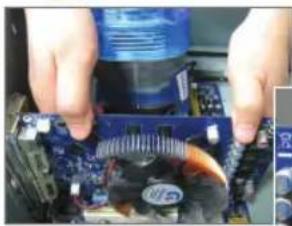
1-1 Remove the metal slot cover and then insert the graphics card into the slot.
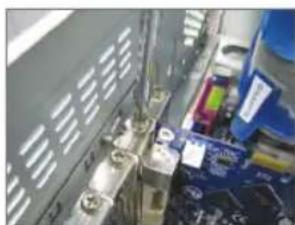
1-2 Once the graphics card is securely seated in the slot, replace the screw to fasten the card.

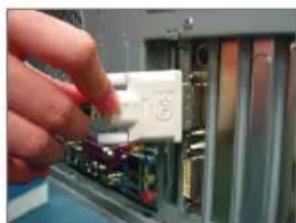
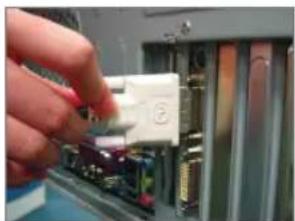
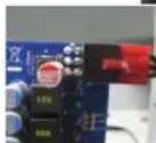
If there is a power connector on the graphics card, connect the corresponding power supply power cable to your graphics card, or the system will not boot.
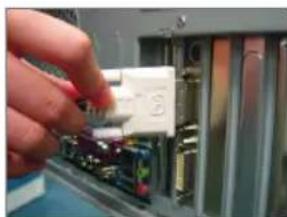
1-3 Plug the display cable into the graphics card; then turn on the computer and monitor.

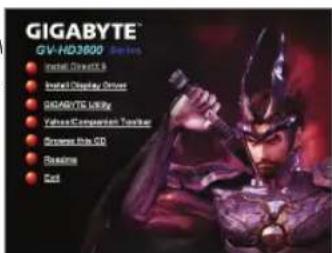
Installation of Drivers


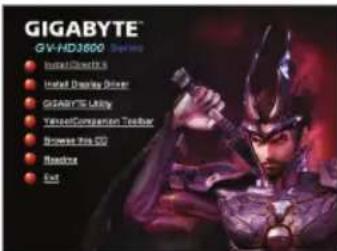
Insert the driver disk into your optical drive. The Autorun window automatically appears. (If it does not appear automatically, go to My computer, double-click the optical drive and execute the setup.exe program.) Complete the installation procedure following the on-screen instructions.
Installation of Microsoft DirectX
Install Microsoft® DirectX® to enable 3D hardware acceleration support for Windows® XP to achieve better 3D performance.

Introduction of the Display Properties Page


YcTaHOBka rpaΦnuecko nIaTbI
1-1 CHINMTE MeTALIHueCKyU KpbIuKy, 3aKpbBaUoSyU pa3bEm paunpeHHn, uYCTAHOBITE B 3OT pa3bEm rpaQneCKyU pNaTy.

1-2 y6eINBwncb, yTO rpaΦnuecka nnata HadeXho yCTaHOBJIeHa B pa3beMe, 3aBePHnte KpeNXbI BNHT.

EcHnHa rpa#chuecko nnate HmeeTc pa3bem nHTAHN, NOKNIHOHTe K Hemy COOTBETCTBYOUsn PpOBd NHTAHN. B IpOTNBOM cnyae KOMNbIOTep He 3aRpy3NTC.
1-3 IopKnHouTe K rpaquecko nIate Kaebb MOHITopa. BKNIOUHTe KOMNbIOTep m MOHITOP.

YcTaHOBKa IpaIbepOB

Bctabbte B CD-DCNCKOBOD KOMNaKT- DnCK C dpaBepamn. NOBNTcR OKHO aBTO3anycka. Ecnn OkHo He nOraBnIOcB, BbI6epnte NyHKT "MOn KOMNBIOTe", DBaXdbI 9eKHNTE Mblbno no NIKTORpAmme CD- DnCKOBODa n 3anyCTnte paan setup.exe. BblonHnTe npoceDpy yCTaHOBKn, CJIeDyra BBIODMbIM Ha 3kpan HnCTpyKUmaR.
YcTaHObKa IIO Microsoft 念 DirectX
Дя подержкн annapathoro yckopeneria tpexmepho B Windows XP n DocnkeHnnyupei npo3bOIndTeNbHocTn tpexmepho rpaqkn cneyet yctahOBntb PO Microsoft DirectX.

Kpatkne cBeDeHn o6 okHe 3KpaH - NapaMeTpbl
IIN3MeHHeNpa3peHHeN3KpHa - CDBHHbTe DnNKoB H KyhHyc TcPOHy.
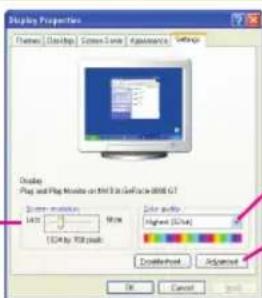
IINBbIbopaKaueCTBaCBeTonepeaHaxMMTE3TyKHOKy.
Дя BXODA B MeHOp pacuHpeHHbIX HAcTpoEk 3KpaHa HaxMTe KhoNky "DononHnTeIbHo".

Installera drivrutiner


a a a a a a a a a a a a a a a a a a a a a a a a a a a a

jglal 1

1900/98/ME Drivers
Microsoft
y
auii j
m = 311
1
aalil 1-1

JiL 110000000000000000000000000000000000000000000000
1-3
J 1
J 1
J 1
J 1
J 1
slll 1
J 1
a a a a a a a a a a a a a a a a a a a a a a a a a a a a a a a a a a
1-2

Drivers
2
J 1 J 1 J 1 J 1 J 1 J 1 J 1 J 1 J 1 J 1 J 1 J 1 J 1 J 1 J 1 J 1 J 1 J 1 J 1 J 1 J 1 J 1 J 1 J 1 J 1 J 1 J 1 J 1 J 1 J 1 J 1 J 1 J 1 J 1 J

Microsoft DirectX
Microsoft DirectX 1
jellailuaiaiaia
a
3
J 15 J 15 J 15 J 15 J 15 J 15 J 15 J 15 J 15 J 15 J 15 J 15 J 15 J 15 J 15 J 15 J 15 J 15 J 15 J 15 J 15 J 15 J 15 J 15 J 15 J 15
S
1
1-1

- Graphics Card Installation
- Installation of a Graphics Card
- Installation of Drivers
- Installation of Microsoft DirectX
- Introduction of the Display Properties Page
- YcTaHOBka rpaΦnuecko nIaTbI
- YcTaHOBKa IpaIbepOB
- YcTaHObKa IIO Microsoft 念 DirectX
- Kpatkne cBeDeHn o6 okHe 3KpaH - NapaMeTpbl
- Installera drivrutiner
- auii j
- Drivers
- jellailuaiaiaia
- S
- 1
Brand : GIGABYTE
Model : GVN210D2512I
Category : Graphic card