
HO-FP512W - Robot HIGH ONE - Free user manual and instructions
Find the device manual for free HO-FP512W HIGH ONE in PDF.

| Product type | Multi-function food processor |
| Brand | HIGH ONE |
| Model | HO-FP512W |
| Power supply | 220-240 V~, 50/60 Hz |
| Power | 500 W |
| Bowl capacity | 1.2 L |
| Protection class | Class II |
| Main functions | Knead, chop, slice, grate |
| Included accessories | Kneading hook, chopping blade, slicing disc, fine grating disc, coarse grating disc, disc holder, pusher |
| Bowl material | Plastic (estimated) |
| Speed | 2 speeds + pulse |
| Approx. dimensions | 30 x 20 x 25 cm (estimated) |
| Approx. weight | 2.5 kg (estimated) |
| Cable length | 0.8 m (estimated) |
| Care and cleaning | Bowl, lid, accessories are hand-washable; wipe motor unit with a damp cloth |
| Safety | Locks if bowl or lid not properly engaged; sharp blades, handle with care |
| Warranty | 2 years |
| Intended use | Household use only |
Frequently Asked Questions - HO-FP512W HIGH ONE
User questions about HO-FP512W HIGH ONE
0 question about this device. Answer the ones you know or ask your own.
Ask a new question about this device
Download the instructions for your Robot in PDF format for free! Find your manual HO-FP512W - HIGH ONE and take your electronic device back in hand. On this page are published all the documents necessary for the use of your device. HO-FP512W by HIGH ONE.
USER MANUAL HO-FP512W HIGH ONE
CONDITION DE GARANTIE
This product is guaranteed against faults caused by defects in manufacturing or the materials used for a period of two years, starting from the date of purchase.* This warranty does not cover defects or damage caused by failure to install the device correctly, incorrect use of the product, or excessive wear and tear.
*proof of purchase required
GARANTIEVOORWAARDEN
NL
Thank you for choosing this HIGHONE product. HIGHONE products are chosen, tested, and recommended by ELECTRO DEPOT, so you can be sure you are getting a top-quality, easy-to-use product that won't let you down.
We're confident your new device will be a pleasure to use every day!
Welcome to ELECTRO DEPOT.
Table of Contents

Parts
Product overview
Intended use
Technical specifications

Before first use Use Use -Kneading or chopping Use-Slicing or grating

Cleaning and maintenance Storage
Parts
A Pusher
B Work bowl lid
C Julienne disc
Grating disc - Coarse
E Slicing disc
F Grating disc - Fine
Disc support ring
Drive rod
Work bowl
Drive
K Main motor unit
L Speed control
M Power cable with a power plug
Dough blade
0 S-shaped blade
Product overview
- Unpack the unit. Remove all the labels from the unit. Check that the unit is complete and in a good condition. If the unit is damaged or faulty, do not use it and take it to your retailer or after-sales service centre.
- Keep all packaging out of the reach of children. There is a risk of accidents if children play with packaging materials.
Intended use
This unit has been designed exclusively for kneading and chopping food in private homes.
Any other use may damage the unit or cause injury.
Technical specifications
| Model: | 961777 |
| Operating voltage: | 220-240 V ~, 50/60 Hz |
| Electric power: | 500 W |
| Capacity: | Work bowl: 1.2 L |
| Protection class: | Class II |
Before first use
- Due to the manufacturing process, the unit is likely to emit a faint burning smell when first turned on. This is completely normal and does not indicate a manufacturing defect or risk.
Clean the unit ( Cleaning and maintenance).
Use

WARNING
- Hand injury risk! Carefully grasp the blades when removing, disassembling or cleaning them, as they are extremely sharp.
- Before assembling the unit, always set the control to "0" to switch off the unit and then disconnect the power plug from the mains socket.
- Do not use this unit for hot liquid preparations.
-
Should you need to continuously use the unit, the duration between 2 cycles should be 3 minutes. Do not use it for more than 5 consecutive cycles.
-
Place the motor unit on a dry, flat and stable surface. Make sure that the motor unit's rubber feet are firmly planted on the surface.
Use - Kneading or chopping
Illustration 1
Position the work bowl on the motor unit's drive.
- Turn the bowl anticlockwise until it clicks into place.
- Place the drive rod onto the drive from the inside of the bowl.

WARNING
The S-shaped blade is sharp. Exercise caution when handling the blade.
- Illustrations 3 / 4 : Push the blade onto the drive rod until it slots into place. Place the ingredients in the mixing bowl.
B Product usage
- Place the bowl lid on top of the mixing bowl.
- Turn the bowl lid anticlockwise until it clicks into place.

Note: The unit cannot be used if the bowl and its lid are not secured correctly.
- Set the speed control to "0".
- Connect the power plug to an appropriate mains socket.
- Set the speed control to one of the following positions:
| Position | Suitable for |
| 0 | - (off) |
| 1 | Lower speed |
| 2 | Higher speed |
P Pulse (high power)
Maximum operating time = 1 minute
- Add smaller ingredients or dough to the feed tube. Use the pusher to lower the food into the work bowl.

WARNING
Never put your hands inside the tube. Always use wooden or plastic spatulas, and only when the unit is not in use.
After use, set the speed control to "0" to turn off the unit.
Unplug the power plug from the mains socket.
Use - Slicing or grating
Illustration 2
Position the work bowl on the motor unit's drive.
- Turn the bowl anticlockwise until it clicks into place.
- Place the drive rod onto the drive from the inside of the bowl.
- Insert one of the 4 discs into the disc support ring:
Disc
Suitable for
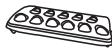
Grating vegetables, fruit or cheese
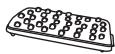

Pureeing potatoes
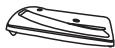
Slicing vegetables, fruit or cheese

WARNING
The discs are sharp. Exercise caution when inserting and removing the discs from the support ring.
- Place the disc support ring on the drive rod.
- Place the bowl lid on top of the mixing bowl.
- Turn the bowl lid anticlockwise until it clicks into place.

Note: The unit cannot be used if the bowl and its lid are not secured correctly.
- Set the speed control to "0".
- Connect the power plug to an appropriate mains socket.
- Set the speed control to one of the following positions:
Position Suitable for
0 - (off)
1 Lower speed (for processing soft ingredients)
2 Higher speed
P Pulse (high power)
Maximum operating time = 1 minute
- Insert the ingredients into the tube. Use the pusher to lower the food into the work bowl.
After use, set the speed control to "0" to switch off the unit.
Unplug the power plug from the mains socket.
Pulse function

WARNING
You can always use the Pulse function for extra power! Use this function for 1 minute max. to prevent the motor from overheating!
- Set the speed control to "P" to start the operation.
- Turn the speed control to "0" to stop the process.
Cleaning and maintenance

WARNING
- Before cleaning or maintaining the unit, make sure that it has been switched off and unplugged from the mains socket. Then let it cool completely.
- Never immerse the unit in water.
-
Handle the blades carefully to avoid injury.
-
Switch off the unit.
- Unplug the power plug from the mains socket.
- Disassemble the unit by performing the assembly steps in reverse order.
- Clean the unit with a soft, slightly damp cloth. Try not to let any moisture get into the unit whilst cleaning it.
- Wash the work bowl, bowl lid, drive rod, disc support ring and blades in a solution of warm water and mild detergent. Then rinse and dry completely.
- Never use corrosive cleaners, wire brushes, abrasive scouring pads or metal/sharp tools to clean your unit.
- Thoroughly dry the unit after cleaning it.
- Store the unit in a cool, dry place, out of the reach of children and pets.
Storage
- Always unplug the unit before storing it.
- Store the unit in a fresh, dry and dust-free place, out of the reach of children and pets.
- Please retain the packaging and use it to store your unit when it is not in use for an extended period of time.

Bedankt!

- CONDITION DE GARANTIE
- GARANTIEVOORWAARDEN
- Table of Contents
- Parts
- Product overview
- Intended use
- Technical specifications
- Before first use
- Use
- WARNING
- Use - Kneading or chopping
- B Product usage
- Use - Slicing or grating
- Illustration 2
- Disc
- Suitable for
- The discs are sharp. Exercise caution when inserting and removing the discs from the support ring.
- Note: The unit cannot be used if the bowl and its lid are not secured correctly.
- Position Suitable for
- Pulse function
- Cleaning and maintenance
- Storage
- Bedankt!
Brand : HIGH ONE
Model : HO-FP512W
Category : Robot