
DVD-R125P - DVD player SAMSUNG - Free user manual and instructions
Find the device manual for free DVD-R125P SAMSUNG in PDF.
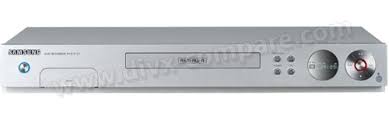



| Product type | DVD recorder/player |
| Brand | Samsung |
| Model | DVD-R125P |
| Dimensions (W x D x H) | 430 x 250 x 59 mm |
| Weight | 2.9 kg |
| Power supply | 220-240 V AC, 50 Hz |
| Power consumption | 35 W |
| Supported disc formats | DVD-Video, DVD-RAM, DVD-RW, DVD-R, CD, CD-R/RW, MP3, JPEG, MPEG4 |
| Recording modes | XP, SP, LP, EP (6 h or 8 h) |
| Video outputs | HDMI (576p/720p/1080i), Component, S-Video, Composite, SCART AV1 (RGB/Composite) |
| Audio outputs | Digital optical and coaxial, analog stereo |
| Inputs | Antenna, SCART AV2, AV3 (Composite), DV (i.LINK) |
| Main functions | Timer recording, ShowView, MPEG4 playback, automatic chapter creation, title editing, playlist, progressive scan |
| Care and cleaning | Unplug before cleaning; use a soft dry cloth; do not use benzene, thinner or solvent |
| Safety | Do not expose to moisture; do not open; use only approved accessories; follow ventilation instructions |
| Warranty | 12 months (parts and labor) from date of purchase |
| Supplied accessories | Remote control, batteries, SCART cable, HDMI cable, quick start guide |
| Operating temperature | +5°C to +35°C |
| Operating humidity | Less than 75% |
| Repairability | Refer all servicing to qualified personnel; contact Samsung after-sales service |
Frequently Asked Questions - DVD-R125P SAMSUNG
User questions about DVD-R125P SAMSUNG
0 question about this device. Answer the ones you know or ask your own.
Ask a new question about this device
Download the instructions for your DVD player in PDF format for free! Find your manual DVD-R125P - SAMSUNG and take your electronic device back in hand. On this page are published all the documents necessary for the use of your device. DVD-R125P by SAMSUNG.
USER MANUAL DVD-R125P SAMSUNG
This symbol indicates "dangerous voltage" inside the product that presents a risk of electric shock or personal injury.

This symbol indicates important instructions accompanying the product.
Do not install this equipment in a confined space such as a bookcase or similar unit.
WARNING: To prevent damage which may result in fire or electric shock hazard, do not expose this appliance to rain or moisture.
CAUTION: DVD RECORDER USES AN INVISIBLE LASER BEAM WHICH CAN CAUSE HAZARDOUS RADIATION EXPOSURE IF DIRECTED. BE SURE TO OPERATE RECORDER CORRECTLY AS INSTRUCTED.
CAUTION
THIS PRODUCT UTILIZES A LASER. USE OF CONTROLS OR ADJUSTMENTS OR PERFORMANCE OF PROCEDURES OTHER THAN THOSE SPECIFIED HEREIN MAY RESULT IN HAZARDOUS RADIATION EXPOSURE. DO NOT OPEN COVERS AND DO NOT REPAIR YOURSELF. REFER SERVICING TO QUALIFIED PERSONNEL.
This product satisfies CE regulations when shielded cables and connectors are used to connect the unit to other equipment. To prevent electromagnetic interference with electric appliances, such as radios and televisions, use shielded cables and connectors for connections.
IMPORTANT NOTE
The mains lead on this equipment is supplied with a moulded plug incorporating a fuse. The value of the fuse is indicated on the pin face of the plug. If it requires replacing, a fuse approved to BS1362 of the same rating must be used.
Never use the plug with the fuse cover omitted if the cover is detachable. If a replacement fuse cover is required, it must be of the same colour as the pin face of the plug. Replacement covers are available from your dealer.
If the fitted plug is not suitable for the power points in your house or the cable is not long enough to reach a power point, you should obtain a suitable safety approved extension lead or consult your dealer for assistance.
However, if there is no alternative to cutting off the plug, remove the fuse and then safely dispose of the plug. Do not connect the plug to a mains jack, as there is a risk of shock hazard from the bared flexible cord.
The product unit accompanying this user manual is licensed under certain intellectual property rights of certain third parties. This license is limited to private non-commercial use by end-user consumers for licensed contents.
No rights are granted for commercial use. The license does not cover any product unit other than this product unit and the license does not extend to any unlicensed product unit or process conforming to ISO/IEC 11172-3 or ISO/IEC 13818-3 used or sold in combination with this product unit. The license only covers the use of this product unit to encode and/or decode audio files conforming to the ISO/IEC 11172-3 or ISO/IEC 13818-3. No rights are granted under this license for product features or functions that do not conform to the ISO/IEC 11172-3 or ISO/IEC 13818-3.
Precaution
Important Safety Instructions
Read these operating instructions carefully before using the unit. Follow all the safety instructions listed below. Keep these operating instructions handy for future reference.
1) Read these instructions. 2) Keep these instructions. 3) Heed all warnings. 4) Follow all instructions. 5) Do not use this apparatus near water. 6) Clean only with dry cloth. 7) Do not block any ventilation openings. Install in accordance with the manufacturer's instructions. 8) Do not install near any heat sources such as radiators, heat registers, stoves, or other apparatus (including amplifiers) that produce heat. 9) Do not defeat the safety purpose of the polarized or grounding-type plug. A polarized plug has two blades with one wider than the other. A grounding-type plug has two blades and a third grounding prong. The wide blade or the third prong are provided for your safety. If the provided plug does not fit into your outlet, consult an electrician for replacement of the obsolete outlet. 10) Protect the power cord from being walked on or pinched particularly at plugs, convenience receptacles, and the point where they exit from the apparatus. 11) Only use attachments/accessories specified by the manufacturer. 12) Use only with the cart, stand, tripod, bracket, or table specified by the manufacturer, or sold with the apparatus. When a cart is used, use caution when moving the cart/apparatus combination to avoid injury from tip-over. 13) Unplug this apparatus during lightning storms or when unused for long periods of time. 14) Refer all servicing to qualified service personnel. Servicing is required when the apparatus has been damaged in any way, such as power-supply cord or plug is damaged, liquid has been spilled or objects have fallen into the apparatus, the apparatus has been exposed to rain or moisture, does not operate normally, or has been dropped.
Handling Cautions
- Before connecting other components to this recorder, be sure to turn them all off.
- Do not move the recorder while a disc is being played, or the disc may be scratched or broken, the recorder's internal parts may be damaged.
- Do not put a flower vase filled with water or any small metal objects on the recorder.
- Be careful not to put your hand into the disc tray.
- Do not place anything other than the disc in the disc tray.
- Exterior interference such as lightning and static electricity can affect normal operation of this recorder. If this occurs, turn the recorder off and on again with the STANDBY/ON button, or disconnect and then reconnect the AC power cord to the AC power outlet. The recorder will operate normally.
- Be sure to remove the disc and turn off the recorder after use.
- Disconnect the AC power cord from the AC outlet when you don't intend to use the recorder for long periods of time.
- Clean the disc by wiping in a straight line from the inside to the outside of the disc.
Maintenance of Cabinet
For safety reasons, be sure to disconnect the AC power cord from the AC outlet.
- Do not use benzene, thinner, or other solvents for cleaning.
- Wipe the cabinet with a soft cloth.
Disc Handling
- Use discs with regular shapes. If an irregular disc (a disc with a special shape) is used, this DVD recorder m
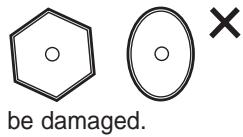
Holding discs
- Avoid touching the surface of a disc where recording is performed.

DVD-RAM, DVD-RW and DVD-R
- Clean with an optional DVD-RAM/PD disc cleaner (LF-K200DCA1 where available). Do not use cleaners or cloths for CDs to clean DVD-RAM/DVD-RW/DVD-R discs.

DVD-Video, Audio CD
- Wipe off dirt or contamination on the disc with a soft cloth.
Cautions on handling discs
- Do not write on the printed side with a ball-point pen or pencil.
- Do not use record cleaning sprays or antistatic. Also, do not use volatile chemicals, such as benzene or thinner.
- Do not apply labels or stickers to discs. (Do not use discs fixed with exposed tape adhesive or leftover peeled-off stickers.)
- Do not use scratch-proof protectors or covers.
- Do not use discs printed with label printers available on the market.
- Do not load warped or cracked discs.
Disc Storage
Be careful not to harm the disc because the data on these discs is highly vulnerable to the environment.
- Do not keep under direct sunlight.
- Keep in a cool ventilated area.
- Store vertically.
- Keep in a clean protection jacket.
- If you move your DVD recorder suddenly from a cold place to a warm place, condensation may generate on the operating parts and lens and cause abnormal disc playback. If this occurs, remove the disc and wait for one to two hours with the power on before attempting playback.
Disc Specifications
DVD-Video
- A digital versatile disc (DVD) can contain up to 135 minutes of images, 8 audio languages, and 32 subtitle languages. It is equipped with MPEG-2 picture compression and Dolby Digital surround sound, allowing you to enjoy vivid and clear theatre-quality images in the comfort of your own home.
- When switching from the first layer to the second layer of a dual-layered DVD Video disc, there may be momentary distortion in the image and sound. This is not a malfunction of the unit.
- Once a DVD-R/RW recorded in Video Mode is finalized, it becomes DVD-Video.
Audio CD
- An audio disc on which 44.1kHz PCM Audio is recorded.
- Plays CD-DA format audio CD-R and CD-RW discs. The unit may not be able to play some CD-R or CD-RW discs due to the condition of the recording.
CD-R/RW
MP3 CD-R/RW
- Only CD-R discs with MP3 files recorded with ISO9660 or JOLIET format can be played back.
- Only MP3 files with the ".mp3" or ".MP3" extension can be used.
- For MP3 files recorded with a VBR (Variable Bit Rates), from 32 Kbps to 320 Kbps, the sound may cut in and out.
- Playable bitrate range is from 56 Kbps to 320 Kbps.
- The unit can handle a maximum of 500 files and 100 folders.
JPEG CD-R/RW
- Only JPEG files with the ".jpg" or ".JPG" extension can be used.
- The unit can handle a maximum of 500 files and 100 folders. The maximum size of progressive JPEG is 3M pixels.
- MOTION JPEG is not supported.
Using CD-R/RW
- Use a 700MB (80 minutes) CD-R/RW disc. If possible, do not use an 800MB (90 minutes) or above disc, as the disc may not play back.
- If the CD-R/RW disc was not recorded as a closed session, you may experience a delay in the early playback time, and all recorded files may not play.
- Some CD-R/RW discs may not be playable with this unit, depending on the device which was used to burn them. For contents recorded on CD-R/RW media from CDs for your personal use, playability may vary depending on contents and discs.
Using MPEG4 disc
Disc: CD-R/RW, DVD-R/RW/RAM - MPEG4 files with the following extensions can be played: .avi, .divx, .AVI, .DIVX - MPEG4 Codec format: DivX 3.11, DivX 4.x, DivX 5.x, DivX-Pro (without QPEL and GMC) - Available Audio Format: "MP3", "MPEG", "WMA", "LPCM", "AC3" Supported subtitle file formats: .smi, .srt, .sub, .psb, .txt, .ass
DVD-R Disc Playback and Recording
- Once a DVD-R recorded in Video Mode is finalised, it becomes DVD-Video.
- You can record onto the available space on the disc and perform editing functions such as giving titles to discs and programmes and erasing programmes before finalising.
- When programming is erased from a DVD-R, that space does not become available. Once an area on a DVD-R is recorded on, that area is no longer viable for recording, whether the recording is erased or not.
- It takes about 30 seconds for the unit to complete recording management information after recording finishes.
- This product optimizes the DVD-R for each recording. Optimizing is carried out when you start recording after inserting the disc or turning on the unit. Recording onto the disc may become impossible if optimizing is carried out too many times.
- Playback may be impossible in some cases due to the condition of recording.
- This unit can play back DVD-R discs recorded and finalised with a Samsung DVD video recorder. It may not be able to play some DVD-R discs depending on the disc and the condition of the recording.
DVD-RW Disc Playback and Recording
- Recording and playback can be performed on DVD-RW discs in both the Video and VR Modes.
- Once a DVD-RW recorded in both the Video and VR Modes is finalised, you cannot perform additional recording.
- Once a DVD-RW recorded in Video Mode is finalised, it becomes DVD-Video.
- In both modes, playback can be performed before and after finalisation, but additional recording, deleting and editing can not be performed after finalisation.
- If you want to record the disc in VR Mode and then record in V Mode, be sure to execute Format. Be careful when executing Format because all the recorded data may be lost.
- A DVD-RW blank disc is initialized to VR Mode when first initialized.
DVD-RW (VR mode)
- This is a format that is used for recording data on a DVD-RAM or DVD-RW disc. You can record multiple titles, edit, delete, partial delete, create a playlist, etc.
- A disc that is recorded in this mode may not be played by existing DVD Recorder.
DVD-RW (Video mode)
- This is a format that is used for recording data on a DVD-RW or DVD-R disc. The disc can be played by existing DVD Recorder once it has been finalised.
- If a disc that has been recorded in Video Mode by a different maker's recorder but has not been finalised, it cannot be played or additionally be recorded by this recorder.
DVD-RAM Disc Playback and Recording
- Ensure that the recording mode is set to VR mode. Otherwise, this product will not be able to play the recording.
- You cannot play a DVD-RAM in most DVD components due to compatibility issues. Only DVD-RAM standard Version 2.0 discs can be played in this unit.
- DVD-RAM recorded on this unit may not work with other DVD components. To determine compatibility with these DVD-RAM discs, refer to the user's manual for the DVD recorder.
- For cartridge type DVD-RAM discs, remove the cartridge and use the disc only.
COPY PROTECTION
- Many DVD discs are encoded with copy protection. Because of this, you should only connect your DVD recorder directly to your TV, not to a VCR. Connecting to a VCR results in a distorted picture from copy-protected DVD discs.
- This product incorporates copyright protection technology that is protected by methods claims of certain U.S. patents and other intellectual property rights owned by Macrovision Corporation and other rights owners. Use of this copyright protection technology must be authorised by Macrovision Corporation, is intended for home and other limited viewing uses only unless otherwise authorised by Macrovision Corporation.
Reverse engineering or disassembly is prohibited.
Protection
This DVD Recorder can allow you to protect the contents of your discs, as described below.
Programme-protected: See page 72 "Locking (Protecting) a Title" - Disc-protected: See page 84 "Disc Protection"
- DVD-RAM/DVD-RW/DVD-R discs that are incompatible with the DVD-VIDEO format cannot be played with this product.
- For more information on DVD recording compatibility, consult your DVD-RAM/DVD-RW/DVD-R manufacturer.
- Use of poor quality DVD-RAM/DVD-RW/DVD-R discs may cause following unexpected problems including, without limitation, recording failure, loss of recorded or edited materials or damage to the recorder.
Do not use the following discs!
- LD, CD-G, CD-I, CD-ROM, DVD-ROM, DVD+R and DVD+RW discs should not be used in this product. [Note] Disc types that can be played : CD/CD-R/CD-RW/MP3/JPEG/DVD-Video/DVD-RAM/DVD-RW/DVD-R. For a DVD-R/DVD-RW disc, which has been recorded in Video Mode on another component, it can play only when finalised.
- Some commercial discs and DVD discs purchased outside your region may not be playable with this product. When these discs are played, either "No disc." or "Please check the regional code." will be displayed.
- If your DVD-RW disc is an illegal copy or is not in DVD video format, it may also not be playable.
We recommend using one of the discs in the table as they have been confirmed to be compatible with this unit. Other discs may not perform correctly.
| Media | Disc | SPEED |
| DVD-R | TDK | 4x |
| Beall | 4x | |
| That's | 4x | |
| Maxell | 4x | |
| Panasonic | 4x | |
| DVD-RW | TDK | 2x |
| Maxell | 2x | |
| Optodisc | 2x | |
| Radius | 2x | |
| Verbatim | 2x | |
| DVD-RAM | Maxell | 3x |
| Fujifilm | 3x | |
| TDK | 2x | |
| Panasonic | 3x |
| Disc | Maximum no. of recordings by disc type |
| DVD-RAM | 100,000 |
| DVD-RW | 1,000 |
| DVD-R | 1 |
- We take no responsibility and offer no compensation for any recording failure, loss of recorded or edited material and/or damage to the recorder arising from usage of unrecommended discs.
Contents
Getting Started
Warning. 2 Precaution 3 Important Safety Instructions. 3 Handling Cautions 3 Maintenance of Cabinet. 3 Disc Handling 3 Disc Storage 4 Disc Specifications 4
General Features. 8
Before reading the user's manual. 9
How to use the DVD Recorder. 9
Unpacking 11
Accessories. 11 Preparing the Remote Control. 11 Setting the Remote Control 11
Description 13
Front Panel 13 Front Panel Display. 13 Rear Panel. 14 Tour of the Remote Control 15
Connecting & Setting Up
Quick Overview 16 Connecting the DVD-Recorder 17 Additional connections. 17 Antenna + DVD Recorder + external decoder box + TV 18 Other type of connecting the Video output cable.....18 Case 1: Connecting to a Video (Composite) output jack .19 Case 2: Connecting to an S-Video output jack.19 Case 3 : Component Video output jacks. 20
Other type of connecting the Audio output cable ..20
Case 1: Connecting to your TV. 20 Case 2: Connecting to a stereo amplifier with AV output jacks 21 Case 3: Connecting to an AV amplifier with a digital output jack................................21
Connecting HDMI/DVI to a TV 22
Case 1: Connecting to a TV with HDMI Jack. 22 Case 2: Connecting to a TV with DVI Jack .22
Connecting to AV3 IN, DV input jack. 23
Case 1 : Connecting a VCR, Set-Top Box(STB), DVD recorder or Camcorder to the AV3 IN jacks …23 Case 2: Connecting a Camcorder to the DV IN jack...23
System Setup
On-Screen Menu Navigation 24 Plug & Auto Setup 25 Setting the Clock. 26 Presetting Channels with the Auto Setup function.....27 Preseting Channels with the Manual Setup function 28 Setting up the Language Options. 29 EP Mode Time Setting. 30 Automatic Chapter Creation 30 Setting up the Front Display Options. 31 Setting up NICAM Options 32 DivX(R) Registration 33 Setting up the Audio Options 33
Audio Options 34
Setting up Video Output Options. 34 Setting up the Progressive scan. 35 Canceling the Progressive scan 36 Setting up the Display(Video) Options. 36
Display(Video) Options 37 Output selection 37
Setting up the Parental Control. 38
If you forgot your password 38 About the Rating Level 39 About the Change Password 39
Recording
Before Recording. 40
Recordable discs. 40
Recording Formats 41
Recording Mode. 41
Unrecordable video. 41
About INFO Key. 42
Checking the available disc space (Disc Information)...42
Recording the current TV programme you are
watching 42
Recording from external equipment you are
watching 44
Copying from a Camcorder 45
Making a One Touch Recording (OTR) 46
Making a Timer Recording 47
Flexible Recording (for Timer recording only) ...48
Editing the Scheduled Record List. 48
Deleting the Scheduled Record List. 49
Using the ShowView Feature. 50
ShowView Extended 51
Recording the Standard Timer List 51
Playback
Before Playing 52
Region code (DVD-Video only) 52
Disc types that can be played. 52
Discs that cannot be played. 52
Playing a Disc 53
Using the Disc Menu & Title Menu 54
Using the Search Functions 54
Slow Motion Play. 55
Step Motion Play. 55
About ANYKEY .55
Using the Repeat Function. 56
Selecting the Subtitle 58
Selecting the Audio language. 59
Changing the Camera Angle. 59
Zooming-In. 60
Using Bookmarks 60
Using Markers 61
Playing an Audio CD/MP3 62
Playing an Audio CD (CD-DA)/MP3 62
Playing a Picture 66
Playing an MPEG4 67
Playing the Title List 68
Editing
Basic Editing (Title List) 71
Renaming (Labeling) a Title 71
Locking (Protecting) a Title 72
Deleting a Title 72
Deleting a Section of a Title 73
Advanced Editing (Playlist) 75
Creating a Playlist 75
Playing Entries in the Playlist 76
Renaming a Playlist Entry 77
Editing a Scene for the Playlist 78
Copying a Playlist Entry to the Playlist 81
Deleting a Playlist Entry from the Playlist. 82
Disc Manager 83
Editing the Disc Name. 83
Disc Protection 84
Formatting a Disc. 84
Delete All Title Lists. 85
Finalising a disc. 86
Unfinalising a disc (V/VR mode) 87
Additional Information
Troubleshooting 88
Specifications. 92
General Features
The DVD Recorder allows you to record and play high quality digital video on DVD-RAM/DVD-RW/DVD-R discs. You can record and edit digital images on DVD-RAM/DVD-RW/DVD-R discs as if they were VCR tapes.
High quality digital audio and video recording and playback
Record up to 16 hours of video with a double-sided 9.4 GB DVD-RAM disc, or up to 8 hours of video with a 4.7 GB DVD-RAM/DVD-RW/DVD-R disc, depending on the recording mode.
Selectable Recording Mode
You can set your recorder to one of four different recording speeds, each varying in recording quality and length. EP (6Hr or 8Hr) mode yields the most recording time, while LP and SP modes provide less recording time with higher quality recording, and XP mode gives you the highest quality recording.
Automated Quality Adjustment for Timer Recording
If FR mode is selected, the video quality is adjusted automatically so that all video for the scheduled time can be recorded onto the free disc space. (See page 48.)
Creating a DVD video title using DVD-RW/DVD-R disc
With the DVD Recorder, you can create your own DVD Video titles on 4.7 GB DVD-RW/DVD-R discs.
Copying data from a digital camcorder using a DV input jack
Record DV Device video onto DVD-RAM or DVD-RW, DVD-R discs using the DV input jack (IEEE 1394-4pin/4pin). (See page 45.)
High quality progressive scan
Progressive scanning provides high resolution and flicker-free video. The 10-bit 54-MHz DAC and 2D Y/C Separating Circuitry provides the highest image playback and recording quality. (See pages 20, 36)
A variety of functions with an easy-to-use user interface
The integrated menu system and the messaging function allow you to perform desired operations both easily and conveniently. With a DVD-RAM or DVD-RW disc, you can edit recorded video, create a playlist, and edit video in a specific sequence according to your requirements.
MPEG4 playback
This DVD Recorder can play MPEG4 formats within an AVI file.
DivX Certification
DivX, DivX Certified, and associated logos are trademarks of DivXNetworks Inc. and are used under license.

HDMI (High Definition Multimedia Interface)
HDMI reduces picture noise by allowing a pure digital video/audio signal path from the DVD recorder to your TV.
Before reading the user's manual
Make sure to check the following terms before reading the user's manual.
Icons that will be used in manual
| Icon | Term | Definition |
| DVD-RAM | DVD | This involves a function available in DVD or DVD-R/DVD-RW discs that have been recorded and finalised in Video Mode. |
| DVD-RAM | RAM | This involves a function available in DVD-RAM. |
| DVD-RW | RW | This involves a function available in DVD-RW. |
| DVD-R | R | This involves a function available in DVD-R. |
| CD | CD | This involves a function available in a data CD (CD-R or CD-RW). |
| JPEG | JPEG | This involves a function available in CD-R/-RW or DVD-R/-RW/-RAM discs. |
| MP3 | MP3 | This involves a function available in CD-R/-RW or DVD-R/-RW/-RAM discs. |
| MPEG4 | MPEG4 | This involves a function available in CD-R/-RW or DVD-R/-RW/-RAM discs. |
| ! | Caution | This involves a case where a function does not operate or settings may be cancelled. |
| NOTE | This involves tips or instructions on the page that help each function operate. | |
| One-Touch button | A function that can be operated by using only one button. | |
| ANYKEY | ANYKEY button | A function that can be operated by using ANYKEY button. |
About the use of this user's manual
1) Be sure to be familiar with Safety Instructions before using this product. (See pages 2~5) 2) If a problem occurs, check for Troubleshooting. (See pages 88~91)
Copyright
©2005 Samsung Electronics Co. All rights reserved; No part or whole of this user's manual may be reproduced or copied without the prior written permission of Samsung Electronics Co.
How to use the DVD Recorder
Step 1 Select the disc type
This unit can record on the following types of discs. If you want to repeatedly record on the same disc or you want to edit the disc after recording, select a rewritable DVD-RW or DVD-RAM type disc. If you want to save recording without any change, choose a non-rewritable DVD-R.
RAM
Step 2: Format the disc to start recording.
Unlike a VCR, the recorder automatically starts formatting when an unused disc is inserted. This is required for the preparation of recording on a disc.
Using a DVD-RAM
This type of disc can be formatted in DVD-Video Recording format (VR mode). You can edit recorded images and create a playlist and edit images in a specific sequence according to your requirements.
Using a DVD-RW
This type of disc can be formatted in either DVD-Video format (Video mode) or DVD-Video Recording format (VR mode). For an unused disc, a message that asks whether to format in VR Mode or not is displayed. You can play a Video mode disc on various DVD components. A VR mode disc allows more varied editing.
Using a DVD-R
This type of disc can be formatted in DVD Video format. After formatting is complete, you can record on the disc. You can play this type of disc on various DVD components only when they have been finalised.
NOTE
- You can only use either the VR or Video mode on a DVD-RW, but not both at the same time.
- You can change the DVD-RW format to another format by reinitializing. It should be noted that the disc's data will be lost when changing formats.
Step 3: Recording
There are two different recording methods: Direct Recording and Timer Recording. Timer recording is classified as a Date: Once (dd/mm(MON)), Every Day, MON-SAT, MON-FRI, Every SAT, etc. Recording mode: XP (high quality mode), SP (standard quality mode), LP (long recording mode), and EP (extended mode) according to the recording mode. When recording is set in the FR mode, the best quality picture is recorded with regards to the remaining time on the disc.
Step 4: Playing
You can select the title you want to play from a displayed menu and then immediately start playback. A DVD consists of sections called titles, and subsections called chapters. During recording, a title is created between two points where you start and stop recording. Chapters will be created automatically when you finalise recording on DVD-R / DVD-RW discs in Video mode. The chapter's length (interval between chapters) varies according to the recording mode.
Step 5: Editing a recorded disc
Editing on discs is easier than on conventional video tapes. The recorder supports many different edit functions, possible only with DVDs.
With a simple and easy edit menu, you can operate various edit functions, such as delete, copy, rename, lock, etc., on a recorded title.
Creating a playlist (DVD-RAM/RW in VR mode): With this recorder, you can create a new playlist on the same disc and edit it without changing the original recording.
Step 6: Finalising & Playing on other DVD components
To play your DVD on other DVD components, finalising may be necessary. First, finish all editing and recording operations, then finalise the disc.
When using a DVD-RW disc in VR Mode
Although finalising is generally unnecessary when playing the disc on a VR Mode compatible component, a finalised disc should be used for playback.
When using a DVD-RW disc in Video Mode
The disc should be finalised first to enable playback on anything other than this recorder. No more editing or recording can be made on the disc once it has been finalised.
When using a DVD-R disc
You should finalise the disc to play it on a component other than this recorder. You cannot edit or record on the disc once it has been finalised.
Accessories
Check for the supplied accessories below.
Video/Audio Cable
RF Cable for TV
HDMI Cable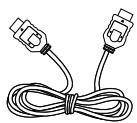
DVI Adapter Cable
Remote Control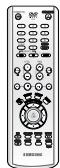
Batteries for Remote Control (AAA Size)
Instruction Manual
Quick Guide
Preparing the Remote Control
Install Batteries in the Remote Control
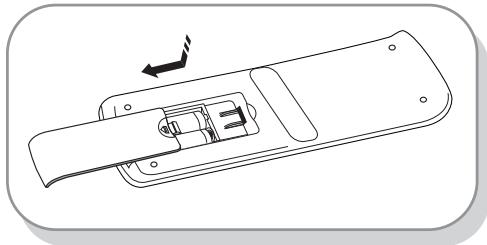
- Open the battery cover on the back of the remote control.
- Insert two AAA batteries. Make sure that the polarities (+ and -) are aligned correctly.
- Replace the battery cover.
If the remote does not operate properly:
- Check the polarity (+/-) of the batteries (dry-cell).
- Check if the batteries are drained.
- Check if the remote sensor is blocked by obstacles.
- Check if there is any fluorescent lighting nearby.
Dispose of batteries according to local environmental regulations. Do not put them in the household trash.
Setting the Remote Control
You can control certain functions of another manufacturer's TV with this remote control.
Control function buttons involve: STANDBY/ON, PROG /, TV VOL +/-, Direct Number buttons, TV MUTE, INPUT button.

To determine whether your television is compatible, follow the instructions below.
- Switch your television on.
- Point the remote control towards the television.
- Press and hold the STANDBY/ON button and enter the two-figure code corresponding to the brand of your television, by pressing the appropriate number buttons.
Controllable TV Codes
| BRAND | BUTTON |
| SAMSUNG | 01, 02, 03, 04, 05, 06, 07, 08, 09 |
| AIWA | 82 |
| ANAM | 10, 11, 12, 13, 14, 15, 16, 17, 18 |
| BANG & OLUFSEN | 57 |
| BLAUPUNKT | 71 |
| BRANDT | 73 |
| BRIONVEGA | 57 |
| CGE | 52 |
| CONTINENTAL EDISON | 75 |
| DAEWOO | 19, 20, 23, 24, 25, 26, 27, 28, 29, 30, 31, 32, 33, 34 |
| EMERSON | 64 |
| FERGUSON | 73 |
| FINLUX | 06, 49, 57 |
| FORMENTI | 57 |
| FUJITSU | 84 |
| GRADIENTE | 70 |
| GRUNDIG | 49, 52, 71 |
| HITACHI | 60, 72, 73, 75 |
| IMPERIAL | 52 |
| JVC | 61, 79 |
| LG | 06, 19, 20, 21, 22, 78 |
| LOEWE | 06, 69 |
| LOEWE OPTA | 06, 57 |
| MAGNAVOX | 40 |
| METZ | 57 |
| MITSUBISHI | 06, 48, 62, 65 |
| MIVAR | 52, 77 |
| NEC | 83 |
| NEWSAN | 68 |
| NOBLEX | 66 |
| NOKIA | 74 |
| NORDMENDE | 72, 73, 75 |
| PANASONIC | 53, 54, 74, 75 |
| PHILIPS | 06, 55, 56, 57 |
| PHONOLA | 06, 56, 57 |
| PIONEER | 58, 59, 73, 74 |
| RADIOLA | 06, 56 |
| RADIOMARELLI | 57 |
| RCA | 45, 46 |
| REX | 74 |
| SABA | 57, 72, 73, 74, 75 |
| SALORA | 74 |
| SANYO | 41, 42, 43, 44, 48 |
| SCHNEIDER | 06 |
| BRAND | BUTTON |
| SELECO | 74 |
| SHARP | 36, 37, 38, 39, 48 |
| SIEMENS | 71 |
| SINGER | 57 |
| SINUDYNE | 57 |
| SONY | 35, 48 |
| TELEAVA | 73 |
| TELEFUNKEN | 67, 73, 75, 76 |
| THOMSON | 72, 73, 75 |
| THOMSON ASIA | 80, 81 |
| TOSHIBA | 47, 48, 49, 50, 51, 52 |
| WEGA | 57 |
| YOKO | 06 |
| ZENITH | 63 |
Result: If your television is compatible with the remote control, it will switch off.
It is now programmed to operate with the remote control.
NOTE
If several codes are indicated for your television brand, try each one in turn until you find one that works. If you replace the remote control's batteries, you must set the brand code again.
Then you can control the television using the following buttons after the TV button.
| Button | Function |
| STANDBY/ON | Used to switch the television on and off. |
| INPUT | Used to select an external source. |
| TV VOL (+ or -) | Used to adjust the volume of the television. |
| PROG ( ^ or √ ) | Used to select the desired channel. |
| TV MUTE | Used to toggle the sound on and off. |
| 0~9 | Used to input number directly. |
NOTE
The various functions will not necessarily work on all televisions. If you encounter problems, operate the television directly.
Front Panel

- STANDBY/ON
Turns the recorder on and off.
- AV3 INPUT
Connect external equipment.
- DV-INPUT
Connect external digital equipment with a DV jack. (such as a camcorder)
- DISC TRAY
Opens to accept a disc.
- OPEN/CLOSE
Opens and closes the disc tray.
- P.SCAN
Selects the progressive scan mode.
- DISPLAY
Displays the playing status, title/chapter/time, etc.
- SEARCH/SKIP
Goes to the next title/chapter/track or goes back to the previous title/chapter/track.
- STOP
Stops disc playback.
- PLAY/PAUSE
Plays a disc or pauses playback or recording.
11.PROG (∧∨)
Select TV preset channels.
Same as PROG button on the remote control.
- REC
Starts recording.
- Remote Control Receiver
Front Panel Display

- Lights in the record mode.
- Lights to indicate the timer record mode.
- Lights in the progressive scan mode.
- Playing time/clock/current status indicator.
- Lights when a disc is loaded.
- Lights when a -R/RW/RAM disc is loaded.
Fan
The fan always revolves when the power is on. Ensure a minimum of 10cm clear space on all sides of the fan when installing the product.
1. DIGITAL AUDIO OUT (OPTICAL)
Connects to an amplifier having a digital optical audio input jack.
2. DIGITAL AUDIO OUT (COAXIAL)
Connects to an amplifier having a digital coaxial audio input jack.
3. AUDIO OUT
Connects to the audio input of external equipment using audio cables.
4. VIDEO OUT
Connects to the input of external equipment using a video cable.
5. S-VIDEO OUT
Connects to the input of external equipment using an S-Video cable.
6. COMPONENT VIDEO OUT
Connects to equipment having component video output.
7. AV1 (TV) OUTPUT SCART Connector
8. AV2 (EXT) INPUT SCART Connector
9. HDMI OUT
- In from aerial connector
- Out to TV connector
NOTE
- The Antenna connection does not pass output signal of DVD. To watch a DVD on your TV, you must connect audio/video or Scart cables.
Tour of the Remote Control

- STANDBY/ON Button
- Number Buttons
- TV/DVD Button
- DVD Button
Press this when you use a DVD Recorder.
- TV VOL Buttons
TV volume adjustment.
- Reverse/Forward Skip Buttons
Press to skip a disc backwards or forwards.
These buttons also function as STEP buttons.
Each press will play one-frame forward or reverse (see page 55).
- Reverse/Forward Search Buttons Press to search a disc backwards or forwards.
- Stop Button: Press to stop a disc.
- Play/Pause Button: Press to play or pause a disc.
- MENU Button
Brings up the DVD recorder's setup menu.
- OK/DIRECTION Buttons
(▲▼▶ Buttons)
- REC MODE Button
This will display the recording status (XP/SP/LP/EP).
- REC Button
Use to make a recording on DVD-RAM/-RW/-R discs.
- CANCEL Button
- REPEAT Button
Allows you to repeat a title, chapter, track or disc.
- OPEN/CLOSE Button
To open and close the disc tray.
- AUDIO/TV MUTE Button
Use this to access various audio functions on a disc. (DVD mode)
This operates as Sound Mute. (TV mode)
- TV Button
Press this to operate TV.
- INPUT Button
Select line input signal in external input mode (PROG, AV input or DV INPUT)
20. PROG Button
Select preset channels in a specific order.
Same as PROG buttons in front panel.
- TITLE LIST/DISC MENU Button
Use this to enter the View Recording list/Disc menu.
- PLAY LIST/TITLE MENU Button
Use this to return to the Title menu, or to view the recorded files list.
- ANYKEY Button
Use this to view the status of the disc that is being played.
- SUBTITLE Button
Press this to switch the DVD's subtitle language.
- RETURN Button
Returns to a previous menu.
- MARKER/TIMER Button
Use this to bookmark a position while playing a disc.
Press to directly enter the Timer Recording Mode menu while stopping a disc.
- INFO Button
This will display current settings or disc status.
Connecting
Setting Up
This section involves various methods of connecting the DVD Recorder to other external components and required initial setting modes.
Quick Overview. 16
Connecting the DVD-Recorder. 17
Additional connections 17
Antenna + DVD Recorder + external decoder box + TV 18
Other type of connecting the Video output cable. 18
Other type of connecting the Audio output cable. 20
Connecting to HDMI/DVI to a TV 22
Connecting to AV3 IN, DV input jack............23
Quick Overview
A Quick Overview presented in this guide will give you enough information to start using the recorder.
Connecting to AV3 IN, DV input jack............23
Quick Overview
A Quick Overview presented in this guide will give you enough information to start using the recorder.
Connecting the DVD-Recorder
Additional connections

Antenna + DVD Recorder + external decoder box + TV

Other type of connecting the Video output cable

Other type of connecting the Audio output cable

Connecting to HDMI/DVI to a TV

Connecting to AV3 IN, DV input jack
Connecting the DVD-Recorder
Additional connections
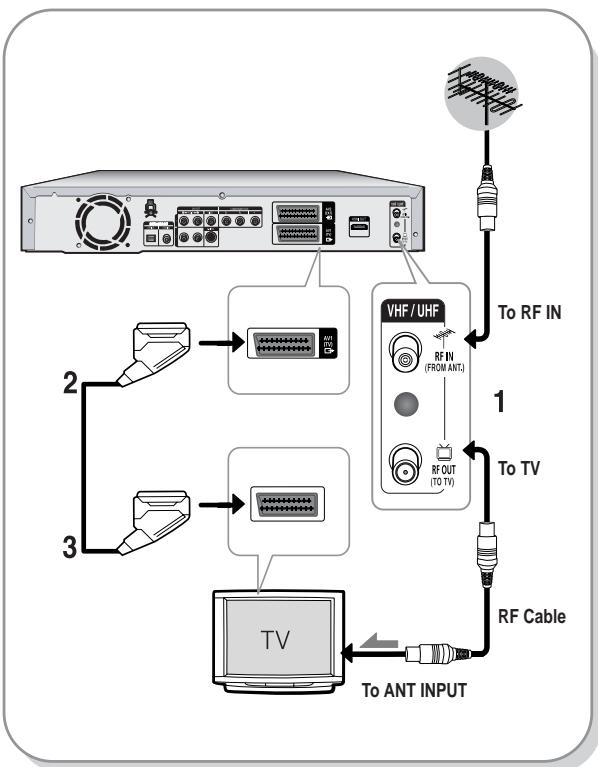
You can connect your DVD Recorder to the television using the SCART cable if the appropriate input is available on the television.
- Connect the RF cable as shown.
- Connect one end of the SCART cable to the AV1 socket on the rear of the DVD Recorder.
- Plug the other end into the appropriate connector on the television.
- Plug in the DVD Recorder and TV
- Turn on the DVD Recorder and TV.
- Press the INPUT button on your TV remote control until the Video signal from the DVD Recorder appears on the TV screen.

NOTE
- The RF cable connection of this product sends only TV signals. You must connect a SCART cable or Audio/Video cables to watch a DVD from your DVD Recorder. TV mode: Press the TV/DVD button on the remote control, then "TV" appears on the front LED display (or turn off the DVD Recorder). Then you can watch programmes received through the RF cable.
You can connect your DVD Recorder to a satellite or digital tuner.

- DVD mode
- Connect the AV2 connector of the DVD Recorder and VCR/Satellite receiver or digital tuner using a SCART cable.
- Connect the AV1 connector to the SCART AV connector on the TV.
- Turn on the DVD Recorder, VCR/Satellite receiver or digital tuner, and TV.
- Set Input mode to AV2.
- TV mode
- Press the TV/DVD button on the remote control, then "TV" appears on the front LED display (or turn off the DVD Recorder).
- You can watch programmes from a satellite or digital tuner connected to this DVD Recorder, even when the DVD Recorder is turned off.
Antenna + DVD Recorder + external decoder box + TV
If you connect an external decoder box to the DVD Recorder, you can record scrambled channels (CANAL+ or Premiere broadcasts) received through the built-in TV tuner in the DVD Recorder.

- Connect RF antenna cables as shown.
- Connect the AV1 connector on this recorder to the SCART AV connector on the TV using a SCART cable.
- Connect the AV2 connector to a SCART AV connector on the decoder box.
- To watch or record PAY-TV Canal Plus programmes, set your DVD Recorder to receive the channels using the on-screen display. (Refer to page 28)
Other types of connecting the video output cable
There are several ways to output video signal without using SCART cables. Select one of the following video connections that best suits you below.
- Case 1: Connecting to a Video (Composite) output jack
- Case 2: Connecting to an S-Video output jack
- Case 3: Component Video output jacks
S-Video, Component video and Progressive Output Modes
- S-Video and Component video output are available only if your TV supports S-Video input or Component video input, respectively. If S-Video or Component video output does not work, check the TV connections and the TV input selection settings.
- Compared to standard interlaced video, progressive scan doubles the amount of video lines fed to your TV, resulting in a more stable, flicker-free, clear image than interlaced video.
This is only available with TVs that support progressive scan.
- Progressive Scan Output (576p)
Consumers should note that not all high definition television sets are fully compatible with this product and may cause artifacts to be displayed in the picture, in case of 576 progressive scan picture problems. It is recommended that the user switch the connection to the 'standard definition' output. If there are questions regarding our TV set compatibility with this model 576p DVD Recorder, please contact our customer service centre.
Case 1: Connecting to a Video (Composite) output jack
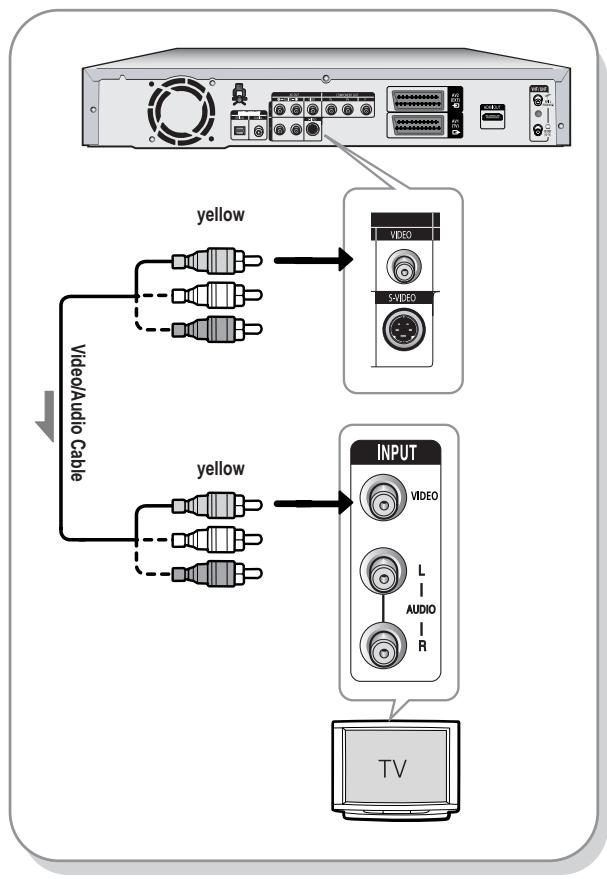
- Connect a video (yellow) cable between the VIDEO (yellow) OUT jack on the DVD Recorder and the VIDEO (yellow) INPUT jack on your TV (or AV amplifier).
- You will enjoy regular quality images.
- Connect audio cables (white and red) between the AUDIO OUT jacks on the DVD Recorder and the AUDIO IN jacks on the TV (or AV amplifier).
(See pages 20 to 21)
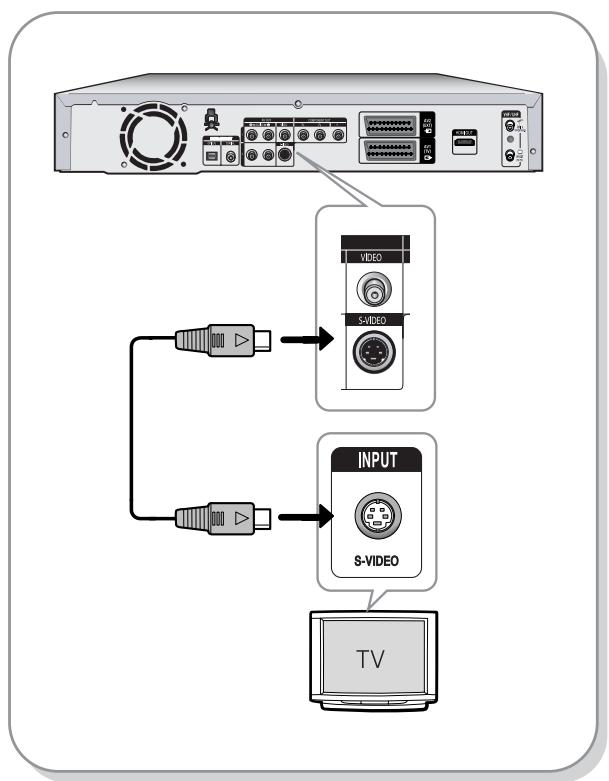
Case 2: Connecting to an S-Video output jack
- Connect an S-Video cable (not included) between the S-VIDEO OUT jack on the DVD Recorder and the S-VIDEO INPUT jack on your TV (or AV amplifier).
- Connect audio cables (white and red) between the AUDIO OUT jacks on the DVD Recorder and the AUDIO IN jacks on the TV (or AV amplifier).
- You will enjoy high quality images.
Case 3: Component Video output jacks
- Connect Component video cables (not supplied) between the COMPONENT OUT (Y, PB, PR) jacks on the DVD Recorder and the COMPONENT IN (Y, PB, PR) jacks on your TV.
- Connect audio cables (white and red) between the AUDIO OUT jacks on the DVD Recorder and the AUDIO IN jacks on the TV (or AV amplifier). (See pages 20 to 21).
- Press the input selection on your TV remote control until the Component signal from the DVD Recorder appears on your TV screen.
- After connecting, refer to pages 34 to 36.
- You will enjoy high quality and accurate colour reproduction images.

The Component jacks will not output video resolutions above 576p.
To view 720p and 1080i, connect the DVD Recorder to your TV with the supplied HDMI cable.
With HDMI connected, press the P.SCAN button to alternate between all available resolutions. (See page 35)
NOTE
Make sure that the colour coded connections match. The Y, PB, PR component output jacks of your DVD Recorder must be connected to the exact corresponding component input jacks on your TV. Progressive setting is only available when the Video Out is set to Component. (See pages 35~36)
Other type of connecting the Audio output cable
There are several ways to output audio signal not using scart cables. Select the audio connection that best suits you below.
- Case 1: Connecting to your TV
- Case 2: Connecting to a stereo amplifier with AV output jacks
- Case 3: Connecting to an AV amplifier with a digital output jack
Manufactured under license from Dolby Laboratories. "Dolby" and the double-D symbol are trademarks of Dolby Laboratories.
"DTS" and "DTS Digital Out" are trademarks of Digital Theatre Systems, Inc.
Case 1: Connecting to your TV
If your TV has audio input jacks, use this connection.

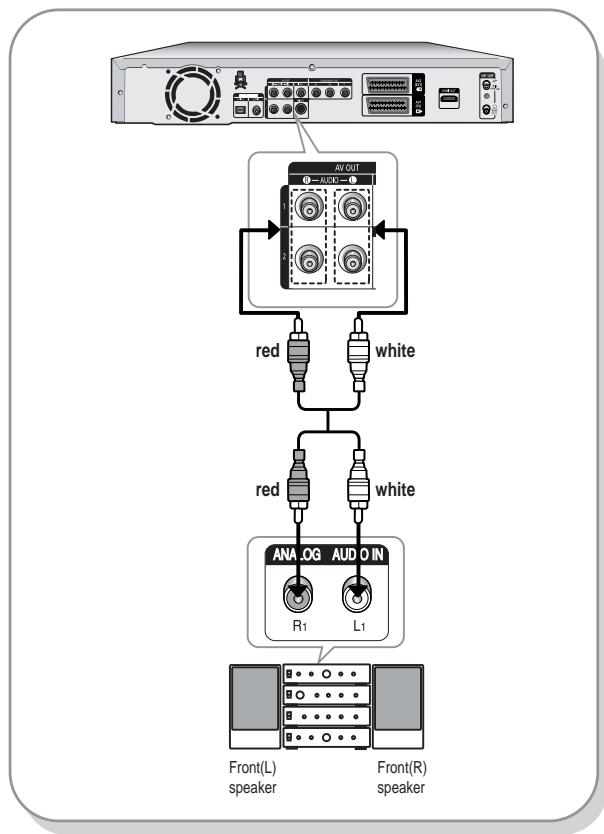
Case 2: Connecting to a stereo amplifier with AV output jacks
If your stereo amplifier only has AUDIO INPUT jacks (L and R), use the AUDIO OUT jacks.
Case 3: Connecting to an AV amplifier with a digital output jack
If your AV amplifier has a Dolby Digital, MPEG2 or DTS decoder and a digital input jack, use this connection. To enjoy Dolby Digital, MPEG2 or DTS sound, you will need to set up the audio settings. (See page 34)

Connecting HDMI/DVI to a TV
If your TV has a HDMI/DVI input, connect HDMI/DVI cable to a TV. You will enjoy the best quality images and sounds.
- Case 1: Connecting to a TV with HDMI Jack
- Case 2: Connecting to a TV with DVI Jack
Case 1: Connecting to a TV with HDMI Jack
- Using the HDMI cable, connect the HDMI OUT jack on the rear of the DVD Recorder to the HDMI IN jack of your TV.
- Press the input selector on your TV remote control until the HDMI signal from the DVD Recorder appears on your TV screen.

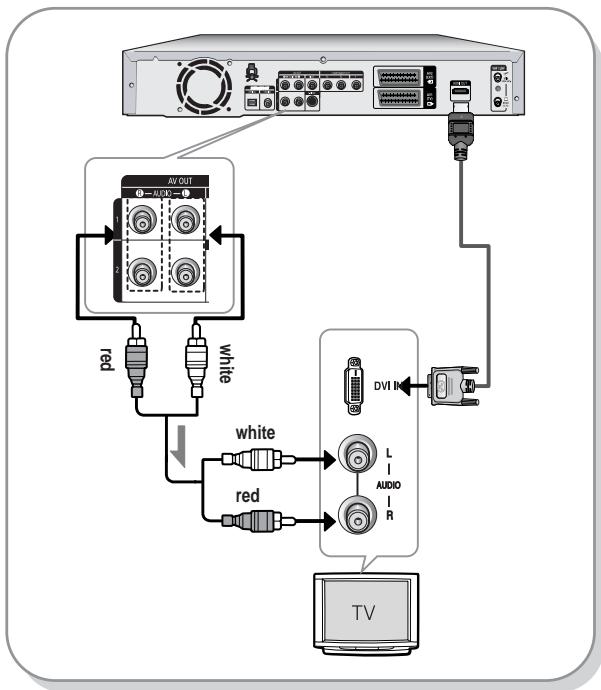
Case 2: Connecting to a TV with DVI Jack
- Using the DVI Adapter Cable, connect the HDMI OUT jack on the rear of the DVD Recorder to the DVI IN jack of your TV.
- Using the audio cables, connect the AUDIO (red and white) OUT jacks on the rear of the DVD Recorder to the AUDIO (red and white) IN jacks of your TV. Turn on the DVD recorder and TV.
- Press the input selector on your TV remote control until the DVI signal from the DVD Recorder appears on your TV screen.

To watch through the HDMI output, set the digital audio output to PCM. See page 33~34. Depending on the HDMI device (TV/HDMI Receiver) you use, audio may not be supported. If TV does not support Dolby digital/DTS, audio output is not available when you set Digital output as Bitstream or select DTS On in Audio setup menu. In this case, set the digital audio output to PCM or DTS off.
NOTE
To change HDMI output resolution, see page 37. HDMI (High Definition Multimedia Interface)
HDMI is an interface that enables the digital transmission of video and audio data with just a single connector. Since HDMI is based on DVI, it is completely compatible with DVI. The only difference between HDMI and DVI is that HDMI supports multi-channel audio.
Using HDMI, the DVD recorder transmits a digital video and audio signal and displays a vivid picture on a TV having an HDMI input jack.
HDMI connection description
HDMI connector - Both uncompressed video data and digital audio data (LPCM or Bit Stream data).
- Though the DVD recorder uses an HDMI cable, the DVD recorder outputs only a pure digital signal to the TV.
- If TV does not support HDCP (High-bandwidth Digital Content Protection), snow noise appears on the screen.
Why does Samsung use HDMI?
Analog TVs require an analog video/audio signal. However, when playing a DVD, the data transmitted to a TV is digital. Therefore either a digital-to-analog converter (in the DVD Recorder) or an analog-to-digital converter (in the TV) is required. During this conversion, the picture quality is degraded due to noise and signal loss. HDMI technology is superior because it requires no D/A conversion and is a pure digital signal from the DVD recorder to your TV.
What is HDCP?
- HDCP (High-bandwidth Digital Content Protection) is a system for protecting DVD content outputted via HDMI from being copied. It provides a secure digital link between a video source (PC, DVD, etc.) and a display device (TV, projector, etc.). Content is encrypted at the source device to prevent unauthorized copies from being made.
Connecting to AV3 IN, DV input jack
This allows you to connect your DVD Recorder to other external devices and view or record their outputs.
- Case 1: Connecting a VCR, Set-Top Box (STB), DVD recorder, or Camcorder to the AV3 IN jacks
- Case 2: Connecting a DV Device to the DV IN jack
Case 1: Connecting a VCR, Set-Top Box (STB), DVD recorder, or Camcorder to the AV3 IN jacks
Connecting a VCR or external device to the AV3 IN jacks of the DVD Recorder.
You can record from connected equipment (VCR, STB, DVD recorder, or Camcorder).

NOTE
AV3 input selection will be done automatically. If the input is not selected automatically, use the INPUT button to select the proper input. - Copy-protected content cannot be recorded.
Case 2: Connecting a Camcorder to the DV IN jack
If your digital camcorder has a DV output jack, connect it to the DV input jack of your DVD Recorder.
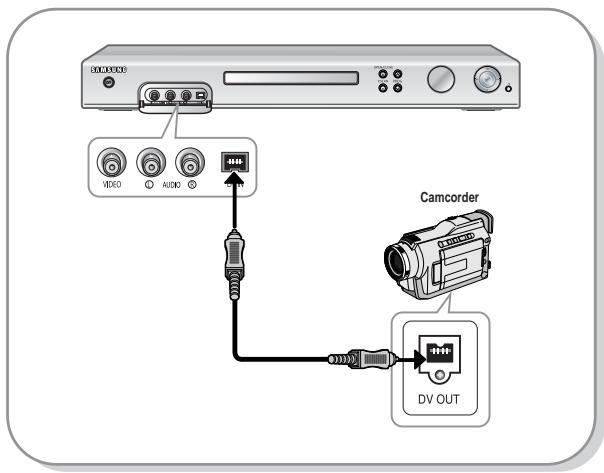
NOTE
If the input is not selected automatically, use the INPUT button to select the proper input.
System Setup
On-Screen Menu Navigation. 24
Plug & Auto Setup. 25
Setting the Clock. 26
Presetting Channels with the Auto Setup function. 27
the Auto Setup function. 27
Presetting Channels with
the Manual Setup function 28
Setting up the Language Options 29
EP Mode Time Setting 30
Automatic Chapter Creation. 30
Setting up the Front Display Options.....31
Setting up NICAM Options 32
DivX(R) Registration. 33
Setting up the Audio Options 33
Setting up Video Output Options. 34
Setting up the Progressive scan. 35
Canceling the Progressive scan. 36
Setting up the Display(Video) Options.....36
Setting up the Parental Control. 38
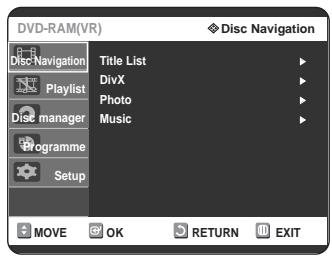
On-Screen Menu Navigation
The on-screen menus allow you to enable or disable various functions on your DVD Recorder.
Use the following buttons to open and navigate through the on-screen menus.

1 MENU Button
Press this button on the remote control to open the on-screen MENU.
Press again to exit the on-screen MENU.
2 Press these buttons on re
Press these buttons on the remote control to move the selection bar , to cycle through the menu options.
OK Button
Press this button on the remote control to confirm any new settings.
RETURN Button
Press this button on the remote control to return to the previous MENU screen displayed or to exit the on-screen MENU.
Plug & Auto Setup
Your DVD Recorder will automatically set itself up when it is plugged in for the first time. TV stations and clock will be stored in memory. The process takes a few minutes. Your DVD Recorder will then be ready for use.
1 Connect the RF cable as indicated on page 18.
(Connecting Your DVD Recorder to the TV Using the RF Cable and scart cable.)
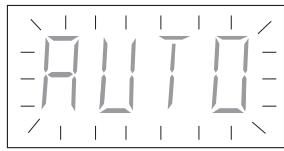
2 Plug the DVD Recorder into the mains. "AUTO" in the front panel display flickers.
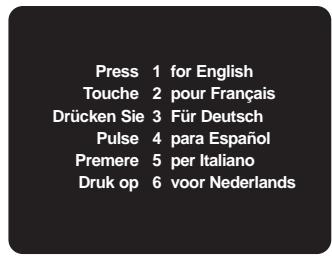
3 Press a Number button to select the language.
4 Start the auto setup.

5 Press the OK button, then select "Country" using the buttons to select your country.

Refer to following abbreviation table when selecting "Country".
| A(Austria) | NL(Netherlands) | S(Sweden) | PL(Poland) |
| B(Belgium) | I(Italy) | CH(Swiss) | CZ (Czech) |
| DK(Denmark) | N(Norway) | TR(Turkey) | Others |
| FIN(Finland) | P(Portugal) | GR(Greece) | |
| D(Deutschland) | E(Spain) | HU(Hungary) |
- The DVD Recorder searches for the stations according to a preset preference list corresponding to the country that you have selected.
6 Press the OK button. Auto Channel scan will be started.

- The number of stations automatically stored by the DVD Recorder depends on the number of stations that it has found.
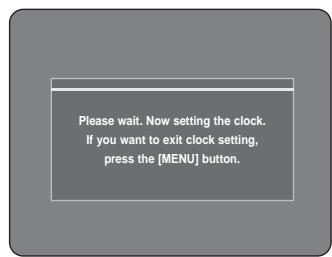
7 After Auto Channel Scan is completed, Auto Clock Setting will be started automatically in 10 seconds. If you want to start Auto Clock Setting immediately, press OK button. If you do not want to do Auto Clock Setting, press CANCEL or MENU button.

8 Wait until current date and time are displayed automatically. If you want to exit Auto clock setting, press MENU button.
9 Check the date and time.

- if it is: Correct, press OK button then the date and time will be saved. If you don't press the OK button, the date and time will be saved automatically after 5 seconds.
- if it is : Incorrect, input correct Time, Date, Year using ▼▲
- buttons or number buttons. Press OK button then the date and time will be saved. When you need to change clock setting, you can set up it manually.

NOTE
Now, DVD Recorder is ready for use. Function for "Plug & Auto Setup" is fixed already. So if you want to change this fixed one, you can change it by Presetting the Stations in OSD "Presetting Channels with the Manual set up function" menu. (see page 28) - Auto Set up function can be performed by pressing (STOP) on the DVD recorder continuously for 5 seconds or more during power off with no disc inserted.
Setting the Clock
This menu is used to set the current time. You need to set the time to use timer recording.
1 With the unit in Stop mode/No Disc mode, press the MENU button.

2 Press the ▲▼ buttons to select Setup, then press the OK or button.

3 Press the ▲▼ buttons to select Clock Set, then press the OK or button.
Use navigation ▲▼◀▶ buttons to input Time, Date or Year. Use number buttons to input clock data directly.

4 Press the ▲▼ buttons to select On for the Auto Clock.
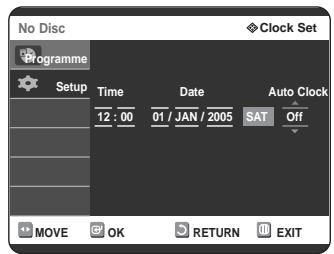
Press the OK button, then the date and time will be saved.
If you don't press the OK button, it will not be saved.

NOTE
- You must have the RF cable connected to set the Auto Clock. See page 18
- The DVD Recorder automatically sets the clock according to the time signal broadcast between the channels PR1 to PR5. If you do not need the Auto clock set function, select Off.
Presetting Channels with the Auto Setup function
This feature allows you to manually set the DVD Recorder tuner band to Antenna or Cable, whichever you connected to the Antenna In jack during initial setup.
1. With the unit in Stop mode/No Disc mode, press the MENU button.

2. Press the ▲▼ buttons to select Setup, then press the OK or ▶ button.
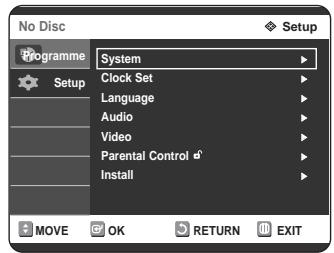
3. Press the ▲▼ buttons to select Install, then press the OK or ▶ button.
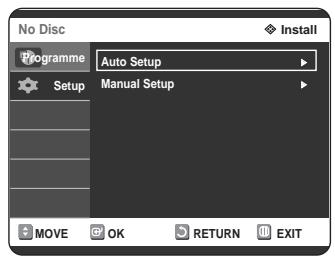
4. Press the ▲▼ buttons to select Auto Setup, then press the OK or ▶ button. The message "Your data will be lost. Press [OK] to continue, [MENU] to exit." is displayed.

5. Press the OK button, then press the ▶ buttons to select your "Country".
- The DVD Recorder searches for the stations according to a preset preference list corresponding to the country that you have selected.

Refer to the following table when selecting your country.
| A(Austria) | NL(Netherlands) | S(Sweden) | PL(Poland) |
| B(Belgium) | I(Italy) | CH(Swiss) | CZ (Czech) |
| DK(Denmark) | N(Norway) | TR(Turkey) | Others |
| FIN(Finland) | P(Portugal) | GR(Greece) | |
| D(Deutschland) | E(Spain) | HU(Hungary) |
6. Press the OK button to continue. If you want to exit, press the MENU button.
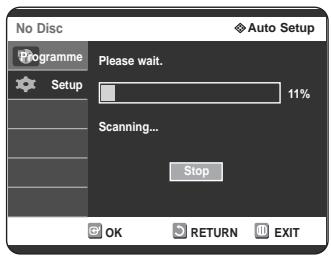
7. Channel scan will be started. Press the OK button to stop the Auto Setup.
Presetting Channels with the Manual Setup function
You can add preset channels that Auto Channel Search missed. And you can delete a channel you wish to remove. You can programme the order of channels.
1. With the unit in Stop mode/No Disc mode, press the MENU button.

2. Press the ▲▼ buttons to select Setup, then press the OK or ▶ button.

3 Press the ▲▼ buttons to select Install, then press the OK or ▶ button.

4 Press the ▲▼ buttons to select Manual Setup, then press the OK or ▶ button.

Press the ▲▼ buttons to select a PR (programme) you wish to edit, delete, or swap, then press the OK or ▶ button. Select Edit, Delete or Swap.

- In case of Edit: you can add or edit PR (programme). After changing PR information (CH, Name, Decoder, MFT), select Save, then press the OK button.

- CH: Tune the channel using the ◀▶ buttons.
- Name: Display station name automatically detected in broadcasting signal. If not detected, you can edit the name using the ▲▼◀▶ buttons.
- Decoder: If you set it on, you can record scrambled channels using an external decoder box. Before setting it on, refer to connecting the external decoder box on page 19.
- MFT: You can tune the channel frequency better using the ◀▶ buttons.
- System: You can select the broadcasting system of the receivable channel (B/G or L/L').
- In case of Delete: the channel information of the selected PR (programme) will be removed.
- In case of Swap: You can swap the channel information of two PRs (programmes). For example, if you wish to swap PR2 and PR5, select Swap at PR2, then press the OK or ▶ button at PR5.
Setting up the Language Options
If you set the audio, subtitle, disc menu, on-screen menu, and DivX subtitle language in advance, they will come up automatically every time you watch a movie.
If the selected language is not recorded on the disc, the original pre-recorded language is selected.
1 With the unit in Stop mode/No Disc mode, press the MENU button.
2 Press the ▲▼ buttons to select Setup, then press the OK or button.
You can't use the Setup functions during disc playback.

Press the ▲▼ buttons to select Language, then press the OK or button.
Language setup menu will be displayed.

4 Press the ▲▼ buttons to select the desired language option, then press the OK or button.
- Audio Language: For the speaker sound.
- Subtitle Language: For the disc subtitles.
- Disc Menu Language: For the disc menu contained on the disc.
- On-Screen Menu Language: For the Player Menu of your DVD Recorder.
- DivX Subtitle: Selecting a supported DivX subtitle language by region.
| Western | English, Breton, Catalan, Danish, Dutch, Faroese, Finnish, French, Gaelic, German, Icelandic, Irish, Italian, Norwegian, Portuguese, Spanish and Swedish |
| Central | English, Albanian, Croatian, Czech, Hungarian, Polish, Romanian, Slovak, Slovenia and Serbian(Latin) |
| Greek | English and modern Greek |
Press the ▲▼ buttons to select the desired Language, then press the OK or button.

NOTE
- Press the RETURN or ◀ button to return to the previous menu. Press the MENU button to exit the menu. The selected language will only appear if it is supported on the disc. If the subtitle language is displayed in broken fonts, change DivX Subtitle to the appropriate region.
If it still does not work, the format is not supported.
EP Mode Time Setting
You can select one of four recording modes by pressing the REC MODE button repeatedly. EP mode is one of the four REC modes (XP, SP, LP, EP). In EP (Extended Play) mode, you can set the recording time to 6 or 8 hours using this setting.
1 With the unit in Stop mode/No Disc mode, press the MENU button.

2 Press the △ ▽ buttons to select Setup, then press the OK or ▸ button.

3 Press the △ ▽ buttons to select System, then press the OK or ▸ button. The System menu will be displayed.

4 Press the △ ▽ buttons to select EP Mode Time, then press the OK or ▸ button.
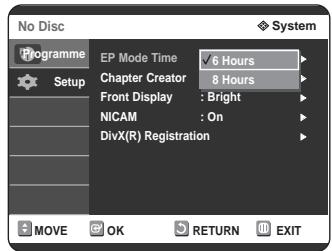
Press the △ ▽ buttons to select the desired time, then press the OK or ▸ button.
Automatic Chapter Creation
A DVD-Video consists of 'Titles' and 'Chapters'. When you record one programme, it makes one Title. If you use this function, the Title will be divided into Chapters.

(V mode)
1 With the unit in Stop mode, press the MENU button.

2 Press the △ ▽ buttons to select Setup, then press the OK or ▸ button.

Press the △ ▽ buttons to select System, then press the OK or ▸ button. The System menu will be displayed.

Press the △ ▽ buttons to select Chapter Creator, then press the OK or ▸ button.

Press the △ ▽ buttons to select On or Off, then press the OK or ▸ button.
- Off: Select this option when you do not want Automatic Chapter Creation.
- On: Select this option when you want automatic chapter creation.
6 Press the REC button to start recording. (See page 43 for how to set the recording speed.) The message "Do you want to create the chapter menu after this recording?" is displayed.

7 Press the left/right buttons to select Yes and press the OK button.
- A new chapter is created according to the selected recording mode. A chapter will be about 5 minutes long in XP and SP, and about 15 minutes long in LP and EP mode. 8 Press the STOP button to stop recording. 9 To display the created chapters, finalize the disc (see page 86) and then press the DISC MENU button. The chapter menu will be displayed.


CAUTION
The Automatic Chapter Creation function does not work during Timer Recording or when you turn the power off. DVD-R discs cannot be unfinalized.
Setting up the Front Display Options
Adjust the brightness of the DVD recorder front panel display.
1 With the unit in Stop mode/No Disc mode, press the MENU button.

2 Press the up/down buttons to select Setup, then press the OK or right button.

3 Press the up/down buttons to select System, then press the OK or right button. The System menu will be displayed.
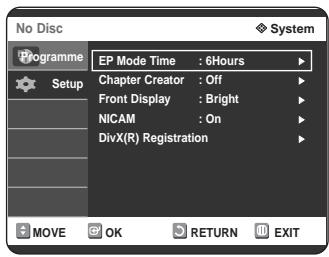
4 Press the up/down buttons to select Front Display, then press the OK or right button.

Press the up/down buttons to select the desired item, then press the OK or right button.
- Bright: Makes the Front Panel Display bright.
- Dim: Makes the Front Panel Display dim.
- Auto Dim: Makes the Front Panel Display dim automatically when the unit is powered off.
Setting up NICAM Options
NICAM programmes are divided into 3 types: NICAM Stereo, NICAM Mono, and Bilingual (transmission in another language). NICAM programmes are always accompanied by a standard mono sound broadcast, and you can select the desired sound by setting NICAM on or off.
1. With the unit in Stop mode/No Disc mode, press the MENU button.

2. Press the ▲▼ buttons to select Setup, then press the OK or ▶ button.

3. Press the ▲▼ buttons to select System, then press the OK or ▶ button. The System menu will be displayed.
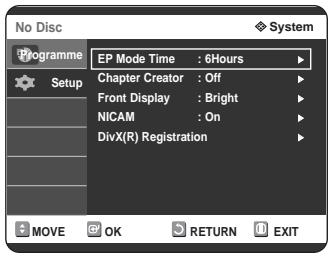
4. Press the ▲▼ buttons to select NICAM, then press the OK or ▶ button.

5. Press the ▲▼ buttons to select On or Off, then press the OK or ▶ button.
- Off: Only set this position to record the standard mono sound during a NICAM broadcast if the stereo sound is distorted due to inferior reception conditions.
- On: NICAM mode.
DivX(R) Registration
Please use the Registration code to register this DVD Recorder with the DivX(R) Video On Demand format. For more information, visit www.divx.com/vod.
Setting up the Audio Options
You can connect the DVD Recorder to an external amp or Home Theatre.
Allows you to set up the audio device and sound status depending on the audio system in use.
1 With the unit in Stop mode/No Disc mode, press the MENU button.
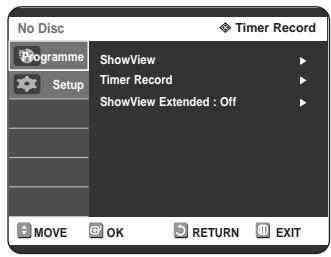
2 Press the ▲▼ buttons to select Setup, then press the OK or button.
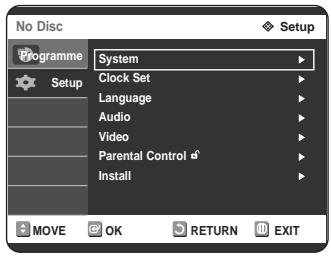
3 Press the ▲▼ buttons to select Audio, then press the OK or button. The Audio setup menu will be displayed.
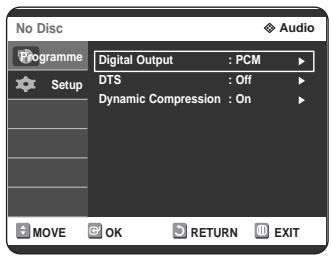
4 Press the ▲▼ buttons to select the desired audio option, then press the OK or button.

Press the ▲▼ buttons to select the desired item, then press the OK or ▶ button.

NOTE
- Press the RETURN or ◀ button to return to the previous menu.
Press the MENU button to exit the menu.
Audio Options
Digital Output
- PCM: Select this when you have no equipment that can decode Dolby Digital (or MPEG-2) signal. When you play a Dolby Digital (or MPEG-2) sound track, the digital output is converted to PCM Stereo.
- Bitstream: Output Dolby Digital (or MPEG-2) audio as bitstream. Select this when your AV receiver or AV amplifier has a Dolby Digital (or MPEG-2) decoder.

NOTE
- Digital output setting is equally applied to both Dolby Digital and MPEG-2 audio. LPCM sound track is always outputted as PCM. It has no relation with Digital Output setting.
- Be sure to select the correct Digital Output or you will hear no sound or loud noise.
DTS
- Off : Doesn't output DTS signal. Select this when your AV receiver or AV amplifier does not have DTS decoder.
- On: Outputs DTS Bitstream via digital output when you play DTS track. Select this only when your AV receiver (or AV amplifier) have DTS decoder.

NOTE
- When DTS soundtrack is played, sound does not output from AV Audio Output.
Dynamic Compression
This is only active when a Dolby Digital signal is detected.
- Off: You can enjoy the movie with the standard Dynamic Range.
- On: When Movie soundtracks are played at low volume or from smaller speakers, the system can apply appropriate compression to make low-level content more intelligible and prevent dramatic passages from getting too loud.
Setting up Video Output Options
You can enjoy high quality image through RGB or Component video connections.
1 With the unit in Stop mode/No Disc mode, press the MENU button.

2 Press the buttons to select Setup, then press the OK or button.

3 Press the ▲▼ buttons to select Video, then press the OK or button. The Video setup menu will be displayed.
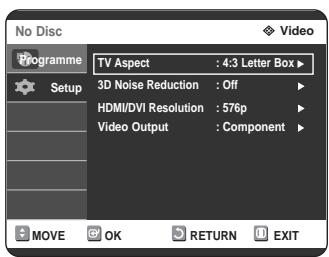
4 Press the ▲▼ buttons to select Video Output, then press the OK or button.

| Component | Select this when the Recorder is connected to a TV with Component jack. |
| RGB | Select this to output RGB signals. |
Press the ▲▼ buttons to select the desired item, then press the OK or button.
In Component mode, you can set video output to Progressive (P.SCAN) or Interlace, see page 36.
When the HDMI cable is not connected, the available video output jacks are as follows.
Available Video Output Jack
| Setting mode Output jack | Component mode | RGB Mode | ||
| P.SCAN off mode (Interlace mode) | P.SCAN on mode | |||
| Component Output (Y, Pb, Pr) | O | O (TV in progressive mode) | X | |
| AV1 Scart | R, G, B | X | X | O |
| Composite | O | X | X | |
| AV2 Scart | Composite | O | X | O |
| Composite Video out | O | X | O | |
| S-Video out | O | X | O | |

- When the HDMI cable is connected, other A/V outputs do not operate.
Setting up the Progressive scan
If the TV supports Progressive Scan, press the P.SCAN button on the front of the DVD Recorder to enjoy.
1 With the unit in Stop mode, press the P.SCAN button on the front of the DVD Recorder.
The message "Press [Yes] to confirm Progressive scan mode. Otherwise press [No]" will appear. Press the ◀▶ buttons to select Yes, and then press the OK button.

2 The message "Please set your TV to Progressive input. To deactivate, press [STOP] key." will appear. Press the OK button.
![SAMSUNG DVD-R125P - The message "Please set your TV to Progressive input. To deactivate, press [STOP] key." will appear. Press the OK button. - 1](/content/2019/10/27595/images/b376ce1bea1e7728880f02974041c77cf2e7b041e3764058e6507c18d0874562.jpg)
3 The message "Video Output Mode Progressive Scan" will appear.

NOTE
- When the HDMI cable is connected, this screen is not displayed.
- Progressive setting is only available when the DVD recorder is in stop mode.
- Progressive setting is only available when the Video Out is set to Component. If the P.SCAN button on the DVD recorder's front panel is pressed during playback, the message "This function is possible only on stop mode" appears on the screen.
Canceling the Progressive scan
1 With the unit in Stop mode, press the P.SCAN button on the front of the DVD Recorder.
The message "Press [Yes] to confirm Interlace scan mode. Otherwise press [No]" will appear.
Press the left arrow buttons to select Yes, and then press the OK button.
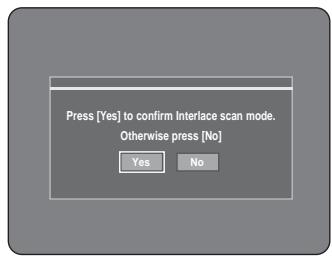
The message "Please set your TV to Interlace input. To deactivate, press [STOP] key." will appear. Press the OK button.
![SAMSUNG DVD-R125P - The message "Please set your TV to Interlace input. To deactivate, press [STOP] key." will appear. Press the OK button. - 1](/content/2019/10/27595/images/f53845522e1b11782a363a67735eb8578293ec25a4ced98351c696ccea80c811.jpg)
3 The message "Video Output Mode Interlace Scan" will appear.


NOTE
- Do not press the P.SCAN button if you are using a TV that does not support Progressive mode. Nothing will be displayed on the screen if pressed. If you press the P.SCAN button by mistake when your TV does not support Progressive mode, you need to release the Progressive mode. To release the Progressive mode, press the P.SCAN button on the front panel 3 times. The screen will recover after the PSO LED on the front panel display turns off.
Setting up the Display (Video) Options
This function allows you to set up the TV screen settings.
1 With the unit in Stop mode/No Disc mode, press the MENU button.
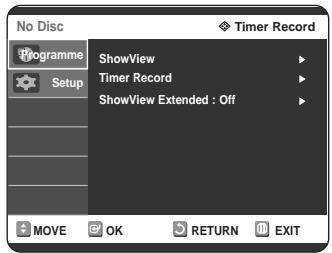
Press the up/down arrow buttons to select Setup, then press the OK or right arrow button.

Press the up/down arrow buttons to select Video, then press the OK or right arrow button.
The video setup menu will be displayed.

Press the ▲▼ buttons to select the desired video option, then press the OK or button.

Press the ▲▼ buttons to select the desired item, then press the OK or ▶ button.

NOTE
- Press the RETURN or ◀ button to return to the previous menu. Press the MENU button to exit the menu.
Display (Video) Options
This function depends on the disc type. It may not work for some disc types.
TV Aspect
Depending on the type of television you have, you may want to adjust the screen setting (aspect ratio).

- 4:3 Letter Box: Select this when you want to see the total 16:9 ratio screen that DVD supplies, even though you have a TV with a 4:3 ratio screen. Black bars will appear at the top and bottom of the screen.
- 4:3 Pan & Scan: Select this for a conventional size TV when you want to see the central portion of the 16:9 screen. (The extreme left and right sides of the movie picture will be cut off.)
- 16:9 Wide: You can view the full 16:9 picture on your widescreen TV.
3D Noise Reduction (motion adaptive noise reduction)

- On: Provides a clear picture through noise reduction (for recording).
- Off: Normal
HDMI/DVI Resolution
This setting is used when the DVD recorder is connected by HDMI or DVI to display devices (TV, projector, etc.).

- The menu screen will zoom out to 2/3 at 1080i.
Output selection
- Connect the DVD recorder to your TV via HDMI. Set your TV's input to HDMI.
- Press the P.SCAN button while the unit is in Stop mode to select the HDMI output resolution as follows: 576p → 720p → 1080i.
NOTE
- Progressive scan automatically activates when HDMI is connected. There will be no HDMI video and audio outputs unless progressive scan function is activated.
- Consult your TV User's Manual to find out if your TV supports Progressive Scan. If Progressive Scan is supported, follow the TV User's Manual regarding Progressive Scan settings in the TV's menu system. If Video Output is set incorrectly, the screen may be blocked.
- The resolutions available for HDMI/DVI output depend on the connected TV or projector. For details, see the user's manual of your TV or projector.
- When the resolution is changed it may take a few seconds for a normal image to appear. If you set the HDMI output resolution to 720p or 1080i, HDMI output provides better picture quality. DivX playback screen output can only be done in 576p.
Setting up the Parental Control
The Parental Control function works in conjunction with DVDs that have been assigned a rating which helps you control the types of DVDs that your family watches. There are up to 8 rating levels on a disc.

1. With the unit in Stop mode/No Disc mode, press the MENU button.
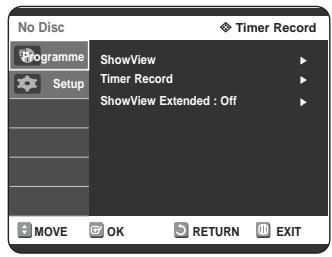
2. Press the ▲▼ buttons to select Setup, then press the OK or button.
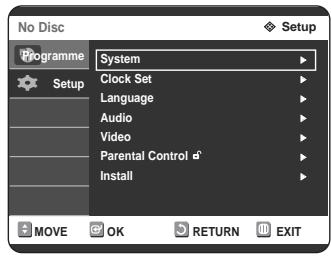
3 Press the up/down buttons to select Parental Control, then press the OK or right button.

4 Enter the 4-digit password using the 0 to 9 buttons on the remote control.
The 'Confirm the password.' message will be displayed. Enter your password again.

Press the OK or right button to select Password.

6 Press the up/down buttons to select On or Off, then press the OK or button.

- Press the RETURN or left button to return to the previous menu. Press the MENU button to exit the menu.
If you forgot your password
1 Remove the disc. 2 Press and hold right (FF) on the front panel for 5 seconds or more.
1 Press the up/down buttons to select Rating Level.

Press the OK or button. The rating level will be displayed.
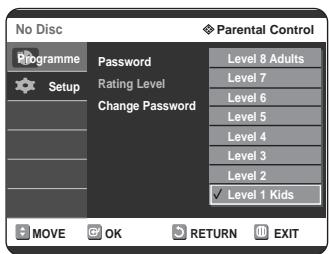
3 Press the up/down buttons to select Rating Level you want, then press the OK or button.
For example, if you select up to Level 6, discs that contain Level 7, 8 will not play. A larger number indicates that the programme is intended for adult use only.
About the Change Password
1 Press the up/down buttons to select Change Password.

Press the OK or right button. The 'Enter the password.' message will be displayed.
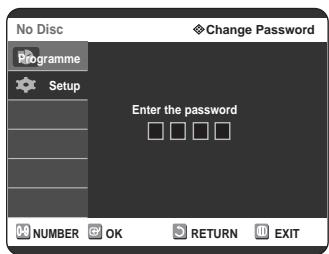
3 Enter the 4-digit password using the 0 to 9 buttons on the remote control. The 'Confirm the password.' message will be displayed. Enter your password again.


NOTE
See page 38 if you forgot your password.
Recording
This section shows various DVD recording methods.
Before Recording 40
Recording the current TV programme you are watching. 42
Recording from external equipment you are watching. 44
Copying from a Camcorder 45
Making a One Touch Recording (OTR) 46
Making a Timer Recording 47
Flexible Recording (for Timer recording only) 48
Editing the Scheduled Record List. 48
Deleting the Scheduled Record List. 49
Using the ShowView Feature. 50
ShowView Extended 51
Recording the Standard Timer List 51
Before Recording
This DVD recorder can record on various types of discs. Before recording, read the following instructions and select the disc type according to your preference.
Recordable discs
This recorder can record on the following discs.
| DVD-RAM | DVD-RW | DVD-R |
| DVD RAM | DVD RW | DVD R |
DVD-RWs and DVD-RAMs are rewritable. DVD-Rs are non-rewritable.
Compatibility between Samsung and Other Company's Recorder
| Disc Types | Recording format | Recording Device | Finalising | Additional Recording in Samsung Recorder |
| DVD-RAM | VR Mode | Samsung | X | Recordable |
| Other Company | X | Recordable | ||
| DVD-RW | VR Mode | Samsung | finalised | Not recordable |
| not finalised | Recordable | |||
| Other Company | finalised | Not recordable | ||
| not finalised | Recordable | |||
| V Mode | Samsung | finalised | Not recordable | |
| not finalised | Recordable | |||
| Other Company | finalised | Not recordable | ||
| not finalised | Not recordable | |||
| DVD-R | V Mode | Samsung | finalised | Not recordable |
| not finalised | Recordable | |||
| Other Company | finalised | Not recordable | ||
| not finalised | Not recordable |

Finalise
- This closes the DVD-R/RW so no additional recording can be done.
Unfinalise
- This allows additional recording on a DVD-RW disc originally recorded on the DVD Recorder.
- A DVD-RW disc that has been recorded by DAO (Disc At Once) in a PC cannot be unfinalised.
- A DVD-RW disc that has been recorded in Video Mode of a different maker's recorder cannot be unfinalised.
- A DVD-R disc cannot be unfinalised.
Recording Formats
Since available functions differ depending on the disc type, select a disc that best fits your preferences.
When you insert an unused disc, the following message appears:
DVD-RAM: Use after formatting the disc.
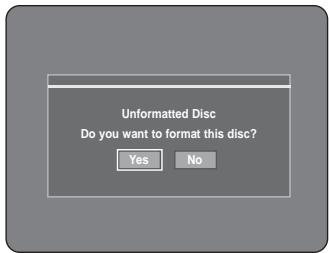
DVD-RW: When a blank disc is first inserted, the message "Do you want to initialize this disc?" will appear.
When Yes is selected, the disc will be formatted in VR Mode.

If you want to format in either VR Mode or Video Mode, refer to Formatting a Disc on page 84.

DVD-R: Formatting DVD is unnecessary and only Video Mode Recording is supported.
DVD-RW(Video mode)/-R
- Chapters will be created automatically when you finalise recording on DVD-R / DVD-RW discs in Video mode. The chapter's length (interval between chapters) varies according to the recording mode.
- Simple editing (erasing titles/changing title name)
DVD-RW(VR mode)/-RAM
- This mode allows multiple editing functions (such as deletion of the whole title, partial deletion of a title, etc.)
- Various editing options using a created Playlist
Recording Mode
Select one of four recording modes by pressing the REC MODE button repeatedly while the DVD recorder is in Stop mode for the desired recording time and picture quality. In general, picture quality improves as the recording time decreases. In FR mode, the most suitable record mode is adjusted automatically, according to remaining time on the disc and length of the timer recording.
This function is selected only one mode in XP, SP, LP and EP modes and you can use this mode for timer recording.
| Mode | Characteristic | Recording Times Data Rates |
| XP (high quality mode) | Select when the video quality is important. | Approx. 1 hour about 8 Mbps |
| SP (standard quality mode) | Select to record in standard quality. | Approx. 2 hours about 4 Mbps |
| LP (long recording mode) | Select when a long recording time is required. | Approx. 4 hours about 2 Mbps |
| EP (extended mode) | Select when a longer recording time is required. | Approx. 6 hours/ about 1.2 Mbps Approx. 8 hours/ about 0.8 Mbps |
| FR (Flexible Recording) | for timer recording only see page 48. | Approx 60 to 480 Min Approx 0.8 to 8Mbps |
Unrecordable video
Video with copy protection cannot be recorded on this DVD Recorder.
When the DVD Recorder receives a copy guard signal while recording, recording stops and the following message appears on the screen.

Concerning Copy Control Signals
TV broadcasts that contain copy control signals may have one of the following three signal types, Copy-Free, Copy-Once and Copy-Never. If you want to record a copy-once type programme, use DVD-RW with CPRM in VR Mode and DVD-RAM.
| Media\Signal type | Copy-Free | Copy-Once | Copy-Never |
| DVD-RW(Ver.1.1) | O | - | - |
| DVD-RW(Ver.1.1) with CPRM | |||
| VR mode | O | \( O^* \) | - |
| Video mode | O | - | |
| DVD-R | O | - | |
| DVD-RAM(Ver.2.0) | O | \( O^* \) | - |
Once "Copy Once" has been recorded, recording cannot be done anymore.
- Content Protection for Recordable Media (CPRM) CPRM is a mechanism that ties a recording to the media on which it is recorded. It is supported by some DVD recorders, but not by many DVD players. Each blank recordable DVD has a unique 64-bit media ID etched in the BCA. When protected content is recorded onto the disc, it can be encrypted with a 56-bit C2 (Cryptomeria) cipher derived from the media ID. During playback, the ID is read from the BCA and used to generate a key to decrypt the contents of the disc. If the contents of the disc are copied to other media, the ID will be absent or wrong and the data will not be decryptable.
About INFO Key

The INFO function allows you to view the current status and progress of playback and recording. Depending on the disc type and status, the displayed screen may be different.
Checking the available disc space (Disc Information)
When recording on an used disc, make sure that there is enough disc space for recording. With DVD-RWs or DVD-RAMs, you can free up disc space by erasing titles.
- Press the INFO button.
The display window of disc information appears. Items in the display differ depending on the disc type or recording format.

- Disc Type
- Current information display status
- Disc Name
- Total Titles: Total number of titles
- Total Playlist: Total number of Playlists
- Recordable Time: The longest continuous recording time in each of the recording modes (approximately)
- Date: Current date and time
Recording the current TV programme you are watching


Before you start
Check that the disc has enough available space for the recording. Adjust the recording mode.
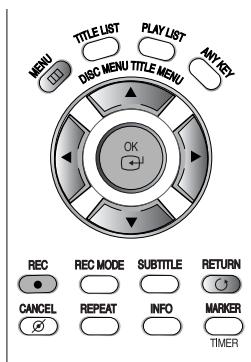
1 Press the OPEN/CLOSE button and place a recordable disc on the disc tray. Press the OPEN/CLOSE button to close the disc tray.
Wait until "LOAD" disappears from the front panel display.
If an unused DVD-RAM disc is used, you will be prompted to format first. Make your selection using the left/right buttons, then press OK button.
(See page 41.)

If an unused DVD-RW disc is used, whether to initialize or not will be asked first. Make your selection, then press the OK button. (See page 41.)

3 Press the PROG (▲/▼) or number (0~9) buttons to select the current programme you want to record. 4 Press the REC MODE button repeatedly, (or press the REC MODE button, then press the ▲/▼ button) to select the recording speed (quality).


Press the REC button. Information concerning the channel is displayed on the screen, then recording begins. Icon() is displayed on the front panel.
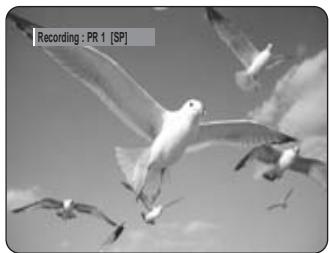
To view the current status of the disc and progress of recording: Press the INFO button, the information about the disc will appear.

Press the INFO button once again to view information about the recording.
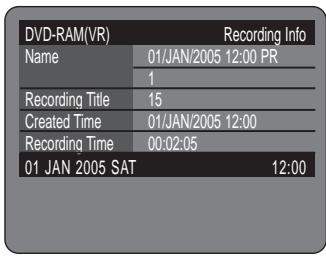
To stop recording
Press the STOP (■) button to stop or finish a recording in progress.
- When using DVD-RAM/DVD-RW/DVD-R discs, the message 'Updating the information of disc. Please wait for a moment' is displayed.
NOTE
- You cannot change the recording mode and the PROG while recording.
- Recording will stop automatically if there is no free space left for recording. Up to 99 titles can be recorded onto a disc.
- Recording will stop automatically if a copy protected image is selected. DVD-RAM/DVD-RW discs must be formatted before starting to record. Most new discs are sold unformatted.
- Do not use DVD-R authoring discs with this DVD recorder.
Recording from external equipment you are watching


Before you start
Check that the disc has enough available space for the recording. Adjust the recording mode.
1 Press the OPEN/CLOSE button, place a recordable disc on the disc tray. Press the OPEN/CLOSE button to close the disc tray.
Wait until "LOAD" disappears from the front panel display.
If an unused DVD-RAM disc is used, whether to format or not will be asked first. (See page 41) If an unused DVD-RW disc is used, whether to initialize or not will be asked first. (See page 41)
3 Press the INPUT button to select the input source according to the connection you made.
The front panel display changes in the following sequence:
- PR Number → AV1 → AV2 → AV3 → DV-
If you connect a digital camcorder, press the INPUT button to select DV. (See page 45)
4 Press the REC MODE button repeatedly, (or press the REC MODE button, then press the ▲▼ button) to select the recording speed (quality).
SP → LP → EP → XP

Press the REC button.
To pause recording
Press the ● button to pause a recording in progress.
- Press the ● button again to resume recording.
- You can switch channels by pressing the PROG (▲/▼) buttons while recording pauses.
To stop recording
Press the STOP (⊙) button to stop or finish a recording in progress. - When using DVD-RAM/DVD-RW/DVD-R discs, the message 'Updating the information of disc. Please wait for a moment' is displayed.
NOTE
- You cannot change the recording mode and input source while recording or during pause.
- Recording will stop automatically if there is no free space left for recording. Up to 99 titles can be recorded onto a disc.
- Recording will stop automatically if a copy-protected image is selected. DVD-RAM/DVD-RW discs must be formatted before starting to record. Most new discs are sold unformatted.
- Do not use DVD-R authoring discs with this DVD recorder.
Copying from a Camcorder
You may control the camcorder using the IEEE1394 (DV) interface.


Before you start
Check that the disc has enough available space for the recording. Adjust the recording mode.
1 Press the OPEN/CLOSE button, place a recordable disc on the disc tray. Press the OPEN/CLOSE button to close the disc tray.
Wait until "LOAD" disappears from the front panel display.
If an unused DVD-RAM disc is used, whether to format or not will be asked first. (See page 41.)
If an unused DVD-RW disc is used, whether to initialize or not will be asked first. (See page 41.)
3 Press the REC MODE button repeatedly, (or press the REC MODE button, then press the ▲▼ button) to select the recording speed (quality).
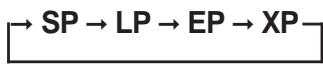

4 Press the INPUT button to select DV. If the input is set to DV, a playback/record menu that enables camcorder control appears at the top of the screen.

5 Select the Play icon at the top of the screen to play back the camcorder and find the starting position to copy.
You can press the PLAY button on the remote control to play the camcorder.
6 To start recording, use the to select the (●) icon at the top of the screen, then press the OK button.
You can press the REC button on the remote control to start recording. To display playback-related icons on the screen, press any direction button on the remote control.
To stop recording
Press the STOP (⊙) button to stop or finish a recording in progress.
- When using DVD-RAM/DVD-RW/DVD-R discs, the message 'Updating the information of disc. Please wait for a moment' is displayed.
NOTE
- You cannot change the recording mode and input source while recording.
- Recording will stop automatically if there is no free space left for recording. Up to 99 titles can be recorded onto a disc.
- Recording will stop automatically if a copy-protected image is selected. DVD-RAM/DVD-RW discs must be formatted before starting to record. Most new discs are sold unformatted.
- Do not use DVD-R authoring discs with this DVD recorder.
Making a One Touch Recording (OTR)


You can set the DVD Recorder to record in 30-minute increments by pressing the REC button.
1 If you want to record a TV channel, press the PROG (∧/∨) or number buttons to select a desired channel.
If you want to record through a connected external component, press the INPUT button to select an appropriate external input (AV1, AV2, AV3 or DV).
TV PROGRAMME: 1 to 99
Press the REC button to start recording.

3 Press the REC button repeatedly to adjust the desired recording time.

NOTE
- The timer counter decreases by the minute from 8:00 to 0:00, then the DVD Recorder stops recording.
To view the current status of the disc and progress of recording: Press the INFO button, and information about the disc will appear.

Press the INFO button once again.
Then you can check the information about the title being recorded.

30 seconds before the recording is done, a message asking whether you want the recorder to power off when the recording is done, will appear on your screen.

To stop recording
Press the STOP (■) button. The message "Do you want to stop recording?" is displayed.

- Press the ◀/▶ buttons to select Yes, then press the OK button.
- Or press the STOP button again.
Making a Timer Recording
Before you start
- Check the antenna cable is connected.
- Check the remaining time of the disc.
- Check the date and time are correct. Make sure the Clock (Setup-Clock Set) must be set before you proceed with a timer recording. (See page 26)
1 With the unit in Stop mode, press the TIMER button.
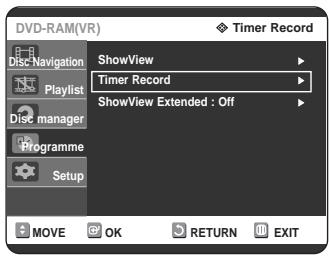
Using the MENU button.
- With the unit in Stop mode, press the MENU button.
- Press the ▲▼ buttons to select Programme, then press the OK or ▶ button.
- Press the ◀ buttons to select Timer Record.
Press the OK or ▶ button.
- The Timer Recording screen is displayed.

2 Set timer recording option.
- Fill the input items using the arrow buttons and number buttons.
:Moves to the previous/next item, ▲▼ , Number buttons: Sets a value.
- Source: The video input source ("AV1", "AV2", "AV3") or the broadcasting channel you want to make a timer recording from.
- Date: Timer Recording allows setting the recording time within one month period. Set the recording day. (day/month) 01JAN(SAT) Every Day 02/JAN(SUN) MON-SAT 03/JAN(MON) MON-FRI 中 : 30JAN(SUN) Every SAT 31JAN(MON) Every SUN
- Start/End Time: Start and end time of the timer recording.
- FR (Flexible Recording): In FR mode, the most suitable record mode is adjusted automatically, according to remaining time on the disc and length of the timer recording. This function is selected only one mode in XP, SP, LP and EP modes.
- XP (high quality): Select when video quality is important. (Approx. 1 hour)
- SP (standard quality): Select to record in standard quality. (Approx. 2 hours)
- LP (low quality): Select when a long recording time is required.(Approx. 4 hours)
- EP (extended) : Select when a longer recording time is required. (Approx.6 hours or 8 hours)
- V/P : VPS(Video Programme System) or PDC(Programme Delivery Control) function.
- If you set this function on, you can control the starting and ending time of recording by special signal included in the broadcasting signal. If a TV programme is shortened or starts earlier or later than scheduled, this function synchronizes the starting and ending time of recording with the actual broadcasting time automatically.
- Set up the start-time EXACTLY according to the published TV schedule. Otherwise the timer recording will not operates.
- Do not select PDC or VPS unless you are sure the programme you wish to record is broadcast with PDC or VPS.
- When you are recording at EP mode on a DVD-RW(V)/-R disc, it may not record the full 6 or 8 hours because the DVD recorder uses the VBR(Variable Bit Rate) ENCODING system. For example, if you record a program with a lot of action, it uses a higher bit rate which in turn consumes more disc memory.
Mode (Recording Mode):
NOTE
Press the OK button.
- will appear on the front panel. It means that a timer recording is registered.
If the timer settings overlap
The programmes are recorded in order of priority. If timer recording is set for the first programme and then again for the second programme and both programmes overlap, the following message will appear on the screen: "This setting is identical with 1"The message shows that the first programme has priority. After recording of the first program is complete, the second program starts being recorded.
To exit without saving the current setting Press the MENU button.
To return to the previous menu
Press the RETURN button if you don't want to set a timer recording.
5 Turn the power off to finish the Timer Recording setting. Timer Recording will not work when the power is on.
- will blink if disc is not inserted.
NOTE
- The timer recording time may differ from the set time depending on disc status and overall timer recording status (for example, recording times overlapping, or when the previous recording ends within 2 minutes before the start time of the next recording.)
- You can make the Timer Recording up to 12 programmes.
Flexible Recording (for Timer recording only)


In FR mode, the most suitable record mode is adjusted automatically, according to remaining time on the disc and length of the timer recording. This function is selected only one mode in XP, SP, LP and EP modes and you can use this mode for timer recording.
The FR mode recording setup is the same as Timer Recording. When setting the mode in step 3, set FR Mode.
Editing the Scheduled Record List


Follow these directions to edit the scheduled record list.
1. With the unit in Stop mode, press the TIMER button.

Using the MENU button.
- With the unit in Stop mode, press the MENU button.
- Press the ▲▼ buttons to select Programme, then press the OK or ▶ button.
- Press the ◀▶ buttons to select Timer Record.
Press the OK or ▶ button.
3. Press the RETURN button to close the Timer Recording screen.

4. Press the ▲▼ buttons to select the number of the timer recording you want to edit, then press the OK or ▶ button.
- The Edit and Delete items are displayed.

Press the ▲▼ buttons to select Edit, then press the OK or ▶ button.
- The Timer Record Input item is displayed. Edit the items you want to modify. See the "Making a Timer Recording" section for more information on Timer Recording Input items.

6. Press the OK button to confirm the edited setting. 7. Press the MENU button after finishing the operation. The menu screen will disappear.
Deleting the Scheduled Record List


Follow these directions to delete an entry from the scheduled record list.
1 With the unit in Stop mode, press the TIMER button.
Using the MENU button.
- With the unit in Stop mode, press the MENU button.
- Press the ▲▼ buttons to select Programme, then press the OK or ▶ button.
- Press the ◀▶ buttons to select Timer Record.
Press the OK or ▶ button.
3 Press the RETURN button to close the Timer Recording screen.

4 Press the ▲▼ buttons to select the number of the timer recording you want to delete, then press the OK or ▶ button.
- The Edit and Delete items are displayed.

Press the ▲▼ buttons to select Delete, then press the OK or ▶ button. - You will be prompted with the delete confirm message such as 'Do you want to delete No.01?' 6 Press the ◀▶ buttons to select Yes, then press the OK button. - The selected entry will be deleted from the list. 7 Press the MENU button after finishing the operation. The menu screen will disappear.
Using the ShowView Feature
Before presetting your DVD Recorder:
- Switch on both the television and your DVD Recorder.
- Check that the date and time are correct.
Up to twelve programmes can be preset.
1 With the unit in Stop mode, press the TIMER button. Press the ▲ ▼ buttons to select ShowView, then press the OK or ▶ button.
- A message is displayed to allow you to enter the ShowView code.

Using the MENU button.
- With the unit in Stop mode, press the MENU button.
- Press the ▲ ▼ buttons to select Programme, then press the OK or ▶ button.
2 Press the number buttons to enter the code of the programme that you want to record in your television magazine.
- If you want to correct the ShowView code that you are entering:
- Press the ◀ button until the digit to be corrected is cleared.
- Enter the correct digit.
Press the OK button.
- The information concerning the programme is displayed.
- When using the ShowView function for the first time with stored stations, the programme number flashes. This one time, you must enter the PR number manually by pressing the ▲ ▼ buttons or number buttons.
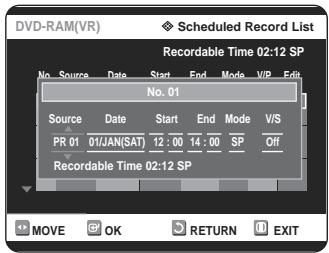

4 If the programme and times are correct, press the OK button.
5 Turn the power off by pressing the STANDBY/ON button to activate the timer recording setting.
Refer to pages 47~49 if you want to:
- Check whether the timer recording has been set correctly or not.
- Cancel a preset recording.
NOTE
- The numbers next to each TV programme listing in the magazines or newspapers are ShowView code numbers, which allow you to programme your DVD Recorder instantly with the remote control. Enter the ShowView code for the programme you wish to record.
- ShowView is a trademark of Gemstar Development Corporation. The ShowView system is manufactured under license from Gemstar Development Corporation.
ShowView Extended
To prevent delays or overruns, DVD Recorder has a function called ShowView Extended allowing you to extend the recording time by up to 60 minutes.
1 With the unit in Stop mode, press the MENU button.

Press the ▲▼ buttons to select Programme, then press the OK or ► button.
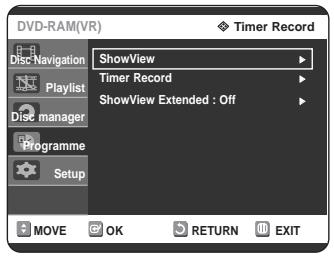
Press the ▲▼ buttons to select ShowView Extended, then press the OK or ► button.

4 Press the ▲▼ buttons to select ShowView Extended time, then press the OK or ► button.
Press the MENU button after finishing the operation.
Recording the Standard Timer List
When the start time in the Scheduled record list reaches while the set is in power off, the set will be powered on and start the recording automatically.
1 When the scheduled recording is operating, the programme being recorded will not display on TV.
- Press the TV/DVD button if you want to see the programme being recorded on TV.
- Press the TV/DVD button again if you don't want to see the programme being recorded on TV.
To stop Recording
Press the STOP ( ) button, and a message that asks whether to end recording or not will be displayed.

- When Yes is selected: Recording stops
- When No is selected: Recording continues
NOTE
If there is not enough disc space or a copy prevention signal is received during recording, recording will stop.

If there is no free disc space or the disc is not recordable, recording will not operate. (You can record after replacing the disc.)
Playback
This section introduces basic functions of playback and playback by disc type.
DIGITAL
Dolby Digital
DTS
Digital Audio
Stereo

PAL broadcast system in U.K, France, Germany, etc.
DivX
MP3
Before Playing. 52
Playing a Disc 53
Playing an Audio CD/MP3 62
Playing a Picture 66
Playing an MPEG4 67
Playing the Title List. 68
Before Playing
Read the following information before playing a disc.
Region code (DVD-Video only)

Both the DVD recorder and the discs are coded by region. These regional codes must match in order for the disc to play. If the codes do not match, the disc will not play. The Region Number for this DVD Recorder is described on the rear panel of the DVD Recorder.

Disc types that can be played
| Disc Types | Disc Logo | Recorded content | Disc Shape | Max. Playing Time |
| DVD-VIDEO | DVDVIDEO | AUDIO + VIDEO | Single sided(12cm) | 240 |
| Double sided(12cm) | 480 | |||
| Single sided(8cm) | 80 | |||
| Double sided(8cm) | 160 | |||
| AUDIO-CD | COMTRACTDSSDG DIGITAL AUDIO | AUDIO | Single sided(12cm) | 74 |
| Single sided(8cm) | 20 | |||
| DVD-RAM | DVDRAM | AUDIO + VIDEO | Single-sided 12cm (4.7GB) | 1 (XP: Excellent Quality) |
| 2 (SP: Standard Quality) | ||||
| 4 (LP: Long Playback) | ||||
| 6 or 8 (EP:Extended) | ||||
| Double-sided 12cm (9.4GB) | 2 (XP: Excellent Quality) | |||
| 4 (SP: Standard Quality) | ||||
| 8 (LP: Long Playback) | ||||
| 12 or 16 (EP:Extended) | ||||
| DVD-RW | DVDRW | AUDIO + VIDEO | 12cm (4.7GB) | 1 (XP: Excellent Quality) |
| 2 (SP: Standard Quality) | ||||
| 4 (LP: Long Playback) | ||||
| 6 or 8 (EP:Extended) | ||||
| DVD-R | DVDR | AUDIO + VIDEO | 12cm (4.7GB) | 1 (XP: Excellent Quality) |
| 2 (SP: Standard Quality) | ||||
| 4 (LP: Long Playback) | ||||
| 6 or 8 (EP:Extended) | ||||
| CD-R/RWDVD-R/RW/DRAM | JPEGMP3MPEG4 | - | - |
NOTE
Depending on the disc type, it may take up to one minute to load.
Discs that cannot be played
DVD-Video with a region number other than "2" or "ALL" 12cm 2.6 GB and 5.2 GB DVD-RAM 3.9 GB DVD-R Disc for Authoring. DVD-RAM, DVD-RW(VR mode) not recorded following the Video Recording Standard - Unfinalised DVD-R, unfinalised DVD-RW(V mode) recorded on other equipment. DVD-ROM/DVD+RW/PD/MV-Disc, etc CVD/CD-ROM/CDV/CD-G/CD-I

NOTE
This DVD recorder can only operate with discs that are compatible with DVD-RAM Standard Version 2.0. - Playback and/or recording may not work for some types of discs, or when specific operations, such as angle change and aspect ratio adjustment, are being performed. Information about the discs is written in detail on the box. Please refer to this if necessary. - Do not allow the disc to become dirty or scratched. Fingerprints, dirt, dust, scratches or deposits of cigarette smoke on the recording surface may make it impossible to use the disc for recording. DVD-RAM/RW/R discs may not be able to play on some DVD Recorders, depending on the DVD recorder, disc and the condition of the recording.
Playing a Disc
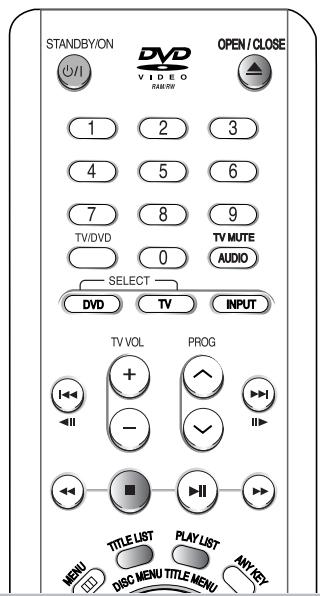
1 Press the OPEN/CLOSE button.
2 Place a disc gently into the tray with the disc's label facing up.
3 Press the OPEN/CLOSE button to close the disc tray.
- Your DVD Recorder closes the disc tray and plays the disc automatically.
- The recorder does not play discs automatically after the initial power on.
- When the recorder is powered on and a disc is in the tray, the DVD recorder will be activated and wait in stop status.
- Press the PLAY button to start playback.
- If you insert an MP3 disc, your DVD recorder will display the file list on the screen and start playing.
- If you insert a JPEG disc, folders and files are displayed as thumbnail pictures.
- If you want the DVD recorder to play automatically when it is powered on with a disc in the DVD recorder, power it on with the PLAY button.
4 Press the STOP button to stop playback.

NOTE
- When you stop playing a disc, the recorder remembers where you stopped. When you press the PLAY button again, it will pick up where you left off (unless the disc is removed, the DVD recorder is unplugged, or you press the STOP button twice).

CAUTION
- Do not move your DVD recorder while playing, as this may cause damage to the disc. Make sure to press the OPEN/CLOSE button to open or close the disc tray.
- Do not push the disc tray while it is being opened or closed, as this may cause a product malfunction.
- Do not place foreign materials on or in the disc tray.
- Some functions may perform differently or be disabled depending on the disc type. If this occurs, refer to the instructions written on the disc case.
- Be especially careful that children's fingers are not caught between the disc tray and the tray chassis when it closes.
- You must only insert one DVD disc at a time. Inserting two or more discs will not allow playback and may cause damage to the DVD recorder.
Using the Disc Menu & Title Menu
Some discs contain a dedicated menu system that allows you to select special functions for the title, such as chapters, audio tracks, subtitles, film previews, information on characters, etc.
For DVD-VIDEO discs

Press the DISC MENU button to enter the disc menu of the disc.
- Move to the setup menu related to the playback operation.
- You can select the audio languages and the subtitles provided by the disc.
Press the TITLE MENU button to move to the title menu of the disc.
- Use this button if the disc contains more than one title. Some types of discs may not support the title menu function.
For DVD-RAM/RW/R discs


1 Press the TITLE LIST button to move to the Title List.
NOTE
- Title List: Title List shows a list to help you select a title. Since the title list consists of the information on video that is actually recorded, if one title is deleted, that title cannot be played again.
- Play List: This refers to a DVD recorder of playback, which is made by selecting a desired scene in the entire Title List. When one playlist is played, only the scene selected by the user will play and then stop. Since only the information necessary for playing a desired scene is included in a playlist, even if that playlist is deleted, the original recording will not be deleted. (only VR mode)
Using the Search Functions

Searching through a Chapter or Track


1 During play, press the SEARCH (⊙) button on the remote control.
| DVD-VIDEO/DVD-RAM/DVD-RW/DVD-R | Fast X 2 → Fast X 4 → Fast X 8 → Fast X 16 → Fast X 32 → Fast X 128 → Fast X 2 |
| MPEG4AUDIO CD(CD-DA) | X 2 → X 4 → X 8 → X 2 |
- You can scan the programme in reverse. To return to normal speed playback, press the ⊙ button.
- When you press and hold the SEARCH button, playback is done at the default speed of 4X. If you release the SEARCH button, playback is performed at a normal speed.
- The speed marked in this function may be different from the actual playback speed.
NOTE
- No sound is heard during Scan (Search) mode, except CDs (CD-DA).
Skipping Chapters or Tracks
- During play, you can search quickly through a chapter or track.
1. During play, press the SKIP button on the remote control. - If you press the left button, it moves to the beginning of the chapter or track or marker (DVD-RAM, DVD-RW (VR mode)). Pressing the button once again within 3 seconds returns to the beginning of the previous chapter or track or marker (DVD-RAM, DVD-RW (VR mode)). - If you press the right button, it moves to the next chapter or track or marker (DVD-RAM, DVD-RW (VR mode)).
Slow Motion Play


1. In pause or step mode, press the SEARCH button on the remote control.
If you press the right button, Slow 1/8 → Slow 1/4 → Slow 1/2. If you press the left button, left Slow 1/8 → left Slow 1/4 → left Slow 1/2. To return to normal speed playback, press the play button.
Press and hold the SEARCH button during pause, the disc will play slowly at a 1/4 speed. If the button is released, the pause operation will resume.
NOTE
The speed marked in this function may be different from the actual playback speed. Slow motion operates only in the forward direction on MPEG 4 discs.
Step Motion Play


1. Press the pause button on the remote control in the still mode. Each time the button is pressed, a new frame will appear. When the previous button is pressed, the previous frame will be activated. When the next button is pressed, the next frame will be activated. To return to normal speed playback, press the play button.
NOTE
- Step motion operates only in the forward direction on MPEG 4 discs.
About ANYKEY

The ANYKEY function allows you to easily search for a desired scene by accessing title, chapter, track, time. You can also change the subtitle and audio settings and set some features including Repeat, Angle, Zoom.
Moving to a scene directly using the ANYKEY
- If you want to move to a title, a chapter or a track to find a desired scene.
1 Press the ANYKEY button during playback.

2 Press the ▲▼ buttons to select Title, Chapter or Track.
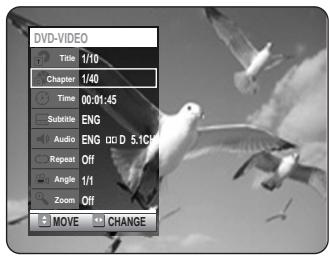
3 Press the ◀ or number (0~9) buttons to select the desired scene. Press the OK button.
- If you want to move to a desired time to help you find a scene.
1 Press the ANYKEY button during playback.

2 Press the ▲▼ buttons to select Time.

3 Enter the time in the sequence of hours, minutes, seconds using the number buttons, then press the OK button.

NOTE
- This may not work for some discs. When an audio CD (CD-DA) or an MP3 disc is inserted, according to a disc type, the information display may not appear. The Time Search function does not operate on some discs. To make the screen disappear, press the ANYKEY again.
Using the Repeat Function

Playing Repeatedly (Repeat Playback)


Using the REPEAT button
Press the REPEAT button during playback.

2 Press the REPEAT or the △ ▽ buttons to select the Title or Chapter you want to play repeatedly. Press the OK button.

Chapter: Repeats the chapter that is playing. Title: Repeats the title that is playing.
- To return to normal playback
3 Press the REPEAT buttons to select Off, then press the △ ▽ or REPEAT button and press the OK button.
Press the CANCEL button to return to normal playback.
1 Press the ANYKEY button during playback.

2 Press the △ ▽ buttons to select Repeat, then press the ◀ ▶ buttons to select the Title or Chapter you want to play repeatedly. For A-B Repeat, refer to page 58.

3 Press the OK button. To make the screen disappear, press the ANYKEY or RETURN button. Repeat play allows you to repeat a title or chapter.

DVD-RAM, DVD-RW (VR mode), unfinalised DVD-R and unfinalised DVD-RW (Video mode) do not repeat a chapter.
Playing Repeatedly (Repeat Playback)


Using the REPEAT button
1 Press the REPEAT button during playback.

2 Press the REPEAT button repeatedly to select Track or Disc you want to play repeatedly.

To return to normal playback
3 Press the REPEAT button repeatedly to select Off. Press the CANCEL button to return to normal playback.

Using the ANYKEY button
1 Press the ANYKEY button during playback. Repeat is highlighted.

2 Press the REPEAT or buttons to select Track or Disc you want to play repeatedly. Press the OK button. For MP3 discs, you can select Track, Folder or Disc. - To return to normal playback - 3 Press the REPEAT button repeatedly to select Off. Press the CANCEL button to return to normal playback.
Playing a Certain section Repeatedly (A-B Repeat Playback)


ANYKEY
Using the ANYKEY button
1 Press the ANYKEY button during playback.

2 Press the buttons to select Repeat, then press the button to select A-B.

3 Press the OK button. 4 Press the OK button at the point where you want the repeat play to start (A), then press it again at the point where you want the repeat play to stop (B). Repeat playback of the A-B section starts. - To return to normal playback - Select "Off" on the Repeat item. Press the CANCEL button to return to normal playback.
NOTE
If you set point (B) before five seconds has lapsed, the prohibition mark () will appear. Audio CDs (CD-DA), MP3 and MPEG4 discs do not support the Repeat A-B function.
Selecting the Subtitle
Subtitle languages may not work depending on the disc type. This is only available during playback.


(VR mode)

Using the SUBTITLE button
1 Press the SUBTITLE button during playback.

2 Press the SUBTITLE or buttons to select the desired subtitle language. To make the screen disappear, press the CANCEL or RETURN button.

Using the ANYKEY button
1 Press the ANYKEY button during playback.
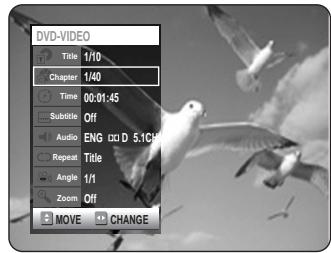
2 Press the buttons to select Subtitle, then press the buttons to select the desired subtitle language.

NOTE
- The subtitle display may be different depending on the disc type. Some discs allow you to select the language for the disc menu only.
Selecting the Audio language
Audio languages may not work depending on the disc type. This is only available during playback.


(VR mode)

Using the AUDIO button
1 Press the AUDIO button during playback.
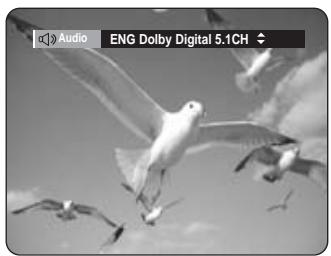
2 Press the AUDIO or the up/down buttons to select the desired audio language.

Using the ANYKEY button
1 Press the ANYKEY button during playback.

2 Press the up/down buttons to select Audio, then press the left/right buttons to select the desired audio language.


Audio languages may be different depending on the disc type. Some discs allow you to select the audio language for the disc menu only.
Changing the Camera Angle
When a DVD-VIDEO contains multiple angles of a particular scene, you can select the Angle function. This is only available during playback. If the disc contains multiple angles, the ANGLE mark appears on the screen.

1 Press the ANYKEY button during playback.

2 Press the left/right buttons to select Angle, then press the left/right or number buttons to select the desired angle.


This function is disc-dependent, may not work on all DVDs. This function does not work when a DVD has not been recorded with a multicamera angle system.
1 Press the ANYKEY button during playback or pause.

2 Press the up/down buttons to select Zoom, then press the OK button. ( ) will be displayed.
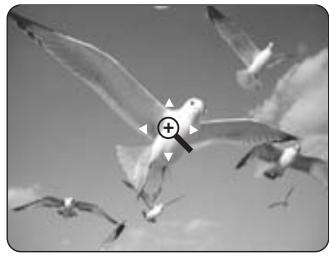
3 Press the up/down/left/right buttons to move to the area you want to enlarge. Press the OK button. The screen will be enlarged to twice the normal size.
If you press the OK button again after the screen was enlarged to twice the normal size, the screen size will be enlarged to four times the normal size.
- When the recording is done in EP mode, the Zoom function is not supported except when the recording has been done in V mode.
Using Bookmarks
This feature lets you bookmark sections of a DVD-VIDEO or DVD-R/-RW(V mode), so you can quickly find them.


(V mode)
1 Press the MARKER button during playback.

2 Press the OK button when the desired scene appears.
The number 1 is displayed and the scene is memorized.

Press the button to move to the next position.
4 Press the OK button when the desired scene appears.
The number 2 is displayed and the scene is memorized.
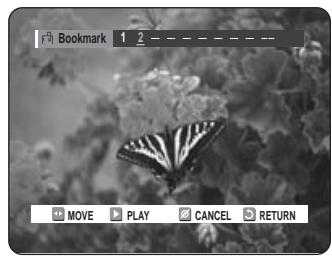
- Repeat above to bookmark other positions.
- You can bookmark up to 10 scenes.
NOTE
- When the disc tray is opened and then closed, bookmarks will disappear.
Playing back a bookmark
1 Press the MARKER button during playback. 2 Press the left/right buttons to select a bookmarked scene.
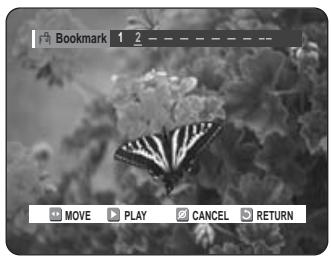
3 Press the OK or play button to start playing from the selected scene.
Clearing a bookmark
1 Press the MARKER button during playback. 2 Press the left/right buttons to select a bookmarked scene.

3 Press the CANCEL button to delete the selected bookmark.

Using Markers

(VR mode)
1 Press the MARKER button during playback.

2 Press the OK button when the desired scene appears.
The number 01 is displayed and the scene is memorized.
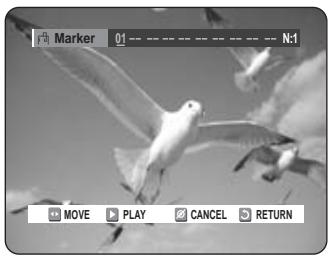
Press the left/right button to move to the next position. 4 Press the OK button when the desired scene appears.
The number 02 is displayed and the scene is memorized.

- DVD-RAM or DVD-RW (VR Mode) discs have the Marker function instead of the Bookmark function. The Marker function allows you to mark up to 99 scenes. Since the scenes may be displayed as many different pages, numbering is necessary. If a disc in use is encoded with Disc Protection, Markers cannot be set or deleted. Only playback is available.
Playing back a Marker
1 Press the MARKER button during playback. 2 Press the left/right buttons to select a bookmarked scene.

3 Press the OK or ⊙ button to start playing from the selected scene.
- If you press the ⊙ button, it moves to the beginning of the marker. Pressing the button once again within 3 seconds returns to the beginning of the previous marker.
- If you press the ⊙ button, it moves to the next marker.
Clearing a Marker
1 Press the MARKER button during playback. 2 Press the ◀ buttons to select a bookmarked scene. Press the CANCEL button to delete the selected bookmark.


- When a marker is cleared while DVD-RAM/-RW (VR mode) is playing, marker numbers will change. For example, if the 7th marker is cleared after ten markers are registered, the marker numbers after the eighth will automatically move ahead by one and the 8th marker becomes the 7th.
Playing an Audio CD/MP3
Playing an Audio CD (CD-DA)/MP3
Each disc has a variety of menu functions available.

Playing an Audio CD (CD-DA)
1 Insert an audio CD (CD-DA) into the disc tray. The audio CD menu appears and the tracks (songs) are played automatically.
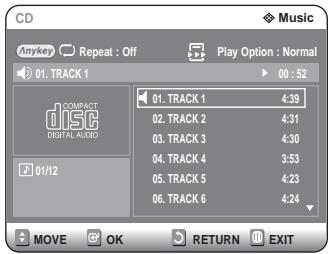
2-1 Press the △▽ buttons to select the track you want to hear, then press the OK or button. 2-2 Press the number buttons to select the track (song) and the track (song) is played automatically.
Audio CD (CD-DA) Screen Elements

- Repeat mode: Repeat off/Repeat Track/Repeat Disc
- Current track (song): Displays the number of the track currently being played.
- Displays the current play index and total track number.
- This shows the operating state of a disc and a playback time corresponding to a portion that is currently played.
- Displays the track list (song list) and the playing time of each track.
- Button display.
- Play Option: Normal, Random, Intro or Playlist
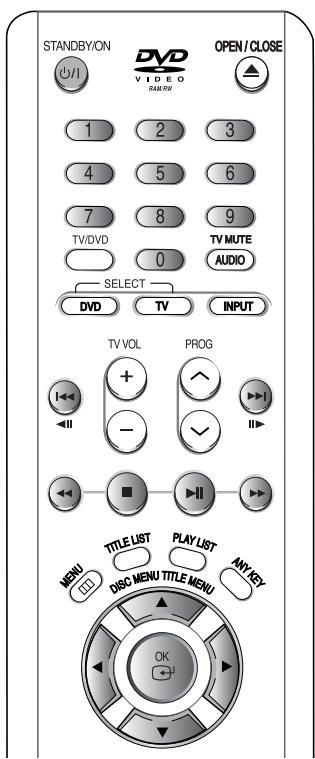
- ▲▼, 0~9: Selects a track (song).
- ▶: Plays the selected track (song).
- OK button: Plays the selected track (song).
- ⊙ button: Plays the next track.
- ⊙ button: Returns to the beginning of the current track when pressed during playback. If pressed again, your DVD recorder moves to and plays the previous track. If you press this button within three seconds after playback starts, the previous track will be played. If you press this button after three seconds, the current track will be replayed from the beginning.
- Press the ⊙/⊙ button: Fast Play (X2, X4, X8)
- ⊙ button: Stops a track (song).
- ● button: Plays a track (song) or pauses playback.
- ANYKEY button: To select the top menu on screen display (Repeat or Play Option).
1 Insert an MP3 Disc into the disc tray.

Press the ▲▼ buttons to select Disc Navigation, and then press the OK or ▶ button.
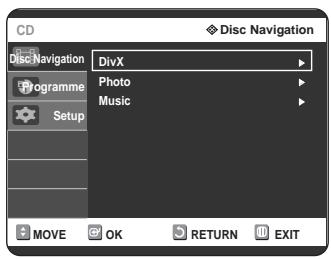
Press the ▲▼ buttons to select Music, then press the OK or ▶ button.

The MP3 menu appears and the tracks (songs) are played automatically.
4-1 Press the ▲▼ buttons to select the track (song) you want to hear, then press the OK or ▶ button.
4-2 Press the number buttons to select the track (song) and the track (song) is played automatically.

- Repeat mode: Repeat off, Repeat Track, Repeat Folder, or Repeat Disc.
- Current track (song): Displays the name of the track being played.
- Displays the current folder and play index.
- This shows the operating state of a disc and a playback time corresponding to the portion that is currently played.
- Displays the information for the folder and its tracks.
- Button display.
- Play Option: Normal, Random, Intro, or Playlist.
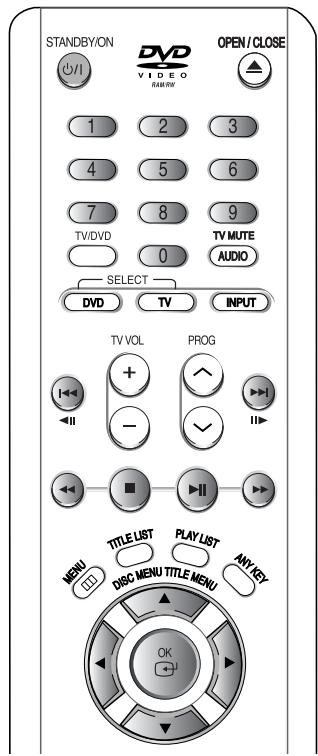
- ▲▼, 0-9: Selects a track (song).
- ▶: Plays the selected track (song).
- OK button: Plays back the selected track (song) or displays the files in the selected folder.
- RETURN button: Moves to the folder to which the current song belongs.
- () button: Plays the next track.
- () button: Returns to the beginning of the current track when pressed while playing. If pressed again, your DVD recorder moves to and plays the previous track.
If you press the this button within three seconds, the previous track will be played.
If you press the this button after three seconds, the current track will be replayed from the beginning.
- () button: Stops a track(song).
- () button: Plays a track(song) or pauses playback.
- ANYKEY button: To select the top menu on screen display (Repeat or Play Option).

- Files of one type: List of files and folders appears in a defined order.
- Files of multiple types: Topmost GUI menu screen (DISC NAVIGATION) appears.
Play Option Mode
The Play Option can be used with an audio CD or MP3 in the Play or Stop mode.


1 Press the ANYKEY button during playback. Repeat Mode will be highlighted.

- During Stop, Play Option will be highlighted.
2 Press the buttons to select Play Option, then press the buttons to select the desired play option (Normal, Random, Intro or Playlist).

Press the ▲▼ buttons to select the desired item (Normal, Random, Intro or Playlist).
- Normal: Tracks on a disc are played in the order in which they were recorded on the disc.
- Random: The Random option plays a disc's tracks in random order. After a random list is generated and played completely, another random list is generated and played. Random Play is continued until the play option is changed.
- Intro: The first 10 seconds of each track will be played. If you want to listen to the music that you have selected, press the OK or ⊕ button. The play option will be changed to Normal Play. When Intro Play is completed, Normal Play is performed.
- Playlist: The Playlist playback option allows you to select the order in which you want tracks to play.
To Programme Tracks
You can register a maximum of 30 tracks in the playlist.
1 Press the ANYKEY button during playback. Repeat Mode will be highlighted.

Press the ◀▶ buttons to select Play Option.

3 Press the OK button. The play option screen will appear. Press the ▲▼ buttons to select Playlist. 4 Press the OK button. The Playlist screen will appear. Press the ▲▼ buttons to select Tracks in the order in which you want them to play. Press the OK button. Press the PLAY button to playback playlist.

5 If you playlisted a wrong track, press the ▶ button, then press the ▲▼ buttons to select wrong track, then press the CANCEL button.
The wrong track will be removed.

6 Press the PLAY button to playback the playlist.
Playing a Picture

Insert a JPEG into the disc tray.
2 Press the △ ∇ buttons to select Disc Navigation, and then press OK or the button.
Press the △ ∇ buttons to select Photo, and then press OK or the ▸ button.
4 Press the △ ∇ ◂ buttons to select a picture.

- To see the next 6 pictures, press the ⊙ button.
- To see the previous 6 pictures, press the ⊙ button.
5-1 If you press the PLAY (⊙) button, the Slide show screen will appear. Press the ◂ buttons to set the slide show speed, then press the OK button.

5-2 Press the ◂ buttons to select a picture file in the Album screen, then press the OK button.

: Returns to the Album screen. : The DVD recorder enters slide show mode. Before the slide show can begin, the picture interval (Slide show speed) must be set. Each time the OK button is pressed, the picture rotates 90 degrees clockwise. Each time the OK button is pressed, the picture is enlarged up to 4X (four times the normal size). (Normal → Zoom 2X → Zoom 4X → Zoom 2X → Normal) - Press the ANYKEY button to display or clear menus.
Playing an MPEG4
MPEG4 File is used to contain the audio and video data.
MPEG4 File with the following extensions can be played: .AVI, .DIVX
1 Insert an MPEG4 Disc into the disc tray.

Press the △ ∇ buttons to select Disc Navigation, and then press OK or the button.

3 Press the △ ∇ buttons to select DivX, and then press OK or the ▸ button.
4 Press the △ ∇ buttons to select the avi file (DivX), then press OK or the button.
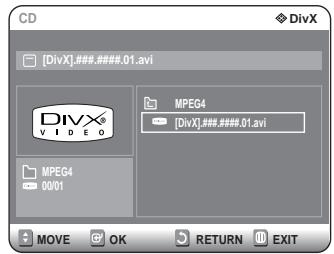
5 When MPEG4 file is played, you can use following functions.
Pressing the STOP button once during playback will display the file list, pressing the button again will exit the menu screen.
MPEG4 Function Description
| Function | Description |
| Skip (← or →) | During play, press the ← or → button, it moves forward or backward 5 minutes. |
| Search (← or →) | During play, press the SEARCH (← or →) button and press again to search at a faster speed. (2X, 4X, 8X) |
| Slow Motion Play | In pause or step mode, press the SEARCH ⊙ button on the remote control. (1/8X, 1/4X, 1/2X) |
| Step Motion Play | Press the ⊙ button on the remote control in the still mode. |

This DVD recorder can play the following video compression formats: - MPEG4 Codec format: DivX 3.11, DivX 4.x, DivX 5.x, DivX-Pro (without QPEL and GMC) - Audio format: .MP3, .MPEG, .WMA, .LPCM, .AC3
Supported subtitle file formats: .smi, .srt, .sub, .psb, .txt, .ass (The subtitle file should have exactly the same name as the corresponding MPEG4 file name). Some MPEG4 files created on a personal computer may not be playable. That is why Codec Type, Version, and Higher resolution over specification are not supported.
Playing the Title List


Follow these instructions to play back a scene from the Title List.

Using the TITLE LIST button
Press the TITLE LIST button. The Title List screen is displayed.

2 Press the buttons to select an entry you want to play from Title List, then press the PLAY ( ) button.
The selected entry (title) will be played back.
3 To stop title play, press the STOP button. To return to the title list screen, press the TITLE LIST button.
Using the MENU button
1 Press the MENU button.
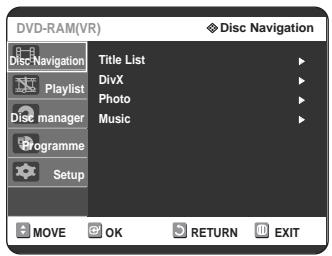
Press the buttons to select Disc Navigation, then press the OK or button twice.
The Title List screen is displayed.

Press the ▲▼ buttons to select Title, then press the OK button.
The Edit menu is displayed on the right.
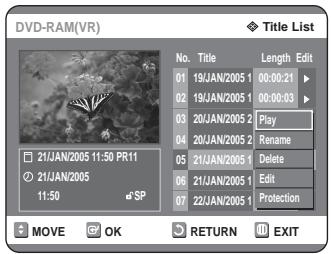
(Play, Rename, Delete, Edit, Protection: See pages 71~74)
Press the ▲▼ buttons to select Play to play the title list, then press the OK button.
The selected entry (title) will be played back.
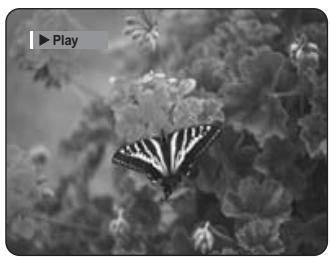
To view the current status of the disc and progress of playback: Press the INFO button, the information about the disc will appear.

Press the INFO button once again. Then you can check the information about the title under playback.
| DVD-RAM(VR) | Playing Info |
| Name | 01/JAN/2005 12:00 PR |
| 1 | |
| Title | 1/15 |
| Created Time | 01/JAN/2005 12:00 |
| Length | 00:01:43 SP |
| Playing Time | 00:13:27 |
| Title Protection | Not Protected |
| 01 JAN 2005 SAT | 12:00 |
To stop title play, press the STOP button. To return to the title list screen, press the TITLE LIST button.

NOTE
- You can also play a recorded programme by pressing the ANYKEY button during playback.

Press the ▲▼ buttons to select Title. Press the ◀▶ buttons to select to play the title list, then press the OK button.
Title List Screen Elements
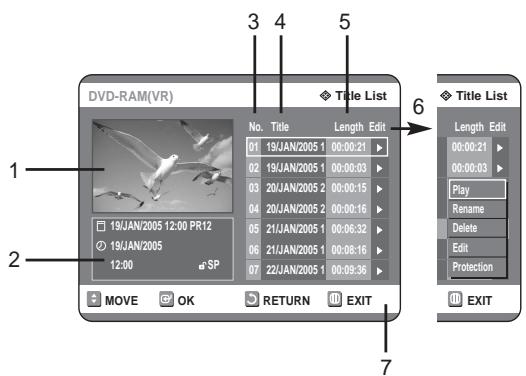
- Playback screen for recorded entries.
- Information window for the selected entry: Title name, recording date, recording time, lock status, recording mode
- Recorded entry No.
- Recorded entry title
- Recording length (i.e., the playing time)
- Title list edit items
Play: Plays the selected entry. Rename: Renames the title of a selected entry. Delete: Deletes the selected entry from the list. Edit: Deletes a section of titles. Protection: Locks or unlocks the selected entry.
- Button display.

NOTE
This may depend on the disc type. DVD-R/DVD-RW(Video) has limited editing function.
Editing
This section introduces basic functions of DVD editing and explains both edit functions for the recording on a disc and edit functions for the entire disc.
Basic Editing (Title List) 71
Advanced Editing (Playlist) 75
Disc Manager 83
Title List
A title is a section of recorded video and audio.
Title List shows a list to help you select a title.
Since the title list consists of the information on stream that is actually recorded, if one title is deleted, that title cannot be played again.
- Play List
This refers to a DVD recorder of playback, which is made by selecting a desired scene in the entire Title List. When one playlist is played, only the scene selected by the user will play and then stop. Since only the information necessary for playing a desired scene is included in a playlist, even if that playlist is deleted, the original stream will not be deleted.
Recording or editing might not be completed if an error, such as a sudden power failure occurs.
Please be aware that a material that has been damaged is unable to be retrieved to its original content.
Basic Editing (Title List)
Renaming (Labeling) a Title
Follow these instructions to rename a title list entry, i.e., to edit the title of a recorded programme.


Using the TITLE LIST button
Press the TITLE LIST button. The Title List screen is displayed.
Using the MENU button
- Press the MENU button.
- Press the △ ▽ buttons to select Disc Navigation, then press the OK or ▸ button twice.

2 Press the △ ▽ buttons to select an entry you want to rename from the Title List, then press the OK or ▸ button.

3 Press the triangle and nabla buttons to select Rename, then press the OK button. The Rename screen is displayed.

4 Press the triangle, nabla, and triangleleft buttons to select the desired characters, then press the OK button.

- Back Space: Deletes and moves the cursor backwards by one position. (Equivalent to the CANCEL button)
- Space: Enters a blank and moves the cursor one forward (to the right).
- Delete: Deletes the character at the cursor position.
- Clear: Deletes all the character inputs.
- Save: Registers the character inputs.
5 Press the triangle, nabla, and triangleleft buttons to select Save, then press the OK button.
The changed title name is displayed on the title item of the selected entry.

Locking (Protecting) a Title
Follow these instructions to lock an entry to protect it from accidental deletion.


Using the TITLE LIST button
Press the TITLE LIST button. The Title List screen is displayed.
Using the MENU button
- Press the MENU button.
- Press the △ ▽ buttons to select Disc Navigation, then press the OK or ▶ button twice.

2 Press the △ ▽ buttons to select an entry you want to protect in the Title List, then press the OK or button.

Press the △ ▽ buttons to select Protection, then press the OK or button.


4 Press the ◀ buttons to select On, then press the OK button. The key icon on the information window for the selected entry changes to the locked status. (→)

Deleting a Title
Follow these instructions to delete an entry from the Title List.


Using the TITLE LIST button
Press the TITLE LIST button. The Title List screen is displayed.
Using the MENU button
- Press the MENU button.
- Press the △ ▽ buttons to select Disc Navigation, then press the OK or ▶ button twice.

2 Press the △ ▽ buttons to select an entry you want to delete in the Title List, then press the OK or ▶ button.

3 Press the △ ▽ buttons to select Delete, then press the OK or button.
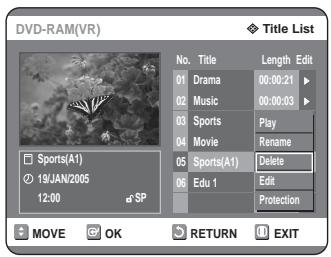
You will be prompted with a confirmation message.
DVD-RAM(VR), DVD-RW(VR mode): Since Playlist is present, the message 'Do you want to delete? (Related playlist may be deleted.)' is displayed.

DVD-RW (Video mode), DVD-R: Since Playlist is not present, the message 'Do you want to delete?' is displayed.
- The message may depend on the type of disc.
4 Press the ◀ buttons to select Yes, then press the OK button.

NOTE
- You cannot delete a protected entry. If you want to delete a protected entry, select "Off" in the Title Protection menu. (See page 72)
- When the Disc Protection has been set to Protected, you cannot delete titles. (See page 84) Once an entry is deleted from the Title List it cannot be recovered. Once DVD-R, DVD-RW is finalised, it cannot be deleted.
- With DVD-R, titles are only deleted from the menu however, the Title remains physically on the disc.
Deleting a Section of a Title
Follow these instructions to delete a section of a Title List entry.


(VR mode)

Using the TITLE LIST button
Press the TITLE LIST button. The Title List screen is displayed
Using the MENU button
- Press the MENU button.
- Press the ▲▼ buttons to select Disc Navigation, then press the OK or ▶ button twice.

2 Press the \(\triangle\) or \(\nabla\) buttons to select an entry you want to edit from the Title List, then press the OK button.
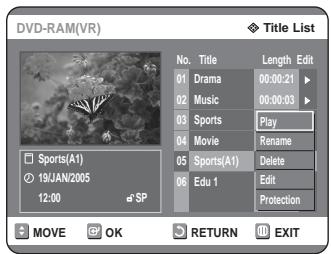
3 Press the \(\triangle\) or \(\nabla\) buttons to select Edit, then press the OK button. The Edit Title List screen is displayed.
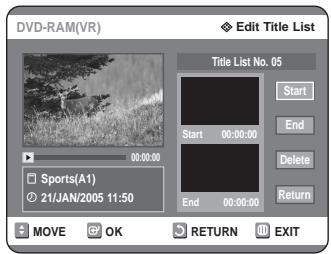
4 Press the OK button at the starting point. The image and starting point time are displayed in the section deletion starting point window.
Edit Title List Screen Elements
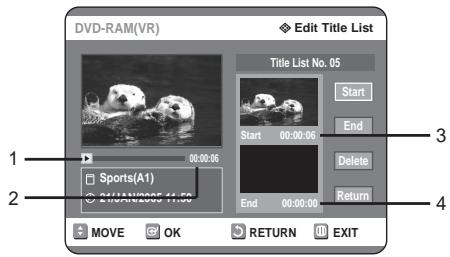
- Playback bar
- Playtime
- Section deletion starting point window and time
- Section deletion end point window and time
- Select the start and end points of the section you want to delete using the playback related buttons.
- Playback related buttons: \(\triangle\), \(\nabla\), and \(\triangleright\).
5 Press the OK button at the end point. The image and end point time are displayed in the Section deletion ending point window.

6 Press the OK button at Delete.


7 Press the \(\triangleleft\) buttons to select Yes, then press the OK button.
The selected section has been deleted.
To return to the Title List screen, press the triangle and nabla buttons to select Return.
NOTE
- The length of the section to be deleted must be at least 5 seconds long. If the length of the section to be deleted is less than 5 seconds, you will be prompted with the message 'The range is too short.' If the end time precedes the starting point, you will be prompted with the message 'End point cannot be marked earlier than start point'.
- The section cannot be deleted when it includes a still picture.
- Press the MENU button after the operation has finished. The Edit Title List screen will disappear.
Advanced Editing (Playlist)
Creating a Playlist
Follow these instructions to create a new playlist entry from a recorded title.


(VR mode)
1 With the unit in Stop mode, press the MENU button. Press the triangle and nabla buttons to select Playlist, then press the OK or right arrow button.

Press the triangle and nabla buttons to select New Playlist, then press the OK or button. The Make Scene screen is displayed.

4 Press the OK button at the start point.

- The image and time at the start point are displayed on the Start window.
- The yellow-coloured selection bar moves to the End item.
- Select the starting point of the section from which you want to create a new scene using the playback related buttons (●, ●, ●).
Press the OK button at the end point.
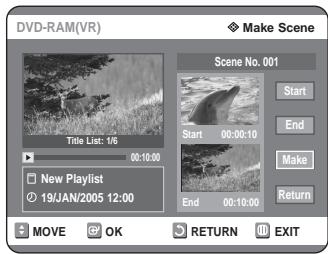
- The image and end point time are displayed in the End window.
- The yellow-coloured selection bar moves to the Make item.
- To make a new playlist -
6 Press the OK button to select the Make. A new Scene will be added to the current Playlist. A new Make Scene screen is displayed.
NOTE
- You can check and see all the scenes on Edit Playlist screen.
- Repeat steps 1~6 if you want to make a new playlist.
- Repeat steps 4~6 if you want to make scenes of the playlist.
- To return to Edit Playlist menu -
7 Press the ▲▼ buttons to select Return, then press the OK button. The Edit Playlist screen is displayed.
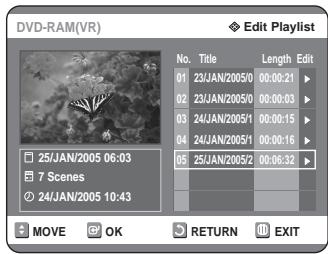
Press the MENU or PLAY LIST button after the operation has finished. The Edit Playlist screen will disappear.
NOTE
- You can create up to 99 playlist entries. Depending on the kind of disc, the displayed screen may have a slight difference.
Playing Entries in the Playlist
Follow these instructions to play the playlist entries.


(VR mode)
1 With the unit in Stop mode, press the PLAY LIST button.
The Edit Playlist screen is displayed.

Using the MENU button
- With the unit in Stop mode, press the MENU button.
- Press the ▲▼ buttons to select Playlist, then press the OK or ▶ button.
- Press the ▲▼ buttons to select Edit Playlist, then press the OK or ▶ button.

2 Press the ▲▼ buttons to select the title you want to edit from the Playlist, then press the OK or ▶ button.
The Edit Playlist menu is displayed: Play, Rename, Edit Screen, Copy, Delete.
Press the ▲▼ buttons to select Play, then select the OK button.
The playlist entries will be played.

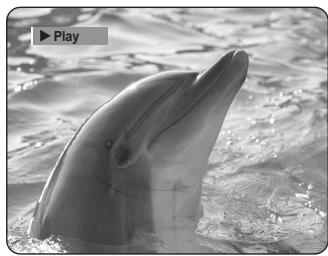
- To view the current status of the disc and progress of playback: Press the INFO button, and the information about the disc will appear.

- Press the INFO button once again. Then you can check the information about the playlist currently playing back.
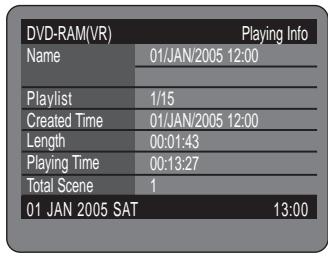
- The screen returns to the Edit Playlist screen when playback has finished.
4 Press the STOP button to stop playback. The screen returns to the Edit Playlist screen.
Renaming a Playlist Entry
Follow these instructions to rename a playlist entry, i.e., to edit the title of a playlist entry.


(VR mode)
1 With the unit in Stop mode, press the PLAY LIST button.
The Edit Playlist screen is displayed.

Using the MENU button
- With the unit in Stop mode, press the MENU button.
- Press the ▲▼ buttons to select Playlist, then press the OK or ▶ button.
- Press the ▲▼ buttons to select Edit Playlist, then press the OK or ▶ button.
2 Press the ▲▼ buttons to select the title you want to edit from the Playlist, then press the OK or ▶ button.
The Edit Playlist menu is displayed: Play, Rename, Edit Scene, Copy, Delete
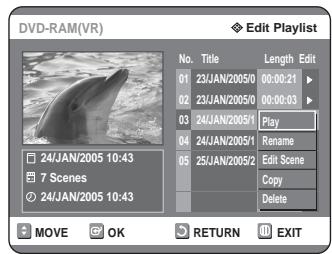
3 Press the ▲▼ buttons to select Rename, then press the OK button.
The Rename screen is displayed.
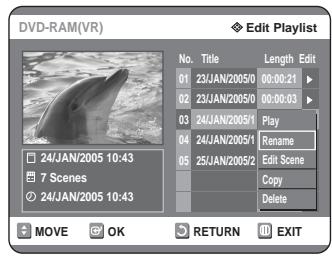
4 Enter the desired characters using the triangle, nabla, and triangleleft buttons.

- This function is the same as the Rename function in renaming the title list. (See page 71.)
- The maximum number of characters that can be entered is 31. All 31 characters can be displayed by pressing the INFO button twice.
5 Press the triangle, nabla, and triangleleft buttons to select Save, then press the OK button.
The changed title is displayed in the title field of the selected playlist entry.

■ Editing a Scene for the Playlist
Follow these instructions to edit scenes for a playlist.


(VR mode)
1 With the unit in Stop mode, press the PLAY LIST button.
The Edit Playlist screen is displayed.

Using the MENU button
- With the unit in Stop mode, press the MENU button.
- Press the triangle and nabla buttons to select Playlist, then press the OK or right arrow button.
- Press the triangle and nabla buttons to select Edit Playlist, then press the OK or right arrow button.
2 Press the triangle and nabla buttons to select the title you want to edit from the Playlist, then press the OK or right arrow button.
The Edit Playlist menu is displayed: Play, Rename, Edit Scene, Copy, Delete.

Press the triangle/nabla buttons to select Edit Scene, then press the OK button.
The Edit Scene screen is displayed.


Playing a Selected Scene
Press the triangle/nabla/left arrow buttons to select the scene you want to play, then press the OK button.
The playlist entry to be played is selected.

Press the OK button.
The selected scene is played.
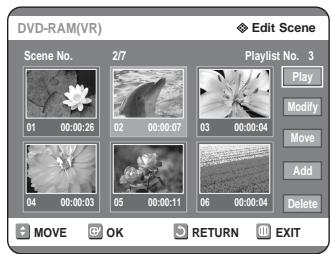

- To stop scene play, press the STOP button.
Modifying a Scene (Replacing a Scene)
To setup, follow steps 1 to 3 on page 78.
Press the triangle/nabla/left arrow buttons to select the scene you want to modify, then press the OK button.

Press the triangle/nabla buttons to select Modify, then press the OK button. The Modify Scene screen is displayed.
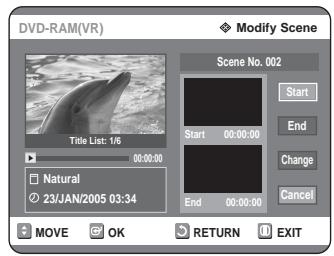
Press the OK button at the start point of the scene.
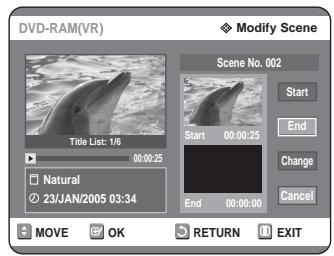
- The image and starting point time are displayed on the Start window.
- Select the starting or ending point of the section you want to modify using the playback related buttons (●, ●, ●).
7 Press the OK button at the end point of the scene.
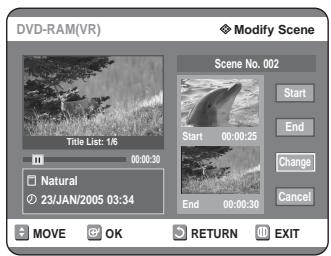
- The image and ending point time are displayed in the End window.
Press the ▲▼ buttons to select Change, then press the OK button.

- The scene you want to modify is changed with the selected section.
Moving a Scene (Changing the Position of a Scene)
To setup, follow steps 1 to 3 in page 78.
4 Press the ▲▼◀▶ buttons to select the scene you want to move (change the position), then press the OK button.

Press the ▲▼ buttons to select Move, then press the OK button.

- A yellow selection window is displayed on the scene to be moved.
6 Press the ▲▼◀▶ buttons to select the position to which you want to move the selected scene, then select the OK button.
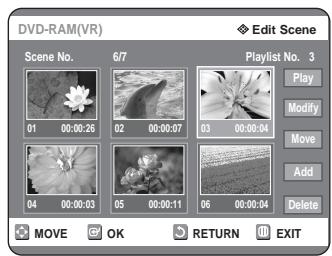
- The selected scene is moved to the selected position.


NOTE
- You cannot move the selected scene to the position of the next scene, because the selected scene should be inserted before that position, which requires no action. Depending on the kind of disc, the displayed screen may have a slight difference.
Adding a Scene
To set up, follow steps 1 to 3 on page 78.
4 Press the ▲▼◀▶ buttons to select the scene that will have a new scene inserted before it, then press the OK button.
A yellow selection window is displayed on the scene to be added as the new scene.

5 Press the ▲▼ buttons to select Add, then press the OK button.
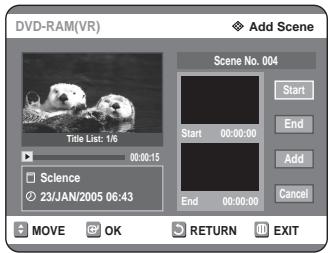
6 Press the OK button at the starting point of the scene.

- The image and starting point time are displayed in the Start window.
- Select the end point of the section where you want to add the new scene using the playback related buttons (◀◀, ▶▶, ▶).
7 Press the OK button at the end point of the scene.

- The image and time of the end point are displayed in the End window.
- To cancel, press the ▲▼ buttons to select Cancel, then press the OK button.
Press the ▲▼ buttons to select Add, then press the OK button.
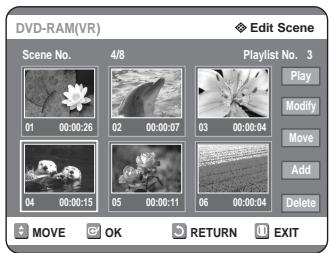
- The section you want to add is inserted prior to the scene selected in step 4.
Deleting a Scene
To set up, follow steps 1 to 3 on page 78.
4 Press the ▲▼◀▶ buttons to select the scene you want to delete, then press the OK button.
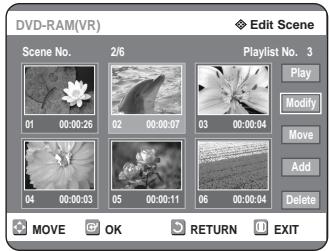
Press the △ ▽ buttons to select Delete, then press the OK button.
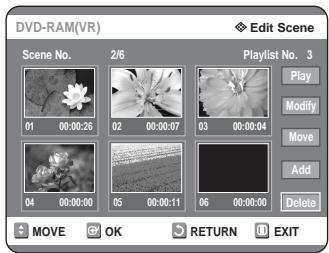
Copying a Playlist Entry to the Playlist

Using the PLAY LIST button
1 With the unit in Stop mode, press the PLAY LIST button.
The Edit Playlist screen is displayed.

Using the MENU button
- With the unit in Stop mode, press the MENU button.
- Press the △ ▽ buttons to select Playlist, then press the OK or ▸ button.
- Press the △ ▽ buttons to select Edit Playlist, then press the OK or ▸ button.
2 Press the △ ▽ buttons to select the title you want to copy to the Playlist, then press the OK or button.
The Edit Playlist menu is displayed: Play, Rename, Edit Scene, Copy, Delete
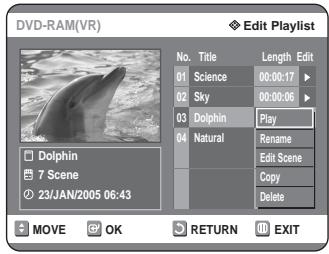
Press the △ ▽ buttons to select Copy, then press the OK button.
The selected playlist will be copied.
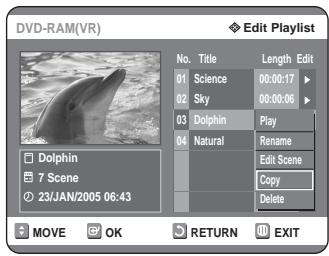

- You can create up to 999 scenes on one disc. In some cases, this may differ from the actual number.
- Press the MENU button after the operation has finished. The Edit Playlist screen will disappear.
- Deleting a Playlist Entry from the Playlist

Using the PLAYLIST button
1. With the unit in Stop mode, press the PLAY LIST button.
The Edit Playlist screen is displayed.

Using the MENU button
- With the unit in Stop mode, press the MENU button.
- Press the ▲▼ buttons to select Playlist, then press the OK or ▶ button.
- Press the ▲▼ buttons to select Edit Playlist, then press the OK or ▶ button.
2. Press the ▲▼ buttons to select the title you want to delete from the Playlist, then press the OK or ▶ button.
The Edit Playlist menu is displayed: Play, Rename, Edit Scene, Copy, Delete.

3. Press the ▲▼ buttons to select Delete, then press the OK button.

- You will be prompted with the delete confirmation message 'Do you want to delete?'

4. Press the ◀▶ buttons to select Yes, then press the OK button.
It automatically returns to the Edit Playlist screen after the delete operation has finished.


Disc Manager
■ Editing the Disc Name
Follow these instructions to give a name to a disc.


1 With the unit in Stop mode, press the MENU button.

Press the ▲▼ buttons to select Disc Manager, then press the OK or button.

Press the ▲▼ buttons to select Disc Name, then press the OK or button. The Edit Name screen is displayed.
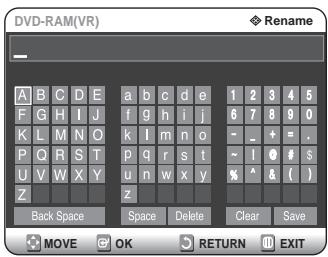
4 Enter the desired characters press the ▲▼◀▶ buttons.

- This function is the same as the Rename function in renaming the title list. (See page 71.)
- The maximum number of characters that can be entered is 31. All 31 characters can be displayed by pressing the INFO button.
Press the ▲▼◀▶ buttons to select Save, then press the OK button. A disc name is given to the disc.

NOTE
- You may need to clear disc protect before beginning editing. Depending on the kind of disc, the displayed screen may be different.
Disc Protection
Disc Protection allows you to protect your discs from being formatted or deleted due to unintended operations.


1 With the unit in Stop mode, press the MENU button.

Press the ▲▼ buttons to select Disc Manager, then press the OK or button.

Press the ▲▼ buttons to select Disc Protection, then press the OK button.

Press the ▲▼ button to select Protected, then press the OK button.

Formatting a Disc
Use these instructions to format a disc. The Disc Protection should also be cleared.


1 With the unit in Stop mode, press the MENU button.

Press the ▲▼ buttons to select Disc Manager, then press the OK button.
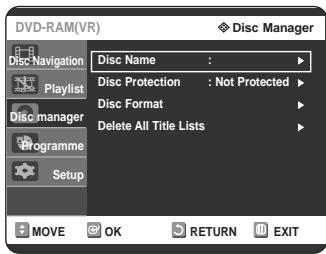
Press the ▲▼ buttons to select Disc Format, then press the OK button.

DVD-RAM
- You will be prompted with the confirmation message 'Do you want to format disc?'

- You will be prompted with the confirmation message 'All data will be deleted. Do you want to continue?'
DVD-RW
- You will be prompted with the confirmation message 'Choose the recording format for DVD-RW.'

Press the ◀▶ buttons to select Yes, then press the OK button. The disc is formatted.
DVD-VR and DVD-V are defined according to their recording format.
| DVD-VR | DVD-V | |
| DISC | DVD-RAM | DVD-RW |
| DVD-RW | DVD-R |
Delete All Title Lists


1 With the unit in Stop mode, press the MENU button.

Press the △ ∇ buttons to select Disc Manager, then press the OK or ▸ button.

3 Press the △ ∇ button to select Delete All Title Lists, then press the OK or ▸ button.

- You will be prompted with the confirmation message 'Do you want to delete all title lists?'
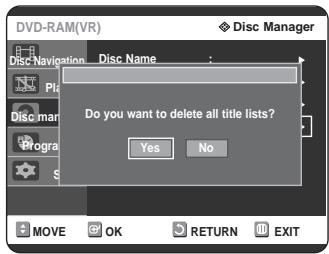
- When Protected Entry exists: The Delete All Title List function will not operate. If there is a title containing a still picture, however, that function will not operate. If you want to delete a protected entry, disable Protect for it on the Lock item.
4 Press the ◁ buttons to select Yes, then press the OK button. All title lists are deleted.
Finalising a disc
After you record titles onto a DVD-RW/DVD-R disc with your DVD recorder, it needs to be finalised before it can be played back on external devices.


1 With the unit in Stop mode, press the MENU button.

Press the △ ∇ buttons to select Disc Manager, then press the OK or ▸ button.

Press the △ ∇ button to select Disc Finalise, then press the OK or ▸ button.
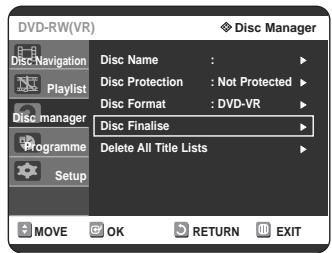
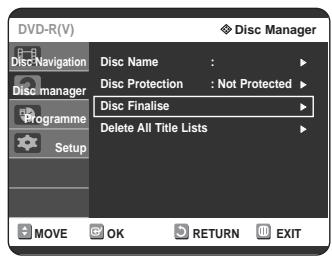
You will be prompted with the message 'Do you want to finalise disc?'
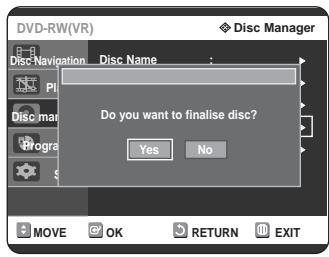
If you select Yes, you will be prompted again with the message ' Disc will be finalised. Do you want to continue?'

4 Press the ◁ buttons to select Yes, then press the OK button.
The disc is finalised.
NOTE
Once a disc is finalised, you cannot delete entries from the record list. After being finalised, the DVD-R/DVD-RW (video mode) operates in the same manner as a DVD-Video. Depending on the disc type, the displayed screen may be different. Finalising time may vary depending on the amount of data recorded on the disc. Data on the disc will be damaged if the recorder is powered off during the finalise process.
Unfinalising a disc (V/VR mode)

1. With the unit in Stop mode, press the MENU button.
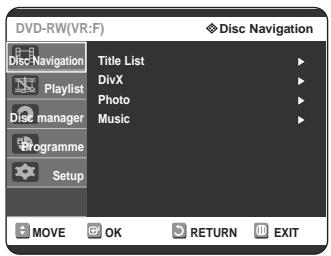
2. Press the ▲▼ buttons to select Disc Manager, then press the OK or ▶ button.

3. Press the ▲▼ buttons to select Disc Unfinalise, then press the OK or ▶ button. You will be prompted with the message 'Do you want to unfinalise disc?'.

4. If you select Yes, you will be prompted again with the message 'Disc will be unfinalised. Do you want to continue?'

5. Press the ◀▶ buttons to select Yes, then press the OK button. The disc is unfinalised.
NOTE
A DVD-RW can be finalised or unfinalised in Video mode.
| Finalise | Unfinalise | |
| Mark | DVD-Video(RW) | DVD-RW(V) |
| Operation | Same as DVD-Video | Additional recording, protection and deletion are possible. |
A DVD-RW can be finalised or unfinalised in VR mode.
| Finalise | Unfinalise | |
| Mark | DVD-RW(VR:F) | DVD-RW(VR) |
| Operation | Additional recording, deletion, editing, and protection are impossible. | Additional recording, deletion, editing, and protection are possible. |
Additional Information
Troubleshooting 88
Specifications 92
Troubleshooting
If your DVD recorder malfunctions, go through the checkpoints below before contacting a Samsung authorised service centre.
Power
The input is displayed for a while when the power is turned on.

Checkpoint 1
The DVD recorder requires some time to initialize and the input will be displayed for approx. 10 seconds after it is turned on.
Recording
Cannot record TV programmes.

Checkpoint 1
Check whether the power cord is securely plugged into the power outlet.
Checkpoint 2
Did you set the DVD recorder channel settings correctly?
Checkpoint 3
Check the free space on your DVD-RAM/DVD-RW/DVD-R discs.
I pressed the REC button but there is no response.

Checkpoint 1
Recording is possible for DVD-RAM/DVD-RW/DVD-R discs only. If a programme is copy protected, it cannot be recorded.
Playback
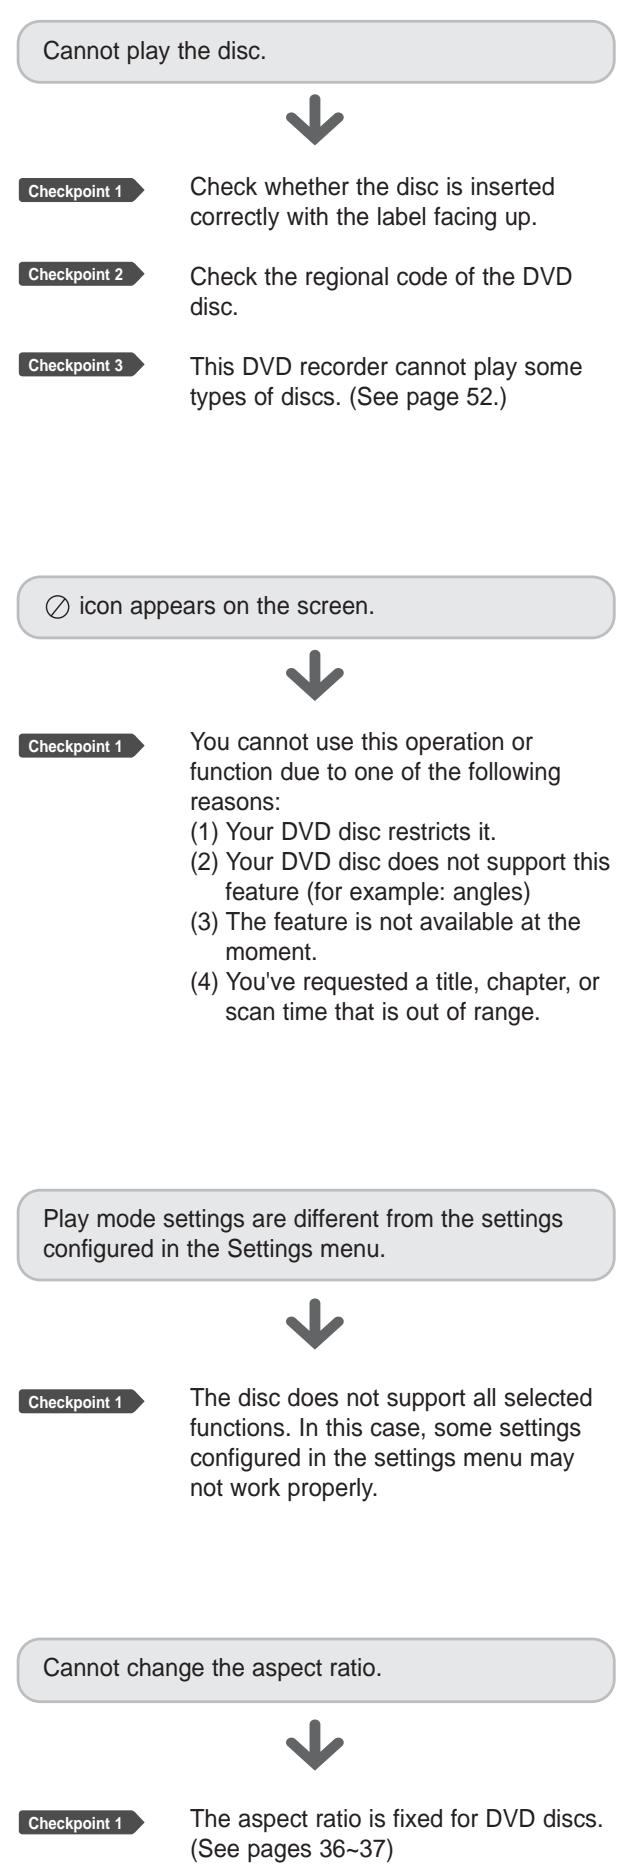
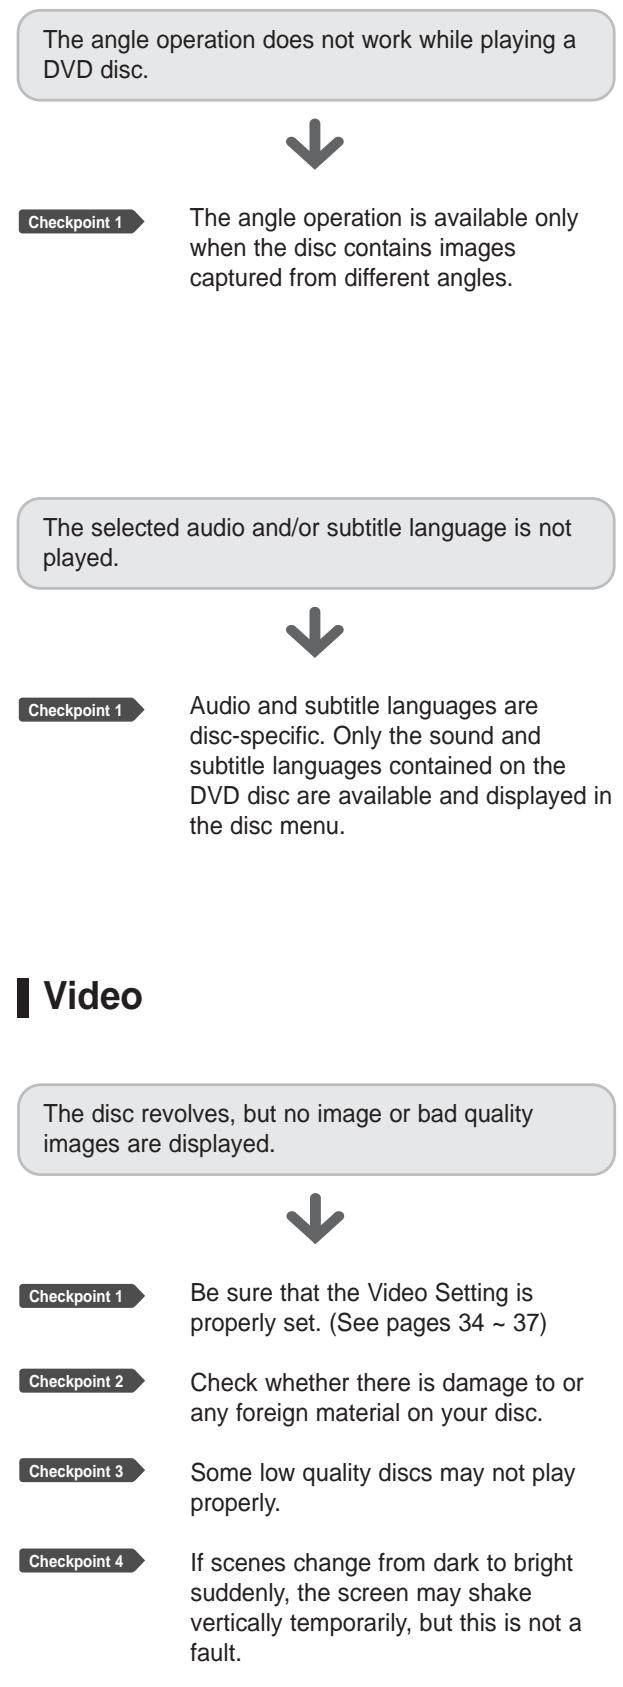
Sound
No sound.

Checkpoint 1
Are you watching a programme in slow or skip mode? If you are playing a programme at a speed other than normal speed, sound will not be heard.
Checkpoint 2
Check the connections and settings. (See pages 20-21, 33-34)
Checkpoint 3
Check whether the disc is damaged. Clean the disc, if necessary.
Checkpoint 4
Check whether the disc is inserted correctly with the label facing up.
No audio output.

Checkpoint 1
Check whether you have selected the correct digital output options in the Audio Output Options menu. (See page 33~34.)
Timer Recording
Timer lamp flickers.

Checkpoint
Check there is enough space on the disc for recording.
Checkpoint 2
Check whether the current disc is recordable or not. Make sure to check before the start time of recording.
Timer recording does not work properly.

Checkpoint 1
Re-check the recording time and the end time settings again.
Checkpoint 2
Recording will be cancelled if the power is interrupted due to a power failure or another similar reason while recording.
HDMI
No HDMI output.

Checkpoint 1
Check that the Video output is set to HDMI.
Checkpoint 2
Check the connection between the TV and the HDMI jack of the DVD Recorder.
Checkpoint 3
See if your TV supports this 576p/720p/1080i DVD Recorder.
Abnormal HDMI output screen.

Checkpoint 1
If snow noise appears on the screen, it means that TV does not support HDCP (High-bandwidth Digital Content Protection).
HDMI output Jitter

Checkpoint 1
Check your TV system setup correctly.
Checkpoint 2
Screen Jitter may occur when the frame rate is converted from 50Hz to 60Hz for 720p/1080i HDMI (High Definition Multimedia Interface) Output.
Checkpoint 3
Please refer to the user's manual of your TV.
Other
I forgot my password for parental supervision.

Checkpoint 1
Press the ▶ button on the front panel of the Recorder for more than 5 seconds with no disc in the DVD recorder. All settings including the password will revert to the factory settings. Do not use this unless absolutely necessary. (Note that this function is possible only when no disc is inserted.)
Remote Control Unit
The remote control doesn't work.

Checkpoint 1
Point the remote control at the remote control sensor on your DVD recorder. Allow for proper distance. Remove obstacles between your DVD recorder and the remote control.
Checkpoint 2
Check whether the batteries are empty.
Checkpoint 3
Check for the TV/DVD selection button.
Is it possible to change a subtitle and an audio signal on a recorded disc?

Checkpoint
A recorded disc is played with only the subtitle and the audio signal which were selected during recording.
Other problems.

Checkpoint
Read the table of contents and then find and read the section describing your problem, follow the instructions given.
Checkpoint 2
Turn your DVD recorder off and on.
Checkpoint 3
If the problem still persists, contact a nearby Samsung service centre.
| General | Power requirements | AC 220-240V, 50Hz | |
| Power consumption | 35 Watts | ||
| Weight | 2,9Kg | ||
| Dimensions | 430mm(W) x 245mm(D) x 59mm(H) | ||
| Operating temp. | +5°C to +35°C | ||
| Other conditions | Keep level when operating. Less than 75% operating humidity | ||
| Input | Video | Composite Video: 1,0 V p-p at 75Ω load, sync negative | |
| Audio | Max.Audio Input Level: 2Vrms | ||
| DV Input | IEEE 1394(4p) compatible jack | ||
| Receivable Channels | SECAM L, PAL B/G | ||
| Scart Jack | AV1 (Scart TV) | Video: Composite, Audio: analogue | |
| AV2 (Scart Ext) | Video: Composite, RGB Audio: analogue | ||
| Output | Audio | Analogue output jacks x 2 | |
| Optical/Coaxial digital audio output | |||
| Video | Composite Video: Video output jack x 1 | ||
| S-Video output x 1 (Y:1,0Vp-p, C:0,286Vp-p at 75Ω load) | |||
| Component output x 1 (Y: 1,0Vp-p, Pb: 0,70Vp-p, Pr: 0,70Vp-p at 75Ω load) | |||
| HDMI/DVI (576p, 720p, 1080i) | |||
| Scart Jack | AV1 (Scart TV) | Video: Composite, RGB Audio: analogue | |
| Recording | Picture Compression format | MPEG-II | |
| Audio Compression format | Dolby Digital 2ch/256Kbps, MPEG-II | ||
| XP (about 8 Mbps), SP (about 4 Mbps), LP (about 2 Mbps), | |||
| Recording Quality | EP (about 1,2 Mbps or about 0,8 Mbps) | ||
| Audio Frequency Response | 20 Hz ~ 20 kHz | ||
Audio Output: For DVD discs, audio signals recorded at 96kHz sampling frequency are converted and output at 48kHz.
| Disc Type | DVD | AUDIO CD(CD-DA) |
| Analogue Audio Output | 48 / 96kHz | 44,1kHz |
| Digital Audio Output | 48kHz | 44,1kHz |
This Samsung product is warranted for the period of twelve (12) months from the original date of purchase, against defective materials and workmanship. In the event that warranty service is required, you should return the product to the retailer from whom it was purchased.
However, Samsung Authorised Dealers and Authorised Service Centers in other EC Countries will comply with the warranty on the terms issued to purchasers in the country concerned.
In case of difficulty, details of our Authorised Service Centers are available from:
Samsung Electronics (U.K.) Ltd., Euro Service Centre, Stafford Park 12,
TELFORD, Shropshire TF3 3BJ, Tel: 0870)242 0303,
Fax: 01952) 297617
■ WARRANTY CONDITIONS
- The warranty is only valid if, when warranty service is required, the warranty card is fully and properly completed and is presented with the original invoice or sales slip or confirmation, and the serial number on the product has not been defaced.
- Samsung's obligations are limited to the repair or, at its discretion, replacement of the product or the defective part.
- Warranty repairs must be carried out by Authorised Samsung Dealers or Authorised Service Centers. No reimbursement will be made for repairs carried out by non-Samsung Dealers, and any such repair work and damage to the products caused by such repair work will not be covered by this warranty.
- This product is not considered to be defective in materials nor workmanship by reason that it requires adaptation in order to conform to national or local technical or safety standards in force in any Country other than the one for which the product was originally designed and manufactured. This warranty will not cover, and no reimbursement will be made for such adaptation nor any damage which may result.
- This warranty covers none of the following:
a) Periodic check ups, maintenance and repair or replacement of parts due to normal wear and tear. b) Cost relating to transport, removal or installation of the product. c) Misuse, including the failure to use this product for its normal purposes or incorrect installation. d) Damage caused by Lightning, Water, Fire, Acts of God, War, Public Disturbances, incorrect mains voltage, improper ventilation or any other cause beyond the control of Samsung.
- This warranty is valid for any person who legally acquired possession of the product during the warranty period.
- The consumers statutory rights in any applicable national legislation whether against the retailer arising from the purchase contract or otherwise are not affected by this warranty. Unless there is national legislation to the contrary, the rights under this warranty are the consumers sole rights and Samsung, its subsidiaries and distributors shall not be liable for indirect or consequential loss or any damage to records, compact discs, videos or audio taper or any other related equipment or material.
SAMSUNG ELECTRONICS (U.K.) LTD.
SAMSUNG
ELECTRONICS
Correct Disposal of This Product
(Waste Electrical & Electronic Equipment)


(Applicable in the European Union and other European countries with separate collection systems)
This marking shown on the product or its literature, indicates that it should not be disposed with other household wastes at the end of its working life. To prevent possible harm to the environment or human health from uncontrolled waste disposal, please separate this from other types of wastes and recycle it responsibly to promote the sustainable reuse of material resources.
Household users should contact either the retailer where they purchased this product, or their local government office, for details of where and how they can take this item for environmentally safe recycling.
Business users should contact their supplier and check the terms and conditions of the purchase contract. This product should not be mixed with other commercial wastes for disposal.
Instructions for use
DVD-R125


English
Dutch
French
Warning
TO AVOID ELECTRIC SHOCK, DO NOT OPEN OR REMOVE THE COVER. NO USER-SERVICEABLE PARTS INSIDE. REFER SERVICING TO QUALIFIED SERVICE PERSONNEL.

| A(Austria) | NL(Netherlands) | S(Sweden) | PL(Poland) |
| B(Belgium) | I(Italy) | CH(Swiss) | CZ (Czech) |
| DK(Denmark) | N(Norway) | TR(Turkey) | Ander |
| FIN(Finland) | P(Portugal) | GR(Greece) | |
| D(Deutschland) | E(Spain) | HU(Hungary) |
| A(Austria) | NL(Netherlands) | S(Sweden) | PL(Poland) |
| B(Belgium) | I(Italy) | CH(Swiss) | CZ (Czech) |
| DK(Denmark) | N(Norway) | TR(Turkey) | Ander |
| FIN(Finland) | P(Portugal) | GR(Greece) | |
| D(Deutschland) | E(Spain) | HU(Hungary) |
| Western | English, Breton, Catalan, Danish, Dutch, Faroese, Finnish, French, Gaelic, German, Icelandic, Irish, Italian, Norwegian, Portuguese, Spanish en Swedish |
| Central | English, Albanian, Croatian, Czech, Hungarian, Polish, Romanian, Slovak, Slovene en Serbian(Latin) |
| Greek | English en modern Greek |
▶ Slowly 1/8 → ▶ Slowly 1/4 → ▶ Slowly 1/2
sudden power failure.
WARRANTY CONDITIONS
ShowView Extended. 51
- Play/Pause button
Quick overview. 16
| A(Austria) | NL(Netherlands) | S(Sweden) | PL(Poland) |
| B(Belgium) | I(Italy) | CH(Swiss) | CZ(Czech) |
| DK(Denmark) | N(Norway) | TR(Turkey) | Autres |
| FIN(Finland) | P(Portugal) | GR(Greece) | |
| D(Deutschland) | E(Spain) | HU(Hungary) |
| A(Austria) | NL(Netherlands) | S(Sweden) | PL(Poland) |
| B(Belgium) | I(Italy) | CH(Swiss) | CZ(Czech) |
| DK(Denmark) | N(Norway) | TR(Turkey) | Autres |
| FIN(Finland) | P(Portugal) | GR(Greece) | |
| D(Deutschland) | E(Spain) | HU(Hungary) |
| Western | English, Breton, Catalan, Danish, Dutch, Faroese, Finnish, French, Gaelic, German, Icelandic, Irish, Italian, Norwegian, Portuguese, Spanish et Swedish |
| Central | English, Albanian, Croatian, Czech, Hungarian, Polish, Romanian, Slovak, Slovene et Serbian(Latin) |
| Greek | English et modern Greek |
ShowViewExtended. 51
- Files of one type: List of files and folders appears in a defined order.
- Files of multiple types: Topmost GUI menu screen (DISC NAVIGATION) appears.
Playback options mode


WARRANTY CONDITIONS
- CAUTION
- IMPORTANT NOTE
- PRECAUTION
- IMPORTANT SAFETY INSTRUCTIONS
- HANDLING CAUTIONS
- MAINTENANCE OF CABINET
- DISC HANDLING
- HOLDING DISCS
- DVD-RAM, DVD-RW AND DVD-R
- DVD-VIDEO, AUDIO CD
- CAUTIONS ON HANDLING DISCS
- DISC STORAGE
- DISC SPECIFICATIONS
- DVD-VIDEO
- AUDIO CD
- CD-R/RW
- MP3 CD-R/RW
- JPEG CD-R/RW
- USING CD-R/RW
- USING MPEG4 DISC
- DVD-R DISC PLAYBACK AND RECORDING
- DVD-RW DISC PLAYBACK AND RECORDING
- DVD-RW (VR MODE)
- DVD-RW (VIDEO MODE)
- DVD-RAM DISC PLAYBACK AND RECORDING
- COPY PROTECTION
- PROTECTION
- DO NOT USE THE FOLLOWING DISCS
- CONTENTS
- GETTING STARTED
- CONNECTING & SETTING UP
- OTHER TYPE OF CONNECTING THE AUDIO OUTPUT CABLE
- CONNECTING HDMI/DVI TO A TV
- CONNECTING TO AV3 IN, DV INPUT JACK
- SYSTEM SETUP
- SETTING UP THE PARENTAL CONTROL
- RECORDING
- PLAYBACK
- EDITING
- ADDITIONAL INFORMATION
- GENERAL FEATURES
- HIGH QUALITY DIGITAL AUDIO AND VIDEO RECORDING AND PLAYBACK
- SELECTABLE RECORDING MODE
- AUTOMATED QUALITY ADJUSTMENT FOR TIMER RECORDING
- CREATING A DVD VIDEO TITLE USING DVD-RW/DVD-R DISC
- COPYING DATA FROM A DIGITAL CAMCORDER USING A DV INPUT JACK
- HIGH QUALITY PROGRESSIVE SCAN
- A VARIETY OF FUNCTIONS WITH AN EASY-TO-USE USER INTERFACE
- MPEG4 PLAYBACK
- DIVX CERTIFICATION
- HDMI (HIGH DEFINITION MULTIMEDIA INTERFACE)
- BEFORE READING THE USER'S MANUAL
- ABOUT THE USE OF THIS USER'S MANUAL
- COPYRIGHT
- HOW TO USE THE DVD RECORDER
- STEP 1 SELECT THE DISC TYPE
- STEP 2: FORMAT THE DISC TO START RECORDING
- USING A DVD-RAM
- USING A DVD-RW
- USING A DVD-R
- STEP 3: RECORDING
- STEP 4: PLAYING
- STEP 5: EDITING A RECORDED DISC
- STEP 6: FINALISING & PLAYING ON OTHER DVD COMPONENTS
- WHEN USING A DVD-RW DISC IN VR MODE
- WHEN USING A DVD-RW DISC IN VIDEO MODE
- WHEN USING A DVD-R DISC
- ACCESSORIES
- PREPARING THE REMOTE CONTROL
- INSTALL BATTERIES IN THE REMOTE CONTROL
- IF THE REMOTE DOES NOT OPERATE PROPERLY
- SETTING THE REMOTE CONTROL
- TO DETERMINE WHETHER YOUR TELEVISION IS COMPATIBLE, FOLLOW THE INSTRUCTIONS BELOW
- THEN YOU CAN CONTROL THE TELEVISION USING THE FOLLOWING BUTTONS AFTER THE TV BUTTON
- FRONT PANEL
- FRONT PANEL DISPLAY
- DIGITAL AUDIO OUT (OPTICAL)
- DIGITAL AUDIO OUT (COAXIAL)
- AUDIO OUT
- VIDEO OUT
- S-VIDEO OUT
- COMPONENT VIDEO OUT
- AV1 (TV) OUTPUT SCART CONNECTOR
- AV2 (EXT) INPUT SCART CONNECTOR
- HDMI OUT
- TOUR OF THE REMOTE CONTROL
- CONNECTING
- SETTING UP
- QUICK OVERVIEW
- CONNECTING THE DVD-RECORDER
- ADDITIONAL CONNECTIONS
- DVD MODE
- TV MODE
- ANTENNA + DVD RECORDER + EXTERNAL DECODER BOX + TV
- OTHER TYPES OF CONNECTING THE VIDEO OUTPUT CABLE
- S-VIDEO, COMPONENT VIDEO AND PROGRESSIVE OUTPUT MODES
- CASE 1: CONNECTING TO A VIDEO (COMPOSITE) OUTPUT JACK
- CASE 2: CONNECTING TO AN S-VIDEO OUTPUT JACK
- CASE 3: COMPONENT VIDEO OUTPUT JACKS
- CASE 1: CONNECTING TO YOUR TV
- CASE 2: CONNECTING TO A STEREO AMPLIFIER WITH AV OUTPUT JACKS
- CASE 3: CONNECTING TO AN AV AMPLIFIER WITH A DIGITAL OUTPUT JACK
- CASE 1: CONNECTING TO A TV WITH HDMI JACK
- CASE 2: CONNECTING TO A TV WITH DVI JACK
- CASE 1: CONNECTING A VCR, SET-TOP BOX (STB), DVD RECORDER, OR CAMCORDER TO THE AV3 IN JACKS
- CASE 2: CONNECTING A CAMCORDER TO THE DV IN JACK
- ON-SCREEN MENU NAVIGATION
- MENU BUTTON
- PRESS THESE BUTTONS ON RE
- OK BUTTON
- RETURN BUTTON
- PLUG & AUTO SETUP
- CHECK THE DATE AND TIME
- SETTING THE CLOCK
- PRESETTING CHANNELS WITH THE AUTO SETUP FUNCTION
- PRESS THE OK BUTTON, THEN PRESS THE ▶ BUTTONS TO SELECT YOUR "COUNTRY
- PRESETTING CHANNELS WITH THE MANUAL SETUP FUNCTION
- SETTING UP THE LANGUAGE OPTIONS
- EP MODE TIME SETTING
- AUTOMATIC CHAPTER CREATION
- SETTING UP THE FRONT DISPLAY OPTIONS
- PRESS THE UP/DOWN BUTTONS TO SELECT FRONT DISPLAY, THEN PRESS THE OK OR RIGHT BUTTON
- PRESS THE UP/DOWN BUTTONS TO SELECT THE DESIRED ITEM, THEN PRESS THE OK OR RIGHT BUTTON
- SETTING UP NICAM OPTIONS
- WITH THE UNIT IN STOP MODE/NO DISC MODE, PRESS THE MENU BUTTON
- PRESS THE ▲▼ BUTTONS TO SELECT SETUP, THEN PRESS THE OK OR ▶ BUTTON
- PRESS THE ▲▼ BUTTONS TO SELECT SYSTEM, THEN PRESS THE OK OR ▶ BUTTON. THE SYSTEM MENU WILL BE DISPLAYED
- DIVX(R) REGISTRATION
- SETTING UP THE AUDIO OPTIONS
- AUDIO OPTIONS
- DIGITAL OUTPUT
- DTS
- DYNAMIC COMPRESSION
- SETTING UP VIDEO OUTPUT OPTIONS
- SETTING UP THE PROGRESSIVE SCAN
- WITH THE UNIT IN STOP MODE, PRESS THE P.SCAN BUTTON ON THE FRONT OF THE DVD RECORDER
- THE MESSAGE "PLEASE SET YOUR TV TO PROGRESSIVE INPUT. TO DEACTIVATE, PRESS [STOP] KEY." WILL APPEAR. PRESS THE OK BUTTON
- THE MESSAGE "VIDEO OUTPUT MODE PROGRESSIVE SCAN" WILL APPEAR
- CANCELING THE PROGRESSIVE SCAN
- THE MESSAGE "PLEASE SET YOUR TV TO INTERLACE INPUT. TO DEACTIVATE, PRESS [STOP] KEY." WILL APPEAR. PRESS THE OK BUTTON
- THE MESSAGE "VIDEO OUTPUT MODE INTERLACE SCAN" WILL APPEAR
- SETTING UP THE DISPLAY (VIDEO) OPTIONS
- PRESS THE UP/DOWN ARROW BUTTONS TO SELECT SETUP, THEN PRESS THE OK OR RIGHT ARROW BUTTON
- PRESS THE UP/DOWN ARROW BUTTONS TO SELECT VIDEO, THEN PRESS THE OK OR RIGHT ARROW BUTTON
- PRESS THE ▲▼ BUTTONS TO SELECT THE DESIRED VIDEO OPTION, THEN PRESS THE OK OR BUTTON
- PRESS THE ▲▼ BUTTONS TO SELECT THE DESIRED ITEM, THEN PRESS THE OK OR ▶ BUTTON
- DISPLAY (VIDEO) OPTIONS
- TV ASPECT
- D NOISE REDUCTION (MOTION ADAPTIVE NOISE REDUCTION)
- HDMI/DVI RESOLUTION
- OUTPUT SELECTION
- IF YOU FORGOT YOUR PASSWORD
- ABOUT THE CHANGE PASSWORD
- BEFORE RECORDING
- RECORDABLE DISCS
- FINALISE
- UNFINALISE
- RECORDING FORMATS
- DVD-RW(VIDEO MODE)/-R
- DVD-RW(VR MODE)/-RAM
- RECORDING MODE
- UNRECORDABLE VIDEO
- CONCERNING COPY CONTROL SIGNALS
- ABOUT INFO KEY
- CHECKING THE AVAILABLE DISC SPACE (DISC INFORMATION)
- RECORDING THE CURRENT TV PROGRAMME YOU ARE WATCHING
- BEFORE YOU START
- TO STOP RECORDING
- RECORDING FROM EXTERNAL EQUIPMENT YOU ARE WATCHING
- PRESS THE REC BUTTON
- TO PAUSE RECORDING
- COPYING FROM A CAMCORDER
- MAKING A ONE TOUCH RECORDING (OTR)
- MAKING A TIMER RECORDING
- WITH THE UNIT IN STOP MODE, PRESS THE TIMER BUTTON
- USING THE MENU BUTTON
- PRESS THE OK OR ▶ BUTTON
- SET TIMER RECORDING OPTION
- MODE (RECORDING MODE)
- PRESS THE OK BUTTON
- IF THE TIMER SETTINGS OVERLAP
- TO EXIT WITHOUT SAVING THE CURRENT SETTING PRESS THE MENU BUTTON
- TO RETURN TO THE PREVIOUS MENU
- TURN THE POWER OFF TO FINISH THE TIMER RECORDING SETTING. TIMER RECORDING WILL NOT WORK WHEN THE POWER IS ON
- FLEXIBLE RECORDING (FOR TIMER RECORDING ONLY)
- EDITING THE SCHEDULED RECORD LIST
- PRESS THE RETURN BUTTON TO CLOSE THE TIMER RECORDING SCREEN
- PRESS THE ▲▼ BUTTONS TO SELECT THE NUMBER OF THE TIMER RECORDING YOU WANT TO EDIT, THEN PRESS THE OK OR ▶ BUTTON
- DELETING THE SCHEDULED RECORD LIST
- USING THE SHOWVIEW FEATURE
- WITH THE UNIT IN STOP MODE, PRESS THE TIMER BUTTON. PRESS THE ▲ ▼ BUTTONS TO SELECT SHOWVIEW, THEN PRESS THE OK OR ▶ BUTTON
- PRESS THE NUMBER BUTTONS TO ENTER THE CODE OF THE PROGRAMME THAT YOU WANT TO RECORD IN YOUR TELEVISION MAGAZINE
- IF THE PROGRAMME AND TIMES ARE CORRECT, PRESS THE OK BUTTON
- TURN THE POWER OFF BY PRESSING THE STANDBY/ON BUTTON TO ACTIVATE THE TIMER RECORDING SETTING
- REFER TO PAGES 47~49 IF YOU WANT TO
- SHOWVIEW EXTENDED
- WITH THE UNIT IN STOP MODE, PRESS THE MENU BUTTON
- PRESS THE ▲▼ BUTTONS TO SELECT PROGRAMME, THEN PRESS THE OK OR ► BUTTON
- PRESS THE ▲▼ BUTTONS TO SELECT SHOWVIEW EXTENDED, THEN PRESS THE OK OR ► BUTTON
- PRESS THE ▲▼ BUTTONS TO SELECT SHOWVIEW EXTENDED TIME, THEN PRESS THE OK OR ► BUTTON
- PRESS THE MENU BUTTON AFTER FINISHING THE OPERATION
- RECORDING THE STANDARD TIMER LIST
- WHEN THE SCHEDULED RECORDING IS OPERATING, THE PROGRAMME BEING RECORDED WILL NOT DISPLAY ON TV
- BEFORE PLAYING
- REGION CODE (DVD-VIDEO ONLY)
- DISC TYPES THAT CAN BE PLAYED
- DISCS THAT CANNOT BE PLAYED
- PLAYING A DISC
- PRESS THE OPEN/CLOSE BUTTON
- PRESS THE OPEN/CLOSE BUTTON TO CLOSE THE DISC TRAY
- PRESS THE STOP BUTTON TO STOP PLAYBACK
- USING THE DISC MENU & TITLE MENU
- FOR DVD-VIDEO DISCS
- PRESS THE DISC MENU BUTTON TO ENTER THE DISC MENU OF THE DISC
- PRESS THE TITLE MENU BUTTON TO MOVE TO THE TITLE MENU OF THE DISC
- FOR DVD-RAM/RW/R DISCS
- PRESS THE TITLE LIST BUTTON TO MOVE TO THE TITLE LIST
- USING THE SEARCH FUNCTIONS
- SEARCHING THROUGH A CHAPTER OR TRACK
- DURING PLAY, PRESS THE SEARCH (⊙) BUTTON ON THE REMOTE CONTROL
- SKIPPING CHAPTERS OR TRACKS
- SLOW MOTION PLAY
- STEP MOTION PLAY
- ABOUT ANYKEY
- MOVING TO A SCENE DIRECTLY USING THE ANYKEY
- USING THE REPEAT FUNCTION
- PLAYING REPEATEDLY (REPEAT PLAYBACK)
- USING THE REPEAT BUTTON
- TO RETURN TO NORMAL PLAYBACK
- USING THE ANYKEY BUTTON
- PLAYING A CERTAIN SECTION REPEATEDLY (A-B REPEAT PLAYBACK)
- ANYKEY
- SELECTING THE SUBTITLE
- USING THE SUBTITLE BUTTON
- SELECTING THE AUDIO LANGUAGE
- USING THE AUDIO BUTTON
- CHANGING THE CAMERA ANGLE
- USING BOOKMARKS
- PLAYING BACK A BOOKMARK
- CLEARING A BOOKMARK
- USING MARKERS
- PLAYING BACK A MARKER
- CLEARING A MARKER
- PLAYING AN AUDIO CD/MP
- PLAYING AN AUDIO CD (CD-DA)/MP
- PLAYING AN AUDIO CD (CD-DA)
- AUDIO CD (CD-DA) SCREEN ELEMENTS
- INSERT AN MP3 DISC INTO THE DISC TRAY
- PRESS THE ▲▼ BUTTONS TO SELECT DISC NAVIGATION, AND THEN PRESS THE OK OR ▶ BUTTON
- PRESS THE ▲▼ BUTTONS TO SELECT MUSIC, THEN PRESS THE OK OR ▶ BUTTON
- PRESS THE ▲▼ BUTTONS TO SELECT THE TRACK (SONG) YOU WANT TO HEAR, THEN PRESS THE OK OR ▶ BUTTON
- PRESS THE NUMBER BUTTONS TO SELECT THE TRACK (SONG) AND THE TRACK (SONG) IS PLAYED AUTOMATICALLY
- PLAY OPTION MODE
- TO PROGRAMME TRACKS
- PLAYING A PICTURE
- INSERT A JPEG INTO THE DISC TRAY
- PRESS THE △ ∇ BUTTONS TO SELECT DISC NAVIGATION, AND THEN PRESS OK OR THE BUTTON
- PRESS THE △ ∇ BUTTONS TO SELECT PHOTO, AND THEN PRESS OK OR THE ▸ BUTTON
- PRESS THE △ ∇ ◂ BUTTONS TO SELECT A PICTURE
- PRESS THE ◂ BUTTONS TO SELECT A PICTURE FILE IN THE ALBUM SCREEN, THEN PRESS THE OK BUTTON
- PLAYING AN MPEG
- INSERT AN MPEG4 DISC INTO THE DISC TRAY
- PRESS THE △ ∇ BUTTONS TO SELECT DIVX, AND THEN PRESS OK OR THE ▸ BUTTON
- PRESS THE △ ∇ BUTTONS TO SELECT THE AVI FILE (DIVX), THEN PRESS OK OR THE BUTTON
- WHEN MPEG4 FILE IS PLAYED, YOU CAN USE FOLLOWING FUNCTIONS
- PLAYING THE TITLE LIST
- USING THE TITLE LIST BUTTON
- TITLE LIST SCREEN ELEMENTS
- TITLE LIST
- PLAY LIST
- RECORDING OR EDITING MIGHT NOT BE COMPLETED IF AN ERROR, SUCH AS A SUDDEN POWER FAILURE OCCURS
- BASIC EDITING (TITLE LIST)
- RENAMING (LABELING) A TITLE
- PRESS THE TITLE LIST BUTTON. THE TITLE LIST SCREEN IS DISPLAYED
- PRESS THE △ ▽ BUTTONS TO SELECT AN ENTRY YOU WANT TO RENAME FROM THE TITLE LIST, THEN PRESS THE OK OR ▸ BUTTON
- PRESS THE TRIANGLE AND NABLA BUTTONS TO SELECT RENAME, THEN PRESS THE OK BUTTON. THE RENAME SCREEN IS DISPLAYED
- PRESS THE TRIANGLE, NABLA, AND TRIANGLELEFT BUTTONS TO SELECT THE DESIRED CHARACTERS, THEN PRESS THE OK BUTTON
- PRESS THE TRIANGLE, NABLA, AND TRIANGLELEFT BUTTONS TO SELECT SAVE, THEN PRESS THE OK BUTTON
- LOCKING (PROTECTING) A TITLE
- PRESS THE △ ▽ BUTTONS TO SELECT AN ENTRY YOU WANT TO PROTECT IN THE TITLE LIST, THEN PRESS THE OK OR BUTTON
- PRESS THE △ ▽ BUTTONS TO SELECT PROTECTION, THEN PRESS THE OK OR BUTTON
- DELETING A TITLE
- PRESS THE △ ▽ BUTTONS TO SELECT AN ENTRY YOU WANT TO DELETE IN THE TITLE LIST, THEN PRESS THE OK OR ▶ BUTTON
- DELETING A SECTION OF A TITLE
- PRESS THE OK BUTTON AT DELETE
- PRESS THE \(\TRIANGLELEFT\) BUTTONS TO SELECT YES, THEN PRESS THE OK BUTTON
- ADVANCED EDITING (PLAYLIST)
- CREATING A PLAYLIST
- PRESS THE OK BUTTON AT THE END POINT
- TO MAKE A NEW PLAYLIST
- TO RETURN TO EDIT PLAYLIST MENU
- PLAYING ENTRIES IN THE PLAYLIST
- WITH THE UNIT IN STOP MODE, PRESS THE PLAY LIST BUTTON
- PRESS THE ▲▼ BUTTONS TO SELECT THE TITLE YOU WANT TO EDIT FROM THE PLAYLIST, THEN PRESS THE OK OR ▶ BUTTON
- PRESS THE ▲▼ BUTTONS TO SELECT PLAY, THEN SELECT THE OK BUTTON
- PRESS THE STOP BUTTON TO STOP PLAYBACK. THE SCREEN RETURNS TO THE EDIT PLAYLIST SCREEN
- RENAMING A PLAYLIST ENTRY
- PRESS THE ▲▼ BUTTONS TO SELECT RENAME, THEN PRESS THE OK BUTTON
- EDITING A SCENE FOR THE PLAYLIST
- PRESS THE TRIANGLE AND NABLA BUTTONS TO SELECT THE TITLE YOU WANT TO EDIT FROM THE PLAYLIST, THEN PRESS THE OK OR RIGHT ARROW BUTTON
- PRESS THE TRIANGLE/NABLA BUTTONS TO SELECT EDIT SCENE, THEN PRESS THE OK BUTTON
- PLAYING A SELECTED SCENE
- PRESS THE TRIANGLE/NABLA/LEFT ARROW BUTTONS TO SELECT THE SCENE YOU WANT TO PLAY, THEN PRESS THE OK BUTTON
- MODIFYING A SCENE (REPLACING A SCENE)
- MOVING A SCENE (CHANGING THE POSITION OF A SCENE)
- ADDING A SCENE
- DELETING A SCENE
- COPYING A PLAYLIST ENTRY TO THE PLAYLIST
- USING THE PLAY LIST BUTTON
- DELETING A PLAYLIST ENTRY FROM THE PLAYLIST
- USING THE PLAYLIST BUTTON
- PRESS THE ▲▼ BUTTONS TO SELECT THE TITLE YOU WANT TO DELETE FROM THE PLAYLIST, THEN PRESS THE OK OR ▶ BUTTON
- PRESS THE ◀▶ BUTTONS TO SELECT YES, THEN PRESS THE OK BUTTON
- DISC MANAGER
- EDITING THE DISC NAME
- DISC PROTECTION
- FORMATTING A DISC
- DVD-RAM
- DVD-RW
- DELETE ALL TITLE LISTS
- FINALISING A DISC
- PRESS THE △ ∇ BUTTONS TO SELECT DISC MANAGER, THEN PRESS THE OK OR ▸ BUTTON
- PRESS THE △ ∇ BUTTON TO SELECT DISC FINALISE, THEN PRESS THE OK OR ▸ BUTTON
- PRESS THE ◁ BUTTONS TO SELECT YES, THEN PRESS THE OK BUTTON
- UNFINALISING A DISC (V/VR MODE)
- PRESS THE ▲▼ BUTTONS TO SELECT DISC MANAGER, THEN PRESS THE OK OR ▶ BUTTON
- PRESS THE ▲▼ BUTTONS TO SELECT DISC UNFINALISE, THEN PRESS THE OK OR ▶ BUTTON. YOU WILL BE PROMPTED WITH THE MESSAGE 'DO YOU WANT TO UNFINALISE DISC
- TROUBLESHOOTING
- POWER
- SOUND
- CHECKPOINT
- TIMER RECORDING
- HDMI
- OTHER
- REMOTE CONTROL UNIT
- WARRANTY CONDITIONS
- SAMSUNG
- ELECTRONICS
- INSTRUCTIONS FOR USE
- DVD-R
- WARNING
- PLAYBACK OPTIONS MODE
Brand : SAMSUNG
Model : DVD-R125P
Category : DVD player