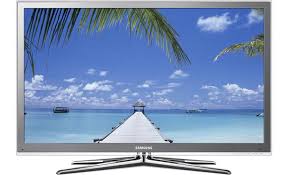
USER MANUAL UN46C8000 SAMSUNG
If you have any questions or comments relating to Samsung products, please contact the SAMSUNG customer care center.
Figures and illustrations in this User Manual are provided for reference only and may differ from actual product appearance. Product design and specifications may be changed without notice.
See the warranty card for more information on warranty terms.
Wide screen format LED Displays (16:9, the aspect ratio of the screen width to height) are primarily designed to view wide screen format full-motion video. The images displayed on them should primarily be in the wide screen 16:9 ratio format, or expanded to fill the screen if your model offers this feature and the images are constantly moving. Displaying stationary graphics and images on screen, such as the dark sidebars on no expanded standard format television video and programming, should be limited to no more than 5% of the total television viewing per week.
Additionally, viewing other stationary images and text such as stock market reports, video game displays, station logos, web sites or computer graphics and patterns, should be limited as described above for all televisions. Displaying stationary images that exceed the above guidelines can cause uneven aging of LED Displays that leave subtle, but permanent burned-in ghost images in the LED picture. To avoid this, vary the programming and images, and primarily display full screen moving images, not stationary patterns or dark bars. On LED models that offer picture sizing features, use these controls to view different formats as a full screen picture.
Be careful in the selection and duration of television formats used for viewing. Uneven LED aging as a result of format selection and use, as well as burned in images, are not covered by your Samsung limited warranty.
• SAMSUNG ELECTRONICS NORTH AMERICAN LIMITED WARRANTY STATEMENT
Subject to the requirements, conditions, exclusions and limitations of the original Limited Warranty supplied with Samsung Electronics (SAMSUNG) products, and the requirements, conditions, exclusions and limitations contained herein, SAMSUNG will additionally provide Warranty Repair Service in the United States on SAMSUNG products purchased in Canada, and in Canada on SAMSUNG products purchased in the United States, for the warranty period originally specified, and to the Original Purchaser only.
The above described warranty repairs must be performed by a SAMSUNG Authorized Service Center. Along with this Statement, the Original Limited Warranty Statement and a dated Bill of Sale as Proof of Purchase must be presented to the Service Center. Transportation to and from the Service Center is the responsibility of the purchaser. Conditions covered are limited only to manufacturing defects in material or workmanship, and only those encountered in normal use of the product.
Excluded, but not limited to, are any originally specified provisions for in-home or on-site services, minimum or maximum repair times, exchanges or replacements, accessories, options, upgrades, or consumables.
For the location of a SAMSUNG Authorized Service Center, please call toll-free:
– In the United States: 1-800-SAMSUNG (1-800-726-7864)
Avoid displaying still images (such as JPEG picture files) or still image elements (such as TV channel logos, panorama or 4:3 image format, stock or news bars at screen bottom, etc.) on the screen. Constant display of still pictures can cause ghosting of the LED screen, which will affect image quality. To reduce the risk of this effect, please follow the recommendations below:
- Avoid displaying the same TV channel for long periods. • Always try to display a full screen image.
- Reducing brightness and contrast will help to avoid the appearance of after-images.
- Use all TV features designed to reduce image retention and screen burn; refer to the proper user manual section for details.
Securing the Installation Space
Keep the required distances between the product and other objects (e.g., walls) to ensure proper ventilation.
Failing to do so may result in fire or a problem with the product due to an increase in the internal temperature of the product.
When using a stand or wall-mount, use parts provided by Samsung Electronics only.
• If you use parts provided by another manufacturer, it may result in a problem with the product or an injury due to the product falling.
The appearance may differ depending on the product.
Installation with a stand.
Installation with a wall-mount.
Getting Started
- List of Features .... 4
- Accessories .... 4 • Install the Stand 5 • Viewing the Control Panel 6 • Viewing the Remote Control....7
- Connecting to an Antenna 8
- Plug & Play (Initial Setup)......8
Connections
- Connecting to an AV Device....9
- Connecting to an Audio Device....11
- Connecting to a PC 12
- Changing the Input Source 13
Basic Features
• How to Navigate Menus...... 13 - Channel Menu 14 Seeing Channels 14 Using Favorite Channels 14 Memorizing Channels 14 Editing Channels 15 Other Features 15
• Picture Menu 16 Changing the Preset Picture Mode 16 Adjusting Picture Settings 16 Economical Solutions 16 Changing the Picture Options 17 Viewing TV using the 3D function 19 Setting up the TV with Your PC 22
• Sound Menu....22 Changing the Preset Sound Mode 22 Adjusting Sound Settings 22 Sound Settings 23
- Setup Menu....24 Setting the Time 24 Using the Sleep Timer 24 Setting the On / Off Timer 24 Locking Programs 25 Other Features 26 Picture In Picture (PIP) 28
• Support Menu....28
Advanced Features
• Network Connection 30 Connecting to a Wired Network 30 Connecting to a Wireless Network 32 • Media Play....37 Connecting a USB Device 37 Connecting to your PC through a network 37 Screen Display 39 Playing Multiple Files 42 Media Play - Additional Functions 42 - Anynet+....44 Setting Up Anynet+ 45 Switching between Anynet+ Devices 45 Recording 46 Listening through a Receiver 46 Troubleshooting for Anynet+ 47 - Internet@TV 48 Getting Started with Internet@TV 48 Setting up Internet@TV 49 Using the Internet@TV service 51 PROFILE Widget 53 Widget Gallery 53 Help Website 54 - AllShare 55 About AllShare 55 Setting Up AllShare 55
- Assembling the Cables 57 • Installing the Wall Mount 58 • Anti-theft Kensington Lock....59 • Securing the TV to the Wall 60
- Troubleshooting 61
- License 64
- Specifications 64
- Dimensions....65
- Index 66
Check the Symbol!

This function can be used by pressing the TOOLS button on the remote control.

Note
Indicates additional information.

Step by Step Guide
Check here for instructions on how to open the relevant submenu within the OSD (on screen display).
Getting Started
List of Features
- Excellent Digital Interface & Networking: With a built-in HD digital tuner, nonsubscription HD broadcasts can be viewed without a cable box / STB (Set-Top-Box) satellite receiver. • Media Play: Allows you to play music files, pictures, and movies saved on a USB device (p. 37).
- Internet@TV: You can use various internet services and view useful information and entertaining content (p. 48).
- AllShare: AllShare connects your TV and compatible Samsung mobile phones/devices through a network (p. 55).
- Self Diagnosis: You can check whether picture or sound operate normally (p. 28).
Accessories

Please make sure the following items are included with your LED TV. If any items are missing, contact your dealer.

The items' colors and shapes may vary depending on the models.

CAUTION: INSERT SECURELY LEST SHOULD BE DETACHED IN SET
• Remote Control (BN68-01055A) & Batteries (AAA x 2) - Owner's Instructions

Blanking Bracket & Screw (1EA)
(BN63-06543A)

TV-Holder & Screw (1EA)
(BN96-10788B)

Cable Tie
(BN61-05596A)

Holder-Wire (3EA)
(BN61-05373A)

Component Sound in Adapter (BN39-01154G)

LAN Adapter (BN39-01154L)

Component Adapter (BN39-01154C)

PC Adapter (BN39-01154K)

Optical Adapter (BN39-01154M)

Install the Stand
See separate guide for installing the stand.

Stand (1EA)
Guide Stand (1EA)
9EA (M4 X L8)
Follow the steps below to connect the TV to the stand.

- Connect the Guide Stand to the Stand using four screws (M4 X L8) as shown.

- With your TV upright, connect the TV to the Stand.

- Fasten two screws (M4 X L8) at position 1, and then fasten three screws (M4 X L8) at position 2.

NOTE
- Make sure to distinguish between the front and back of the Stand and Guide Stand when assembling them.
- Make sure that at least two persons lift and move the LED TV.
- Stand the product up and fasten the screws. If you fasten the screws with the LED TV placed down, it may lean to one side.
Getting Started

For best cable connection to this product, be sure to use cables with a maximum thickness as below:

• Maximum thickness - 0.55 inches (14mm)
Viewing the Control Panel

The product color and shape may vary depending on the model.

| Remote control sensor | Aim the remote control towards this spot on the TV. |
| Power Indicator | Blinks and turns off when the power is on and lights up in standby mode. |
| SOURCE | Toggles between all the available input sources. In the on-screen menu, use this button as you would use the ENTER button on the remote control. |
| MENU | Displays an on-screen menu, the OSD (on screen display) of your TV's features. |
| - VOL+ | Adjusts the volume. In the OSD, use the - VOL+ buttons as you would use the ▲ and ▶ buttons on the remote control. |
| √ CH ∧ | Changes the channels. In the OSD, use the √ CH ∧ buttons as you would use the ▼ and ▲ buttons on the remote control. |
| ○ (Power) | Turns the TV on or off. |
Standby mode
Do not leave your TV in standby mode for long periods of time (when you are away on a holiday, for example). A small amount of electric power is still consumed even when the power button is turned off. It is best to unplug the power cord.
Viewing the Remote Control

Installing batteries (Battery size: AAA)
NOTE
- Use the remote control within 23 feet from the TV.
- Bright light may affect the performance of the remote control. Avoid use when nearby fluorescent lights or neon signs.
- The color and shape may vary depending on the model.
Connecting to an Antenna
When the TV is initially powered on, basic settings proceed automatically.

Connecting the power cord and antenna.

Plug & Play (Initial Setup)
When the TV is initially powered on, a sequence of on-screen prompts will assist in configuring basic settings. Press the POWER ⏻ button. Plug & Play is available only when the Input source is set to TV.

To return to the previous step, press the Red button.
| 1 | Selecting a language | Press the ▲ or ▼ button, then press the ENTER button.Select the desired OSD (On Screen Display) language. |
| 2 | Selecting Store Demo or Home Use | Press the ◀ or ▶ button, then press the ENTER button.Select the Home Use mode. Store Demo Mode is for retail environments.To return the unit's settings from Store Demo to Home Use (standard): Press the volume button on the TV. When you see the volume OSD, press and hold MENU for 5 sec. |
| 3 | Selecting an antenna | Press the ▲ or ▼ button, then press the ENTER button. Select Air, Cable or Auto. |
| 4 | Selecting a channel | Press the ▲ or ▼ button, then press the ENTER button. Select the channel source to memorize. When setting the antenna source to Cable, a step appears allowing you to assign numerical values (channel frequencies) to the channels. For more information, refer to Channel → Auto Program (p. 14).Press the ENTER button at any time to interrupt the memorization process. |
| 5 | Setting the Clock Mode | Set the Clock Mode automatically or manually.Auto: Allows you to select DST (Daylight Saving Time) mode and time zone.Manual: Allows you to manually set the current date and time (p. 24). |
| 6 | View the HD Connection Guide | The connection method for the best HD screen quality is displayed. |
| 7 | Enjoy the TV. | Press the ENTER button. |
If You Want to Reset This Feature...

MENU → Setup → Plug & Play → ENTER
Connecting to an AV Device
Using an HDMI or HDMI/DVI Cable: HD connection (up to 1080p)
We recommend using the HDMI connection for the best quality HD picture.
Available devices: DVD, Blu-ray player, HD cable box, HD STB (Set-Top-Box) satellite receiver
![graph LR A["Monitor"] --> B["PC/DVI AUDIO IN"] B --> C["4 HDMI IN"] B --> D["3"] B --> E["2(ARC)"] B --> F["1(DVI)"] C --> G["HDMI Cable (Not Supplied)"] D --> G E --> H["HDMI to DVI Cable (Not Supplied)"] F --> H G --> I["Device HDMI OUT"] H --> J["Device DVI OUT"] I --> K["Audio Cable (Not Supplie…](/content/2019/10/26820/images/4c49b282ba5ec6963d908bacfa83bfd33415ea94e6e750744fca30615f6f6753.jpg)

HDMI IN 1(DVI), 2(ARC), 3, 4, PC/DVI AUDIO IN
- For better picture and audio quality, connect to a digital device using an HDMI cable.
- An HDMI cable supports digital video and audio signals, and does not require an audio cable.
- To connect the TV to a digital device that does not support HDMI output, use an HDMI/DVI and audio cables.
- The picture may not display normally (if at all) or the audio may not work if an external device that uses an older version of HDMI mode is connected to the TV. If such a problem occurs, ask the manufacturer of the external device about the HDMI version and, if out of date, request an upgrade.
- Be sure to use an HDMI cable with a thickness of 14 mm or less.
- Be sure to purchase a certified HDMI cable. Otherwise, the picture may not display or a connection error may occur.
- A basic high-speed HDMI cable or one with ethernet is recommended. This product does not support the ethernet function via HDMI.
- This product supports the 3D and ARC (Audio Return Channel) functions via an HDMI cable. Note that the ARC function is supported by the HDMI IN 2(ARC) port only.
- If 3D Auto View is set to On, some functions such as Internet@TV may be disabled. In this case, set 3D Auto View or 3D Mode to Off.
- The ARC function allows digital audio to output via the HDMI IN 2(ARC) port. It can be enabled only when the TV is connected with an audio receiver that supports the ARC function.
Connections
Using a Component (up to 1080p) or Audio/Video (480i only) Cable
Available devices: DVD, Blu-ray player, cable box, STB satellite receiver, VCR

![graph TD A["AV Adapter (Supplied)"] --> B["Component Adapter (Supplied)"] B --> C["Component Sound in Adapter (Supplied)"] C --> D["Audio Cable (Not Supplied)"] D --> E["Component Cable (Not Supplied)"] E --> F["Audio Cable (Not Supplied)"] F --> G["Device"] G --> H["Component OUT"] H --> I["Device"…](/content/2019/10/26820/images/6ca756893539d5fb68c49ad1fd25a84004a5c801f7e3e39c93b060aca75767d2.jpg)

For better picture quality, the Component connection is recommended over the A/V connection.
Using an EX-Link Cable Connection
Available Devices: External devices that support EX-Link.

EX-LINK: Connector for service only.
Using an Optical (Digital) or Audio (Analog) Cable Connection
Available devices: Digital Audio System, Amplifier, DVD home theater
![graph TD A["TV Monitor"] --> B["Audio Cable (Not Supplied)"] B --> C["Amplifier / DVD home theater"] C --> D["Digital Audio System"] D --> E["Optical Cable (Not Supplied)"] E --> F["Optical Adapter (Supplied)"] F --> G["Digital Audio OUT (OPTICAL)"]](/content/2019/10/26820/images/253cff2c829e8b0d6598e887dc84c31c5f5f79f145c27089ff4216c15fa51166.jpg)

DIGITAL AUDIO OUT (OPTICAL)
- When a Digital Audio System is connected to the DIGITAL AUDIO OUT (OPTICAL) jack, decrease the volume of both the TV and the system.
- 5.1 CH (channel) audio is available when the TV is connected to an external device supporting 5.1 CH.
- When the receiver (home theater) is set to on, you can hear sound output from the TV's optical jack. When the TV is receiving a DTV signal, the TV will send 5.1 CH sound to the home theater receiver. When the source is a digital component such as a DVD / Blu-ray player / cable box / STB (Set-Top-Box) satellite receiver and is connected to the TV via HDMI, only 2 CH audio will be heard from the home theater receiver. If you want to hear 5.1 CH audio, connect the digital audio out jack from your DVD / Blu-ray player / cable box / STB satellite receiver directly to an amplifier or home theater.

AUDIO OUT: Connects to the audio input jacks on your amplifier/DVD home theater.
- When connecting, use the appropriate connector.
- When an audio amplifier is connected to the AUDIO OUT jacks: Decrease the volume of the TV and adjust the volume level with the amplifier's volume control.
Connecting to a PC
Using an HDMI/DVI cable or a D-sub cable
![graph TD A["PC Adapter (Supplied)"] --> B["PC IN"] B --> C["1(pvi)"] C --> D["HDMI to DVI Cable (Not Supplied)"] C --> E["Audio Cable (Not Supplied)"] C --> F["D-Sub Cable (Not Supplied)"] D --> G["DM OUT"] E --> H["AUDIO OUT"] F --> I["PC OUT"]](/content/2019/10/26820/images/905abe0fa46d293843bc0fe1c186121abe0c5b5a3f8d147d9beb67842ce678e3.jpg)
Optimal resolution is 1920 X 1080 @ 60 Hz.
| Mode | Resolution | Horizontal Frequency (KHz) | Vertical Frequency (Hz) | Pixel Clock Frequency (MHz) | Sync Polarity (H / V) |
| IBM | 640 x 350 | 31.469 | 70.086 | 25.175 | +/- |
| 720 x 400 | 31.469 | 70.087 | 28.322 | -/+ |
| MAC | 640 x 480 | 35.000 | 66.667 | 30.240 | -/- |
| 832 x 624 | 49.726 | 74.551 | 57.284 | -/- |
| 1152 x 870 | 68.681 | 75.062 | 100.000 | -/- |
| VESA CVT | 720 x 576 | 35.910 | 59.950 | 32.750 | -/+ |
| 1152 x 864 | 53.783 | 59.959 | 81.750 | -/+ |
| 1280 x 720 | 56.456 | 74.777 | 95.750 | -/+ |
| 1280 x 960 | 75.231 | 74.857 | 130.000 | -/+ |
| VESA DMT | 640 x 480 | 31.469 | 59.940 | 25.175 | -/- |
| 640 x 480 | 37.861 | 72.809 | 31.500 | -/- |
| 640 x 480 | 37.500 | 75.000 | 31.500 | -/- |
| 800 x 600 | 37.879 | 60.317 | 40.000 | +/+ |
| 800 x 600 | 48.077 | 72.188 | 50.000 | +/+ |
| 800 x 600 | 46.875 | 75.000 | 49.500 | +/+ |
| 1024 x 768 | 48.363 | 60.004 | 65.000 | -/- |
| 1024 x 768 | 56.476 | 70.069 | 75.000 | -/- |
| 1024 x 768 | 60.023 | 75.029 | 78.750 | +/+ |
| 1152 x 864 | 67.500 | 75.000 | 108.000 | +/+ |
| 1280 x 1024 | 63.981 | 60.020 | 108.000 | +/+ |
| 1280 x 1024 | 79.976 | 75.025 | 135.000 | +/+ |
| 1280 x 720 | 45.000 | 60.000 | 74.250 | +/+ |
| 1280 x 800 | 49.702 | 59.810 | 83.500 | -/+ |
| 1280 x 800 | 62.795 | 74.934 | 106.500 | -/+ |
| 1280 x 960 | 60.000 | 60.000 | 108.000 | +/+ |
| 1360 x 768 | 47.712 | 60.015 | 85.500 | +/+ |
| 1440 x 900 | 55.935 | 59.887 | 106.500 | -/+ |
| 1440 x 900 | 70.635 | 74.984 | 136.750 | -/+ |
| 1680 x 1050 | 65.290 | 59.954 | 146.250 | -/+ |
| VESA GTF | 1280 x 720 | 52.500 | 70.000 | 89.040 | -/+ |
| 1280 x 1024 | 74.620 | 70.000 | 128.943 | -/- |
| VESA DMT / DTV CEA | 1920 x 1080p | 67.500 | 60.000 | 148.500 | +/+ |

NOTE
- For HDMI/DVI cable connection, you must use the HDMI IN 1(DVI) jack.
- The interlace mode is not supported.
- The set may operate abnormally if a non-standard video format is selected.
- Separate and Composite modes are supported. SOG(Sync On Green) is not supported.
Source List
Use to select TV or an external input sources such as a DVD / Blu-ray player / cable box / STB satellite receiver.


MENU → Input → Source List → ENTER
■ TV / PC / AV / Component / HDMI1/DVI / HDMI2 / HDMI3 / HDMI4 / USB
You can only choose external devices that are connected to the TV. In the Source List, connected inputs will be highlighted.
In the Source List, PC is always activated.
Basic Features
Before using the TV, follow the steps below to learn how to navigate the menu and select and adjust different functions.
![graph TD A["1"] --> B["CONTENT"] B --> C["MENU"] C --> D["INTERNET @ TV"] E["2"] --> F["TOOLS"] F --> G["EXIT"] G --> H["4"] I["3"] --> J["RETURN"] J --> K["EXIT"]](/content/2019/10/26820/images/f188e74f641bb406a5e6e727bdfb3a62117d4145f12da25a276e1fe6fcce2977.jpg)
① MENU button: Displays the main on-screen menu. ② ENTER / Direction button: Move the cursor and select an item. Confirm the setting. ③ RETURN button: Returns to the previous menu. ④ EXIT button: Exits the on-screen menu.
Edit Name

MENU → Input → Edit Name → ENTER
VCR / DVD / Cable STB / Satellite STB / PVR STB / AV Receiver / Game / Camcorder / PC / DVI PC / DVI Devices / TV / IPTV / Blu-ray / HD DVD / DMA: Name the device connected to the input jacks to make your input source selection easier. When a PC with a resolution of 1920 x 1080 @ 60Hz is connected to the HDMI IN 1(DVI) port, you should set the TV to DVI PC mode under Edit Name. When connecting an HDMI/DVI cable to the HDMI IN 1(DVI) port, you should set the TV to DVI PC or DVI Devices mode under Edit Name.
How to Operate the OSD (On Screen Display)
The access step may differ depending on the selected menu.
| 1 | MENU | The main menu options appear on the screen:Picture, Sound, Channel, Setup, Input, Application, Support. |
| 2 | ▲ / ▼ | Select an icon with the ▲ or ▼ button. |
| 3 | ENTER | Press ENTER to access the sub-menu. |
| 4 | ▲ / ▼ | Select the desired submenu with the ▲ or ▼ button. |
| 5 | ◀ / ▶ | Adjust the value of an item with the ◀ or ▶ button. The adjustment in the OSD may differ depending on the selected menu. |
| 6 | ENTER | Press ENTER to confirm the selection. |
| 7 | EXIT → | Press EXIT. |
Seeing Channels
Channel List
Add, delete or set Favorite channels and use the program guide for digital broadcasts.

MENU → Channel → Channel List → ENTER

Select a channel in the All Channels, Added Channels, Favorite or Programmed screen by pressing the ▲ / ▼ and ENTER buttons. Then you can watch the selected channel.

All Channels: Shows all currently available channels. ■ Added Channels: Shows all added channels. - Favorite: Shows all favorite channels. Programmed: Shows all currently reserved programs.
Using the color buttons with the Channel List
• Red (Antenna): Switches to Air or Cable.
• Green (Zoom): Enlarges or shrinks a channel number.
• Yellow (Select): Selects multiple channel lists. Select desired channels and press the Yellow button to set all the selected channels at the same time. The √ mark appears to the left of the selected channels.
• ⇔ (Page): Move to next or previous page.
• (Tools): Displays the Channel List option menu. (The options menus may differ depending on the situation.)
Channel Status Display Icons
| Icons | Operations |
| √ | A channel selected. |
| ♥ | A channel set as a Favorite. |
| 💡 | A reserved Program. |
Using Favorite Channels

MENU → Channel → Channel List → ENTER
Add to Favorite / Delete from Favorite
Set channels you watch frequently as Favorites.
- Select a channel and press the TOOLS button.
- Add or delete a channel using the Add to Favorite or Delete from Favorite menu respectively.

To show all Favorite channels, click on the button shown on the right.

Memorizing Channels

MENU → Channel → ENTER
Before your television can begin memorizing the available channels, you must specify the type of signal source that is connected to the TV (i.e. an Air or a Cable system).
Auto Program
Air: Air antenna signal. ■ Cable: Cable antenna signal. ■ Auto: Air and Cable antenna.

NOTE
- When selecting the Cable TV system: STD, HRC and IRC identify various types of cable TV systems. Contact your local cable company to identify the type of cable system that exists in your particular area. At this point, the signal source has been selected.
- After all the available channels are stored, it starts to remove scrambled channels. The Auto Program menu then reappears.
Editing Channels

MENU → Channel → Channel List → ENTER
Channel Name Edit
- Select a channel and press the TOOLS button.
- Edit the channel name using the Channel Name Edit menu. ■ Channel Name Edit (analog channels only): Assign your own channel name.
Other Features

MENU → Channel → ENTER
Clear Scrambled Channel
This function is used to filter out scrambled channels after Auto Program is completed. This process may take up to 20~30 minutes.
How to Stop Searching Scrambled Channels
- Press the ENTER ← button to select Stop.
- Press the ◀ button to select Yes.
- Press the ENTER ← button. This function is only available in Cable mode.

Channel List
Set each channel using the Channel List menu options (Add / Delete, Timer Viewing, Select All / Deselect All). Option menu items may differ depending on the channel status.
- Select a channel and press the TOOLS button.
- Select a function and change its settings.
■ Add / Delete: Delete or add a channel to display the channels you want.

NOTE
- All deleted channels will be shown on the All Channels menu.
- A gray-colored channel indicates the channel has been deleted.
- The Add menu only appears for deleted channels.
- Delete a channel from the Added Channels or Favorite menu in the same manner.
Timer Viewing: You can set a desired channel to be displayed automatically at the reserved time. Set the current time first to use this function.
- Press the ◀ / ▶ / ▲ / ▼ buttons to select the desired channel in the Channel List.
- Press the TOOLS button, then select Timer Viewing.
- Scroll up or down to adjust the settings in the box, or use the numeric buttons on your remote to enter the date and time. If you selected Once, Every Week, or Every Day in Repeat, you can enter the date you want.

- Select OK, then press the ENTER button when done.

NOTE
- Only memorized channels can be reserved.
- Reserved programs will be displayed in the Programmed menu.
- When a digital channel is selected, press the ▶ button to view the digital program.
■ Select All: Select all the channels in the channel list.
■ Deselect All: Deselect all the selected channels.

You can only select Deselect All when one or more channels are selected.

Programmed
(in Channel List)
You can view, modify, or delete a show you have reserved to watch. Programmed timer viewing is displayed here. Highlight a program and press the TOOLS button to display Options.
■ Change Info: Change a show you have reserved to watch. Begin with step 3 of “Timer Viewing” above.
■ Cancel Schedules: Cancel a show you have reserved to watch.

This deletes the highlighted or selected program(s).
Basic Features
Information: Display a show you have reserved to watch. (You can also change the reservation Information.)

Alternatively, you can view Information by highlighting a program and pressing the ENTER button.
■ Select All / Deselect All: Select or deselect all reserved programs.
Fine Tune
(analog channels only)
If the reception is clear, you do not have to fine tune the channel, as this is done automatically during the search and store operation. If the signal is weak or distorted, fine tune the channel manually. Scroll to the left or right until the image is clear.

Settings are applied to the channel you're currently watching.

Fine tuned channels that have been saved are marked with an asterisk “*” on the right-hand side of the channel number in the channel banner.

To reset the fine-tuning, select Reset.
Changing the Preset Picture Mode

MENU → Picture → Mode → ENTER
Select your preferred picture type.
■ Dynamic: Suitable for a bright room. ■ Standard: Suitable for a normal environment. ■ Natural: Suitable for reducing eye strain. Natural is not available in PC mode.

■ Movie: Suitable for watching movies in a dark room.
Adjusting Picture Settings

MENU → Picture → ENTER
Backlight / Contrast / Brightness / Sharpness / Color / Tint (G/R)
Your television has several setting options for picture quality control.

NOTE
- When you make changes to Backlight, Contrast, Brightness, Sharpness, Color or Tint (G/R) the OSD will be adjusted accordingly.
- In PC mode, you can only make changes to Backlight, Contrast and Brightness.
- Settings can be adjusted and stored for each external device connected to the TV.
Economical Solutions
The Eco Function can be used to enhance your power savings.
Eco Solution

MENU → Picture → Eco Solution → ENTER
■ Energy Saving (Off / Low / Medium / High / Picture Off / Auto): This adjusts the brightness of the TV in order to reduce power consumption. If you select Picture Off, the screen is turned off, but the sound remains on. Press any button except the volume button to turn on the screen.
■ Eco Sensor (Off / On): To enhance your power savings; the picture settings will automatically adapt to the light in the room.

If you adjust the Backlight, the Eco Sensor will be set to Off.
Min Backlight: When Eco sensor is On, the minimum screen brightness can be adjusted manually.

If Eco Sensor is On, the display brightness may change (become slightly darker in most cases) depending on the surrounding light intensity.
No Signal Power Off (Off / 15 min. / 30 min. / 60 min.): To avoid unnecessary energy consumption, set how long you want the TV to remain on if it's not receiving a signal.

Disabled when the PC is in power saving mode.
Advanced Settings

MENU → Picture → Advanced Settings → ENTER
(Advanced Settings are available in Standard / Movie mode) Compared to previous models, new Samsung TVs have a more precise picture.
In PC mode, you can only make changes to Dynamic Contrast, Gamma, White Balance and LED Motion plus.
Advanced Settings
| Black Tone | : Off |
| Dynamic Contrast | : Medium |
| Gamma | : 0 |
| Expert Pattern | : Off |
| RGB Only Mode | : Off |
| Color Space | : Native |
| White Balance | |
■ Black Tone (Off / Dark / Darker / Darkest): Select the black level to adjust the screen depth. ■ Dynamic Contrast (Off / Low / Medium / High): Adjust the screen contrast. ■ Gamma: Adjust the primary color intensity. ■ Expert Pattern (Off / Pattern1 / Pattern2): By running the Expert Pattern function, the picture can be calibrated. If the OSD menu disappears or a menu other than the Picture menu is opened, the calibration is saved and the Expert Pattern window disappears.
Off: Turns the Expert Pattern function off.
Pattern1: This is a test screen designed to demonstrate the effects of display settings on shades.
Pattern2: This is a test screen designed to demonstrate the effects of display settings on colors.

After selecting Pattern1 or Pattern2, you can adjust any of the advanced settings to the desired effect.

While the Expert Pattern is running, sound is not output.

Only enabled in DTV, Component and HDMI modes.
RGB Only Mode (Off / Red / Green / Blue): Displays the Red, Green and Blue color for making fine adjustments to the hue and saturation. ■ Color Space (Auto / Native / Custom): Adjust the range of colors available to create the image. To adjust Color, Red, Green, Blue and Reset, set Color Space to Custom. ■ White Balance: Adjust the color temperature for a more natural picture.
R-Offset / G-Offset / B-Offset: Adjust each color's (red, green, blue) darkness.
R-Gain / G-Gain / B-Gain: Adjust each color's (red, green, blue) brightness.
Reset: Resets the White Balance to its default settings.
■ 10p White Balance (Off / On): Controls the white balance in 10 point intervals by adjusting the red, green, and blue brightness.

Available when the picture mode is set to Movie and when the external input is set to all input.

Some external devices may not support this function.
Interval: Select interval to adjust.
Red: Adjust the red level.
Green: Adjust the green level.
Blue: Adjust the blue level.
Reset: Resets the 10p White Balance to its default settings.
■ Flesh Tone: Emphasize pink "Flesh Tone." ■ Edge Enhancement (Off / On): Emphasize object boundaries. ■ xvYCC (Off / On): Setting the xvYCC mode on increases detail and color space when watching movies from an external device (e.g. BD/DVD player) connected to the HDMI or Component IN jacks.

Available when the picture mode is set to Movie and when the external input is set to HDMI or Component.

Some external devices may not support this function.
■ LED Motion Plus (Off / Normal / Cinema / Ticker):
Removes drag from fast scenes with a lot of movement to provide a clear picture.
Picture Options

MENU → Picture → Picture Options → ENTER

In PC mode, you can only make changes to the Color Tone, Size and Auto Protection Time.
Picture Options
| Color Tone | : Normal |
| Size | : 16:9 |
| Digital Noise Filter | : Auto |
| MPEG Noise Filter | : Auto |
| HDMI Black Level | : Normal |
| Film Mode | : Off |
| Auto Motion Plus | : Standard |
■ Color Tone (Cool / Normal / Warm1 / Warm2)

Warm1 or Warm2 will be deactivated when the picture mode is Dynamic.

Settings can be adjusted and stored for each external device connected to an input on the TV.

Size: Your cable box/satellite receiver may have its own set of screen sizes as well. However, we highly recommend you use 16:9 mode most of the time.

16:9: Sets the picture to 16:9 wide mode.
Zoom1: Use for moderate magnification.
Zoom2: Use for a stronger magnification.
Wide Fit: Enlarges the aspect ratio of the picture to fit the entire screen.

Available with HD 1080i / 720p signals in 16:9 mode.
4:3: Sets the picture to basic (4:3) mode.

Do not watch in 4:3 format for a long time. Traces of borders displayed on the left, right and center of the screen may cause image retention (screen burn) which are not covered by the warranty.
Screen Fit: Displays the full image without any cut-off when HDMI (720p / 1080i / 1080p) or Component (1080i / 1080p) signals are inputted.

NOTE
- When Double (☐☐, ☐☐) mode has been set in PIP (Picture-in-Picture), the Picture Size cannot be set. • After selecting Zoom1, Zoom2 or Wide Fit:
- Press the ▶ button to select Position.
- Press the ENTER button.
- Press the ▲ or ▼ button to move the picture up or down.
- Press the ENTER button.
- Press the ▶ button to select Reset.
- Press the ENTER button to reset the picture to its default position.
- After selecting Screen Fit in HDMI (1080i/1080p) or Component (1080i/1080p) mode, you may need to center the picture:
- Press the ◀ or ▶ button to select Position.
- Press the ENTER button.
- Press the ▲, ▼, ◀ or ▶ button to move the picture.
- Press the ENTER button.
- Press the ◀ or ▶ button to select Reset.
- Press the ENTER button.
- HD (High Definition): 16:9 - 1080i/1080p (1920x1080), 720p (1280x720)
- Settings can be adjusted and stored for each external device you have connected to an input on the TV.
| Input Source | Picture Size |
| ATV, AV, Component (480i, 480p) | 16:9, Zoom1, Zoom2, 4:3 |
| DTV(1080i), Component (1080i, 1080p), HDMI (720p, 1080i, 1080p) | 16:9, 4:3, Wide Fit, Screen Fit |
| PC | 16:9, 4:3 |
Digital Noise Filter (Off / Low / Medium / High / Auto / Auto Visualization): If the broadcast signal received by your TV is weak, you can activate the Digital Noise Filter feature to reduce any static and ghosting that may appear on the screen.

When the signal is weak, try other options until the best picture is displayed.
Auto Visualization: When changing analog channels, displays signal strength.

Only available for analog channels.

When bar is green, you are receiving the best possible signal.
■ MPEG Noise Filter (Off / Low / Medium / High / Auto): Reduces MPEG noise to provide improved picture quality.
■ HDMI Black Level (Normal / Low): Selects the black level on the screen to adjust the screen depth.

Available only in HDMI mode.
■ Film Mode (Off / Auto1 / Auto2): Sets the TV to automatically sense and process film signals from all sources and adjusts the picture for optimum quality.

Available in TV, AV, COMPONENT (480i / 1080i) and HDMI (480i / 1080i).
■ Auto Motion Plus (Off / Clear / Standard / Smooth / Custom / Demo): Removes drag from fast scenes with a lot of movement to provide a clearer picture.

If noise occurs on the screen, please set the Auto Motion Plus to Off. If Auto Motion Plus is Custom, you can set up the Blur Reduction, Judder Reduction or Reset manually.

If Auto Motion Plus is Demo, you can compare the difference between on and off modes.
Blur Reduction: Adjusts the blur reduction level from video sources.
Judder Reduction: Adjusts the judder reduction level from video sources when playing films.
Reset: Resets the custom settings.
■ Auto Protection Time (2 hours / 4 hours / 8 hours / 10 hours / Off): Sets the time the screen remains idle with a still image until the screen saver is activated. The screen saver prevents the formation of ghost images on the screen.
■ Smart LED (Off / Low / Standard / High / Demo): Controls the LED backlight to maximize picture clarity.
Demo: Displays the difference between Smart LED on and off modes.
Viewing TV using the 3D function

MENU → Picture → 3D → ENTER
WARNING
- As the TV turns on, the left and right sides of 3D pictures may overlap more than usual. It may take time until the picture quality is optimized.
- The 3D effect may be experienced differently depending on the viewer. You may not notice the 3D effect at all if you have a prescription for one eye that is very different from the other eye.
- Parents' careful supervision is required particularly when children or teenagers view 3D images.
- Photosensitive Seizure Warning and Other Health Risks
- Some viewers may experience an epileptic seizure or stroke when exposed to certain flashing images or lights contained in certain television pictures or video games. If you or any of your relatives has a history of epilepsy or strokes, please consult with a medical specialist before using the 3D function.
- Do not watch 3D pictures when you feel incoherent, sleepy, tired, or sick. Avoid watching 3D pictures for many hours.
- Even those without a personal or family history of epilepsy or stroke may have an undiagnosed condition that can cause "photosensitive epileptic seizures."
- If you experience any of the following symptoms, immediately stop watching 3D pictures and consult a medical specialist: (1) altered vision; (2) lightheadedness; (3) dizziness; (4) involuntary movements such as eye or muscle twitching; (5) confusion; (6) nausea; (7) loss of awareness; (8) convulsions; (9) cramps; and/or (10) disorientation. Parents should monitor and ask their children about the above symptoms—children and teenagers may be more likely than adults to experience these symptoms.
- Note that watching TV while sitting too close to the screen for an extended period of time may weaken your eyesight. • Note that watching TV while wearing 3D Active Glasses for an extended period of time may cause a headache or fatigue. If you feel headache, fatigue, or dizziness, stop watching TV and rest.
- Some 3D pictures may startle viewers. The pregnant, elderly, epileptic, and those suffering from serious physical conditions are advised to avoid utilizing the unit's 3D functionality.
- We don't recommend watching 3D if you are in bad physical condition, need sleep, or have been drinking liquor.
- Please take care to be aware of the room around you. This product is designed to be immersive. DO NOT use this product near open stairwells, cables, balconies, or other objects that can be tripped over, run into, knocked down, broken, or fallen over. Being startled or deluding yourself into thinking that the 3D images are real may cause you to crush a nearby object or get injured trying to move your body.
Basic Features
- Do not use the 3D Active Glasses for any other purpose than for which it was designed. Wearing the 3D Active Glasses for any other purpose (as general spectacles, sunglasses, protective goggles, etc.) may physically harm you or weaken your eyesight.
- Immersive video can potentially have adverse effects on the user including motion sickness, perceptual after effects, disorientation, eye strain, and decreased postural stability. Take frequent breaks to lessen the potential of these effects. If your eyes show signs of fatigue or dryness or if you have any of the above symptoms, immediately discontinue use of this device and do not resume using it for at least thirty minutes after the symptoms have subsided.
- The ideal viewing distance should be three times or more the height of the screen. We recommend sitting with viewer's eyes on a level with the screen.
3D
This exciting new feature enables you to view 3D content. In order to fully enjoy this feature, you must purchase a pair of Samsung 3D Active Glasses (SSG-2100AB, SSG-2200AR, SSG-2200KR) to view 3D video.
Samsung 3D Active Glasses are sold separately. For more detailed purchasing information, contact the retailer where you purchased this TV.


If there is any obstacle between the emitter and 3D Active Glasses, the proper 3D effect may not be obtained.
■ 3D Mode: Select the 3D input format.

If you want to feel the 3D effect fully, please wear the 3D Active Glasses first, and then select 3D Mode from the list below that provides the best 3d viewing experience.

When watching 3D images, turn on 3D Active Glasses.
| 3D Mode | Operation |
| Off | Turns the 3D function off. |
| 2D → 3D | Changes a 2D image to 3D. |
| Side by Side | Displays two images next to each other. |
| Top & Bottom | Displays one image above another. |
| Line by Line | Displays the images for the left and right eye alternately in rows. |
| Vertical Stripe | Displays the images for the left and right eye alternately in columns. |
| Checker Board | Displays the images for the left and right eye alternately in pixels. |
| Frequency | Displays the images for the left and right eye alternately in frames. |

“Side by Side” and “Top & Bottom” are available when the resolution is 720p, 1080i and 1080p in DTV, HDMI and USB mode or when set to PC and the PC is connected through an HDMI/DVI cable.

"Vertical Strip", "Line by Line" and "Checker Board" are available when the resolution is set to PC and the PC is connected through an HDMI/DVI cable.

“Frequency” displays the frequency (60Hz only) when the resolution is set to PC.
■ 3D → 2D (Off / On): Displays the image for the left eye only.

This function is deactivated when 3D Mode set to “2D → 3D” or Off.
■ 3D View point: The overall adjustment of 3D perspective.

This function is deactivated when 3D Mode is set to "2D → 3D" or Off.
■ Depth: Adjusts focus/depth in "2D → 3D" mode.

This function is only activated when the 3D Mode is "2D → 3D".
■ Picture Correction: Adjusts the images for the left and right eye.
3D Auto View (Off / On): If 3D Auto View is set to On, a "Side-by-Side" format HDMI signal with one of the resolutions below is automatically switched to 3D. Here, correct 3D information must be sent from the Standard HDMI 3D Format.

If a 3D failure occurs due to a 3D information error, set 3D Auto View to Off and manually select a 3D Mode using the 3D button or corresponding menu.

Support resolution (16:9 only)
| Resolution | Frequency (Hz) |
| 1280 x 720p | 60 Hz |
| 1920 x 1080i | 60 Hz |
| 1920 x 1080p | 24 / 30 / 60 Hz |
■ 3D Optimize: The overall adjustment of 3D effect.
Resolution supported for HDMI PC mode
The resolution for HDMI PC mode is optimized to 1920 x 1080 input.
An input resolution other than 1920 x 1080 may not be displayed properly in 3D display or full screen mode.
How to watch the 3D image
- Press the CONTENT button, then the Content View menu will appear.
- Press the ◀ or ▶ button, then select 3D.
To watch in 3D, wear 3D Active Glasses and press the power button on the glasses.
- Select OK, then press the ENTER button.
- Using the ◀ or ▶ buttons on your remote control, select the 3D Mode of the image you want to view.
Some 3D modes may not be available depending on the format of the image source.

The 3D formats indicated below are recommended by the HDMI association and must be supported.
| Source signal format | Standard HDMI 1.4 3D |
| 1920x1080p@24Hz x 2 | 1920x2205p@24Hz |
| 1280x720p@60Hz x 2 | 1280x1470p@60Hz |
The mode is automatically switched to 3D in one of the source signal formats above.
For the Standard HDMI 3D format with 24Hz, the TV is optimized as follows:
- Resolution First Display Mode: If Auto Motion Plus is set to Off, Clear or Standard, you can watch the video at a high resolution optimized to the resolution of the source video.
- Judder Reduction Display Mode: When Auto Motion Plus is set to Smooth or Custom, you can watch a smooth picture without judder.
Before using 3D function...

NOTE
- You may notice a small amount of screen flickering when watching 3D images in poor light conditions (from a strobe light, etc.), or under a fluorescent lamp (50Hz \~ 60Hz) or 3 wavelength lamp. If so, dim the light or turn the lamp off.
- 3D mode is automatically disabled in following cases: when changing a channel or the input source, or accessing Media Play or Internet@TV.
- Some Picture functions are disabled in 3D mode.
- PIP is not supported in 3D mode.
- 3D Active Glasses from other manufacturers may not be supported.
Basic Features
- The 3D Active Glasses may not work properly if there is any other 3D product or electronic devices turned on near the glasses or TV. If there is a problem, keep other electronic devices as far away as possible from the 3D Active Glasses.
- Photos of Media Play are shown in "2D → 3D" mode only.
- If you lie on your side while watching TV with 3D active glasses, the picture may look dark or may not be visible.
- Be sure to stay within the viewing angle and optimum TV viewing distance when watching 3D pictures.
- Otherwise, you may not be able to enjoy proper 3D effects.
Picture Reset (OK / Cancel)
Resets your current picture mode to its default settings.
Setting up the TV with Your PC
Set the input source to PC.

MENU → Picture → ENTER
Adjust frequency values/positions and fine tune the settings automatically.

Not available when connecting with an HDMI/DVI cable.
Screen
Coarse / Fine: Removes or reduces picture noise. If the noise is not removed by Fine-tuning alone, then adjust the frequency as best as possible (Coarse) and Fine-tune again. After the noise has been reduced, readjust the picture so that it is aligned to the center of screen. ■ Position: Adjust the PC's screen positioning if it does not fit the TV screen. Press the ▲ or ▼ button to adjust the Vertical-Position. Press the ◀ or ▶ button to adjust the Horizontal-Position. ■ Image Reset: Resets the image to default settings.
Using Your TV as a Computer (PC) Display
Setting Up Your PC Software (Based on Windows XP)
Depending on the version of Windows and the video card, the actual screens on your PC will probably look different, but the same basic set-up information will apply in most cases. (If not, contact your computer manufacturer or Samsung Dealer.)
- Click on "Control Panel" on the Windows start menu.
- Click on "Appearance and Themes" in the "Control Panel" window and a display dialog-box will appear.
- Click on "Display" and a display dialog box will appear.
- Navigate to the "Settings" tab on the display dialog-box.
- The correct size setting (resolution) [Optimum: 1920 X 1080 pixels]
- If a vertical-frequency option exists on your display settings dialog box, the correct value is "60" or "60 Hz". Otherwise, just click "OK" and exit the dialog box.
Changing the Preset Sound Mode

MENU → Sound → SRS TheaterSound → ENTER
■ Standard: Selects the normal sound mode. ■ Music: Emphasizes music over voices. ■ Movie: Provides the best sound for movies. ■ Clear Voice: Emphasizes voices over other sounds. ■ Amplify: Increases the intensity of high-frequency sound to allow a better listening experience for the hearing impaired.
Adjusting Sound Settings

MENU → Sound → Equalizer → ENTER
Equalizer
Adjusts the sound mode (standard sound mode only).
■ Balance L/R: Adjusts the balance between the right and left speaker. 100Hz / 300Hz / 1kHz / 3kHz / 10kHz (Bandwidth Adjustment): Adjusts the level of specific bandwidth frequencies. ■ Reset: Resets the equalizer to its default settings.
Sound Settings

MENU → Sound → ENTER
(standard sound mode only)
This function provides a virtual 5.1 channel surround sound experience through a pair of speakers using HRTF (Head Related Transfer Function) technology.
SRS TruDialog (Off / On)
(standard sound mode only)
This function allows you to increase the intensity of a voice over background music or sound effects so that dialog can be heard more clearly.
Preferred Language
(digital channels only)
Digital-TV broadcasts can transmit multiple audio tracks simultaneously (for example, simultaneous translations of the program into foreign languages).

You can only select a language among the ones being broadcast.
(analog channels only)
■ Mono: Choose for channels broadcasting in mono or if you are having difficulty receiving a stereo signal. ■ Stereo: Choose for channels broadcasting in stereo. ■ SAP: Choose to listen to the Separate Audio Program, which is usually a foreign-language translation. Depending on the particular program being broadcast, you can listen to Mono, Stereo, or SAP.

Auto Volume (Off / Normal / Night)
To equalize the volume level on each channel, set to Normal.
■ Night: This mode provides an improved sound experience compared to Normal mode, making almost no noise. It is useful at night.
Speaker Select (External Speaker / TV Speaker)
A sound echo may occur due to a difference in decoding speed between the main speaker and the audio receiver. In this case, set the TV to External Speaker.

When Speaker Select is set to External Speaker, the volume and MUTE buttons will not operate and the sound settings will be limited.

When Speaker Select is set to External Speaker.
• TV Speaker: Off, External Speaker: On

When Speaker Select is set to TV Speaker.
• TV Speaker: On, External Speaker: On

If there is no video signal, both speakers will be mute.
SPDIF Output
SPDIF (Sony Philips Digital Interface) is used to provide digital sound, reducing interference going to speakers and various digital devices such as an A/V Receiver/Home theater.
■ Audio Format: During the reception of a digital TV broadcast, you can select the Digital Audio output (SPDIF) format from the options PCM or Dolby Digital. ■ Audio Delay: Correct audio-video sync problems, when watching TV or video, and when listening to digital audio output using an external device such as an AV receiver (0ms \~ 250ms).
Sound Reset (OK / Cancel)
Reset all sound settings to the factory defaults.
Setting the Time

MENU → Setup → Time → ENTER
Time
■ Clock: Setting the clock is for using various timer features of the TV.

The current time will appear every time you press the INFO button.

If you disconnect the power cord, you have to set the clock again.
Clock Mode (Auto / Manual)
- Auto: Set the current time automatically using the time from a digital channel. The antenna must be connected in order to set the time automatically.
- Manual: Set the current time manually. Depending on the broadcast station and signal, the auto time set up may not be correct. In this case, set the time manually.
Clock Set: Set the Month, Day, Year, Hour, Minute and am/pm manually.
Available only when Clock Mode is set to Manual. You can set the Month, Day, Year, Hour and Minute directly by pressing the number buttons on the remote control.
DST (Daylight Saving Time) (Off / On): Switches the Daylight Saving Time function on or off.
This function is only available when the Clock Mode is set to Auto.
Time Zone: Select your time zone. This function is only available when the Clock Mode is set to Auto.
Using the Sleep Timer

MENU → Setup → Time → Sleep Timer → ENTER
Sleep Timer TOOLS: Automatically shuts off the TV after a preset period of time. (30, 60, 90, 120, 150 and 180 minutes). To cancel the Sleep Timer, select Off.
Setting the On / Off Timer

MENU → Setup → Time → Timer 1 → ENTER
You can set the TV to turn on automatically at a preset time.
■ Timer 1 / Timer 2 / Timer 3: Three different on / off timer settings can be made. You must set the clock first.

On Time / Off Time: Set the hour, minute, and activate / inactivate. (To activate the timer with the setting you've chosen, set to Activate.)
Volume: Set the desired volume level.
Source: Select TV or USB content to be played when the TV is turned on automatically. (USB can be selected only when a USB device is connected to the TV)
Antenna (when the Source is set to TV): Select Air or Cable.
Channel (when the Source is set to TV): Select the desired channel.
Contents (when the Source is set to USB): Select a folder in the USB device containing music or photo files to be played when the TV is turned on automatically.

NOTE
- If there is no music file on the USB device or the folder containing a music file is not selected, the Timer function does not operate correctly.
- When there is only one photo file in the USB, the Slide Show will not play.
- If a folder name is too long, the folder cannot be selected.
- Each USB you use is assigned its own folder. When using more than one of the same type of USB, make sure the folders assigned to each USB have different names.
Repeat: Select Once, Everyday, Mon~Fri, Mon~Sat, Sat~Sun or Manual to set at your convenience. If you select Manual, you can set up the day you want to activate the timer.
The √ mark indicates the day is selected.
Auto Power Off (available only when the TV is turned on by the Timer): The TV will be automatically turned off after 3 hours of being left idle to prevent overheating.
Locking Programs

MENU → Setup → Security → ENTER
Security
The PIN input screen appears. Enter your 4-digit PIN number.
V-Chip: The V-Chip feature automatically locks out programs that are deemed inappropriate for children. The user must enter a PIN (personal identification number) before any of the V-Chip restrictions are set up or changed.

NOTE
- V-Chip is not available in HDMI, Component, or PC mode.
- The default PIN number of a new TV set is "0-0-0-0".
- Allow All: Press to unlock all TV ratings. • Block All: Press to lock all TV ratings.
V-Chip Lock (Off / On): You can block rated TV programs.
TV Parental Guidelines: You can block TV programs depending on their rating. This function allows you to control what your children are watching.
- TV-Y: Young children / TV-Y7: Children 7 and over / TV-G: General audience / TV-PG: Parental guidance / TV-14: Viewers 14 and over / TV-MA: Mature audience
- ALL: Lock all TV ratings. / FV: Fantasy violence / V: Violence / S: Sexual situation / L: Adult Language / D: Sexually Suggestive Dialog
The V-Chip will automatically block certain categories dealing with more sensitive material. For example, if you block the TV-Y category, then TV-Y7 will automatically be blocked. Similarly, if you block the TV-G category, then all the categories in the young adult group will be blocked (TV-G, TV-PG, TV-14 and TV-MA). The sub-ratings (D, L, S, V) work similarly. So, if you block the L sub-rating in TV-PG, then the L sub-ratings in TV-14 and TV-MA will automatically be blocked.
MPAA Rating: You can block movies depending on their MPAA rating. The Motion Picture Association of America (MPAA) has implemented a rating system that provides parents or guardians with advanced information on which films are appropriate for children.
- G: General audience (no restrictions). / PG: Parental guidance suggested. / PG-13: Parents strongly cautioned. / R: Restricted. Children under 17 should be accompanied by an adult. / NC-17: No children under age 17. / X: Adults only. / NR: Not rated.

The V-Chip will automatically block any category that deals with more sensitive material. For example, if you block the PG-13 category, then R, NC-17 and X will automatically be blocked.
Canadian English: You can block TV programs depending on their Anglophone Canadian ratings.
- C: Programming intended for children under age 8. / C8+: Programming generally considered acceptable for children 8 years and over to watch on their own. / G: General programming, suitable for all audiences. / PG: Parental Guidance. / 14+: Programming contains themes or content which may not be suitable for viewers under the age of 14. / 18+: Adult programming.

The V-Chip will automatically block any category that deals with more sensitive material. For example, if you block the G category, then PG, 14+ and 18+ will automatically be blocked.
Canadian French: You can block TV programs depending on their French Canadian rating.
- G: General / 8 ans+: Programming generally considered acceptable for children 8 years and over to watch on their own. / 13 ans+: Programming may not be suitable for children under the age of 13. / 16 ans+: Programming is not suitable for children under the age of 16. / 18 ans+: Programming restricted to adults.

The V-Chip will automatically block any category that deals with more sensitive material. For example, if you block the 8 ans+ category, then 13 ans+, 16 ans+ and 18 ans+ will automatically be blocked also.
Downloadable U.S. Rating: Parental restriction information can be used while watching DTV channels.
Basic Features

NOTE
- If information is not downloaded from the broadcasting station, the Downloadable U.S. Rating menu is deactivated.
- Parental restriction information is automatically downloaded while watching DTV channels. It may take several seconds.
- The Downloadable U.S. Rating menu is available for use after information is downloaded from the broadcasting station. However, depending on the information from the broadcasting station, it may not be available for use.
- Parental restriction levels differ depending on the broadcasting station. The default menu name and Downloadable US Rating change depending on the downloaded information.
- Even if you set the on-screen display to another language, the Downloadable U.S. Rating menu will appear in English only.
- The rating will automatically block certain categories that deal with more sensitive material.
- The rating titles (For example: Humor Level..etc) and TV ratings (For example: DH, MH, H..etc) may differ depending on the broadcasting station.
■ Change PIN: The Change PIN screen will appear. Choose any 4 digits for your PIN and enter them. As soon as the 4 digits are entered, the Confirm New PIN screen appears. Re-enter the same 4 digits. When the Confirm screen disappears, your PIN has been memorized.
How to watch a restricted channel
If the TV is tuned to a restricted channel, the V-Chip will block it. The screen will go blank and the following message will appear:
This channel is blocked by V-Chip. Please enter the PIN to unblock.

If you forget the PIN, press the remote-control buttons in the following sequence, which resets the pin to "0-0-0-0:" POWER (off) → MUTE → 8 → 2 → 4 → POWER (on)
Other Features

MENU → Setup → ENTER
Set the menu language.
- Select Menu Language and press the ENTER button.
- Choose desired language and press the ENTER button.

Choose between English, Español and Français.
Caption
(On-Screen Text Messages)
Caption (Off / On): You can switch the caption function on or off. If captions are not available, they will not be displayed on the screen.

The Caption feature doesn't work in Component, HDMI or PC modes.

Caption Mode: You can select the desired caption mode.
The availability of captions depends on the program being broadcast.
Default / CC1~CC4 / Text1~Text4: (analog channels only) The Analog Caption function operates in either analog TV channel mode or when a signal is supplied from an external device to the TV. (Depending on the broadcasting signal, the Analog Caption function may or may not work with digital channels.)
Default / Service1~Service6 / CC1~CC4 /
Text1~Text4: (digital channels only) The Digital Captions function works with digital channels.

Service1~6 may not be available in digital caption mode depending on the broadcast.
■ Digital Caption Options: (digital channels only)
Size: Options include Default, Small, Standard and Large. The default is Standard.
Font Style: Options include Default and Styles 0 to 7. The default is Style 0.
Foreground Color: Options include Default, White, Black, Red, Green, Blue, Yellow, Magenta and Cyan. You can change the color of the letter. The default is White.
Background Color: Options include Default, White, Black, Red, Green, Blue, Yellow, Magenta and Cyan. You can change the background color of the caption. The default is Black.
Foreground Opacity: This adjusts the opacity of text. Options include Default, Transparent, Translucent, Solid and Flashing.
Background Opacity: This adjusts the opacity of the caption background. Options include Default, Transparent, Translucent, Solid and Flashing.
Return to Default: This option sets each Size, Font Style, Foreground Color, Background Color, Foreground Opacity, and Background Opacity to its default.
NOTE
- Digital Caption Options are available only when Default and Service1 \~ Service6 can be selected in Caption Mode.
- The availability of captions depends on the program being broadcast.
- The Default setting follows the standards set by the broadcaster.
- The Foreground and Background cannot be set to have the same color.
- You cannot set both the Foreground Opacity and the Background Opacity to Transparent.
Network (Network Type / Network Setup / Network Test / SWL (Samsung Wireless Link) / SWL connect)
For details on setup options, refer to the “Network Connection” instructions (p. 30).
General
■ Game Mode (Off / On): When connecting to a game console such as PlayStation™ or Xbox™, you can enjoy a more realistic gaming experience by selecting the game menu.

NOTE
• Precautions and limitations for game mode - To disconnect the game console and connect another external device, set Game Mode to Off in the setup menu. - If you display the TV menu in Game Mode, the screen shakes slightly. - Game Mode is not available when the input source is set to TV or PC. - After connecting the game console, set Game Mode to On. Unfortunately, you may notice reduced picture quality. • If Game Mode is On: - Picture mode is set to Standard and Sound mode is set to Movie. – Equalizer is not available.
■ BD Wise (Off / On): Provides the optimal picture quality for Samsung DVD, Blu-ray and Home Theater products which support BD Wise. When BD Wise is turned On, the picture mode is automatically changed to the optimal resolution.

Available when connecting Samsung products that support BD Wise through an HDMI cable.
■ Menu Transparency (Bright / Dark): Set the transparency of the menu.
■ Melody (Off / Low / Medium / High): Set so that a melody plays when the TV is turned on or off.

Melody is disabled when FastStart is On.
■ FastStart (Off / On): When the TV is powered on, the screen will come on quickly with this feature.
Light Effect (Off / In Standby / Watching TV / Always): You can turn the LED on/off on the front of the TV. Turn it off to save power or if the LED is too bright for you.

Set the Light Effect to Off to reduce power consumption.

The color of light may vary depending on the model.
Basic Features
Wireless Remote Control (Off / On)
Turn on/off or give permission to Samsung mobile phones/devices.
You must have a Samsung Mobile phone/device that supports Wireless Remote Control. For more details, refer to each device's manual.
Picture In Picture (PIP)
You can watch the TV tuner and one external video source simultaneously. PIP (Picture-in-Picture) does not function in the same mode.

MENU → Setup → PIP → ENTER
NOTE
- For PIP sound, refer to the Sound Select instructions.
- If you turn the TV off while watching in PIP mode, the PIP window will disappear.
- You may notice that the picture in the PIP window becomes slightly unnatural when you use the main screen to view a game or karaoke.
- While V-Chip or Internet@TV is in operation, the PIP function cannot be used.
- PIP Settings
| Main picture | Sub picture |
| Component, HDMI1/DVI, HDMI2, HDMI3, HDMI4, PC | TV |
■ PIP (Off / On): Activate or deactivate the PIP function. Air/Cable (Air / Cable): Select either Air or Cable as the input source for the sub-screen. ■ Channel: Select the channel for the sub-screen. ■ Size (☐ / ☐ / ☐ / ☐): Select a size for the sub-picture. ■ Position (☐ / ☐ / ☐ / ☐): Select a position for the sub-picture. In Double (☐☐, ☐☐) mode, Position cannot be selected. ■ Sound Select (Main / Sub): You can choose the desired sound (Main / Sub) in PIP mode.


MENU → Support → ENTER
Legal Notice

The Legal Notice may differ depending on the country.
Self Diagnosis
Self Diagnostic might take few seconds, this is part of the normal operation of the TV.
■ Picture Test: Use to check for picture problems.
Yes: If the test pattern does not appear or there is noise in the test pattern, select Yes. There may be a problem with the TV. Contact Samsung's Call Center for assistance (1-800-SAMSUNG).
No: If the test pattern is properly displayed, select No. There may be a problem with your external equipment. Please check your connections. If the problem persists, refer to the external device's user manual.
■ Sound Test: Use the built-in melody sound to check for sound problems.
If you hear no sound from the TV's speakers, before performing the sound test, make sure Speaker Select is set to TV Speaker in the Sound menu. The melody will be heard during the test even if Speaker Select is set to External Speaker or the sound is muted by pressing the MUTE button.
Yes: If you can hear sound only from one speaker or not at all during the sound test, select Yes. There may be a problem with the TV. Contact Samsung's Call Center for assistance (1-800-SAMSUNG).
No: If you can hear sound from the speakers, select No. There may be a problem with your external equipment. Please check your connections. If the problem persists, refer to the external device's user manual.
Signal Information: (digital channels only) An HD channel's reception quality is either perfect or the channels are unavailable. Adjust your antenna to increase signal strength.
- Troubleshooting: If the TV seems to have a problem, refer to this description.
If none of these troubleshooting tips apply, contact the Samsung customer service center.
Software Upgrade
Software Upgrade can be performed by network connection or downloading the latest firmware from “www.samsung.com.” to a USB memory device.
Current Version - the software already installed in the TV.

Software is represented as "Year/Month/Day_Version."
Software Upgrade
Installing the Latest Version
By USB: Insert a USB drive containing the firmware upgrade file, downloaded from “www.samsung.com,” into the TV. Please be careful not to disconnect the power or remove the USB drive until upgrades are complete. The TV will be turned off and on automatically after

Completing the firmware upgrade. When software is upgraded, video and audio settings you have made will return to their default settings. We advise you to write down your settings so that you can easily reset them after the upgrade.
■ By Online: Upgrade the software using the Internet.
First, configure your network. For detailed procedures on using the Network Setup, refer to the “Network Connection” instructions. If the internet connection doesn't operate properly, the connection may be broken. Please retry downloading. If the problem persists, download by USB and upgrade.
■ Alternative Software (backup): Displays the software version downloaded through By Online. During the software upgrading, When the Upgrade will discontinue from last step, this function be activated.
HD Connection Guide
Refer to this information when connecting external devices to the TV.
View this information when your TV does not work properly or when you want to upgrade the software. You can find information regarding our call centers and how to download products and software.
Network Connection
You can set up your TV so that it can access the Internet through your local area network (LAN) using a wired or wireless connection.
Connecting to a Wired Network
You can attach your TV to your LAN using cable in three ways:
- You can attach your TV to your LAN by connecting the LAN port on the back of your TV to an external modem using a Cat 5 cable. See the diagram below.

- You can attach your TV to your LAN by connecting the LAN port on the back of your TV to a IP Sharer which is connected to an external modem. Use a Cat 5 cable for the connection. See the diagram below.

- Depending on how your network is configured, you may be able to attach your TV to your LAN by connecting the LAN port on the back of your TV directly to a network wall outlet using a Cat 5 cable. See the diagram below. Note that the wall outlet is attached to a modem or router elsewhere in your house.

If you have a Dynamic Network, you should use an ADSL modem or router that supports Dynamic Host Configuration Protocol (DHCP). Modems and routers that support DHCP automatically provide the IP address, subnet mask, gateway, and DNS values your TV needs to access the Internet, so you don't have to enter them manually. Most home networks are Dynamic Networks.
Some networks require a Static IP address. If your network requires a Static IP address, you must enter the IP address, subnet mask, gateway, and DNS values manually on your TV's Cable Setup Screen when you set up the network connection. To get the IP address, subnet mask, gateway, and DNS values, contact your Internet Service Provider (ISP). If you have a Windows computer, you can also get these values through your computer.
You can use ADSL modems that support DHCP if your network requires a Static IP address. ADSL modems that support DHCP also let you use Static IP addresses.
Network Setup (Auto)
Use the Automatic Network Setup when connecting your TV to a network that supports DHCP. To set up your TV's cable network connection automatically, follow these steps:
How to set up automatically
- Connect your TV to your LAN as described in the previous section.
- Turn on your TV, press the MENU button on your remote, use the ▲ or ▼ button to select Setup, and then press the ENTER button.
- Use the ▲ or ▼ button to select Network in the Setup menu, and then press the ENTER button. The Network screen appears.

- On the Network screen, select Network Type.
- Set Network Type to Wired.
- Select Network Setup. The Network Setup screen appears.

- Set Internet Protocol Setup to Auto.
- Auto acquires and enters the needed Internet values automatically.
- Wait two minutes, and then press the RETURN button on your remote.
- If the Network Function has not acquired the network connection values, go to the directions for Manual.
Network Setup (Manual)
Use the Manual Network Setup when connecting your TV to a network that requires a Static IP address.
Getting the Network Connection Values
To get the Network connection values on most Windows computers, follow these steps:
- Right click the Network icon on the bottom right of the screen.
- In the pop-up menu that appears, click Status.
- On the dialog that appears, click the Support tab.
- On the Support Tab, click the Details button. The Network connection values are displayed.
How to set up manually
To set up your TV's cable network connection manually, follow these steps:
- Follow Steps 1 through 6 in the "How to set up automatically" procedure.
- Set Internet Protocol Setup to Manual.
- Press the ▼ button on your remote to go to the first entry field.
- Enter the IP Address, Subnet Mask, Gateway, and DNS Server values. Use the number buttons on your remote to enter numbers and the arrow buttons to move from one entry field to another.
- When done, press the RETURN button on your remote.
- Select Network Test to check the Internet connectivity.
To connect your TV to your network wirelessly, you need a wireless router or modem and a Samsung Wireless LAN Adapter (WIS09ABGN, WIS09ABGN2, WIS10ABGN), which you connect to your TV's back or side panel USB jack. See the illustration below.

To use the SWL (Samsung Wireless Link) function, connect to the USB 1 (HDD) port.


Samsung's Wireless LAN adapter is sold separately and is offered by select retailers, Ecommerce sites and Samsungparts.com. Samsung's Wireless LAN adapter supports the IEEE 802.11A/B/G and N communication protocols. Samsung recommends using IEEE 802.11N. When you play video over a IEEE 802.11B/G connection, the video may not play smoothly.

NOTE
- You must use the “Samsung Wireless LAN Adapter” (WIS09ABGN, WIS09ABGN2, WIS10ABGN) to use a wireless network. Samsung's Wireless LAN Adapter is sold separately. The SAMSUNG Wireless LAN Adapter is offered by select retailers, Ecommerce sites and Samsungparts.com.
- To use a wireless network, your TV must connect wirelessly to a wireless IP sharer (either a router or a modem). If the wireless IP sharer supports DHCP, your TV can use a DHCP or static IP address to connect to the wireless network.
- Select a channel for the wireless IP sharer that is not currently being used. If the channel set for the wireless IP sharer is currently being used by another device nearby, this will result in interference and communication failure.
- If you apply a security system other than the systems listed below, it will not work with the TV.
- If you select the Pure High-throughput (Greenfield) 802.11N mode and set your AP's Security Encryption type to WEP, TKIP or TKIPAES (WPS2Mixed), your Samsung TV will not support the connection in compliance with new Wi-Fi certification specifications.
- If your AP supports WPS (Wi-Fi Protected Setup), you can connect to the network via PBC (Push Button Configuration) or PIN (Personal Identification Number). WPS will automatically configure the SSID and WPA key in either mode.
- If your router, modem, or device isn't certified, it may not connect to the TV via the “Samsung Wireless LAN Adapter.”
- Connection Methods: You can setup the wireless network connection six ways.
- Samsung Auto Configuration - For non-Samsung devices.
- PBC (WPS) – Auto Setup (Using the Auto Network Search function)
- Manual Setup
- SWL (Samsung Wireless Link) - For Samsung devices only.
- Ad-Hoc
- The Samsung Wireless LAN Adapter may not be recognized or work properly when connecting via a USB hub or via a USB extension cable other than the one available from Samsung.
Notice
The picture may appear corrupted or have static for some channels when the TV is connected to the Samsung Wireless LAN Adapter. In such a case, establish a connection using one of the following methods or connect the Samsung Wireless LAN Adapter using a USB cable in a place that is not affected by radio interference.
Method 1: Connect using the USB right angle adapter
To connect the Samsung Wireless LAN Adapter using the USB right angle adapter, follow these steps:
- Connect the USB right angle adapter to the Samsung Wireless LAN Adapter.
- Connect the other end of the right angle adapter to the USB 1 (HDD) port.
Network Setup (Samsung Auto Configuration)
The Samsung Auto Configuration function lets you connect your Samsung TV automatically to non-Samsung wireless APs. If your non-Samsung AP does not support Samsung Auto Configuration, you must connect using one of the other methods: PBC (WPS), auto configuration, or manual configuration.

To use this function, you must set SWL (Samsung Wireless Link) to Off in the TV's on-screen menu.

You can check for equipment that supports Samsung Auto Configuration on www.samsung.com.
How to set up using Samsung Auto Configuration
- Place the AP and TV next to each other and turn them on.

Because AP booting times vary, you may have to wait approximately two minutes for your AP to boot up.

Ensure the LAN cable is connected to the WAN port of the AP during Samsung Auto Configuration. If it is not connected, Samsung Auto Configuration only confirms that the TV is connected to the AP, but does not confirm it is connected to the Internet.
Method 2: Connect via an extension cable
To reconnect the Samsung Wireless LAN Adapter using the extension cable, follow these steps:

The Samsung Wireless LAN Adapter should be installed in an interference-free area in order to avoid interference between the adapter and tuner.
- Connect the extension cable to the USB 1 (HDD) port.
- Connect the extension cable and Samsung Wireless LAN Adapter.
- Attach the Samsung Wireless LAN Adapter to the back of the TV near the top, using double-sided adhesive tape.
- After 2 minutes, connect the Samsung Wireless LAN Adapter to the TV. When the Samsung Wireless LAN Adapter establishes a connection with your TV, a pop-up window appears.
- As soon as a connection is established, place the AP parallel to the Samsung Wireless LAN Adapter and not farther than 9 and 7/8 inches (25 cm) from it.
- Wait until the connection is automatically established.
If Samsung Auto Configuration does not connect your TV to your AP, a pop-up window appears on the screen notifying you of the failure. If you want to try using Samsung Auto Configuration again, reset the AP, disconnect the Samsung Wireless LAN Adapter and then try again from Step 1. You can also choose one of the other connection setup methods: PBC (WPS), auto, or manual.
- Place the AP in a desired location.
If the AP settings change or you install a new AP, you must perform the Samsung Auto Configuration procedure again, beginning from Step 1.
Advanced Features
Network Setup (PBC (WPS))
How to set up using PBC (WPS)
If your router has a PBC (WPS) button, follow these steps:
- Connect your TV to your LAN as described in the previous section.
- Turn on your TV, press the MENU button on your remote, use the ▲ or ▼ button to select Setup, and then press the ENTER □ button.
- Use the ▲ or ▼ button to select Network in the Setup menu, and then press the ENTER ← button.
- On the Network screen, select Network Type.
- Set Network Type to Wireless.
- Select Network Setup. The Network Setup screen appears.

- Press the Red button on your remote.
- Press the PBC (WPS) button on your router within 2 minutes. Your TV player automatically acquires all the network setting values it needs and connects to your network.
- After the network connection is set up, press the RETURN button to exit the Network Setup screen.
Network Setup (Auto)
Most wireless networks have an optional security system that requires devices that access the network to transmit an encrypted security code called an Access or Security Key. The Security Key is based on a Pass Phrase, typically a word or a series of letters and numbers of a specified length you were asked to enter when you set up security for your wireless network. If you use this method of setting up the network connection, and have a Security Key for your wireless network, you will have to enter the Pass Phrase during the setup process.
How to set up automatically
To set up the wireless connection automatically, follow these steps:
- Follow Steps 1 through 6 in the “How to set up using PBC (WPS)” procedure.
- Press the ▼ button to select Internet Protocol Setup, and then press the ENTER button. Press the ▲ or ▼ button to select Auto, and then press the ENTER button.
- Press the ▲ button to go to Select a Network, and then press the ENTER button. The Network function searches for available wireless networks. When done, it displays a list of the available networks.
- In the list of networks, press the ▲ or ▼ button to select a network, and then press the ENTER ← button.
If the AP is set to Hidden (Invisible), you have to select Add Network and enter the correct Network Name (SSID) and Security Key to establish the connection.
- If the Security/PIN pop-up appears, go to Step 6. If the Network Connecting Screen appears, go to Step 10.
- Press the ▲ or ▼ button to select Security or PIN. For most home networks, you would select Security (for Security Key). The Security Screen appears.

- On the Security screen, enter your network's Pass Phrase.
You should be able to find the Pass Phrase on one of the set up screens you used to set up your router or modem.
- To enter the Pass Phrase, follow these general directions:
- Press the number buttons on your remote to enter numbers.
- Use the direction buttons on your remote to move from button to button on the Security Key screen.
- Press the Red button to change case or display symbols/characters.
- To enter a letter or symbol, move to the letter or symbol, and then press the ENTER button.
- To delete the last letter or number you entered, press the Green button on your remote.
- When done, press the Blue button on your remote. The Network Connecting screen appears.
- Wait until the connection confirmation message is displayed, and then press the ENTER button. The Network Setup screen re-appears.
- To test the connection, press the RETURN button to select Network Test, and then press the ENTER button.
Network Setup (Ad-Hoc)
You can connect to a mobile device without an access point through the “Samsung Wireless LAN Adapter” by using a peer to peer network.

This function is available when SWL (Samsung Wireless Link) is set to Off in the TV's on-screen menu.
How to connect to new Ad-hoc device
- Follow Steps 1 through 6 in the “How to set up using PBC (WPS)” (p. 34).
- Choose Select a Network. A list of devices/networks appears.
- While in the device list, press the Blue button on the remote. The message Ad-hoc is a direct Wi-Fi connection with cell phone or PC. The existing network system may have limited functionality. Do you want to change the network connection? is displayed.
- Input the generated Network Name (SSID) and Security Key into the device you want to connect.

How to connect an existing Ad-hoc device
- Follow Steps 1 through 6 in the "How to set up using PBC (WPS)" (p. 34).
- Choose Select a Network. The Device/Network list appears.
- Select the device you want in the Device list.
- If security key is required, input the security key.
If network doesn't operate normally, check the Network Name (SSID) and Security Key again. An incorrect Security Key may cause a malfunction.
Network Setup (Manual)
If the other methods do not work, you need to enter the network setting values manually.
Getting the Network Connection Values
To get the network connection values on most Windows computers, follow these steps:
- Right-click the Network icon at the bottom right of the screen.
- In the pop-up menu, click Status.
- On the dialog that appears, click the Support tab.
- On the Support tab, click the Details button. The network settings are displayed.
How to set up manually
To enter the network connection values manually, follow these steps:
- Follow Steps 1 through 6 in the “How to set up using PBC (WPS)” (p. 34).
- Press the ▼ button to select Internet Protocol Setup, and then press the ENTER button. Press the ▲ or ▼ button to select Manual, and then press the ENTER button.
- Press the ▼ button to go to the first entry field (IP Address).
- Use the number buttons to enter numbers.
- When done with each field, use the ▶ button to move successively to the next field. You can also use the other arrow buttons to move up, down, and back.
- Enter the IP Address, Subnet Mask, and Gateway values.
- Press the ▲ or ▼ button to go to DNS.
- Press the ▼ button to go to the first DNS entry field. Enter the numbers as above.
- When done, press the ▲ button to go to Select a Network. Select your network, and then press the ENTER button.
- Go to Step 4 in the "How to set up automatically" (p. 34), and follow the directions from that point on.
Advanced Features
SWL (Samsung Wireless Link)
This function lets you connect your TV to a Samsung device (router, etc.) that supports PBC (WPS). You can connect the TV to the device even if a sharer is not connected to the TV.
For the TV to use Internet@TV, the AP (access point) must be connected to the wireless network. If a Samsung Wireless Lan Adapter is connected to the USB 2 port, the network may not operate normally. We recommend connecting it to the USB 1 (HDD) port. Only sharers using the 2.4 Ghz band are supported. Sharers using the 5 Ghz band are not supported.
SWL connect
You can directly connect the TV to a Samsung device that supports PBC (WPS).
This function is available when SWL (Samsung Wireless Link) is set to On. To use the SWL (Samsung Wireless Link) function, connect the Samsung Wireless LAN Adapter to the USB 1 (HDD) port.
How to connect using Samsung Wireless Link
To connect using Samsung Wireless Link, follow these steps:
- Follow Steps 1 through 5 in the “How to set up using PBC (WPS)” (p. 34).
- Select SWL (Samsung Wireless Link) by using the ▼ button, and then press the ENTER button to turn it On.
- Select SWL connect by using the ▼ button, and then press the ENTER button.
- If the "Press the PBC button on the PBC(WPS) supported device to connect within 120 seconds." message appears, press the PBC button on the device to connect. For more information, refer to the wireless network setup manual of the device to be connected.
- If the TV connects properly to the device after the count in the message box starts, then the message box disappears automatically. If the connection fails, please retry after 2 minutes.
If Your TV Fails to Connect to the Internet
Your TV may not be able to connect to the Internet because your ISP has permanently registered the MAC address (a unique identifying number) of your PC or modem, which it then authenticates each time you connect to the Internet as a way of preventing unauthorized access. As your TV has a different MAC address, your ISP cannot authenticate its MAC address, and your TV cannot connect.
To resolve this problem, ask your ISP about the procedures required to connect devices other than a PC (such as your TV) to the Internet.
If your Internet service provider requires an ID or password to connect to the Internet, your TV may not be able to connect to the Internet. If this is the case, you must enter your ID or password when connecting to the Internet.
The internet connection may fail because of a firewall problem. If this is the case, contact your Internet service provider.
If you cannot connect to the Internet even after you have followed the procedures of your Internet service provider, please contact Samsung Electronics at 1-800-SAMSUNG.

Enjoy photos, music and/or movie files saved on a USB Mass Storage Class (MSC) device.

MENU → Application → Content
View → Media Play → ENTER

Connecting a USB Device
- Turn on your TV.
- Connect a USB device containing photo, music and/or movie files to the USB 1 (HDD) or USB 2 jack on the side of the TV.
- When USB is connected to the TV, a popup window appears. Then you can select Media Play.
TV Rear Panel
Connecting to your PC through a network
You can play pictures, music and videos saved on your PC through a network connection in the Media Play mode.

If you want to use Media Play to play files saved on your PC over your TV, you should download “PC Share Manager” and the users manual from “www.samsung.com.”
![graph TD A["LAN"] --> B["PC"] B <--> C["External Modem (ADSL/VDSL/Cable TV)"] B <--> D["Modem Cable (Not Supplied)"] B <--> E["LAN Cable (Not Supplied)"] B <--> F["LAN Cable (Not Supplied)"] B <--> G["LAN Cable (Not Supplied)"] H["TV Rear Panel"] --> I["or Samsung Wireless LAN Adapter"] J["Wireless…](/content/2019/10/26820/images/95ca9ed6ef44da5bdcbcbd23a029bef4568d80bcefda8db2f950222927f04a8b.jpg)
- For more information on how to configure your network, refer to "Network Connection" (p. 30).
- You are recommended to locate both the TV and the PC in same subnet. The first 3 parts of the subnet address of the TV and the PC IP addresses should be the same and only the last part (the host address) should be changed. (e.g. IP Address: 123.456.789.*)
- Using a LAN cable, connect between the external modem and the PC onto which the Samsung PC Share Manager Program will be installed.
- You can connect the TV to the PC directly without connecting it through a Sharer (Router).
Advanced Features
Functions that are not supported when connecting to a PC through a network:
- The Background Music and Background Music Setting functions.
- Sorting files by preference in the Photos, Music, and Videos folders.
- The (REW) or (FF) button while a movie is playing.
DivX DRM, multi-audio, and embedded captions are not supported.
Samsung PC Share Manager should be permitted by the firewall program on your PC.
When you use Media Play mode through a network connection, depending on the functions of the provided server:
• The sorting method may vary. - The scene search function may not be supported. - The Play Continuously function, which resumes playing of a video, may not be supported. - The Play Continuously function does not support multiple users. (It will only memorize the point where the most recent user stopped playing.) - The ◀ or ▶ buttons may not work depending on the content information. - You may experience file stuttering while playing a video in Media Play through a network connection.
It might not work properly with unlicensed multimedia files.
Need-to-Know List before using Media Play
- MTP (Media Transfer Protocol) is not supported.
- The file system supports FAT16, FAT32, and NTFS.
- Certain types of USB digital cameras and audio devices may not be compatible with this TV.
- Media Play only supports USB Mass Storage Class (MSC) devices. MSC is a Mass Storage Class Bulk-Only Transport device. Examples of MSC are thumb drives, flash card readers, and USB HDD (USB hubs are not supported). Devices should be connected directly to the TV's USB port.
- Before connecting your device to the TV, please back up your files to prevent them from damage or loss of data. SAMSUNG is not responsible for any data file damage or data loss.
- Connect a USB HDD to the dedicated USB 1 (HDD) port.
- Do not disconnect the USB device while it is loading.
- The higher the resolution of the image, the longer it takes to display on the screen.
- The maximum supported JPEG resolution is 15360X8640 pixels.
- For unsupported or corrupted files, the “Not Supported File Format” message is displayed.
- If the files are sorted by Basic View, up to 1000 files can be displayed in each folder.
- MP3 files with DRM that have been downloaded from a non-free site cannot be played. Digital Rights Management (DRM) is a technology that supports the creation, distribution and management of the content in an integrated and comprehensive way, including the protection of the rights and interests of the content providers, the prevention of the illegal copying of contents, as well as managing billings and settlements.
- If more than 2 PTP devices are connected, you can only use one at a time.
- If more than two MSC devices are connected, some of them may not be recognized. A USB device that requires high power (more than 500mA or 5V) may not be supported.
- If an over-power warning message is displayed while you are connecting or using a USB device, the device may not be recognized or may malfunction.
- If the TV has been no input during time set in Auto Protection Time, the Screensaver will run.
- The power-saving mode of some external hard disk drives may be released automatically when connected to the TV.
- If a USB extension cable is used, the USB device may not be recognized or the files on the device may not be read.
- If a USB device connected to the TV is not recognized, the list of files on the device is corrupted or a file in the list is not played, connect the USB device to the PC, format the device and check the connection.
- If a file deleted from the PC is still found when Media Play is run, use the “Empty the Recycle Bin” function on the PC to permanently delete the file.
Move to the desired file using the up/down/right/left buttons and then press the ENTER or ▶ (Play) button. The file is played.

Supports the View Devices and Home in Media Play homepage.

Videos
Playing Video
- Press the ◀ or ▶ button to select Videos, then press the ENTER ▼ button in the Media Play menu.
- Press the ◀/▶/▲/▼ button to select the desired video in the file list.
- Press the ENTER button or ▶ (Play) button.
- The selected file is displayed on the top with its playing time.
- If video time information is unknown, play time and progress bar are not displayed.
- During video playback, you can search using the ◀ and ▶ button.

In this mode, you can enjoy movie clips contained on a Game, but you cannot play the Game itself.
• Supported Subtitle Formats
| Name | File extension | Format |
| MPEG-4 time-based text | .txt | XML |
| SAMI | .smi | HTML |
| SubRip | .srt | string-based |
| SubViewer | .sub | string-based |
| Micro DVD | .sub or .txt | string-based |

Advanced Features
Supported Video Formats
| File Extension | Container | Video Codec | Resolution | Frame rate (fps) | Bit rate (Mbps) | Audio Codec |
| *.avi*.mkv | AVI MKV | Divx 3.11 / 4.x / 5.1 / 6.0 | 1920x1080 | 6 ~ 30 | 8 | MP3 / AC3 / LPCM / ADPCM / DTS Core |
| XviD | 1920x1080 | 6 ~ 30 | 8 |
| H.264 BP / MP / HP | 1920x1080 | 6 ~ 30 | 25 |
| MPEG4 SP / ASP | 1920x1080 | 6 ~ 30 | 8 |
| Motion JPEG | 800x600 | 6 ~ 30 | 8 |
| *.asf | ASF | Divx 3.11 / 4.x / 5.1 / 6.0 | 1920x1080 | 6 ~ 30 | 8 | MP3 / AC3 / LPCM / ADPCM / WMA |
| XviD | 1920x1080 | 6 ~ 30 | 8 |
| H.264 BP / MP / HP | 1920x1080 | 6 ~ 30 | 25 |
| MPEG4 SP / ASP | 1920x1080 | 6 ~ 30 | 8 |
| Motion JPEG. | 800x600 | 6 ~ 30 | 8 |
| *.wmv | ASF | Window Media Video v9 | 1920x1080 | 6 ~ 30 | 25 | WMA |
| *.mp4 | MP4 | H.264 BP / MP / HP | 1920x1080 | 6 ~ 30 | 25 | MP3 / ADPCM / AAC |
| MPEG4 SP / ASP | 1920x1080 | 6 ~ 30 | 8 |
| XVID | 1920x1080 | 6 ~ 30 | 8 |
| *.3gp | 3GPP | H.264 BP / MP / HP | 1920x1080 | 6 ~ 30 | 25 | ADPCM / AAC / HE-AAC |
| MPEG4 SP / ASP | 1920x1080 | 6 ~ 30 | 8 |
| *.vro | VROVOB | MPEG1 | 1920x1080 | 24 / 25 / 30 | 30 | AC3 / MPEG / LPCM |
| MPEG2 | 1920x1080 | 24 / 25 / 30 | 30 |
| *.mpg*.mpeg | PS | MPEG1 | 1920x1080 | 24 / 25 / 30 | 30 | AC3 / MPEG / LPCM / AAC |
| MPEG2 | 1920x1080 | 24 / 25 / 30 | 30 |
| H.264 | 1920x1080 | 6 ~ 30 | 25 |
| *.ts*.tp*.trp | TS | MPEG2 | 1920x1080 | 24 / 25 / 30 | 30 | AC3 / AAC / MP3 / DD+ / HE-AAC |
| H.264 | 1920x1080 | 6 ~ 30 | 25 |
| VC1 | 1920x1080 | 6 ~ 30 | 25 |
Other Restrictions

NOTE
- If there are problems with the contents of a codec, the codec will not be supported.
- If the information for a Container is incorrect and the file is in error, the Container will not be able to play correctly.
- Sound or video may not work if the contents have a standard bitrate/frame rate above the compatible Frame/sec listed in the table above.
- If the Index Table is in error, the Seek (Jump) function is not supported.
| Video Decoder | Audio Decoder |
| Supports up to H.264, Level 4.1H.264 FMO / ASO / RS, VC1 SP / MP / AP L4 and AVCHD are not supported.XVID, MPEG4 SP, ASP :Below 1280 x 720: 60 frame maxAbove 1280 x 720: 30 frame maxGMC 2 over is not supported.H.263 is not supported.Only Samsung Techwin MJPEG is supported. | Supports up to WMA 7, 8, 9, STDWMA 9 PRO does not support 2 channel excess multi channel or lossless audio.WMA sampling rate 22050Hz mono is not supported. |
Playing movie continuously (Resume Play)
If you exit the playing movie function, the movie can be played later from the point where it was stopped.
If you press the ENTER button (Chaptering) during playing the file, you can explore scene divided into 5 chapters you want. If the index information is damaged or unsupported, you will not be able to use the Chaptering function.
- Select the movie file you want to play continuously by pressing the ◀ or ▶ button to select it from the file list section.
- Press the ▶ (Play) / ENTER ← button.
- Select Play Continuously (Resume Play) by pressing the Blue button. The Movie will begin to play from where it was stopped.

The Blue button is available when resuming play.

If the Continuous Movie Play Help function is set to On in the Settings menu, a pop-up message will appear when you resume play a movie file.

Music
Playing Music
- Press the ◀ or ▶ button to select Music, then press the ENTER □ button in the Media Play menu.
- Press the ◀/▶/▲/▼ button to select the desired Music file in the file list.
- Press the ENTER button or ▶ (Play) button.
- During music playback, you can search using the ◀ and ▶ button.
- (REW) and (FF) buttons do not function during play.
Only displays the files with MP3 and PCM file extension. Other file extensions are not displayed, even if they are saved on the same USB device.

If the sound is abnormal when playing MP3 files, adjust the Equalizer in the Sound menu. (An over-modulated MP3 file may cause a sound problem.)
Creating My Playlist
- Press the ◀/▶/▲/▼ button to select the tracks you want to add and press the TOOLS button.
- Select Add My Playlist.
- When the Add My Playlist menu appears, select New My Playlist.
To add to an old playlist, simply select the playlist you want to add music to.
- The newly created or updated playlist will be in the main Music page.
Playing My Playlist
Select the My Playlist folder and it will play automatically. Press the ▲ or ▼ button to select a different music file within the playlist.
Photos
Viewing a Photo (or Slide Show)
- Press the ◀ or ▶ button to select Photos, then press the ENTER button in the Media Play menu.
- Press the ◀/▶/▲/▼ button to select the desired photo in the file list.
- Press the ENTER button or ▶ (Play) button.
- While a photo list is displayed, press the ▶ (Play) / ENTER button on the remote control to start the slide show.
- All files in the file list section will be displayed in the slide show. – During the slide show, files are displayed in order.

Music files can be automatically played during the Slide Show if the Background Music is set to On.

The BGM Mode cannot be changed until the BGM has finished loading.

Playing Multiple Files
Playing selected video/music/photo files
- Press the Yellow button in the file list to select the desired file.
- Repeat the above operation to select multiple files.

NOTE
- The √ mark appears to the left of the selected files.
- To cancel a selection, press the Yellow button again.
- To deselect all selected files, press the TOOLS button and select Deselect All.
- Press the TOOLS button and select Play Selected Contents.

Playing the video/music/photo file group
- While a file list is displayed, move to any file in the desired group.
- Press the TOOLS button and select Play Current Group.
Sorting the file list
Press the Blue button in the file list to sort the files.
| Category | Operation | Videos | Music | Photos |
| Basic View | Displays the whole folder. You can view the photo by selecting the folder. | √ | √ | √ |
| Title | Sorts and displays the file title in Symbol/Number/Alphabet/Special order. | √ | √ | √ |
| Preference | Sorts and displays the file by preference. You can change the file preference in the file list section using the Green button. | √ | √ | √ |
| Latest Date | Sorts and shows files by the latest date. | √ | | √ |
| Earliest Date | Sorts and shows files by the earliest date. | √ | | √ |
| Artist | Sorts the music file by artist in alphabetical order. | | √ | |
| Album | Sorts the music file by album in alphabetical order. | | √ | |
| Genre | Sorts music files by the genre. | | √ | |
| Mood | Sorts music files by the mood. You can change the music mood information. | | √ | |
| Monthly | Sorts and shows photo files by month. | | | √ |
| Category | Operation | Videos | Music | Photos |
| Basic View | Displays the whole folder. You can view the photo by selecting the folder. | √ | √ | √ |
| Title | Sorts and displays the file title in Symbol/Number/Alphabet/Special order. | √ | √ | √ |
| Preference | Sorts and displays the file by preference. You can change the file preference in the file list section using the Green button. | √ | √ | √ |
| Latest Date | Sorts and shows files by the latest date. | √ | | √ |
| Earliest Date | Sorts and shows files by the earliest date. | √ | | √ |
| Artist | Sorts the music file by artist in alphabetical order. | | √ | |
| Album | Sorts the music file by album in alphabetical order. | | √ | |
| Genre | Sorts music files by the genre. | | √ | |
| Mood | Sorts music files by the mood. You can change the music mood information. | | √ | |
| Monthly | Sorts and shows photo files by month. | | | √ |
During file playback, press the TOOLS button.
| Category | Operation | Videos | Music | Photos |
| Title | You can move directly to another Title. | √ | | |
| Repeat Mode | You can play movie and music files repeatedly. | √ | √ | |
| Picture Size (Mode1 / Mode2 / Original) | You can adjust the picture size to your preference. | √ | | |
| Picture Setting | You can adjust the picture setting. (p. 16~22) | √ | | √ |
| Sound Setting | You can adjust the sound setting. (p. 22, 23) | √ | √ | √ |
| Subtitle Setting | You can play the video with Subtitles. This function only works if the subtitles are the same file name as the video. | √ | | |
| Audio | You can enjoy video in one of supported languages as required. The function is only enabled when stream-type files which support multiple audio formats are played. | √ | | |
| Stop Slide Show / Start Slide Show | You can start or stop a slide show. | | | √ |
| Slide Show Speed | You can select the slide show speed during the slide show. | | | √ |
| Slide Show Effect | You can set various slide show effects. | | | √ |
| Background Music | You can set and select background music when watching a slide show. | | | √ |
| Zoom | You can zoom into images in full screen mode. | | | √ |
| Rotate | You can rotate images in full screen mode. | | | √ |
| Home Background | You can move the file to the Media Play desktop. | | | √ |
| Information | You can see detailed information about the played file. | √ | √ | √ |
Settings
■ Background Setting: Select to display the background you want. ■ Continuous Movie Play Help (Resume Play) (On / Off): Select to display the help pop-up message for continuous movie playback. ■ Get DivX® VOD registration code: Shows the registration code authorized for the TV. If you connect to the DivX web site and register, you can download the VOD registration file. If you play the VOD registration using Media Play, the registration is completed.

For more information on DivX® VOD, visit "www.DivX.com."
■ Get DivX® VOD deactivation code: When DivX® VOD is not registered, the registration deactivation code is displayed. If you execute this function when DivX® VOD is registered, the current DivX® VOD registration is deactivated. ■ Information: Select to view information about the connected device.
Anynet+
Anynet+ is a function that enables you to control all connected Samsung devices that support Anynet+ with your Samsung TV's remote. The Anynet+ system can be used only with Samsung devices that have the Anynet+ feature. To be sure your Samsung device has this feature, check if there is an Anynet+ logo on it.
To connect to a Samsung Home Theater![graph LR A["TV Rear Panel"] --> B["Digital Audio Out (OPTICAL)"] A --> C["HDMI IN 4"] A --> D["2(ARC) 3"] A --> E["1(DM) 1"] B --> F["Optical Adapter (Supplied)"] C --> G["Optical Cable (Not Supplied)"] G --> H["HDMI Cable (Not Supplied)"] H --> I["Home Theater"] I --> J["Digital/AUDIO IN HDMI OUT H…](/content/2019/10/26820/images/247ef3193ce7f3b24ac40ed2073511eb3e909429bbefef0d2dd3e9466bcf57dc.jpg)
- Connect the HDMI IN (1(DVI), 2(ARC), 3 or 4) jack on the TV and the HDMI OUT jack of the corresponding Anynet+ device using an HDMI cable.
- Connect the HDMI IN jack of the Home Theater and the HDMI OUT jack of the corresponding Anynet+ device using an HDMI cable.

NOTE
- Connect the Optical cable between the DIGITAL AUDIO OUT (OPTICAL) jack on your TV and the Digital Audio Input on the Home Theater.
- The ARC function enables digital output of sound using the HDMI IN 2(ARC) port and can only be operated when the TV is connected to an audio receiver that supports the ARC function.
- When following the connection above, the Optical jack only outputs 2 channel audio. You will only hear sound from the Home Theater's Front, Left and Right speakers and the subwoofer. If you want to hear 5.1 channel audio, connect the DIGITAL AUDIO OUT (OPTICAL) jack on the DVD / Satellite Box (i.e. Anynet Device 1 or 2) directly to the Amplifier or Home Theater, not the TV.
- You can connect only one Home Theater.
- You can connect an Anynet+ device using the HDMI cable. Some HDMI cables may not support Anynet+ functions.
- Anynet+ works when the AV device supporting Anynet+ is in the standby or on status.
- Anynet+ supports up to 12 AV devices in total. Note that you can connect up to 3 devices of the same type.
The Anynet+ menu changes depending on the type and status of the Anynet+ devices connected to the TV.
| Anynet+ Menu | Description |
| View TV | Changes Anynet+ mode to TV broadcast mode. |
| Device List | Shows the Anynet+ device list. |
| (device_name) MENU | Shows the connected device menus. E.g. If a DVD recorder is connected, the disc menu of the DVD recorder will appear. |
| (device_name) INFO | Shows the play menu of the connected device. E.g. If a DVD recorder is connected, the play menu of the DVD recorder will appear. |
| Recording: (*recorder) | Starts recording immediately using the recorder. (This is only available for devices that support the recording function.) |
| Stop Recording: (*recorder) | Stops recording. |
| Receiver | Sound is played through the receiver. |
If more than one recording device is connected, they are displayed as (*recorder) and if only one recording device is connected, it will be represented as (*device_name).
Setting Up Anynet+

MENU → Application → Anynet+ (HDMI-CEC) → ENTER
Setup
Anynet+ (HDMI-CEC) (Off / On): To use the Anynet+ Function, Anynet+ (HDMI-CEC) must be set to On.
When the Anynet+ (HDMI-CEC) function is disabled, all the Anynet+ related operations are deactivated.
Auto Turn Off (No / Yes): Setting an Anynet+ Device to turn off automatically when the TV is turned off.
The active source on the TV must be set to TV to use the Anynet+ function. Even if an external device is still recording, it may turn off.
Switching between Anynet+ Devices
- Anynet+ devices connected to the TV are listed.
If you cannot find a device you want, press the Red button to refresh the list.
- Select a device and press the ENTER button. You can switch to the selected device.
The Device List menu will only appear when you set Anynet+ (HDMI-CEC) to On in the Application menu.
- Switching to the selected device may take up to 2 minutes. You cannot cancel the operation during the switching operation.
- If you have selected external input mode by pressing the SOURCE button, you cannot use the Anynet+ function. Make sure to switch to an Anynet+ device by using the Device List.
Recording
You can make a recording of a TV Program using a Samsung recorder.
1. Select Recording.
When there are more than two recording devices
- When multiple recording devices are connected, the recording devices are listed. Select one recording device in the Device List.
When the recording device is not displayed, select Device List and press the Red button to search devices.
You can record the source streams by selecting Recording: (device_name). Pressing the ☐ (REC) button will record whatever you are currently watching. If you are watching video from another device, the video from the device is recorded. Before recording, check whether the antenna jack is properly connected to the recording device. To properly connect an antenna to a recording device, refer to the recording device's users manual.
Listening through a Receiver
You can listen to sound through a receiver (i.e Home Theater) instead of the TV Speaker.
1. Select Receiver and set to On.
If your receiver supports audio only, it may not appear in the device list. The receiver will work when you have properly connected the optical in jack of the receiver to the DIGITAL AUDIO OUT (OPTICAL) jack of the TV. When the receiver (i.e Home Theater) is set to On, you can hear sound output from the TV's Optical jack. When the TV is displaying a DTV (air) signal, the TV will send out 5.1 channel sound to the receiver. When the source is a digital component such as a DVD and is connected to the TV via HDMI, only 2 channel sound will be heard from the receiver.
NOTE
- You can only control Anynet+ devices using the TV remote control, not the buttons on the TV.
- The TV remote control may not work under certain conditions. If this occurs, reselect the Anynet+ device.
- The Anynet+ functions do not operate with other manufacturers' products.
Using the ARC function
You can listen to sound through a receiver connected HDMI cable without the need for a separate optical cable.
1. Select Receiver and set to On.
To use the ARC function, a receiver which supports the HDMI-CEC and ARC features must be connected to the HDMI IN 2 (ARC) port. To disable the ARC function, set the Receiver to Off. Even if the TV transmits the ARC signal continuously, the receiver will be blocked from receiving the signal.
| Problem | Possible Solution |
| Anynet+ does not work. | Check if the device is an Anynet+ device. The Anynet+ system supports Anynet+ devices only.Only one receiver (home theater) can be connected.Check if the Anynet+ device power cord is properly connected.Check the Anynet+ device's Video/Audio/HDMI cable connections.Check whether Anynet+ (HDMI-CEC) is set to On in the Anynet+ setup menu.Check whether the TV remote control is in TV mode.Check whether the remote control is Anynet+ compatible.Anynet+ doesn't work in certain situations. (Searching channels, operating Media Play or Plug & Play (initial setup), etc.)When connecting or removing the HDMI cable, please make sure to search devices again or turn your TV off and on again.Check if the Anynet+ Function of Anynet+ device is set on. |
| I want to start Anynet+. | Check if the Anynet+ device is properly connected to the TV and check if the Anynet+ (HDMI-CEC) is set to On in the Anynet+ Setup menu.Press the TOOLS button to display the Anynet+ menu and select a menu you want. |
| I want to exit Anynet+. | Select View TV in the Anynet+ menu.Press the SOURCE button on the TV remote control and select a non- Anynet+ device.Press √ CH ∧, PRE-CH, and FAV.CH to change the TV mode. (Note that the channel button operates only when a tuner-embedded Anynet+ device is not connected.) |
| The message “Connecting to Anynet+ device...” appears on the screen. | You cannot use the remote control when you are configuring Anynet+ or switching to a view mode.Use the remote control when the Anynet+ setting or switching to view mode is complete. |
| The Anynet+ device does not play. | You cannot use the play function when Plug & Play (initial setup) is in progress. |
| The connected device is not displayed. | Check whether or not the device supports Anynet+ functions.Check whether or not the HDMI cable is properly connected.Check whether Anynet+ (HDMI-CEC) is set to On in the Anynet+ setup menu.Search Anynet+ devices again.You can connect an Anynet+ device using the HDMI cable only. Some HDMI cables may not support Anynet+ functions.If connection is terminated because there has been a power interruption or the HDMI cable has been disconnected, please repeat the device scan. |
| The TV Program cannot be recorded. | Check whether the antenna jack on the recording device is properly connected. |
| The TV sound is not output through the receiver. | Connect the optical cable between TV and the receiver.The ARC function enables digital output of sound using the HDMI IN 2(ARC) port and can only be operated when the TV is connected to an audio receiver that supports the ARC function. |
Getting Started with Internet@TV

Internet@TV brings useful and entertaining contents and services directly from the web to your TV.

MENU → Application → Content View → Internet@TV → ENTER

Screen Display


NOTE
- Configure the network settings before using Internet@TV. For more information, refer to “Network Connection” (p. 30).
- Unsupported fonts within the provider's content will not display normally.
- Slow responses and/or interruptions may occur, depending on your network conditions.
- Depending on the region, English may be the only language supported for application services.
- This feature is not available in some locations.
- If you experience a problem using an application, please contact the content provider.
- According to circumstances of the contents provider, an application's updates or the application itself may be discontinued.
- Depending on your country's regulations, some applications may have limited service or not be supported.
Account Login
For an application with multiple accounts, use ◀ and ▶ to access the different accounts.
![Login. User account : admin. Password : . A Create [0-6] Enter PIN Cancel.](/content/2019/10/26820/images/afbe614674f9522a0937242729e87293cc37d71018393e7c16816a4923ec5a54.jpg)
For a more enjoyable application experience, register and log in to your account. For instructions on creating an account, refer to Settings → Internet@TV ID → Create.
- Press the Red button on the Internet@TV home page.
- Select the desired User account, then press the ENTER button.
If you want to create an account, press the Red button; then the create account OSD window will appear.
- After selecting User account, enter the Password using the number buttons on the remote control. When login succeeds, User account will be displayed on the screen.
Setting up Internet@TV
Settings
Create IDs and configure Internet@TV settings from this screen. Highlight Settings using the ▲ and ▼ buttons and press the ENTER button.

System Setup
Ticker Autorun (Off / On): You can set Ticker Autorun to come on when powering on the TV.
The Ticker application provides useful News, Weather, and Stock Market information. The Ticker application on Internet@TV must be downloaded to use this feature. Depending on your country, Ticker application may have a different service or not be supported.
Channel Bound Service (Off / On): Some channels support applications as an Internet data service, allowing you to access the Internet service while watching TV.
Only available if supported by the broadcaster.
Change the Service Lock password
The default password is "0-0-0-0." If you forget the password you created, press the following sequence of remote control buttons to reset the password to "0-0-0-0": POWER (off) → MUTE → 8 → 2 → 4 → POWER (on).
Reset: Resets Internet@TV settings to factory default settings.
Internet@TV ID
You can use this menu when creating and deleting the account. You can control your account including contents site's account information.
Create: Create an account and link it with desired service applications.
NOTE
• Maximum number of accounts is 10. • Maximum number of characters is 8.
Advanced Features
How to create Internet@TV ID
Before creating a User account, you should download the application first on the Samsung Apps.
- Using the ▲/▼/◄/► button, select Settings. Then press the ENTER ← button.
- Press the ▼ button to select Internet@TV ID, then press the ENTER◀ or ▶ button.
- Select Create. The Keypad screen will appear.
- The keypad OSD will be displayed on the screen.
Using the Keypad
Pressing the – button on the remote while you are using the Screen Keypad enables you to change the text fields to lower case, upper case, numbers and icons.
You can use this Screen Keypad in several Internet@TV applications.
Here is how to input characters.
4-1. For example, suppose that you want to input "105Chang". 4-2. Press the – button on the remote twice to change the input mode from lower case to numbers. 4-3. Press the 1, 0 and 5 button in numerical order. 4-4. Press the – button on the remote 3 times to change the input mode from numbers to upper case. 4-5. Press the 2 button on the remote 3 times to input C. 4-6. Press the – button on the remote 3 times to change the input mode from upper case to lower case. 4-7. Press buttons on the remote to input the rest of "Chang". When done, press the ENTER button.
- Using the number buttons, enter the User account and Password.
- Password must be numbers only.
- You can delete the entered character using the PRE-CH button.
- Using the ◀◀ (REW) or ▶▶ (FF) button, you can select the icon you want to enter in the icon keypad screen.
- Account created. You can use the services provided by all users of your Samsung TV with a single login by linking the users' account to the TV ID. If you want to register a service site ID, select Yes.
Service Site list will appear on the screen.
- Select Register of the Service Site you want, then press the ENTER button.
- Using number buttons, enter your application site ID and password. Then press the ENTER button.
- Registered successfully. If you want to add another service site, select Yes, then press the ENTER button and go to step 5.
- When completed, select OK, then press the ENTER button.
Manager
– Service Site: Register login information for service sites. - Change Password: Change account password. – Delete: Delete the account.
■ Service Manager: Delete and lock applications installed to Internet@TV.
Lock: Lock the application.
Accessing a locked application requires the password.
Delete: Delete the application.
■ Properties: Display information about Internet@TV. Use the Check the speed of your internet connection option to test your network connection.
Samsung Apps
Samsung Apps is a store for downloading applications to be used on Samsung TV/AV equipment.
Users can enjoy a variety of contents such as videos, music, photos, games, useful information etc. using the downloaded applications.
Additional applications will be available in the future.


Using the color buttons with the Samsung Apps.
• A Red (Login): To log in to the internet service. - Green (Thumbnail View): To change the view mode. - Blue (Sort by): To sort the applications by Featured, Most downloaded, Most recent or Name. - Return: Moves to previous menu.
Using the Samsung Apps by category
The following categories are available:
- What's New?: Displays newly registered applications.
- Video: Displays various video media such as movies, TV shows and short length videos.
- Sports: Displays various sports media such as match information, images and short length video.
- Game: Displays various games such as sudoku and chess.
- Lifestyle: Includes various lifestyle media services such as music, personal photo management tools and social networking such as Facebook and Twitter.
- Information: Includes various information services such as news, stocks and weather.
- Other: Includes other miscellaneous services.
- My Page: Displays the application list and your cyber cash balance.

Starting in the middle of 2010 (US and Korea only), you can purchase cyber-cash for buying applications through tv.samsung.com.
- Help: If you have questions about Internet@TV, check this section first.
Skype
Skype created a little piece of software that makes communicating with people around the world easy and fun. With Skype you can say hello or share a laugh with anyone, anywhere. And if both of you are on Skype, it's free. Communicate with people around the world!

For more information, download the Skype user's manual from “www.samsung.com.”

Advanced Features
Yahoo

Internet@TV provides an integrated Internet and television experience powered by the Yahoo!® Widget Engine. You can monitor financial stocks, share photos with friends and family, and track news and weather all through the Yahoo!® Widget Engine.
When running Internet@TV for the first time, you will be prompted to configure the basic settings. Depending on your country's regulations, some applications may have limited service or not be supported.
Screen Display
- Dock Mode

Welcome Banner: Shows your profile.
- D Blue (Viewport): Toggles between Viewport and Overlay modes.
- C Yellow (Edit Snippet): To edit snippets with a help window.
In Viewport mode, the TV or video plays in a scaled-down area with graphics outside. In overlay mode, the graphics are displayed on top of the TV or video.
Dock: Displays your snippets.
- Snippets are quick launch icons for your widgets.
PROFILE Widget and Widget Gallery cannot be deleted.

Widget logo and Current menu.
Contents List:
The current selection is highlighted in blue.
Displays the current page and total number of pages.
Controls:
- A Red: To close the widget. If you want to see the Dock mode, press the YAHOO! button.
- B Green: To change the widget's settings. • C Yellow: To manage your snippets. • D Blue: To size video to fit or display in full screen.
Some buttons may not be available with certain widgets.
Editing Snippets in the Dock
- Edit a snippet by selecting it in the dock and pressing the Yellow button.
- The snippet moves to the Second position and its tile slides up to show the following help text:
Using the color buttons with the dock mode.
• A Red (Delete): To remove the widget. Deleted widgets can be restored from Widget Gallery.
• D Blue (Move): To rearrange snippets.
• C Yellow (Done): To exit the Edit Snippet menu.
Set up user profiles through Profile Widget. You can set up multiple profiles, each with its own list of widgets. Use the Switch Profile option to switch to a different user profile.

There must be at least two registered profiles. For instructions on adding a profile, refer to Administrative Controls.
- Use the Profile Settings option to customize and protect your profile.
- User profiles can be customized with a unique name and avatar (a picture used to represent your profile).
- Your profile's name and avatar are displayed in the profile snippet in the dock.
- Protect your profile using the Create Profile PIN option.
- When setting up a new PIN, you can set a Security Question.

- The Profile Settings option limits access to the profile's widgets.
- If you forget your Profile PIN, answer your profile's Security Question.
- New widgets cannot be added to profiles with the Limit Profile indicator enabled.

Owner PIN must be set to use this feature. For instructions on setting Owner PIN, refer to Administrative Controls.
• System Settings allows you to:
- Change your Location and Zip Code (US only) to tailor contents specific to your region.
- Replay the tutorial that was shown during guided setup.
- Restore Factory Settings resets all widget settings and information.

If you cannot run Restore Factory Settings normally, or you cannot install or run specific widgets normally, press the remote control buttons in the following sequence to reset the Yahoo Service: POWER (on) → MUTE → 9 → 4 → 8 → EXIT → POWER (off) → POWER (on) → YAHOO! (If the Yahoo Service is displayed on the TV screen, you should stop the Yahoo Service using the EXIT button in advance.)
• From the Administrative Controls menu you can:
- Configure the Screen Saver timeout to avoid screen burn-in.
- Create an Owner PIN and set a Security Question to control other profiles.
- Create and configure a new profile with a unique set of widgets. – Delete an existing profile.
- Sign into Yahoo!® from the PROFILE Widget using your Yahoo! ID.
- If you have a Yahoo! ID, you can access personalized content using Yahoo! TV widgets.
- You will be automatically signed in to all installed Yahoo! TV widgets with your profile's Yahoo! ID.
- If you do not have a Yahoo! account, visit “www.yahoo.com” to create one.
- You may not be able to log in with an ID created through a Yahoo website in a country that does not support Internet@TV.
- About Profile Widget: Press the Green button to view a brief description of Profile Widget, Copyright Policy, Terms of Service, and Privacy Policy.
Use Yahoo!® Widget Gallery to add more widgets to your TV. View available TV widgets in the following categories:
■ Featured: Displays recommended widgets. ■ Latest: Displays the most recent widgets. ■ All widgets: Displays all widgets. ■ Categories: Displays all widgets by category.
To install a widget, select Add Widget to My Profile and press the ENTER button. The widget will be installed and become available in the dock.

- Widget Gallery Settings: Press the Green button.
- About Yahoo! Widget Gallery...: You can view brief information for the Widget Gallery, Copyright Policy, Terms of Service, and Privacy Policy.
- TV Widget Software: Displays the current version of the system software, and installed widgets.
- Create your own widgets through the Developer Settings menu. For more information, visit our developer site at http://connectedtv.yahoo.com/.
Troubleshooting for Internet@TV
| Problem | Possible Solution |
| Some application contents only appear in English. How can I change the language? | The Application content language may be different from the application user interface language.The ability to change the language depends on the service provider. |
| Some application services do not work. | Check with the service provider.Refer to the help website for application service provider information. |
| When a network error occurs, I can only use the setting menu. | If network connection doesn’t work, your service might be limited, as all functions except the setting menu are needed to connect to the internet. |
All content and services accessible through this device belong to third parties and are protected by copyright, patent, trademark and/or other intellectual property laws. Such content and services are provided solely for your personal noncommercial use. You may not use any content or services in a manner that has not been authorized by the content owner or service provider. Without limiting the foregoing, unless expressly authorized by the applicable content owner or service provider, you may not modify, copy, republish, upload, post, transmit, translate, sell, create derivative works, exploit, or distribute in any manner or medium any content or services displayed through this device.
YOU EXPRESSLY ACKNOWLEDGE AND AGREE THAT USE OF THE DEVICE IS AT YOUR SOLE RISK AND THAT THE ENTIRE RISK AS TO SATISFACTORY QUALITY, PERFORMANCE AND ACCURACY IS WITH YOU. THE DEVICE AND ALL THIRD PARTY CONTENT AND SERVICES ARE PROVIDED "AS IS" WITHOUT WARRANTY OF ANY KIND, EITHER EXPRESS OR IMPLIED. SAMSUNG EXPRESSLY DISCLAIMS ALL WARRANTIES AND CONDITIONS WITH RESPECT TO THE DEVICE AND ANY CONTENT AND SERVICES, EITHER EXPRESS OR, IMPLIED, INCLUDING BUT NOT LIMITED TO, WARRANTIES OF MERCHANTABILITY, OF SATISFACTORY QUALITY, FITNESS FOR A PARTICULAR PURPOSE, OF ACCURACY, OF QUIET ENJOYMENT, AND NON-INFRINGEMENT OF THIRD PARTY RIGHTS. SAMSUNG DOES NOT GUARANTEE THE ACCURACY, VALIDITY, TIMELINESS, LEGALITY, OR COMPLETENESS OF ANY CONTENT OR SERVICE MADE AVAILABLE THROUGH THIS DEVICE AND DOES NOT WARRANT THAT THE DEVICE, CONTENT OR SERVICES WILL MEET YOUR REQUIREMENTS, OR THAT OPERATION OF THE DEVICE OR SERVICES WILL BE UNINTERRUPTED OR ERROR-FREE. UNDER NO CIRCUMSTANCES, INCLUDING NEGLIGENCE, SHALL SAMSUNG BE LIABLE, WHETHER IN CONTRACT OR TORT, FOR ANY DIRECT, INDIRECT, INCIDENTAL, SPECIAL OR CONSEQUENTIAL DAMAGES, ATTORNEY FEES, EXPENSES, OR ANY OTHER DAMAGES ARISING OUT OF, OR IN CONNECTION WITH, ANY INFORMATION CONTAINED IN, OR AS A RESULT OF THE USE OF THE DEVICE, OR ANY CONTENT OR SERVICE ACCESSED BY YOU OR ANY THIRD PARTY, EVEN IF ADVISED OF THE POSSIBILITY OF SUCH DAMAGES.
Third party services may be changed, suspended, removed, terminated or interrupted, or access may be disabled at any time, without notice, and Samsung makes no representation or warranty that any content or service will remain available for any period of time. Content and services are transmitted by third parties by means of networks and transmission facilities over which Samsung has no control. Without limiting the generality of this disclaimer, Samsung expressly disclaims any responsibility or liability for any change, interruption, disabling, removal of or suspension of any content or service made available through this device. Samsung may impose limits on the use of or access to certain services or content, in any case and without notice or liability.
Samsung is neither responsible nor liable for customer service related to the content and services. Any question or request for service relating to the content or services should be made directly to the respective content and service providers.
Help Website

Accessing steps may be changed in the future.

It can be different links for special countries.
| Country | Website |
| USA | www.samsung.com → consumer products → Television → medi@2.0 → Internet@TV |
| Canada | www.samsung.com → consumer products → TV → medi@2.0 → Internet@TV |
| www.samsung.com → produits grand public → téléviseurs → medi@2.0 → Internet@TV |
| Mexico | www.samsung.com → productos de consumo → televisores → medi@2.0 → Internet@TV |
AllShare

MENU → Application → Content View → AllShare → ENTER
About AllShare
AllShare connects your TV and compatible Samsung mobile phones/ devices through a network. On your TV, you can view call arrivals, SMS messages and schedules set on your mobile phones. In addition, you can play media contents including videos, photos and music saved on your mobile phones or the other devices (such as your PC) by controlling them on the TV via the network. Additionally, you can use your TV for browsing web pages in your mobile phones.

For more information, visit “www.samsung.com” or contact the Samsung call center. Mobile devices may need additional software installation. For details, refer to each device’s user’s guide.
Setting Up AllShare
Setup
■ Message (On / Off): Enables or disables the message function (for call arrivals, SMS messages and schedules set on your mobile phones). ■ Media (On / Off): Enables or disables the media function. When the media function is on, it plays videos, photos and music from a mobile phone or other device that supports AllShare. ■ ScreenShare (On / Off): Enables or disables the ScreenShare function for using mobile phone as a remote control. ■ TV name: Sets the TV name so you can find it easily on a mobile device. If you select User Input, you can type on the TV using the OSK (On Screen Keyboard).


Shows a list of mobile phones or connected devices which have been set up with this TV for using the Message, Media, or ScreenShare function.

The Media function is available in all mobile devices which support AllShare.
- Allowed / Denied: Allows/Blocks the mobile phone. ■ Delete: Deletes the mobile phone from the list.

This function only deletes the name of the mobile from the list. If the deleted mobile device is turned on or tries to connect to the TV, it may appear on the list again.
Using the Message Function
Using this function, you view call arrivals, SMS messages and schedules set on the mobile phone through the alarm window while watching TV.

NOTE
- To disable the alarm window, set Message to Off in Setup of AllShare.
- If OK is selected, or if OK is not selected after the message has appeared three times, the message will be deleted. The message is not deleted from the mobile phone.
- The alarm window can be displayed while using some applications such as Media Play etc. To view the contents of a message, switch to TV viewing mode.
- When a message from an unknown mobile phone is displayed, select the mobile phone on the message menu in AllShare and select Denied to block the phone.
Message View
If a new SMS message arrives while you are watching TV, the alarm window appears. If you click the OK button, the contents of the message are displayed.
You can configure the viewing settings for SMS messages on your mobile phones. For the procedures, refer to the mobile phone manual. Some types of characters may be displayed as blank or broken characters.
Advanced Features
Call Arrival Alarm
If a call arrives while you are watching TV, the alarm window appears.
Schedule Alarm
While you are watching TV, the alarm window appears to display the registered event.

You can configure viewing settings for schedule contents on your mobile phones. For the procedures, refer to the mobile phone manual.

Some special characters may be displayed as blank or broken characters.
An alarm window appears informing the user that the media contents (videos, photos, music) sent from a mobile phone will be displayed on your TV. The contents are played automatically 3 seconds after the alarm window appears. If you press the RETURN or EXIT button when the alarm window appears, the media contents are not played.

NOTE
- If the media function executes for the first time, the warning popup window appears. Press the ENTER button to select Allow, then you can use Media function on that device.

- To turn off the media contents transmission from the mobile phone, set Media to Off in the AllShare setup.
- Contents may not be played on your TV depending on their resolution and format.
- The ENTER◀ and ◀ / ▶ buttons may not work depending on the type of media content.
- Using the mobile device, you can control the media playing. For details, refer to each mobile's user's guide.
- When you want to play media contents from your PC, select the PC icon on the main display of AllShare. Then the TV's Media Play menu automatically changes. For more detail information, refer to “Media Play” (p. 37).
Using ScreenShare Function
Using ScreenShare, you can browse various web contents provided by the mobile phone. For example, the image below displays an access page for contents on a mobile. You can read the mobile's files and view the phone book and calendar on the TV. Also, in the phone book, you can make a call to another person, or send an SMS.

NOTE
- You must have ScreenShare installed on your Samsung Mobile phone/device to use this feature.
- Doc Viewer can read files in doc format, but cannot modify them.
- The screen display may differ depending on the connected device.

Using your Samsung phone to control your TV Simply
Before you can use this feature, you must connect to a Samsung mobile phone that supports ScreenShare functions. When operating the TV with your mobile phone, only the POWER, -VOL+, √CH ∧ and MUTE buttons are supported.

Even if you keep pressing down on a control button (channel or volume) on the mobile phone, the value will only go up or down by one unit.
Assembling the Cables
Stand Type
1

2

3
Wall-Mount Type


Do not pull the cables too hard when arranging them. This may cause damage to the product's connection terminals.
Installing the Wall Mount
Attaching the Blanking Bracket
When installing the TV onto a wall, attach the Blanking Bracket as shown.

Preparing before installing Wall-Mount
To install a wall-mount from another manufacturer, use the Holder-Ring.

Installing the Wall Mount Kit
The wall mount kit (sold separately) allows you to mount the TV on the wall.
For detailed information on installing the wall mount, see the instructions provided with the wall mount. Contact a technician for assistance when installing the wall mount bracket. Samsung Electronics is not responsible for any damage to the product or injury to yourself or others if you elect to install the TV on your own.
Wall Mount Kit Specifications (VESA)
The wall mount kit is not supplied, but sold separately.
Install your wall mount on a solid wall perpendicular to the floor. When attaching to other building materials, please contact your nearest dealer. If installed on a ceiling or slanted wall, it may fall and result in severe personal injury.

NOTE
- Standard dimensions for wall mount kits are shown in the table below.
- When purchasing our wall mount kit, a detailed installation manual and all parts necessary for assembly are provided.
- Do not use screws that do not comply with the VESA standard screw specifications.
- Do not use screws that are longer than the standard dimension or do not comply with the VESA standard screw specifications. Screws that are too long may cause damage to the inside of the TV set.
- For wall mounts that do not comply with the VESA standard screw specifications, the length of the screws may differ depending on the wall mount specifications.
- Do not fasten the screws too strongly; this may damage the product or cause the product to fall, leading to personal injury. Samsung is not liable for these kinds of accidents.
- Samsung is not liable for product damage or personal injury when a non-VESA or non-specified wall mount is used or the consumer fails to follow the product installation instructions.
- Do not mount the TV at more than a 15 degree tilt. • Always use two people to mount the TV to a wall.
| Product Family | inches | VESA Spec. (A * B) | Standard Screw | Quantity |
| LED-TV [Ultra-Slim] | 19~22 | 75 X 75 | M4 | 4 |
| 23~29 | 200 X 100 | M8 |
| 32~37 | 200 X 200 |
| 40~55 | 400 X 400 |
| 56~65 | 600 X 400 |


Do not install your Wall Mount Kit while your TV is turned on. It may result in personal injury due to electric shock.
Anti-theft Kensington Lock
The Kensington Lock is not supplied by Samsung. It is a device used to physically fix the system when using it in a public place. The appearance and locking method may differ from the illustration depending on the manufacturer. Refer to the manual provided with the Kensington Lock for additional information on proper use.
Please find a “☑” icon on the rear of the TV. A Kensington slot is beside the “☑” icon.
To lock the product, follow these steps:
- Wrap the Kensington lock cable around a large, stationary object such as a desk or chair.
- Slide the end of the cable with the lock attached through the looped end of the Kensington lock cable.
- Insert the locking device into the Kensington slot on the product ①.
- Lock the lock.
These are general instructions. For exact instructions, see the User manual supplied with the locking device. The locking device has to be purchased separately. The location of the Kensington slot may be different depending on the TV model.
![graph TD A["<TV Rear>"] --> B["Lock Icon"] B --> C["<Optional>"] C --> D["Switch 1"] style A fill:#f9f,stroke:#333 style C fill:#ccf,stroke:#333](/content/2019/10/26820/images/cebad2a879cdc2465b2a0cb276b22d345521b6be5e2191620b165cea0e0fce53.jpg)
Securing the TV to the Wall

Caution: Pulling, pushing, or climbing on the TV may cause the TV to fall. In particular, ensure your children do not hang over or destabilize the TV; doing so may cause the TV to tip over, causing serious injuries or death. Follow all safety precautions provided on the included Safety Flyer. For added stability, install the anti-fall device for safety purposes, as follows.
Accessories
TV-Holder
Screw (M8xL19)
To prevent the TV from falling
- Remove the screw attached to the back of your TV, then connect the TV-Holder to the TV with the screw.

Make sure to only use the supplied screw.

- Firmly fasten the screw to the wall or cabinet where the TV is to be installed. Tie the TV-Holder attached to the TV and the screw fastened on the wall or cabinet so that the TV is fixed.
Only the screw needed to attach the holder to the TV is supplied. The screw to attach the Holder to the wall or cabinet must be purchased separately. We recommend purchasing a size M4xL20 wood screw. Install the TV close to the wall so that it does not fall. When attaching the TV to the wall, tie the cord level with the ground or slanted downwards for safety purposes. Check the cord occasionally to make sure it is secure. Before moving the TV, separate the connected cord first.


- Verify all connections are properly secured. Periodically check connections for any sign of fatigue or failure. If you have any doubt about the security of your connections, contact a professional installer.
Troubleshooting
If the TV seems to have a problem, first try this list of possible problems and solutions. If none of these troubleshooting tips apply, visit “www.samsung.com,” then click on Support, or call Samsung customer service at 1-800-SAMSUNG.
| Issues | Solutions and Explanations |
| Poor picture | First of all, please perform thePicture Testand confirm that your TV is properly displaying the test image.(go toMENU -Support - Self Diagnosis - Picture Test)(p. 28)If the test image is properly displayed, the poor picture may be caused by the source or signal. |
| The TV image does not look as good as it did in the store. | If you have an analog cable/satellite box, upgrade to an HD digital set top box. Use HDMI or Component cables to deliver HD (high definition) picture quality.Cable/Satellite subscribers: Try HD stations from the channel line up.Antenna connection: Try HD stations after performing Auto program.Many HD channels are up scaled from SD(Standard Definition) contents.Adjust the Cable/Sat box video output resolution to 1080i or 720p. |
| The picture is distorted: macro block error, small block, dots, pixelization. | Compression of video contents may cause picture distortion, especially in fast moving pictures such as sports and action movies.Low signal level can cause picture distortion. This is not a TV problem.Mobile phones used close to the TV (cca up to 1m) may cause noise in picture on analog and digital TV. |
| Color is wrong or missing. | If you're using Component connection, make sure the component cables are connected to the correct jacks. Incorrect or loose connections may cause color problems or a blank screen. |
| There is poor color or brightness. | Adjust thePictureoptions in the TV menu (go toPicture mode / Color / Brightness / Sharpness)(p. 16)AdjustEnergy Savingoption in the TV menu (go toMENU-Picture-Eco Solution-Energy Saving)(p. 16)Try resetting the picture to view the default picture settings (go toMENU-Picture-Picture Reset)(p. 22) |
| There is a dotted line on the edge of the screen. | If the picture size is set toScreen Fit, change it to16:9(p. 18).Change cable/satellite box resolution. |
| The picture is black and white. | If you are using an AV composite input, connect the video cable (yellow) to the Green jack of component input 1 on the TV. |
| When changing channels, the picture freezes or is distorted or delayed. | If connected to a cable box, please try to reset it. (reconnect the AC cord and wait until the cable box reboots. It may take up to 20 minutes)Set the output resolution of the cable box to 1080i or 720p. |
| 3D | |
| The 3D Active Glasses may not work properly if there is any other 3D product or electronic devices turned on near the glasses or TV. | If there is a problem, keep other electronic devices as far away as possible from the 3D Active Glasses. |
| You may notice a small amount of screen flickering when watching 3D images in poor light conditions (from a strobe light, etc.), or under a fluorescent lamp (50Hz ~ 60Hz) or 3 wavelength lamp. | If so, dim the light or turn the lamp off. |
| The ideal viewing distance should be three times or more the height of the screen. | We recommend sitting with viewer's eyes on a level with the screen. |
| If you leave 3D glasses on, battery lifespan is shortened. | Turn off 3D glasses while not using them. |
Other Information
| Issues | Solutions and Explanations |
| Sound Problem | First of all, please perform theSound Testto confirm that your TV audio is properly operating.(go toMENU -Support -Self Diagnosis -Sound Test)(p. 28)If the audio is OK, the sound problem may caused by the source or signal. |
| There is no sound or the sound is too low at maximum volume. | Please check the volume of the device (Cable/Sat Box, DVD, Blu-ray etc) connected to your TV. |
| The picture is good but there is no sound. | Set theSpeaker Selectoption toTV Speakerin theSoundmenu (p. 23).If you are using an external device, make sure the audio cables are connected to the correct audio input jacks on the TV.If you are using an external device, check the device's audio output option (ex. you may need to change your cable box's audio option to HDMI when you have a HDMI connected to your TV).If you are using a DVI to HDMI cable, a separate audio cable is required.If your TV has a headphone jack, make sure there is nothing plugged into it.Reboot the connected device by reconnecting the device's power cable. |
| The speakers are making an inappropriate noise. | Check cable connections. Make sure a video cable is not connected to an audio input.For antenna or Cable connections, check the signal strength. Low signal level may cause sound distortion.Perform theSound Testas explained above. |
| No Picture, No Video |
| The TV won't turn on. | Make sure the AC power cord is securely plugged in to the wall outlet and the TV.Make sure the wall outlet is working.Try pressing thePOWERbutton on the TV to make sure the problem is not the remote. If the TV turns on, refer to “Remote control does not work” below. |
| The TV turns off automatically. | Ensure theSleep Timeris set toOffin theSetupmenu (p. 24).If your PC is connected to the TV, check your PC power settings.Make sure the AC power cord is plugged in securely to the wall outlet and the TV.When watching TV from an antenna or cable connection, the TV will turn off after 10 - 15 minutes if there is no signal. |
| There is no picture/video. | Check cable connections (remove and reconnect all cables connected to the TV and external devices).Set your external device's (Cable/Sat Box, DVD, Blu-ray etc) video outputs to match the connections to the TV input. For example, if an external device's output is HDMI, it should be connected to an HDMI input on the TV.Make sure your connected devices are powered on.Be sure to select the TV's correct source by pressing theSOURCEbutton on the remote control.Reboot the connected device by reconnecting the device's power cable. |
| RF(Cable/Antenna) Connection |
| The TV is not receiving all channels. | Make sure the coaxial cable is connected securely.Please tryAuto Programto add available channels to the channel list. Go toMENU -Channel -Auto Programthen select Auto and make sure the correct Cable TV signal type is set in the menu.There are 3 options (STD, HRC andIRC)(p. 14)Verify the Antenna is positioned correctly. |
| No Caption on digital channels. | Check Caption Setup menu. Try changingCaption Mode Service1to CC1(p. 26).Some channels may not have caption data. |
| The picture is distorted: macro block error, small block, dots, pixelization. | Compression of video contents may cause picture distortion, especially with fast moving pictures such as sports and action movies.A low signal can cause picture distortion. This is not a TV problem. |
| PC Connection |
| A “Mode Not Supported” message appears. | Set your PC's output resolution so it matches the resolutions supported by the TV (p. 12). |
| “PC” is always shown on the source list, even if a PC is not connected. | This is normal; “PC” is always shown on the source list, regardless of whether a PC is connected. |
| The video is OK but there is no audio. | If you are using an HDMI connection, check the audio output setting on your PC. |
| Network Connection |
| The wireless network connection failed. | The Samsung Wireless USB dongle is required to use a wireless network.Make sure the Network Connection is set toWireless(p. 32).Make sure the TV is connected to a wireless IP sharer (router). |
| Software Upgrade over the network fails. | Try network test inSetupmenu (p. 27).If you have latest SW version, SW upgrade will not proceed. |
| Others |
| Purple/green rolling horizontal bars and buzzing noise from the TV speakers with Component cable connection. | Remove the left and right audio connections from the set-top-box. If the buzzing stops, this indicates that the set-top-box has a grounding issue. Replace the Component video cables with an HDMI connection. |
| The picture won't display in full screen. | HD channels will have black bars on either side of the screen when displaying up scaled SD (4:3) contents.Black bars on the Top & Bottom will be shown on movies that have aspect ratios different from your TV.Adjust the picture size options on your external device or TV to full screen. |
| The remote control does not work. | Replace the remote control batteries with the poles (+/-) in the right direction.Clean the sensor's transmission window on the remote.Try pointing the remote directly at the TV from 5~6 feet away. |
| The cable/set top box remote control doesn't turn the TV on or off, or adjust the volume. | Program the Cable/Set remote control to operate the TV. Refer to the Cable/Set user manual for the SAMSUNG TV code. |
| Can not turn off theLight Effecton the front bezel. (Below SAMSUNG Logo) | Adjust theLight Effectoption in the setup menu. Options are : Off, In Standby, Watching TV and Always.Light Effectis not available on all models. |
| A “Mode Not Supported” message appears. | Check the supported resolution of the TV, and adjust the external device's output resolution accordingly. Refer to the resolution settings on page 12 of this manual. |
| Captionon TV menu is greyed out. | Captioncan not be selected in the TV menu when connected via HDMI or Component (p. 26).Captionmust be activated on the external device (p. 26). |
| There is a plastic smell from the TV. | This smell is normal and will dissipate over time. |
| The TVSignal Informationis unavailable in the Self Diagnostic Test menu. | This function is only available with digital channels from an Antenna / RF/Coax connection (p. 28). |
| The TV is tilted to the side. | Remove the base stand from the TV and reassemble it. |
| The channel menu is greyed out (unavailable). | TheChannelmenu is only available when the TV source is selected. |
| Your settings are lost after 30 minutes or every time the TV is turned off. | If the TV is in theStore Demo mode, it will reset audio and picture settings every 30 minutes. Change the settings fromStore Demo mode toHome Usemode in thePlug & Playprocedure. Press the SOURCE button to selectTVmode, and go to MENU → Setup → Plug & Play → ENTER( p. 8). |
| You have intermittent loss of audio or video. | Check the cable connections and reconnect them.Loss of audio or video can be caused by using overly rigid or thick cables. Make sure the cables are flexible enough for long term use. If mounting the TV to a wall, we recommend using cables with 90 degree connectors. |
| You see small particles when you look closely at the edge of the frame of the TV. | This is part of the product's design and is not a defect. |
| ThePIPmenu is not available. | PIPfunctionality is only available when you are using a HDMI, PC or Component source. |
| POP (TV's internal banner ad) appears on the screen. | SelectHome UseunderPlug & Playmode. For details, refer toPlug & PlayFeature (p. 8). |

This TFT LED panel uses a panel consisting of sub pixels which require sophisticated technology to produce. However, there may be a few bright or dark pixels on the screen. These pixels will have no impact on the performance of the product.
License

TheaterSound
TheaterSound, SRS and the Ⓞ symbol are trademarks of SRS Labs, Inc. TheaterSound technology is incorporated under license from SRS Labs, Inc.

DIGITAL PLUS
PULSE
Manufactured under license from Dolby Laboratories. Dolby and the double-D symbol are trademarks of Dolby Laboratories.


2.0+Digital Out
Manufactured under license under U.S. Patent #'s: 5,451,942; 5,956,674; 5,974,380; 5,978,762; 6,487,535 & other U.S. and worldwide patents issued & pending. DTS and the Symbol are registered trademarks. & DTS 2.0+ Digital Out and the DTS logos are trademarks of DTS, Inc. Product Includes software. © DTS, Inc. All Rights Reserved.

DivX Certified to play DivX video up to HD 1080p, including premium content.
ABOUT DIVX VIDEO: DivX® is a digital video format created by DivX, Inc. This is an official DivX Certified device that plays DivX video. Visit www.divx.
com for more information and software tools to convert your files into DivX video.
ABOUT DIVX VIDEO-ON-DEMAND: This DivX Certified® device must be registered in order to play DivX Video-on-Demand (VOD) content.
To generate the registration code, locate the DivX VOD section in the device setup menu.
Go to vod.divx.com with this code to complete the registration process and learn more about DivX VOD. Pat. 7,295,673; 7,460,688; 7,519,274
Open Source License Notice
In the case of using open source software, Open Source Licenses are available on the product menu.
Open Source Licence Notice is written only in English.
Specifications
| Panel native | 1920 x 1080 |
| Environmental Considerations | |
| Operating Temperature | 50°F to 104°F (10°C to 40°C) |
| Operating Humidity | 10% to 80%, non-condensing |
| Storage Temperature | -4°F to 113°F (-20°C to 45°C) |
| Storage Humidity | 5% to 95%, non-condensing |
| Stand Swivel (Left / Right) | -20° ~ 20° |
| Model Name | UN46C8000 | UN55C8000 |
| Screen Size(Diagonal) | 46 inches(45.9 inches measured diagonally) | 55 inches(54.6 inches measured diagonally) |
| Sound(Output) | 10 W X 2 | 15 W X 2 |
| Dimensions (WxDxH) | | |
| Body | 42.9 X 0.9 X 26.1 inches(1090.8 X 23.9 X 662.8 mm) | 50.5 X 0.9 X 30.4 inches(1282.0 X 23.9 X 772.0 mm) |
| With stand | 42.9 X 11.9 X 28.5 inches(1090.8 X 303.0 X 723.8 mm) | 50.5 X 11.9 X 32.8 inches(1282.0 X 303.0 X 832.7 mm) |
| Weight | | |
| Without Stand | 37.5 lbs (17.0 kg) | 48.5 lbs (22.0 kg) |
| With Stand | 42.3 lbs (19.2 kg) | 53.4 lbs (24.2 kg) |
Design and specifications are subject to change without prior notice. This device is a Class B digital apparatus. For information about power supply, and more about power consumption, refer to the label attached to the product.
Dimensions
■ Front view / Side view

(Unit: inches)
| Model name | 1 | 2 | 3 | 4 | 5 | 6 | 7 | 8 |
| UN46C8000 | 42.9 | 40.2 | 22.7 | 28.4 | 26.1 | 28.5 | 0.9 | 11.9 |
| UN55C8000 | 50.5 | 47.8 | 27.0 | 28.4 | 30.4 | 32.8 | 0.9 | 11.9 |
■ Jack panel detail / Rear view
![graph TD A["1"] --> B["2"] B --> C["3"] C --> D["4"] D --> E["5"] E --> F["6"] F --> G["7"] G --> H["8"] H --> I["9"] style A fill:#f9f,stroke:#333 style B fill:#f9f,stroke:#333 style C fill:#f9f,stroke:#333 style D fill:#f9f,stroke:#333 style E fill:#f9f,stroke:#333 style F fill:#f9f,stroke:#333 st…](/content/2019/10/26820/images/6005402f274973f9a7aa88ad6d4818821a9f6e3fda13c2e9f09ac403eaa24da2.jpg)
(Unit: inches)
| Model name | 1 | 2 | 3 | 4 | 5 | 6 | 7 | 8 | 9 |
| UN46C8000 | 15.7 | 15.7 | 29.4 | 4.0 | 3.1 | 9.7 | 4.5 | 11.9 | 1.0 |
| UN55C8000 | 15.7 | 15.7 | 35.5 | 4.2 | 3.7 | 9.9 | 4.8 | 122.9 | 2.0 |
NOTE: All drawings are not necessarily to scale. Some dimensions are subject to change without prior notice. Refer to the dimensions prior to performing installation of your TV. Not responsible for typographical or printed errors. © 2010 Samsung Electronics America, Inc
Index
A
| AllShare | 55 |
| Amplify | 22 |
| Antenna | 14 |
| Anynet+ | 44 |
| AUDIO OUT | 11 |
| Auto Adjustment | 22 |
| Auto Volume | 23 |
B
| Background Music | 43 |
| Balance L/R | 22 |
| Basic View | 42 |
| Batteries | 7 |
| Black Tone | 17 |
| Blanking Bracket | 58 |
| Brightness | 16 |
C
| Cable Tie | 4, 57 |
| Change PIN | 26 |
| Channel Menu | 14 |
| Clock | 24 |
| Color Tone | 18 |
| Component | 10 |
| Connecting to a PC | 12 |
| Connecting to an Audio Device | 11 |
D
| DIGITAL AUDIO OUT | 11, 44 |
| DivX® VOD | 43 |
| D-sub | 12 |
| Dynamic | 16 |
| Dynamic Contrast | 17 |
E
| Eco Sensor | 16 |
| Edit Name | 13 |
| Editing Channels | 15 |
| Energy Saving | 16 |
| Equalizer | 22 |
| External Speaker | 23 |
F
| FAV.CH button | 7, 14 |
| Favorite Channel | 14 |
| Film Mode | 19 |
| Fine Tune | 16 |
| Flesh Tone | 17 |
| Frequency | 12 |
H
| HDMI | 9, 44 |
| Home Theater | 11, 44 |
|
| Installation Space | 2 |
| Internet@TV | 48 |
L
M
| Media Play | 37 |
| Melody | 27 |
| Menu Transparency | 27 |
| Mono | 23 |
| Music | 41 |
N
| Navigate | 13 |
| Network Connection | 30 |
| Network Setup | 31 |
O
| ON/OFF button | 7 |
| Optimal resolution | 12 |
P
| Password | 49 |
| Photos | 42 |
| Picture Size | 18, 43 |
| PIP (Picture in Picture) | 28 |
| Plug & Play | 8 |
| Power Indicator | 6 |
R
| Receiver | 46 |
| Recording | 46 |
| Remote Control | 7 |
| Repeat Mode | 43 |
| RGB Only Mode | 17 |
| Rotate | 43 |
S
| Select All | 16 |
| Self Diagnosis | 28 |
| Sharpness | 16 |
| Signal Information | 28 |
| Sleep Timer | 24 |
| Slide Show | 42 |
| Software Upgrade | 29 |
| Source List | 13 |
| Speaker Select | 23 |
| Specifications | 64 |
| Standby mode | 6 |
| Symbol | 3 |
T
| Timer | 24 |
| Title | 42 |
| Tools | 3 |
| Troubleshooting | 61 |
| TV Speaker | 23 |
U
V
| Video Formats | 40 |
| Videos | 39 |
| Volume | 6 |
W
| Wall Mount | 58 |
| Warm | 18 |
| White Balance | 17 |
| Widget | 53 |
This page is intentionally left blank.
TV stand and screw (1 unit)
(BN96-10788B)

Cable holder (BN61-05596A)

Cable support (3 units)
(BN61-05373A)

Cable holder (BN61-05491A)

Ring support (4 units)
(BN61-05280A)

Antenna adapter (BN39-01154P)

TV adapter (BN39-01154H)

Support (1 unit)
NOTE
DIGITAL AUDIO OUT (OPTICAL)
![graph TD A["1(DVI)"] --> B["PCIN"] A --> C["PC/DVI AUDIO"] B --> D["Switch"] C --> D D --> E["Switch"] D --> F["Switch"] E --> G["Output"] F --> H["Output"]](/content/2019/10/26820/images/30e8adc0b844a914fccb985d806aaa5a525b8da01ee5c7bebabe861e1b1ac187.jpg)


Advanced Functions
1

2

3
Wall mount type


TheaterSound, SRS and the Ⓞ symbol are trademarks of SRS Labs, Inc. TheaterSound technology is incorporated under license from SRS Labs, Inc.

DIGITAL PLUS
PULSE
Manufactured under license under U.S. Patent #'s: 5,451,942; 5,956,674; 5,974,380; 5,978,762; 6,487,535 & other U.S. and worldwide patents issued & pending. DTS and the Symbol are registered trademarks. & DTS 2.0+ Digital Out and the DTS logos are trademarks of DTS, Inc. Product includes software. © DTS, Inc. All Rights Reserved.

DivX Certified to play DivX video up to HD 1080p, including premium content.
ABOUT DIVX VIDEO: DivX® is a digital video format created by DivX, Inc. This is an official DivX Certified device that plays DivX video. Visit www.divx.
com for more information and software tools to convert your files into DivX video.
ABOUT DIVX VIDEO-ON-DEMAND: This DivX Certified® device must be registered in order to play DivX Video-on-Demand (VOD) content.
To generate the registration code, locate the DivX VOD section in the device setup menu.
Go to vod.divx.com with this code to complete the registration process and learn more about DivX VOD. Pat. 7,295,673; 7,460,688; 7,519,274
This page is intentionally left blank.
Wall installation.
Table of Contents
Getting Started
Support (1EA)
Support Guide (1EA)
9EA (M4 X L8)

NOTE
![graph TD A["Ant In"] --> B["Component IN"] B --> C["Audio OUT"] D["Appareil"] --> E["Audio OUT"] F["Appareil"] --> G["Audio OUT"] H["Audio OUT"] --> I["Video OUT"] J["Audio OUT"] --> K["Video OUT"] style A fill:#f9f,stroke:#333 style D fill:#f9f,stroke:#333 style F fill:#f9f,stroke:#333 style H fill…](/content/2019/10/26820/images/1edf9f64b7ac92d83c5e38210a5d8579f0cbaa623983c62644eb2d4bb80ddf63.jpg)

DIGITAL AUDIO OUT (OPTICAL)
MENU → Support → ENTER
Legal Notice

Advanced Functions
[0~9] Enter PIN

1

2

3
Wall mounting


TheaterSound, SRS and the Ⓞ symbol are trademarks of SRS Labs, Inc.
TheaterSound technology is incorporated under license from SRS Labs, Inc.

DOLBY.
DIGITAL PLUS
PULSE
Manufactured under license under U.S. Patent #'s: 5,451,942; 5,956,674; 5,974,380; 5,978,762; 6,487,535 & other U.S. and worldwide patents issued & pending. DTS and the Symbol are registered trademarks. & DTS 2.0+ Digital Out and the DTS logos are trademarks of DTS, Inc. Product includes software. © DTS, Inc. All Rights Reserved.

DivX Certified to play DivX video up to HD 1080p, including premium content.
ABOUT DIVX VIDEO: DivX® is a digital video format created by DivX, Inc. This is an official DivX Certified device that plays DivX video. Visit www.divx.
com for more information and software tools to convert your files into DivX video.
ABOUT DIVX VIDEO-ON-DEMAND: This DivX Certified® device must be registered in order to play DivX Video-on-Demand (VOD) content.
To generate the registration code, locate the DivX VOD section in the device setup menu.
Go to vod.divx.com with this code to complete the registration process and learn more about DivX VOD. Pat. 7,295,673; 7,460,688; 7,519,274
(Unit: inches)
| Nom de modèle | 1 | 2 | 3 | 4 | 5 | 6 | 7 | 8 | 9 |
| UN46C8000 | 15.7 | 15.7 | 29.4 | 4.0 | 3.1 | 9.7 | 4.5 | 11.9 | 1.0 |
| UN55C8000 | 15.7 | 15.7 | 35.5 | 4.2 | 3.7 | 9.9 | 4.8 | 122.9 | 2.0 |
© 2010 Samsung Electronics America, Inc
Index
A
| Aff. de base | 42 |
| AllShare | 55 |
| Amplification | 22 |
| Antenne | 14 |
| Anynet+ | 44 |
| AUDIO OUT | 11 |
| Autodiagnostic | 28 |
B
This page is intentionally left blank.