USER MANUAL 1005 BERNINA
Printed in Switzerland
095CB00653681.04SSB
Important!
Safety instructions
SEV VDE (Official Testing Authorities in Switzerland and West Germany). The following safety instructions must be observed.
The moving needle is a source of danger (risk of injury to the fingers). Therefore, always watch your work.
- The sewing machine should be disconnected from the mains by removing the mains plug from the socket when carrying out any operations within the needle movement area, e.g. changing the needle, presser foot, stitch plate, bulb or when removing or replacing the lower thread bobbin or hook or when carrying out maintenance (cleaning and lubricating) and whenever work is interrupted or completed.
- Electrical repairs should only be carried out by a BERNINA dealer.
Index
Accessories. 14
Accessory box, 6
Blind hemming, 22
Bobbin
-winding.7
Bobbin case
-removing,8
Bulb-changng.29
Buttonholes
cutting open, 24
with gimp cord, 24
Buttonholes Model 1004
with gimp cord, 26
Darning, 27
withdaring ring,28
Details of the machine, 4
Fault prevention, 31
Faulty seams. 31
Feed-dog-lowering.10
Foot control unit, 5
Light, 5
Lower thread
breakage,31
bringing up, 10
Machine does not run, 31
Maintenance. 30
Needle
breakage 31
positions,18
table,13
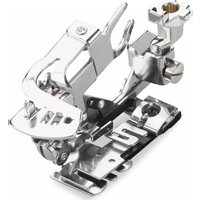
Overlock foot
neckband with overlock seam, 20
Oversewing edges, 19
Power/light switch, 5
Practical stitches, 15
Presser feet, 14
Reverse sewing, 18
Safety instructions, 2, 32
Satin stitch, 19
Sewing tips, 16
Skipped stitches, 31
Stitch selection, 17
Straight stitch, 18
Supplementary thread guide on handle, 9
Thread
and needle, 12
breakage,31
-- cutter, 16
Threading upper thread, 9
Vari-overlock seam, 20
Zig-zag-setting,19
Zips - sewing in, 21
Details of the machine
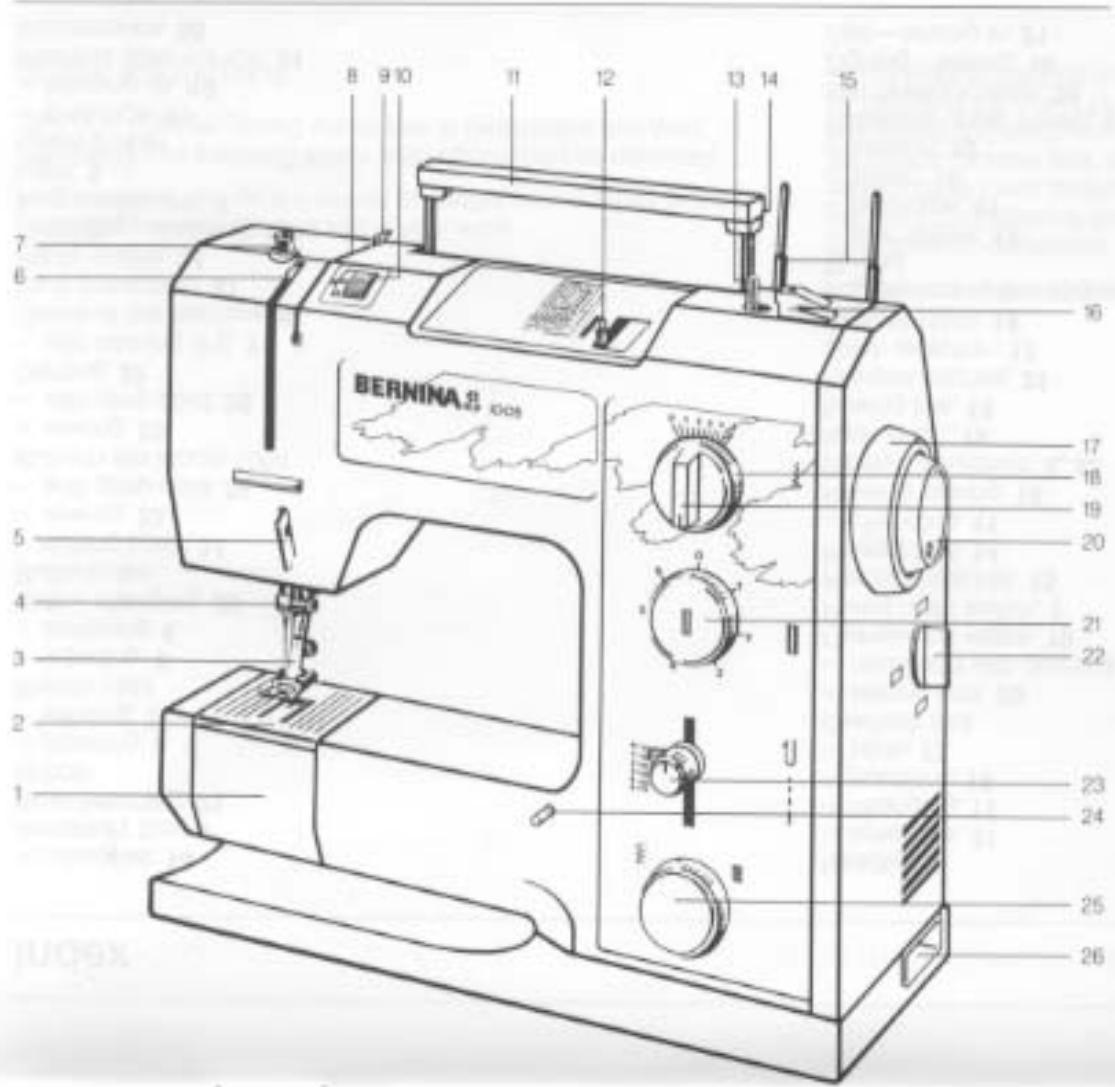
- Hinged front cover
Z Stich plate
3 Presser foot
4 Needle clamp
5 Thread regulator
6 Thread take-up level
7 Pre-tension stud
B Thread tension slot
9 Thread guide
10 Thread tension adjustment knob
11 Retractable carrying handle
12.5tch selector level
13 Bobbin spindle
14 Supplementary thread guide
15 Thread holder pins
16 Bobbin winder stop
- Handwheel
- Stitch width knob
19 Needle position knob
20 Handwheel release
21 Buttonhole knob (Model 1005 only)
22 Power/light switch
- Stretch length knob
24 Securing pins for sewing table
25 Sawing/Carning selector knob
26 Combined mains/foot control socket
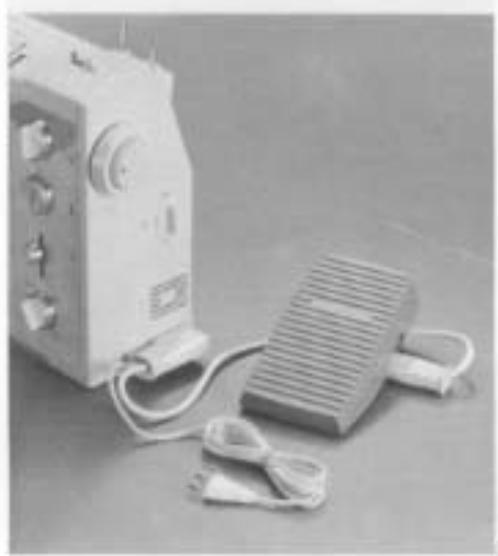
Mains cable, Foot control unit, Power switch, Sewing light
Connecting mains cable and foot control unit
1 Plug the specially combined mains/foot control cable into the machine. Plug the foot control cable into the foot control and the machine cable into the mains socket.
This is used to regulate the sewing speed. The sewing speed can be controlled from virtually 0 to the speed desired by varying the pressure on the plate of the foot control unit.
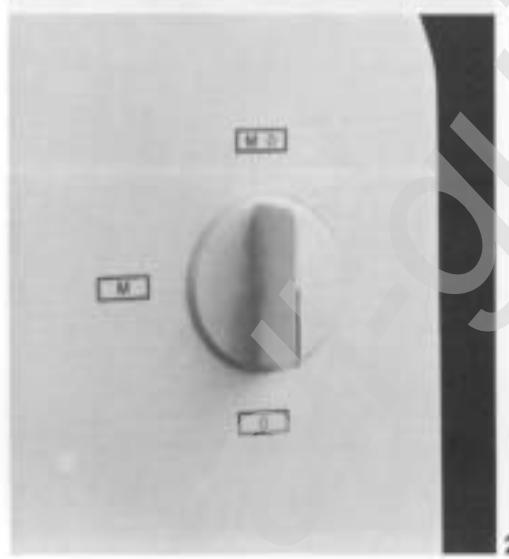
Power switch, sewing light
2
M
OFF The machine is switched off.
ON The machine is switched on.
The machine AND sewing light are switched on.
1
2
3
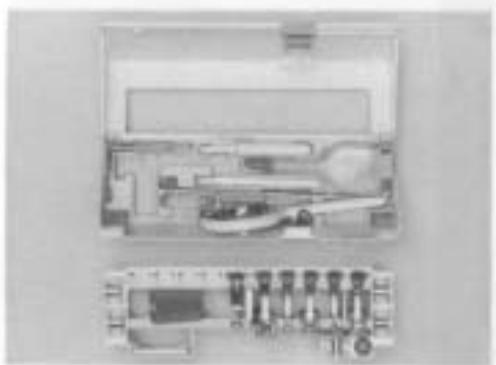
Accessory box \*
Accessory box
1 The accessories are neatly stored in the accessory box.
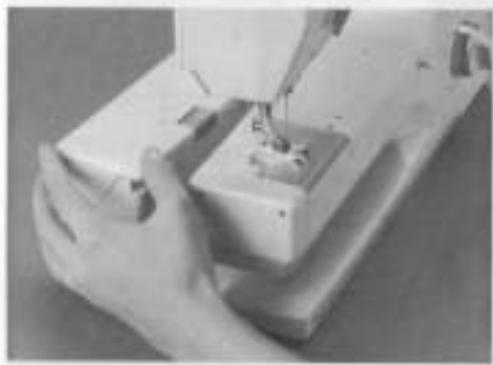
Removing the accessory box
2 Simply push back away from the machine.
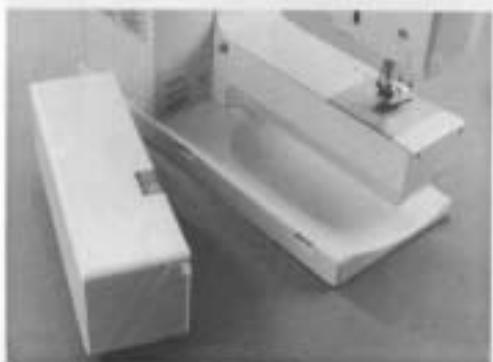
Fitting the accessory box onto the machine
3 The accessory box has two fixing lugs that fit into the base plate of the machine. Lay the box onto the base plate from the rear and press against the free arm until the fixing lugs engage in the holes provided.
- Additional accessory in some countries

1
2
3
Winding lower thread
Winding lower thread
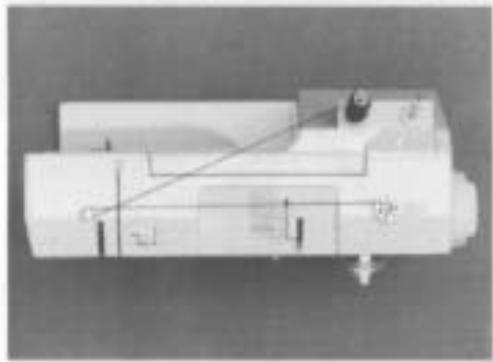
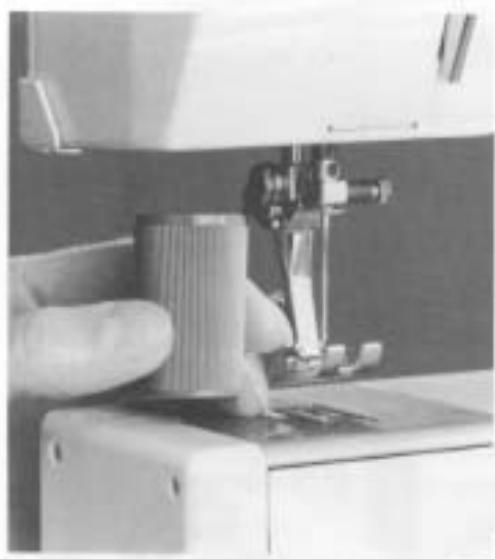
1 Holding the handwheel with the left hand, turn the handwheel release forward with the right hand. The sewing machine is now disengaged.
Place empty bobbin on the spindle and press it to the right. The bobbin winder is now engaged.
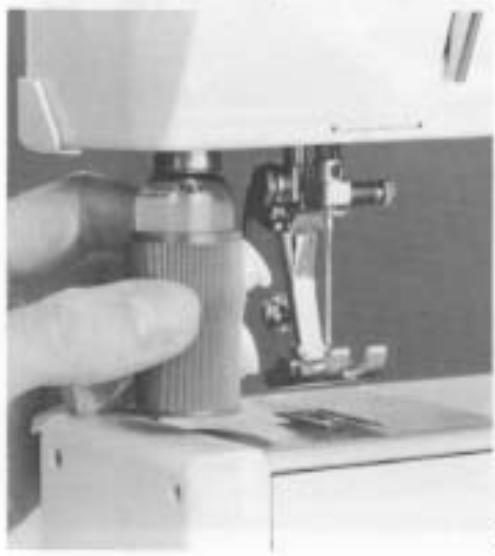
2 Take thread from the reel of thread on the thread holder pin and pass it clockwise around the pre-tension stud to the empty bobbin. Wind around the empty bobbin several times, again in a clockwise direction.
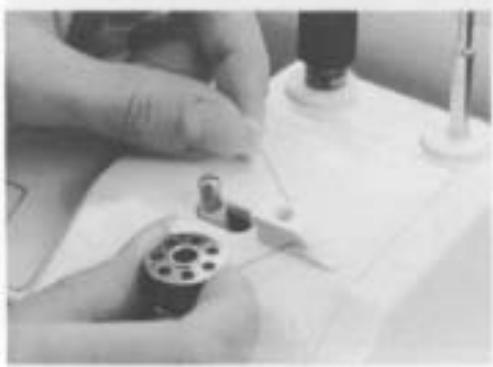
Press the foot control to start the motor. When the bobbin is full, the bobbin winder will stop automatically. Push the bobbin back to the left and remove.
3 When removing the bobbin, cut the thread by pulling it to the left against the bobbin winder stop.
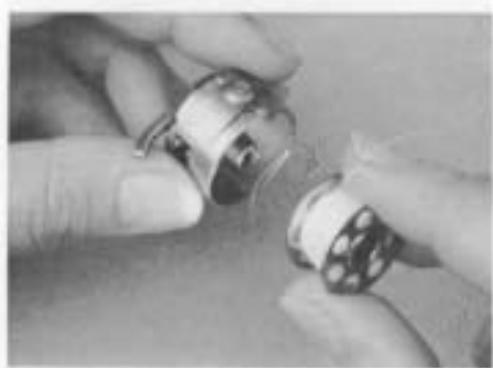
Inserting the bobbin, Removing and inserting the bobbin case
Inserting the bobbin
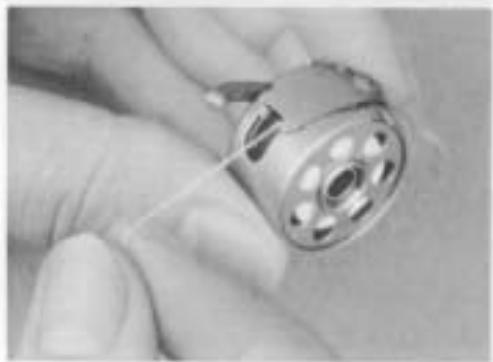
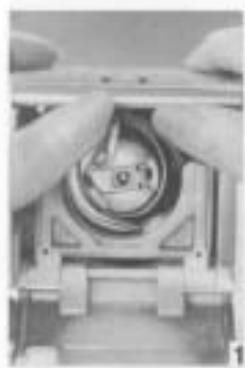
1 Hold the bobbin case in the left hand. Insert the bobbin with the thread running in a clockwise direction. See arrow.
2 Take the thread anti-clockwise to the slot. Pull the thread into the slot and under the spring, until it lies in the T-shaped slot at the end of the spring.
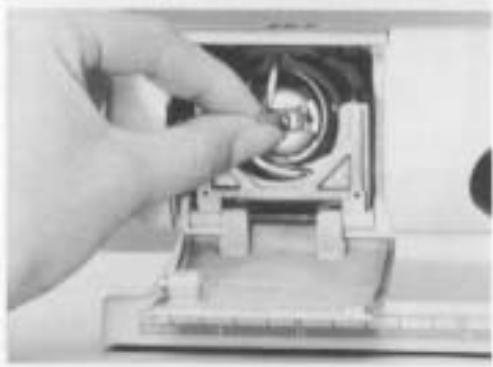
Removing the bobbin case
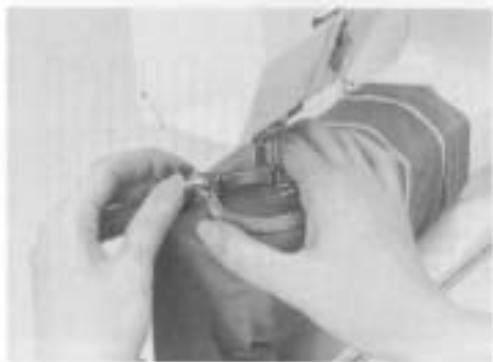
3 Raise the needle using the handwheel. Open the hinged front cover on the free arm. With the index finger and thumb of the left hand, pull the bobbin case latch forward and remove the bobbin case.
Inserting the bobbin case
Make sure that the needle is fully raised when inserting or removing the bobbin case. Hold the bobbin case as in Fig. 3. Insert so that the finger of the bobbin case points upwards, engaging in the notch of the hook. Close the hinged front cover.
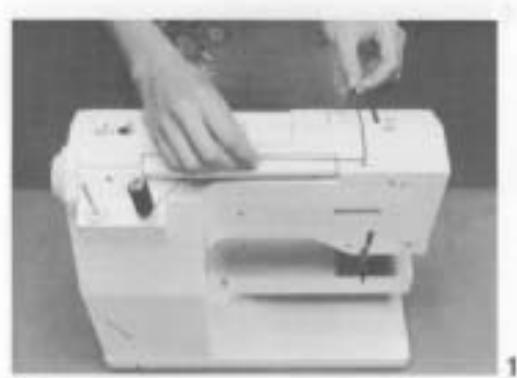
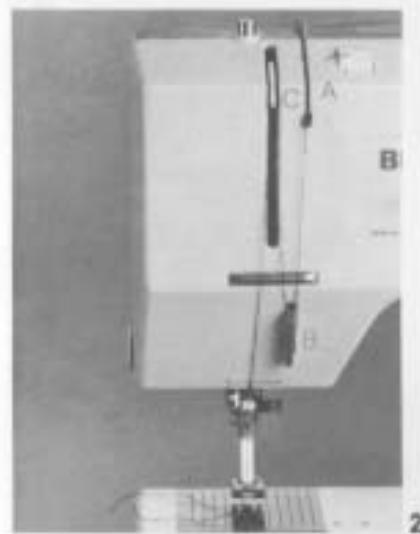
Threading the upper thread
Thread the upper thread
1 Check that the needle is in the raised position. Raise the presser foot. Place the reel of thread on one of the two thread holder pins. Firmly clip the thread into the thread guide on the top of the machine. Then pull it through the long slot (A) into the thread tension.
2 On the front of the machine, take the thread from the slot (A) downwards under the thread regulator (B), then up to the thread take-up lever at the top (C) and down again to the needle holder thread guide (D). Always thread the needle from front to back.
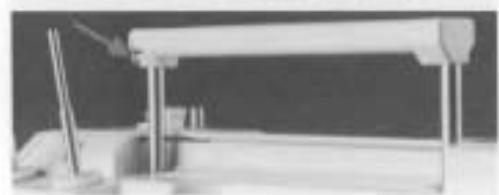
Supplementary thread guide on handle
3 When sewing with cross-wound reels, metal and silver threads, double or triple needles, take the thread through the special supplementary thread guide on the handle. This ensures perfect thread feed.
1
2
3
Bringing up the lower thread, Thread tension, Feed-dog
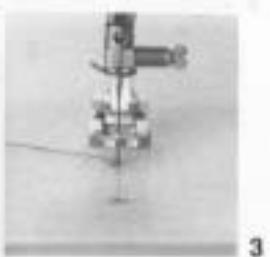
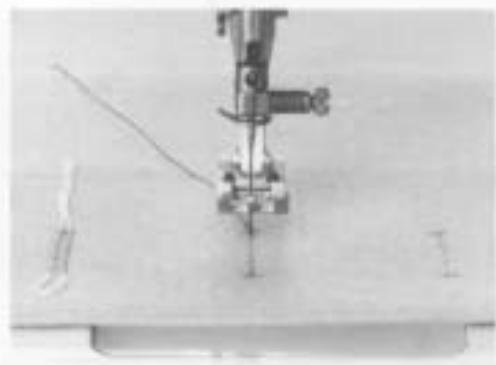
Bringing up the lower thread
Hold the upper thread loosely. Turn the handwheel towards you until the thread take-up lever is fully raised. Pull the upper thread so that the lower thread is brought up through the stitch plate hole. Take both threads through the slot in the presser foot and place to the side.
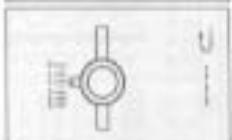
Thread tension
2 Normal tension = red mark (5) The thread tension should be adjusted for special sewing, e.g. sewing with Cordonnet. For a tighter tension, turn the tension dial to the next larger number and for a looser tension, turn it to the next smaller number.
Lowering the feed dog
3 For all normal sewing work, the feed-dog should be raised. Knob should point to symbol .For certain types of sewing.e.g.darning,sewing on buttons,the fabric should not be moved and the feed-dog must be lowered.Turn the knob to the symbol
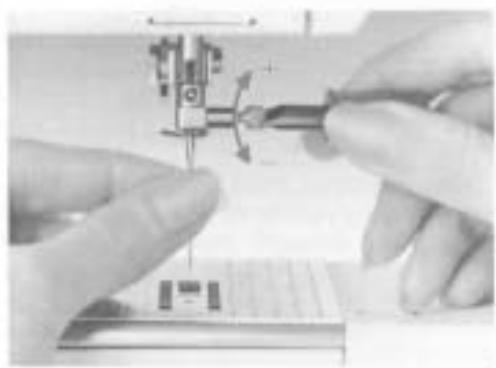
Changing the needle
1 Set the power switch to 0
Check that the needle is in the raised position. If not, turn the handwheel. Using the special screwdriver, loosen the needle clamp screw by half a turn (anti-clockwise) and remove the needle.
Insert a NEW needle - flat side to the rear. Push the needle right UP and tighten the needle clamp screw securely.
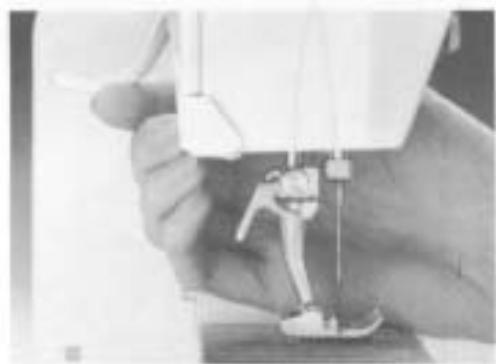
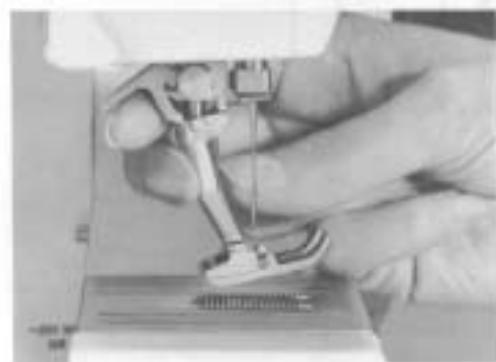
Changing presser feet
Turn the handwheel towards you until needle is fully raised.
2 Raise the presser foot.
3 Raise the clamping lever with the index finger of the right hand and using the middle finger and thumb, remove the pressor foot.
To attach the presser foot, the procedure is the same but press the clamping lever down with the index finger.
Needles / Thread
| Needle | 70 | 80 | 90 | 100 | 110-120 |
| Darning thread | * | * | | | |
| Embroidery thread 30 | | * | | | |
| Mercerised cotton sewing thread | | * | * | | |
| Synthetic sewing thread | | * | * | | |
| Coarse mercerised cotton Mercerised synthetic | | | * | * | |
| Buttonhole thread for top stitching (Cordonnet) | | | | * | * |
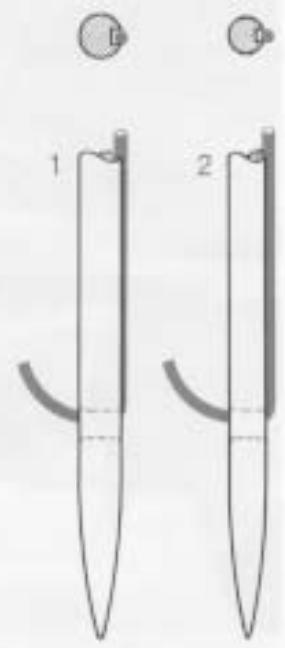
Important points to note concerning sewing machine needles
The needle size required depends on the thread selected. The needle must match the thread.
When sewing, the thread lies in the long groove to the front of the needle (Fig. 1). If the needle is too fine, the thread will not fit into the groove (Fig. 2) and skipped stitches will result.
Needle table
Standard needle
130/705 H (Normal point, slightly rounded)
All-purpose needle for woven synthetic and natural fibres, fine linen, chiffon, batiste, organdie, wool, velvet, decorative seams and embroidery.
Special needles
130/705-SES(Fine ball point)
Fine knits, also specially suitable for synthetics.
130/705 H-SUK (Medium ball point)
Heavier synthetic or natural fibre knits.
130/705 H-Stretch (Medium ball point)
Special needle for delicate or difficult stretch fabrics.
130/705 H-J (Extra fine point)
Twill, workwear, heavy linen, denim, canvas.
Penetrates dense fabrics more easily
130/705 H-LL or H-LR (Cutting point)
Leather, suee, calfskin, kid, pigskin, imitation leathers and
suedes, plastics, waxed fabrics.
Presser feet, Accessories
Presser feet are an important sewing aid
Successful sewing depends on the correct choice of presser foot. However, individual presser feet are not just for one particular type of work. They can also be used to simplify other tasks, e.g. Blind stitch foot for edge stitching.
Accessories 1005
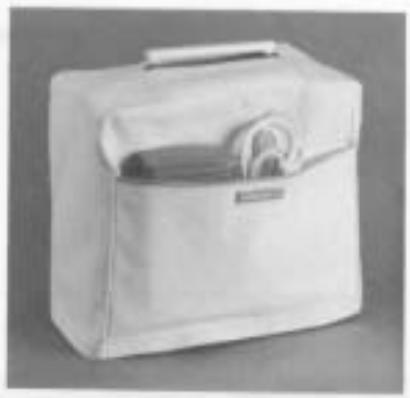
Fabric cover
Accessory box 6bobbins
Needle assortment
Seam ripper
Darning ring with Small screwdriver
Special screwdrive Cleaning brush Oiler filled Bulb holder
Presser foot No.0 Overlock foot No.2 Blind stitch foot No.5 Buttonhole foot No.3 Darning foot No.9Zip foot No.4
Accessories 1004
Fabric cover
Accessory box
3bobbins
Needle assortment
Seam ripper
Darning ring with a
Small screwdriver
Special screwdrive
Cleaning brush
Oiler filled
Bulb holder
Presser foot No.0 Overlock foot No.2 Blind stitch foot No.5 Buttonhole foot No.19 Darning foot No.9*
- Additional accessory in some countries
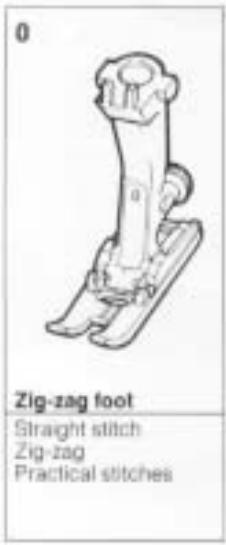
Range of applications Practical stitches
1 Straight stitch
All types of non-stretch fabric.
All straight stitch work
2 Zlg-zag
For most types of fabric.
All simple zig-zag work, e.g. overviewing, especially on fine fabrics. Sewing on elastic and lace.
3 Blind Stitch
For most types of fabric.
Brid hemming, shell edging on soft jersey and fine fabrics. decorative work
4 Universal stitch
For firmer knitted tabrics, felt, leather, etc.
Flat joining seams, visible items, patchwork, mending interlock fabrics, sewing on elastic, decorative seams.
5 Stretch stitch
wWwWw
For very stretchy fabrics. Very stretchy open seams for six, riding, climbing and hiking wear.
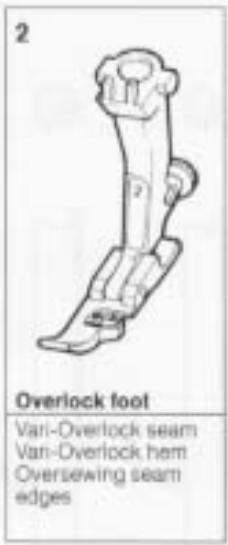
6 Vari-overlock
Primarily for fine synthetic and silk jersey, Helanca, fine cotton and wool.
Stretchy overlock seams and hems, pat ticularly suitable for sports underwear pyjamas,T-shirts, sweatshirts, jogging suits,etc.
7 Running stitch
For most types of fabric.
Darning with running stitch, mending woven fabrics, reinforcing edges, etc.
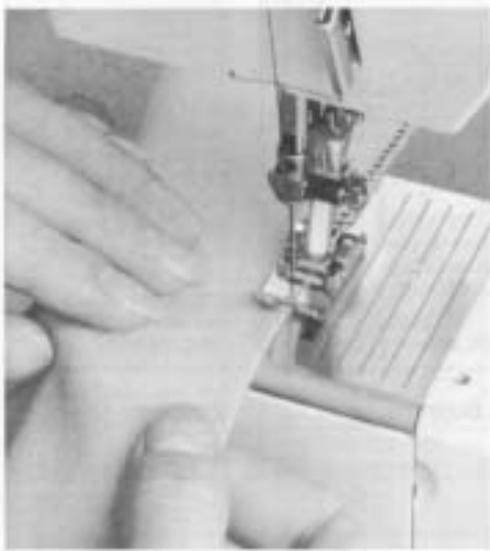
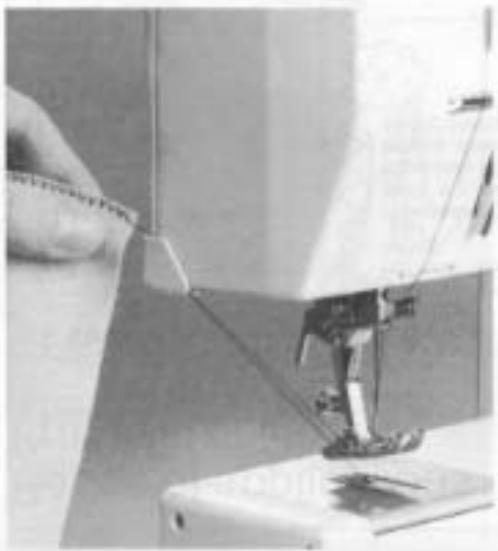
Sewing tips
A few hints
Set your Bernina far enough away from the table edge.
Correct sitting position and correct guiding of the work will make
Sit right in front of the needle, i.e. in front of the working area.
Guide the work as shown in Fig. 1.
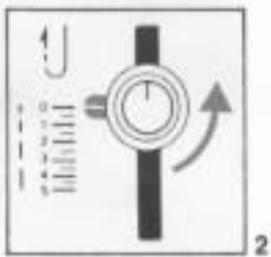
Thread cutter
To remove the work, raise the presser foot and check that the needle is raised. If not, turn the handwheel. Take work out to the rear left and hook both threads into the cutter (Fig. 2).
The thread ends free themselves when you start sewing again.
E
F*
G
H
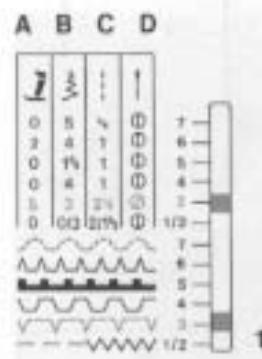
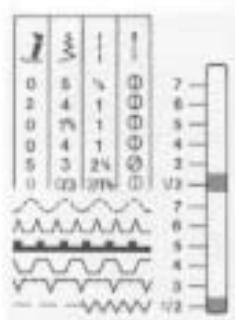
Selecting the stitches
Push the selector lever to the right to disengage and select desired stitch.
When the stitch is selected, the basic setting will be displayed at the same time
e.g.:Stitch No.3 Blind stitch
Presser foot No.5 Blind stitch foot
Stitch width: 3
Stitch length: 2%
Needle position: half right/right
The stitch width and length should be adjusted to suit the type of work and fabric. The presser foot display recommends the appropriate foot for easy work and perfect results.
Fig.1
A Presser foot
B Stiich width
C Stitch length
D Needle position
Fig. 2
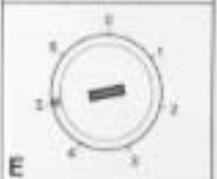
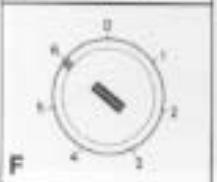
E Stitch width/needle position
FButtonhole求
G Stitch length (Normal stitch length is approx. 2)
H Feed-dog
not available on Model 1004
Straight stitch, Needle positions
| Presser foot: | 0 |
| Thread: | according to fabric |
| Needle: | according to thread |
| Stitch: | - |
| Stitch width: | 0 |
| Stitch length: | 2 (or as desired) |
| Needle position: | centre |
| Feed-dog: | sewing |
The stitch length is adjusted to suit the fabric and the work.
Stitch length for most normal work is 2.
Reverse sewing
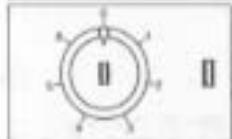
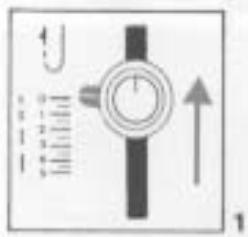
Push the stitch length knob upwards above 0 and hold until reverse sewing is completed
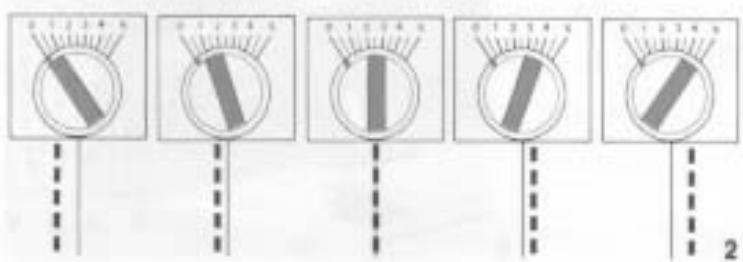
Five needle positions
2 The position of the stitch can be set to left and right in five positions with the needle position knob e.g., for blind hemming, edge stitching, sewing in zips.
For all normal sewing, the needle position is centre
1
Zig-zag, Oversewing edges, Satin stitch
| Presser foot: | 0 |
| Thread: | according to fabric |
| Needle: | according to thread |
| Stitch: | |
| Stitch width: | 1-5 |
| Stitch length: | 1-5 |
| Needle position: | centre |
| Feed-dog: | sewing |
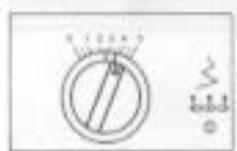
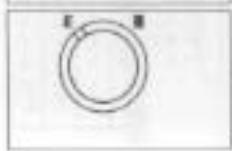
Setting zig-zag
The stitch width and length can be altered during sewing or when the machine is stopped. Needle must be out of the work when the machine is stopped.
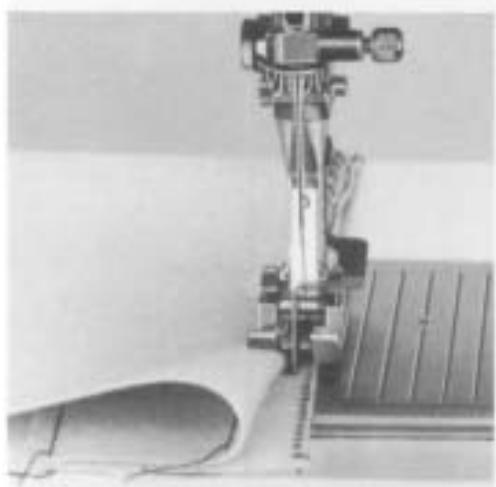
Oversewing edges
1 Generally, the zig-zag should not be too wide or the stitch length too long. Start by cutting a neat edge. Guide the edge of the fabric to the centre of the foot so that the needle goes alternately into the fabric and then over the edge.
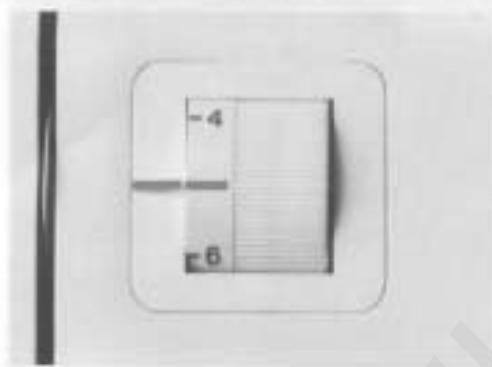
Satin stitch - close zig-zag
We recommend using the Embroidery foot No. 6 (additional accessory).
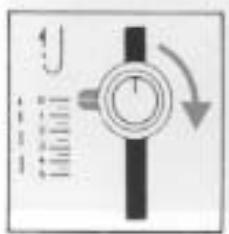
2 To set the stitch length, turn stitch length knob to the right until it locks (Fig. 2). By rotating HALF a turn to the left (mark at the bottom), the basic setting for satin stitch is obtained. Adjust the stitch density according to the fabric.
19
1
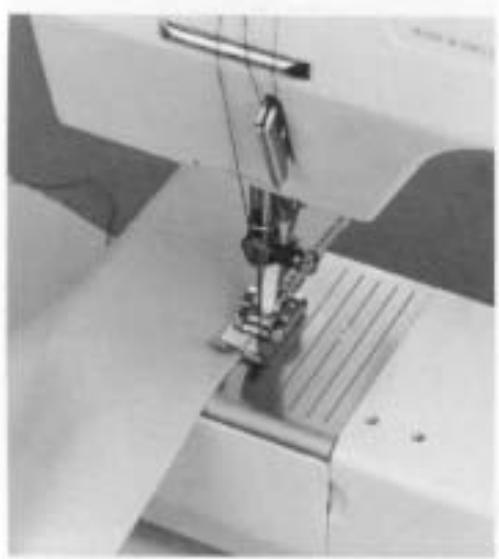
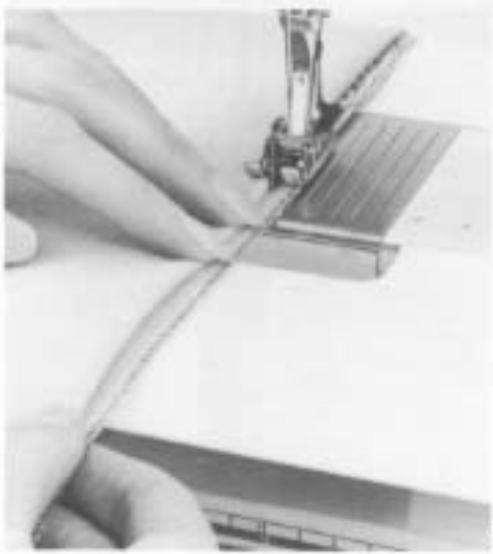
1 Neckband with overlock seam
For all types of jersey
| Presser foot: | 2 |
| Stitch: | AAAAAAAAAAAAAAAAA |
| Stitch width: | 4-5 |
| Stitch length: | 1 |
| Needle position: | right |
| Feed-dog: | sewing |
Fold the neatly cut neckband in half and press. Pin to the right side of the neckline, with the cut edges of the band exactly in line with the neckline edge. When sewing, guide the edges to the pin of the overlock foot.
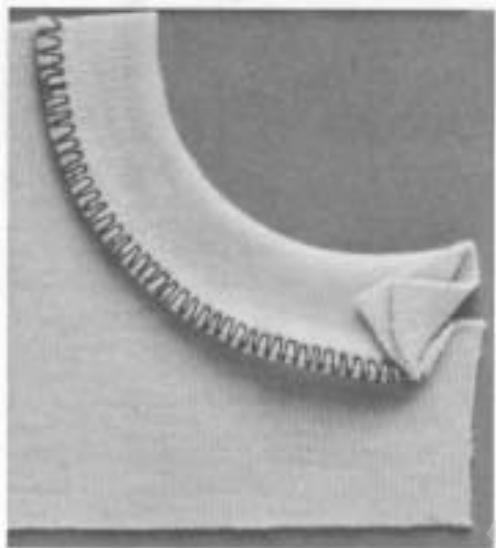
2 Vari-overlock seam
Elastic overlock seam for all fine jersey fabrics, dresses, blouses, underwear, nightwear etc.
| Presser foot: | 2 |
| Stitch: | AAAAAAAAAAAAAAAAA |
| Stitch width: | 4 |
| Stitch length: | 1 |
| Needle position: | right |
| Feed-dog: | sewing |
20
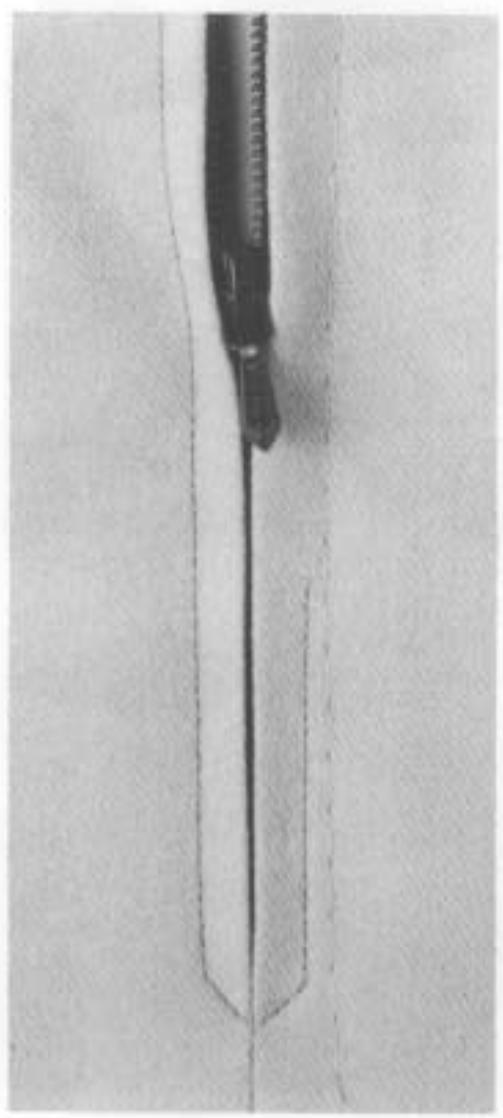
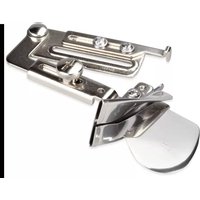
Sewing in zips
Zip fastener inserted flat
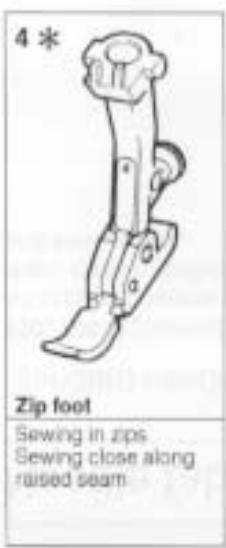
| Presser foot: | 4 * |
| Thread: | sewing thread |
| Needle: | 80 |
| Stitch: | - - - - - - - - - - - - - - - - - - - - - - - - - - - - - - - - - - - - - - - - - - - - - - - - - - - - - - - - - - - - - - - - - - - - - - - - - - - - - - - - - - - - - - - - - - - - - - - - - - - - - |
| Stitch width: | 0 |
| Stitch length: | approx. 2 |
| Needle position: | left/right |
| Feed-dog: | sewing |
Baste the zip into position so that the teeth are covered by the fabric. Sew in the zip, starting each side at the bottom and sewing to the top, once with needle position right and once with needle position left.
* Additional accessory in some countries
1
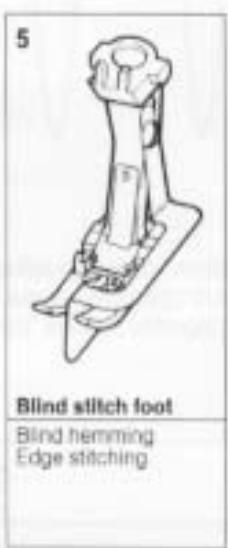
Blind hemming
Presser foot: 5
Thread: sewing/darning thread
Needle: 80-70
S1tch:
Stitch width: approx. 3
Stitch length: 2/4
Needle position: half right/right
Feed-dog: sewing
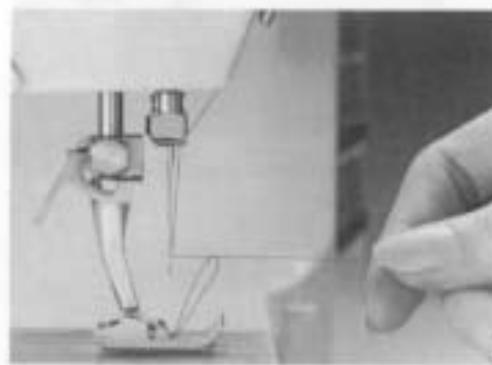
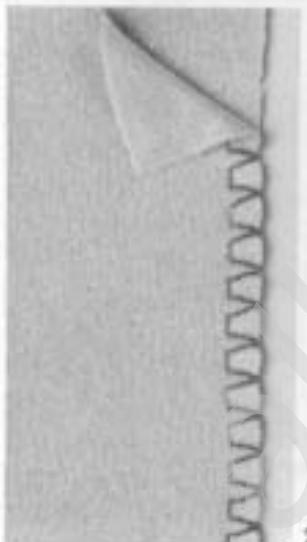
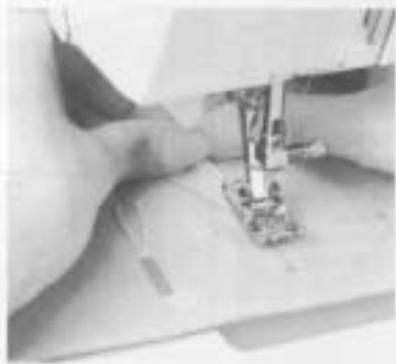
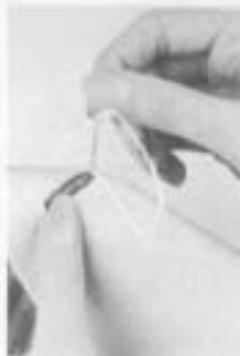
Sewing blind hems
The hem should be prepared in the same way as for sewing by hand. Overseaw raw edge, baste and press.
Depending on the thickness of the fabric, select needle position half right/right.
1
2 Position the hem under the foot as shown in Fig. 1. Sew slowly until the needle swings to the left. Using the handwheel, lower the needle until it is just about to enter the fabric and check that it is only just catching the fabric. If necessary, adjust the stitch width slightly - narrower if the needle is going in too far and a little wider if it is failing to catch sufficiently.
Always do a sewing test first!
22
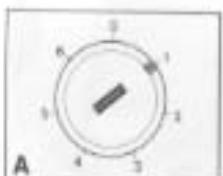
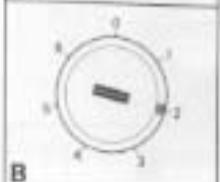
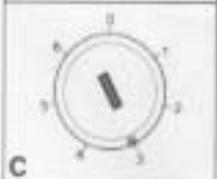
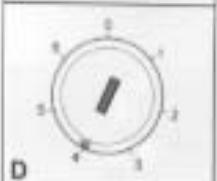
Knob to 1 Machine sews the first beef forwards
Knob to 2 Machine sews a reverse straight stitch.
Knlo to 3 Machine sews the bar tack.
Knob to 4 Machine sews the 2nd bead forwards.
Knob to 5 Machine sews the bar tack.
Knob to 6 Machine saws securing stitches
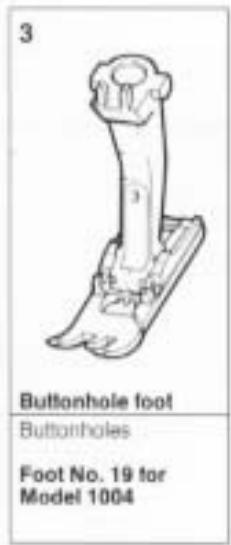
1005
| Presser foot: | 3 |
| Thread: | sewing/darning thread |
| Needle: | 80-70 |
| Stitch: | AAAAAAAAAAAAAAAA |
| Stitch width: | set automatically |
| Stitch length: | approx. % (satin stitch) |
| Needle position: | set automatically |
| Feed-dog: | sewing |
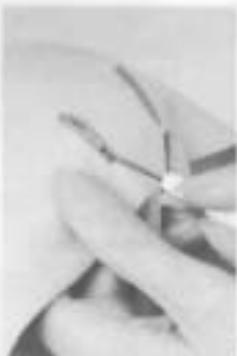
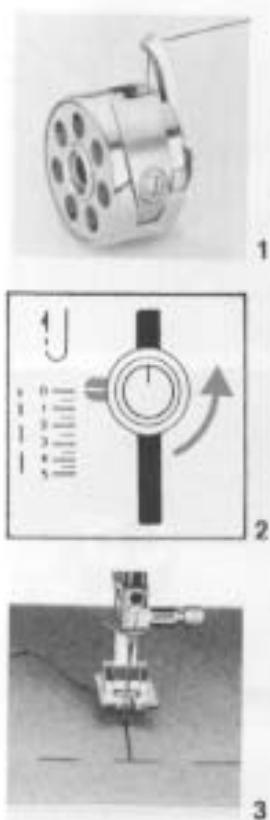
1 When sewing buttonholes, thread the lower thread through the finger of the bobbin case.
2 Set stitch length: Turn knob to the right until it looks. The mark will be at the top (Fig. 2). Stitch length is 0. By rotating half a turn to the left (mark at the bottom) the basic stitch length setting for buttonholes is obtained. Set the stitch density according to the fabric. Turn anti-clockwise for thicker fabrics, clockwise for finer fabrics. ALWAYS SEW A TRIAL BUTTONHOLE
3 Lay the fabric under the foot so that the edge of the fabric lies in front of the presser foot. Lower the needle into the fabric precisely at the start of the buttonhole. Lower the presser foot and sew the buttonhole in steps. Cut buttonhole open as shown on Page 24.
1
2
3
4
1005
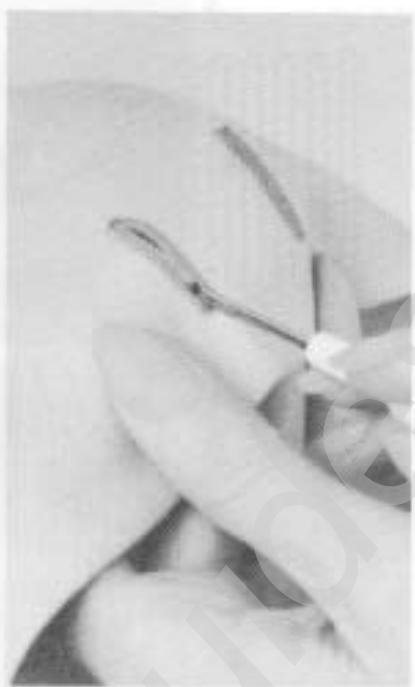
Gimp cord strengthens the buttonhole and is especially important when sewing any type of knitted fabric. The loop of the gimp will lie at the end of the buttonhole where the button will pull.
1 Lay the fabric under the foot and lower the needle into the fabric precisely at the start of the buttonhole. Do not lower the foot yet.
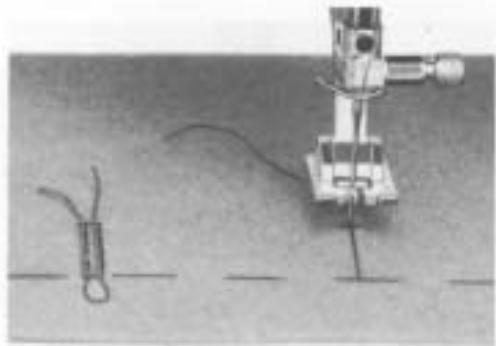
2 Hook the gimp cord over the centre prong of the buttonhole foot and take both ends back under the foot. Sew the buttonhole. At position 2 (reverse straight stitch), the cord comes away from the prong of the foot. Therefore, it is advisable to hold the loop of gimp down LIGHTLY with the finger.
3 Finally, pull the loop of gimp through. With knitted fabrics, thread the gimp ends through to the back with a coarse hand sewing needle and tie or sew in securely. In woven fabrics, the gimp ends can be simply cut off.
4 It is best to cut from each end of the buttonhole towards the centre to prevent cutting through a bar tack.
1004
| Presser foot: | 19 |
| Thread: | sewing thread/darning thread |
| Needle: | 80-70 |
| Stitch: | √√√√√√√√√√√√√√√√√√√√√√√√√√√√√√√√√√√√√√√√√√√√√√√√√√√√√√√√√√√√√√√√√√√√√√√√√√√√√√√√√√√√√√√√√√√√√√√√√√√√ |
| Stitch width: | 2 for beads
4 for bar tacks |
| Stitch length: | approx. 1/4 (satin stitch) |
| Needle position: | left |
| Feed-dog: | sewing |
1 When sewing buttonholes, thread the lower thread through the finger of the bobbin case.
2 Set stitch length. For method, see Page 23.
3 Select stitch width 2 and needle position LEFT. Check if the needle is in the centre of the presser foot. If not, turn the handwheel. Place the fabric under the presser foot and lower the needle so that it enters the fabric at the exact point where the buttonhole begins (Fabric edge should be in front of the presser foot.) Sew the first bead, lower the needle into the centre of the foot, raise the presser foot and turn the work. Lower the presser foot and raise the needle. Adjust stitch width to 4 for sewing the bar tack. Hold the work and sew a few bar tack stitches. Raise the needle. Adjust stitch width back to 2 and sew the second bead. Raise the needle. Adjust stitch width to 4, hold the work and sew a few bar tack stitches. Adjust stitch width to 0 and sew a few securing stitches.
Using the seam ripper, cut from each end of the buttonhole towards the centre.
1

2
3
1004
Gimp cord is especially important for all knitted fabrics. The thickness of the cord depends on the fabric. Suitable cords are: Perle yarn No. 8, thick hand sewing thread or fine crochet cord.
Position the work under the presser foot as illustrated. The loop of the gimp should lie at the end of the buttonhole where the button will pull.
Sewing with gimp cord
1 Using the handwheel, lower the needle to check if it is in the CENTRE of the presser foot. If not, turn the handwheel through one complete turn to raise the needle again. Place the fabric under the foot and lower the needle so that it enters the fabric at the exact point where the buttonhole begins. Do not lower the presser foot yet. Place the gimp to the left of the needle so that it lies in the left groove in the presser foot when the foot is lowered.
2 Sew the buttonhole. After sewing the first bead, lower the needle into the centre of the presser foot, raise the foot and turn the work so that the gimp lies round the needle. Lower the presser foot and continue as described.
3 When buttonhole is complete, pull the gimp loop through. With knitted fabrics, pull the ends through to the wrong side with a coarse hand sewing needle and knot or sew in securely. In woven fabrics, the gimp ends can be simply cut off.
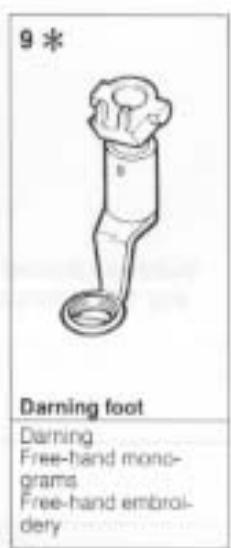
Darning
| Presser foot: | 9* |
| Thread: | Darning/machine embroidery thread |
| Needle: | 80-70 |
| Stitch: | - - - - - - - - - - - - - - - - - - - - - - - - - - - - - - - - - - - - - - - - - - - - - - - - - - - - - - - - - - - - - - - - - - - - - - - - - - - - - - - - - - - - - - - - - - - - - - - - - - - - - |
| Stitch width: | 0 |
| Stitch length: | 0 |
| Needle position: | centre |
| Feed-dog: | lowered |
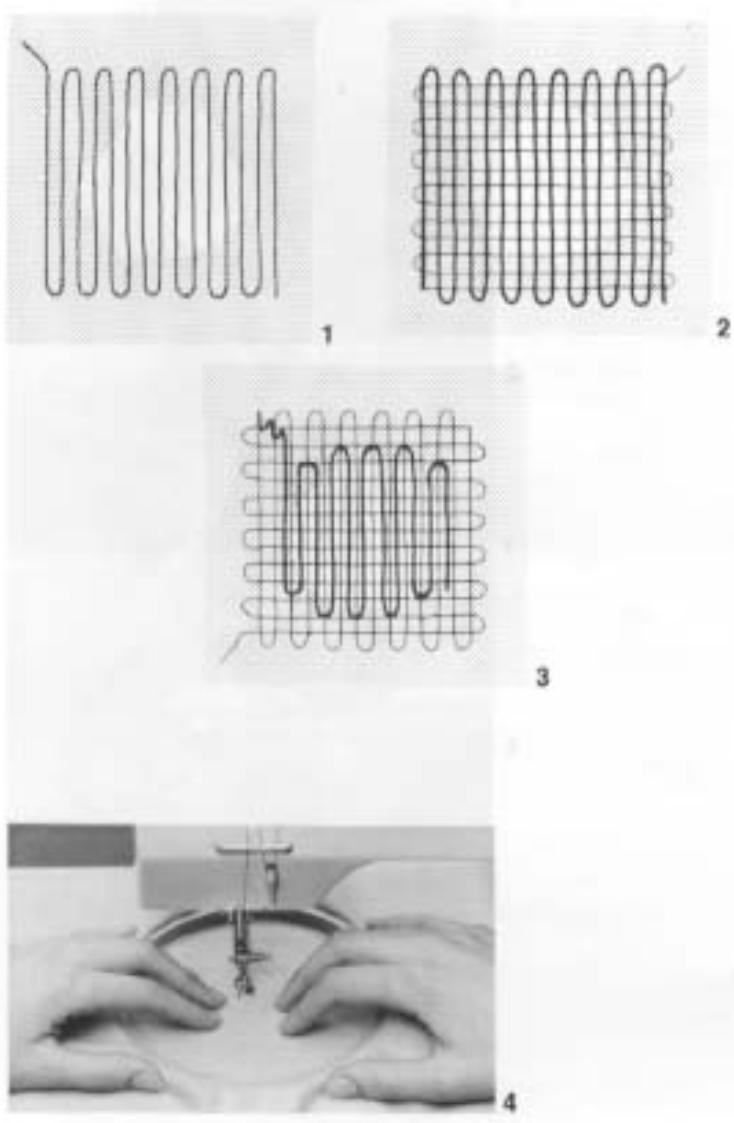
Use the sewing table. Whenever possible, use a darning ring. Lower the feed-dog. Always work from left to right, moving up and down over the hole. It is important to guide evenly when darning. Guide the ring as shown in Fig. 4.
Darning technique
The three steps:
1 Work across hole then turn work through 90^
2 Work again from left to right then turn work through 180°.
3 Fill in the darn, but only across the "hole". The stitches will be in the same direction so that they blend in with the second row.
- Additional accessory in some countries
1
3
Darning with small darning ring
The small darning ring* is particularly practical for darning small torn/worn areas in fine fabrics and in fine underwear of all kinds, fine socks and pullovers.
Stretching the work
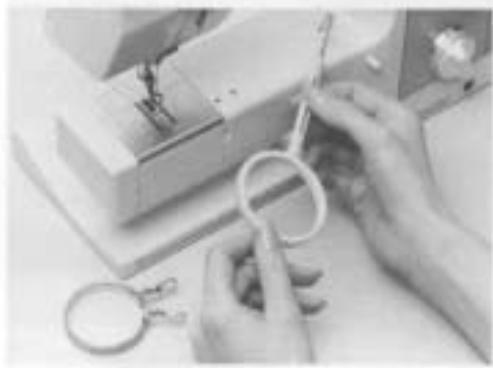
1 Fit the darning ring without the spring clip onto the free arm (Fig. 1). Push the darning ring as far out to the left as possible
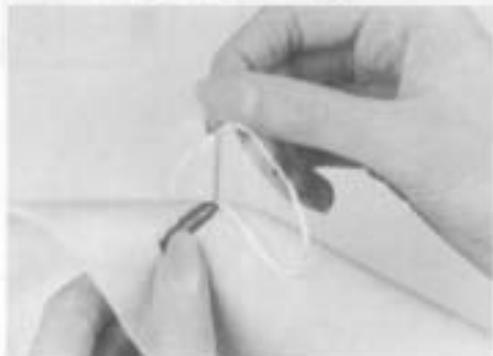
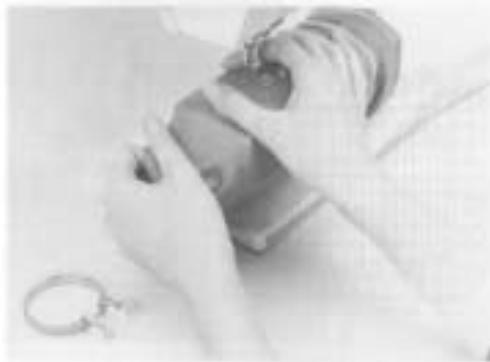
2 Place the index finger and thumb of the right hand on the darning ring to form a circle. With the left hand, stretch the fabric over the end of the free arm. Hold the tensioned fabric with the thumb of the right hand.
3 With the left hand, fit the spring clip and press firmly into the darning ring.
Darning technique
Tubular items are usually stitched up and down and then side to side as it is not possible to turn the work.

Additional accessory in some countries
28
Changing the bulb
Disconnect machine from the mains by removing the mains plug from the socket
Sewing light 220V/15 Watt
Changing the bulb
Using the special bulb holder, press the bulb up, twist to the left and remove.
2 To insert new bulb, place the new bulb on the bulb holder and insert the bulb into the socket. Press upwards and twist to the right as far as it will go.
3
Maintenance: Cleaning and lubricating
If the machine is stored in a cold room, it should be brought to a warm room approximately one hour before use to restore the oil in the bearings to a fluid state.
Cleaning and lubricating the hook
-Set the power switch to 0
- Check that the needle is raised.
- Remove presser foot and needle.
- Open the hinged front cover on the free arm.
Lower the feed-dog by turning knob to symbol
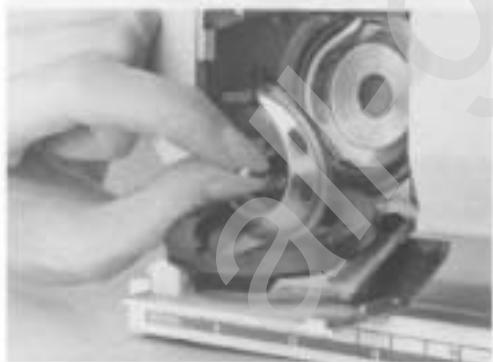
1 - Using both thumbs, press the stitch plate up and back.
Take out the bobbin case.
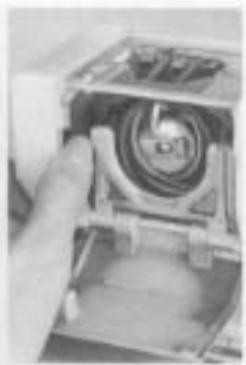
2 With the thumb of the left hand, press the lower release lever to the left. Fold down the semi-spherical locking strap with the black hook race cover.
Take out the hook.
- Clean the top and bottom of the hook race with the cleaning brush and cotton cloth.
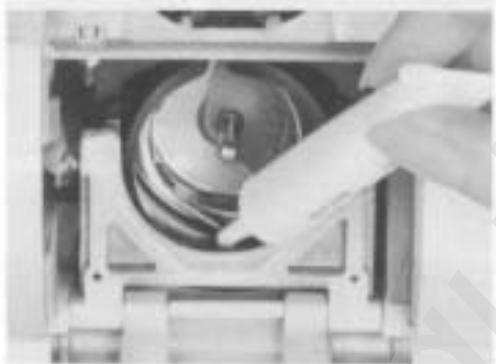
3 - Lightly oil the hook race with 1-2 drops of oil.
4 Insert the hook. If necessary, turn the handwheel until the hook driver is on the left.
- Close the black hook race cover and locking strap. The paw must engage.
Insert the bobbin case.
- To refit the stitch plate, insert the stitch plate from the rear, push forward until it engages.
- Close the hinged cover on the free arm.
- Raise the feed-dog by turning knob to symbol
Fault prevention
If the sewing machine does not sew properly, it is usually due to incorrect use.
Check whether:
The upper and lower threads are correctly threaded.
The needle has been correctly inserted with the flat side of the shank to the rear.
The needle size is correct. See needle and thread table.
The machine is clean. Brush away any thread remnants.
The hook race is clean and lubricated.
Any remnants of thread are trapped between the thread tension disc and beneath the bobbin case spring.
The upper thread tension is too tight.
Poor quality needles. Ideally, needles should be purchased from a BERNINA dealer.
The needle has been incorrectly inserted. The flat side of the shank must be to the rear.
The needle is blunt or bent.
Poor quality thread, knotted or dried-out thread.
- Stitch plate or hook tip damaged. Take to a BERNINA dealer.
The lower thread tension is too tight.
The bobbin is jamming in the bobbin case. Replace bobbin.
The hole in the stitch plate has been damaged by the needle. This must be repolished by an expert.
The needle is blunt or bent.
Needle breaks
-Needle clamp screw not sufficiently tightened.
Fabric withdrawn forwards instead of backwards under the presser foot.
- When sewing over a thick area, the fabric was pushed while needle still in the fabric. Use a Jeans foot.
Poor quality thread, unevenly wound or knotted.
Skipped stitches
- Wrong needles. Use only 130/705 H needle system.
The needle is blunt, bent or incorrectly inserted. Push right to the top when inserting.
Poor quality, badly polished needle.
The needle point does not suit the fabric being sewn. If necessary, use ball point for knitted fabrics and cutting point for leather.
Machine fails to run
- Plug is not inserted properly.
Power switch in 0 position
Machine gummcd up by use of unsuitable oil. Machine will have to be cleaned by a BERNINA dealer.
Machine has been standing in a cold room.
Faults in seams
Remnants of thread between the thread tension discs.
Remnants of thread under the bobbin case spring.
- Threaded with foot down.
- Incorrectly threaded. Check lower and upper threads.
Important
If you have to take your machine to a BERNINA dealer, please always take the foot control unit and accessories.
The right to make constructional changes differing from text and illustrations is reserved.
Important!
Safety instructions
SEV VDE (Official Testing Authorities in Switzerland and West Germany). The following safety instructions must be observed.
The moving needle is a source of danger (risk of injury to the fingers). Therefore, always watch your work.
- The sewing machine should be disconnected from the mains by removing the mains plug from the socket when carrying out any operations within the needle movement area, e.g. changing the needle, presser foot, stitch plate, bulb or when removing or replacing the lower thread bobbin or hook or when carrying out maintenance (cleaning and lubricating) and whenever work is interrupted or completed.
Electrical repairs should only be carried out by a BERNINA dealer.