5KSB5080EFP - 5KSB5080EMS - 5KSB5080EOB - Blender KITCHENAID - Free user manual and instructions
Find the device manual for free 5KSB5080EFP - 5KSB5080EMS - 5KSB5080EOB KITCHENAID in PDF.
Download the instructions for your Blender in PDF format for free! Find your manual 5KSB5080EFP - 5KSB5080EMS - 5KSB5080EOB - KITCHENAID and take your electronic device back in hand. On this page are published all the documents necessary for the use of your device. 5KSB5080EFP - 5KSB5080EMS - 5KSB5080EOB by KITCHENAID.
USER MANUAL 5KSB5080EFP - 5KSB5080EMS - 5KSB5080EOB KITCHENAID
un | woman en vanne à & sonne ou u | =
| TABLE OF CONTENTS BLENDER SAFETY Important safeguards.. Electrical requirements Electrical equipment waste disposal Motor horsepower….
PARTS AND FEATURES Parts and accessories …
ASSEMBLING THE BLENDER Preparing the Blender for use
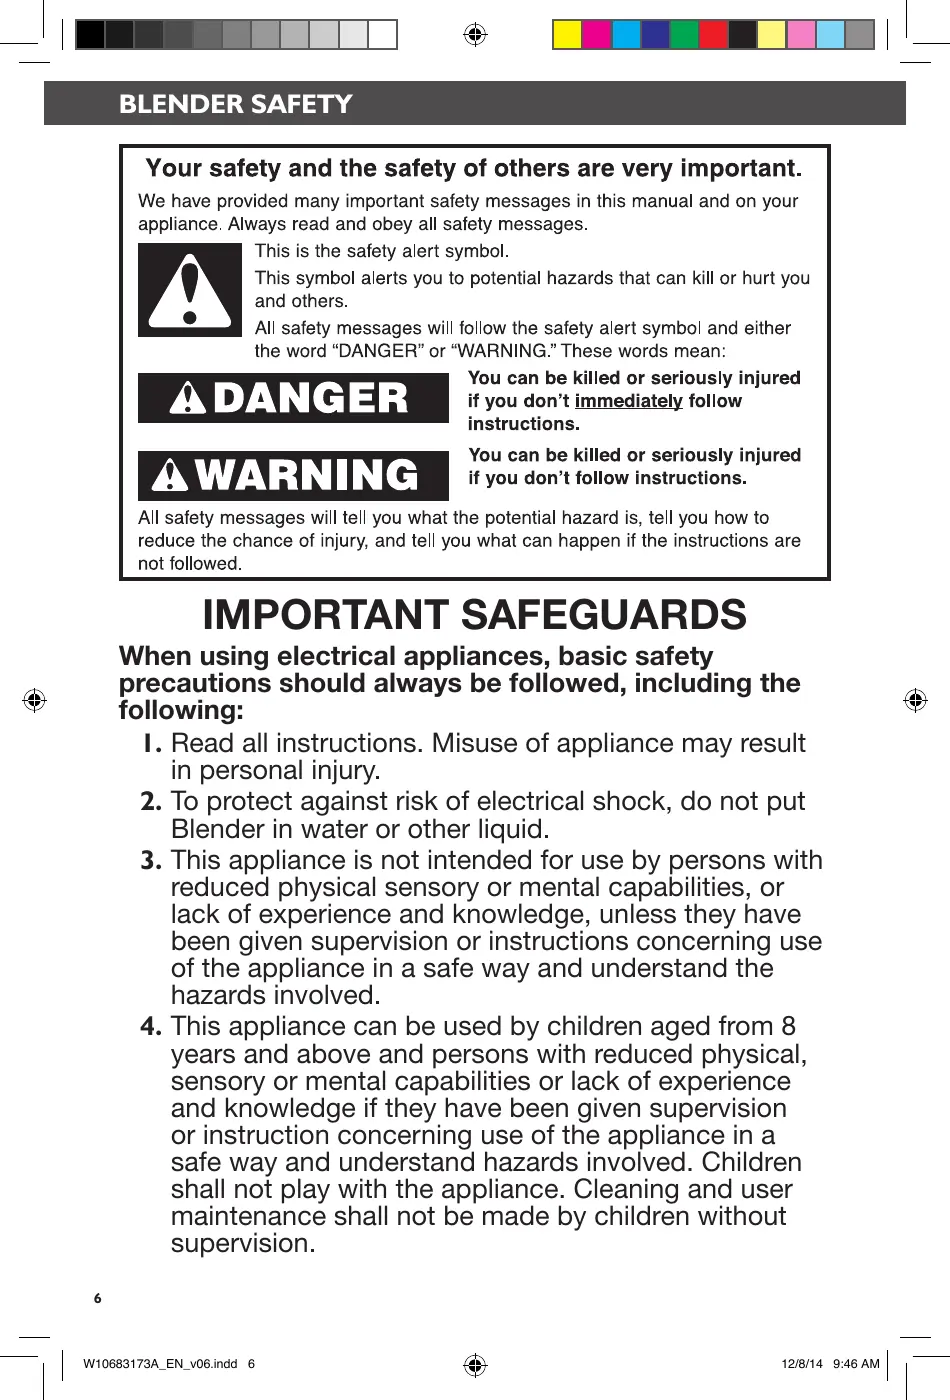
BLENDER SAFETY Your safety and the safety of others are very important. We have provided many important safety messages in this manual and on your appliance. Always read and obey all safety messages.
This is the safety alert symbol.
This symbol alerts you to potential hazards that can kill or hurt you and others.
All safety messages will follow the safety alert symbol and either the word “DANGER” or “WARNING These words mean:
Ye be killed ul ly injured ENOYUTA LU contimmeciater tolow
Y be killed î ly injured
À WARNING HITS" TT SE All safety messages will tell you what the potential hazard is, tell you how to reduce the chance of injury, and tell you what can happen if the instructions are not followed.
IMPORTANT SAFEGUARDS When using electrical appliances, basic safety precautions should always be followed, including the 2 d following: S
1. Read all instructions. Misuse of appliance may result in personal injury.
To protect against risk of electrical shock, do not put Blender in water or other liquid.
This appliance is not intended for use by persons with reduced physical sensory or mental capabilities, or lack of experience and knowledge, unless they have been given supervision or instructions concerning use of the appliance in a safe way and understand the hazards involved.
This appliance can be used by children aged from 8 years and above and persons with reduced physical, sensory or mental capabilities or lack of experience and knowledge if they have been given supervision
or instruction concerning use of the appliance in a safe way and understand hazards involved. Children shall not play with the appliance. Cleaning and user maintenance shall not be made by children without supervision.
Unplug from outlet when not in use, before putting on or taking off parts, and before cleaning.
Avoid contact with moving parts.
Do not operate the Blender with a damaged cord or plug or after appliance malfunctions, or is dropped or damaged in any manner. Return appliance to the nearest Authorised Service Center for examination, repair or electrical or mechanical adjustment.
. Do not use outdoors. . Do not let cord hang over edge of table or counter. . Keep hands and utensils out of container while
blending to reduce the risk of severe injury to persons or damage to the Blender. À scraper may be used but must be used only when the Blender is not running.
. Blades are sharp. Care should be taken when
handling the sharp cutting blades, emptying the pitcher and during cleaning.
. The use of attachments not recommended by
KitchenAid may cause a risk of injury to persons.
. Flashing light indicates ready to operate - avoid any &
contact with blades or moveable parts.
. This appliance is intended to be used in household
and similar applications such as:
- staff kitchen areas in shops, offices or other working environments.
- by clients in hotels, motels and other residential type environments.
- bed and breakfast type environments.
SAVE THESE INSTRUCTIONS
| W0683172A EN vO6indé 7 & tarmna ou au | |
Electrical Shock Hazard
Plug into a grounded outlet. Do not remove ground prong. Do not use an adapter.
Do not use an extension cord.
Failure to follow these instructions can result in death, fire, or electrical shock.
NOTE: ff the plug does not fit in the outlet, contact a qualified electrician. Do not modify the plug in any way. Do not use an adapter.
Do not use an extension cord. If the power
supply cord is too short, have a qualified electrician or serviceman install an outlet near the appliance.
Electrical equipment waste disposal
Disposal of packing material
The packing material is 100% recyclable and is marked with the recycle symbol {. The various parts of the packing must therefore be disposed of responsibly
and in full compliance with local authority regulations governing waste disposal.
Scrapping the product
- This appliance is marked in compliance with European Directive 2012/19/EU, Waste Electrical and Electronic Equipment (WEEE). - By ensuring this product is disposed of correctly, you will help prevent potential negative consequences for the environment
| wioceorraa EN 1osinae 8
and human health, which could otherwise be caused by inappropriate waste handling of this product.
- The symbol = on the product or on the accompanying documentation indicates
that it should not be treated as domestic waste but must be taken to an appropriate collection center for the recycling of electrical and electronic equipment.
For more detailed information about treatment, recovery and recycling of this product, please contact your local city office, your household waste disposal service or the shop where you purchased the product.
_| RER © CE BLENDER SAFETY Motor horsepower for the Blender motor was measured using a dynamometer, a machine that laboratories routinely use to measure the mechanical power of motors. Our 2.0 peak horsepower (HP) motor reference reflects the horsepower output of the motor itself and not the Blender’s horsepower output in the Blender pitcher. As with any blender, the power output in the pitcher is not the same as the horsepower of the motor itself. This motor delivers 1.8 peak HP in the pitcher enabling your Blender to deliver robust power for
NOTE: In accordance with guidelines from the medical device manufacturers, as with many products containing magnets, it is recommended that those with implantable pacemakers/ defibrillators should use care with the Blender and keep their device 30cm (12 inches) away from the Blender.
un | women vanne 9 & sonne ou u | =
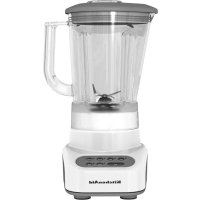
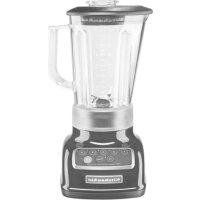
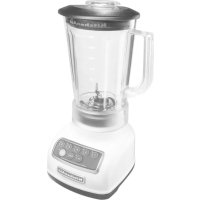
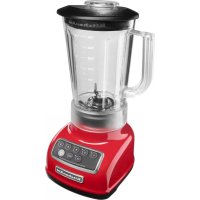
_| RER © CE PARTS AND FEATURES Parts and accessories
Removable ingredient cap with measuring markings
SL. pie-east & metal base Pitcher release
Function selection dial*.
BPA Free pitcher with lid
Stainless steel blades
Magnetic drive (not visible)
* See the “Blender function guide” section.
| |. roman en seems 10 & sonne ou u | =
_| RER © CE ASSEMBLING THE BLENDER Preparing the Blender for use
AWARNING Before first use Before using your Blender for the first time, wipe Blender base with a warm damp cloth, then wipe clean with a damp cloth. Dry with a soft cloth. Wash pitcher, Ç lid, and ingredient cup in warm, sudsy
water (see “Care and cleaning” section). Rinse parts and Wipe dry.
Electrical Shock Hazard Plug into a grounded outlet.
Do not remove ground prong.
. Do not use an adapter. ‘ Do not use an extension cord. Failure to follow these instructions can result in death, fire, or electrical shock. Before using the Blender, plug into
OPERATING THE BLENDER Using the Blender
Before operating the Blender, make sure the pitcher is properly locked into the Blender base.
The Blender will not run if the pitcher and lid are not fully in place. If you pull the Blender out of the base before the Blender stops running, the blade brake will kick in to stop the blades, and the Blender will stop after a few seconds.
The Blender has four pre-set recipe programs: ley Drinks/Smoothies, Milkshakes, Soups/Sauces, and Juice. It also features Variable Speed and Pulse selections that allow you to customize your blending for any recipe you make. See “Blender function guide” for more detailed information.
| | momo en vanne 1 & sonne ou u | =
OPERATING THE BLEND Remove the pitcher from the Blender base in order to fil it with ingredients. Pull the pitcher release lever to help remove the pitcher. Grab the handle firmby, and pull the pitcher straight towards you to remove.
Put ingredients in the pitcher. Add liquids first, then soft foods, then ice or frozen fruit last. Do not fill the pitcher beyond the max fil line - especially when using primarily liquids. Put the lid on the pitcher spout first, then
push down on the side of the lid near the handle, ensuring that the lid is on Straight. The Blender will not work without the lid in place.
Align the top of the pitcher to slide under the top of the base, and slide pitcher forward into the housing. Ensure that the pitcher goes in straight and is secured in place.
Ensure that the pitcher is fully in place by making sure that the tab on the pitcher release handle sits between the two triangular notches on the base of the pitcher. You will hear a dick when the pitcher is fully in place.
NOTE: There should be 1 em (0.5 in) of platform evenly visible around the pitcher when it's fully locked in place.
| |. roman en seems 2 & sonne ou u | =
Turn the selection knob to your desired pre-set program or variable speed selection (see the “Blender function guide” for more information).
Press the START/PAUSE button.
DA You may use the removable ingredient cap and removable funnel to add more ingredients to the pitcher while blending, if needed. The cap includes convenient measuring indicators for precise measurement of added ingredients.
To use the Pulse feature, turn the dial L to PULSE, then PRESS AND HOLD the START/PAUSE button for the desired length of time.
The Blender will automatically stop when programs are complete. The Blender will chime to signal the cycle is complete, or Press the START/PAUSE to stop the Blender manually.
Pull the release lever to help remove the pitcher after you have finished blending. Grab the handle firmiy, and pull the pitcher straight towards you to remove.
| W10683178A EN VOGindd 13 &
for your favourite recipes.
The four pre-set recipe programs were each developed based on typical recipes in that category. However, you’ll find that not
all recipes are exactly the same, and sometimes a particular recipe might blend more to your preference on a program that is not obvious. For example, some milkshakes with frozen fruit blend better on the lcy Drinks/Smoothies program. Also, when making smoothies, you might prefer the finer texture that the Juice program creates. We encourage you to experiment to find the best program
Setting | Description Blending time | Items to blend (in minisec) ÿ Quick puises of power Blended ice drinks Frozen chopped fruit 40 crush large amounts (defrose sighely until it Crushed of hard foods, such as 1:05 rushed ice can be probed with a 1CY DRINKS/ | ice, frozen vegetables, knife tp) SMOOTHIES | cr frozen fruits Long, slow speed Ice cream based drinks Smooth ricotta or Ô bled ocre Sherbeulce cottage cheese smooth, uniform milk-based drinks Pureed fruit or MILKSHAKES | consistency when : roi PE blending thick, 1:39 Frozen yogurt- vegetables/Baby fo0r sticky fonds. based drinks Pureed meat/Baby Potato pures food meat Pancake/Waffle batter & œ Gradual ramp-up of Hot Drinks Salad dressing speed and power. So H soUPs/ | Ideal for blending 125 up \oE sauces SAUCES _ | hot ingredients in particular. High blade speed to Fruit juice from Cold fruit or blend to à fine texture frozen concentrate vegetable sauce for recipes with Foods Fruit-based drinks Finely chopped high in fiber, or with 1:29 ruit-based drini inely chopps
Finely chopped fresh vegetables
PULSE Allows precise control of the duration and frequency of blending.
Great for recipes that require a light touch
Short puises of 2-3 seconds as needed
Savory crumb topping Sweet crumb topping
Meat salad for sandwich filling
Chopped fruits Chopped vegetables
VARIABLE SPEEDS Adjustable speeds for fine tuned chopping and blending needs to prepare any recipe.
Up to 2:00, as needed for desired recipe
Meat salad for sandwich filling
_| RE Using the Blender + Stop the Blender before using utensils in the pitcher. Use a rubber spatula to mix ingredients only when the Blender is off. Never use any utensil, including spatulas,
in the pitcher while the motor is running. The Blender is capable of handling hot ingredients. Cool hot foods, if possible, before blending.
For best results, when blending hot foods or liquids, do not fill the Blender pitcher to the top. Secure the lid, remove the center ingredient cap. Do not place bare hand on pitcher lid when processing hot foods or liquids.
The blender is not intended to be used as a heating device.
Magnetic Blending + Be aware that the Blender jar and Blender base contain magnets that may attract other items. For example, the jar may attract adjacent metal utensils when placed on a countertop.
Metal items may also be attracted to
the Blender base if jar is not in place. However, the Blender will not run Without the jar and lid in place.
Check that jar bottom is free of small magnetic debris before each use
Blending on Variable Speed
+ For mixtures blended on the Variable Speeds setting, start the blending process at a lower speed to thoroughly combine
| wioceorran EN vobinas 15
the ingredients. Then increase to a higher speed, as desired, You’ll find that the pre-set recipe programs will make blending easier by varying the speed level automatically.
Because the Blender can work without user intervention, the Variable Speed function will automatically turn off after approximately 2 minutes to ensure it does not run longer than intended and the recipe does not get overblended.
If you want to blend longer, reset the Blender to the “OFF/O” position and run it again as needed.
Using the ingredient feed
+ If desired, you can remove centre ingredient cap to add ingredients while the Blender is operating.
+ The ingredient cap and funnel will need to be washed even if ingredients are not added through the ingredient feed.
+ For thorough processing of ingredients, add them early in the cycle so that the Blender can process them fully.
+ If chunks of fruit and vegetables are desired, add the ingredients towards the end of the blending cycle.
+ Ifthe ingredient cap does not fully seat, make sure the funnel is fully in the down position. If you are having trouble, rotate either the funnel or the
cap until you find the correct position.
+ Wipe out inner funnel liner after each use.
+ Ice directly from the freezer will crush better than partially melted ice for snow.
+ Smaller ice cubes can be chopped or crushed faster than large ones.
+ For best results, crush ice by adding it through the ingredient feed as the Blender is running.
Dissolve flavoured gelatin: Pour boiling water into the pitcher; add gelatin. Remove center ingredient cup, and place a towel over the lid. Use the VARIABLE SPEEDS setting and blend at a slow speed until gelatin is dissolved, about 10 to 30 seconds. Add other ingredients.
Chop fruits and vegetables: Put 2 cups (475 mL) of fruit or vegetable chunks in Pitcher. In PULSE mode, cover and blend, pulsing a few times, about 2 to 3 seconds each time, until reaching desired consistency.
Puree fruits: Place 2 cups (475 mL) canned or cooked fruit in pitcher. Add 2 to 4 tablespoons (30 to 60 mL) fruit juice or water per cup (240 mL) of fruit. Cover and blend on MILKSHAKES setting,
Puree vegetables: Place 2 cups (475 mL) canned or cooked vegetables in pitcher. Add 2 to 4 tablespoons (30 to 60 mL) broth, water, or milk per 1 cup (240 mL) of vegetables. Cover and blend on MILKSHAKES setting.
| wicceorran EN vobinas 16
Take lumps out of sauce: If sauce becomes lumpy, place in the pitcher. Cover and blend on MILKSHAKES setting until smooth.
Combine flour and liquid for thickening: Pour liquid ingredients in pitcher first, then add flour on top. Cover, and blend on MILKSHAKES setting.
Prepare white sauce: Pour milk in pitcher first, then add flour on top and, if desired, salt. Cover, and blend on MILKSHAKES setting.
Prepare pancake or waffle batter from mix: Pour liquid ingredients in pitcher first, then add mix and other ingredients on top. Cover, and blend on MILKSHAKES
setting. Stop the Blender and scrape sides of the pitcher as needed.Make smoothies: Place liquids and frozen ingredients in pitcher first, then add other ingredients on top. Cover and blend on ICY DRINKS/SMOOTHIES setting.
_| RER © CE CARE AND CLEANING
+ Clean the Blender thoroughly after every use. Be sure to unplug before cleaning. + To avoid damaging the Blender, do not immerse the Blender base or cord in water. + To avoid scratching the Blender, do not use abrasive cleansers or scouring pads.
I To clean the Blender base, and cord: To quickly clean the Blender while Unplug the Blender before cleaning. in the base: Add | drop of dish soap Wipe with a warm, damp cloth; wipe to half a pitcher of water, and run on clean with a damp cloth, and dry with the lcy Drinks/Smoothies cycle. Discard a soft cloth. Make sure to clean inside water when cycle is finished, and rinse the ingredient feed each time. completely.
To clean pitcher, lid, ingredient cap, and funnel: Wash all items in the dishwasher on the top or bottom rack. Or hand wash with soapy water, rinse, and wipe dry.
NOTE: For best results when cleaning the Blender, completely disassemble the lid, ingredient cap and funnel and thoroughly wash all parts after each use.
| |. wiomarr en seems + & sonne ou u | =
Understanding the Blender flash codes
IMPORTANT: The Blender will not operate at any speed unless the START/PAUSE button
LED is flashing slowly
LED is flashing rapidly
the LED slowly glows with increasing intensity and then
is off, the Blender is ready for blending. Press START/PAUSE button to start blending.
If the LED flashes on/off in
rapid bursts, the Blender is not
The most common reasons
- Pitcher is not properly in place
- Pitcher was removed before blending was completed
First, rotate the knob to
“OFF/O”. Next, make sure
the pitcher is properly in
place. Then, choose your
selection and press the
If Blender is jammed, it will
stop running to avoid damage
to the motor. Press START/
PAUSE, then unplug the power
cord. Remove the pitcher from
the base, and with a scraper,
free the blades by breaking
up or removing the contents
at the bottom of the pitcher.
To restart, rotate the knob to
“OFF/O” position and then
rotate to knob selection and
Ifthe LED does not flash after a setting is selected, the Blender is not ready for blending.
The most common reasons include:
- Blender is in “sleep mode” - Blender has been unplugged or a power outage has occurred
The Blender may have gone into an inactive mode or “sleep mode.” This feature saves power if the Blender is left unattended for a few minutes. Resetting the dial to “OFF/O" brings the Blender back into “active mode”. First, rotate the knob to “OFF/O”. Next, make sure the pitcher is property
in place. Then, choose your selection and press the START/ PAUSE button.
the Blender was not in
sleep mode, check to see if the Blender is plugged into a grounded outlet, then, press START/PAUSE. If the Blender still does not work, see below for further information on ways to correct the operation error.
WA0G83173A EN vOGindd 18 sara ou au | |
TROUBLESHOOTING Blender does not operate when a setting is selected
Electrical Shock Hazard
Plug into a grounded outlet. Do not remove ground prong. Do not use an adapter.
Do not use an extension cord.
Failure to follow these instructions can result in death, fire, or electrical shock.
Kthe LED is flashing on/off in rapid bursts, the pitcher might not be fully in place or the Blender might have gone into “sleep mode” and need to be reset to “OFF/O”. Follow the instructions above under Operation ERROR mode.
Check to see if the Blender is plugged into a grounded outlet. [fit is, press START/PAUSE; then unplug the Blender. Plug it back in to the same outlet, and Press START/PAUSE. If the Blender still does not work, check the fuse or cireuit breaker on the electrical circuit the Blender is connected to and make sure the circuit is closed.
The pitcher might not be fully in place. Ensure it is all the way in and the lid
The Blender may need to be reset.
Turn it to the “OFF/O” position and back to your desired setting.
Blender stops while blending
Power Loss - Rotate selection dial to
the “OFF/O” position and then rotate
to desired selection setting and press START/PAUSE.
The Blender automatically shuts off after approximately 2 minutes of blending
on Variable Speed. To reset it, turn the selection dial to the “OFF/O” position, and then back to your desired setting, and press START/PAUSE.
+ The Blender may be jammedl. [fit is jammed, the Blender will stop running to avoid damage to the motor. Rotate the knob to “OFF/O”, then unplug the power cord. Remove the pitcher from the base, and with a scraper, free the blades by breaking up or removing the contents at the bottom of the pitcher. To restart, rotate the knob to “OFF/O” position and then rotate to knob selection and press START/PAUSE.
If the problem cannot be fixed with the steps provided in this section, contact an authorized service center (see “Warranty and service” section).
| wioceorran EN vobinas 19
WARRAN AND SERVICI Length of KitchenAid Will Pay KitchenAid Will Not Warranty: For: Pay For:
Europe, Middle East The replacement A. Repairs when Blender is used and Africa: parts and repair labour for operations other than For models 5SKSB5080: costs to correct normal household food Seven years full warranty defects in materials or preparation.
from date of purchase. | workmanship. Service | 8, Damage resulting from
must be provided by an accident, alterations, misuse, Authorized KitchenAid abuse, or installation/operation Service Center. not in accordance with local electrical codes.
KITCHENAID DOES NOT ASSUME ANY RESPONSIBILITY FOR INDIRECT DAMAGES.
In U.K. and Ireland: For any questions, or to find the nearest KitchenAid Authorized Service Center, please find our contact details below.
& NOTE: All service should be handled locally by an Authorized KitchenAid Service Center. &
Contact number for U.K. and Northern Ireland: Tollfree number 0800 988 1266 (calls from mobile phones are charged standard network rate) or call 0194 260 5504.
Contact number for Ireland: Tollfree number +44 (0) 20 8616 5148
and Ireland: , and click on the link “Contact Us” at the bottom
E-mail contact for U Go to www.kitchen: of the page.
Address for UK. and Ireland: KitchenAid Europa, Inc.
BELGIUM In other countries: For all product related questions and after sales matters, please contact your dealer to obtain the name of the nearest Authorized KitchenAid Service/Customer Center.