LEGRIA HF R47 - Camcorder CANON - Free user manual and instructions
Find the device manual for free LEGRIA HF R47 CANON in PDF.
Download the instructions for your Camcorder in PDF format for free! Find your manual LEGRIA HF R47 - CANON and take your electronic device back in hand. On this page are published all the documents necessary for the use of your device. LEGRIA HF R47 by CANON.
USER MANUAL LEGRIA HF R47 CANON
Important Usage Instructions COPYRIGHT WARNING: Unauthorized recording of copyrighted materials may infringe on the rights of copyright ‘owners and be contrary to copyright laws. To reduce the risk of electric shock, do not expose this product to d'ipping or splashing The Mains plug is used as the disconnect device. The Mains plug shall remain readily operable to disconnect the plug in case of an accident Wile using the compact power adapter, do not wrap it or cover it with a piece of cloth, and do not place it in confined narrow spaces. [EA-TTOE identification plate is located on the bottom European Union (and EEA) only. These symbols indicate that this product is not to be disposed of with X >: your household waste, according to the WEEE Directive (2002/06/EC), the Battery Directive (2006/66/EC) and/or your national laws = implementing those Directives. This product should be handed over to a designated collection point, e.g., on an authorized one-for-one basis when you buy a new Similar product or to an authorized collection site for recycling waste electrical and electronic equipment (EEE) and batteries and accumulators. Improper handling of this type of waste could have a possible impact on the environment and human health due to potentially hazardous substances that are generally associated with EEE. Your cooperation in the correct disposal of this product will contribute to the effective usage of natural resources For more information about the recycling of this product, please contact your local city office, waste authority, approved scheme or your household waste disposal service or visit ww. canon-europe.com/environment. (EEA: Norway, Iceland and Liechtenstein)
LEGRIA HF R48, LEGRIA HF R47 and LEGRIA HF R46 are in compliance (as of January 2013) with the radio signal regulations of the regions listed below. For details on other regions where they can be used, make inquiries with the contacts listed on the back side of this instruction manual. REGIONS Australia, Austria, Belgium, Bulgaria, China (PRC mainland), Cyprus, Czech Republic, Denmark, Estonia, Finland, France, Germany, Greece, Hong Kong SA.R., Hungary, Iceland, reland, ty, Latvia, Liechtenstein, Lithuania, Luxembourg, Malta, Netherlands, New Zealand, Norway, Poland, Portugal, Romania, Russia, Singapore, Slovakia, Slovenia, Spain, Sweden, Switzerland, United Kingdom Statement on EC directive C € Hereby, Canon Inc. declares that this WM217 is in compliance with the essential requirements and other relevant provisions of Directive 1999/5/EC. Please contact the following address for the original Dectaration of Conformity: CANON EUROPA NV. Bovenkerkenweg 59, 1158 XB Amstelveen, The Netherlands CANON INC. 30-2, Shimomaruko 3-chome, Ohta-ku, Tokyo 146-8501, Japan Model 1D0020: LEGRIA HF R46 / LEGRIA HF R47 / LEGRIA HF R48
Trademark Acknowledgements + SD, SDHC and SDXC Logos ar trademarks of SD-3C, LLC. + Microsoft and Windows are trademarks or registered trademarks of Microsoft Corporation in the United States andor other countries. App Siore, Pad, IPhone, iTunes and Mac OS are trademarks of Apple Inc, registered in tne US. and ather countries, HDMI, the HDMI logo and High-Defnition Muttimedia Interface are trademarks or registered trademarks of HDMI Licensing LLC in the United States and other countries. VOD" ND Progress ane No rogrssn ou [XL] DOLBY trademarks of Panasonic Corporation and Sony Corporation. Manufactured under license from Dolby Laboratories. DIGITAL “Dolby” and the double-D symbol ar trademarks of Dolby Laboratories. STEREO CREATOR Google, Android, Google Pay, YouTube are trademarks of Google Inc. Facebook sa registered trademark of Facebook, ln. 108 is à trademark or registered trademark of Cisco in the US. and other countries and is used under license. The Tuiter name and marks are trademarks of Twviter, Inc. Wi-Fi a registered trademark of the Wi-Fi Aliance. ‘Wi-Fi Certified, PA, WPA?, and the Wi-Fi Certified logo are trademarks of the Wi-Fi Aliance WPS as used on the camcorders setings, onscreen displays and in ts manual signifie Wi-Fi Protected Setup. ‘The Wi-Fi Protected Setup Identifier Mark is a mark of the Wi-Fi Aliance. Other names and products not mentioned above may be trademarks or registered trademarks af their respective companies. This device incorporates exFAT technology licensed from Microsoft. “Full HD 1080" refrs to Canon camcorders compliant with high-definition video composed of 1,080 vertical pixels (scanning Ines. ‘This product licensed under AT&T patents for the MPEG-A standard and may be used or encoding MPEG-4 complant video and/or decoding MPEG-4 complant video that was encoded only (1) for 2 personal and non-commercial purpose or (2) by a video provider licensed under the AT&T patents to provide MPEG-4 compliant video. No license is granted or impled for any other use for MPEG-4 standard
Exciting Features and New Functions UHR 471] Wi-Fi Functions CERTIFIED (Cjii9) Enjoy the freedom of Wi-Fi by using convenient Wi-Fi functions such as the following. + You can use a smartphone as a remote control and record mov- ies from a distance ([L] 122). + You can wirelessly connect the camcorder to your home net- work and upload your record- ings to CANON iMAGE GATEWAY (CL) 126). This will allow you to even share your videos on YouTube and Face- book. You can share your videos on YouTube and Facebook also by uploading them using an OS device (CI 125). + Enjoying your recordings with family and friends has just become easier because you can use the Web browser on a smartphone or computer to view the camcorders recordings (C2 123). Wi-Fi is a connection method for devices to connect wirelessiy and is certified by the Wi-Fi Alliance. Baby Mode (C1 63) Using Baby mode, you will not miss out on baby's precious moments. The camcorders settings are optimized to capture the beauty of baby's skin. You can also add stamps to the video to keep track of baby"s growth. AVCHD and MP4 Recording (1 59) When you record movies, you have the freedom to choose whether the movie is in AVCHD or MP4 format. Record movies in AVCHD and play them back with fantastic picture quality. Alternatively, record movies in MPA4 for uploading to the Web and transferring to mobile devices. When you use the highest video quality setting for AVCHD {28 Mbps) and MP4 movies {85 Mbps), you can record at 50 frames per second. With video at 50 frames per second, your videos will achieve a level of realistic movement that will impress your audience.
Smart AUTO Smart AUTO (C2 42) Smart AUTO automatically selects the best scene mode for the scene you want to shoot. You get spectacular recordings every time without worrying about settings. Video Snapshot (72) Shoot or capture short scenes and arrange them into a video clip set to your favorite background music. Cinema-Look Filters (C2 64) Use professional cinema-look filters to create unique movies with distinctive looks. Face Detection (75) The camcorder automatically detects people's faces and adjusts the focus and other settings accordingly for beautiful results.
Image Stabilization Dynamic IS (CL 73) compensates for camcorder shake when you shoot video while walking. Powered IS (C2 74) will produce stable shots when you zoom in on distant subjects (full telephoto). Intelligent IS (C2 44) selects the type of image stabilization for the recording situation.
Enjoying Your Recordings on Other Devices
Connectthe camcorder ton HDTV (C1 109. Copy your recordings to an external video recorder (2 116). Upload recordings to your computer (CL 108). Copy the camcorders entire memory onto an external hard drive (C2 113).
Save your recordings. Upload your MP4 movies and photos to the Web (118).
Enjoying Your Recordings Using the Camcorder’s Wi-Fi Functions dd | | Use your i0S or Android smartphone or Le tablet to remotely vieu to remotely control the camcorder (CL 122). Use the Web Browser on your i0S or à Android smarphone or tablet the recordings on the camcorder (CL) 123). Save your recordgs on an iPhone or iPad and play them Z back (a 125). CANON PA IMAGE ) > GATEWAY Connect the camcorder to an After connecting the access point on your home camcorder to an iPhone, iPad network and then share your or CANON IMAGE GATEWAY, recordings on CANON IMAGE you can upload your GATEWAY (C2 126). From recordings to other sites. there, you can make online albums to enjoy your recordings.
Exciting Features and New Functions About this Manual Getting to Know the Camcorder Supplied Accessories and CD-ROM Names of Parts E Preparations
Getting Started Charging the Battery Pack Turning On the Camcorder Using the Grip Belt Opening the Lens Cover and Adjusting the LCD Screen Using a Memory Card Memory Cards Compatible for Use with the Camcorder Inserting and Removing a Memory Card First Time Settings Basic Setup Changing the Time Zone Initializing the Memory Basic Operation of the Camcorder Using the Touch Screen Using the Menus Operating Modes Table of contents + 9
m Basic Shooting and Playback
Selecting the Movie Format (AVCHD/MP4) Selecting the Video Quality (XD Selecting the Memory (Built-in Memory/Memory Card) for Recordings Dual Recording and Relay Recording Baby Mode Cinema Mode and Cinema-Look Filters Special Scene Modes Programmed AE Mode: Adjusting Settings to Match Your Needs Decoration: Adding a Personal Touch Video Snapshot Advanced Image Stabilization Powered IS Face Detection and Tracking Faders Adjusting the Exposure Adjusting the Focus Pre-Recording White Balance Self Timer Frame Rate Tele Macro 10 + Table of contents
85 Audio Scenes 86 Audio Recording Level 87 Using Headphones = Advanced Playback and Editing 89 Capturing Video Snapshot Scenes and Photos from a Movie 90 Playing Back Scenes in the Baby Album o1 Playing Back Video Snapshot Scenes 92 Playback with Background Music 94 Selecting the Playback Starting Point 96 Dividing Scenes 97 Trimming Scenes 97 Slideshow m External Connections 99 Terminals on the Camcorder 100 Connection Diagrams 103 Playback on a TV Screen 104 Saving and Sharing Your Recordings 104 CHXS/CHN/AE Copying Movies and Photos to a Memory Card 107 CB / (D / (HS Converting Movies to MP4 Format 108 Saving Recordings on a Computer 113 CB/UN/ARB Memory Save: Saving an Entire Memory onto an External Hard Drive 116 Copying Recordings to an External Video Recorder 118 Uploading MP4 Movies and Photos to the Web Table of contents + 11
Introduction to Wi-Fi Recording Movies Using a Smartphone as a Remote Control Remote Browse: Viewing Recordings Using a Web Browser on Your iOS Device or Android Smartphone Uploading Videos Using an iOS Device Sharing Recordings with CANON IMAGE GATEWAY Playback on a Computer Wi-Fi Connection Using an Access Point Viewing and Changing Wi-Fi Settings m Additional Information
Appen Menu Options Lists # Main Functions] and [Edit] Panels Other Settings] Menus Appendix: Onscreen Icons and Displays Trouble? Troubleshooting List of Messages Do’s and Don'’ts Handling Precautions Maintenance/Others Using the Camcorder Abroad General Information Accessories Optional Accessories Specifications Index 12 + Table of contents
About this Manual Thank you for purchasing the Canon LEGRIA HF R48 / LEGRIA HF R47 / LEGRIA HF R46 / LEGRIA HF R406. Please read this manual carefully before you use the camcorder and retain it for future refer- ence. Should your camcorder fail to operate correctiy, refer to Trouble- shooting (C1 155). Conventions Used is Manual + @ IMPORTANT: Precautions related to the camcorder's operation. + @ NOTES: Additional topics that complement the basic operating procedures. + @ POINTS TO CHECK: Restrictions or requirements regarding the function described. + (A: Reference page number within this manual. Text that applies only to the models shown in the icon. + The following terms are used in this manual: When not specified as “memory card” or “built-in memory”, the term “memory” by itself refers to both. “Scene” refers to one movie unit from the point you press the [START/STOP] button to start recording until you press again to pause the recording. The photos included in this manual are simulated pictures taken with a still camera. Unless indicated otherwise, illustrations and menu icons refer to the (HXB. Introduction + 13
Go indicates that a function is available in the Brackets [] are used to reter to operating mode indicated and »… indicates control buttons and menu options that the function is not available. The operating you wil touch on the screen and to modes are divided into the following three other onscreen messages and groups. For a detailed explanation, refer to displays. Operating Modes ([L] 38). Movie format Shooting mode Playback mode SciFTimer L Ce EN | 09° T © ur oner Satis ID on 91 9 1x] + uit appear on ren. 2 apr, Slctng [ED 0%), 10 um te aura Movies: In record pause mode, press [SHRTETE The names of physical buttons The 5) arrow is used to abbreviate menu selections. and switches on the For a detailed explanation on how to use the menus, camcorder are indicated within refer to Using the Menus (LL) 34). For a concise a “button” frame. summary of all available menu options and settings, For example [STARTISTOP]. refer to the appendix Menu Options Lists (CL] 141). 14 + Introduction
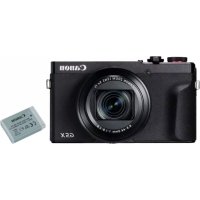
Supplied Accessories and CD-ROM The following accessories are supplied with the camcorder: D CA-110E Compact Power Adapter 22e (incl. power cord) BP-718 Battery Pack 4 D-IFC-300PCU/S USB Cable
EP HTG-100/S High Speed HDMI Cable à D Quick Guide Wi-Fi Basic Setup Guide” > > Transfer Utility LE Startup Guide 4 (ee below) on. Transfer Utility LE Startup Guide: This guide explains how to download PIXELAS Transfer Utility LE software, which allows you to save your AVCHD movies and transfer music data from the supplied Canon LEGRIA CD-ROM (see next page) to the camcorder. For details on using the software, refer to the Transfer Utility LE Software Guide included with the downloaded software. @nores + The camcorder may make a rating sound if it is shaken (CA 158) Introduction + 15
The Canon LEGRIA CD-ROM is also supplied with the camcorder. The CD-ROM contains the following components: - Instruction Manual - The full-version instruction manual of the camcorder (this PDF file). - ImageBrowser EX - The CD-ROM contains an automatic installer for the software ImageBrowser EX, which allows you to save and manage MP4 movies and photos and upload CANON IMAGE GATEWAY:, YouTube and Facebook. An Internet connection is required for full installation of the software. - Music data - Music files that can be used as background music during playback. These music flles are for exclusive use with PIXELAS software. The disc cannot be played back on CD players. - Image mix data - Image fles that can be used with the image mix function (mage mix frames).
- CANON iMAGE GATEWAY is an online service that allows you to share mov- ies and photos, make photo albums, and more. This service may not be available in all countries/regions. 16 + Introduction
Names of Parts Left side view Front view D {+} (playback mode) button (C1 39) 2 ON/OFF button (C1 21) © Memory card slot cover % AV OUT terminal (C1 99, 101) Q (headphones) terminal (CT 87) 5 HDMI OUT terminal (O1 99, 100) © USB terminal (O2 99, 102) Memory card slot (O1 27) ® START/STOP button (C1 40) © DC IN terminal (C7 19) 4 Grip belt (CI 22) #5 Lens cover switch (O2 23) & Stereo microphone (C1 86) Introduction + 17
Top view < Speaker (O1 51) 43 Zoom lever (C1 46) LCD touch screen (C1 23, 34) ACCESS indicator (C1 40) CB Wi-Fi antenna LCD panel Back view 18 + Introduction LR A 4 “ POWER/CHG (charge) indicator: Green - On Red - Charging (CD 19) ‘ Battery attachment unit (C[] 19) 20 Serial number
SINT28456780012 TITRE S Trpod socket (LI 171) & BATTERY RELEASE switoh (CL) 20)
£ Preparations This chapter describes basic operations, such as using the touch panel, navigating the menus, and first time settings to help you learn more about your camcorder. Getting Started Charging the Battery Pack The camcorder can be powered with a battery pack or directly using the compact power adapter. For approximate charging times and recording/playback times with a fully charged battery pack, refer to Charging, Recording and Playback Times (CL) 177). 1 Connect the power cord to the compact power adapter.
Plug the power cord into a power outlet.
Connect the compact power adapter to the camcorder's DC IN terminal. 4 Attach the battery pack to the camcorder. Press the battery pack sofly into the battery attachment unit and slide it up until it clicks in place. DC IN terminal Preparations + 19
5 Charging will start when the POWER/CHG (charge) indicator camcorder is turned off. + Ifthe camcorder was on, the green POWER/CHG indicator will go out when you turn off the camcorder. After a moment, the POWER/CHG indicator will turn on in red (battery pack charging). The red POWER/ CHG indicator will go out when the battery pack is fully charged. + Ifthe indicator flashes, refer to Toubleshooting (CA 158). POWER/ cHG To remove the battery pack 1 Slide (BATTERY RELEASE) in the direction of the arrow and hold it pressed down. 2 Slide the battery pack and then pull it out. BATTERY RELEASE switch O mort + Tu off the camcorder before connecting or disconnecting the com- pact power adapter. After turning off the camcorder, important data is updated in the memory. Be sure to wait until the green POWER/CHG indicator goes out. + Do not connect to the camcorder's DG IN terminal or to the compact power adapter any electrical equipment that is not expressiy recom- mended for use with this camcorder. + To prevent equipment breakdowns and excessive heating, do not con- nect the supplied compact power adapter to voltage converters for 20 + Preparations
overseas travels or special power sources such as those on aircraft and ships, DC-AC inverters, etc. @nores + We recommend charging the battery pack in temperatures between 10 °C and 80 °C. If either the ambient temperature or the battery packs temperature is outside the range of approx. O °C to 40 °C, charging will not start. If the ambient temperature or the battery packs temperature is low, Charging may take longer than usual The battery pack will be charged only when the camcorder is off. If the power supply was disconnected while charging a battery pack, make sure the POWER/CHG indicator has gone out before restoring the power supply. If remaining battery time is an issue, you can power the camcorder using the compact power adapter so the battery pack will not be con- sumed. Charged battery packs continue to discharge naturally. Therefore, charge them on the day of use, or the day belore, to ensure à full charge. Battery packs for this camcorder can display the remaining battery time. The first time you use a battery pack, fuly charge it and then use the camcorder until the battery pack is completely exhausted. Doing so will ensure that the remaining recording time will be displayed accurately. + We recommend that you prepare battery packs to last 2 to 3 times longer than you think you might need! Turning On the Camcorder You can turn the camcorder on and off by opening and closing the LCD panel. The first time you turn on the camcorder, the initial setup screens will appear and guide you through the basic settings ([L1 29). Preparations + 21
Open the LCD panel to turn on the camcorder. To turn off the camcorder Close the LCD panel or press (ONOFF] . @ nores + You can use the 47 83 [#1 #2 [Power On Using LCD Panel] setting so that you can tu the camcorder on and off only by pressing [ONF] . Using the Grip Belt Fasten the grip belt. Adjust the grip belt so that you can reach the Zoom lever with your index finger, and the [START/STOP) button with your thumb. To remove the grip belt 1 Liftthe padded handgrip's flap and detach the strap from the Velcro pad. 22 + Preparations
2 Pull the strap to remove it first from the front bracket on the camcorder, then to unthread it from the handgrip and finally to remove it from the rear bracket on the camcorder. Opening the Lens Cover and Adjusting the LCD Screen Before you start recording, open the lens cover. Move the lens cover switch down to @ to open the lens cover. Rotating the LCD Panel The first time you open the LCD panel, the initial setup screens will appear and guide you through the basic settings (LI 29). Open the LCD panel 90 degrees. + You can rotate the panel 90 degrees dounward. + You can rotate the panel 180 degrees toward the lens. Rotating the LCD panel 180 degrees can be useful to allow the camcorder to include yourself in the picture when recording with the self timer. Preparations + 23
Subject can monitor the LCD screen G@ nores + About the LCD screen: The screen is produced using extremely high-pre- cision manufacturing techniques, with more than 99.99% of the pixels operating to specification. Less than 0.01% of the pixels may occasion- aly misfire or appear as black, red, blue or green dots. This has no effect on the recorded image and does not constitute a malfunction. + For details about how to take care of the touch screen, refer to Handling Precautions (CA 170), Cieaning (CA 174. + You can adjust the screens brighiness using the 17 > FE] 6) [LCD Brightness] and [LCD Backighi] settings. When the compact power adapter is connected, [LCD Backight] will automatically change to IH Bright]. 24 + Preparations
Using a Memory Card Memory Cards Compatible for Use with the Camcorder You can use the following types of commercially available Secure Digi- tal (SD) cards with this camcorder. As of January 2013, the movie recording function has been tested using SD/SDHC/SDXC memory cards made by Panasonic, Toshiba and SanDisk. For the latest information on cards that can be used, visit your local Canon Web site. Memory card type: 2% SD memory card, && SDHC memory card, Z2 SDXC memory card SD Speed Class ass@ ass ass uass® Capacity: 128 MB or larger.
- When using an SD memory card without a speed class rating, you may not be able to record movies, depending on the memory card used “D memory cards with a capacity of 64 MB or smaller cannot be used to record movies. @ nores + About the Speed Class: Speed Class is a standard that indicates the mini- mum guaranteed data transfer speed of memory cards. When you buy a new memory card, look for the Speed Class logo on the package. When you record movies with a video quality of 50P or 35 Mbps, we recommend using memory cards rated SD Speed Class 6 or 10. When vou record movies with other video quality options, we recommend using memory cards rated SD Speed Class 4, 6 or 10. SDXC Memory Cards You can use SDXC memory cards with this camcorder. When using memory cards with other devices, such as digital recorders, computers and card readers, make sure that the external device is compatible with SDXC cards. For more information on compatibility, contact the computer, operating system or memory card manufacturer. Preparations + 25
@ mort + If you use an SDXC memory card with a computer OS that is not SDXC- compatible, you may be prompted to format the memory card. In such case, cancel the operation to prevent data loss. + After repeatedly recording, deleting and editing scenes (fragmentedi memory) it will take longer to write data on the memory and recording may stop. Save your recordings and initialize the memory. 26 + Preparations
Inserting and Removing a Memory Card If you plan on using a memory card, turn off the camcorder before per- forming the initial setup and then insert the memory card. After per- forming the initial setup, initialize the memory card (CI 31). Open the LCD panel. Ithis is your first time to turn on the camcorder, the language selection screen of the initial setup screens will appear. Press (ONOFF) to turn off the camcorder. Make sure the POWER/CHG indicator is off.
Open the memory card slot cover. 4 Insert the memory card at a Lens slight angle, with the label facing toward the lens, all the way into the memory card slot until it clicks. The memory card slot is at a slight angle toward the lens so be careful not to damage the memory card when inserting it Close the memory card slot cover. Do not force the cover closed if the memory card is not correctiy inserted. Memory card Top view
To remove the memory card Push the memory card once to release it. When the memory card springs out, pull i all the way out. Preparations + 27
@ mort + Memory cards have front and back sides that are not interchangeable. Inserting à memory card facing the wrong direction can cause à mal- function of the camcorder. Be sure to insert the memory card as described in step 4. 28 + Preparations
First Time Settings Basic Setup The first time you turn on the camcorder, you will be guided by the camcorders easy-to-follow setup screens to configure the cam- corders initial settings. You will set the date and time, movie format, and other basic functions. For details on how to use the touch screen, refer to Using the Touch Screen (CL 34). 1 Touch the language used for onscreen “Touch [D>] after selecting displays and then touch [>]. a language + You may need to scroll down to find your 2 language. + After you select a language, the [Date Format] screen wil appear. Touch [Y.M.D], [M.D,Y] or [D.M.Y] to select the date format you prefer and then touch [D]. After you select the date format, the [Date/Time] screen will appear with the first field selected
Touch a field you want to change (year, month, day, hours or minutes). Touch [A] or [W] to change the field as necessary. CES Set the correct date and time by changing all the fields in the same way + Touch [24H] to use 24-hour clock or leave it unselected to use 12-hour clock (AM/PM). Touch [OK] and then touch [D]. + After you select the date and time, the [Movie Format] screen will
appear. 7 Touch [{IED] or [QI] to select the movie format and then touch . CD/ŒHRG After you select the movie format, the ['Æ Rec Media for Movies] screen will appear, where you can select the memory to which you want to record movies. Preparations + 29
. Skip to step 10. Touch [Œ)] (built-in memory) or [(so]] (memory card) and then touch [D]. + When selecting the memory, you can check the available recording time based on the video quality setting. + After you select the memory to which you want to record movies, the [M Rec Media for Photos] screen will appear. Touch [Œ)] (built-in memory) or [(55]] (memory card) and then touch [D]. When selecting the memory, you can check the number of photos that can be recorded, based on a photo size of 1920x1080. 10 Touch [OK]. Setup is complete. The settings you selected will appear briefy and then the camcorder will be ready to record. @ nores + Some control buttons, such as [ZOOM] or [PHOTO], will appear in English regardless of the language selected. + You can change the language later on with the 47 03 [#1 0) [Lan- quage &] seting. You can adjust the date and time later on with the ET 9 D # 1 92 [Date/Time] setting. You can change the m jo mat later on with the rt #> [Movie Format] setting. CHEB CHEN You can select the memory for movies and photos later on with ne D [Recording Media] +3 ["@ Rec Media for Movies] and [a Rec Media for Photos] settings. + When you do not use the camcorder for about 3 months, the buil-in rechargeable lithium battery may discharge completely and the date and time setting may be lost. In such case, recharge the buïlt-in lithium battery (C1 173). The next time you turn on the camcorder, you will have to configure the initial settings again.
Changing the Time Zone Change the time zone to match your location. The default setting is Paris. In addition, the camcorder is able to retain the date and time of another location. This is convenient when you travel so that you can set the camcorder to match the time of your home location or that of your destination. Operating modes: Qauro) (© CE) (SON) CP) | Wa) (mp4) | C8) Ce 1 Open the [Time Zone/DST] screen. { @ 9 Ur Other Setings] 9) TF1 0 [Time Zone/DST] 2 Touch [#] to set the home time zone, or [#] to set the time zone of your destination when you are traveling. 3 Touch [A] or [Y] to set the desired time zone. If necessary, touch LK] to adjust for daylight saving time. 4 Touch [X] to close the menu. Initializing the Memory Initialize memory cards when you use them with this camcorder for the first time. You can also initialize a memory card or the built-in memory (CERB/CRD/ RS only) to permanently delete all the recordings it contains. At the time of purchase, the built-in memory comes pre-initialized and contains music files for use as background music and images for use with the image mix function (image mix frames). Operating modes: luro) ©) Ci) (SON) CP) | Ge) (m9) | CA) CS 1 Power the camcorder using the compact power adapter. Preparations + 31
Do not disconnect the power source or turn off the camcorder until the initialization is completed. 2 Initialize the memory. QHERA7PAHERA 6 À 9 [AT Other Settings] 63 TF1 0 [Initialize ©/6e]] D [© Built-in Mem.] or [{] Mem. Card] 6 [Initialize] 6> [Complete Initialization]! 63 [Yes]? +3 [OK] 02 [X] o À [AT Other Settings] 03 [#1 0 [Initialize (s)] 0D [nitialize] 6) [Complete Initialization]! 63 [Yes]? 6) [OK] e> [x] Touch this option if you want to physical erase all the data rather than just clear the file allocation table of the memory. 2 you selected the [Complete Initialzation] option, you can touch [Cancel] to cancel the initialization while ii in progress. Al recordings will be erased and the memory can be used without any problem. Q mort + Initializing the memory will permanentiy erase all recordings. Lost origi- nal recordings cannot be recovered. Make sure you save important recordings in advance using an external device (C1 104) + Initializing a memory card wil permanentiy erase any musi images you may have transferred to the card. music files and image mix frames that come pre-installed in the buil-in memory will be restored after i is initialized.) To transfer music files from the supplied LEGRIA CD-ROM to the memory card connected to a computer: - Windows users: Remove the memory card from the camcorder, connect it to a computer and use the supplied software for AVCHD movies, Transfer Utility LE. For detail, refer to the Software Guide {PDF file) of PIXELAS software. - Mac OS users: Remove the memory card from the camcorder and connect it to a computer. Use Finder to transfer music files from the fes and 32 + Preparations
“MUSIC” folder on the supplied LEGRIA CD-ROM to the memory card connected to a computer. Refer to About the music files (CD 185) for the folder structure of the memory card. Preparations + 33
Basic Operation of the Camcorder Using the Touch Screen The control buttons and menu items that appear on the touch screen change dynamically depending on the operating mode and the task you are performing. With the intuitive touch screen interface you have all the controls at your fingertips. Touch a Touch on an element displayed on the touch F screen. Used to start playing back a scene in an LL index screen, to select a setting from the À menus, etc. Drag a While touching the screen, swipe your fin- F ger up and down or left and right across Î the screen. LL Used to scroll menus, to browse through N index screen pages or to adjust slider controls like the volume. @ mort + Inthe following cases, you may not be able to perform touch operations correctiy. - Using your fingemails or hard-tipped objects, such as ballpoint pens. - Operating the touch screen with wet or gloved hands. - Apping excessive force with your finger. Using the Menus Many of the camcorder’s functions can be adjusted from the menus in the À (Home) menu. In addition, you will find it useful to learn how to navigate the other menus as well so that you can access all that your camcorder has to offer. 34 + Preparations
À (Home) Menu The À (Home) menu is the gateway to most of the camcorder's func- tions and settings. Operating modes Quro) [5 )Cæ ] CN) CP) | Ge) (MP) | CRD CS 1 Touch [@] on the upper left of the screen to open the À (Home) menu. 2 Drag your finger left/right to bring the desired menu to the center. 3 Touch the icon of the desired menu to open it. See below for a description of each menu. The menus that appear depend on whether the camcorder is in recording mode or playback mode. In recording mode In playback mode hootng Mode Movie Pak Menus Available in Recording Mode Menu Other Settings] ct Recording Setup] {Shooting Mode] Description Opens the [47 Other Settings] menus, which gives you access to various camcorder settings. For details on how to navigate this menu, refer to Using ie [47 Other Settings] Menus (C2 36). Open this menu to select the movie format (CL) 59) video quality (C1 59) the memory used for recordings" (CL) 62) and whether to use dual recording or relay recording (CI 62). From this menu, you will be able to select the shooting mode. Each ofthe 5 modes offers you different functionality and control over the camcorder. For more detail, refer to Æecording (C2 38). Preparations + 35
Menu Description This contains functions commonly used while shooting, such as L# Main Functions] | focus and exposure. For details on how to navigate this menu, refer to /ë Main Functions] Panel(CQ 37) Es Remote Control+_| After installing the remote control app, use your smartphone as a Streaming]* remote control to record movies with the camcorder (CL] 122).
- CCE only. Menus Available in Playback Mode Menu Description Open the [47 Other Settings] menus (C1 36). The available functions diffr in recording mode and playback mode. Le Photo Playback] | Switches the camcorder to photo playback mode (C1 53). LR Movie Playback] | Switches the camcorder to movie playback mode (CII 49) You can play back the movies you recorded with Baby mode (CA 90). IE Video Snapshot]_| You can play back video snapshot scenes (CI) 91) Allows you to access the various Wi-Fi functions, such as: uploading recordings to the Web or playing back recordings using a smartphone. For more details on Wi-Fi functions, refer to Wi-Fi Functions (CD 119). T Other Settings] L@ Baby Album] La Wi-Fi @ nores + For brevity sake, references to settings in the À (Home) menu will include only the icon of the menu, the tab of the desired submenu (for settings in the [4 Other Settings] menu) and the setting name. For example, to adjust the screens brightness, use the 17 0) [LCD Brightness] setting.
- In (AID) mode, access to functions is limited. Touch [A] on the upper left of the screen to open the À (Home) menu. Drag your finger left/right to bring [17 Other Settings] to the center. Touch the icon to open the [AT Other Settings] menus. 4 Touch the tab of the desired menu. Drag your finger up/down to bring the setting you want to change into the orange selection bar. + You can also use the [A] and [Y] icons for scroling + Menu items not available appear grayed out. + You can touch any menu item on the screen to bring it directly into the selection bar. When the desired menu item is inside the selection bar, touch [D]. Touch the desired option and touch [X]. You can touch [X] to close the menu at any time.
fr Main Functions] Panel The [“# Main Functions] panel contains frequently used shooting func- tions. Refer to ["® Main Functions] Panel (CA 141) for available func- tions. Operating modes: auro) C9] Ci) (SON) CP) | Geo (mp4) |
- In [AUTS) mode, access to functions is limited. Touch ["#] on the lower right of the screen to open the [n# Main Functions] panel. Preparations + 37
Drag your finger up and down along the scroll bar to display the rest of the panel Touch to scroll up or down Touch the control button of the desired function You may need to drag your finger up and down along the scroll bar or touch [A] and [W] to find the control button of the desired function. Operating Modes Recording When recording, the camcorder's operating mode is determined by the [Shooting Mode] menu in the A (Home) menu and the [Movie Format] option in the [r# Recording Setup] menu. Perform the following proce- dure to set the shooting mode. Refer to Selecting the Movie Format (AVCHD/MP4) (CA 59) for a detailed explanation on how to set the movie format. 1 Touch the shooting mode button on the left side of the screen. 2 Drag your finger up/down to bring the desired shooting mode to the center and then touch [OK]. Shooting mode button For (ED and (Si) modes, you will need to make additional selections and then touch [OK] Shooting mode Operation C3 | Use Baby mode so that you can record all your lite one's precious (Baby mode) | moments (C1 63). 38 + Preparations
Shooting mode Operation Let the camcorder take care of most of the settings while you concentrate on recording (CL 40). Great for beginners or i vou just prefer not to bother with detailed camcorder settings. = Give your recordings a cinematic look and use cinema-look fiers to (Ginema mode) | create unique movies (CI 64). (umo) {AUTO mode) (Grenid pene From nightscapes to beaches, have the camcorder select the best Modes) | Seti that match te situation you are in (CL] 65. (2) CProgrammed_ | Enjoy full access to menus, settings and advanced functions (CL) 67). AE mode) Playback Press the (E) button to switch the camcorder between camera (recording) mode and playback mode. You can press [EI ] when the camcorder is off to turn it on directly in playback mode. Playback mode Operation Playing back movies (C1 49). You can also open index screens to play (2) back only video snapshot scenes (C2 91) or scenes recorded in Baby mode (CL) 90). CD | Viewing photos (O2 53) @ notes
- CRB/ŒRD/ ES When switching to a playback mode, the memory selected for playback wil| be the same currently used for recording. Preparations + 39
pr Basic Shooting and Playback This chapter covers how to easily record video and photos in mode, play them back, and how to use other basic func- tions. To enjoy full access to menus and more advanced func- tions, refer to Advanced Shooting (CL 59) and Advanced Playback and Editing (CL 89). Basic Recording Shooting Video With (A0) mode, you can take great-looking videos by letting the cam- corder automatically adjust settings based on the recording situation. Operating modes: @fronrs TO CHECK + Before you begin recording, make a test recording first to check that the camcorder is operating correctiy. 1 Open the LCD panel to turn on the camcorder. . By default, movies are recorded in the built-in memory. You can select the memory that will be used to record movies (CL] 62). + You can also press (ONIOFF) . 2 Slide the lens cover switch down. POWER À _/ HG —
40 + Basic Shooting and Playback
Set the camcorder to (Air) mode. o AIT (shooting mode button) 63 [@D Auto] 6D [OK] + This step is not necessary the first time you use the camcorder. + To change the movie format, refer to Selecting the Movie Format {AVCHD/MP4) (CA 59) Shooting moe button 4 Press (START/STOP) to begin recording. + Press [STARTISTOP) again to pause the recording + The ACCESS indicator wil flash from time to time while the scene is being recorded. When you have finished recording 1 Make sure that the ACCESS indicator is off. 2 Close the LCD panel to turn off the camcorder. You can also press (ONOFF)- 3 Slide the lens cover switch up. Basic Shooting and Playback + 41
About AUTO mode + Oniy the following functions are available in GO) mode. - Zoom (01 46). - Video snapshot (O1 72). - Face detection and tracking (OA 75) to get beautiful shots of people every time, tracking the subject even if the person moves. - Decoration (CI 68) to add a fun personal touch using stamps, drawings, image mix and more. About the Smart AUTO function In GT mode, the camcorder will automatically detect certain characteristics of the subject, background, lighting conditions, etc. It will then adjust various settings (focus, exposure, color, image stabilization, image quality, among others), selecting the best set- tings for the scene you want to shoot. The Smart AUTO icon will change to one of the following icons. 42 + Basic Shooting and Playback
Smart AUTO icons People (stationary) &) E: People (moving) Subjects other than people, such as landscapes Close objects People (stationary) People (moving) _ _ Subjects other than people, such as ladscanes Close objects _ _
- The icon in parentheses appears under backlight conditions. Basic Shooting and Playback + 43
Intelligent IS Inteligent IS allows the camcorder to select the best image stabilzation option based on your shooting method. During (Aure] and (5) mode, the Inteligent IS icon will change to one of the following icons. In other shooting modes, you can set the image stabiization manually (C2 73). Shooting method Icon Most general situations; Zooming out (200ming toward W): Following subjects at a distance moving left or right Zooming in (z00ming toward T), while remaining stationary, on subjects at a distance Close-up of a subject (D (Macro IS) When using a tripod €) (tipod mode)
- You can use the $F +2 [m1 0) [Intelligent IS] setting to change whether Powered IS is available when Intelligent IS is activated. QU (dynamic 1) (Powered IS)* O mort + To protect the lens, keep the lens cover closed when you are not recording movies and when you are not using the camcorder. + Observe the following precautions while the ACCESS indicator is on or flashing. Falling to do so may result in permanent data loss or damage to the memory. - Do not open the memory card slot cover. - Do not disconnect the power source or turn off the camcorder. - Do not change the camcorder's operating mode. + Be sure to save your recordings regularly (CL 104), especially after making important recordings. Canon shall not be liable for any loss or corruption of data. @ nores + About the power saving mode: f 47 6) [ & 1 #2 [Auto Power Of] is set to [EH On, the camcorder wi shut off automatically to save power when it is powered by a battery pack and is left without any operation for 3 minutes. Should this happen, turn the camcorder back on. + When recording in bright places, it may be difficult to use the LCD screen. In such cases, you can adjust the LCD backlight with the 47 03 44 + Basic Shooting and Playback
92 {LCD Backight] setting or adjust the brightness of the LCD screen with the $F 0» # [LCD Brightness] setting. + If you plan on making a long recording while the camcorder is in a fixed position, such as on a tripod, you can record with the LCD panel closed in order to conserve the battery's power. In such case, make sure 47 9 #1 0) [Power On Using LCD Panel] is set to [Off] + Under certain conditions, the Smart AUTO icon that appears on the screen may not match the actual scene. Especially when shooting against orange or blue backgrounds, the Sunset or one of the Blue Skies icons may appear and the colors may not look natural. In such case, we recommend recording in (P2) mode (C[ 67). Taking Photos You can easily take photos with the camcorder. You can even take pho- tos simultaneously while recording a movie. Operating modes: | Gao (MP | 1 Open the LCD panel to turn on the camcorder. . (HE R477 By default, photos are recorded in the buit-in memory. You can select the memory that will be used to record photos (CI 62) + You can also press (oiorF]
Slide the lens cover switch down. Set the camcorder to mode. Power \ / CHE —
{ À [Shooting Mode] s> [@D Auto] #D [OK] + This step is not necessary the first time you use the camcorder. 4 Touch [PHOTO] to take a photo. Basic Shooting and Playback + 45
A green icon (©) and © © (TRE only) or MA L> (551 will appear momentarily on the screen and the ACCESS indicator will flash as the photo is recorded. However, if you record a photo while recording a movie, @ will not appear. When you have finished taking photos 1 Make sure that the ACCESS indicator is off. 2 Close the LCD panel to turn off the camcorder. You can also press (ONOFF). 3 Slide the lens cover switch up. O mPoRaNT + The information in the sidebars (CA 42, 43, 44), IMPORTANT section (CA 44) and NOTES section (CL] 44) on the previous pages also apply to photos. G@ nores + Photos are recorded as JPG files. The photo size is 1920x1080. At this size, a 1 GB memory card can hold approximately 660 photos. How- ever, the actual number of photos that can be recorded will vary depending on the subject and shooting conditions.
- When the video quality is 4 Mbps for MP4 movies, the photo size is 1280x720. Atthis size, a 1 GB memory card can hold approximately 1,490 photos. + Photos cannot be recorded while fading in or fading out a scene. Zooming There are two ways you can zoom in and out: using the zoom lever on the camcorder or using the zoom controls on the touch screen. You can also select the zoom type (optical, advanced or digital). Operating modes: (AUTO) CO) CE) (SC) CP3 | Wan) (mp4) | 46 + Basic Shooting and Playback
Using the Zoom Lever Move the zoom lever toward W {wide angle) to zoom out. Move it toward T (telephoto) to zoom in. = By default, the zoom lever operates at a variable speed — press gently for a slow zoom; press harder for faster zooms.
W Zoom out TZoomin Using the Touch Screen's Zoom Controls 1 Display the zoom controls on the touch screen. fs ”# 0) [ZOOM] + The zoom controls appear on the left side of the screen. 2 Touch the zoom controls to operate the zoom. Touch anywhere within the W area to Zoom out or anywhere within the T area to zoom in. Touch closer to the center for à slow zoom; touch closer to the icons for faster zooms. Touch [START] to begin recording. Touch [STOP] to pause the recording. 4 Touch [X] to hide the zoom controls.
Selecting the Zoom Type The camcorder offers three types of zoom - optical, advanced and digital. Basic Shooting and Playback + 47
Operating modes: CP2 | (MP |
- In GTS mode, [Zoom Type] will be set to [E3 Optical] { #& 0) [Zoom Type] #3 Desired zoom type 63 [X] Options [€ Optical] For optical zoom, the camcorder uses the optical magnification ratio of the lens. [EM Advanced] For advanced zoom, the camcorder processes the image beyond the range of the optical zoom to obtain a larger zoom without any deterioration in image quality, At full wide angle, the angle of view with advanced zoom is wider than the angle of view with optical zoom. [TE Digital] (ED [ZM Digital) For digital zoom (light blue area on the zoom bar), the image is processed digitally so image qual- ity will deteriorate the more you zoom in. @ nores + Keep at least 1 m away from the subject. At full wide angle, you can focus on a subject as close as 1 cm. Using tele macro (C1 84), you can focus on a subject as close as 50 cm at full telephoto + You can also set 47 #2 [æ | 62 [Zoom Speed] to one of three con- stant speeds (3 is the fastest, 1 the slowest). When [Zoom Speed] is set to [ŒB Variable], the zoom speed will be faster in record pause mode than when actually recording, except when pre-recording (LA 80) is activated. + When you turn off the camcorder, it “remembers” the zoom position 50 the next time you turn it on, the zoom position will be the same. You can activate this feature using the 47 #> [ra] 63 [Zoom Position at Star- tup] setting. 48 + Basic Shooting and Playback
only) and movie format. Press to change the index screen: [2] Drag your finger left/ight for the next/previous index page [3] Display the next/previous index page. [4] if Scene's timeline (C1 94; for AVCHD movies). i Scene information (for MP4 movies). Recording date (for AVCHD movies) or folder name (for MP4 movies; (1 149). 3 Look for the scene you want to play back. 4 Touch the desired scene to play it back. + The camcorder will play back the scene selected and continue until the end of the last scene in the index screen. + Touch the screen to display the playback controls. During playback, the playback controls will disappear automatically after a few seconds without operation. In playback pause, touch the screen again to hide the playback controls. Displaying scene information for MP4 movies 1 inthe LR Movie Playback] index screen for MP4 movies, touch til. Touch the desired scene. + The scene information screen appears. + Touch Æ/B to select the previous/next scene.
50 + Basic Shooting and Playback
3 Touch [4] twice when finished. During playback: COTON E] Jump to the beginning of the scene. Double-tap to jump to the previous scene. 2] Jump to the beginning of the next scene. 3] Pause the playback. L] Fast playback® backward/fonward 5] Display the volume (C1 51) and background music mix balance ([A 92) controls: [6] Stop the playback. [7] Decoration (C1 68) [8] Recording date (for AVCHD movies) or the date the recording started (for MP4 movies)
- Touch several times to increase the playback speed to approx mately 5x > 15x > 60x normal speed. Adjusting the volume 1 During playback, touch the screen to display the playback controls. 2 Touch [#a], drag your finger along the [Speaker]" bar to adjust the volume and touch [#1].
- When ET 9 [#1 9 [AV/Headphones] is set to [Q Headphones], adjust the {Headphones] bar instead. Basic Shooting and Playback + 51
During playback pause: [] Resume playback. 2] Slow playback® backward/fonward. 5] Capture the displayed frame as a photo (CI 90). [4] Decoration (CA 68).
- Touch several times to increase the playback speed 1/8 — 1/4 the normal speed! @ mort + Observe the following precautions while the ACCESS indicator is on or flashing. Faling to do so may result in permanent data loss. - Do not open the memory card slot cover. - Do not disconnect the power source or turn off the camcorder. - Do not press CE ] + You may not be able to play back with this camcorder movies recorded on a memory card using another device and then transferred to a mem- ory card connected to a computer. G@ nores + You can use the ;7 0) %2 [Display Date/Time] setting to choose whether to display the recording date when you play back videos. + Depending on the recording conditions, you may notice brief stops in video or sound playback between scenes. + During fast/slow playback, you may notice some anomalies (blocky video artifacts, banding, etc.) in the playback picture. Also, sound will not be output. + The speed indicated on the screen is approximate. + Slow reverse playback will look the same as continuous frame reverse. + You cannot jump to the previous or next scene with MP4 movies. 52 + Basic Shooting and Playback
+ Sound will not be output from the built-in speaker while the supplied High Speed HDMI cable or optional STV-250N Stereo Video Cable is connected to the camcorder. Viewing Photos Operating modes: 1 Press | EF). 2 Open the [@ Photo Playback] index screen. ha» Photo Playback] QHFR46] I necessary, change the index screen. [@] (index screen button) 6) Memory with the desired photo (3 or (s)) s> [OK] Basic Shooting and Playback + 53
ul Index screen button. Displays the currently selected memory. Press to change the index screen. {21 Drag your finger left/right for the next/previous index page*. 5] Display the next/previous index page. [4] Folder name (C1 149)
- While browsing through index pages, a larger scroll bar will appear at the bottom of the screen for a few seconds. When you have a large number of photos it may be more convenient to drag your finger along the scroll bar. 4 Look for the photo you want to play back. 5 Touch the photo you wish to view. + The photo is displayed in single photo view. + Drag your finger left/right to browse through the photos one by one. To return to the index screen from single photo view
1. Touch the screen to display the playback controls.
2 Touch [E=]. Photo Jump Function When you have recorded a large number of photos, you can jump eas- ily through the photos using the scroll bar. 1 Touch the screen to display the playback controls. 2 Jump through the photos using the scroll bar. [&] +) Drag your finger left and right along the scroll bar 5) [5] 54 + Basic Shooting and Playback
O PoraNT + Observe the following précautions while the ACCESS indicator is on or flashing. Falling to do so may result in permanent data loss. - Do not open the memory card slot cover. - Do not disconnect the power source or turn off the camcorder. - Do not press [ E1 ]. + Even if you transfer them to a memory card connected to a computer, the following image files may not be displayed correctiy using the cam- corder. - Images not recorded with this camcorder. - Images edited on a computer. - Images whose file names have been changed. Deleting Scenes You can delete those scenes and stories that you are not interested in keeping. Deleting scenes allows you also to free up space on the mem- ory. Deleting a Single Scene Operating modes: | Wa) MP | CRD 1 Play back the scene you want to delete. 2 Touch the screen to display the playback controls. 3 Delete the scene. o [I] 0) [Edit 6 [Delete] +) [Yes] #> [OK] Deleting Scenes from the Index Screen Operating modes: | a) (MP | CRD Basic Shooting and Playback + 55
1 Open the desired index screen ([L1 49, 90, 91). To delete all the scenes recorded on a specific date, drag your finger left/right until a scene you want to delete appears. Delete the scenes.
- When you select [Select], perfomm the following procedure to select the indiid- ual scenes you want to delete before touching [Ves]. “Touch [Stop] to interrupt the operation while it is in progress. Some scenes may be deleted nevertheless. To select individual scenes 1 Touch on the individual scenes you want to delete. + Acheckmark Y will appear on the scenes you touch. The total number of selected scenes will appear next to the &4 icon. + Touch a selected scene to remove the checkmark. To remove all checkmarks at once, touch [Remove AI] 63 [Yes] 2 After selecting all the desired scenes, touch [OK]. Options [date/folder namg] Delete all the scenes recorded on a particular date. For AVCHD movies, the date will appear in the control but- ton. For MP4 movies, the folder name (1 149) will appear. [Select] Select individual scenes to delete. [All Scenes] Delete all the scenes.
- The last four digits of the folder name indicate the date the folder was created. Q PORTANT + Be careful when deleting recordings. Once deleted, scenes cannot be recovered. + Save copies of important scenes before deleting them (C1 108). + Observe the following precautions while the ACCESS indicator is on or flashing (while scenes are being deleted) - Do not open the memory card slot cover. - Do not disconnect the power source or turn off the camcorder. - Do not change the camcorder's operating mode. 56 + Basic Shooting and Playback
@nores + To delete all movies and make al recordable space available again you may prefer to initialize the memory (CA 31) Deleting Photos You can delete those photos that you are not interested in keeping. Operating modes: Deleting a Single Photo 1_ In single photo view, select the photo you want to delete. 2 Touch the screen to display the playback controls. 3 Delete the photo. ff, lEditl +) IDelete] 9) [fi Proceed] +) Nes] 4 Drag your finger left/right to select another photo to delete or touch [XI]. Deleting Photos from the Index Screen 1 Open the [£à Photo Playback] index screen ([[1 53). 2 Delete the photos. {}; [di] + [Delete] #> Desired option" # [Vesl” 6) [OK]
- When you select [Select], perlorm the following procedure to select the individ- ual photos you want to delete before touching [Yes] Touch [Stop] to interrupt the operation while it is in progress. Some photos will be deleted nevertheless: To select individual photos
1. Touch the individual photos you want to delete.
Basic Shooting and Playback + 57
+ A checkmark Y” will appear on the photos you touch. The total number of selected photos wil appear next to the R2 icon: + Touch a selected photo to remove the checkmark. To remove al checkmarks at once, touch [Remove AI] eD [Yes] 2 After selecting all the desired photos, touch [OK]. Options [folder name] Delete all the photos taken on a particular date. The folder name” (CA 149) will appear in the control button. [Select] Select individual photos to delete. [All Photos] Delete all the photos.
- The last four digits of the folder name indicate the date the folder was created. O mPoRaNT + Be careful when deleting photos. Deleted photos cannot be recovered. + Photos that were protected with other devices and then transferred to the memory card when it was connected to a computer cannot be deleted with this camcorder. 58 + Basic Shooting and Playback
Advanced Shooting This chapter covers advanced shooting functions, such as Spe- cial Scene modes and Baby mode. For details about basic video shooting, refer to Basic Shooting and Playback (CI 40). Selecting the Movie Format (AVCHD/MP4) You can choose to record movies in AVCHD or MP4 format. AVCHD movies are ideal for playback with fantastic picture quality. MP4 mov- ies are versatile and can easily be played back on smartphones or uploaded to the Web. Operating modes: QuTO) (2) CE) (SON) CP) | ED (MP4) | À 5 [ct Recording Setup] #3 [Movie Format] 6) Desired movie format 63 [>] 03 [X] Selecting the Video Quality The camcorder offers several video quality options (measured by bit rate’) for recording movies. For AVCHD movies, select 50P or MXP mode for higher quality and select LP for longer recording times. Simi- larly, for MP4 movies, select 35 Mbps or 24 Mbps mode for higher quality and 4 Mbps mode for longer recording times. If you select 50P or 35 Mbps, movies will be recorded at 50P frames per second, pro- gressive. The table after the following procedure gives approximate recording times.
- Bit rate indicates how much information is recorded in 1 second of video and also affects recording time available on the memory. Movies with higher bit rates will have higher video quality while those with lower bit rates will have smaller file sizes, allowing you to record longer and upload more quickly. Operating modes: (AUTO) (97) CH) (SCN) CP | vo) (MP4) | Advanced Shooting + 59
- You can view information on the video quality with the following procedure. To view information on the video quality 1 Touchli]. A screen with the resolution, bit rate and frame rate will appear. 2 Touch [#]. Œ@ nores + Movies recorded in 50P or MXP mode cannot be saved on AVCHD discs. Use an external Blu-ray Disc recorder compliant with AVCHD Ver.
2.0 specifications to copy those movies onto Blu-ray discs.
+ Depending on the portable device, you may not be able to play back your recordings. + The camcorder uses a variable bit rate (VBR) to encode video so the actual recording times will vary depending on the content of the scenes. + The following types of MP4 scenes wil be recognized as multiple files: on other devices. - Scenes exceeding 4 GB - Scenes recorded at 35 Mbps exceeding 80 minutes - Scenes recorded at a video quality other than 35 Mbps exceeding 1 hour + Depending on the TV, you may not be able to play back movies recorded in 50P or 35 Mbps. + When the video quality is set to 50P or 35 Mbps, dual recording and decoration are not available. + When the shooting mode is set to recording in 50P or 85 Mbps is not available. When the shooting mode is set to (@2), recording in 50P is not available. 60 + Advanced Shooting
Approximate recording times + Defauit value For AVCHD movies: 8 GB Memory card/ 35 min. 40 min. th in memory 1668 Memory card | The 15 min. 1h25 min. | 2hr5min. | Ghr 5 min. 32 GB Memory card/ | 2hr. 30 min. | 2hr.55 min. | 4hr 10 min. | 12hr. 15 min Buit-in memory 64 GB Memory card | ShrSmin. | Shr55 min. | Bhe20min 24h 30 min.# For MP4 movik 8 GB Memory card/ 30 min. 40 min. The | 4h20 min. CRD /CERE Buit- in memory£ 16 GB Memory card Th Th 25 min. | 2hrS min | Bhr 40 min. 32 GB Memory card/ 2e |2hr55min 4h 10m. 17h Built-in 20 min. memorÿ® 64 GB Memory card Ah | She 55 min 8h 20m. She 45 min.$ À Recorded in 1,920x1,080 resolution. 2 Recorded in 1,440x1,080 resolution. $ CB/RD/ RS At the time of purchase, the built-in memory contains about 70 MB of music files (background music), 5 MB of image fles (mage mix rames) and about 2 MB of fle management data. # A single scene can be recorded continuous}y for 12 hours; at that point, the camcorder wil stop for about 8 seconds before resuming recording. $ Recorded in 1,280x1,080 resolution. Advanced Shooting + 61
CB / CHEN / CHEB Selecting the Memory (Built-in Memory/ Memory Card) for Recordings You can select to record your movies and photos in the built-in mem- ory or on a memory card. The default memory for recording both is the built-in memory. Operating modes: QUO) CE C5) CN CP) | we) (MP | À 5 [r# Recording Setup] #3 [Recording Media] 6} [’Æ Rec Media for Movies] or [É3 Rec Media for Photos] 9 Desired memory 9) [4] 5) [2] 0) [X] CHEB / D / (XD Dual Recording and Relay Recording When you record, you can use dual recording to record an MP4 movie that has the same image as the scene being recorded. The MP4 movie is saved on the memory not currently selected for recording. Because the resulting movie is in MP4 format, it is ideal for transferring to another device or uploading to the Web. You can activate the relay recording so if the assigned memory becomes full while recording movies, the recording will continue unin- terrupted on the other memory. Operating modes: Quro) C@7 Ce) (SON) CP) | we) | Activate the desired function. À 9 [r* Recording Setup] 6) [Dual/Relay Recording] 6) Desired function 6) [>] 93 [X] G@ nores + Dual recording is not available in the following cases: 62 + Advanced Shooting
- When the video quality is set to 50P or 35 Mbps. - When the shooting mode is set to (I or (EN). + When dual recording is activated, decoration is not available. + When you use relay recording, there will be a momentary stop in the scene at the point where the camcorder switches from one memory to another. Baby Mode Baby's first smile, first step, first word. When you us mode, you can easily capture those once-in-a-lifetime moments and keep track of baby's growth day by day. With the optimized settings, baby's skin will appear with vibrant clarity. In addition, you can add a stamp to the video to show how much time has passed since baby was born. Operating modes: © | eva | {am (shooting mode button) #3 [© Baby] 9 [OK] Shooting moe button @nores + During mode, pre-recording (QA 80) will be activated and cannot be turned off. That way, you will not miss memorable moments. + You can play back recordings made in mode from the [@ Baby Album] (C1 90) or 'Æ Movie Playback] screen. The baby album is particularly convenient because it contains, in chronological order, only the scenes recorded in [F3] mode. + During mode, recording in S0P or 35 Mbps is not available. + During mode, dual recording is not available. + Refer to The appendix Menu Options Lists (CT 141) for functions avail- able during (97) mode. Advanced Shooting + 63
Cinema Mode and Cinema-Look Filters In CH) mode, the camcorder will adjust the frame rate and several other picture-related settings to give your recordings a cinematic look. In this mode you can also use a variety of professional cinema-look fil- ters to create unique movies with a distinctive appearance. When you convert movies to MP4, you can add cinema-look filters (Ca 107. Operating modes: C5) | Even) (MPa) | Set the shooting mode to AUTO (shooting mode button) 63 [Eh Cinema] 0) [OK] 62 Desired cinema-look filter 8) [OK] + The selected cinema-look filter will be applied and its number will appear on the control button Shooting mode button 64 + Advanced Shooting
The camcorder offers 7 cinema- look filters. Select the desired filter Hi] Filter number (will appear on while previewing the effect on the the control button) screen. [2] Filter name [1. Cinema Standard]* [3] Preview the effect on the L. Vivid] screen
13. Cool] [4] Brief description (onscreen
[4. Nostalgic] guidance) [5. Sepia]
[7. Dramatic B&W] @ nores + When the shooting mode is set to (EM), the following functions are not available. - Taking photos - Decoration - Dual recording - Recording in 50P or 35 Mbps Special Scene Modes Recording in a very bright ski resort or capturing the full colors of a sunset or a fireworks display becomes as easy as selecting a Special Scene mode. Operating modes: [SGN) | Ga) me | Advanced Shooting + 65
AO (shooting mode button) #3 [SCN Scene] #3 [OK] 0> Desired Special Scene mode 6) [OK] Shooting mode button Options _ (* Defauit value) [® Portraitj* The camcorder uses a large aper- ture, to achieve a sharp focus on the subject while blurring the background. L'& Sports] To record sports scenes such as tennis or golf. [a Night Scene] _ To record nightscapes with lower noise. [& Snow] To recordin bright ski resorts without the subject being underexposedi
LG: [ Beach] To record on a sunny beach without the subject being underexposed' P à [x Sunset] To record sunsets in vibrant colors. 5 : 66 + Advanced Shooting
LA Spotlight] To record spotlit scenes. [4 Fireworks] To record fireworks. [9 Low Light] To record in low-light situations. @nores + [® Portail, Sports][$ Snow] Beach]: The picture may not appear smooth during playback. + [® Portrait]: The blur effect of the background increases the more you zoom in (T). + [$ Snow/['a Beach]: The subject may become overexposed on cloudy days or in shaded places. Check the image on the screen. + [@ Low Light}: - Moving subjects may leave a trailing afterimage. - Picture quality may not be as good as in other modes. - White points may appear on the screen. - Autofocus may not work as well as in other modes. In such case, adjust the focus manually. + Le Fireworks]: - To avoid camcorder blur (blur due to the camcorder moving) we recommend using à tripod. Programmed AE Mode: Adjusting Settings to Match Your Needs Give yourself the most control while shooting by using Programmed AE (AE: auto exposure) shooting mode. As with other shooting modes, the camcorder automatically adjusts the shutter speed and aperture. How- ever, this mode offers you the most versatility by allowing you to adjust other settings to achieve the results you are looking for. Advanced Shooting + 67
Operating modes: CP2 | (MP | {am (shooting mode buttor) 6 [P Programmed AE] +3 [OK] Shooting mode button Decoration: Adding a Personal Touch Add a new level of enjoyment to your scenes by decorating them. You can add animated graphics, [ stamps and even your own freehand drawing easily just by simply using your fingertip. When you convert movies to MP4, you can add decorations (LI 107). Decorating Scenes while Recording Operating modes: Qauro) C®] [SCN) CP) | Geo) (MPa) | 1 Open the decoration screen. b # 62 [9% Decoration] 2 Use a tool from the toolbar as explained in the following procedures. 3 Press [START/STOP) to record movies with your decorations. You can add decorations even while recording a scene. 4 Touch [X] to exit the decoration screen. 68 + Advanced Shooting
E WE dE El [1] Canvas - The area where you will draw and see your décorations in action. 2 Toolbar. 3 [@ Pens and Stamps] Select the type of pen or stamp and its color. You can also save a single canvas or load a previousiy saved canvas. [4] [#2 Animated Stamps] Select animated stamps to add to your decoration. 5] [© Date/Time] Add the date and/or time as a caption that will be included in the recording. [6] [Bi] (mage Mix) Choose one of 26 different frames to add onto the canvas. Image mix can be used in combination with the pens, stamps and animated stamps. E [I In recording mode: pause the live video. Touch [»HI] again to restore the live video. You can add decorations to and record the frozen image. In playback mode: pause the playback. Touch [B»] to resume playing back the scene. & [=] Minimize the toolbar to the top of the screen to view almost all of the canvas. Touch [AL] to restore the toolbar. To use [Pens and Stamps]
Touch [#1]. The [Pens and Stamps] screen will appear. Select the desired pen or stamp from [Tools] and then touch [4]. The main decoration screen wil appear again. Draw freely on the canvas with your fingertip. + To select a different pen or stamp: Repeat steps 1 and 2 Advanced Shooting + 69
+ To change color: Touch [@] and then touch the white or black button under [Colors]. Alternatively, touch [@] e> [/#] and select a color from the color palette. + To clear your freehand drawings and stamps: Touch [@] +> [Clear] 92 es] 3 [S1. + To save your freehand drawings and stamps: Touch [@] 62 1@Save]! or [(s]Save]! 0D [Yes] D [#1]. + To load a previously saved canvas (freehand drawings and stamps only) from the memory: Touch [@] #3 [E)LoadP or [Gr]Load]? 6) Des] > [91]. Ÿ The freehand drawings and stamps will be saved in the buït-in memory (CHEB, ES only) or on a memory card (BE on). 2 The camcorder wil apply the last freehand drawings and stamps that were saved in the built-in memory (CHEB / GR only) or on a memory card (EE on) To use [Animated Stamps] Touch [::]. The [Animated Stamps] screen will appear. Touch one of the control buttons. Touch anywhere on the canvas to place the selected animated stamp. You can also drag some animated stamps to a different location. CAN To use [Date/Time] During mode, this screen offers more functionality specific to that mode. See the next section for details. 1 Touch [@]. The [Date/Time] screen will appear. 2 Touch [Date] or [Time] and touch [4]. 3 Touch the caption and drag it to the desired location. To use stamps during mode During mode, you can add stamps to the video to track baby's height, weight and age. 70 + Advanced Shooting
Operating modes: ÿ | a | 1 Touch [@1. + The screen with stamps for (SJ mode will appear. 2 Select and set the desired stamps. + To add the age stamp: Touch [0 days] 6) [#7] > A/Y to set baby's date of birth 82 [#1]. + To add the height stamp: Touch [40 cm] +) [#] +) A/ baby's height 6) [1] + To add the weight stamp: Touch [3000 g] > [$] 2 A/Y to set baby's weight 0) [91]. + To add the current date or time: Touch [Date] or [Time]. 3 Touch [#)]. 4 Touch the stamp, date or time and drag it to the desired location. @nores + For the age stamp, days will be displayed for 6 days after birth, weeks wil be displayed from 1 week up to, but not including, 1 month: months wil be displayed from 1 month up to, but not including, 1 year: and years will be displayed from 1 year. to set To use image mix To use the image mix function when recording on a memory card, you will need to connect the memory card to a computer and transfer the image mix data from the supplied LEGRIA CD-ROM to the memory card in advance. See About the image files for the Image Mix function (CA 185). Operating modes: (AUTO) [ @ ] CN) CP) | wa) | ea) @ronrs TO CHECK Before performing this procedure, make sure the memory with the image mix data is selected (CL) 62). At the time of pur- chase, image mix data is in the built-in memory. Advanced Shooting + 71
Touch [EZ] to open the [Select Image] screen and then touch [ON]. Touch [+] or [-] to select a different image mix frame. You can touch one of the memory icons at the bottom of the screen to read image mix frames saved on a different memory (only when recording on or playing back scenes from a memory card). 3 Touch [#] to mix the selected frame with the live video.
Decorating Scenes during Playback Operating modes: 1 From the index screen ([I] 49), play back the scene you want to decorate.
Touch the screen to display the playback controls. 3 Touch [/W] to open the decoration screen. Decorate the scene using the tools from the toolbar as explained in the previous section. G@ nores + Initializing a memory will erase any [Pens and Stamps] drawing canvas and image files you may have saved. (OEEB/ (HD The image mix frames that come pre-installed in the built-in memory will be restored after itis initialized) + [Animated Stamps] and [Date/Time] cannot be used at the same time. + Image mix cannot be selected during recording or playback. Select the image mix during playback pause or before starting the conversion of movies to MP4 (CRE /GHXD/GHXB on). + During recording mode or when dual recording is activated, decoration is not available when the video quality is set to 50P or 35 Mbps.
Video Snapshot Record a series of short scenes. When you play back your video snap- shot scenes, you can even set them to your favorite music (CL] 92) to 72 + Advanced Shooting
create your own fun music video. You will be surprised how by chang- ing the background music, you can give your scenes an entirely new feel. You can change the length of the video snapshot scene with the 47 6} #2 [Video Snapshot Length] setting. Operating modes: (AUTO) CB) 1 Activate video snapshot. 6 l'D) + Touch [OFF] instead to deactivate video snapshot. + A blue border appears on the screen. Press [START/STOP). The camcorder records for a few seconds (the blue frame serves as a visual progress bar) and then automatically returns to record pause mode. @nores + Video snapshot scenes recorded in MP4 format can be played back from the ["Æ Movie Playback] index screen (CL 49) while those recorded in AVCHD format can also be played back from the [HE Video Snapshol] index screen ((L1 91). + Any of the following actions will deactivate video snapshot. - Tuming off the camcorder. - Pressing [© - Changing the movie format (AVCHD/MP4), video quality or frame rate. CP) | (ve) (MPa) | Video Snapshot] +) [ON] 9 [X]
Advanced Image Stabilization The image stabilizer reduces camcorder blur (blur due to the cam- corder moving) so you can get nice, stable shots. Select the image sta- bilization mode according to the shooting conditions. Operating modes: [ED (SON) CP) | Gwen) (MPa) | Advanced Shooting + 73
À 9) [AT Other Settings] 6) Ma] 6) [Image Stabilizer] 9 Desired IS mode 0) [X] Options _ (* Default value) [Œ Dynamic]* Compensates for a higher degree of camcorder Shake, such as when shooting while walking, and is more effec- tive as the zoom approaches full wide angle. [ŒD Standard] Compensates for a lower degree of camcorder Shake, such as when shooting while remaining stationary, and is suitable for shooting natural-looking scenes. Off] Use this setting when the camcorder is mounted on a tipod. Powered IS You can use Powered IS to make the image stabilization even more powerful. Powered IS is most effective when you are stationary and Zooming in on far subjects using high zoom ratios (the more you approach the telephoto end). Holding the LCD panel with your left hand will add to the stability of the shot. b né +) [is Powered IS] 9) [ON] 52 [X] + Repeat, selecting [OFF], to turn off Powered IS. @ nores + Ifthe degree of camcorder shake is too high, the image stabilizer may not be able to fully compensate. + [Œ Dynamic] is available only when [Zoom Type] is set to [ER Optical] + For surveying and following shots, when you pan the camcorder from side to side or tit it up and down, we recommend setting the IS mode to [ŒB Dynamic] or [ŒD Standard]. 74 + Advanced Shooting
Face Detection and Tracking The camcorder automatically detects people's faces and uses this information to select the optimal settings for beautiful videos and pho- tos. You can use tracking to tell the camcorder to track and optimize settings for a different person. You can also use tracking to always keep in focus other moving subjects, such as pets or moving vehicles. Operating modes: CPD | Wa (9 |
- Face detection and tracking are always activated in and modes. @ronrs TO CHECK + Select a shooting mode other than the [24 Night Scene], [à Low Light] or [# Fireworks] Special Scene mode in [Sn] mode. By default, face detection and tracking are activated so you can skip step 1 inthe following procedure. Ifthe function was turned off, perform the fol- lowing procedure starting from step 1. 1 Activate face detection and tracking. À 9 [47 Other Settings] > [rm ] 0) [Face Detection & Tracking] +) [EN On Lars
Point the camcorder at a person. Ifthere is more than one person in the picture, the camcorder will automatically select one person it determines is the main subject. The main subject is indicated by a white face detection frame and the camcorder will optimize the settings for that person. Other faces will have gray frames.
Touch a different face on the touch Zi screen to optimize the camcorders settings for that person. 42 + You can also touch other moving objects, such as a pet. Main subject Advanced Shooting + 75
+ A white double frame will appear around the subject and track it as it moves. + Touch [Cancel £ 3] to remove the frame and cancel the tracking. @ nores + The camcorder may mistakenly detect the faces of non-human sub- jects. In such case, turn face detection off. + In certain cases, faces may not be detected correctiy. Typical examples include: - Faces extremely small, large, dark or bright in relation to the overall picture. - Faces turned to the side, at a diagonal or partially hidden. Face detection cannot be used when the shutter speed used is slower than 1/25 or when the digital zoom is activated at more than 212x zoom. When face detection is activated, the slowest shutter speed used by the camcorder is 1/25 Touching somewhere with a color or pattern unique to the subject will make it easier to track. However, if there is another subject in the vicinity that shares similar characteristics to the selected subject, the cam- corder may start tracking the incorrect subject. Touch the screen again to select the desired subject. In certain cases, tracking may not be able to track the subject. Typical examples include: - Subjects extremely small or large in relation to the overall picture. - Subjects too similar to the background. - Subjects lacking sufficient contrast - Fast moving subjects. - When shooting indoors with insufficient lighting} Faders The camcorder offers two professional looking transition effects to fade-in or fade-out scenes. You have the option to activate the fader only one time or every time you start or stop recording. Operating modes: Œuro) CE (CN) CP) | (va) (mP9) | 76 + Advanced Shooting
+2 [ES Faders] 0) Desired fader* +) esired fader color +2 [X]
- You can preview the transition effect on the screen. + The icon ofthe selected fader appears. + Repeat, selecting [ΠOff, to turn off faders. To fade in/out Press [START/STOP] in record pause mode to start recording with a fade in. Press [START/STOP) while recording to fade out and pause the recording. @nores + When you apply a fader, not only the picture but also the sound wil face in or out + Faders cannot be used in the following cases: - While using the [Old Movies] cinema-look filter in - When recording scenes with decorations. - When recording video snapshot scenes. - While pre-recording is activated. - When the video quality is set to 50P or 35 Mbps. mode. Adjusting the Exposure Attimes, backlit subjects may appear too dark (underexposed) or sub- jects under very strong lights may appear too bright or glaring (overex- posed). To correct this, you can adjust the exposure manually or use the Touch AE function to automatically set the optimal exposure for the subject you select. This is convenient when the brightness of the sub- ject you want to shoot is noticeably brighter/darker than the general brightness of the image. Operating modes: PD) | Gen) (mp4) | Advanced Shooting + 77
@ronrs TO CHECK + Select a shooting mode other than the [Æ Fireworks] Special Scene mode in (SCN] mode. 1 Open the exposure adjustment screen. b »& 0) [4 Exposure]
Touch a subject that appears inside the [4 frame. + The Touch AE mark (°1+) wil flash and the exposure will be adjusted automatically so the area you touched will be correctly exposed. You have the option to further adjust the exposure manually as necessary. + You can touch [M] instead to adjust the exposure manually without activating the Touch AE function. + The manual adjustment dial appears and the adjustment value is set at 40. + Touch [M] again to return the camcorder to automatic exposure. Touch [4] or [>] or drag your finger along the dial to set the exposure adjustment value. The adjustment range may vary depending on the initial brightness of the image, and some values may be grayed out Touch [X] to lock the exposure at the selected value. During exposure lock, LA and the selected exposure adjustment value will appear on the screen. @ nores + Ifthe shooting mode is changed during exposure lock, the camcorder will return to automatic exposure. + When shooting subjects with a strong light source behind them, the camcorder automatically corrects for the backight. You can turn off the automatic backight correction with the 1T_6> [m1 # [Auto Backlight Correction] setting. Note that the automatic backlight correction is not available in the following cases. mode, when using à cinema-look filter other than [Cinema
- In (SNJ mode, when using the [2 Night Scene], [& Snow], [a Beach], [&: Sunset] or [A Spotlight] Special Scene mode. Adjusting the Focus Autofocus may not work well on the following subjects. In such case, focus manually. + Reflective surfaces + Fast moving subjects + Subjects with low contrast + Through wet windows or without vertical lines + Night scenes Operating modes: CFD | Ga (WP | @ ronnrs ro cHEck + Adjust the zoom before you start the procedure. 1 Open the manual focus screen. o n& 0) [© Focus] 2 Touch a subject that appears inside the © frame. + The Touch AF mark (+2+) will flash and the focusing distance will be adjusted automatically. You have the option to further adijust the focus manual as necessary. + You can touch [MF] instead to adjust the focus manualy without activating the Touch AF function. + The manual focus controls appear. + Touch [MF] again to return the camcorder to autofocus. 3 Touch and hold [AA] or [à] to adjust the focus. + The focusing distance displayed will change as you adjust the focus. The focusing distance will be displayed for about 2 seconds. You can change the units used for the distance display with the 47 9) T# 1 9 [Displayed Units] setting. Advanced Shooting + 79
+ The center of the screen will be magnified to help you focus more easily. You can also turn off this function with the {7 6) M] 6) [Focus Assistance] setting + If you wish to focus on faraway subjects such as mountains or fireworks, touch and hold [a] until the focusing distance changes to CO 4 Touch [X] to lock the focus at the selected distance. During manual focus, [MF] will appear on the screen @nores + When you use [à] and [aÂ] to adjust the focus manually, you can touch inside the frame to automatically focus on that spot. Pre-Recording The camcorder will start recording 3 seconds before you press [START/STOP), ensuring you do not miss important shooting opportuni- ties. This is especially useful when it is difficult to predict when to start recording. Operating modes: Au | : © [SEN) CP) | (we) (ea |
- Pre-recording is always activated in mode. 1 _Activate the pre-recording function. f »& +) [© Pre REC] 0) [ON] 6) [X] + © will appear on the screen. + Repeat, selecting [OFF], to turn off pre-recording. 2 Press [START/STOP). The scene recorded in the memory will start 3 seconds before [START/STOP) was pressed. 80 + Advanced Shooting
@nores «The camcorder will not record the full 3 seconds prior to pressing [START/STOP] if the button was pressed within 3 seconds of having turned on pre-recording or having finished the previous recording. + Any of the following actions will deactivate the pre-recording function. - Leaving the camcorder without any operation for 5 minutes. - Changing the operating mode. - Activating video snapshot. - Touching any of the following control buttons in the [në Main Function] panel: [WB White Balance], [fä} Faders] or [9% Decoration]. - Opening the [{7 Other Settings] menus. - Changing the shooting mode. White Balance The white balance function helps you to accurately reproduce colors under different lighting conditions so that white objects will always look truly white in your recordings. Operating modes: CP) | wa) | 4 »# 02 [WB White Balance] #) Desired option 0) [X] *_ When you select [% Custom WE], set the custom white balance with the fol- lowing procedure before touching [X]. To set the custom white balance Point the camcorder at a white object, so it fills the whole screen, and touch [Set WE]. When the adjustment is completed, «®ù stops flashing and disappears. The camcorder will retain the custom white balance even if you turn it off. Advanced Shooting + 81
Options _ (* Default value) [AB Automatic]* The camcorder automatically sets the white bal- ance for natural looking colors. Daylight] To record outdoors. E% Tungsten] _ To record under tungsten and tungsten-type (8-wavelength) fluorescent lighting. [:% Custom WB] Use the custom white balance setting to make white subjects appear white under colored lighting. G@ nores + When you select the custom white balance: - Set nf 62 [Zoom Type] (CL 47) to [EM Optical]. - Resel the white balance when you change locations or the lighting or other conditions change. - Depending on the light source, #% may keep flashing. The result will still be better than with [AÏB Automatic]. + Custom white balance may provide better results in the following cases: - Changing lighting conditions - Close-ups - Subjects in a single color (sky, sea or forest) - Under mercury lamps, certain types of fluorescent lights and LED lights Self Timer Operating modes: AUTO) CE (SON) CP) | Ga) (MPa) | = For movies only. À 9 [47 Other Settings] 6) M] 0) [Self Timer] 6» [EN On Ÿ] D [X] + © will appear on the screen. + Repeat, selecting [@ Off, to turn off the self timer. Movies: In record pause mode, press [START/STOP). 82 + Advanced Shooting
The camcorder starts recording after a 10-second countdown. The countdown appears on the screen. Photos: In record pause mode, touch [PHOTO]. + The camcorder will record the photo after a 10-second countdown. The countdown appears on the screen. + Photos cannot be recorded while the camcorder is set to @nores + Once the countdown has begun, any of the following actions will cancel the self timer. - Pressing (START/STOP), when recording movies. - Touching [PHOTO], when recording photos. - Turning off the camcorder. - Changing the camcorder's operating mode. mode. Frame Rate You can change the frame rate (the number of frames recorded per second) of AVCHD movies to change the look of your movies. MP4 movies with a video quality setting of 35 Mbps are recorded at 50P while those at other video quality settings are recorded at [FE] and these frame rates cannot be changed. Operating modes: CP | Ge 10 | À +) [r? Recording Setup] 03 [Video Quality] 63 [i] 0 Desired frame rate #3 [#2] 6) [2] 0) [X] Advanced Shooting + 83
Options (* Default value) [ED}* _ 50 fields per second, interlaced. Standard frame rate of PAL TV signals. Shooting at 25 frames per second, progressive”. Using this frame rate will give your recordings a cinematic look. Recording mode wil further enhance the effect.
- Recorded as 50. @ nores + The frame rate can be set independentiy for (SN), CD and CP) modes. Tele Macro Using tele macro, the camcorder can focus at a shorter distance (up to 50 cm from the subject at full telephoto), allowing you get closer shots of small subjects like flowers and insects. This function also adds a soft focus to the background, so the subject not only looks larger but it also stands out more. Operating mode: e-2} (mp4) | in mode, tele macro wil be activated automatically when you zoom in to full telephoto and bring the camcorder up close to the subject. @fronrs TO CHECK + Select a shooting mode other than the [# Fireworks] Special Scene mode in (SN) mode. 1 Activate tele macro. { “#02 [ZOOM] 0) [éfr]' (tele macro) *_ Touch again lo turn off the tele macro function. + The camcorder will automatically adjust the zoom to the telephoto end. 84 + Advanced Shooting
2 Touch [START]. + Touch [STOP] to pause the recording. 3 Touch [X]. Quotes + Any of the following actions will deactivate the tele macro function. - Tuming off the camcorder. - Pressing ( © ] - Zooming out toward W (wide angle) - Setting the shooting mode to mode, [31] mode or the LE Fireworks] Special Scene mode in (SN) mode. + Tele macro cannot be turned on/off while recording. Audio Scenes You can have the camcorder optimize the audio settings of the built-in microphone by selecting the audio scene that matches your surround- ings. This will greatly enhance the sense of “being there.” Operating modes: (AUTO) © CE) (SCN) CP) | Gwen) (MP) | mode, the audio scene is always set to [4m Standard] { #0) [ADO Audio Scene] #) Desired audio scene 0} [X] Options … (* Default value) Lim Standard] To record most general situations. The camcorder records with standard settings. Le Music] To vibrantiy record music performances and singing indoors. [«& Speech] _ Best for recording human voices and dialog. [$ Forest and Birds] To record birds and scenes in forests. The camcorder clearly captures sound as it spreads. Advanced Shooting + 85
[84 Noise Suppression] To record scenes while reducing noise from wind, passing vehicles and similar ambient sound. Ideal for recording at the beach or in places with a lot of noise. Audio Recording Level You can adjust the audio recording level of the built-in microphone. You can display the audio level indicator while recording. Operating mode: CFD | ma (MP | Manual Adjustment of the Audio Recording Level 1 Open the manual audio recording level adjustment screen. 4 w# 0) [Ÿ Mic. Level] 3 [M] (manual) + The audio level indicator and current audio recording level will appear on the screen. + Touch [A] (automatic) to return the camcorder to automatic audio recording levels. Manual audio level adjustment Audio level indicator Current audio level Audio level adjustment bar
Touch and hold [4] or [-] to adjust the audio recording level as necessary. As a guideline, adjust the audio recording level so that the audio level meter will go to the right of the -12 dB mark (yellow area) only occasionally. 86 + Advanced Shooting
3 Touch [X] to lock the audio recording level at the current level. To display the audio level indicator Usually, the audio level indicator will be displayed only after activating the manual adjustment of the audio recording level. You can choose to display it also when the audio level is adjusted automatically. {, "# 9 [8 Mic. Level] 9) [A] (automatic) 9) [Audio Level Indicator] 5) [X] @nores + When the audio level meter reaches the red point (0 dB), the sound may be distorted. + We recommend using headphones to check the sound level while adjusting the audio recording level Using Headphones Use headphones for playback or to check the audio level while record- ing. The headphones are connected to the AV OUT/) terminal, which is used for both the headphones and the audio/video output. Before connecting the headphones, follow the procedure below to change the function of the terminal from AV output to {} (headphones) output. Do not connect the headphones to the AV OUT/Q terminal if the © icon does not appear on the screen. The noise output in such case may be harmful to your hearing. Operating modes: fauro) ( & ]( mm) CPD | Wa (wP4) | CRD Gen 1 Change the function of the terminal to headphones output. À 9 (47 Other Settings] > [#1 9) [AV/Headphones]
9) [Q Headphones] D) [#]
2 Connect the headphones to the AV OUT/() terminal. Advanced Shooting + 87
3 Adjust the volume as necessary. { [Volume] 63 [Q] or [QD] to adjust the volume 0) [X]
- You can also drag your finger along the [Headphones] bar. + Q will appear on the screen. To adjust the volume during playback In (FD mode, and in (6) mode during slideshow playback, adjust the headphones volume the same way you adjust the speaker's vol- ume (C1 51, 97). Q mort + When using headphones, make sure to lower the volume to an appro- priate level G@ nores + Use commercially available headphones with a & 3.5 mm minjack and a cable no longer than 3 m + Even if [AV/Headphones] was set to [Q} Headphones] in a playback mode, the function of the AV OUT/Q) terminal will return automatically to AV output when you tu off the camcorder. + Audio wil not be output from the AV OUT/Q) terminal while Wi-Fi func- tions are in use. 88 + Advanced Shooting
Advanced Playback and Editing In this chapter, you can learn how to use functions related to playback and editing, such as capturing video snapshot scenes and photos from your movies and playing back your movies with background music. Capturing Video Snapshot Scenes and Photos from a Movie You can capture video snapshot scenes or photos from a previously recorded scene. For example, you may want to print photos from video recorded at a party or create a small video clip using video snapshot scenes from the highlights of an event. For details on playback, refer to Playing Back Video Snapshot Scenes (CA 91) for AVCHD movies and Playing Back Video (LL 49) for MP4 video snapshot scenes. Capturing a Video Snapshot Scene Operating modes: | Gvan) | Play back the scene from which you want to capture the video snapshot scene (1 49). Press [START/STOP) to capture the video snapshot scene. The camcorder captures the video snapshot scene for about 4 seconds (the blue frame serves as a visual progress bar), and then enters playback pause mode 8 Touch the screen and then touch [IN] to stop the playback. @nores + You can change the length of the video snapshot scenes you capture to 2 or 8 seconds with the 47 #> PR 1 #2 [Video Snapshot Length] set- ting + A Video snapshot scene can be captured only during playback; it can- not be captured during playback pause mode. + The captured video snapshot scene is saved to the same memory that contains the source scene.
Advanced Playback and Editing + 89
+ Video snapshot scenes cannot be captured from scenes shorter than 1 second. + When the source scene is itself a video snapshot scene, you may not be able to capture a video snapshot scene depending on the length of the source scene and the length currently selected for video snapshot scenes. + When you start capturing a video snapshot scene less than 1 second from the end of the scene, the video snapshot scene will be captured starting from the beginning of the following scene. + During the playback of video snapshot scenes captured from a previ- ously recorded movie, you may notice some anomalies in the picture/ sound at the point where the playback switches to a new scene. Capturing Photos Operating modes:
1 Play back the scene from which you want to capture the photo (C2 49). 2 Pause the playback at the point you want to capture. 3 Touch [PHOTO]. 4 Touch [I] to stop the playback. @ nores + The size of captured photos will be 1920x1080. + The data code of the photos wil reflect the date and time of recording of the original scene. + Photos captured from a scene with a lot of fast movement may be blurred + Photos will be recorded on the memory selected for recording photos. Playing Back Scenes in the Baby Album The baby album contains, in chronological order, only the movies recorded in mode so you can conveniently play those movies back and enjoy watching baby's growth. You can also play back those movies from the ['Æ Movie Playback] index screen (LI 49). 90 + Advanced Playback and Editing
Operating modes: | a | 1 Open the baby album. o À [@ Baby Album] 2 Select the scene you want to play back. Drag your finger left/right to bring the desired scene to the front. 3 Touch the scene’s thumbnail to start the playback. + The camcorder will play back the scene selected and continue until the end of the last scene in the index screen. + Playback controls are the same as when playing back scenes from the LR Movie Playback] index screen (CL 49). O Por + Observe the following précautions while the ACCESS indicator is on or flashing. Falling to do so may result in permanent data loss. - Do not open the memory card slot cover. - Do not disconnect the power source or turn off the camcorder. - Do not press [ E1 ]. Playing Back Video Snapshot Scenes When you record video snapshot scenes in AVCHD, you can play back only those scenes to create an entertaining montage. You can also play back those scenes from the [’Æ Movie Playback] index screen (CL] 49). Video snapshot scenes recorded in MP4 can be played back only from the LR Movie Playback] index screen (CL 49). Operating modes: | eve | 1 Open the [IE Video Snapshot] index screen for AVCHD scenes. ha» Video Snapshot] Advanced Playback and Editing + 91
Select the scene you want to play back. Drag your finger lef/right to bring the desired scene to the front Touch the scene’s thumbnail to start the playback. + The camcorder wil play back the scene selected and continue until the end of the last scene in the index screen. + Playback controls are the same as when playing back scenes from the LR Movie Playback] index screen (OL 49).
Q PORTANT + Observe the following precautions while the ACCESS indicator is on or flashing. Faling to do so may result in permanent data loss. - Do not open the memory card slot cover. - Do not disconnect the power source or turn off the camcorder. - Do not change the camcorder's operating mode. Playback with Background Music You can play back movies (or a photo slideshow) using one of the sup- plied music tracks as background music. Operating modes:
The supplied LEGRIA CD-ROM contains 3 music tracks you can use as background music. (3 /ŒE : The music files come pre- installed in the built-in memory. You can mix the original audio and the background music and adjust the background music mix balance to your preference. @fronrs TO CHECK + To play back scenes or a slideshow of photos recorded on a memory card, you wil need to connect the memory card that contains your recordings to a computer and transfer the music tracks in advance. See the NOTES section (CL] 94). 1 Open the desired index screen ([L1 49, 90, 91). 92 + Advanced Playback and Editing
2 Select the music track. À 92 [17 Other Settings] 9) [a | 62 [Select Music] 8) [CN On] +) [A] or [W] to select the desired music track [1] Select the desired music track. 2] Adjust the background music balance. 3] Play back the original sound (no background music). H] Delete the music track selected. [] Listen to the music track selected. Touch again (1) to stop the playback. 3 Adjust the mix balance between the original sound and the background music. Touch [A] (more of the original sound) or [44] (more of the background music) or drag your finger along the [Music Balance] bar to adjust the background music balance as desired. 4 Touch [X] and then touch a scene to start the playback with the selected background music. To adjust the background music balance during playback 1 During playback, touch the screen to display the playback controls. 2 Touch [Sel], drag your finger along the [Music Balance] bar to adjust the background music balance as desired and touch [5]. To delete a music track In the [Select Music] screen, touch [A] or [W] to select the track you want to delete. Advanced Playback and Editing + 93
{5 1619 Des] Q PORTANT + If you use copyrighted songs and music tracks in your video creations, remember that music under copyright may not be used without permis- sion from the copyright holder, except for cases permitted under appli- cable laws, such as for personal use. Make sure to follow applicable laws when using music files. @ nores + Initializing a memory card will permanei ny music files you may have transferred to the card. (| 3 The music files that come pre-installed in the built-in memory will be restored aîter it is initialized) To transfer music files from the supplied LEGRIA CD-ROM to the memory card connected to a computer: - Windows users: Remove the memory card from the camcorder, connect it to a computer and use the supplied software for AVCHD movies, Transfer Utility LE. For details, refer to the Software Guide (PDF file) of PIXELA'S software. - Mac OS users: Remove the memory card from the camcorder and connect it to a computer. Use Finder to transfer music files from the “MUSIC” folder on the supplied LEGRIA CD-ROM to the memory card connected to a computer. Refer to About the music fles (C[ 185) for the folder structure of the memory card. + Transfer music files to the memory card connected to a computer that contains the recordings you want to play back with background music. Selecting the Playback Starting Point If you have a very long scene, you may want to start playing back the scene from a certain point. You can use the movie timeline to break the scene to segments at fixed time intervals ranging from 6 seconds to 6 minutes. Operating modes: 94 + Advanced Playback and Editing
1 Open the desired index screen for AVCHD movies (C1 49, 90, 91). 2 Open the scene’s [Timeline] screen. 4 [M] +) Desired scene + The [Timeline] screen appears. The large thumbnail wil show the first frame of the scene. Below it, the timeline ruler shows frames taken from the scene at fixed intervals. 3 Touch the desired frame in the timeline ruler to start playing back the scene from that point. H] Touch twice to return to the index screen. E] Previous/next scene. 3] Drag your finger left along the ruler to display the next 5 frames. H] Sceness video quality and length. E] Recording date and time. [6] Drag your finger right along the ruler to display the previous 5 frames. urrent scene / Total number of scenes. urrently selected interval between frames.
Lei Lei To change the interval between frames 6 [6 sec] +) Desired interval 83 [5] Advanced Playback and Editing + 95
Dividing Scenes You can divide AVCHD scenes in order to leave out the best parts and later cut out the rest. Operating modes: Play back the desired scene ([11 49). Touch the screen and then touch [II] to pause the playback. Open the screen for dividing scenes. CRE ô [Edit] 0e) [Divide]
Bring the scene to a precise point, if necessary. Playback controls will appear on the screen (CA 51). Use any special playback modes (fast playback, frame reverse/advance) as necessary to locate the desired point.
Divide the scene. b [2 Divide] 63 [Yes] + The video from the division point to the end of the scene will appear as a new scene in the index screen. notes + When advancing/reversing frames while dividing the scenes, the interval between frames is about 0.5 seconds. + Ifthe scene cannot be divided at the point where you paused the play- back, advance/reverse a frame and then divide the scene. + During the playback of a scene that was divided, you may notice some anomalies in the picture/sound at the point where the scene was cut. + Video snapshot scenes and other scenes that are too short (less than 3 seconds) cannot be divided. + Scenes cannot be divided within 1 second from the beginning or the end of the scene. 96 + Advanced Playback and Editing
Trimming Scenes You can trim MP4 scenes by removing everything up to a certain point or everything after a certain point. By doing so, you leave only memo- rable moments to keep for posterity. Operating modes:
1 Play back the desired scene ([[1 49). 2 Touch the screen and then touch [II] to pause the playback. 3 Open the screen for trimming scenes. & [Edit] > [Trim] 4 Bring the scene to a precise point, if necessary. + The point at which is movie will be trimmed is indicated by the Y marker. + Playback controls will appear on the screen (C1 51). Use any special playback modes (fast playback, frame reverse/advance) as necessary to locate the desired point 5 Trim the scene. {, [rm] 9 Select whether to trim before or after the T marker 5) Select whether to save as a new scene or write over the existing scene Touch [Stop] to interrupt the operation whil it is in progress. Slideshow You can play a slideshow of all the photos and even set it to music. Operating modes: Advanced Playback and Editing + 97
Touch the photo that will open the slideshow to display it in single photo view.
Touch the screen to display the playback controls, then touch [b>] to play back the slideshow set to the selected music track. During the photo slideshow + Touch the screen and drag your finger left and right along the volume bar to adjust the volume. + Touch the screen and touch [HI] to stop the slideshow. To change the slideshow’s transition effects from the index screen À 9 [47 Other Settings] > Fe 1 D [Slideshow Transition] > [C3 Off], [EX Dissoive] or [CM Slide Image] D [X] 98 + Advanced Playback and Editing
External Connections This chapter explains how to connect your camcorder to an external device such as a TV, VCR, or computer. FRA 7)2 You can also use the camcorder’s convenient Wi-Fi func- tions (C1 119). Terminals on the Camcorder Open the LCD panel to access the terminals on the camcorder. ©° ° ee: AvouT Q Hoñt our USB {cable connector shoun upside-doun) © AV OUT/() Terminal 2 HDMI OUT Terminal“ The HDMI OUT terminal offers a high-quality digital connection that combines audio and video in a single convenient cable. This terminal is an HDMI mini receptacle. When using a commercially available HDMI cable, make sure the HDMI cable is Type À to Type C and is no longer than 3 meters. USB Terminal This terminal is a mini-AB receptacle. You can use the supplied USB cable to connect to a computer or ather digital devices with standard-A receptacles; or use the optional UA-100 USB Adapter to connect to the camcorder an external hard drive or similar storage device with a standard-A cable (HE. ES on!y).
- When connecting the supplied High Speed HDMI cable to the camcorder, make sure to align the triangle marks on the cable's connector and on the camcorders terminal. External Connections + 99
Connection Diagrams In the following connection diagrams, the left side shows the terminals on the camcorder and the right side shows (for reference only) an example of terminals on a connected device. #oM: Type: Digital » Quality: High definition + Output only Connect to a high-defiition TV (HDTV) with an HDMI input terminal. HDuIN far Dos High Speed HDWI Cable Œ HDMI mini connector) Suppl) (standard HDMI connector) About the HDMITM connection The HDMI (High-Definition Multimedia Interface) connection ([1]) is a convenient all-digital connection using a single cable for both video and audio. When you connect the camcorder to an HDTV equipped with an HDMI terminal, you can enjoy video and audio playback at the highest quality. - The HDMI OUT terminal on the camcorder is for output only. Do not connect it to an HDMI output terminal on an external device, as this may damage the camcorder. - While the camcorder is connected to an HDTV using connection {1}, there will be no video output from the AV OUT/() terminal. - Correct operation cannot be guaranteed when connecting the camcorder to DVI monitors. - Depending on the HDTV, correct playback of personal video content may not be possible using connection [1]. Try using connection [2]. 100 + External Connections
Yelow —m{D © 2 aubto, © ht xD © AvouT/{} STV-2S0N St eo Cable Red —"x@}) eh (pion) Avour/( STV-250N Stereo Video Cable (optional) SCART adapte (commercialy available) External Connections + 101
©, en «5 USB Cable Mini-8 {Suppled) Standard-A computer, digital recorder) © RD CRD, TRS ony USB cable supplied with he external storage use UA-100 USB MiniB Adapter (optional) External hard drive @nores + Powrer the camcorder using the compact power adapter and only then connect it to the computer using the supplied USB cable in the follow ing cases. - To save your recordings on a computer. - To save a memory onto an extemal hard drive. + Sound from the built-in speaker wil be muted while a cable is con- nected to the HDMI OUT terminal or AV OUT/() terminal + Audio and video will not be output from the HDMI terminal while Wi-Fi functions are in use. 102 + External Connections
Playback on a TV Screen Connect the camcorder to a TV to enjoy your recordings with family and friends. Playback on an HDTV using the HDMI OUT terminal will ensure the best playback quality. Operating modes: | Go) (MP | CR) CSD Turn off the camcorder and the TV. 2 Connect the camcorder to the TV. Refer to Connection Diagrams (CA 100) and select the most appropriate connection for your TV. 3 Turn on the connected TV. On the TV, select as the video input the same terminal to which you connected the camcorder. Refer to the instruction manual of the connected TV. 4° Turn on the camcorder and set it to [M] or (1) mode. Play back the desired movies or photos. notes + You can also play video directly from your memory card on AVCHD- compatible HDTVS and digital recorders with a card slot compatible with the type of memory card used”. + We recommend powering the camcorder using the compact power adapter. + Connection [2] or El: When you play back your 16:9 movies on stan- dard TV sets with a 4:8 aspect ratio, the TV set will switch automatically to Widescreen mode if it is compatible with the WSS system. Otherwise, change the aspect ratio of the TV manually.
- Refer to the instruction manual of the device. Depending on the device used, cor- reot playback may not be possible even if the device is AVCHD-compatible. In Such case, play back the recordings on the memory card using the camcorder. External Connections + 103
Saving and Sharing Your Recordings CHEB / 9 / (HD Copying Movies and Photos to a Memory Card You can copy your recordings from the built-in memory to a memory card. Copying Scenes from the Index Screen Operating modes: Open the desired index screen in the buil 91). To copy all the scenes recorded on a specific date, drag your finger left/right until a scene you want to copy appears. memory ([[] 49, 90,
- When you select [Select], perform the following procedure ta select the individ- ual scenes you want to copy before touching [Yes] “Touch [Stop] to interrupt the operation while it is in progress. To select individual scenes 1 Touch the individual scenes you want to copy. + Acheckmark Y will appear on the scenes you touch. The total number of selected scenes will appear next to the &4 icon. + Touch a selected scene to remove the checkmark. To remove all checkmarks at once, touch [Remove AI] D [Yes] 2 After selecting all the desired scenes, touch [OK]. 104 + External Connections
Options [date/folder name] Copy all the scenes recorded on a particular date. For AVCHD movies, the date will appear in the control but- ton. For MP4 movies, the folder name (C1 149) will appear. [Select] Select individual scenes to copy. [All Scenes] Copy all the scenes. + The last four digits of the folder name indicate the date the folder was created. Copying a Single Photo Operating modes:
1. In single photo view, select the photo you want to copy.
2 Touch the screen to display the playback controls. 3 Copy the photo. f [Edit] e> [Copy (6 * [s))] 92 [6] Proceed] 02 [Yes] 4 Drag your finger left/right to select another photo to copy or touch [X]. Copying Photos from the Index Screen Operating modes: 1 Open the [@ Photo Playback] index screen in the built-in memory (CU 53). 2 Copy the photos. [Edit] 82 [Copy (@ + (s))] 8 Desired option 63 [Yes] D [OK] External Connections + 105
- When you select [Select], perfomm the following procedure to select the indiid- ual photos you want to copy before touching [Yes]. “Touch [Stop] to interrupt the operation while it is in progress. To select individual photos 1 Touch the individual photos you want to copy. + Acheckmark will appear on the photos you touch. The total number of selected photos wil appear next to the R2 icon: + Touch a selected photo to remove the checkmark. To remove al checkmarks at once, touch [Remove AI] 63 [Yes] 2 After selecting all the desired photos, touch [OK]. Options [folder name] Copy all the photos taken on a particular date. The folder name* (CA 149) will appear in the control button. [Select] Select individual photos to copy. [AIl Photos] Copy all the photos.
- The last four digits of the folder name indicate the date the folder was created. @ mPoRaNT + Observe the following precautions while the ACCESS indicator is on or flashing. Faling to do so may result in permanent data loss. - Do not open the memory card slot cover. - Do not disconnect the power source or turn off the camcorder. - Do not press [E ) @ notes + In the following cases, you wil not be able to copy recordings to the memory card: - Ifthe memory card slot cover is open. - Ifthe LOCK switch on the memory card is set to prevent writing. = IFthe file numbering is at maximum (CA 149). - Ifthere is no memory card in the memory card slot. + When you copy photos, there is not enough space on the memory card, as many files as possible will be copied before stopping the oper- ation. 106 + External Connections
CD / CD / (HE Converting Movies to MP4 Format You can convert AVCHD movies into MP4 movies or even convert MP4 movies into smaller MP4 movies. This is convenient, for example, when you want to upload the MP4 movies to the Web. The movie you want to convert must be in the built-in memory. After conversion, the resulting MP4 movie will be saved on the memory card. Operating modes: | Eva) (m4) | Ca) Open the desired index screen in the built-in memory ([[1 49, 90, 91). Open the screen for selecting scenes to convert.
[Edit] 6 [Convert to MP4 (E)% (5o])] 6) [OK] 0> Desired video quality of converted movies
- Before selecting the video quality, touch [Join Scenes] to join the converted movies into one movie. Touch the individual scenes you want to convert. + A checkmark Y wil appear on the scenes you touch. The total number of selected scenes will appear next to the 2 icon. + Touch a selected scene to remove the checkmark. To remove all checkmarks at once, touch [Remove AI] 8> [Yes]. 4 After selecting all the desired scenes, touch [OK] and then touch [Next]. + To add a cinema-look fier‘ (C1 64): Touch [FILTER 1] and then select the desired filter. Touch the button again to deactivate the filter. + To add decorations* (C1 68): Touch [7] + To adjust the volume (C1 51) or background music balance (C1 93): Touch [Se]. + When a cinema-look fier is applied to a movie, you cannot add decorations. Touch [START] to convert the scene. Touch [STOP] to interrupt the operation whil it is in progress. 6 Touch [OK].
@ nores + When you convert movies, the video quality you can choose for the resulting MP4 movie will depend on the video quality of the original movie. Based on the following options, movies in the built-in memory will be converted and then copied to the memory card. Video quality before conversion . : mn en Video quality after conversion ((55]) 50P 35 Mbps Cannot be converted MXP, FXP LP 24 Mbps, 17 Mbps | 24 Mbps, 17 Mbps, 4 Mbps - 4 Mbps The video quality wall remain at 4 Mbps. + If you convert AVCHD movies with a frame rate of 50i, the frame rate of the resulting MP4 movie will be 25P. Saving Recordings on a Computer Movies recorded with this camcorder are saved in the built-in memory [CHE RASTAHE R47] only) or on a memory card. Because space is lim- ited, make sure to save your recordings on a computer on a regular basis. This section explains how to save your recordings on a computer using a USB connection. Use the supplied software Transfer Utility LE for AVCHD movies and the supplied software ImageBrowser EX for MP4 movies. ED / CHEB Refer to Wi-Fi Functions ([[]] 119) for details on saving your recordings wirelessiy. Saving AVCHD Movies (Windows only) With the software Transfer Utility LE, you can save to your computer the scenes you have recorded. Download the software and install it before you connect the camcorder to the computer for the first time. An Internet connection is required to download the software. Perform the following procedures while referring to the supplied ‘Transfer Utility LE Startup Guide’. 108 + External Connections
@ronrs TO CHECK + Before instaling the software, make sure your computer is connected to the Internet. Installation Download the zip file from PIXELA's Web site. Visit the PIXELAS site to download the zip flle, which contains the software and instruction manual. http//pixela.jp/cetule_dl/ Uncompress the zip file. The zip file contains the installer (setup.exe) and the Software Guide (PDF file). Run the installer to install the software. For details, refer to the Software Guide (PDF file) of the PIXELA'S software.
Gonnecting the Camcorder to a Computer Power the camcorder using the compact power adapter. 2 Camcorder: Open the desired index screen (C] 49, 90, 91). 3 Connect the camcorder to the computer using the supplied USB cable. Connection [31-®. Refer to Connection Diagrams (CA 102). Camcorder: Select [AII (for PC only)]. Camcorder: When the connection is successfully established, [USB Connection] appears on the screen Computer: Click the icon shown on the right. Follow the onscreen instructions to complete the LR? procedure. ES For details about using the software, refer to the Software Guide (PDF file) of the PIXELAS software.
Saving MP4 Movies and Photos (Windows/Mac OS) With the supplied software ImageBrowser EX you can save MP4 movies and photos to your computer and easily organize them. Refer to the ‘ImageBrowser EX User Guide’ (PDF file) for the full system requirements and other information. Installation Install the software before you connect the camcorder to the computer for the first time. Make sure to install the software even if you have a different version of ImageBrowser EX on your computer. The auto- update function of the software may make available to you features optimized for this camcorder. The ‘mageBrowser EX User Guide’ will also be installed with the soft- ware. @fronrs TO CHECK + Before instaling the software, make sure your computer is connected to the Internet. Insert the LEGRIA CD-ROM into the computer's disc drive. Windows: Open the drive into which you inserted the CD-ROM using Windows Explorer. Mac OS: Use Finder and click on the CD-ROM icon. Click/Double-click the Disc_Setup.exe icon. Click [ImageBrowser EX]. Follow the onscreen instructions to select your AnageBrouser EX area (continent), country/ Came) D =
region and language. Available options will vary depending on your country/ Lee, region ne 6 In the main installer panel, nd click [Easy Installation]. 110 + Exteral Connections
For Windows users, if a User Account Control dialog box appears, follow the instructions. 7 Follow the onscreen instructions to complete the installation. + During the installation process, you may be prompted to instal Microsoft Silverlight. Follow the instructions to do so + CameraWindow wil also be installed! To check that the software was installed correctly You can check that the software was installed correctiy by looking for the ImageBrowser EX icon in the following location. Windows: From the Start Menu’, AI Programs #> Canon Utilities #) ImageBrowser EX Mac OS: In the Dock, on the Desktop.
- Windows 8 users: Display the Desktop screen first. If you cannot find the icon, check your Internet connection and install the software again. First-time connection to a computer running Windows The first time you connect the camcorder to the computer, you also need to select the CameraWindow auto-launch setting. Gonnecting the Camcorder to a Computer Power the camcorder using the compact power adapter.
Open the ['Æ Movie Playback] index screen for MP4 movies (C1 49) or [RS Photo Playback] index screen (CU 53). Connect the camcorder to the computer using the supplied USB cable. + Connection [3]-. Refer to Connection Diagrams (CA 102) + Camcorder: When the connection is successfully established, [USB Connection] appears on the screen
4 Save the recordings onto the computer. Refer to relevant sections in the ‘ImageBrowser EX Instruction Manual‘, which can be accessed through the ? menu on the upper right of the software's screen. External Connections + 111
@ mort + When the camcorder is connected to a computer: - Do not open the memory card slot cover and do not remove the memory card. - Do not access, change or delete any of the camcorders folders or files direct from the computer as this may result in permanent data loss.When saving recordings on à computer, use Transfer Utility LE for AVCHD movies and ImageBrowser EX for MP4 movies and photos. + Observe the following precautions while the ACCESS indicator is on or flashing. Faling to do so may result in permanent data loss. - Do not open the memory card slot cover. - Do not disconnect the USB cable. - Do not tu off the camcorder or the computer. - Do not change the camcorders operating mode. + Operation may not work correctiy depending on the specifications/set- tings of your computer. + If you wish to use the recordings on your computer, make copies of them first. Use the copied files, retaining the originals. @ notes + Depending on the computer, you may not be able to play back movies. + The following types of MP4 scenes will be recognized as multiple files: on other devices. - Scenes exceeding 4 GB - Scenes recorded at 35 Mbps exceeding 80 minutes - Scenes recorded at a video quality other than 35 Mbps exceeding 1 hour + Users of Windows 8, Windows 7, Windows Vista, Windows XP and Mac OS X: Your camcorder is equipped with the standard Picture Transfer Protocol {PTP) allowing you to transfer photos (JPEG only) simply by connecting the camcorder to à computer using the supplied USB cable, without having to instal the supplied software ImageBrowser EX. 112 + External Connections
CHEB / CHEN / CHE Memory Save: Saving an Entire Memory onto an External Hard Drive You can easily save all the movies and photos you recorded onto a commercially available external hard drive connected directly to the camcorder. You can also use the camcorder to play back your record- ings directly from the hard drive. Initialize the hard drive (C[ 115) when you use it with this camcorder for the first time.
- Ifthe USB cable supplied with the external hard drive has a standard-A connector, you will need to use the optional UA-100 USB Adapter. Operating modes: | We) (MP0) | CRD Ce Saving a Memory onto an External Hard Drive Power the camcorder using the compact power adapter. 2 Press | E] ] to set the camcorder to playback mode. 3 Connect the camcorder to the external hard drive using the optional UA-100 USB Adapter. Connection [31-2. Refer to Connection Diagrams (CA 102). Save the entire contents of the desired memory.
[Save to Hard Drive] 63 Desired memory 43 [Yes]* D [OK]
- Touch [Stop] #> [Yes] + [OK] to interrupt the operation while it is in progress. + After selecting the memory, you can check the name of the folder that wil be created on the hard drive. Every memory save operation wil create a separate memory save folder with the date (in numerical form) used as the folder name: up to 10 memory save folders can be created for any given date and up to 300 memory save folders can be saved on a single hard drive. External Connections + 113
Before disconnecting the external hard drive Before turning off or physically disconnecting the external hard drive, be sure to safely end the connection to the camcorder to avoid dam- age to your files. From the [External Hard Drive] screen: { [Safely Remove Hard Drive] 63 [Yes] @ mort + Make sure you power the camcorder with the compact power adapter before you save à memory to the external hard drive. If the compact power adapter becomes disconnected, the connection between the camcorder and the hard drive will end, which may lead to the corruption of data in the hard drive. @nores + Initialize the external hard drive (CI 115) when you use it with this cam- corder for the first time. + You cannot select both the buit-in memory and memory card to save them simultaneousiy. + You cannot use the following types of external hard drives. - USB-powered portable hard drives - Hard drives with a capacity over 2 TB - USB flash drives or media connected to card readers + Ifthe external hard drive is partitioned, only the first partition will be rec- ognized. Playing Back Previously Saved Recordings from the External Hard Drive 1 Power the camcorder using the compact power adapter. 2 Press [E1) to set the camcorder to playback mode. 3 Connect the camcorder to the external hard drive using the optional UA-100 USB Adapter. Connection [31-2. Refer to Connection Diagrams (CA 102). Touch [Play Back from Hard Drive] and select the memory save folder you wish to play back. + If you performed multiple memory save operations on the same day (for example, if you saved the built-in memory and then a memory
114 + Exteral Connections
card), the folder name of memory save foiders following the first one will end in a numerical suffix. + The index screen will appear. Touch a recording to play it back. To switch to another memory save folder, touch [dr] and then select the memory save folder you with to play back. Repeat step 5. 6 When you have finished playing back, be sure to safely end the connection to the external hard drive before physically disconnecting it.
4 [Safely Remove Hard Drive] 6) [Yes] To delete a memory save folder With the external hard drive connected to the camcorder:
1. Select the memory save folder you want to delete.
2 Delete the memory save folder. À 9 [47 Other Settings] 9) [ # 1 62 [Delete Memory Save Folder] 6) [Yes] +) [OK] 3 Safely end the connection to the external hard drive before physically disconnecting it. + Be careful when deleting recordings. Once deleted, recordings cannot be recovered. + Observe the following precautions while the external hard drive's access indicator is on or flashing. - Do not disconnect the USB cable. - Do not disconnect the camcorder or the external hard drive. - Do not change the camcorder's operating mode. Initializing the External Hard Drive 1 Power the camcorder using the compact power adapter. Do not disconnect the power source or turn off the camcorder until the initialization is completed. External Connections + 115
Press [E1) to set the camcorder to playback mode. Connect the camcorder to the external hard drive using the optional UA-100 USB Adapter. Connection [31-2. Refer to Connection Diagrams (CA 102) Initialize the external hard drive.
À 9 [47 Other Settings] D [E 1 0 [Initialize ŒD] s> [Initialize] D [Complete Initialization]! #3 [Yes]? 6> [OK] ? Touch this option if you want to physically erase all the data rather than just clear the file allocation table of the hard drive. For large-capacity hard drives this operation can take several hours. 2 If you selected the [Complete Initialization] option, you can touch [Cancel] > [OK] to cancel the initialization while it is in progress. All recordings will be erased and the hard drive can be used without any problem. Sately end the connection to the external hard drive before physically disconnecting it.
Q mort + Initializing the external hard drive will permanently erase all the data on the hard drive (including your recordings, previous data not saved with the camcorder, and partitioned drives). Make sure to copy in advance important data to a computer or other device. Copying Recordings to an External Video Recorder Operating modes:
In High Definition Connect the camcorder to Blu-ray Disc recorders and other AVCHD- compatible digital video recorders using the supplied USB cable to make perfect copies of your movies in high definition. f the external digital video recorder has an SD memory card slot', you can use the memory card to copy your movies without connecting the camcorder.
- Make sure the external device is compatible with the type of memory card used. 116 + External Connections
Connecting Power the camcorder using the compact power adapter. 2 Open the desired index screen (LI 49, 90, 91). Connect the camcorder to the digital video recorder using the supplied USB cable. Refer to Connection Diagrams (CA 102). 4 CHRD/ŒRB Camcorder: Select the memory that contains the scenes you want to copy. + Select an option other than [AI (for PC only]. + When the connection is successfully established, [USB Connection] appears on the screen
Recording Details will vary depending on the device used so be sure to refer to the instruction manual of the digital video recorder. In Standard Definition You can copy your movies by connecting the camcorder to a VCR or a digital video recorder with analog audio/video inputs. Video output will be in standard definition, although the original scenes are in high defi- nition. Connecting Connect the camcorder to the VCR using Connection [2] or EI. Refer to Connection Diagrams (CA 101). Recording 1 External recorder: Load a blank cassette or disc and set the recorder to record pause mode. Turn on the camcorder and open the ["Æ Movie Playback] index screen for AVCHD movies (CL) 49). + We recommend powering the camcorder using the compact power adapter. + Verify tha
9 #1 9 [AV/Headphones] is set to [EVE AVI. External Connections + 117
3 Camcorder: Locate the scene you wish to copy and pause the playback shortly just before the desired scene. Camcorder: Resume playback. By default, the date and time will be embedded in the output video signal. You can change this using the 47 > 9 [Display Date/ Time] setting. External recorder: Start recording when the scene you wish to copy appears; stop recording when it ends. 6 Camcorder: Stop playback. G@ nores + Use an external Blu-Ray Disc recorder compliant with AVCHD ver. 2.0 specifications to copy onto Blu-Ray discs movies recorded in 50P or MXP
Uploading MP4 Movies and Photos to the Web With the supplied software ImageBrowser EX, you can upload your MP4 movies to YouTube and photos to Facebook from your computer. Additionally, you can use CANON IMAGE GATEWAY" to make photo albums and more.
- This service may not be available in all countries/regions. Installation Install the software before you connect the camcorder to the computer for the first time. The software is compatible with computers running Windows or Mac OS operating systems. Refer to Saving MP4 Movies and Photos (Windows/Mac OS) (C2 110). Connecting to the Computer and Uploading Your Recordings Refer to the relevant sections in the ‘mageBrowser EX Instruction Manual’ (PDF file). 118 + External Connections
Wi-Fi Functions This chapter contains information about how to operate the Wi-Fi functions of your camcorder, starting with the Wi-Fi net- work setup needed to add your camcorder to an existing Wi-Fi network.
Introduction to Wi-Fi When you use the camcorder's Wi-Fi function to connect to a smartphone!, you can wirelessly save, play back and upload your recordings. You can even use a smartphone as a remote control and record using the device's screen. Refer to Glossary (CI 140) for a defi- nition of the frequently used terms in this text. 1 For brevity sake, “smartphone” is used in this text to refer to Wi-Fi-enabled smartphones and tablets while “OS device” refers to Wi-Fi-enabled iPhones and iPads. Wi-Fi connection [A] After you download the CameraAccess app?, use your i0S device or Android smartphone ‘to remotely control the camcorder and make recordings (C1 122). 2 The CameraAccess app, provided by PIXELA, is available for free from the App Store (for iOS devices) and Google Play'" (for Android smartphones). ) ja | | Smartphone Wi-Fi Functions + 119
© PoraNT + Using an unprotected Wi-Fi network can expose your files and data to monitoring by unauthorized third parties. Be aware of the risks involved. @uores + Do not open the memory card slot cover during the wireless connec- tion. + While using Wi-Fi functions, the camcorder's automatic power of func- tion will be disabled. Before Using Wi-Fi Functions Based on the function, the camcorder will wirelessiy connect to a Wi-Fi-enabled device, such as a smartphone, directly or to a Wi-Fi net- work via an access point (wireless router). After selecting the function you want to use, follow the onscreen directions to connect the cam- corder.
- Depending on the manufacturer, the access point may be referred to using a different name, such as wireless LAN router or wireless network router. About the Wi-Fi antenna When using the camcorder's WiFi func- tions, do not cover the back portion of the camcorder with your hand or other object. The Wi-Fi antenna is located in the back portion and covering it may interfere with wireless signals. Wi-Fi antenna About the camcorder's Wi-Fi standard The camcorder's Wi-Fi standard complies with the IEEE 802.11 b/g/n protocol and operates in the 2.4 GHz band. As such, the max- imum data transfer rate is 11 Mbps for IEEE 802.11b, 54 Mbps for IEEE 802.119, and 150 Mbps for IEEE 802.11n. Note that these are theoretical values and actual data transfer rates may differ. Wi-Fi Functions + 121
Recording Movies Using a Smartphone as a Remote Control Using the CameraAccess app° for iOS devices and Android'# smart- phones, you can control the camcorder from a distance while you view the camcorder's image on the smartphone’ screen. Not only can you control the camcorder to start and stop recording, you can also record the camcorder's image directly onto your smartphone.
- The CameraAccess app, provided by PIXELA, is available for free from the App Store (for iOS devices) and Google Play" (for Android smartphones).
Smartphone Operating modes: ea) | Ga 9 | @ronrs TO CHECK + Before you perform this procedure for the first time, download and install the CameraAccess app on your smartphone. The app can be downloaded for free from the following sites (English only). App Store: http///itunes.com/apps/cameraaccess Google Play"! http//play.google.com/store/apps/details?id=jp.co.pixela.cameraaccess 1 Camcorder: Set the camcorder to receive remote control commands. b À 9 ['#} Remote Control+Streaming] + The camcorder's SSID (network name) and password will appear. + The camcorder will be ready to connect with the smartphone. 2 Smartphone: Activate Wi-Fi in the settings screen. The network names of detected access points will appear. 122 + Wi-Fi Functions
Smartphone: Touch the access point with the same SSID as that of the one from step 1. 4 Smartphone: Enter the password. [Connected] will appear on the camcorder's screen and the connection will be established. Smartphone: Start the CameraAccess app. 6 Smartphone: Operate the controls on the screen while viewing the image from the camcorder. 7 Camcorder: Touch [End] when finished. @nores + For details about the CameraAccess app, visit PIXELAS Web site. http://pixela.jp/ceca (English only) + This function is not available in the following cases. - When the video quality is 5OP. - When dual recording is activated.
Remote Browse: Viewing Recordings Using a Web Browser on Your i0S Device or Android Smartphone With the Remote Browse function, you can use the Web browser on your iOS device, Android smartphone, computer or similar device to show a list of recordings in the camcorder, play them back and even download them. This convenientiy allows you to view your recordings while you are out.
- Depending on the device, OS, browser, movie format and video quality, you may not be able to play back or download recordings. For details, visit your local Canon
Smartphone or similar device Operating modes: | | Ts2 Wi-Fi Functions + 123
1 Camcorder: From any movie index screen, set the camcorder to connect with the smartphone. À @ 9 Iæ Wi-Fi] 9 [à Playback via Browser] #) [OK] + The camcorder's SSID (network name) and password will appear. + The camcorder will be ready to connect with the smartphone.
Smartphone: Activate Wi-Fi in the settings screen. The network names of detected access points will appear. 3 Smartphone: Touch the access point with the same SSID as that of the one from step 1. Smartphone: Enter the password (first time only). + [Connected] will appear on the camcorder’s screen and the connection will be established. + If you have already performed this procedure before, the connection will be established automatically without entering the password. Smartphone: Start the Web browser. Smartphone: Enter the URL that appears on the camcorder's screen into the Web browser's address bar. + The Remote Browse screen will appear. + The URL is always the same so you may find it convenient to bookmark the URL. Smartphone: Touch [E) (IEP] on the upper left of the screen and open the desired index screen. Next, touch the desired recording from the list. For movies, the selected recording will start playing back. For photos, the photo wi be displayed. 8 Smartphone: Touch @ to save the recording on the smartphone. 9 Smartphone: Touch à 10 Camcorder: Touch [End] when finished. @nores + The following types of MP4 scenes wil be recognized as multiple files on other devices.
when finished. 124 + Wi-Fi Functions
- Scenes exceeding 4 GB - Scenes recorded at 35 Mbps exceeding 30 minutes - Scenes recorded at a video quality other than 35 Mbps exceeding {hour Uploading Videos Using an i0S Device Using the Movie Uploader app for iOS devices, you can connect the camcorder to the device to upload your movies to YouTube and Face- book even when you are away from your home network. You can save** and play back MP4 movies and photos on an iOS device.
- The Movie Uploader app, provided by PIXELA, is available for free from the App Store “Not available for MP4 movies recorded at 35 Mbps. i0S device Operating modes: | Go (9 | @ronrs TO CHECK + Before you perform this procedure for the first time, install the Movie Uploader app on your iOS device. The app can be downloaded for free from the following site. http;//tunes.com/apps/movieuploader 1 Camcorder: From any movie index screen, set the camcorder to connect with the iOS device. {; & ® Lv Wi-Fi 9 ID Movie Uploader #> [OK] + The camcorder's SSID (network name) and password will appear. + The camcorder will be ready to connect with the IOS device. Wi-Fi Functions + 125
iOS device: Touch Settings > Wi-Fi and then turn Wi-Fi on. The network names of detected access points will appear. iOS device: Touch the access point with the same SSID as that of the one from step 1. iOS device: Enter the password. + [Connected] will appear on the camcorder’s screen and the connection will be established. + If you have already performed this procedure before, the connection will be established automatically without entering the password. iOS device: Use the Movie Uploader app to upload the camcorder's movies. You can also play back or save MP4 movies. Camcorder: Touch [End] when finished. After the connection has ended, the index screen will appear. @nores + Depending on factors such as the wireless network conditions, it can take some time to upload video files. + The procedure above may differ depending on the version of iOS you are using. + For details about the Movie Uploader app, visit PIXELA'S Web site. http/www.pixela.co.jp/oem/canon/e/movieuploader/ (English only) + The following types of MP4 scenes wil be recognized as multiple files on other devices. - Scenes exceeding 4 GB - Scenes recorded at 35 Mbps exceeding 30 minutes - Scenes recorded at a video quality other than 35 Mbps exceeding 1 hour
Sharing Recordings with CANON IMAGE GATEWAY After you register for CANON IMAGE GATEWAY*, you will be able to access various Web services**. You will be able to upload movies and photos to online albums, share the albums on Twitter, upload movies to Facebook and YouTube, send links to your online albums by e-mail to 126 + Wi-Fi Functions
friends and family, and more! To use this function, you will need an access point connected to the Internet.
- Availability differs from area to area. ** “Web services” is used in this text to refer to various Internet services supported by CANON iMAGE GATEWAY. CONCN > ) )EA) <> © GATEWAY > À Wireless router (Access point)
CANON iMAGE GATEWAY is a site that provides CANON IMAGE various photo-related services for owners of qualified Canon products. After you complete the FeMAN7NE free registration online, you can use the Web ser- vices, create online photo albums, and more. Visit Canon’s Web site for information on registra- tion and countries/regions where you can use this service. http2/canon.com/cig General requirements + Computer with the supplied software ImageBrowser EX and CameraWindow correctly installed. For details on installing the soft- ware, refer to Saving MP4 Movies and Photos (Windows/Mac OS) (cn 110). + Completed free registration online for CANON IMAGE GATEWAY. + Account settings for YouTube, Facebook and Twitter (depending on the services you plan to use) Setting the Desired Web Services in the Camcorder Using the supplied software CameraWindow, log in to CANON IMAGE GATEWAY and set the Web services you want to use. Refer to “CameraWindow Instruction Manual’ for details on using the software. Operating modes: | Gao) MP) | CR) CS) Wi-Fi Functions + 127
1 Camcorder: Open the ["Æ Movie Playback] index screen for MP4 movies (CI 49). Aleratively, you can open the [Eä Photo Playback] index screen (59. 2 Connect the camcorder to the computer using the supplied USB cable. Connection [3]-1. Refer to Connection Diagrams (CA 102). 3 Computer: Start CameraWindow. + Windows: the AutoPlay dialog box appears, click Downloads Images From Canon Camera to open the main screen. + Mac OS: CameraWindow will automatically start and the main screen will appear. 4 Computer: Click Camera Settings > Set Up Web Services. 5 Computer: Enter your account information > click Login. After you log in, the camera settings screen will appear. 128 + Wi-Fi Functions
6 Computer: Click Edit Web Services > Desired Web service > Edit > Follow the onscreen instructions and enter your account information for the selected Web service > Set > Finish. The camera settings screen will appear again. 7 Computer: Select the Web service to set in the camcorder and then click (=). + Repeat to select multiple Web services. + The selected Web services will appear in the camera panel. + You can click A and Y to change the order in which the Web services appear in the camcorder. 8 Computer: Click Menu in the upper left. The selected Web services will be set in the camcorder and the CameraWindow menu screen will appear. 9 Computer: Exit CameraWindow and then end the connection between the camcorder and computer. Wi-Fi Functions + 129
Available Web services* Web service What you can do CANON IMAGE GATEWAY | Upload MP4 movies and photos to your online photo albums Facebook You can upload movies directly to Facebook. Tuitter Share recordings on Twitter. You can post a link to your online photo album on your Twitter feed. YouTube You can upload movies directly to YouTube. E-mail notification You can send e-mail notifications with a link to your online photo album. You can even set up to 20 e-mail addresses.
- The available Web services may be updated. For details, refer to the help module of CANON IMAGE GATEWAY. @ notes + Ifthe date set in the camcorder is not correct, the camcorder cannot connect to CANON IMAGE GATEWAY. Make sure the date is correct before trying to establish a connection. + When the number of set Web services reaches maximum, you cannot set any more. Delete unnecessary Web services and then set the desired Web service. + You cannot set multiple accounts for Web services other than e-mail + CANON IMAGE GATEWAY, Facebook, Twitter and e-mail notifications are available only for MP4 movies and photos when you use CameraWindow. Sharing Your Recordings Using Web Services Convenientiy share your recordings with family and friends using Web services. You can upload movies to YouTube and Facebook. Also, you can upload movies and photos to online albums on CANON IMAGE GATEWAY. Then, you can post links to those online albums on Tinitter. Operating modes: | | Ca) 1 From any movie index screen, set the camcorder to connect with the Web service. 130 + Wi-Fi Functions
{, @ D Im Wi-Fi] D [® To Web Service] +) [OK] 2 When [Configuration completed] appears on the screen, touch [OK]. 3 Perform the procedure in W-Fi Connection Using an Access Point (1134. [Connected] will appear on the camcorder's screen and the connection will be established. 4 Select the desired Web service. + Select one of the available Web services other than e-mail. + You can send an e-mail notification of the when your movies and photos are uploaded (O1 132). 5 Touch the type of upload (AVCHD movie, MP4 movie or photo) and the memory on which the desired recordings are saved. 6 Touch [OK]. 7 Touch the scene or photo to upload. 8 Touch [OK]. + If you are uploading to YouTube, read the YouTube agreement carefully and touch [| Agree] if you agree. + The upload will begin automatically. + You can touch [Stop] and then [X] to cancel the wireless transfer while it is in progress. Checking your uploads using CANON IMAGE GATEWAY Library You can use the CANON IMAGE GATEWAY Library screen to see the movies and photos you uploaded. You can also check what files you have sent and the various settings for the Web services. For details on CANON IMAGE GATEWAY, refer to the Help module {in the upper right of the screen). @ nores + Upload limits for movies: The maximum length of movies you can upload is 10 minutes (15 minutes for YouTube); the maximum size is less than 2 GB. Wi-Fi Functions + 131
+ For movies, you can upload one at a time: for photos, up to 10 at a time. + Depending on the wireless router settings and capability, it can take some time to upload files. Sending Links to Recordings by E-mail After you upload movies and photos to online albums on CANON iMAGE GATEWAY, you can send links to those albums by e-mail to family and friends. Operating modes: | Even) [MPa] [CR] C&) To set e-mail addresses in the camcorder You can set up to 20 e-mail addresses in the camcorder. 1 Computer: Start CameraWindow and log in to CANON IMAGE GATEWAY. Refer to Sefting the Desired Web Services in the Camcorder (CA 127) Computer: Click Edit Web Services > Desired Web service > Edit > Follow the onscreen instructions and set the e-mail address > Set > Finish Computer: Select the Web service to set in the camcorder and then click (=). + Repeat to select multiple Web services. + The selected Web services will appear in the camera panel. + You can click À and Y to change the order in which the Web services appear in the camcorder. Computer: Click Menu in the upper left. The selected Web services will be set in the camcorder and the CameraWindow menu screen will appear. Computer: Exit CameraWindow and then end the connection between the camcorder and computer.
To set e-mail notifications 1 Set the camcorder to connect with the Web service. 132 + Wi-Fi Functions
When [Configuration completed] appears on the screen, touch [OK]. Perform the procedure in Wi-Fi Connection Using an Access Point (Ca 134. [Connected] will appear on the camcorder's screen and the connection will be established. Touch [F1]. Perform steps 5 to 8 of Sharing our Recordings Using Web Services ([ 130). @ notes + E-mail addresses must consist of single-byte characters. Only e-mail addresses with 16 or less characters before the @ mark can be set in the camcorder.
CES Playback on a Computer Using the Media Server function, you can wirelessiy view your movies and photos on your computer or similar device. You will need an access point connected to your home network and software installed on your computer that can play back movies and photos on the media server. We recommend that you connect the computer to the access point using a LAN cable. Refer also to the instruction manuals for the computer, software and access point.
LAN cable ) = Access point Computer Operating modes: | Gao) (MP) | CRD CS) 1 Camcorder: Activate the media server function. Wi-Fi Functions + 133
6 À 9 [w Wi-Fi] > [EL Media Server] #) [OK] + If you have already performed this procedure before, the connection will be established automatically. Skip to step 4. 2 Camcorder: When [Save the access point] appears on the screen, touch [OK]. 3 Camcorder: Perform the connection in Wi-Fi Connection Using an Access Point (CO 134). + [Connected] will appear on the camcorder's screen and the connection will be established. + After the connection is established, you can touch [View Information] to view the access points SSID, connection protocol, and the camcorder's IP address and MAC address.
Computer: Select your camcorders model number from the list. Computer: Select the folder for the camcorder's built-in memory or memory card and play back the movies and photos. 6 Camcorder: Touch [End] when finished.
@ mPoRaNT + Do not open the memory card slot cover during the wireless connec- tion. G@ nores + Depending on the wireless router's settings and capabity, playback may take time to start or may not appear smooth. For details, refer to Toubleshooting (CA 160). Wi-Fi Connection Using an Access Point The camcorder can connect to a Wi-Fi network using a wireless router {access point) and even remember the settings for the 4 most recently used access points. When this is exceeded, the oldest setting will be replaced. 134 + Wi-Fi Functions
General requirements + Correctiy configured router that complies with the e
802.1 1b/g/n protocol and is Wi-Fi certiied (bears
the logo shown on the right) and a home network. Touch the desired connection method. Operating modes: Options [WPS: Button]* Simply press and hold the WPS button on your wireless router and then touch the camcorder's screen. This is the easiest connection method if you are using a WPS-compati- ble router. For details, see Wi-Fi Protected Setup (WPS) (CA 135). [WPS: PIN Code]* Access the wireless router's configuration screen using your Web browser. The camcorder will give you a PIN code, which you will enter into the browser. You will need a WPS- compatible router and a computer or other device connected to it. For details, see Wi-Fi Protected Setup (WPS) (CA 135). [Search for Access Points] Following the camcorder's onscreen instructions, you select your wireless router from a list and then enter your password. For details, see Searching for Access Points (CA 136) [Manual Setup] You manually enter the wireless router's name, password and other network settings. This method is recom- mended for advanced users of Wi-Fi networks. For details, see Manual Setup (CA 137)
- WPS, which stands for Wi-Fi Protected Setup, is a standard that makes connect- ing to a wireless router easier. Wi-Fi Protected Setup (WPS) If our wireless router is WPS-compatible (bears the logo shown on the right), connecting the cam- corder to it can be very easy. With WPS, you will either use the [WPS: Button] method or [WPS: PIN Code] method (see the description in the previous section). If you can- not successfully connect the camcorder using WPS, try using the WF PROTECTED. SETUP Wi-Fi Functions + 135
[Search for Access Points] method. Refer also to the router's instruc- tion manual. 1 IWPS: Button] method Press and hold the WPS button on the wireless router. + Depending on the router, the amount of time required may differ. + Make sure the router's WPS function is activated. IWPS: PIN Code] method From a computer or similar device connected to the wireless router, use the Web browser to open the router's WPS settings screen. After the 8-digit PIN code appears on the camcorders screen, enter it into your router's WPS settings screen. 2 Within 2 minutes, touch [OK] on the camcorder's screen. + The camcorder will connect to the wireless router. + You can touch [Stop] and then [OK] to interrupt the Wi-Fi Protected Setup whil it is in progress. + After the connection is established, continue using the function you were previously using. For details, refer to the procedure in Vewing and Changing Wi-Fi Settings (CA 139), Sharing Your Recordings Using Web Services (CA 130) or Playback on à Computer (CQ 133) as necessary. Searching for Access Points The camcorder will automatically detect access points in the vicinity. After you select the desired access point, you simply enter the pass- word (encryption key) to connect the camcorder. To enter text for the various settings, use the virtual keyboard (CI) 137). Note the access points network name (SSID) and encryption key. When the detected access points appear, touch the desired access point and then touch [OK]. You can touch [A] and [W] to go through the detected access points. In the field for encryption key, enter the encryption key and then touch [OK]. Ifthe access point selected in step 2 did not have a [A] icon, this step is not necessary.
4 Touch [OK]. After the connection is established, continue using the function you were previously using. For details, refer to Vewing and Changing Wi-Fi Settings (CA 139) or Sharing Your Recordings Using Web Services (CA 130), as necessary. Using the virtual keyboard When you need to enter text for various settings, touch the text field and a virtual keyboard will appear on the screen. The illustration below explains the various keys you can use. witch between letters and numbers/special characters. [2] Change the position of the cursor. [8] Delete the character to the cursors left (backspace). [4] Caps Lock. When the numerical keyboard is displayed, [#%2?] switches between set 1 and set 2 of special characters. Manual Setup Perform this procedure to manually configure the wireless connection settings. This may be necessary, for example, if your wireless router's network name (SSID) cannot be detected due to the stealth function being enabled. Manual setup is for advanced users of Wi-Fi networks. To enter text for the various settings, use the virtual keyboard (CU 137). In the field for SSID, enter the SSID and then touch [Next]. In the authentication/encryption method area, touch [OPEN NONE] and then touch the desired method. If you selected [OPEN WEP], the WEP index is 1. In the field for encryption key, enter the encryption key and then touch [Next].
In step 2, if you selected [OPEN NONE], this step is not necessary. Touch [Automatic] or [Manual] to select how to obtain the IP address. If you selected [Automatic], proceed to step 11 For both the IP address and subnet mask areas, touch [0.0.0.0] and then touch [A J/[W] to change the value. Touch and next field and change the value, as necessary, Touch [OK] and then touch [Next]. In the default gateway area, touch [0.0.0.0] and then touch [A ]/ [Y] to change the value. Touch and next field and change the value, as necessary, Touch [OK] and then touch [Next]. For both the primary and secondary DNS server areas, touch [0.0.0.0] and then touch [AJ/[W] to change the value. Touch and next field and change the value, as necessary, 10 Touch [OK] and then touch [Next]. 11 Touch [OK]. + After the connection is established, continue using the function you were previously using. For details, refer to the procedure in Vewing and Changing Wi-Fi Settings (CA 139) or Sharing Your Recordings Using Web Services (CA 130), as necessary. @ notes + The Wi-Fi functions available and the setup method will vary depending on the specifications and characteristics of the Wi-Fi network you want to use.
Viewing and Changing Wi-Fi Settings When the camcorder is connected to an access point or to a Wi-Fi- enabled device, you can view the Wi-Fi connection settings and even change them, if necessary. Operating modes: | = Ce) 138 + Wi-Fi Functions
1 From any movie index screen, open the setting selection screen. o À 92 [ww Wi-Fi] 9 [$ Check/Edit Settings] +3 [OK] To view the smartphones connection settings 2 Touch [Smartphone Connection Settings]. The camcorder's SSID and password will appear.
If necessary, touch [Edit] 63 [Manual Setup] to change the settings and then perform the procedure in Manual Setup (1137. The next time you make a wireless connection, you will need to change the Wi-Fi settings in the smartphone. To view the access point's connection settings 2 Touch [Access Point Connection Settings]. + The 4 access points’ SSID settings in the camcorders memory will appear. + To add an access point, touch [Not Configured] and then perform the procedure in Wi-Fi Connection Using an Access Point (CA 134). After doing so, the screen from this step will appear again. Touch the SSID of the access point whose settings you want to view. + The access points settings wi appear. + Touch [A] and [W] to view more information. + To delete the settings, touch [Edit] 63 [Delete] #3 [Ves]. If necessary, touch [Edit] s) [Manual Setup] to change the settings and then perform the procedure in Manual Setup (1137.
Glossary This is a glossary of some of the basic terms used frequently in this chapter. The documentation for your wireless router may also con- tain a glossary you can refer to. Access Point A wireless access point (WAP) is a device that allows wireless devices, like your camcorder, to connect to a wired network (includ- ing to the Internet) using the Wi-Fi standard. In most cases, this will be your wireless router. IP Address Exclusive number assigned to each device connected to the net- work. SSID Service Set Identifier. This is simply the public name of a Wi-Fi net- work. WPS Wi-Fi Protected Setup. Standard for easy and secure setup of Wi-Fi networks created by the Wi-Fi Alliance. 140 + Wi-Fi Functions
rm Additional Information (CU This chapter contains troubleshooting advice, screen mes- sages, handling and maintenance tips, and other information. Appendix: Menu Options Lists The functions that are available depend on the shooting mode. In the following tables, available functions are indicated by © and functions not available are indicated by —. On the camcorder’s screen, menu items not available appear grayed out. For details about how to select an item, refer to Using the Menus (C[] 34). For details about each func- tion, see the reference page. Menu options without a reference page are explained after the tables. Underlined menu options indicate default values. L& Main Functions] and [Edit] Panels Dé Main Functions] Panel - Recording Modes Control Button Setting options/Function @ sen P a [EEE Video [ON], [OFF] ee. 7 Snapshot] LAUDO Audio Em Standard], [à Music], | e - ee © 85 Scene] [à Speech], LB» Forest and Birds], 8 Noise Suppression] 19% Decoration] | [@ Pens and Stamps], ee + - ee 568 L:£ Animated Stamps], [© Date/Time] CP 1@1 SOBEE LEZ] image mix ee Toggle on or off [UT] (pause live video) [7%] (minimize toolbar) ee Additional Information + 141
Control Button Setting options/Function @ SN [Z00M] Zoom controls, [STARTI/[STOP] control Sr] (tele macro): Toggle on or off [H&} Faders] [GS off, [M Fade Trigger, IG Wipe], [Black Screen], [White Screen] [Zoom Type] [ER Optical], (EE Advanced], (TD Digital, ER Dicital] LB Powered | [ON], [OFF] Is] [% Pre REC] LON], [OFF] [© Focus] [MF] (manual focus): oggle on or off, Touch AF frame Exposure] | [M] (manual exposure}: Toggle on or off, Touch AE frame [$ Mic. Level] LA] (automatic), [M] (manual) {Audio Level Indicaton: Toggle on or off [WB Wnite [AB Automatic], [38 Dayligh], Balance] CÆ Tungsten, L®% Custom WB] 142 + Additional Information
Menu item Setting options [ea] {Face Detection & | [ON On 2], [CH 01 75 Tracking] {Auto Backlight [ED on), (C3 of 78 Correction] {Auto Slow Shutter] | [D On], [CH 0] - Flicker Reduction] | [CH Off, [ÆIP 50 Hz], [ŒIE 60 Hz] _ Image Stabilizer] | [@J3 Dynamic], (ŒD Standard], [C3 0] 73 Intelligent IS] Les With (4, Ceqi, Without (fs ] 44 [Video Snapshot | [EX 2 sec], [ER 4 sec], [ER 8 secl 72, Length] 89 [Zoom Position at Startup]: Allows you to choose the position of the zoom when you turn on the camcorder. [Full Wide Angle]: The zoom position will be at full wide angle. [Last Used Position]: The zoom position will be at the same position it was the last time you used zoom. + When this function is set to [Full Wide Angle] and you manually adjust the focus, the focus will be lost and autofocus will be activated the next time you turn on the camcorder. [Focus Assistance]: When focus assistance is activated, the image at the center of the screen is magnified to help you focus manually (C2 79). + Using focus assistance will not affect the recordings. It will be cancelled automatically after 4 seconds or when you start recording + This function is available when the shooting mode is set to (SCN), or . + This function is available only for recording movies. [Auto Slow Shutter]: The camcorder automatically uses slow shutter Speeds to obtain brighter recordings in places with insufficient lighting + Minimum shutter speed used: 1/25; 1/12 when the frame rate is set to + This function is available when the shooting mode is set to (npz), but the setting wil not change even if you set the shooting mode 10 (auro). + Ifa traling afterimage appears, set the slow shutter to [CH Of. {Flicker Reduction]: If the screen starts to flicker when recording movies under fluorescent lights, change the setting to reduce the effect. 144 + Additional Information
+ This function is available when the shooting mode is set to [SEN]. CS or cp) F1 / F1 Playback Setup Menu item Setting options ren [Select Music] eo When [D On! - list of music tracks, [MUSIC Balance] [ER] mms [99] {Original sound/Background music) [Slideshowr (O3 0“, (3 Dissone], [CI Slide Image] | - | © | 97 Transition] Mideo Snapshot | [EE 2 sec], [ER 4 sec], [ES 8 sec] ee 72, Length] 89 Display Setup Menu item Setting options "#0 LOnscreen Markers] | [CH 0ff], [Ew Level (White), ee - - - (ES Level (Gray), [EF Grid (White), LE Grid (Gray)] Display Date/Time] | [@ On), [C3 01] ee - [Output Onscreen | [GI On], [C3 01] ee - Displays] ILCD Brightness] | # : # ee _- ILCD Backlight] TH Bright], [M Normal], (L Dim] ee - ILCD Mirror Image] | [@I On], °l-l-1- THDMI Status] - ee - [Demo Mode] [ON on), [E3 0] l-1-1- DV Type] IE 43 M, (TE Wide - ee. - [Onscreen Markers]: You can display a grid or a horizontal line at the cen- ter of the screen. Use the markers as a reference to make sure your sub- ject is framed correctly (vertically and/or horizontally) + Using the onscreen markers will not affect the recordings. Additional Information + 145
[Display Date/Time]: Select whether to display the date and time during playback. For MPA movies, only the date will be displayed [Output Onscreen Displays]: When set to [OM On], the camcorder's onscreen displays will appear also on the screen of a TV or monitor con- nected to the camcorder. + This function is not available when the shooting mode is set to (aura). [LCD Brightness]: Adjusts the brightness of the LCD screen. + Changing the brighiness of the LCD screen does not affect the bright- ness of your recordings or the brighiness of the playback image on a TV. [LCD Backlight}: Sets the screen to one of three brightness levels. You can use this to make the screen brighter when recording in bright places, for example. + Changing the brightness of the LCD screen does not affect the bright- ness of your recordings or the brightness of the playback image on à TV. + Using the bright setting will shorten the effective usage time of the bat- tery pack. [LCD Mirror Image]: When set to [M On]. this function reverses the image on the screen horizontally when you rotate the LCD panel 180 degrees toward the subject. In other words, the screen will show a mirror image of the subject. « While the LCD panel is rotated toward the subject you will not be able to decorate the scene. THDMI Status]: Displays a screen where you can verify the standard of the output signal from the HDMI OUT terminal. [Demo Mode]: The demonstration mode displays the camcorder's main features. lt starts automatically when the camcorder is powered with the compact power adapter if you leave it turned on without a memory card for more than 5 minutes. + To cancel the demo mode once it has started, press any button or turn off the camcorder. TV Type]: When you connect the camcorder to a TV using the optional STV-250N Stereo Video Cable, select the setting according to the type of TV in order to display the picture in full and in the correct aspect ratio. [8 4:3 TV]: TV sets with 4:8 aspect ratio. [Æ Wide TV]: TV sets with 16:9 aspect ratio. 146 + Additional Information
+ When the TV type is set to [Œ 4:3 TV], during the playback of video originally recorded with an aspect ratio of 16:9, the picture will not be displayed fullscreen. + This function is not available when the camcorder is connected to an HDTV using the supplied High Speed HDMI cable. TF1 System Setup Menu item Setting options "en [Language &] Gesky], [Dansk], [Deutsch], [Ehnuxä], | © | © © | 29 [English], [Español], [Français], [italiano], [Magyar], [Melayu], [Nedertands], [Norsk], [Polski], [Português], [Romänä], [Suomi], [Svenska], Türkçe], [Pycoui], Lipaïnebra], [ali], [és], ane], [ide], [REX], Létaoi], [RAGE] [Time Zone/DST] | [A+](home time zone) or[Æ] (travel | © © © | 31 time zone): [Paris], lis of world time zones E#] (DST adjustment: Toggle on or off IDate/Time] IDate/Time]: - + 2 [Date Format]: DM.D), [M.D.M], [D.MY] (year, M- month, D- day) {24H]: Toggle on (24-hour clock or [Available Space in CE Memory] @l {built-in memory), Efso]] (memory card) [Used Space in / CHEN, re Memory] [Œ] (buit-in memory), E[So]] (memory card) LHERASQAHE R477E = - ee - [External Hard Drive Info]* [AV/Headphones] AV, [Q Headphones] es Additional Information + 147
Menu item [Volume] {Notification Sounds] {Custom Control Button] {Battery Info] [Displayed Units] FFile Numbering] {Auto Power Off] {Power On Using LCD Panel] CRE / CD / [nitialize @/(s0)1 [nitialize (so)] CHE / [HF R46] [nitialize CD) [Firmware] [Certification Logo Display]
[Delete Memory Save Foldeg* [Reset AI] [Speaker ——1#}), 5 THeadphones] Qu ())), QE LE) High Volume] D) Low Volume], (C3 of] Same as the [£ Main Functions] panel (Defautt: [7% Decoration]) DD Meters/Grams], FeetPounds]
[M Reset], [Œ Continuous] [LON ROLE IEnable], CN 01), (C3 0] Enable], [Off] [© Buit-in Mem.], [so] Mem. Card] {Complete Initialization] oggle on or off No], [Ves]
- Option available only after connecting an external hard drive to the camcorder. 148 + Additional Information
[Available Space in Memory]/[Used Space in Memory]: Displays a screen where you can verify how much of the built-in memory (GERS /CHED/ only) or the memory card is currently available for recording or how much is in use (M] indicates photos). + Estimated figures about available movie recording time and available number of photos are approximate and based on the currently selected video quality and a photo size of 1920x1080. + In the information screen of a memory card you can also check its The [Total space] shown for the built-in memory indicates actually usable space. It may be slightiy smaller than the nom- inal built-in memory capacity listed in the specifications. [External Hard Drive Info]: When the camcorder is connected to an exter- nal hard drive, this setting displays information about the hard drive. [Notification Sounds]: A beep will accompany some operations like turn- ing on the camcorder, the self-timer countdown, etc. + Set to [ŒH Off] to turn off notification sounds. + While pre-recording (C1 80) is activated, the camcorder will not emit some notification sounds. [Custom Control Button]: On the lower right of the recording screen, a control button that is a shorteut to one of the functions in the [# Main Functions] panel is constantiy displayed. By changing this setting, you can change the shorteut, which wil allow you to access one of your frequently used functions quickly and convenientiy. in and (ure) mode, this function is always set to [Ÿ% Decoration]. [Battery Info]: When you are using a battery pack that is compatible with Inteligent System, this option displays a screen where you can verify the battery charge (as a percentage) and the remaining recording time (during recording mode) or playback time (during playback mode). + fthe battery pack is exhausted, the battery information may not be dis- played. Displayed Units]: Selects the units to use for the focusing distance display during manual focus. This also affects the units used in for height and weight in mode. [File Numbering]: MP4 movies and photos are saved as files in folders. You can select the file numbering method for those files. File numbers appear on various screens in playback mode in a format such as “101-0107”. The first three digits indicate the folder number and the last four digits are different for each file in a folder. Additional Information + 149
[@ Reset}: File numbers wil restart from 100-0001 every time you record on a memory that has been initialized. Continuous]: File numbers wil continue from the number following that of the last file recorded with the camcorder. + Ifthe memory card you insert already contains a file with a larger num- ber, a new flle will be assigned a number one higher than that of the last file on the memory card. + We recommend using the [Æ Continuous] setting. + Folder names, on the other hand, appear in a format such as “101-0501”. The first three digits indicate the folder number and the last four digits indicate the month and day (May 1, for the example folder above). In the same example, a recording with a flle number of “101-0107” is saved in the folder DCIM\101_0501 with a file name of “MVLL0107.MP4" (for MP4 movies) or “IMG_0107.JPG" (for photos). Folders can contain up to 500 files (MP4 movies and photos combined) and a new folder is created every time a folder exceeds this number. The first three digits of the file number range from 100 to 999 and the last four digits range from 0001 to 9900. File numbers are automatically assigned consecutive numbers. [Auto Power Off]: In order to save power when the camcorder is powered by a battery pack, it will automatically shut of if left without any operation for 3 minutes. + Approximately 30 seconds before the camcorder shuts off, [Auto Power Off] will appear. Operating any of the camcorder’s controls while the message is displayed will prevent the camcorder from shutting off. [Power On Using LCD Panel]: If set to [Enable], opening the LCD panel turns the camcorder on while closing the LCD panel turns it off. Set to [Off to deactivate this feature. In either case, you can still use (ONIOFF; [Firmware]: You can verify the current version of the camcorder's firm- ware, which is the software that controls the camcorder. This menu option is usually unavailable. [Certification Logo Display]: This displays select certification logos that apply to this camcorder. + The certification logos apply to Australia and New Zealand only. [Reset All: Resets al of the camcorder's settings. 150 + Additional Information
Appendix: Onscreen Icons and Displays Recording Movies (AUTO) and C2] modes {with the zoom control displayed) D Control button [PHOTO]: Take a @ Control button [START]: Start photo (CI) 40, 90) recording a movie (CII 40)
- Available only in faurs) mode. Additional Information + 151
@ Memory operation © Record, QUI Record pause, D> Playback, I Playback pause, >>> Fast playback, A Fast reverse playback, 1» Slow playback, <{ Slow reverse playback, DD Frame advance, <Qll Frame reverse. Remaining battery charge + The icon shows a rough estate Of er = NT the remaining charge as a percentage of te ful charge otre BCE EE En) battery pack. + Wen the battery charge becomes low, replace or charge the battery pack. Depending on the condition of the camcorder or battery, the actual battery charge may not match what is displayed on the screen. + Wen you attach an empty battery pack, the power may turn off without displaying Dépending on the conditions under which the camcorder and the battery pack are used, the actual battery charge may not be indicated accurately. You can display the charge status of a battery pack with the 7 03 TE 1 0) [Battery Info] setting. & Remaining recording time When there is no more free space on the memory, [Œ End] (built-in memory, CHD/ GES oniy) or [(se] End] (memory card) will be displayed in red and the recording will stop. 154 + Additional Information
Troubleshooting If you have a problem with your camcorder, refer to this section. Some- times what you think is a malfunction of the camcorder may have the simplest of solutions - please read the “CHECK THIS FIRST” box before going on to the more detailed problems and solutions. Consult your dealer or a Canon Service Center if the problem persists.
Power supply + Is the battery charged? ls the compact power adapter correctly con- nected to the camcorder? (Q] 19) Recording + Did you turn the camcorder on and correctly set it to a recording mode? (CU 40, 45) f you are recording on à memory card, is one cor- rectly inserted into the camcoder? (C[] 27) Playback + Did you turn the camcorder on and correctly set it to playback mode? (C2 49, 53) If you are playing back recordings from a memory card, is one correctly inserted into the camcorder? (C1 27) Does it contain any recordings? Power source ‘The camcorder will not turn on or it turns off by itself. The battery pack is exhausted. Replace or charge the battery pack - Remove the battery pack and reattach it correcty. ‘The camcorder turns off without the battery warning indicator appearing on the screen. The battery charge has become low or the battery pack is exhausted. Replace or charge the battery pack. Cannot charge the battery pack. - Make sure the camcorder is off so charging can start. The temperature of the battery pack is outside its operating range (approximately O — 40 °C). Remove the battery pack, warm it or et it cool down, as necessary, and try charging it again. - Charge the battery pack in temperatures between approximately 0 °C and 40 °C. The battery pack is faulty. Replace the battery pack. The camcorder cannot communicate with the battery pack attached. Battery packs not rec- ommended by Canon for use with this camcorder cannot be charged using this camcorder. - If you are using a battery pack recommended by Canon for use with this camcorder, there may be a problem with the camcorder or battery pack. Consult a Canon Service Center. Additional Information + 155
A noise can be heard from the compact power adapter. - A faint sound can be heard while the compact power adapter is connected to a power outlet. This is not a malfunction. The battery pack is exhausted extremely quickly even at normal temperatures. The battery may have reached the end of its battery life. Buy a new battery pack. Recording Pressing (START/STOP) will not start recording, = You cannot record while the camcorder is writing previous recordings onto the memory (while the ACCESS indicator is on or flashing). Wait until the camcorder has finished. = The memory is full or it already contains the maximum number of scenes of AVCHD movies (8.99 scenes). Delete some recordings (CL 55, 57) or initiale the memory (CL 31) to free some space The point where (START/STOP) was pressed does not match the beginning/end of the recording. There is a slight interval between pressing [STARTISTOP] and the actual start/end of record ing. This is not a malfunction. ‘The camcorder will not focus. - Autofocus does not work on the subject. Focus manually (CZ 79). = The lens is dirty. Clean the lens with a soft lens-cleaning cloth (21 174). Never use tissue paper t clean the lens. When a subject its across in front of the lens, the image appears slightiy bent. = This is a phenomenon typical of CMOS image sensors. When a subject crosses very quickly in front of the camcorder, the image may seem slighty warped. This is not a malfunction. Changing the operating mode between recording (@ Vrecord pause (@H)/playback (D takes longer than usual. = When the memory contains a large number of scenes, some operations may take longer than usual. Save your recordings (CL] 108) and initialize the memory (C2 31). Movies or photos cannot be recorded properiy. This may occur as movies and photos are recorded/deleted over time. Save your recordings {C1 108) and initialize the memory using the [Complete Initialzation] option (CL1 31). Cannot record a photo while recording movies. - You cannot take photos in (HSE) mode or while fading in or fading out a scene (CL 76). After using the camcorder for a long time, it becomes hot. - The camcorder may become hot after using it continuous for long periods of time; this is not a malfunction. 1 the camorder becomes unusualy hot or it becomes hot after using it only for a short while, it may indicate a problem with the camcorder. Consul a Canon Service Cen- ter. 156 + Additional Information
Playback Cannot delete a scene. = You may not be able to delete scenes recorded or edited using another device and then trans- ferred to a memory card connected to a computer. Deleting scenes takes longer than usual. = When the memory contains a large number of scenes, some operations may take longer than usual. Save your recordings (C1 108) and initialize the memory (C2 31). Cannot capture a video snapshot scene from a movie. - You cannot capture video snapshot scenes from scenes recorded or edited using another device and then transferred to a memory card connected to the computer. Also, you cannot capture scenes that are from MP4 movies. The memory is full. Delete some recordings (CL 55, 57) to free some space. When playing back scenes/slideshow with background music, the music track is not played back correctiy. This can occur when you transfer the music iles to a memory card after repeatediy recording and deleting scenes (fragmented memory). Save your recordings ([L1 108) and intialize the memory card using the (Complete Inttialzation] option (LI 31). Then, transfer the music files fist and only then transfer the video files. = Music tracks will not play back correct if the connection was interrupted while transferring the music files to a memory card. Delete the music tracks and transfer he music files again. = The transfer rate of the memory card used is too slow. Use a recommended memory card (2225). Cannot divide scenes - You cannot divide scenes recorded or edited using another device and then transferred to a memory card connected to the computer. - The memory is full. Delete some recordings (CL 55, 57) to free some space. Cannot mark individual scenes/photos in the index screen with a checkmark - You cannot select more than 100 scenes/photos individual. Select the [AI Scenes] or [All Photos] option instead of [Select] Indicators and Onscreen Displays 42 lights up in red. - Battery pack is exhausted. Replace or charge the battery pack. 4 appears on the screen. The camcorder cannot communicate with the battery pack attached so the remaining battery charge cannot be displayed Additional Information + 157
£S lights up in red. = A memory card error occurred. Turn off the camcorder. Remove and reinsert the memory card. itialze the memory card if the display does not change back to normal. - The memory card is full. Replace the memory card or delete some recordings (CL 55, 57) to free some space on the memory card. Even after stopping recording, the ACCESS indicator does not go off. = The scene is being recorded in the memory. This is not a malfunction. ‘The red ON/OFF (CHG) indicator flashes rapidly ( one flash at 0.5-second intervals). = The temperature of the battery pack is outside is operating range (approximately 0 — 40 °C). Remove the battery pack, warm it or let it cool down, as necessary, and try charging it again. - Charge the battery pack in temperatures between approximately 0 °C and 40 °C. - The battery pack is damaged. Use a different battery pack. = Charging has stopped because the compact power adapter or the battery pack is faulty. Con- sult a Canon Service Center. Picture and Sound A ratiling can be heard from the camcorder. = fit cannot be heard during camera mode, then the rattling is due to the movement of the intemal lens fodure, This is not a malfunction. ‘The screen appears too dark. - The LCD screen was dimmed. Change the 47 +) [EX | o> (LCD Backlight] setting to [Normal] or [Bright]. Screen displays turn on and off repeatedly. - The battery pack is exhausted. Replace or charge the battery pack. - Remove the battery pack and reattach it correct. Abnormal characters appear on the screen and the camcorder does not operate properiÿ. - Disconnect the power source and reconnect it after a short time. W the problem st persists, remove the battery pack and disconnect al other power sources from the camcorder. Then, reset all the camcorders settings to default values (CL) 148). Video noise appears on screen. - Keep a distance between the camcorder and devices that emit strong electromagnetic fields {plasma TVs, cellular phones, etc). Horizontal bands appear on the screen. - This is a phenomenon typical of CMOS image sensors when recording under some types of fluorescent, mercury or sodium lamps. This is not a malfunction. To reduce the symptoms, 9 Um 102 (Fiicker Reduction] setting 158 + Additional Information
Sound is distorted or is recorded at lower levels. = When recording near loud sounds (such as ireworks, shows or concerts), sound may become distorted or it may not be recorded at tne actual levels. Adjust te audio recording level man- ually (C7 86). The picture is displayed correct but there is no sound from the built-in speaker. - Speaker volume is tumed off. Adjust the volume. - Ifthe HTC-100/S High Speed HDMI Cable or optional STV-250N Stereo Video Cable is con- nected to the camcorder, disconnect it. The AV terminal is set to headphone output. Set 47 #2 -& 163 [AV/Headphones] to [AV]. There is no sound from the headphones. - Audio will not be output from the AV OUT/Q terminal while Wi-Fi functions are in use. Memory Card and Accessories Cannot insert the memory card. The memory card was not facing the correct direction. Turn the memory card over and insert
Cannot record on the memory card. The memory card is full. Delete some recordings (C1 55, 57) to free some space or replace the memory card. = Intilize the memory card (C2) 31) when you use it with the camcorder for the first time. - The LOCK switch on the memory card is set to prevent accidental erasure. Change the posi- tion of the LOCK switch. = A compatible memory card must be used to be able to record movies on a memory card (2125). The folder and file numbers for MP4 movies and photos have reached their maximum value. Set 47 D 102 (Fie Numbering] to [Reset] and insert a new memory card. External Devices Connections Video noise appears on the TV screen. = When using the camcorder in a room where a TV is located, keep a distance between the compact power adapter and the power or antenna cables of the TV. Playback looks fine on the camcorder but there is no image on the TV screen. = The video input on the TV is not set to the video terminal to which you connected the cam- corder. Select the correct video input. Additional Information + 159
‘The camcorder is connected using the supplied High Speed HDMI cable, but there is no picture or sound from the HDTV. - Disconnect the supplied High Speed HDMI cable and then restore the connection or turn the camcorder off and then on again. There is no image on the TV screen and there is no sound. - Video and audio will not be output from the camcorder while Wi-Fi functions are in use. - Video and audio will not be output from the AV OUT/{) terminal while the supplied High Speed HDMI cable is connected. Disconnect the cable. The computer does not recognize the camcorder even though the camcorder is connected correctiy. - Disconnect the USB cable and tum off the camcorder. After a short while, turn it on again and restore the connection. - Connect the camcorder to a different USB port on the computer. Cannot save photos on my computer - When the memory contains too many photos (Windows — 2,500 photos or more, Mac OS — 1,000 photos or more), you may not be able to transfer photos to a computer. Try using a card reader to transfer the photos on the memory card. B only: To transter the photos in the built-in memory, copy them to the memory card in advance (CL] 104). Refer also to the instruction manual of your wireless router and other devices you will use. Cannot connect with the wireless router. = Check that the wireless router is working correct. = The effective communication range bebween the camcorder and wireless router may vary depending on the strength of the wireless signal. Try using the camcorder closer to the wire- less router. = Cordiess phones, microwave ovens, refrigerators and other appliances in the line of sight between the wireless router and the camcorder may interfere with the wireless signal. Try using the camcorder in a location farther away from such appliances. = Wi-Fi networks with a stealth function that do not broadcast their network name (SSID) wi not be detected by the camcorder during the Wi-Fi network setup. Perform the setup manu- ally (C0 137) or turn off the stealth function of the wireless router. Wireless playback on a computer or Similar device is not smooth. Playback may not be smooth depending on the wireless router's settings and capabilty. = Connect the computer to the access point using a LAN cable. = Remove any objects between the camcorder and wireless access point that may interfere with the wireless signal. = Move the camcorder closer to the wireless access point. 160 + Additional Information
= Tum offthe wireless functions of other wireless devices other than the computer or similar device being used for playback. - Siiteh the wireless access point to IEEE802.11n. Referto it instruction manual for details. = Hthese do not soie the issue, the cause may be due the device or conditions unique to the surrounding area. Use the supplied High Speed HDMI cable to connect the camcorder to a TV (22103) The wireless connection was interrupted while transferring files. = Incomplete fes may remain at the transfer destination. H incomplete files remain at the transfer destination, check the content and make sure they are safe to delete before deleting them - Select [New Files] and perform the file transfer again. List of Messages (in alphabetical order) Refer to List of Messages for Connecting to an External Hard Drive (CA 166) for messages related to an external hard drive, List of Messages for Wi-Fi Functions (CU 167) for a list of mes- sages related to general Wi-Fi functions, and List of Messages for Web Services (LL 169) for messages related to Web services when using Wi-Fi functions. Back up recordings regulariy - This message may appear when you tum on the camcorder. In the event of a malfunction, recordings may be lost so back up your recordings regulary. Built-in memory error = The built-in memory could not be read. Contact a Canon Service Center. Built-in memory is full - The built-in memory is full ([Æ) End] appears on the screen). Delete some recordings (C2 55, 57) to free some space. Alternatively, save your recordings (CL 108) and iniialize the built-in memory (CL] 31). Built-in memory writing error Attempt to recover the data? - This message will appear the next time you turn on the camcorder if power Supply was acci- dental interrupted while the camcorder was writing to the buil-in memory. Select [Recover] to try to recover the recordings. GES Cannot access the built-in memory There is a problem with the built-in memory. Contact a Canon Service Center. Cannot communicate with the battery pack. Continue using this battery pack? - You attached a battery pack that is not recommended by Canon for use with this camcorder. - If you are using a battery pack recommended by Canon for use with this camcorder, there may be a problem with the camcorder or battery pack. Consul a Canon Service Center. Additional Information + 161
Cannot copy - The total size of the scenes you selected to copy exceeds the available space on the memory card. Delete some recordings on the memory card (CL) 55, 57) or reduce the number of Scenes to copy. The memory card already contains the maximum number of AVCHD scenes (3,999 scenes) Delete some scenes ([L1 55) to free some space. Cannot divide the scene -_ The scene could not be divided because the camcorder‘s internal scene management data log is full. Delete some scenes (C1 55) and photos ([L1 57) and try dividing the scene again. Cannot divide the scene. Initialize only using the camcorder. = The scene could not be divided because the camcorder‘s internal scene management data log is full. Delete some scenes (C1 55) and photos ([L1 57) and try dividing the scene again. Cannot load canvas -_ The canvas file that was saved on the memory is corrupted. - Canvas data cannot be read from canvas files created using other devices and then trans- ferred to a memory card connected to the computer. Cannot play back -_ There is a problem with the memory. I this message appears often without apparent reason, contact a Canon Service Center. CHR / (ER Cannot play back Cannot access the buit-in memory - There is a problem with the buit-in memory. Save your recordings (CL) 108) and initialize the built-in memory using the (Complete Iitialization] option (C1 31). If the problem persists, contact a Canon Service Center. Cannot play back Check the memory card - There is a problem with the memory card. Save your recordings (CL] 108) and initialize the memory card using the [Complete Iitialzation] option (C1 31). the problem persists, use a different memory card CHR / (ER Cannot play the movies in the buit-in memory _Initialize only using the camcorder - The camcorders buit-in memory was initialized using a computer. Initialize the built-in mem ory with this camcorder (EL 31). Cannot play the movies on this memory card - Movies cannot be played back from a 64 MB or smaller memory card. Use a recommended memory card (CL 25). Cannot play the movies on this memory card Initialize only using the camcorder = The memory card in the camcorder was initialized using a computer. Initilize ne memory card with this camcorder (OÙ 31). 162 + Additional Information
Cannot record - You cannot capture video snapshot scenes from scenes recorded or edited using another device and then transferred to a memory card connected to the computer. - There is a problem with the memory. I this message appears often without apparent reason, contact a Canon Service Center. CRD / (ER Cannot record Cannot access the built-in memory = There is a problem with the buit-in memory. Save your recordings (CL) 108) and initaliz the buil-in memory using the [Complete Initialzation] option (CI 31). Ithe problem persists, contact a Canon Service Center. Cannot record Check the memory card - There is a problem with the memory card. Save your recordings (CL] 108) and initialize the memory card using the [Complete Iitialzation] option (C1 31). the problem persists, use a different memory card. Cannot record movies in the built-in memory Initilize only using the camcorder - The camcorders buit-in memory was initialized using a computer. Initialize the built-in mem ory with this camcorder (CL 31). Cannot record movies on this memory card = Movies cannot be recorded on a 64 MB or smaller memory card. Use a recommended mem ory card (C1 25). Cannot record movies on this memory card Initilize only using the camcorder = The memory card in the camcorder was iniialized using a computer. Initilize ne memory card with this camcorder (O1 31). Cannot save the canvas - Cannot save your (Pens and Stamps] drawing on the memory. Save your recordings (C2 108) and initialize the memory (C2 31). Charge the battery pack - Battery pack is exhausted. Charge the battery pack Check the memory card - Cannot access the memory card. Check the memory card and make sure it is inserted cor- recty. = A memory card error occurred. The camcorder cannot record or display the image. Try remov- ing and reinserting the memory card, or use à different memory card. - You inserted a MultiMedia Card (MMC) into the camcorder. Use a recommended memory card (225). = Iafter the message disappears, [so] appears in red, perform the following: Turn off the cam- corder and remove and reinsert the memory card. 1 [so] tums back to green you can resume recording/playback. 1 the problem persists, save your recordings (CL 108) and initialize the memory card (C2 31). Additional Information + 163
Check whether the lens cover is open - Slide the lens cover switch doun. Do not disconnect the power source. Do not disconnect the USB cable unless you first use the computer to safely end the connection. - Wen the camcorder is in (2) mode and is connected to the computer with the supplied USB cable, the camcorder cannot be operated. Disconnecting the USB cable or power source while this message appears may result in permanent loss of the recordings in the camcorder. Use the computer Safely Remove Hardware function to end the connection and disconnect the USB cable before using the camcorder. File name error - The folder and file numbers have reached their maximum value. Set 17 6> (#16) [File Numbering] to [Reset] and delete al the MP4 movies (C1 55) and photos (CL 57) on the memory card or initialize it (C1 31). Initialize only using the camcorder - There is a problem with the file system that prevents accessing the selected memory. Initilize the memory with this camcorder (CL 31). LCD Screen has been dimmed Use the [LCD Backlight} setting to change the brightness - Change the 47 0) #2 [LCD Backight] setting to [Normal] or [Bright]. May not be possible to record movies on this memory card - You may not be able to record movies on a memory card without a Speed Class rating or with one rated SD Speed Class 2. Replace the memory card with one rated SD Speed Class 4, 6 or Mem. Card Number of scenes already at maximum = The memory card already contains the maximum number of AVCHD scenes (3,999 scenes): no further scenes can be copied onto the memory card. Delete some scenes (CL) 55) to free some space. Mem. Card Unable to recognize the data -_The memory card contains scenes recorded using a video configuration that is not supported (NTSC). Play back the recordings in the memory card with the device originally used to record them. Memory card cover is open - After inserting a memory card, close the memory card slot cover. Memory card is full = The memory card is full. Delete some recordings (CL) 55, 57) to free some space or replace the memory card. Memory card is write-protected = The LOCK switch on the memory card is set to prevent accidental erasure. Change the posi- tion of the LOCK switch. 164 + Additional Information
Memory card writing error Attempt to recover the data? - This message will appear the next time you turn on the camcorder if power supply was acci- dental interrupted while the camcorder was writing to the memory. Select [Recover to try to recover the recordings. you inserted a memory card that contains scenes recorded using another device, we récommend that you select [No]. Need to recover files from the memory card. Change the position of the LOCK switch on the memory card. - This message will appear the next time you turn on the camcorder if power supply was acci- dental interrupted while the camcorder was writing on the memory card and later the posi- tion of the card's LOCK switch was changed to prevent erasure. Change the position of the LOCK switch No memory card - Insert a compatible memory card into the camcorder (CL 27). The memory card may not be inserted correct. Insert the memory card all the way into the memory card slot until t clicks Not enough available space - Delete some recordings on the memory card (CL) 55, 57) or select [4 Mbps] for the conver- sion. Number of scenes already at maximum The maximum number of AVCHD scenes (3,999 scenes) has been reached. Delete some scenes (CI1 55) to free some space. Recording was stopped due to insutficient write speed of the memory card = The data transfer rate was too high for the memory card in use and the recording was stopped. Replace the memory card with one rated SD Speed Class 2, 4, 6 or 10. - After repeatediy recording, deleting and editing scenes (fragmented memory), it will take longer to write data on the memory and recording may stop. Save your recordings (CL] 108) and initialize the memory (C[] 31). Scene recorded using another device. Cannot copy the scene. - Scenes that were not recorded with this camcorder cannot be copied to the memory card. - Scenes that were edited using software cannot be copied or divided. Scene recorded using another device. Cannot divide the scene. - Scenes that were not recorded with this camcorder cannot be divided with this camcorder. - Scenes that were edited using software cannot be copied or divided. Scene recorded using another device. . Cannot play back the scene. - Scenes that were not recorded with this camcorder cannot be played back Select the desired scene number = Anumber of scenes have the same recording date but different file control information. This can oceur for example wen you record movies in the area of the international date line. Select a number to display the corresponding group of scenes. Additional Information + 165
Some scenes could not be deleted = Movies that were protected/edited with other devices and then transferred to a memory card connected to the computer, cannot be deleted with this camcorder. Some scenes were recorded using another device and cannot be copied - Scenes that were not recorded with this camcorder cannot be copied to the memory card. Task in progress. Do not disconnect the power source. - The camcorder is updating the memory. Wait until the operation ends and do not disconnect the compact power adapter or remove the battery pack. ‘This photo cannot be displayed - You may not be able to display photos taken with other devices or image files created or edited on a computer and then transferred to a memory card connected to the computer. To record video on this memory card, it is recommended to use [Long Play] video quality. = When using a memory card rated SD Speed Class 2, you may not be able to record movies if you use a video quality option other than LP or 4 Mbps. To record video on this memory card, i is recommended to use a video quality setting other than [50P Recording]. - When using a memory card rated SD Speed Class 2 or 4, you may not be able to record mov- ies if you use a video quality option other than 50P or 35 Mbps. ‘Too many photos and MP4 movies. Disconnect the USB cable. - Disconnect the USB cable. Try using a memory card reader or decrease the number of photos and MP4 movies on the memory card to fewer than 2,500 (Windows), or 1,000 (Mac OS). - Ifa dialog box appeared on the computer screen, close it. Disconnect the USB cable, and restore the connection after a short while. Unable to recognize the data - You transferred data to the camcorder recorded using a video configuration that is not sup- ported (NTSC). Play back the recordings with the device originally used to record them. Unable to recover data Could not recover a corrupted fil. Save your recordings (CL) 108) and initialize the memory using the [Complete Initalzation] option (C1 31). HER Error writing to external hard drive - This message will appear the next time you turn on the camcorder if power supply was acci- dentallyinterrupted while the camcorder was writing to the external hard drive. Select {Recover] to try to recover the recordings. Quickiy erases all files and deletes partitions from the external hard drive. Initialize? - I you initilize the hard drive, all data it contains will be lost, including any parttioned drives. I necessary, back up data and then iniialze the hard drive with the camcorder. List of Messages for Connecting to an External Hard Drive 166 + Additional Information
The compact power adapter was disconnected. Could not safely remove the external hard drive. - While the camcorder was connected to an external hard drive, the camcorder's compact power adapter was disconnected and the connection was ended. Check whether data in the hard drive was corrupted. List of Messages for Wi-Fi Functions Refer also to the instruction manual of your wireless router and other devices you will use. Another user is already controlling the camcorder. Try again later. - This message appears on the screen of the Wi-Fi device. Multiple Wi-Fi devices are trying to connect with the camcorder. Make sure only one Wi-Fi device is trying to connect and then touch Retry. IP address conflict - Change the camcorders IP address to avoid any conflict with devices connected to the same network. Altematively, change the IP address of the conflicting device. Memory card cover is open = The memory card cover was opened while the memory card was being accessed. Stop the Wi-Fi function in use and end the Wi-Fi connection. Multiple access points detected. Try the operation again. - There are multiple access points sending out a WPS signal at the same time. Try the operation again later or perform setup using the [WPS: PIN Code] or [Search for Access Points] option (C2 134. No access points found - The access point set in the camcorder could not be found. - Cordless phones, microwave ovens, refrigerators and other appliances may interfere with the wireless signal. Try using the camcorder in a location farther away from such appliances. - Make sure that you use the access points SSID for the camcorder's Wi-Fi settings (CL) 136). - Ifthe access point is using MAC address fitering, enter the camcorder's MAC address in the access points configuration screen. Unable to access configuration files Turn off the camcorder. After a short while, turn it on again. If the problem persists contact a Canon Service Center. Unable to complete WPS. Try the operation again. - Some wireless routers require pressing and holding the Wi-Fi Protected Setup (WPS) button. For detail, refer to the instruction manual of your wireless router. - Make sure to touch [OK] on the camcorder screen within 2 minutes of activating the Wi-Fi Protected Setup signal on the wireless router, whether by pressing the button or by entering the PIN code. Additional Information + 167
Unable to complete WPs. = Tum ofthe camcorder and wireless router. After a short while, turn them on again and try again. I the problem perssts, perform setup using the [Search for Access Points] option (C2 134). Unable to connect - Cordless phones, microwave ovens, refigerators and other appliances may interere with the wireless signal. Ty using the camcorder in a location father away from such appliances. Unable to obtain an IP address = you are not using a DHCP server, connect using the [Manual Setup] option and enter the IP address using the [Manual] option (CL] 137). = Tum on the DHCP server. Hit is already on, make sure iis functioning property. - Make sure the address range for the DHCP server is suffcient. = Tum on the DNS server. Hitis already on, make sure it is functioning properiy. = Make sure that te DNS server IP address and the name for that address ar correcty configure. - Setthe DNS server IP address in the camcorder. = H you are not using a DNS server, set the DNS address to [0.0.0.0]. = Hyou are using a wireless gateway router, make sure al of the devices in the network, includ- ing the camcorder, are configured with the correct gateway address. Wi-Fi authentication unsuccessful = Make sure the camcorder and access point are using the same authentication/encryption method and encryption key, = the access point is using MAC address fitering, enter the camcorders MAC address in the access points configuration screen. Wi-Fi connection terminated - Cordless phones, microwave ovens, refigerators and other appliances may interere with the wireless signal. Ty using the camcorder in a location farther away from such appliances. = The camcorder may not be able to connect to the access point if too many devices are accessing it. After a short while, establish the connection again. Wi-Fi error incorrect authentication method = Make sure the camcorder and access point are correctiy configured. - Make sure the camcorder and access point are using the same authentication/encryption method and encryption key, = the access point is using MAC address fitering, enter the camcorders MAC address in the access points configuration screen Wi-Fi error incorrect encryption key = The encrypton key (password) is case sensitive so make sure to enter it correcty. Wi-Fi error incorrect encryption method = Make sure the camcorder and access point are using the same authentication/encryption methoc. = Ithe access point is using MAC address fiering, enter the camcorders MAC address in the access points configuration screen. 168 + Additional Information
Wireless communication is not working correct - Cordless phones, microwave ovens, refrigerators and other appliances may interfere with the wireless signal. Try using the camcorder in a location farther away from such appliances. Turn off the camcorder and wireless router. After a short while, tu them on again and per- form the Wi-Fi network setup again. W the problem persists contact a Canon Service Center. List of Messages for Web Services Check network settings = The network settings in the camcorder are not correcty configured. Check the connection point, SSID and other network settings. Connect to a computer and use supplied software to set up This service may not be available in your region - To use Web services, set in the camcorder the settings saved on CANON IMAGE GATEWAY. Install ImageBrowser EX and CameraWindowr in your computer and configure the settings using CANON IMAGE GATEWAY. Connect to a computer and use the supplied software to set again - An error occurred when connecting to the CANON IMAGE GATEWAY server. Check the settings saved on CANON IMAGE GATEWAY and set them again in the camcorder. Insufficient space on server - You have exceeded the amount of data you can save on the CANON IMAGE GATEWAY server. Delete some data to free some space. Movie must be less than X min - You attempted to send a movie whose length exceeds the maximum length allowed by the Web service (the maximum length differs according to the Web service). Shorten the movie and try sending it again. Server busy_ Try again later - The CANON IMAGE GATEWAY server is busy due to a high number of users trying to connect to the server. End the Wi-Fi connection and try again later. This image cannot be sent - You attempted to send a type of recording or a file with a size that is not supported by the selected Web service. Check the recording before sending Try again - An error oceurred when connecting to the CANON IMAGE GATEWAY server or the server is temporarly down. End the Wi-Fi connection and try again. Additional Information + 169
Handling Precautions Camcorder Be sure to observe the following precautions to ensure maximum per- formance. + Save your recordings periodically. Make sure to transfer your record- ings to an external device such as a computer or digital video recorder (CA 104) and save them on a regular basis. This wil protect your impor- tant recordings in case of damage and create more free space on the memory. Canon shall not be liable for any data loss. Do not carry the camcorder by the LCD panel. Be careful when closing the LOD panel. Handle the touch screen with care. Do not apply excessive force and do not use ballpoint pens or other hard-tipped tools to operate the touch screen. This may damage the touch screen's surface. Do not leave the camcorder in places subject to high temperatures (Ike the inside of a car parked under direct sunligh®, or high humidity. Do not use the camcorder near strong electromagnetic fields such as above TVS or near plasma Ts. CD / CG Do not use the camcorders Wi-Fi functions inside hospitals, medical clinics or onboard aircraft. In addition, do not use them near medical equipment or sensitive electronic devices as it may affect their performance. In the case of pacemakers, keep the cam- corder at least 22 cm away from the device. ED / RE The camcorders Wi-Fi functions may be subject to interference from devices such as cordiess phones and microwave ovens. Keeping as much distance as possible from these devices or using the camcorder's Wi-Fi functions at à different time of day may reduce such interference. Do not point the lens at strong light sources. Do not leave the cam- corder pointed at a bright subject. Do not use or store the camcorder in dusty or sandy places. The cam- corder is not waterproof — avoid also water, mud or salt. If any of the above should get into the camcorder it may damage the camcorder and/or the lens. + Be careful of heat generated by lighting equipment. 170 + Additional Information
+ Do not disassemble the camcorder. If the camcorder does not function proper, consult qualfied service personnel. + Handie the camcorder with care. Do not subject the camcorder to shocks or vibration as this may cause damage. + When mounting the camcorder on a tipod, make sure that the tripods fas- tening screw is shorter than 5.5 mm. Using other tripods may damage the camcorder. When recording movies, try to get a calm, stable picture. Excessive cam- corder movement while shooting and extensive use of fast zooms and panning can result in jtery scenes. In extreme cases, the playback of such scenes may result in visually induced motion sickness. If you expe- rience such a reaction, stop the playback immediately and take a rest break as necessary. Long-term storage If you do not intend to use the camcorder for a long time, store it in a place free of dust, in low humidity, and at temperatures not higher than 30°C Battery Pack DANGER! Treat the battery pack with care. + Keep it away from fire (or it might explode). + Do not expose the battery pack to temperature higher than 60 °C. Do not leave it near a heater or inside a car in hot weather. + Do not try to disassemble or modify it. + Do not drop it or subject it to shocks. + Do not get it wet. + Dirty terminals may cause a poor contact between the battery pack and the camcorder. Wipe the terminals with a soft cloth. Additional Information + 171
Long-term storage + Store battery packs in a dry place at temperatures no higher than 30°C. + To extend the battery life of the battery pack, discharge it completely before storing it. + Charge and discharge all your battery packs full at least once a year. Remaining battery time When you are using a battery pack that is compatible with Inteligent Sys- tem, ifthe remaining battery time displayed is not correct, charge the bat- tery pack fully. Stil, the correct time may not be displayed after a large number of repeated uses, if a fully charged battery pack is left unused, or if a battery pack is used for long periods of time in high temperatures. Use the time shown on the screen as an approximation. Memory Card + We recommend backing up the recordings on the memory card onto your computer. Data may be corrupted or lost due to memory card defects or exposure to static electricity. Canon shall not be liable for lost or corrupted data. Do not touch or expose the terminals to dust or dirt. Do not use memory cards in places subject to strong magnetic fields. Do not leave memory cards in places subject to high humidity and high temperature. Do not disassemble, bend, drop, or subject memory cards to shocks and do not expose them to water. Check the direction before inserting the memory card. Forcing a mem- ory card into the slot if i is not correcily oriented may damage the mem- ory card or the camcorder. Do not attach any labels or stickers on the memory card. Secure Digital (SD) memory cards have a physical switch to prevent writ- ing on the card so as to avoid the accidental erasure of the card's con- tent. To write-protect the memory card set the switch to the LOCK position. LOCK switch 172 + Additional Information
Built-in Rechargeable Lithium Battery The camcorder has a built-in rechargeable lithium battery to keep the date/time and other settings. The built-in lithium battery is recharged while you use the camcorder; however, it will discharge completely if you do not use the camcorder for about 3 months. To recharge the built-in lithium battery: Connect the compact power adapter to the camcorder and leave it connected for 24 hours with the camcorder off Disposal When you delete movies or initialize the memory, only the file allocation table is altered and stored data is not physicall erased. When you dis- pose of the camcorder or memory card or give either to another per- son, initialize the camcorder's built-in memory (GI HER47TAHER46] only) or memory card using the [Complete Initialization] option (LL 31). Fillit up with unimportant recordings, and then initialize it again using the same option. This makes recovering the original recordings very difficult. Additional Information + 173
Maintenance/Others Cleaning Camcorder Body + Use a soft, dry cloth to clean the camcorder body. Never use chemically treated cloths or volatile solvents such as paint thinner. Lens + Ifthe lens surface is dirty, autofocus may not work properly. + Remove any dust or dirt particles using a non-aerosol type blower brush. + Use a clean, soft lens-cleaning cloth to gentiy wipe the lens. Never use tissue paper. LCD Touch Screen + Clean the LCD touch screen using a clean, soft lens-cleaning cloth. + Condensation may form on the surface of the screen when the temper- ature changes suddenly. Wipe it with a soft dry cloth. Condensation Moving the camcorder rapidly between hot and cold temperatures may. cause condensation (water droplets) to form on its internal surfaces. Stop using the camcorder if condensation is detected. Continued use may damage the camcorder. Condensation may form in the following cases: + When the camcorder is moved quickly from cold to warm places + When the camcorder is left in a humidl room + When a cold room is heated rapidly To avoid condensation + Do not expose the camcorder to sudden or extreme changes in tem- perature. 174 + Additional Information
+ Remove the memory card and battery pack. Then, place the camcorder in an airtight plastic bag and let it adjust gradually to temperature changes before removing it from the bag. When condensation is detected The precise time required for water droplets to evaporate will vary depending on the location and weather conditions. As a general rule, wait for 2 hours before resuming use of the camcorder. Using the Camcorder Abroad Power Sources You can use the compact power adapter to operate the camcorder and to charge battery packs in any country with power supply between 100 and 240 V AC, 50/60 Hz. Consult a Canon Service Center for information on plug adapters for overseas use. Playback on a TV Screen You can only play back your recordings on TVs compatible with the PAL system. PAL (or the compatible SECAM system) is used in the following regions/countries: Europe: Al of Europe and Russia. Americas: Only in Argentina, Brazil, Uruguay and French territories (French Guiana, Guadeloupe, Martinique, etc.). Asia: Most of Asia (except in Japan, the Philippines, South Korea, Taiwan and Myanmar). Africa: All of Africa and African islands. Australia/ Oceania: Australia, New Zealand, Papua New Guinea; most Pacific islands (except for Micronesia, Samoa, Tonga and US territories like Guam and American Samoa). Additional Information + 175
Accessories (Availability differs from area to area)
Exiernal o hard drive"
TVHDTV <——<Æ = Digital video recorder Optional accessories not listed below are described in more detail in the following pages. © CA-H10E Compact Power Adapter 2 HTC-100/S* or HTC-100 High Speed 2 Memory card HDMI Cable S IFC-300PCU/S* or IFC-400PCU USB ‘# STV-250N Stereo Video Cable Cable
- Supplied with the camcorder; not available as an optional accessory. FRABÏTNE À ony. 176 + Additional Information
Optional Accessories Use of genuine Canon accessories is recommended. This product is designed to achieve excellent performance when used with genuine Canon accessories. Canon shall not be liable for any dam- age to this product and/or accidents such as fire, etc., caused by the malfunction of non-genuine Canon accessories (8.g., à leakage and/or explosion of a battery pack}. Please note that this warranty does not apply to repairs arising out of the malfunction of non-genuine Canon accessories, although you may request such repairs on a chargeable basis. @ Battery Packs When you need extra battery packs, select one of the following models: BP-718 or BP-727. When you use battery packs bearing the r Inteligent System mark, the camcorder |. @ Intelligent will communicate with the battery and display the remaining usage time (accurate to 1 minute). You can only use and charge these battery packs with camcorders and chargers compati- ble with Intelligent System. n Battery © CG-700 Battery Charger Use the battery charger to charge the battery packs. Charging, Recording and Playback Times The charging times given in the following table are approximate and vary according to charging conditions and initial charge of the battery pack Bat > IE BP-718 BP-727 Charging conditions L Using the camcorder 335 min. 465 min. Using the CG-700 Battery Charger 220 min. 315 min. Additional Information + 177
- Approximate times for recording with repeated operations such as start/Stop, 200ming, and power on/off. L UA-100 pe Adapter tH Allows you to con- met to the c: mor ar an external hard drive or similar storage device with a standard-A cable. After doing so, you can
save an entire memory onto the device. Check in advance the USB cable supplied with your external hard drive @ SC-2000 Soft Carrying Case Ahandy camcorder bag with padded compartments and plenty of space for accessories. This mark identifies genuine Canon video accessories. When you use Canon video equipment, we recommend Canon-brand accessories or products bearing the same mark. 180 + Additional Information
MP4 movies: 35 Mbps: 1 hr. 24 Mbps: t hr 25 min. 17 Mbps: 2 hr. 5 min. 4 Mbps: 8 hr. 40 min. + Image Sensor 1/4.85-type CMOS, 3,280,000 pixels® Efectve pixels: 2,070,000 pixels® (1920 x 1080) When advanced 200 s on: 1920 x 1080 (wide angle) 1360 x 765 (ul telephoto) 51 om (3in), wide, TFT color, 230.000 dots”, touch operation + Microphone: Stereo electret condenser microphone + Lens 122.8-89.6 mm, F/1.8-4.5, 32x optical zo0m, 53x advanced 200m 35 mm equivalent. 38.5 1,232 mm°
32.5 1,723 mm (when advanced zoom is on)
+ LCD Touch Scres + Lens Configuration: 10 elements in 7 groups (1 aspheric element) + AF System Autofocus (TTL) or Manual focus + Minimum Focusing Distance 11m; 50 cm with tele macro on at full telephoto; 1 cm at full wide angle + White Balance Auto white balance, Custom wie balance or Preset wie balance settings: Dayight, Tungsten + Minimum Ilumination
0.4 x (Low Light] Special Scene mode, Shutter speed at 1/2)
4x ([Programmed AE] shooting mode, Auto slow shutter [On], Shutter speed at 1/25) + Recommended Ilumination: More than 100 1x + Image Stabilization: Optical-Shift Image Stablizer + Size of Video Recordings AVCHD movies: 50P, MXP, FXP: 1920 x 1080 pixels; LP: 1440 x 1080 pixels MP4 movies: 35 Mbps, 24 Mbps, 17 Mbps: 1920 x 1080 pixels; 4 Mbps: 1280 x 720 pixels + Size of Photos: 1920 x 1080 pixels 1280 x 720 pixels (MP4 movies at 4 Mbps) 1920 x 1080 pixels (photos captured from a movie) Terminals + AV OUT/() Terminal 2 3.5 mm minijack: output oniy (dual purpose terminal also for headphones stereo output) Video: 1 Vp-p/75 Q unbalanced Audio: 10 dBV (47 KO load) / 3 KG or less 182 + Additional Information
+ USB Terminal: mini-AB, Hi-Speed USB; output only + HDMI OUT Terminal HDMI Mini Connector, output only only) + Standard: Complies with the IEEE 802.11b/g/n protocol, Wi-Fi Protected Setup (connection methods: WPS button, PIN code) + Frequency: 2.4 GHz + Supported channels: 1 - 13 + Encryption methods: WEP-64/WEP-128, TKIP/AES Power/Others + Power supply (rated)
3.6 V DC (battery pack, 5.3 V DC (compact power adapter)
+ Power consumption: 3.0W (FXP mode, AF on, LCD normal brightness) + Operating temperature *: 0 — 40 °C + Dimensions* [W x H x D] (excluding the grip belt) 53x57 x 116 mm + Weight* (camcorder body only)
CA-110E Compact Power Adapter + Power supply: 100 - 240 V AG, 50/60 Hz + Rated output / consumption: 5,3 V DC, 1.5 A/ 17 VA (100 V — 23 VA (240 V) + Operating temperature *: 0 — 40 °C + Dimensions Ÿ: 49 x 27 x 79 mm + Weight*: 110 g Additional Information + 183
BP-718 Battery Pack + Battery type Rechargeable lithium ion battery + Rated voltage: 3.6 V DC + Operating temperature *: 0 — 40 °C + Battery capacity: 1,840 mAh {ypica); 6.5 Wh / 1,790 mAh (minimum) + Dimensions Ÿ: 30.3 x 24.9 x 40.1 mm + WeightŸ: 42 g 184 + Additional Information
About the music files The specifications of the music files compatible with the camcorder are as follows. Audio encoding: Linear PCM Audio sampling: 48 KHz, 16 bits, 2 channels Minimum length: 1 second File type: WAV The music data is saved in the memory under the following folders. CHEN In the built-in memory: \CANON\MY_MUSIC\MUSIC_01.WAV to MUSIC_99.WAV On the memory card: \CANON\PRIVATE\MY_MUSIC\MUSIC_01.WAV to MUSIC_99.WAV Sample music tracks can be found in the “MUSIC” folder of the supplied LEGRIA CD-ROM. About the image files for the Image Mix function Image files are saved in the memory under the following folders. Hi] In the built-in memory: \CANON\MY_PICT\MIX_01.JPG to MIX_99.JPG On the memory card: \CANON\PRIVATE\MY_PICT\MIX_01.JPG to MIX_99.JPG Sample image mix frames can be found in the "MY_PICT" folder of the supplied LEGRIA CD-ROM. Weight and dimensions are approximate. Errors and omissions excepted. The information in this manual is verified as of January 2013. Subject to change without notice. Additional Information + 185
- Index 50P recording p. 50
- Abroad, using the camcorder . 175 Aspect ratio of a connected TV (TV type) .146 Audio recording level p. 86
- Audio scene select p. 85
- AUTO mode p. 40
- Auto slow shutter p. 144
- Automatic backight correction p. 78
- AV OUT/Q terminal 87, 99, 101 Baby album p. 0
- Baby mode p. 63
- Background music - 92 Battery pack Battery information p. 149
- , 154 Charging Remaining charge indicator p. 19
Beach (Special Scene mode)... .66 Built-in backup battery 173 CameraAccess* . ..122