USER MANUAL S7 JANOME
IMPORTANT SAFETY INSTRUCTIONS
When using an electrical appliance, basic safety precautions should always be followed, including the following:
This sewing machine is designed and manufactured for household use only.
Read all instructions before using this sewing machine.
DANGER— To reduce the risk of electric shock:
- An appliance should never be left unattended when plugged in. Always unplug this sewing machine from the electric outlet immediately after using and before cleaning.
WARNING — To reduce the risk of burns, fire, electric shock, or injury to persons:
- Do not allow to be used as a toy. Close attention is necessary when this sewing machine is used by or near children.
- Use this appliance only for its intended use as described in this owner's manual.
Use only attachments recommended by the manufacturer as contained in this owner's manual.
- Never operate this sewing machine if it has a damaged cord or plug, if it is not working properly, if it has been dropped or damaged, or dropped into water.
Return this sewing machine to the nearest authorized dealer or service center for examination, repair, electrical or mechanical adjustment.
- Never operate the appliance with any air opening blocked. Keep ventilation openings of this sewing machine and foot controller free from accumulation of lint, dust and loose cloth.
- Never drop or insert any object into any opening.
- Do not use outdoors.
- Do not operate where aerosol (spray) products are being used or where oxygen is being administered.
- To disconnect, turn all controls to the off ("O") position, then remove plug from outlet.
- Do not unplug by pulling on cord. To unplug, grasp the plug, not the cord.
- Keep fingers away from all moving parts. Special care is required around the sewing machine needle and/or cutting blade.
- Always use the proper needle plate. The wrong plate can cause the needle to break.
- Do not use bent needles.
- Do not pull or push fabric while stitching. It may deflect the needle causing it to break.
- Switch this sewing machine off (“O”) when making any adjustment in the needle area, such as threading the needle, changing the needle, threading the bobbin or changing the presser foot, and the like.
- Always unplug this sewing machine from the electrical outlet when removing covers, lubricating, or when making any other adjustments mentioned in this owner's manual.
SAVE THESE INSTRUCTIONS
For Europe only:
This appliance can be used by children aged from 8 years and above and persons with reduced physical, sensory or mental capabilities or lack of experience and knowledge if they have been given supervision or instruction concerning use of the appliance in a safe way and understand the hazards involved. Children shall not play with the appliance. Cleaning and user maintenance shall not be made by children without supervision.
For outside Europe (except U.S.A and Canada):
This appliance is not intended for use by persons (including children) with reduced physical, sensory or mental capabilities, or lack of experience and knowledge, unless they have been given supervision or instruction concerning use of the appliance by a person responsible for their safety.
Children should be supervised to ensure that they do not play with the appliance.

Please note that on disposal, this product must be safely recycled in accordance with relevant National legislation relating to electrical/electronic products. If in doubt please contact your retailer for guidance. (European Union only)
TABLE OF CONTENTS
ESSENTIAL PARTS
Names of Parts....3
Standard Accessories....4
Accessory Storage....5
Extension Table....5
Free-arm sewing 5
GETTING READY TO SEW
Connecting the Power Supply....6
Operating Instructions: 6
Controlling Sewing Speed....7
Foot Control....7
Machine Operating Buttons 8
Touch Panel Keys....9
Winding the Bobbin....10-12
Threading the Machine 13
Built-in Needle Threader....14
Drawing up the Bobbin Thread 15
Replacing Needles.... 16
Fabric and Needle Chart.... 16
Replacing the Presser Foot ....17
Removing and Attaching the Foot Holder.... 18
Attaching the Dual Feed Foot 19
Attaching the Darning Foot PD-H 19
Replacing the Needle Plate 20
Raising and Lowering the Presser Foot.... 21
Knee Lifter....21
Dropping the Feed Dog....22
ORDINARY SEWING MODE
Ordinary Stitch Patterns....23
Function Keys in Ordinary Sewing Mode....24-25
UTILITY STITCHES
Straight Stitches 26
Sewing from the Edge of Thick Fabric 26
Changing Sewing Direction....26
Turning a Square Corner....26
Securing Seams 27
Cutting Threads....27
Needle Plate Guides 27
Variety of Straight Stitches.... 28
Sewing with the Dual Feed Device 29
U11 Basting 30
Zigzag Stitches....30
Variety of Overcasting Stitches.... 31
Manual Stitch Settings 32
Adjusting Thread Tension 33
Adjusting Foot Pressure Control....33
Foot up for Pivoting 33
Favorite Stitch Adjustment 34
U12 Backward Stitch 35
U16 Hemstitch....35
U21 Fagotting....35
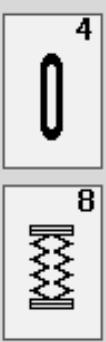
Variety of Buttonholes....36
B1 Sensor (Square) Buttonhole 37-40
Using the Stabilizer Plate....41
B2 Automatic (square) Buttonhole 42-43
Other Buttonholes 44
B11 Welted Buttonhole (Bound Buttonhole) 45-46
Corded Buttonhole 47
Speciality Stitches....48-49
B13 Darning....48
B15 Eyelet 49
DECORATIVE STITCHES
Decorative Stitches 50-53
Quilting(Q) 54
Using the Quilting Guide Bar 54
Q1-Q3 Patchwork Piecing 54
Angle Scales on the Needle Plate 54
Q48-Q51 Hand-look quilt stitches.... 54
S1-S14 Decorative Satin Stitches 55
Elongation Ratio....55
Created Stitches (CS) 56
Twin Needle Sewing....57
PROGRAMMING A PATTERN COMBINATION
Mirror Image of Patterns 58
Bridge Stitches....58
Editing a Pattern Combination 59
Deleting a Pattern 59
Inserting a Pattern....59
Startover Key 60
Checking Pattern Combination Length 61
MONOGRAMMING
Function Keys....62
Manual Thread Tension 63
Individual Thread Tension Adjustment....63
Unified Thread Tension Adjustment....63
Spacing 63
Reducing the Size of Letters....63
Programming a Monogram 64
Saving a Pattern Combination 65
Opening a Pattern Combination 66
SEWING APPLICATION
Sewing Application....67
Seaming 68
Overedge....69
Blind Hem....70
Shell Tuck....71
Rolled Hem....72
Zipper Sewing 73-75
Concealed Zipper Sewing (optional)....76-77
Gathering....78
Basting 78
Button Sewing 79
Tacking 80
Applique 81
Patchwork....82
Quilting 83
Clasp Stitches 83
Free Quilting....84
One Stitch Off....84
Foot Height for Free Motion Quilting 84
Sculpture Stitches 84
Hand-look Quilt Stitches 85
Variable Zigzag 85
Maximum Zigzag Width Adjustment 85
CUSTOMIZING MACHINE SETTINGS
Machine Setting Mode 86
Common Setting Mode 86-89
Ordinary Sewing Setting Mode 89-91
Language Selection Mode 92
Correcting Distorted Stitch Patterns 92
CARE AND MAINTENANCE
Cleaning the Hook Area....93
Cleaning the Inside of the Thread Guide 94
Problems and Warning Signals....95
Troubleshooting....96
Stitch Chart 97-98
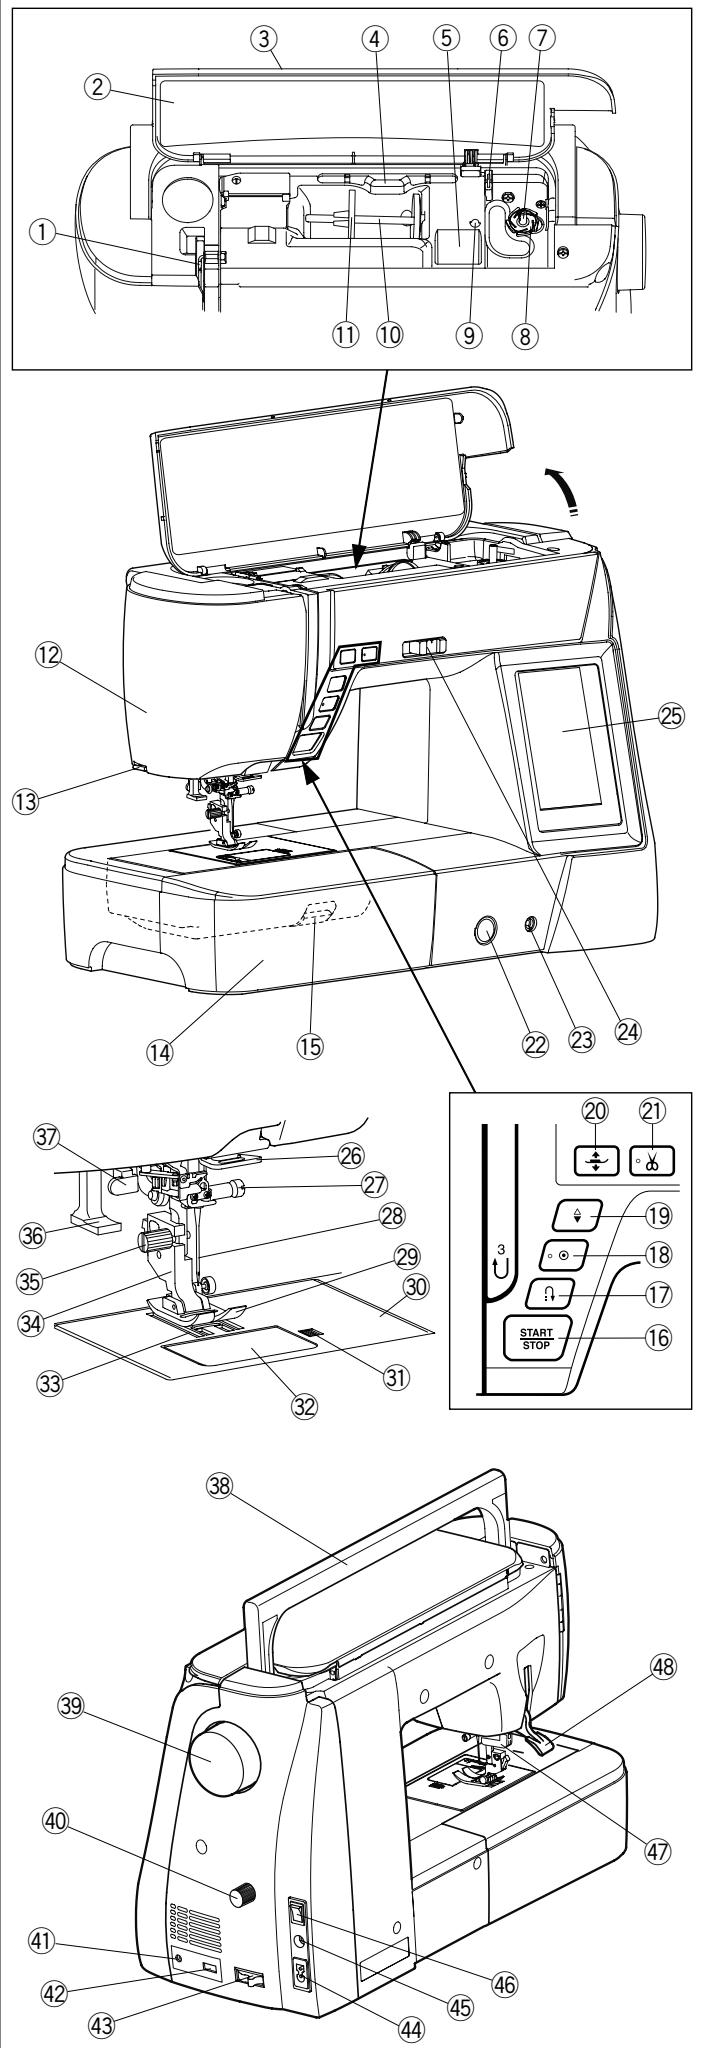
ESSENTIAL PARTS
Names of Parts
① Thread take-up lever
② Reference chart
③ Top cover
④ Touch panel stylus holder
⑤ Foot storage compartment
⑥ Bobbin thread cutter B
⑦ Bobbin winder spindle
⑧ Bobbin thread cutter A
⑨ Hole for extra spool pin
⑩ Spool pin
⑪ Spool holder (large)
⑫ Face cover
⑬ Thread cutter
⑮ Needle plate release lever
⑯ Start/stop button
⑰ Reverse button
⑱ Auto-lock button
⑲ Needle up/down button
⑳ Presser foot lifter button
②1 Thread cutter button
②2 Feed balancing dial
②3 Knee lifter socket
⑳ Speed control slider
⑲ Visual touch screen
②6 Lower thread guide
⑳ Needle clamp screw
⑳ Needle
⑲ Zigzag foot A
③0 Needle plate
③1 Hook cover release button
③2 Hook cover plate
③3 Feed dog
③4 Foot holder
③5 Setscrew
③6 Needle threader
③7 Buttonhole lever
③8 Carrying handle
⑲ Handwheel
④0 Dual feed balancing dial
④1 Thread cutter switch jack*
④2 USB port
④3 Drop feed lever
④4 Machine socket
④5 Foot control jack
④6 Power switch
④7 Dual feed drive
④8 Presser foot lifter
⑭ Extension table (accessory storage)
NOTE:
To carry the sewing machine, hold the carrying handle with your hand, and support the sewing machine with the other hand.
NOTE:
Sewing machine design and specifications are subject to change without prior notice.
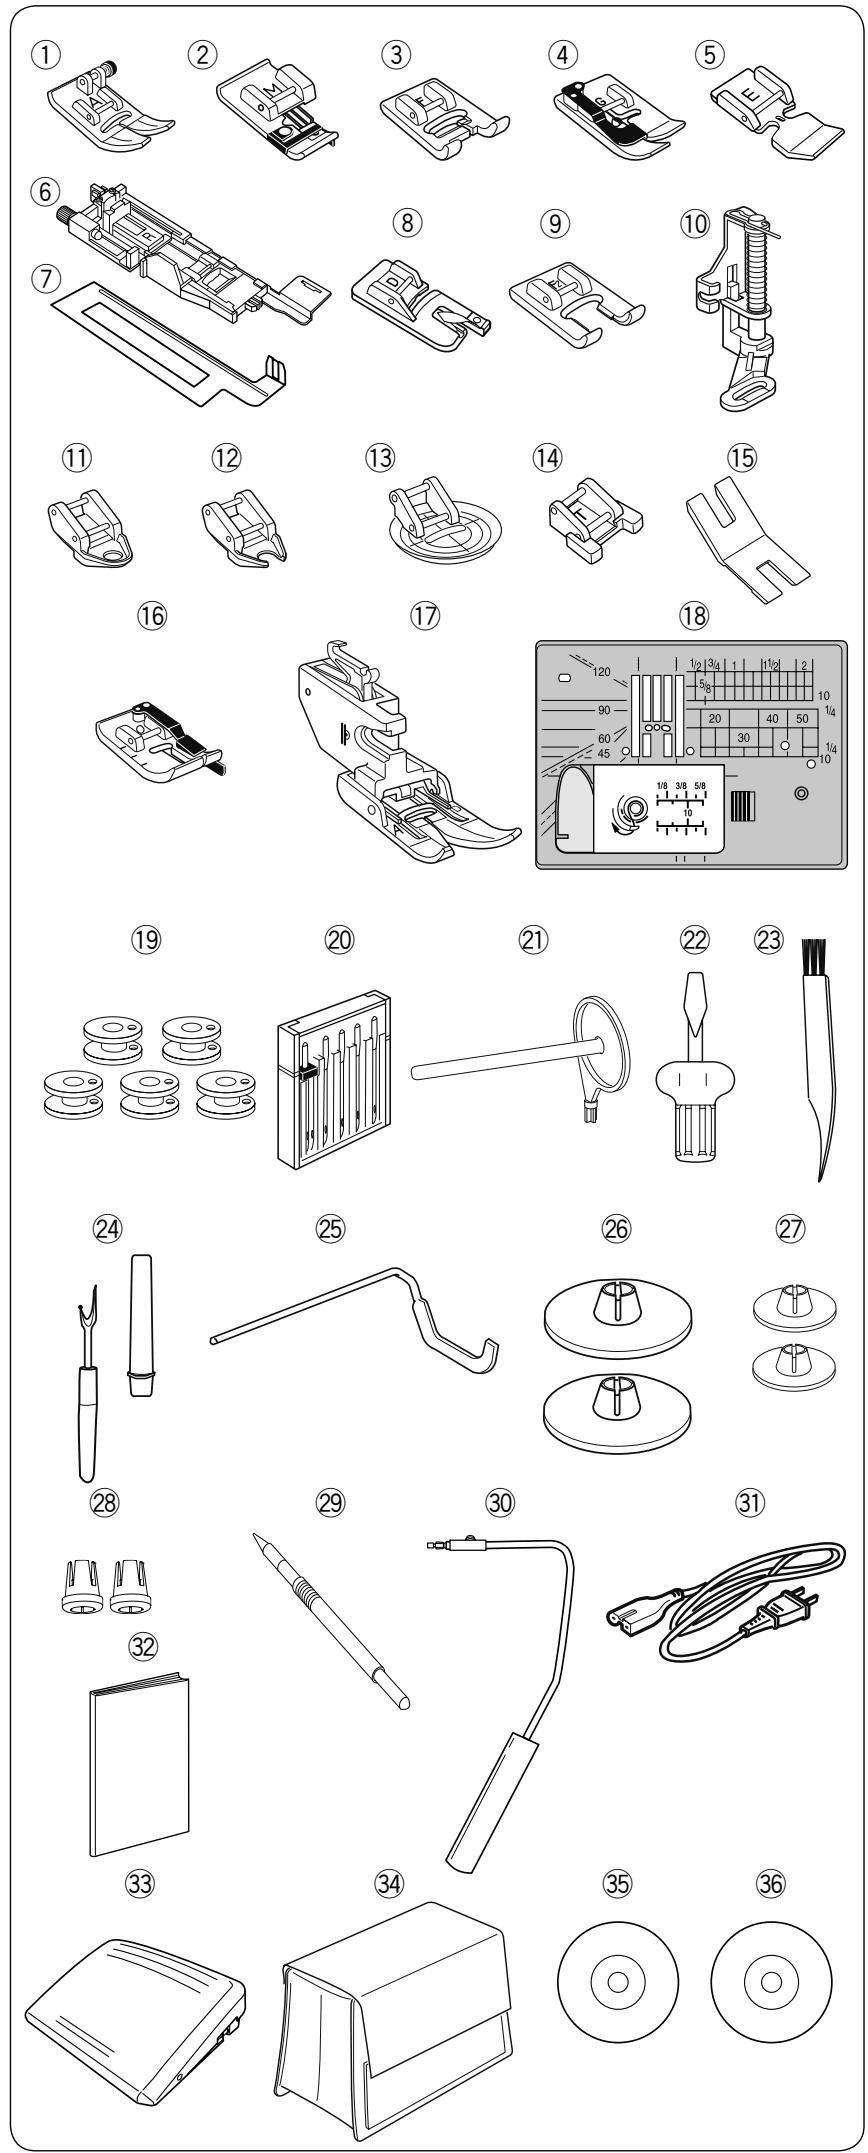
Standard Accessories
① Zigzag foot A (set on the machine)
② Overedge foot M
③ Satin stitch foot F
④ Blind hemming foot G
⑤ Zipper foot E
⑥ Automatic buttonhole foot R
⑦ Stabilizer plate
⑧ Rolled hem foot D
⑨ Open toe satin stitch foot F2
⑩ Darning foot PD-H
⑪ Free motion quilting closed-toe foot QC
⑫ Free motion quilting open-toe foot QO
⑬ Free motion quilting zigzag foot QV
⑭ Button sewing foot T
⑮ Button shank plate
⑯ 1/4" seam foot O
⑰ Dual feed foot AD (twin)
⑱ Straight stitch needle plate
⑲ Bobbin x 5 (1 set on the machine)
⑳ Needle set
②1 Additional spool pin
②2 Screwdriver
②3 Lint brush
⑳ Seam ripper (buttonhole opener)
⑳ Quilting guide bar
②6 Spool holder (large) x 2 (1 set on the machine)
⑳ Spool holder x 2 (small)
⑳ Spool holder x 2 (special)
⑲ Touch panel stylus
③0 Knee lifter
③1 Power cable
③2 Instruction book
③3 Foot control
③4 Semi-hard fabric cover
③5 Instructional video DVD
③6 Stitch composer
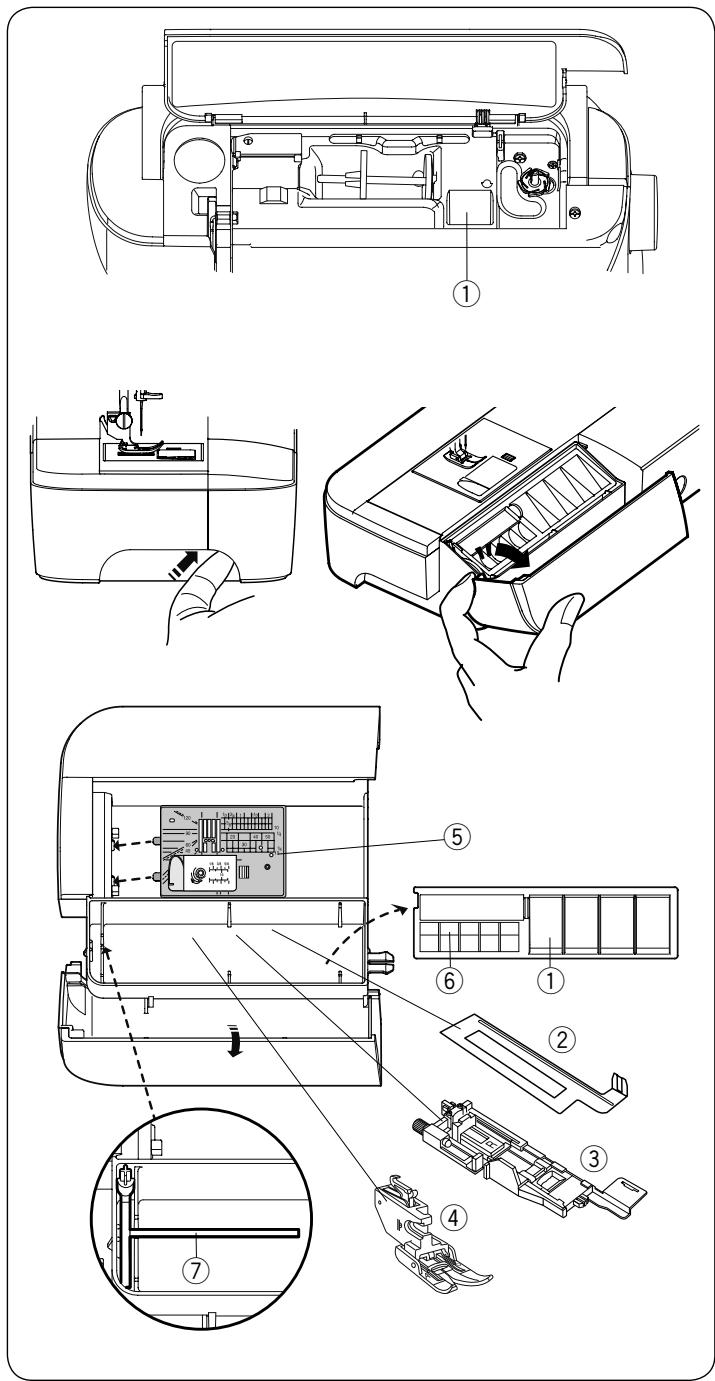
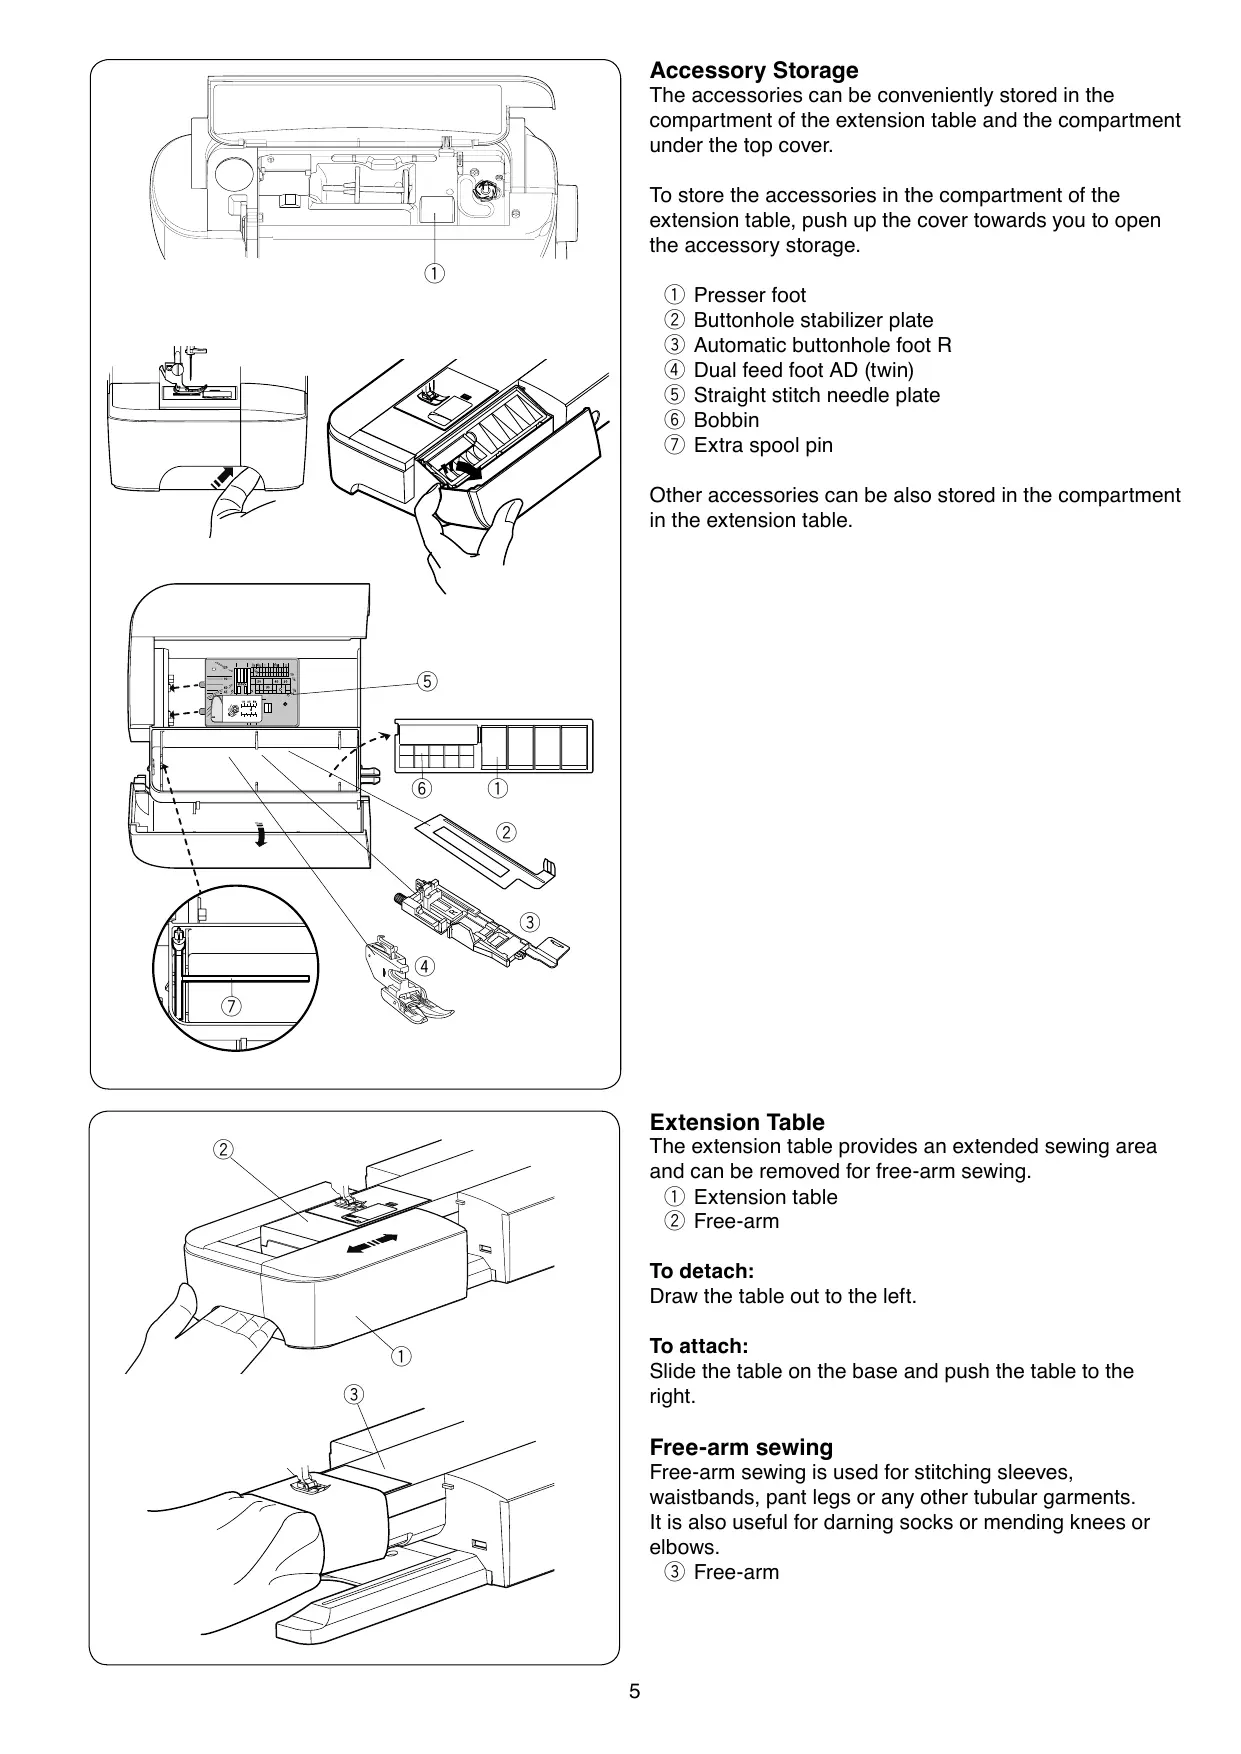
Accessory Storage
The accessories can be conveniently stored in the compartment of the extension table and the compartment under the top cover.
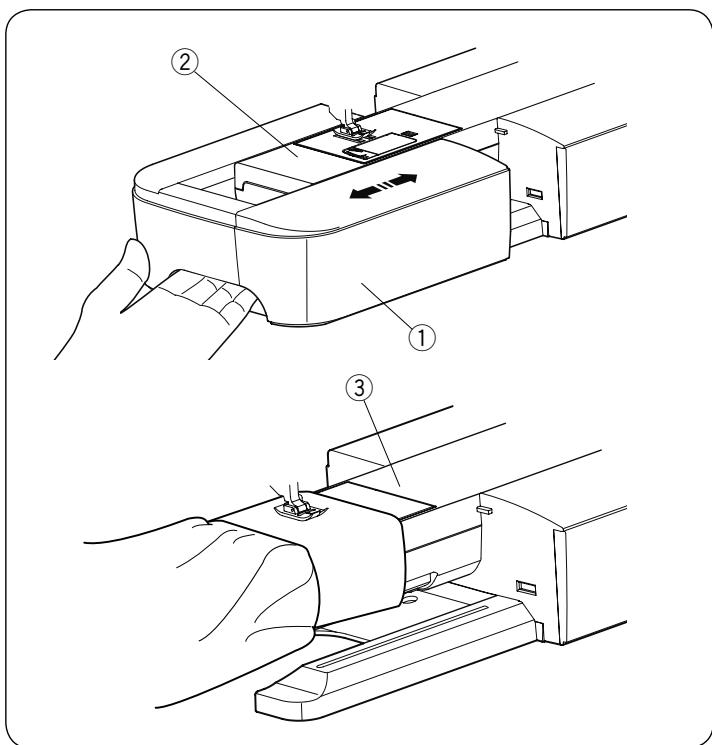
To store the accessories in the compartment of the extension table, push up the cover towards you to open the accessory storage.
① Presser foot
② Buttonhole stabilizer plate
③ Automatic buttonhole foot R
④ Dual feed foot AD (twin)
⑤ Straight stitch needle plate
⑥ Bobbin
⑦ Extra spool pin
Other accessories can be also stored in the compartment in the extension table.
Extension Table
The extension table provides an extended sewing area and can be removed for free-arm sewing.
① Extension table
② Free-arm
To detach:
Draw the table out to the left.
To attach:
Slide the table on the base and push the table to the right.
Free-arm sewing
Free-arm sewing is used for stitching sleeves, waistbands, pant legs or any other tubular garments. It is also useful for darning socks or mending knees or elbows.
③ Free-arm
natural_image
Technical line drawing of a device showing a component before and after assembly (no text or symbols)
GETTING READY TO SEW
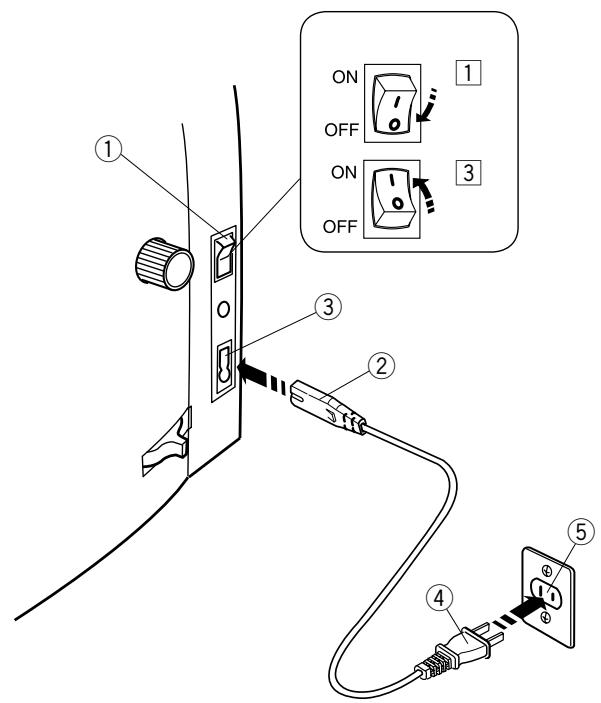
Connecting the Power Supply
① First make sure the power switch ① is off.
② Insert the machine plug ② of the power supply cord into the machine socket ③.
3 Insert the power supply plug ④ into the wall outlet ⑤, and turn the power switch ① on.
① Power switch
② Machine plug
③ Machine socket
④ Power supply plug
⑤ Wall outlet
NOTE:
Make sure to use the power supply cable that came with the machine.
If you turn off the power switch, wait for 5 seconds before turning it on again.

WARNING:
While in operation, always keep your eyes on the sewing area, and do not touch any moving parts such as the thread take-up lever, handwheel or needle.
Always turn off the power switch and unplug the machine from the power supply:
- when leaving the machine unattended.
- when attaching or removing parts.
- when cleaning the machine.
Do not place anything on the foot control.
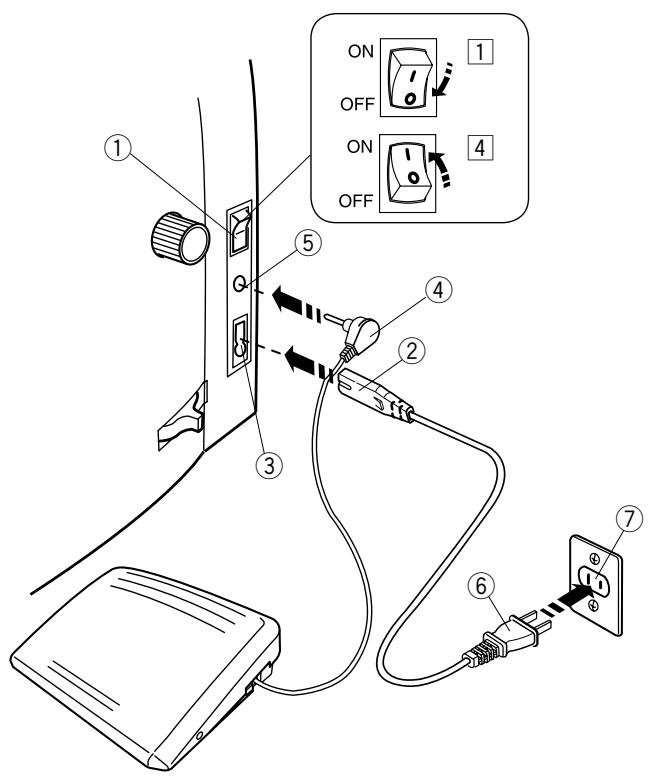
If you wish to use the foot control, pull out the cord from the foot control and insert the pin connector into the jack on the machine.
① First make sure the power switch ① is off.
② Insert the machine plug ② of the power supply cable into the machine socket ③.
3 Draw out the cord from the foot control and insert the pin connector ④ into the jack ⑤ on the machine.
4 Insert the power supply plug ⑥ into the wall outlet ⑦, and turn the power switch ① on.
① Power switch
② Machine plug
③ Machine socket
④ Pin connector
⑤ Jack
⑥ Power supply plug
⑦ Wall outlet
NOTE:
The start/stop button does not work when the foot control is connected.
Operating Instructions:
The symbol “O” on a switch indicates the “off” position of the switch.
For the U.S.A. and Canada only
Polarized plug (one blade wider than the other):
To reduce the risk of electric shock, this plug is intended to fit in a polarized outlet only one way. If it does not fit fully in the outlet, reverse the plug. If it still does not fit, contact a qualified electrician to install the proper outlet. Do not modify the plug in any way.
flowchart
graph TD
    A["Left Hand"] --> B["Right Hand"]
    B --> C["Left Left Arrow"]
    B --> D["Right Right Arrow"]
    style A fill:#f9f,stroke:#333
    style B fill:#ccf,stroke:#333
    style C fill:#cfc,stroke:#333
    style D fill:#fcc,stroke:#333
natural_image
Line drawing of a mechanical device with a curved arm and base plate (no text or symbols)
natural_image
Technical line drawing of a mechanical component with labeled part (2), showing internal structure without any text or symbols.
Controlling Sewing Speed
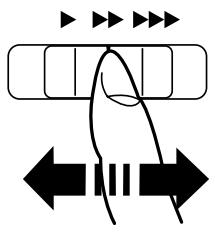
Speed control slider
You can limit the maximum sewing speed with the speed control slider according to your sewing needs.
To increase the sewing speed, move the slider to the right.
To decrease the sewing speed, move the slider to the left.
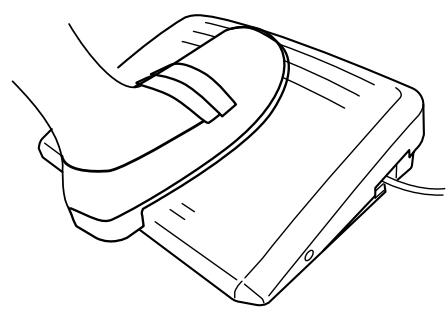
Pressing on the foot control can vary sewing speed. The harder you press the foot control, the faster the machine runs.
NOTE:
The machine runs at the maximum speed set by the speed control slider when the foot control is fully depressed.
This machine is equipped with an automatic shutdown safety feature to prevent overheating whenever the machine is running overloaded. Follow the safety instructions that appear on the visual touch screen.
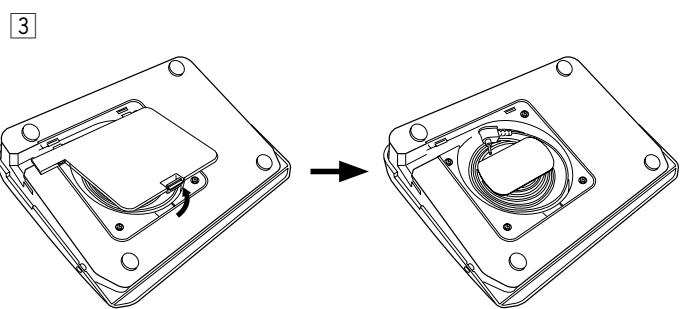
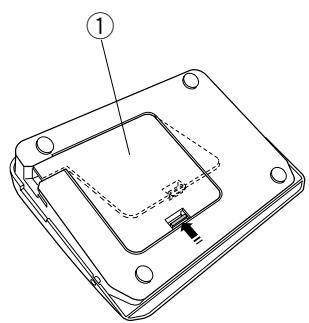
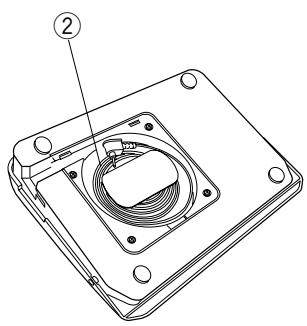
Cord storage
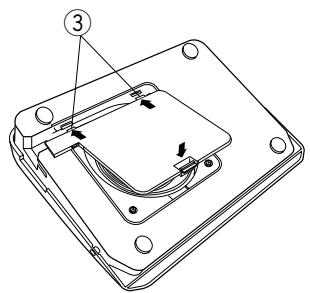
The cord of the foot control can be conveniently stored in the cord storage under the base cover of the foot control.
① Base cover
② Cord
③ Hooks
Operating Instructions:
Foot control model 21380 is for use with this sewing machine.
flowchart
graph TD
    A["1"] --> B["START STOP"]
    B --> C["2"]
    C --> D["3"]
    D --> E["4"]
    E --> F["5"]
    F --> G["6"]
    G --> H["7"]
    H --> I["8"]
    style A fill:#f9f,stroke:#333
    style B fill:#ccf,stroke:#333
    style C fill:#cfc,stroke:#333
    style D fill:#fcc,stroke:#333
    style E fill:#cff,stroke:#333
    style F fill:#ffc,stroke:#333
    style G fill:#fcf,stroke:#333
    style H fill:#cff,stroke:#333
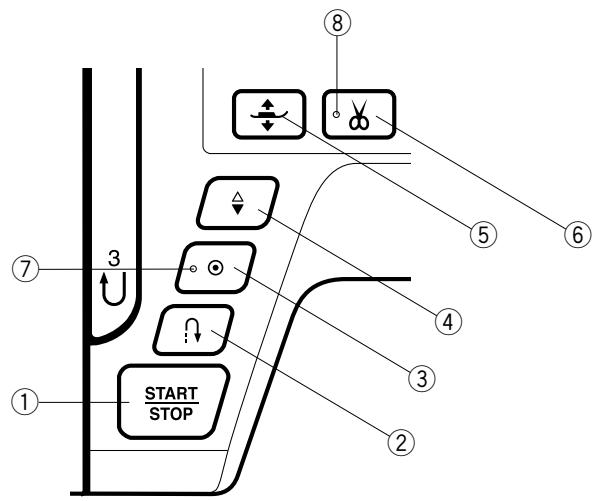
Press this button to start or stop the machine.
The machine starts running slowly for the first few stitches, it then runs at the speed set by the speed control slider. The machine runs slowly as long as this button is pressed.
The button will turn red when the machine is running, and green when it has been stopped.
Pressing and holding this button while sewing will slow down the sewing speed and the machine will stop when the button is released.
NOTE:
- The start/stop button cannot be used when the foot control is connected to the machine.
- You can select the desired start-up speed from slow, medium or high (refer to page 90).
- When stitch pattern U01, U04, U08-U10, Q01-Q03, or BR01-BR05, is selected;

The machine will sew in reverse as long as the reverse button is pressed. Release the button to sew forward.
When the machine is stopped and foot control is disconnected, the machine will sew in reverse slowly as long as the reverse button is pressed. Release the button to stop the machine.
- When any other stitches are selected;
If you press the reverse button when sewing any other patterns, the machine will immediately sew locking stitches and automatically stop.
NOTE:
There will be particular functions of the reverse button when stitch pattern U02, U03, B02, B13, or B14 is selected. Refer to page 28, 42, 48 and 80 for instructions.
- When stitch pattern U01, U04, U08-U10, Q01-Q03, or BR01-BR05, is selected;

Press the auto-lock button to sew a locking stitch immediately. The machine will automatically stop.
When the machine is stopped, press the auto-lock button to blink the LED signal ⑦. The machine will immediately sew locking stitches and automatically stop when the machine is started.
- When any other stitches are selected;
Press the auto-lock button to sew a locking stitch at the end of current pattern. The machine will automatically stop.
When the machine is stopped, press the auto-lock button to blink the LED signal ⑦. The machine will sew a locking stitch at the end of the current pattern and automatically stop when the machine is started.
The machine will trim the threads automatically after locking the stitch when the auto thread cutting is turned on (refer to page 91).
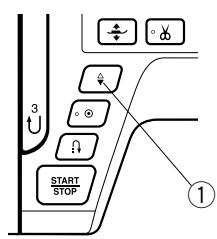
Press this button to bring the needle bar up or down.
The machine will stop with the needle in down position.
However, you can change the needle stop position in the machine setting mode (refer to page 89).
The presser foot will go up or go down by pressing this button.
You can also use the presser foot lifter and knee lifter to raise and lower the presser foot (refer to page 21).
After finish sewing, press this button to trim the threads. The needle bar automatically rises after trimming the threads (refer to page 27).
The LED signal ⑧ blinks when the machine trims threads.
NOTE:
The thread cutter button does not function:
- directly after turning on the power.
- when the presser foot is raised with the foot lifter.
- after being pressed 3 times in a row.
Use the thread cutter on the face cover if the thread is #30 or thicker (refer to page 27).
Touch Panel Keys

CAUTION:
Do not press the touch panel or visual touch screen with hard or sharp objects like pencils, screwdrivers or the like. Use the touch panel stylus included in the standard accessories.
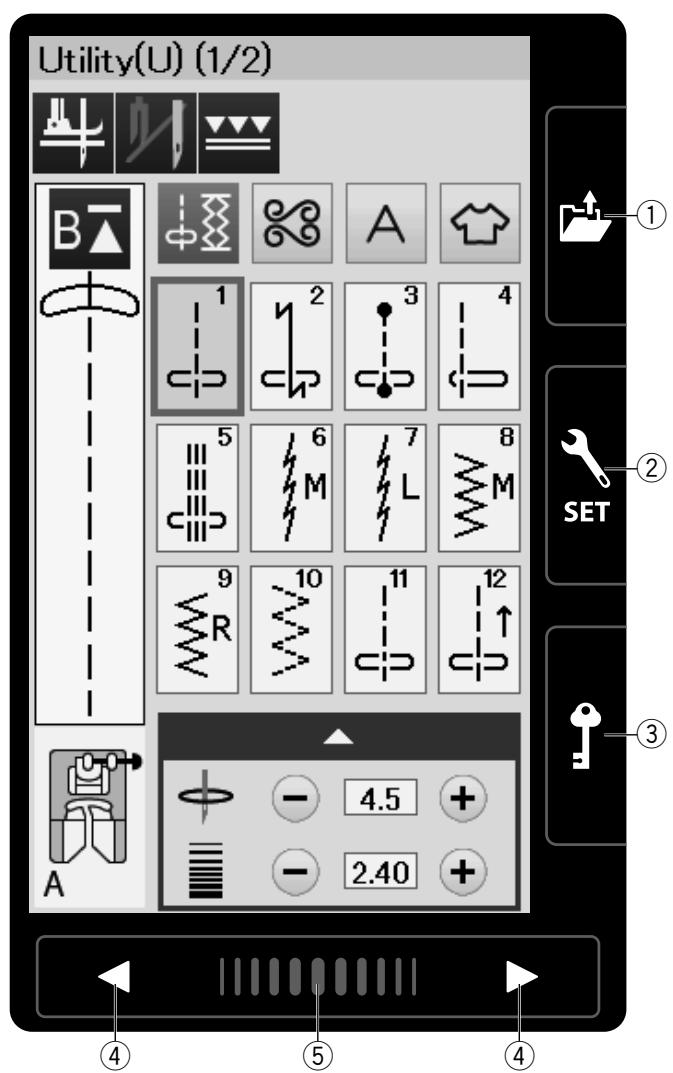
① Open file key (refer to page 56, 66)
Press this key and the open file window will open.
You can open pattern combinations and monograms saved in the machine's internal memory or on a USB flash drive.
② Set mode key (refer to page 86)
Press this key to enter the setting mode. You can customize the machine settings to your preference. The machine settings for Common Settings, Ordinary Sewing and Choose Language are available in this mode
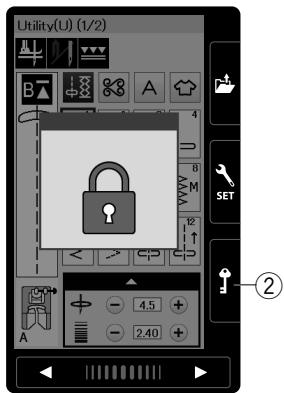
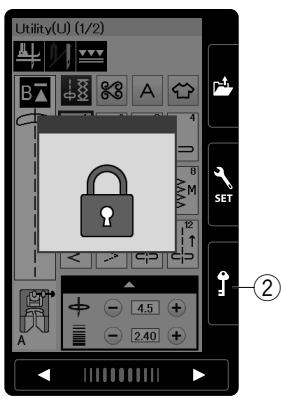
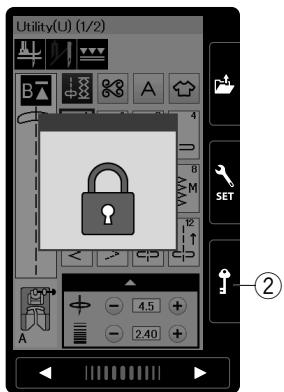
③ Lockout key
Press this key to lockout the machine when threading the machine, replacing the accessories etc.
To reduce the risk of injury, all the buttons except the lock key and presser foot lifter button are deactivated.
To unlock the machine, press this key again.
④ Page keys
Press the page key to display the next page or previous page. Press and hold the page key to turn the pages continuously.
⑤ Touch bar
Press on the bar and slide to the right or left to display the next page or previous page.
Winding the Bobbin
Removing the Bobbin
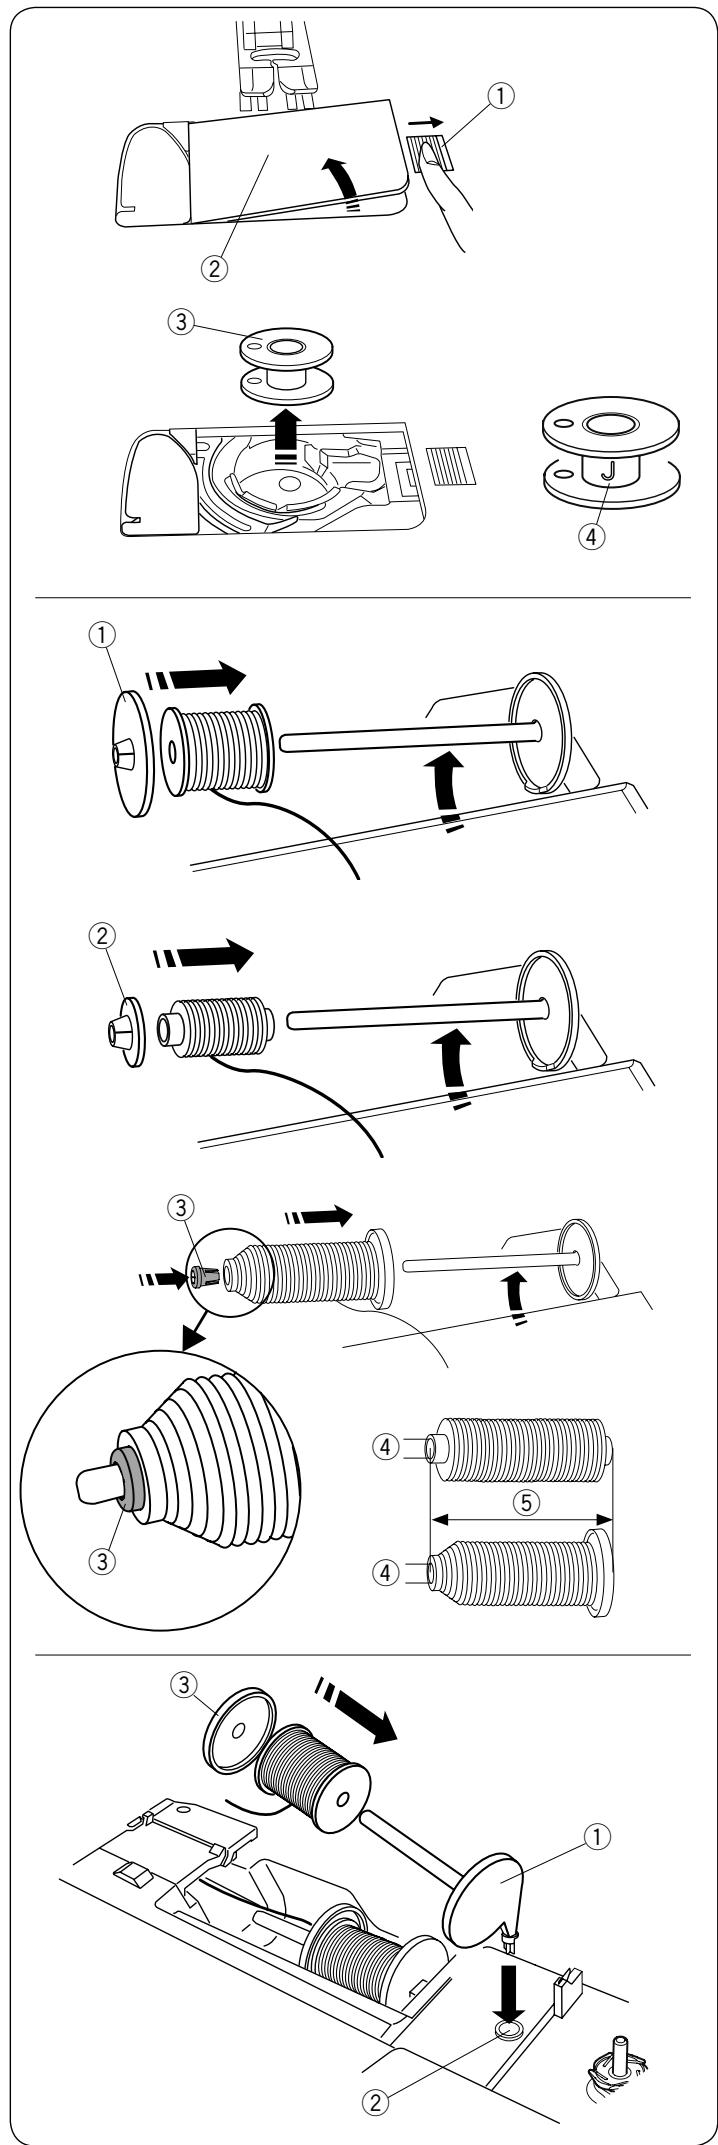
Slide the hook cover release button to the right, and remove the hook cover plate.
① Hook cover release button
② Hook cover plate
Lift out the bobbin from the bobbin holder.
③ Bobbin
NOTE:
Use the “J” plastic bobbins for horizontal hook (marked with “J” ④). Using other bobbins, such as pre-wound paper bobbins, may cause stitching problems and/or damage to the bobbin holder.
Setting the spool of thread
Lift up the spool pin. Place the spool of thread on the spool pin.
Attach the large spool holder, and press it firmly against the spool of thread.
① Large spool holder
Use the small spool holder to hold narrow or small spools of thread.
② Small spool holder
Use the spool holder (special) to hold the specific size of the spool of threads as shown.
The sizes of the spools of thread are as follows;
The hole diameter of the spool has a range of 3/8" to 7/16" (9.5 to 10.5 mm), and the spool length has a range of 2 3/4" to 3" (70 to 75 mm).
③ Spool holder (special)
④ Hole diameter (3/8" to 7/16")
⑤ Spool length (2 3/4" to 3")
Firmly insert the spool holder (special) into the hole and hold the spool as illustrated.
Use the extra spool pin when you need to wind a bobbin without unthreading the machine while working on a sewing project.
Insert the extra spool pin into the hole as shown.
Place a spool of thread on the extra spool pin and fix the spool with the spool holder.
① Extra spool pin
② Hole for extra spool pin
③ Large spool holder
NOTE:
The extra spool pin is also used for twin needle sewing.
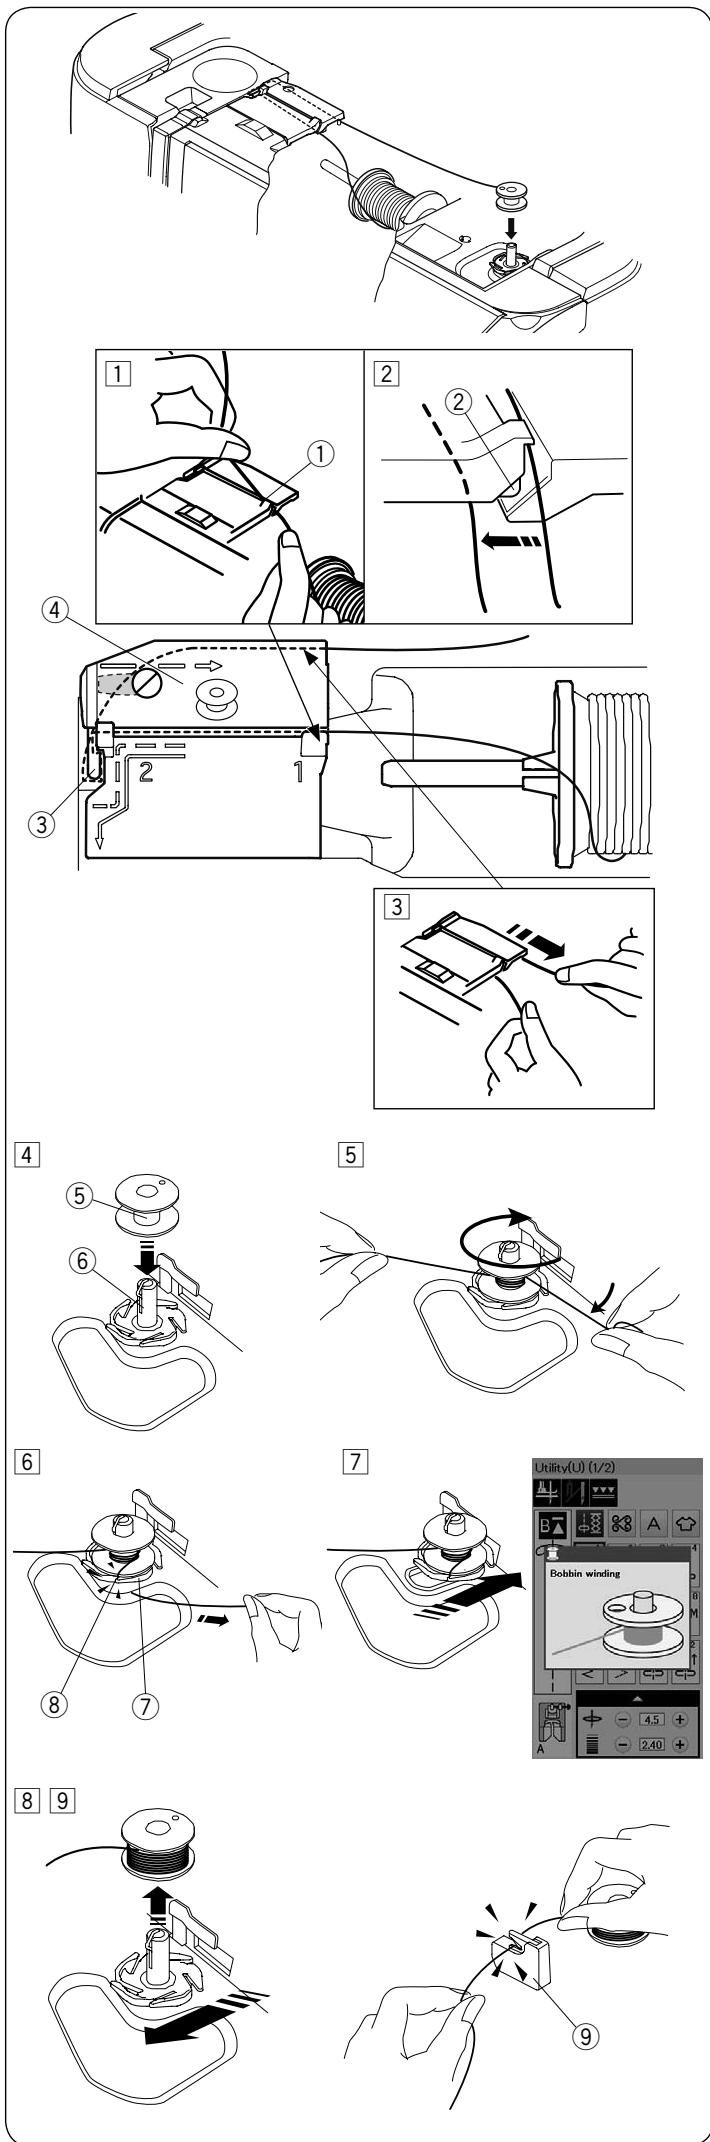
Winding the bobbin
NOTE:
Set the speed control slider at the fastest position (refer to page 7).
1 Pull the thread from the spool.
Hold the thread with both hands and pass the thread into the guide slot ①.
① Guide slot
2 Be sure that the thread is pulled down under the notch ② and into the space below the guide slot as shown.
② Notch
3 Draw the thread to the left and forward around the thread guide ③.
Draw the thread to the rear and to the right around and under the guide plate ④.
Firmly pull the thread to the right while holding it with both hands.
③ Thread guide
④ Guide plate
③ Thread guide
④ Guide plate
4 Put the bobbin ⑤ on the bobbin winder spindle ⑥.
⑤ Bobbin
⑥ Bobbin winder spindle
⑤ Bobbin
⑥ Bobbin winder spindle
5 Pass the thread to the bobbin.
Hold the thread with both hands and wind it around the bobbin clockwise several times.
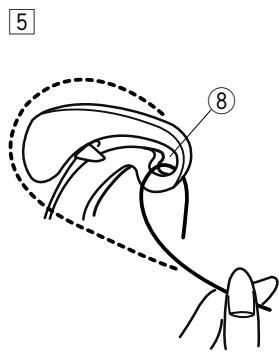
6 Insert the thread into one of the slits ⑧ of the flange plate ⑦ and pull the thread to cut.
⑦ Flange plate
⑧ Slit
7 Push the bobbin to the right. The visual touch screen will show the bobbin winding sign.
8 Start the machine.
Stop the machine when the bobbin is fully wound and stops spinning.
Return the bobbin winder spindle to its original position.
9 Remove the bobbin. Cut the thread with bobbin thread cutter B ⑨.
⑨ Bobbin thread cutter B
NOTE:
For safety purposes, the machine will automatically stop 1.5 minutes after starting bobbin winding.
1
2
3
Correct
natural_image
Technical line drawing of a mechanical component with no visible text or symbols
⑧
⑧
4
5
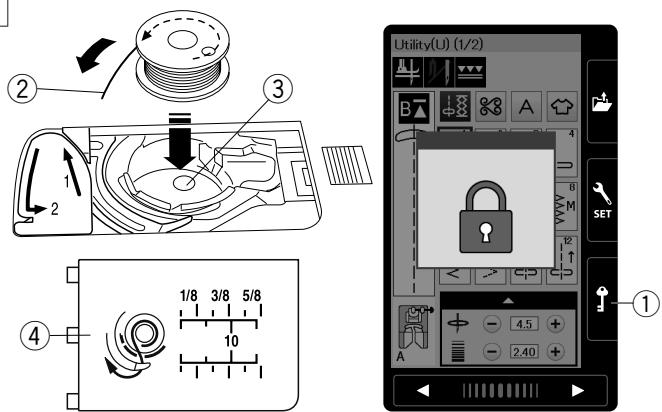
Inserting the bobbin
1 Press the lockout key.
Place a bobbin in the bobbin holder with the thread running off counterclockwise as shown on the hook cover plate.
① Lockout key
② End of thread
③ Bobbin holder
④ Hook cover plate
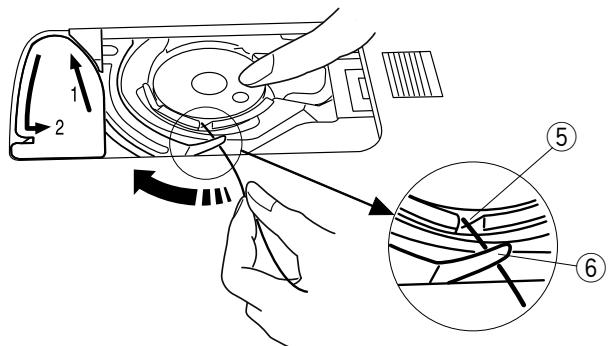
2 Hold the bobbin with your fingertip so it does not rotate.
Guide the thread into the front notch of the bobbin holder.
Pull the thread to the left to pass it under the guide.
⑤ Front notch
⑥ Guide
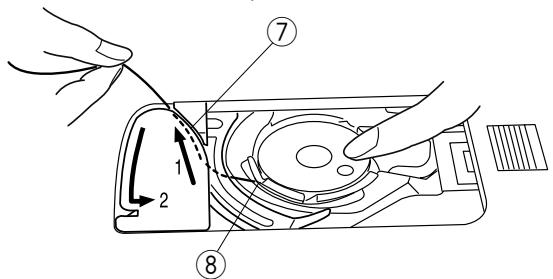
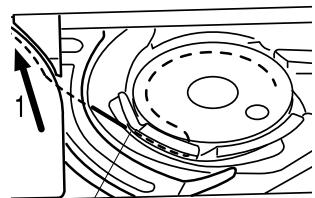
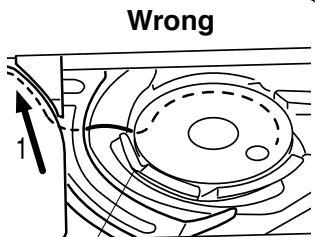
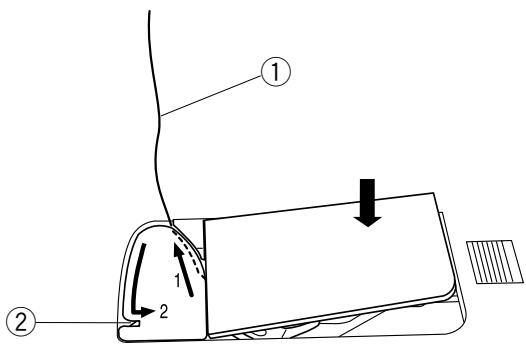
3 Draw the thread to the left to pass it into the guide path marked "1".
Make sure that the thread comes out from the side notch of the bobbin holder.
⑦ Guide path 1
⑧ Side notch
NOTE:
If the thread does not come out from the side notch, rethread from step 1.
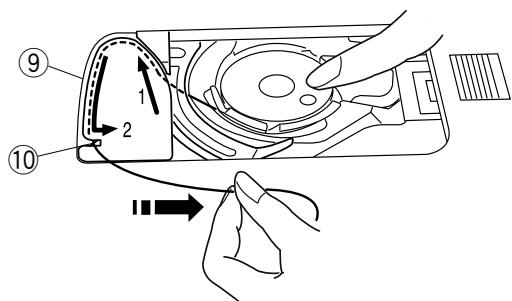
4 Continue to draw the thread along the guide path marked "2" and pull the thread to the right through the slit. The thread will be cut to a proper length and held in place.
⑨ Guide path 2
⑩ Slit (Thread cutter)
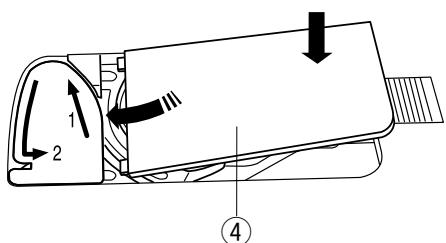
5 Set the left edge of the hook cover plate into opening.
Push down the hook cover plate to fit in place.
NOTE:
Unless otherwise noted, you can start sewing without drawing up the bobbin thread.
Refer to page 15 for how to draw up the bobbin thread.
6 7 8
Threading the Machine

CAUTION:
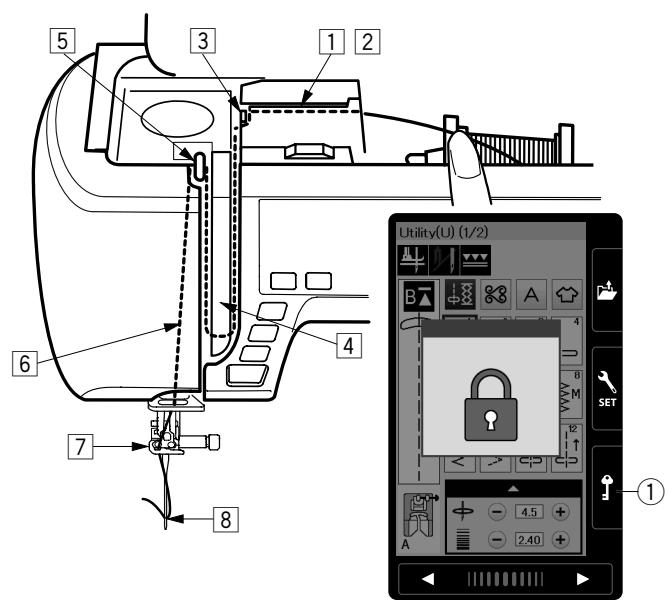
Always make sure to press the lockout key to lockout the machine before threading the machine.
Press the needle up/down button to raise the take-up lever to the highest position.
Press the lockout key to lockout the machine. The presser foot will go down and the upper thread tension disks will open.
① Lockout key
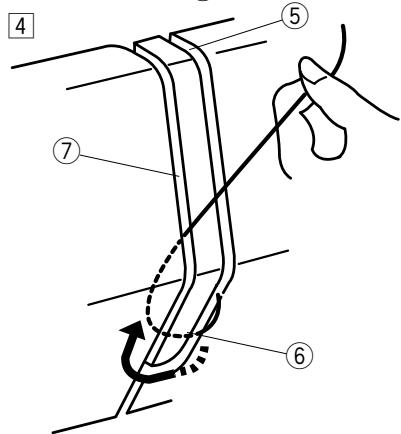
Pass the thread in order 1 to 8.
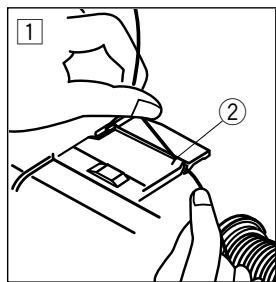
1 Hold the thread with both hands and pass the thread into the guide slot ②.
② Guide slot
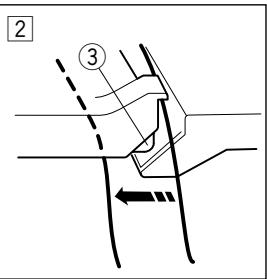
2 Be sure that the thread is pulled down under the notch ③ and into the space below the guide slot as shown.
③ Notch
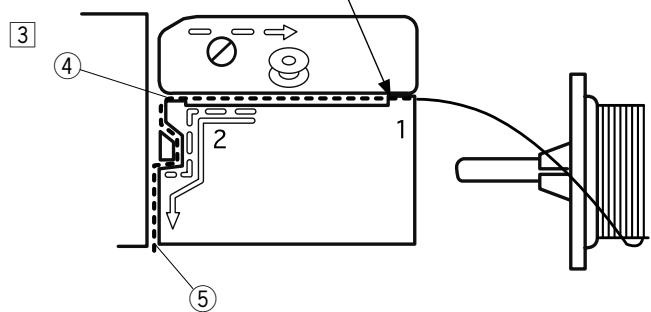
3 Hold the thread with both hands and draw the thread around the corner of the guide.
Firmly pull the thread toward you along the right channel until the thread snaps.
④ Corner of the guide
⑤ Right channel
4 Draw the thread down along the right channel and around the bottom of the thread guide plate. Pull the thread up along the left channel.
⑤ Right channel
⑥ Thread guide plate
⑦ Left channel
5 While holding the thread at the spool, firmly draw the thread up and to the back of the take-up lever. Draw the thread forward to slip it into the eye of the take-up lever.
⑧ Eye of the take-up lever
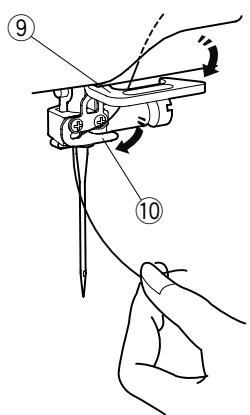
6 Then pull the thread down along the left channel and through the lower thread guide.
⑨ Lower thread guide
7 Slide the thread from the right of the needle bar thread guide to the left.
⑩ Needle bar thread guide
8 Thread the needle with the needle threader (refer to the next page).
1
flowchart
graph TD
    A["Start STOP"] --> B{Condition}
    B --> C["✓"]
    B --> D["○"]
    B --> E["Ω"]
    B --> F["✓"]
    style A fill:#f9f,stroke:#333
    style B fill:#ccf,stroke:#333
    style C fill:#cfc,stroke:#333
    style D fill:#fcc,stroke:#333
    style E fill:#cff,stroke:#333
    style F fill:#ffc,stroke:#333
2
3
natural_image
Illustration of a hand using a tool to adjust or install a mechanical component (no text or symbols visible)
4

natural_image
Diagram of a robotic arm with a hand holding the base, showing mechanical components and a downward arrow indicating motion (no text or symbols present)
5

natural_image
Illustration of a hand operating a sewing machine with a tool, showing no text or symbols
6
natural_image
Line drawing of a sewing machine needle being inserted into a hand, showing thread insertion (no text or symbols)
Built-in Needle Threader
NOTE:
- The needle threader can be used with a #11 to #16 needle.
Thread size 50 to 90 is recommended.
Do not use thread size 30 or thicker.
- The needle threader cannot be used with the twin needle.
1 Press the needle up/down button to raise the needle. Press the lockout key to lock the machine.
① Needle up/down button
② Lockout key
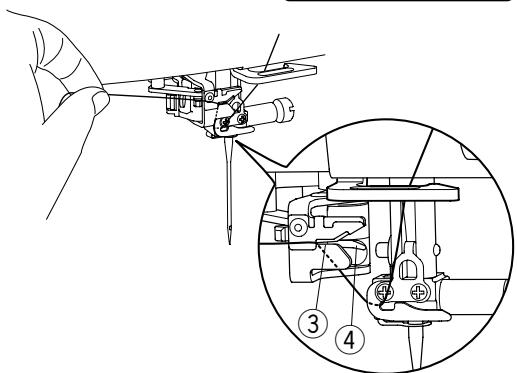
2 Draw the thread through the slit ③ of the needle threader. The thread should pass under the hook ④.
③ Slit
④ Hook
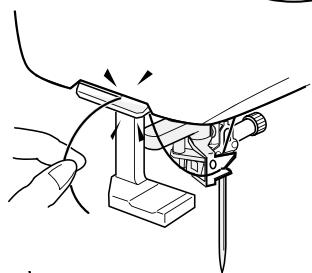
3 Pull the thread up and slip it between the thread cutter and face plate from behind.
Pull the thread toward you to cut.
4 Pull down the needle threader knob as far as it will go.
5 Raise the threader slowly so a loop of the thread is pulled up through the needle eye.
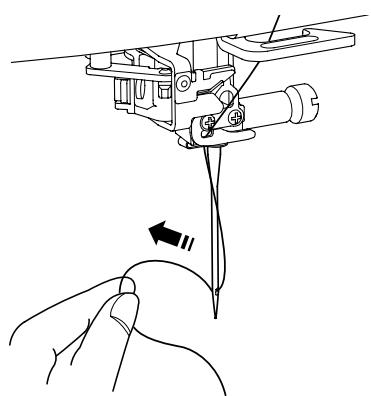
6 Pull the thread loop to take the thread end out through the needle eye to the rear.
NOTE:
If the thread is caught in the hook and the thread loop is not formed, remove the thread from the hook and pull it to take the thread end out through the needle eye.
1
2
natural_image
Line drawing of a sewing machine needle stitching fabric, with no text or symbols present
3
flowchart
graph TD
    A["Start STOP"] --> B{Condition}
    B -->|Yes| C["✓"]
    B -->|No| D["○"]
    C --> E["✓"]
    D --> F["○"]
    G["Start STOP"] --> H["✓"]
    I["Start STOP"] --> J["○"]
natural_image
Line drawing of a sewing machine needle stitching fabric, with no text or symbols present
4
natural_image
Line drawing of a sewing machine needle being adjusted, showing the blade and base (no text or symbols)
Drawing up the Bobbin Thread
After using auto thread cutting or threading the bobbin holder, you can start sewing without drawing up the bobbin thread.
However, you need to draw up the bobbin thread when sewing gathering stitches etc.
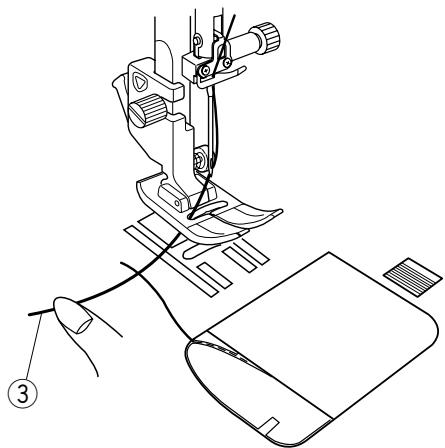
1 Remove the bobbin. Insert the bobbin into the bobbin holder again and rethread the bobbin holder according to the instructions on page 12, but leave a 10 cm (4") tail of bobbin thread as shown.
① Bobbin thread
NOTE:
Do not cut the bobbin thread with the thread cutter.
② Thread cutter
2 Raise the presser foot. Hold the needle thread lightly with your left hand.
③ Needle thread
3 Press the needle up/down button twice to lower and raise the needle and pick up the bobbin thread.
④ Needle up/down button
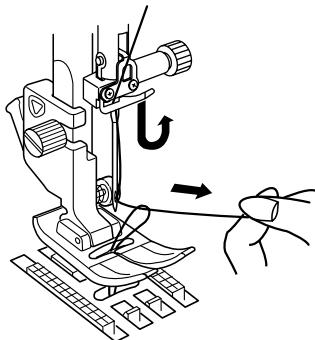
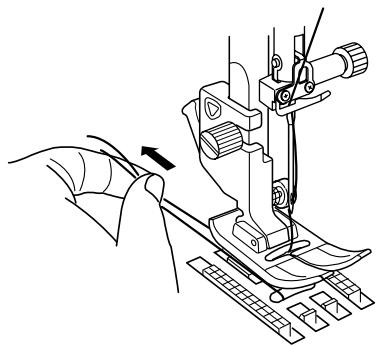
4 Pull both threads 10 cm (4") under and behind the presser foot.
Replacing Needles

CAUTION:
Always make sure to press the lockout key to lockout the machine before replacing the needle.
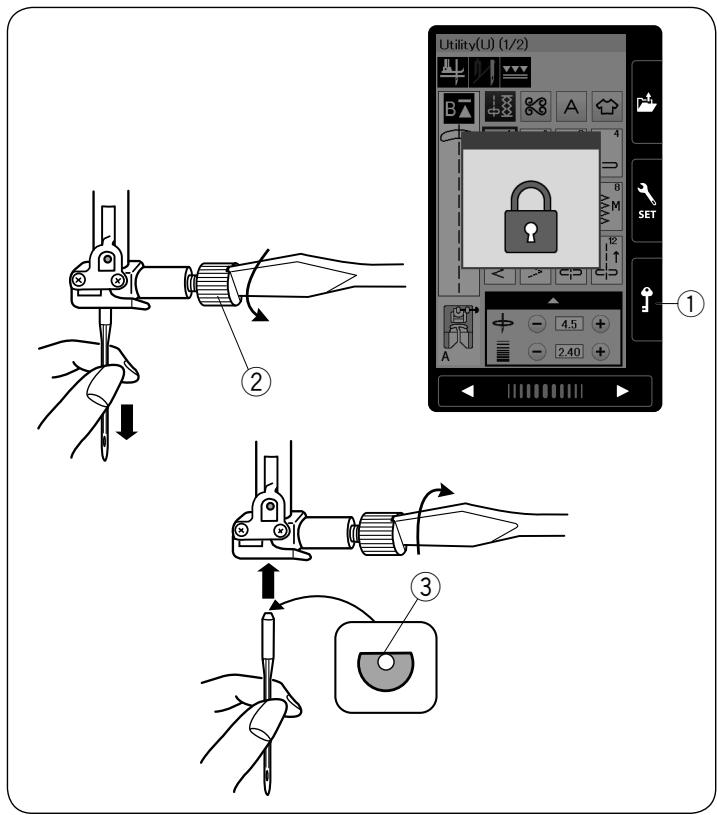
Raise the needle by pressing the needle up/down button. Press the lockout key.
① Lockout key
Loosen the needle clamp screw by turning it counterclockwise.
Remove the needle from the clamp.
② Needle clamp screw
Insert a new needle into the needle clamp with the flat side of the needle to the rear.
③ Flat side
When inserting the needle into the needle clamp, push it up against the stopper pin and tighten the needle clamp screw firmly with a screwdriver.
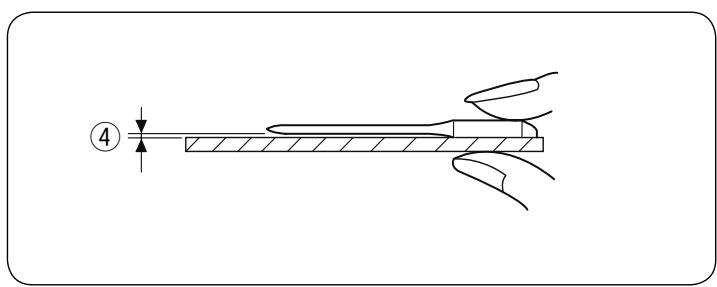
To check needle straightness, place the flat side of the needle onto something flat (a needle plate, glass etc.). The gap between the needle and the flat surface should be consistent.
④ Gap
Never use a blunt needle.
| Fabric | Thread | Needle |
| Fine | LawnGeorgetteTricotOrganzaCrepe | Silk #80-100Cotton #80-100Synthetic #80-100 | Blue tip needleUniversal needle#9/65-11/75 |
| Medium | SheetingJerseyBroadclothFleece | Silk #50Cotton #50-80Synthetic #50-80 | Red tip needlePurple tip needleUniversal needle#11/75-14/90 |
| Heavy weight | DenimTweedCoatingQuilting | Silk #30-50Cotton #40-50Synthetic #40-50 | Red tip needlePurple tip needleUniversal needle#14/90-16/100 |
NOTE:
1 x twin needle, 2 x blue tip needle (#11/75), 1 x red tip needle (#14/90) and 1 x purple tip needle (#14/90) are included in the needle case (Part No. 859856005).
Fabric and Needle Chart
- For general sewing, use red needle.
- Fine threads and needles should be used for sewing fine fabrics.
- In general, use the same thread for both needle and bobbin.
- Use a blue tip needle for sewing fine fabrics, stretch fabrics, tricot and buttonholes to prevent skipped stitches.
- Use a purple tip needle for sewing knits, free quilting and across the hem to prevent skipped stitches.
- Use a stabilizer or interface to stretch or fine fabrics to prevent seam puckering.
- Always test the thread and needle size on a small piece of the same fabric you will use for actual sewing.
flowchart
graph TD
    A["Start STOP"] --> B{Condition}
    B -->|Yes| C["Action"]
    B -->|No| D["End"]
    C --> E["Directional Arrow"]
    D --> F["Directional Arrow"]


CAUTION:
Always make sure to press the lockout key to before replacing the presser foot.
Use the proper foot for the selected pattern.
The wrong foot can cause the needle to break.
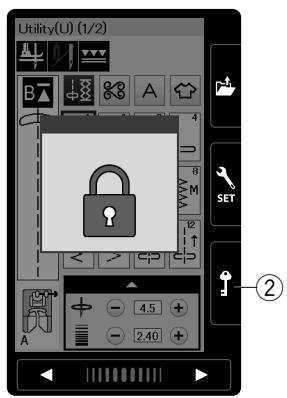
Raise the needle by pressing the needle up/down button. Press the lockout key.
① Needle up/down button
② Lockout key
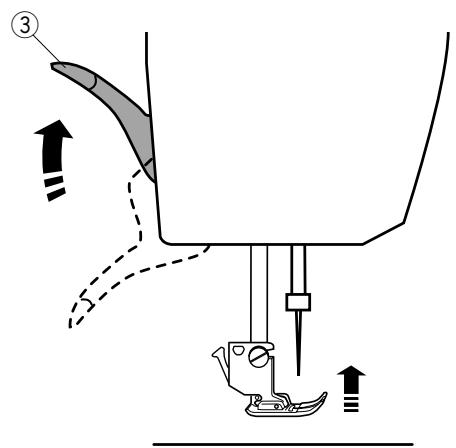
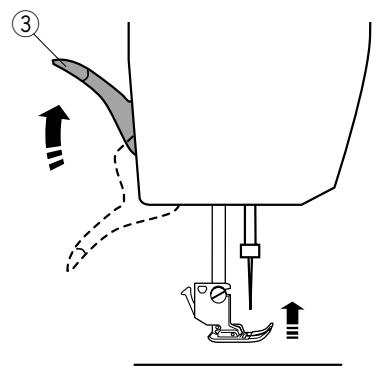
Raise the presser foot lifter.
③ Presser foot lifter
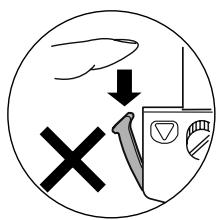
Press the black lever on the back of the foot holder. The presser foot will drop off.
④ Lever

CAUTION:
To avoid damaging the lever, do not push it down.
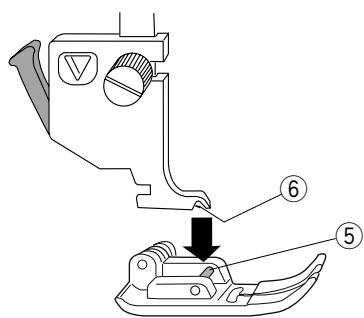
Place the presser foot so that the pin on the foot lies just under the groove of the foot holder.
Lower the presser bar to lock the foot in place.
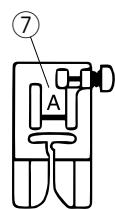
Each foot is marked with an identification letter.
⑤ Groove
⑥ Pin
⑦ Identification letter
flowchart
graph TD
    A["Start STOP"] --> B["Switch"]
    B --> C["Gear"]
    C --> D["Control Icon"]
    D --> E["Arrow to Switch"]
    style A fill:#f9f,stroke:#333
    style E fill:#ccf,stroke:#333
Remove the foot holder before using the dual feed foot or darning foot.

CAUTION:
Always make sure to press the lockout key to lockout the machine before replacing the foot holder.
Raise the needle by pressing the needle up/down button. Press the lockout key and raise the presser foot with the presser foot lifter.
① Needle up/down button
② Lockout key
③ Presser foot lifter
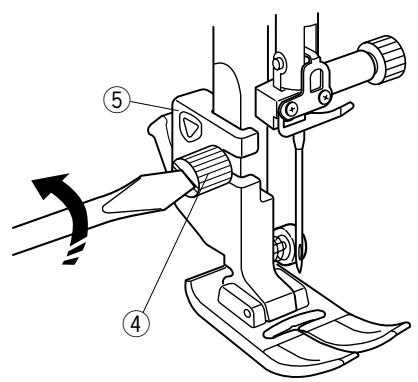
Loosen the setscrew and remove the foot holder.
④ Setscrew
⑤ Foot holder
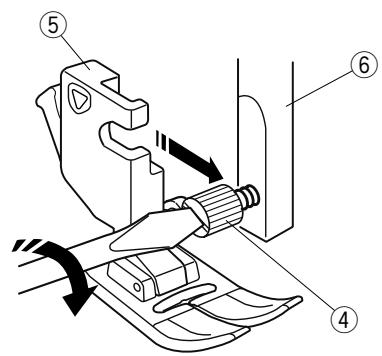
Attach the foot holder to the presser bar from the rear. Tighten the thumbscrew securely with the screwdriver.
⑥ Presser bar
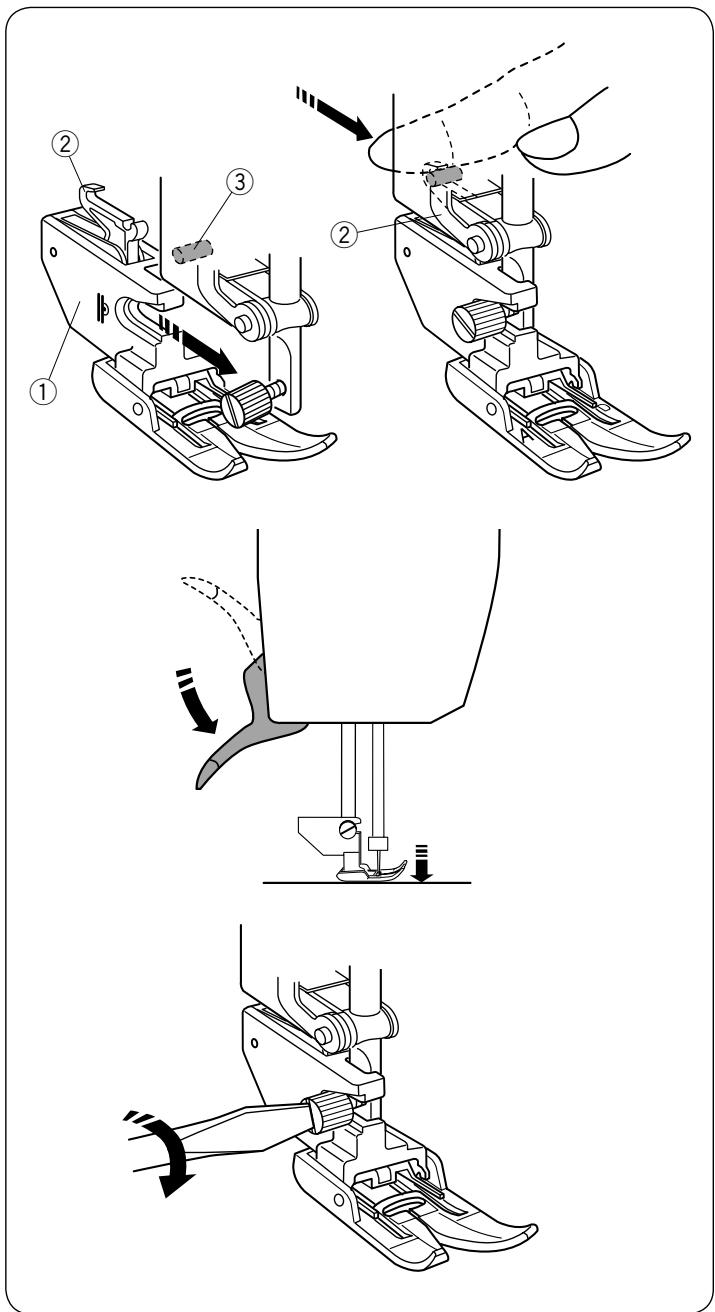
Attach the dual feed holder to the presser bar.
① Dual feed holder
Tighten the thumbscrew with your fingers.
Push the dual feed link to engage it with upper feed drive.
② Dual feed link
③ Upper feed drive
Lower the presser foot lifter. Lower the needle to the lowest position by turning the hand wheel.
Tighten the thumbscrew securely with the screwdriver.
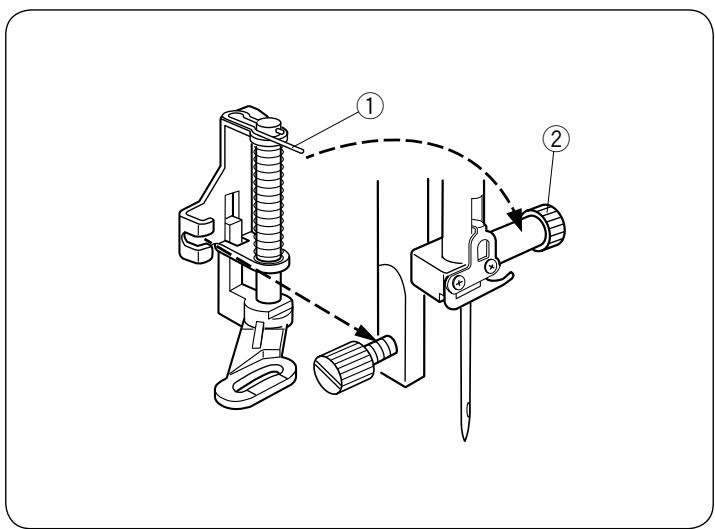
Attach the darning foot PD-H to the presser bar by putting the pin on the needle clamp screw.
① Pin
② Needle clamp screw
Tighten the thumbscrew firmly with the screwdriver.
1
flowchart
graph TD
    A["Start STOP"] --> B{Condition}
    B -->|Yes| C["✓"]
    B -->|No| D["✓"]
    C --> E["✓"]
    D --> F["✓"]
    G["Start STOP"] --> H["✓"]
    H --> I["✓"]
    style A fill:#f9f,stroke:#333
    style I fill:#f9f,stroke:#333
flowchart
graph TD
    A["Start STOP"] --> B["Directional Arrow 3"]
    B --> C["Directional Arrow ③"]
    C --> D["Arrow to Start Stop"]
    style A fill:#f9f,stroke:#333
    style D fill:#ccf,stroke:#333
2
3
natural_image
Technical line drawing of a sewing machine on a flatbed workbench (no text or symbols)
4
Replacing the Needle Plate
Use the straight stitch needle plate when sewing with the dual feed foot.

CAUTION:
Always make sure to press the lockout key to lockout the machine before replacing the needle plate.
NOTE:
When the straight stitch needle plate is attached to the machine, the patterns not suitable for the straight stitch needle plate cannot be selected.
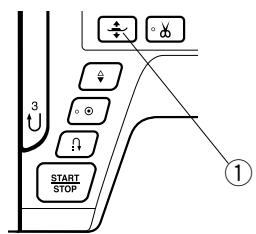
1 Press the needle up/down button to raise the needle.
Press the lockout key.
Press the presser foot lifter button to raise the presser foot.
① Needle up/down button
② Lockout key
③ Presser foot lifter button
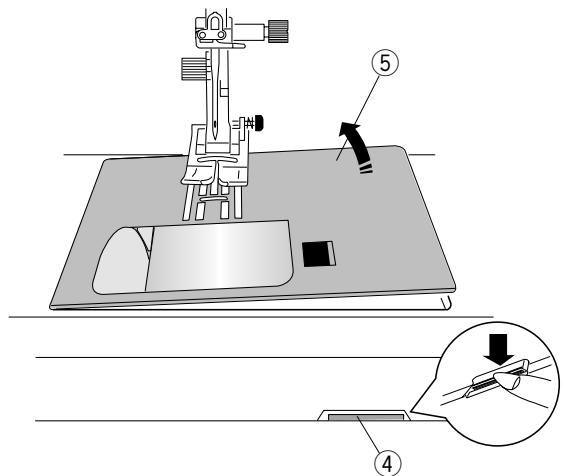
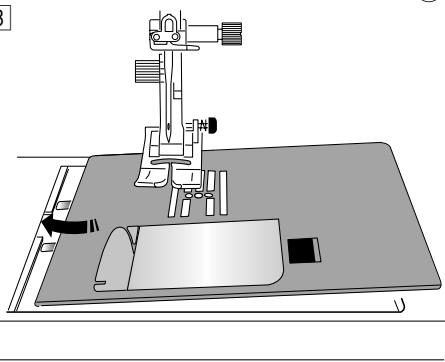
2 Slide the extension table to the left to remove it. Push down the needle plate release lever and the needle plate will snap off.
④ Needle plate release lever
⑤ Needle plate
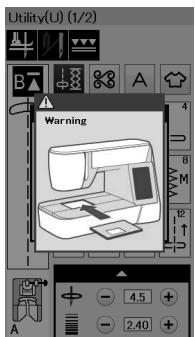
3 A message will appear warning that the needle plate is not secured.
Remove the needle plate to the right.
Place the straight stitch needle plate on the machine.
Set the left edge of the needle plate into the opening.
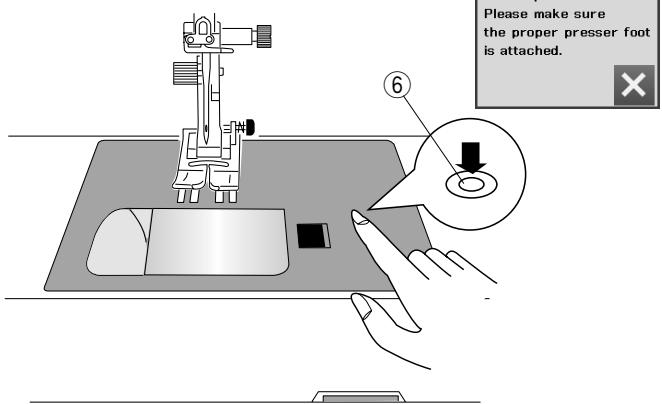
4 Push down on the mark of the needle plate until it locks in place.
Make sure the warning message disappears and the straight stitch is automatically selected.
Turn the hand wheel slowly and make sure that the needle does not hit the needle plate.
Press the lockout key to unlock.
⑥ Mark

CAUTION:
Never press the needle plate release lever while running the machine.
flowchart
graph TD
    A["Start STOP"] --> B["✓"]
    B --> C["✓"]
    C --> D["✓"]
    D --> E["✓"]
    E --> F["✓"]
    F --> G["✓"]
    G --> H["✓"]
    H --> I["✓"]
    I --> J["✓"]
    J --> K["✓"]
    K --> L["✓"]
    L --> M["✓"]
    M --> N["✓"]
    N --> O["✓"]
    O --> P["✓"]
    P --> Q["✓"]
    Q --> R["✓"]
    R --> S["✓"]
    S --> T["✓"]
    T --> U["✓"]
    U --> V["✓"]
    V --> W["✓"]
    W --> X["✓"]
    X --> Y["✓"]
    Y --> Z["✓"]
    Z --> AA["✓"]
    AA --> AB["✓"]
    AB --> AC["✓"]
    AC --> AD["✓"]
    AD --> AE["✓"]
    AE --> AF["✓"]
    AF --> AG["✓"]
    AG --> AH["✓"]
    AH --> AI["✓"]
    AI --> AJ["✓"]
    AJ --> AK["✓"]
    AK --> AL["✓"]
    AL --> AM["✓"]
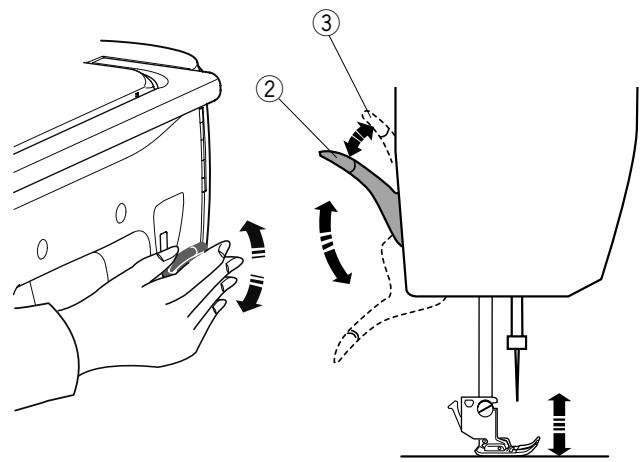
You can raise and lower the presser foot with the presser foot lifter button, the presser foot lifter or the knee lifter.
① Presser foot lifter button
② Presser foot lifter
③ Extra lifted position
You can raise the presser foot about 7 mm (1/4") higher than the normal up position by exerting more pressure when lifting the presser foot lifter or knee lifter.
This allows for changing the needle plate, and also helps you to place layers of thick fabrics.
NOTE:
The presser foot cannot be lowered with the presser foot lifter if the foot was raised with the presser foot lifter button.
NOTE:
Do not turn the hand wheel or press the up/down needle button when the presser foot is in the extra lifted position.
Knee Lifter
The knee lifter is extremely helpful when sewing patchwork, quilting etc, since it allows you to handle the fabric while your knee controls the presser foot.
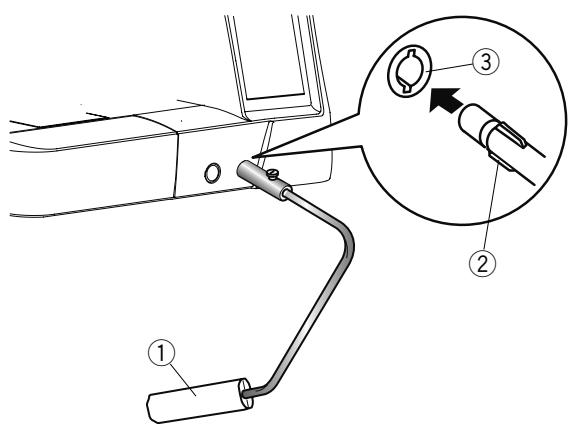
Attaching the knee lifter
Match the ribs on the knee lifter with the notches in the knee lifter socket and insert the knee lifter.
① Knee lifter
② Rib
③ Knee lifter socket
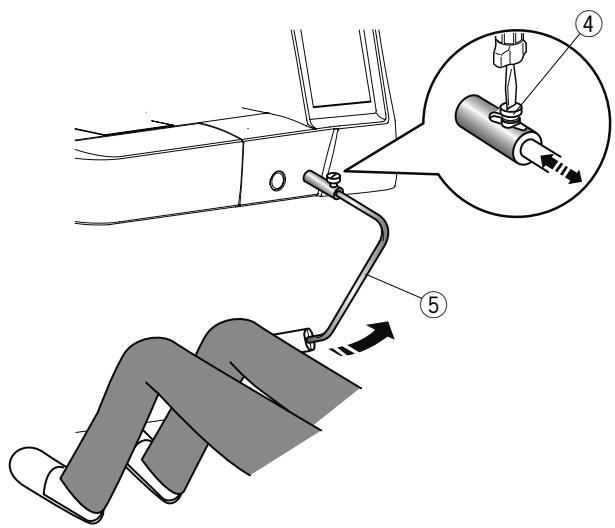
Adjusting the knee lifter
The angle of the knee lifter can be adjusted to fit you. Loosen the setscrew and slide the angle bar in or out to adjust the angle of the knee lifter.
Tighten the setscrew to secure the angle bar.
④ Setscrew
⑤ Angle bar
Using the knee lifter
Push the knee lifter with your knee to easily move the presser foot up and down.
You can control how high the foot rises by the amount of knee pressure you exert.
natural_image
Technical line drawing of a sewing machine with no visible text or symbols

Raise the Feed Dog and start.

Dropping the Feed Dog
The feed dog can be lowered for sewing on buttons, free motion quilting etc.
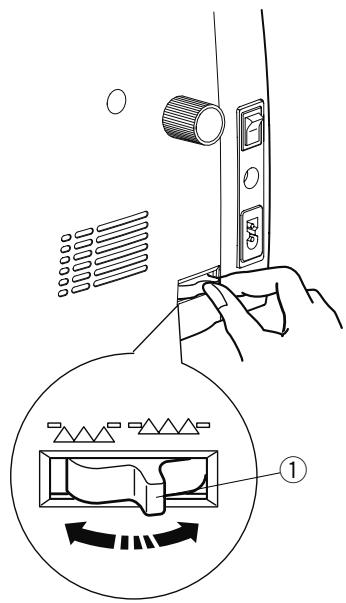
Shift the drop feed lever toward you to lower the feed dog.
① Drop feed lever
② Feed dog
Shift the drop feed lever away from you to raise the feed dog, it will return to the up position when you start the machine.
NOTE:
If you start the machine with the feed dog lowered, a message will appear on the visual touch screen.
①
②
③ A
ORDINARY SEWING MODE Ordinary Stitch Patterns
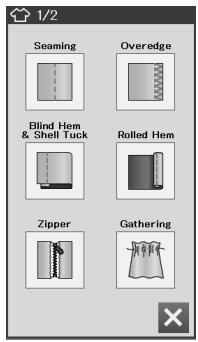
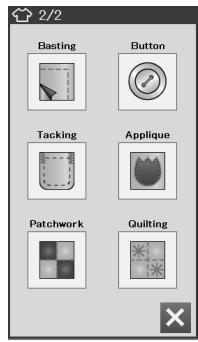
In the ordinary sewing mode, there are 4 categories available.
① Utility stitches, Buttonhole and specialty stitches
② Decorative and quilting stitches
③ Monogramming
④ Sewing applications
Press one of the icon keys to select the category.
NOTE:
In this manual, the pattern number refers to the initial for each group or category.
For example pattern #15 in the buttonholes and specialty stitches is referred to as pattern B15.
You can select utility stitches (U), buttonholes and speciality stitches (B) in this category.
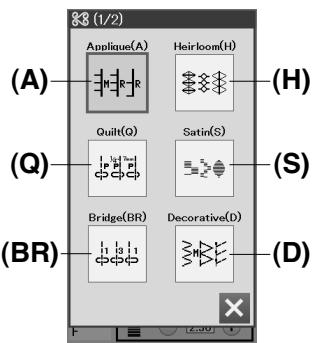
② Decorative and quilting stitches
This category consists of the following 10 groups.
Applique stitches (A)
Heirloom stitches (H)
Quilting stitches (Q)
Satin stitches (S)
Bridge stitches (BR)
Decorative stitches (D)
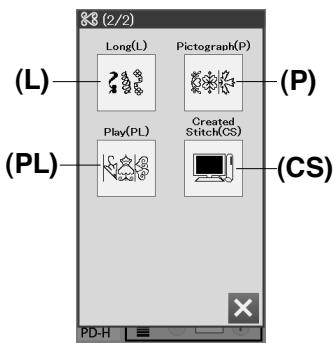
Long stitches (L)
Pictograph stitches (P)
Play stitches (PL)
Created Stitches (CS) ^*
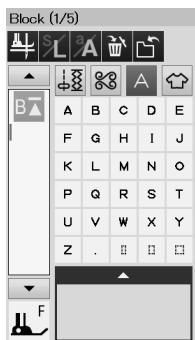
③ Monogramming
You can program lettering as well as a combination of characters.
* Created Stitches category appears when stitch patterns created with Stitch Composer are imported to the machine.
④

④




A
④ Sewing applications
You can select the appropriate stitch for a specific sewing project and fabric type from the designated application in this category.
Function Keys in Ordinary Sewing Mode
If this option is turned on, the needle stops at the down position and the presser foot will automatically go up when the machine stops.
Press this key to turn this option on or off (refer to page 33).
② Twin needle key
Press this key to set the stitch width for twin needle sewing (refer to page 57).
③ Dual feed key
Press this key for dual feed sewing (refer to page 29).
④ Startover key
If you stop sewing in the middle of a stitch pattern and wish to sew the pattern again from the beginning, press this key before you start sewing.
Press this key once to startover from the beginning of the current pattern, or press this key twice to startover from the beginning of the first pattern of the combination (refer to page 60).
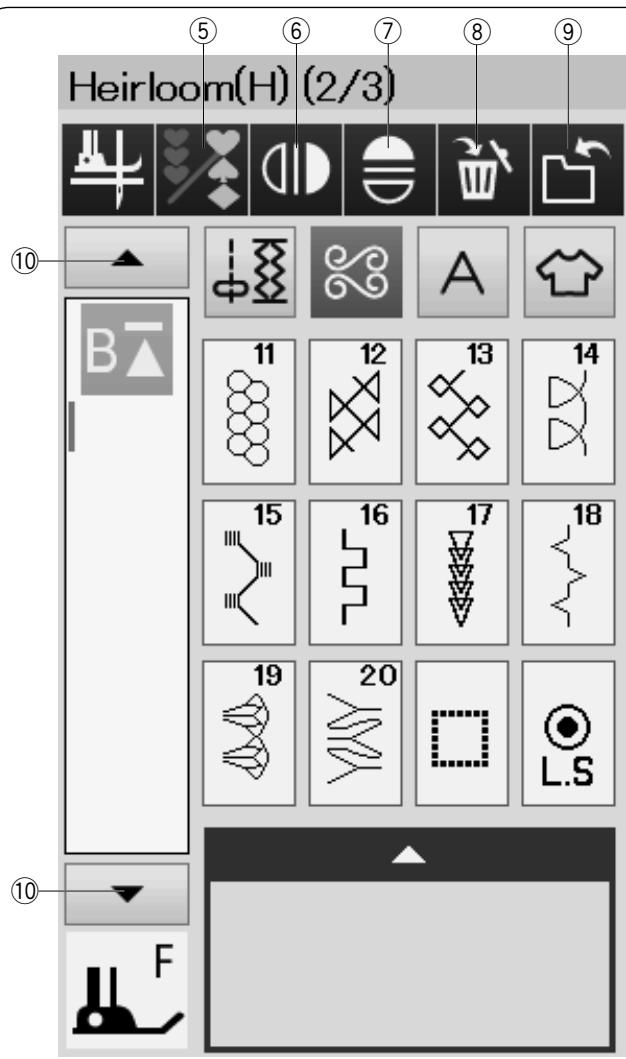

Press this key to program a pattern combination.
When this key is pressed, the delete key, mirror image keys, save file key and cursor keys will appear.
⑥ Vertical mirror image key
Press this key to sew a vertical mirror image of the selected pattern (refer to page 58).
⑦ Horizontal mirror image key
Press this key to sew a horizontal mirror image of the selected pattern. The key is grayed out if the selected pattern cannot be turned over (refer to page 58).
⑧ Delete key
Press this key to delete the pattern from the pattern combination.
⑨ Save file key
Press this key to save the pattern combination as a file.
⑩ Cursor keys
Press one of the cursor keys to move the cursor up or down.
⑪ Letter size key
Press this key to select the full size (L) or small size (S).
⑫ Letter case key
Press this key to select upper case or lower case for monograms.
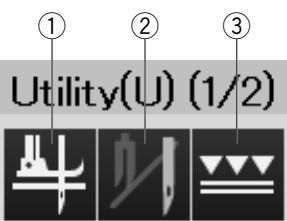
Utility(U) (1/2)

UTILITY STITCHES
Straight Stitches
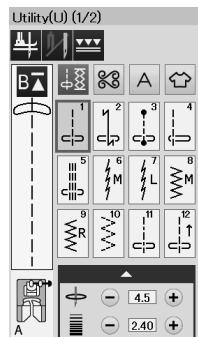
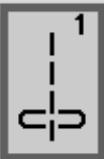
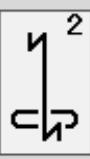
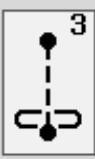
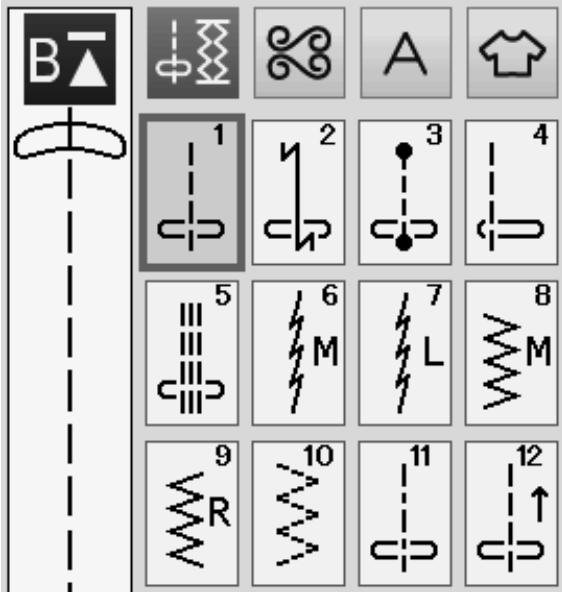
Patterns U1 to U5 are straight stitches for seaming. Press the pattern selection key for the desired stitch.
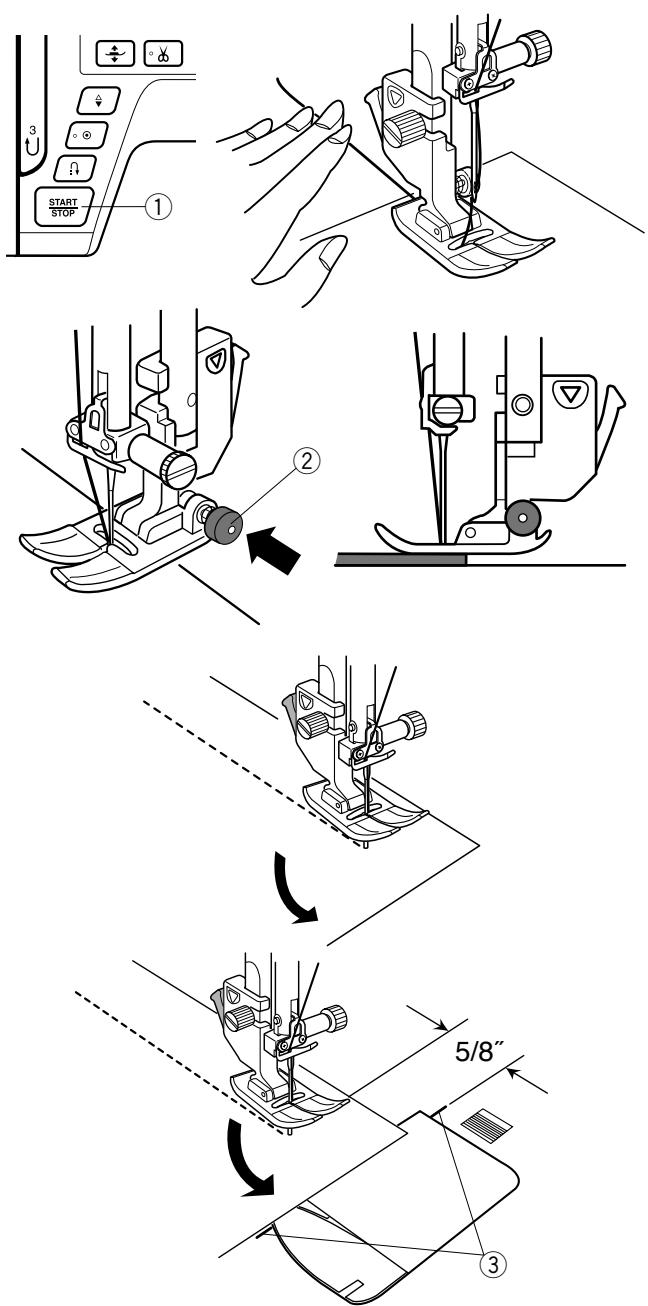
Starting to sew
Place the fabric next to the seam guide line on the needle plate. Lower the needle to the point where you want to start.
Pull the needle thread towards the rear and lower the foot.
NOTE:
Pull the needle thread to the left when using satin stitch foot F, open-toe satin stitch foot F2, dual feed foot or automatic buttonhole foot R.
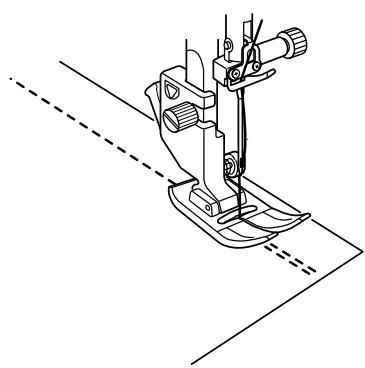
Press the start/stop button or foot control to start sewing. Gently guide the fabric along the seam guide line letting the fabric go naturally.
① Start/stop button
Sewing from the Edge of Thick Fabric
The black button on the zigzag foot locks the foot in the horizontal position.
This is helpful when you start sewing at the extreme edge of thick fabrics or for sewing across a hem.
Lower the needle into the fabric at the point where you wish to start sewing.
Lower the foot while pushing in the black button. The foot is locked in the horizontal position to avoid slipping.
After a few stitches, the black button is released automatically.
② Black button
Changing Sewing Direction
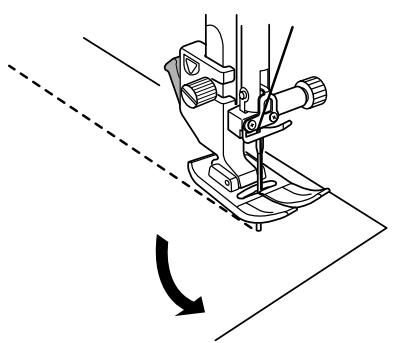
Stop the machine and press the presser foot lifter button to raise the presser foot.
Pivot the fabric around the needle to change the sewing direction as desired.
Start sewing in a new direction.
NOTE:
If you turn on the foot up option, the presser foot will automatically go up when the machine stops (refer to page 33).
Turning a Square Corner
To maintain a 5/8" seam allowance after turning a square corner, use the cornering guide on the needle plate.
Stop sewing when the front edge of fabric reaches the cornering guide lines.
Press the foot lifter button and turn the fabric 90 degrees. Start sewing in the new direction.
③ Cornering guide
natural_image
Line drawing of a sewing machine needle and foot (no text or symbols)
flowchart
graph TD
    A["Start STOP"] --> B["Button ③"]
    B --> C["Button ②"]
    C --> D["Button ③"]
    D --> E["Button ②"]
    E --> F["Button ③"]
    F --> G["Button ②"]
    G --> H["Button ③"]
    H --> I["Button ②"]
    I --> J["Button ③"]
    J --> K["Button ②"]
    K --> L["Button ③"]
    L --> M["Button ②"]
    M --> N["Button ③"]
    N --> O["Button ②"]
    O --> P["Button ③"]
    P --> Q["Button ②"]
    Q --> R["Button ③"]
    R --> S["Button ②"]
    S --> T["Button ③"]
    T --> U["Button ②"]
    U --> V["Button ③"]
Securing Seams
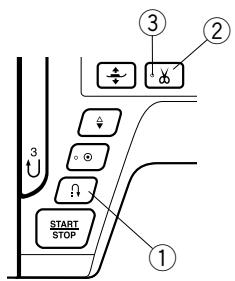
For fastening the ends of seams, press the reverse button and sew several reverse stitches.
The machine sews in reverse as long as you press and hold the reverse button.
① Reverse button
Press the reverse button once when sewing the lock-a-matic stitch (pattern U2) or locking stitch (pattern U3) and the machine will lock the stitches off and stop automatically.
Cutting Threads
To cut the threads after finishing sewing, press the thread cutter button. The needle bar and presser foot will automatically go up after trimming the threads.
② Thread cutter button
NOTE:
The thread cutter button does not function when the presser foot is up or the LED signal ③ is turned off. Use the thread cutter on the face plate to cut specialized or thick threads if the auto thread cutter does not work well.
③ LED signal
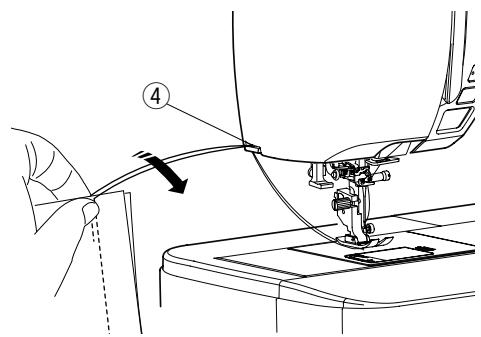
To use the thread cutter on the face plate, remove the fabric and draw it to the back.
Pull the threads up and slip them between the thread cutter and face plate from behind.
Pull the threads toward you to cut.
④ Thread cutter
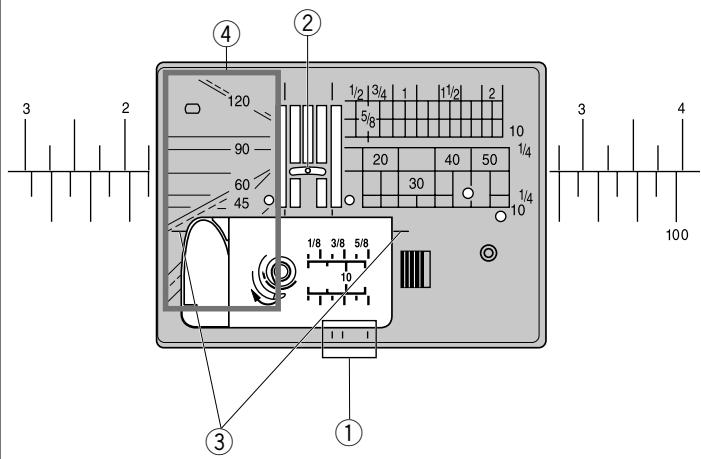
Needle Plate Guides
The seam guides are marked on the needle plate, free arm and hook cover.
The seam guides for 1/4", 3/8" and 5/8" are also marked on the front of the needle plate.
① Seam guides on the front of the needle plate
The numbers on the needle plate indicate the distance from the center needle position in millimeters and inches.
② Center needle position
The cornering guides are very useful when turning a square corner.
③ Cornering guide
The angle scales on the needle plate are useful for patchwork piecing (refer to page 54).
④ Angle scales
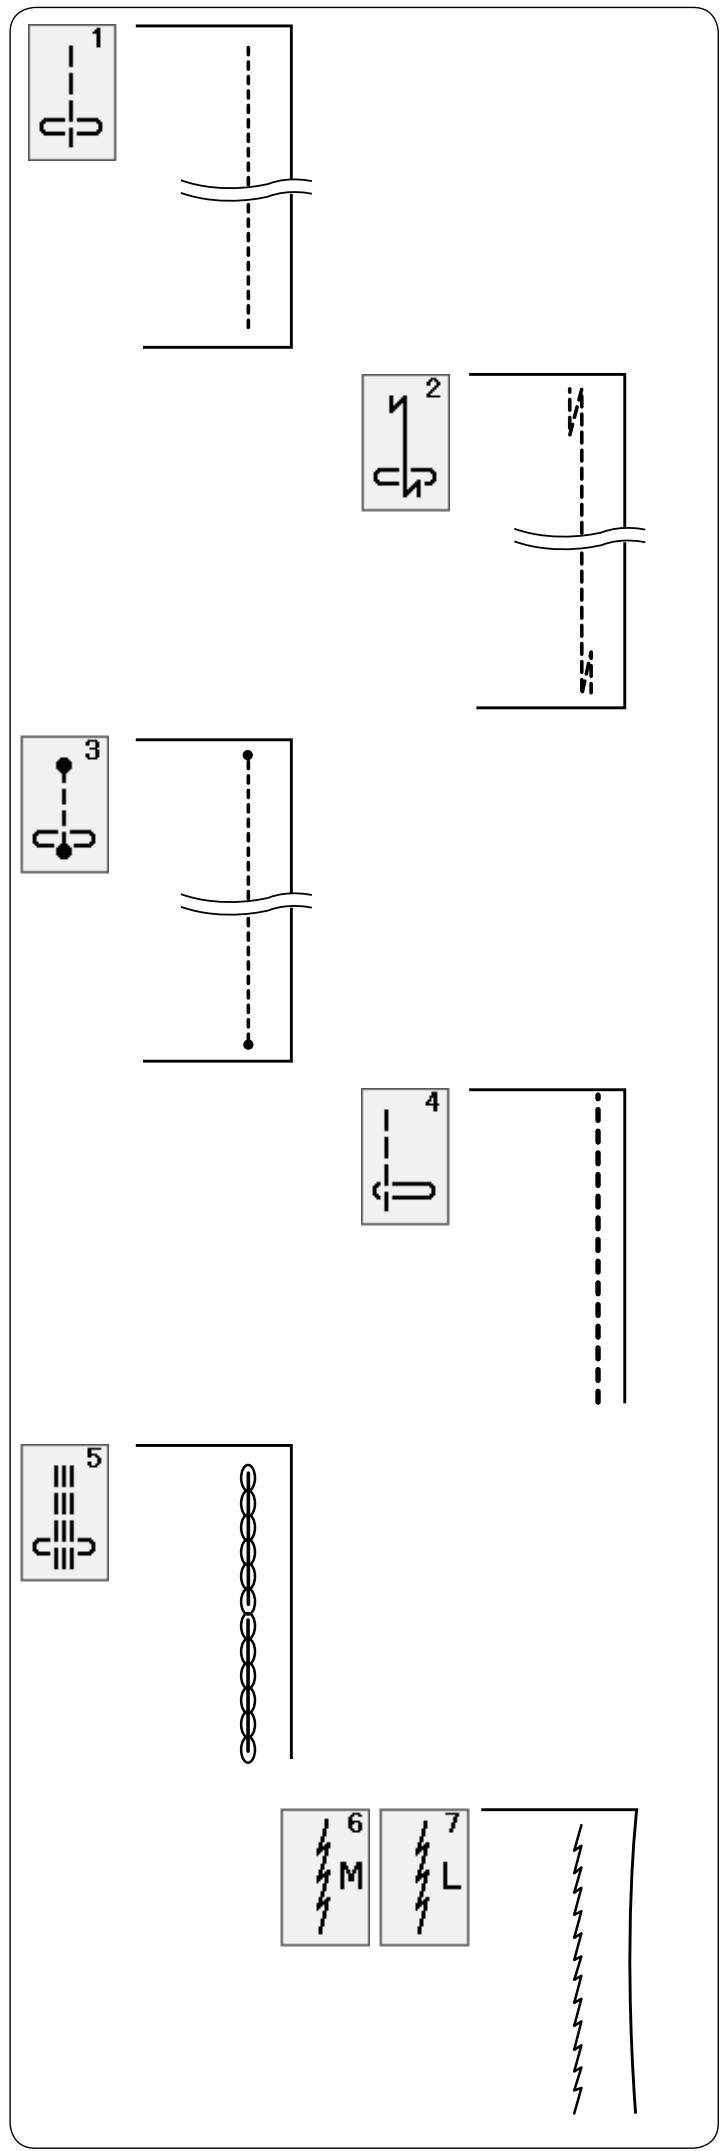
Variety of Straight Stitches
U1 Straight stitch in center needle position
Use this stitch for seaming, rolled hemming etc.
U2 Lock-a-matic stitch
Use this stitch to secure the beginning and the end of a seam with backstitching.
When you reach the end of the seam, press the reverse button once.
The machine will sew four reverse stitches, four forward stitches, and then stop sewing automatically.
U3 Locking stitch
This unique stitch is used where an invisible locking stitch is needed.
The machine will sew several locking stitches at the beginning and continue sewing forward.
When you press the reverse button at the end of the seam, the machine will sew several locking stitches in place, then stop sewing automatically.
U4 Straight stitch in left needle position
Use this stitch to seam fabrics close to the edge.
U5 Triple stretch stitch
This strong, durable stitch is recommended for areas where both elasticity and strength are needed to ensure comfort and durability.
Use it to reinforce areas such as crotch and armhole seams.
Also use it when constructing items such as backpacks for extra strength.
U6, U7 Stretch stitches
These are narrow stretch stitches designed to eliminate puckering on knit fabrics and bias seams, while permitting the seam to be pressed completely open flat.
Use U7 for seaming fine fabrics or stretch fabrics.
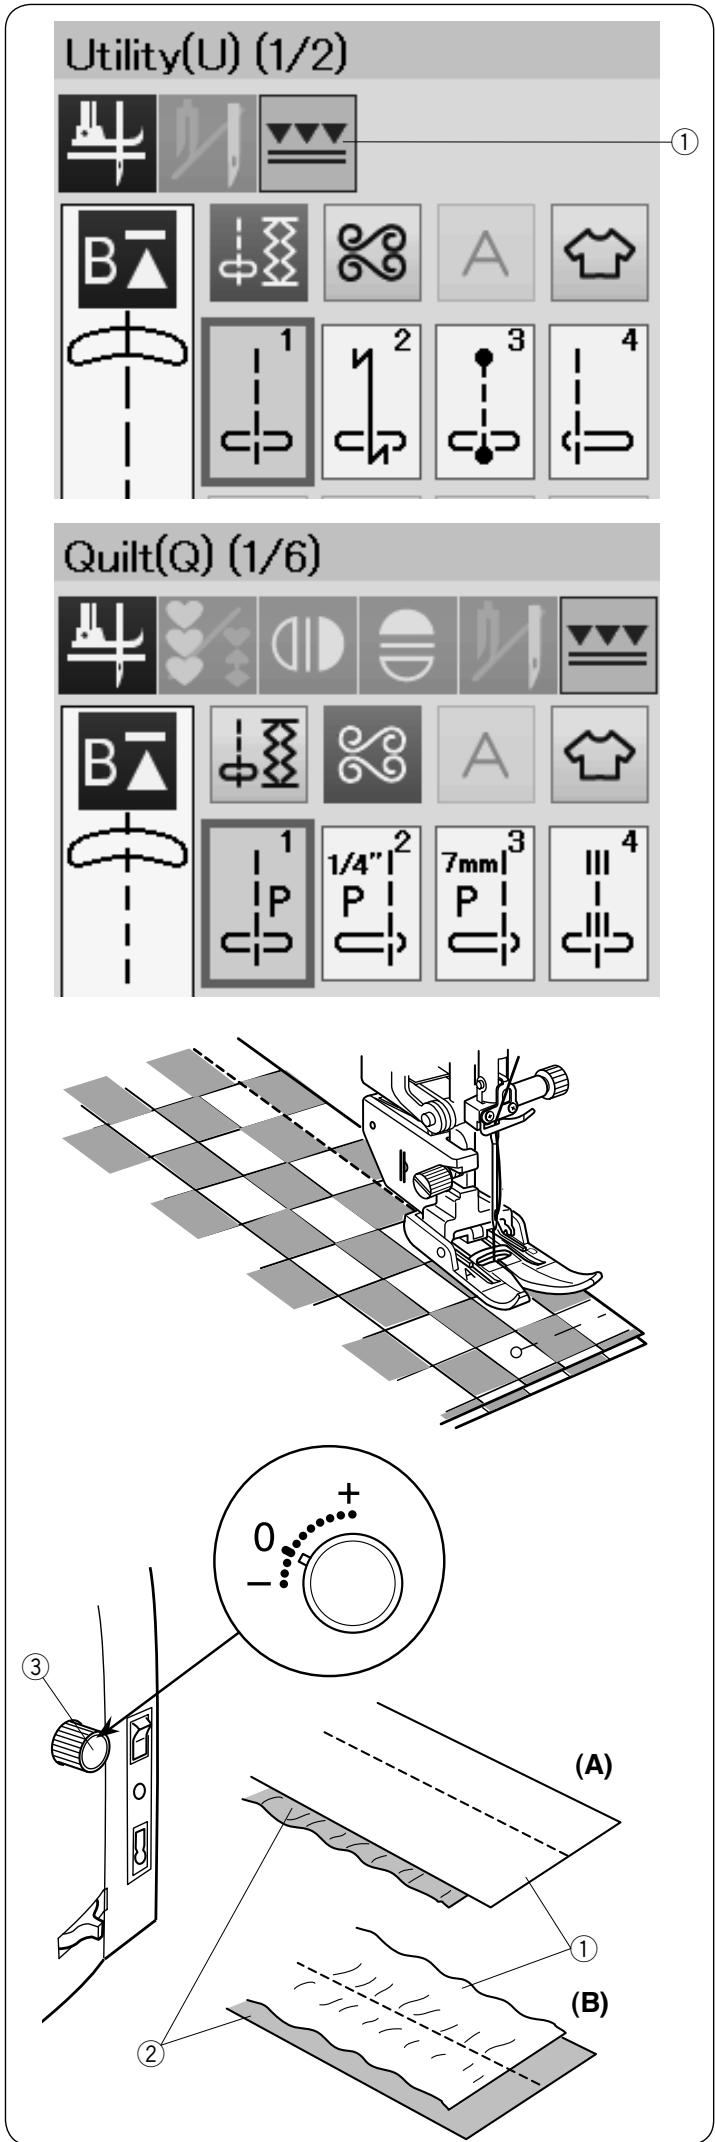
Sewing with the Dual Feed Device
Patterns U1 to U4 and Q1 to Q4 can be sewn with the dual feed device.
The dual feed device is extremely effective when sewing hard to feed materials such as PVC coated fabric or leather.
It also eliminates layer slippage.
See page 19 for how to attach the dual feed foot and to engage the dual feed device.
Press the dual feed key ① and select the desired pattern.
NOTE:
The patterns not suitable for dual feed sewing are grayed out.
The dual feed key will gray out or not be indicated if you selected a pattern not suitable for dual feed sewing.
Place the fabric under the foot and lower the needle at the point where you wish to start.
Start sewing at medium speed.
When seaming plaid fabrics, match the plaids of the upper and lower layers and pin them together.
Remove the pins as you sew.
Dual feed balancing dial
The dual feed balancing dial should be set at "0", however you may need to adjust the dual feed balance depending on the type of fabric.
Check the feed balance by test sewing on a scrap piece of the fabric you intend to use.
(A): If the lower layer puckers, turn the dual feed balancing dial toward “+”.
(B): If the upper layer puckers, turn the dual feed balancing dial toward “—”.
① Upper layer
② Lower layer
③ Dual feed balancing dial
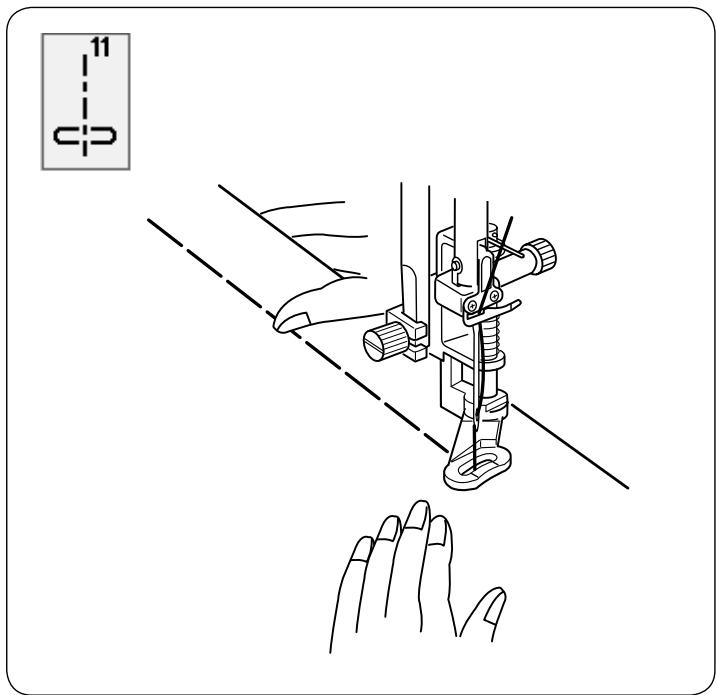
U11 Basting
See page 78 for sewing instructions.
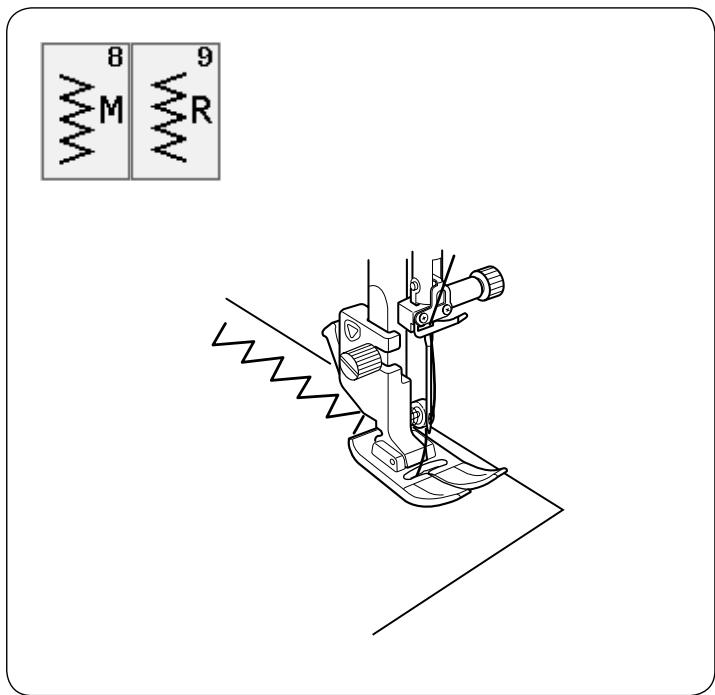
Zigzag Stitches
U8, U9 Zigzag stitches
Zigzag stitches are used for various sewing needs including overcasting. These stitches can be used on most woven fabrics.
A dense zigzag stitch can also be used for applique.
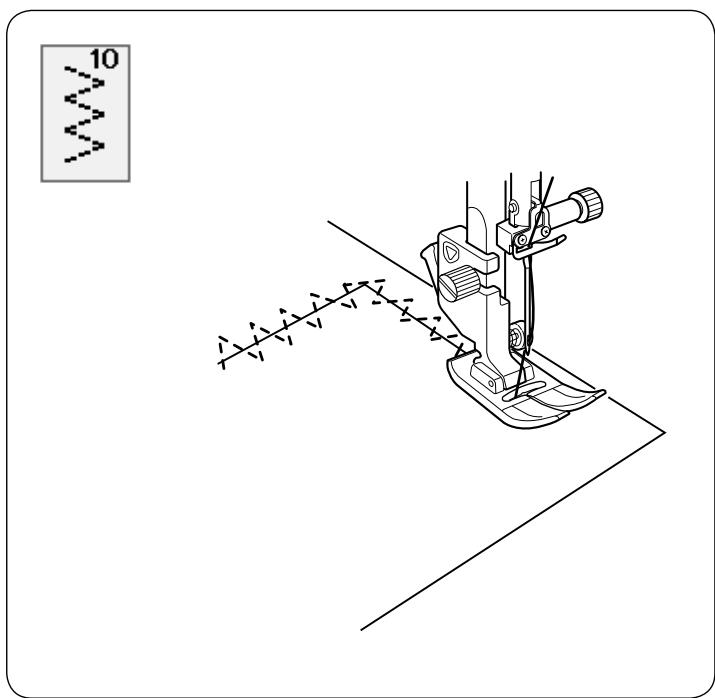
U10 Multiple zigzag stitches
These stitches are used for mending tears.
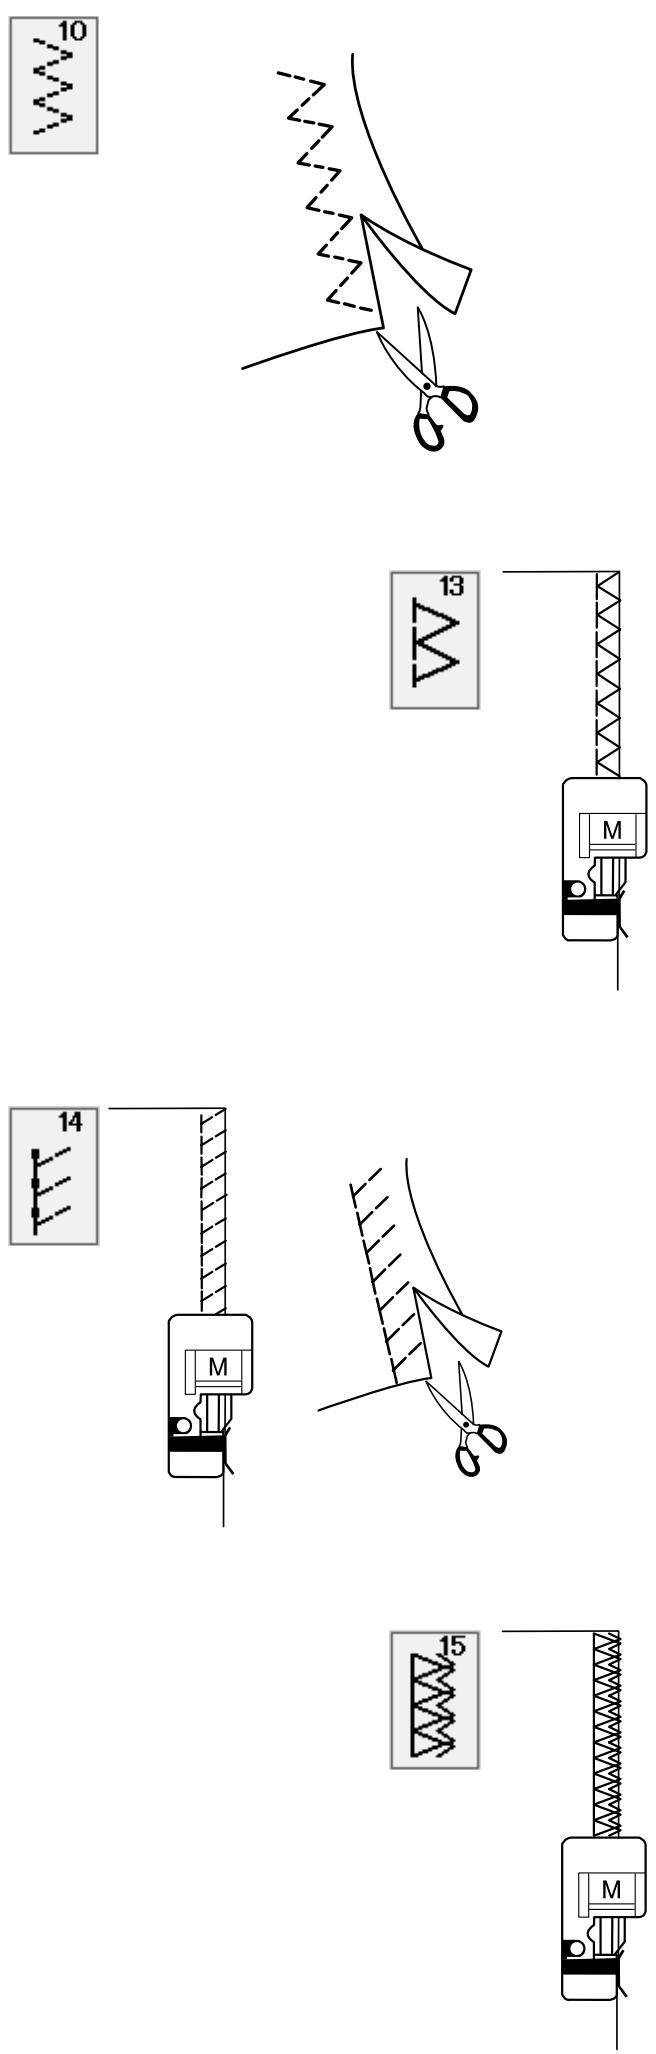
Variety of Overcasting Stitches
This stitch is used to finish a raw edge of synthetics and other stretch fabrics that tend to pucker.
Sew along the fabric edge leaving an adequate seam allowance. After sewing, trim off the seam allowance closer to the stitches.
This stitch can be used to simultaneously seam and overcast edges of fabrics.
Use this stitch when you do not need to open seams flat. Place the fabric edge next to the guide of the foot and sew.
This stitch is recommended for sewing such fabrics as synthetic knits and stretch velour as it provides the greatest amount of elasticity and strength.
Place the fabric edge next to the guide of the foot and sew.
For better results, use the zigzag foot A and sew leaving an adequate seam allowance.
After sewing, trim the seam allowance close to the stitches.
This stitch is excellent for fabrics that tend to fray extensively such as linens and gabardines.
Place the fabric edge next to the guide of the foot and sew.
Two rows of zigzag stitches are simultaneously sewn over the edge to insure that the fabric will not ravel.
chemical
Diagram showing two spring symbols with polarity labels (-) and (+)
Manual Stitch Settings
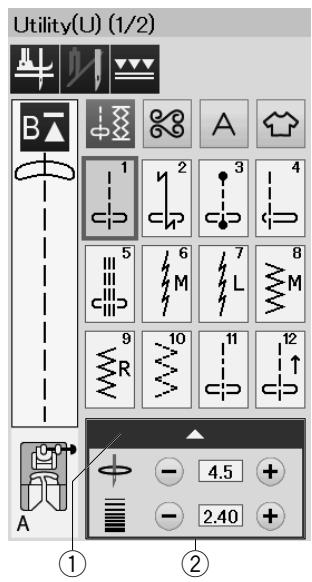
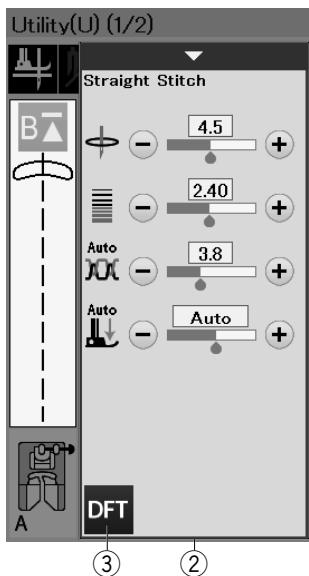
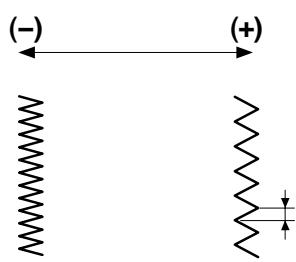
You can alter the stitch width (or needle drop position of the straight stitches) and stitch length.
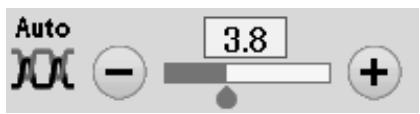
Press the “+” or “−” key beside the setting you wish to change. Press default key ③ to recover the original stitch setting.
When you press the setting bar, the manual setting window expands to show more options.
You can alter other settings such as needle thread tension and presser foot pressure value, depending on the selected stitch pattern.
Press the setting bar again to shrink the manual setting window.
① Setting bar
② Manual setting window
③ Default key
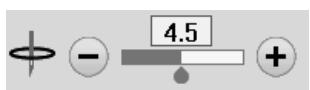
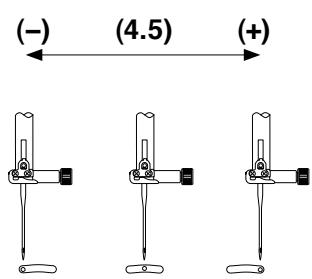
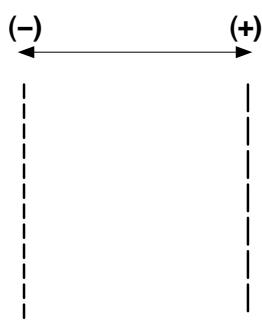
Altering needle drop position (straight stitches)
Press the “+” key to move the needle drop position to the right.
Press the “—” key to move the needle drop position to the left.
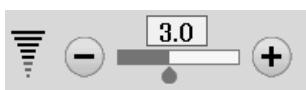
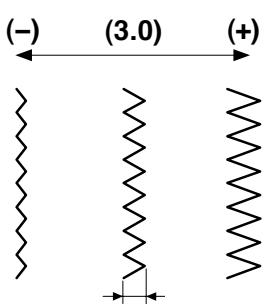
Altering stitch width
Press the “+” key to increase the stitch width.
Press the “—” key to decrease the stitch width.
NOTE:
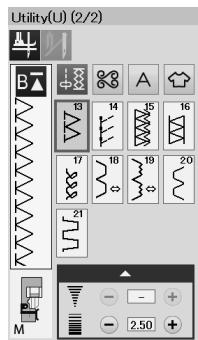
The adjustable range of patterns U6-U10 is 0.0 to 7.0.
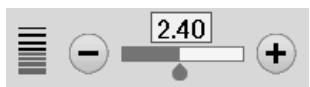
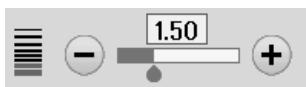
Altering stitch length
Press the “+” key to increase the stitch length.
Press the “—” key to decrease the stitch length.
NOTE:
The adjustable range of patterns U6 is 0.0 to 5.0, U7 is 1.0 to 5.0, U8-U10 is 0.0 to 5.0.
natural_image
Diagram of a mechanical device with a wire and coil, no text or symbols present
natural_image
Diagram of a wire-winding tool interacting with a spring-loaded device (no text or symbols present)
natural_image
Diagram of a mechanical component with springs and connectors, no text or symbols present
natural_image
Diagram of a U-shaped mechanical component with a dashed line indicating a seam or edge, and a numbered label (②) on the left side.
Utility(U) (1/2)
natural_image
Abstract geometric shapes and symbols arranged in rows (no text or labels)
natural_image
Line drawing of a sewing machine needle and foot, showing mechanical components and a curved arrow indicating rotation (no text or symbols)
Adjusting Thread Tension
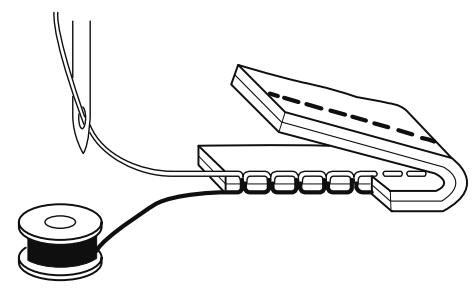
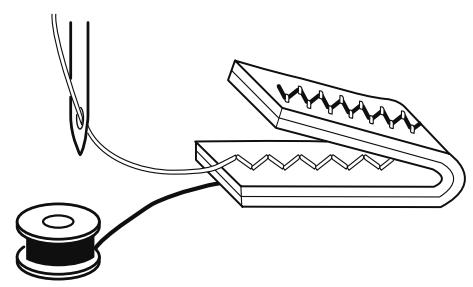
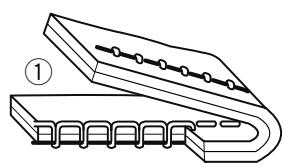
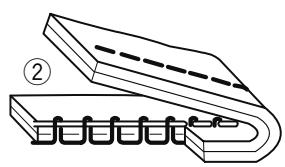
This machine is equipped with automatic thread tension control, which optimizes the tension balance for the selected stitch pattern.
Balanced thread tension
Straight stitch: Both needle and bobbin threads interlock between the layers.
Zigzag stitch: The needle thread appears slightly on the wrong side of the fabric.
However you may need to manually adjust the tension balance depending on the sewing conditions, or you can fine-tune the thread tension to suit your preference.
① Press the “+” key if the tension is too loose.
② Press the “—” key if the tension is too tight.
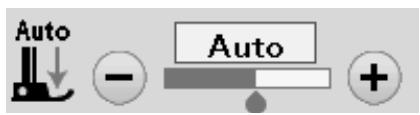
The presser foot pressure is automatically optimized for each stitch pattern.
However, you can adjust the foot pressure manually by pressing the “+” key or “−” key to suit your specific sewing needs.
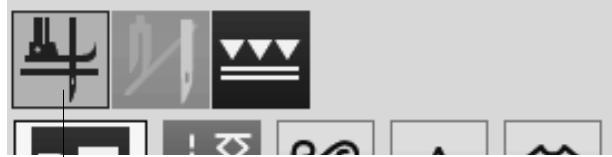
If this option is turned on, the presser foot will automatically go up when the machine stops.
This feature is very useful when turning corners.
Press the foot-up key to turn this option on or off.
① Foot-up key
NOTE:
Height of the foot can be altered in the ordinary sewing setting mode (refer to page 90).
②
③
④
Favorite Stitch Adjustment
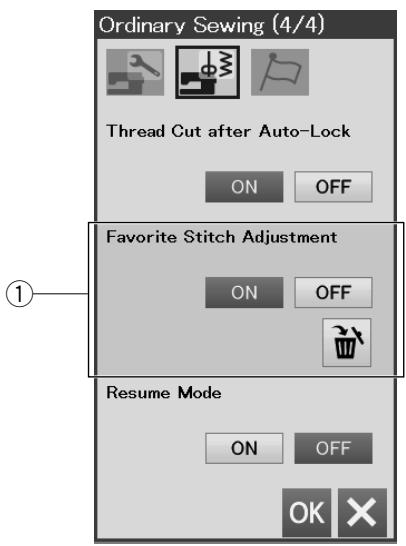
You can save customized stitch settings (stitch length, stitch width, thread tension and presser foot pressure, depending on the selected stitch patterns) as Favorite Stitch Adjustment. When the favorite stitch adjustment option is turned ON ① (refer to page 91), the last-used customized stitch settings are automatically assigned when the stitch pattern is selected.
NOTE:
Favorite stitch option cannot be assigned for created stitch (CS).
Favorite stitch option cannot be used in monogram mode.
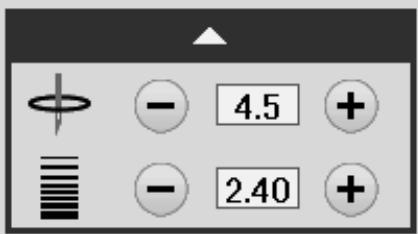
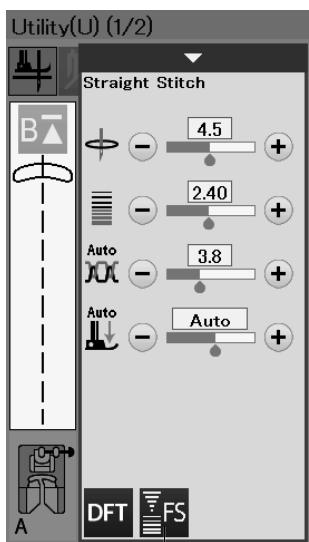
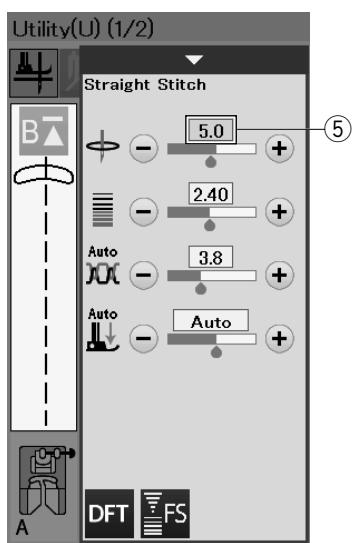
Example: To change the preset value of the needle drop position from "4.5" to "5.0".
Turn the Favorite Stitch Adjustment option ON (refer to page 91).
Select stitch pattern U1.
Press the setting bar. The manual setting window expands to show more options.
The favorite stitch key ② appears on the manual setting window.
Change the needle drop position from "4.5" to "5.0" by pressing "+" key.
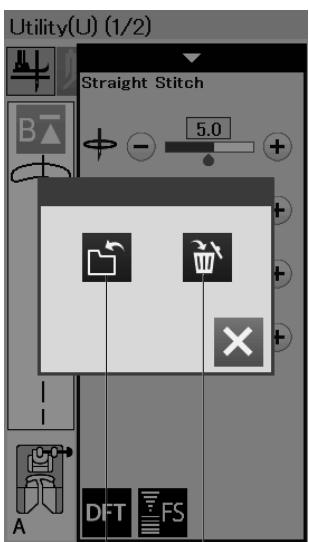
Press the favorite key ②.
The dialog box will open.
Press the save favorite key ③ to register the favorite stitch settings.
The cream colored box ⑤ indicates that the customized preset stitch value is applied to the setting.
To delete favorite stitch settings, press the favorite stitch key and press the delete key ④.
natural_image
Simple line drawing of a garment sleeve with measurement markings and a patterned inset (no text or symbols)
natural_image
Line drawing of a sewing machine needle and base mechanism (no text or symbols)
natural_image
Line drawing of a sewing machine needle stitching on a slatted base (no text or symbols)
U12 Backward Stitch
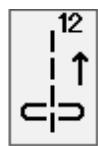
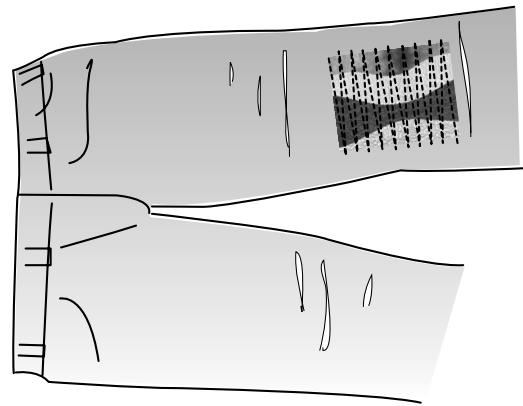
U12 is backward stitch.
Use the stitch if it is hard to guide the fabric while pressing the reverse button.
The machine sews in reverse without pressing the reverse button so that you can guide the fabric with both hands.
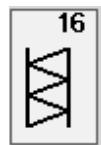
U16 Hemstitch
Use this stitch for fagoting or decorative stitch.
U21 Fagotting
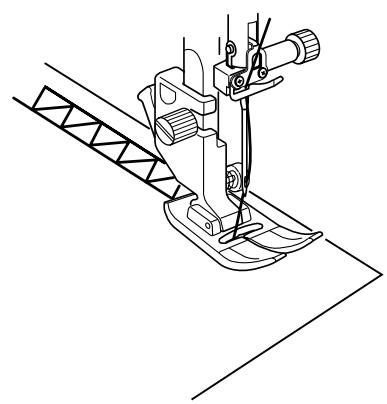
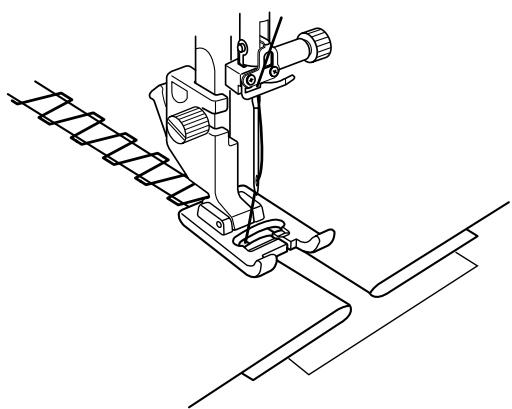
Use the stitch to join two pieces of fabric to create an open work appearance and add stitch interest.

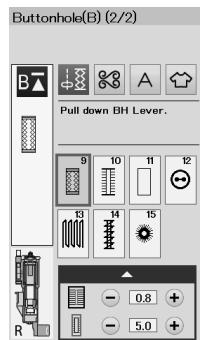
This square buttonhole is widely used on medium to heavy weight fabrics. The buttonhole size is automatically determined by placing a button in the foot.
This is also a square buttonhole similar to the sensor square buttonhole, but you can manually set the buttonhole size and the machine memorizes it to sew buttonholes of the same size.
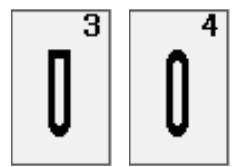
This buttonhole is used on fine to medium weight fabrics especially for blouses and children's clothes.
This buttonhole is rounded at both ends and is used on fine, delicate fabrics such as fine silk.
The keyhole buttonhole is widely used on medium to heavy weight fabrics. It is also suitable for larger and thicker buttons.
This buttonhole is used for thicker buttons on medium weight fabrics.
This durable buttonhole is used with thick buttons and heavy fabrics.
This buttonhole is suitable for stretch fabrics. It can also be used as a decorative buttonhole.
This buttonhole is suitable for knit fabrics. It can also be used as a decorative buttonhole.
This buttonhole looks like the heirloom stitch. It has an attractive handmade appearance and makes a nice decorative buttonhole.
This is a template pattern for the hand sewn welted (bound) buttonhole.
NOTE:
B3-B11 are sensor buttonholes and the sewing procedure is the same as for B1.



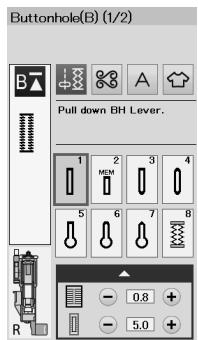
Pull down BH Lever.
2
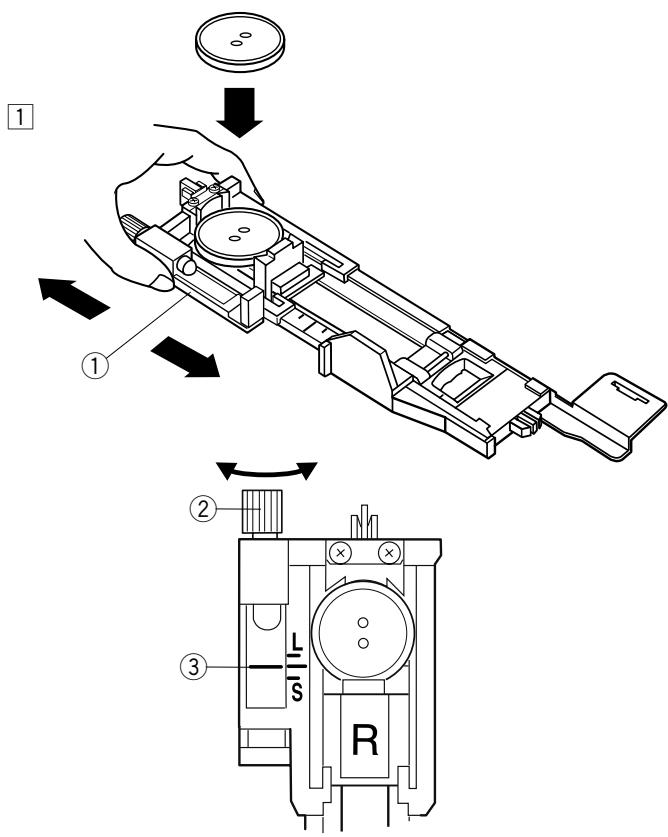
The size of a buttonhole is automatically set by placing a button in the rear of automatic buttonhole foot R.
The button holder of the foot takes a button size of 1 cm (3/8") to 2.5 cm (1") in diameter.
When selecting the buttonholes, the visual touch screen advise you to lower the buttonhole lever.
NOTE:
It is sometimes necessary to change buttonhole size to match certain heavy or specific fabrics and threads. Make a test buttonhole on an extra piece of the fabric to check your settings.
The preset width of the buttonhole is suited for ordinary buttons.
Apply an interfacing to stretch or fine fabrics.
Sewing
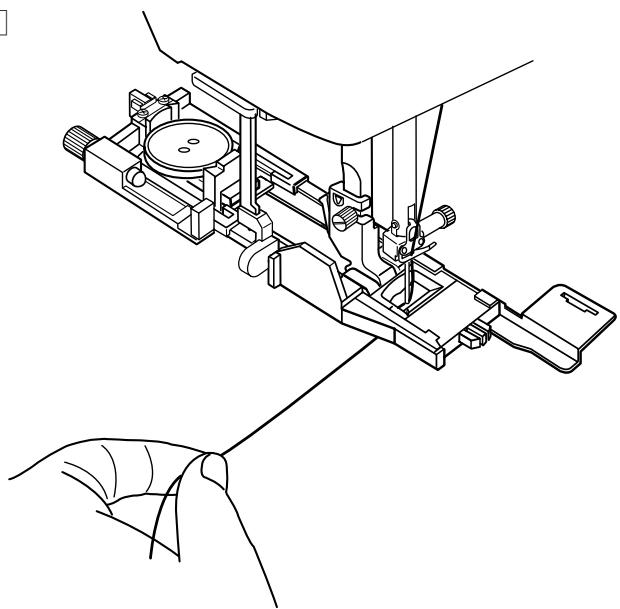
1 Pull the button holder to the back, and place the button in it. Push it together tightly on the button.
① Button holder
NOTE:
Check the length of the test buttonhole, and adjust the buttonhole length if necessary by turning the adjusting screw on the buttonhole foot.
To increase the buttonhole length, turn the adjusting screw to move the marker toward "L".
To decrease the buttonhole length, turn the adjusting screw to move the marker toward "S".
② Adjusting screw
③ Marker
2 Press the needle up/down button to raise the needle. Press the lockout key.
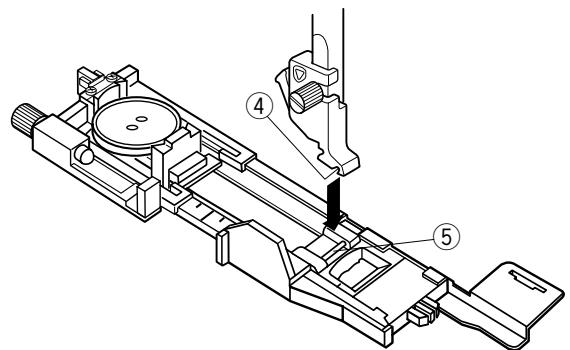
Raise the presser foot and attach the automatic buttonhole foot R snapping the pin into the groove of the foot holder.
You may lift the presser foot lifter to the extra lifted position when placing the automatic buttonhole foot under the foot holder.
Press the lockout key to unlock the machine.
④ Groove
⑤ Pin
3
natural_image
Technical line drawing of a sewing machine mechanism with no visible text or symbols
4
natural_image
Technical line drawing of a mechanical assembly with no visible text or symbols

5
natural_image
Technical line drawing of a sewing machine mechanism with hands operating it (no text or symbols present)
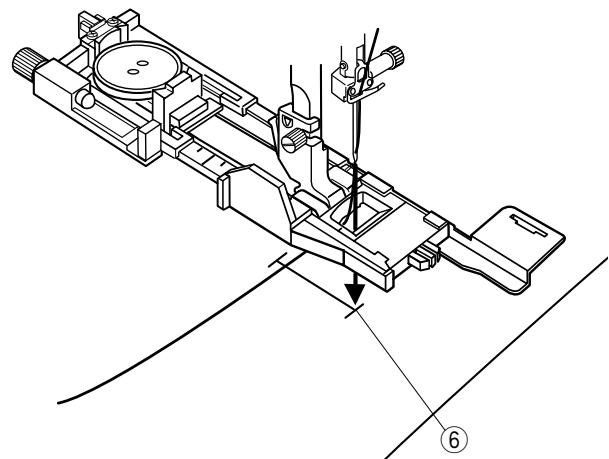
3 Draw the needle thread to the left through the hole of the foot.
Mark the buttonhole position on the fabric and place it under the buttonhole foot. Lower the needle at the starting point by turning the hand wheel.
⑥ Starting point
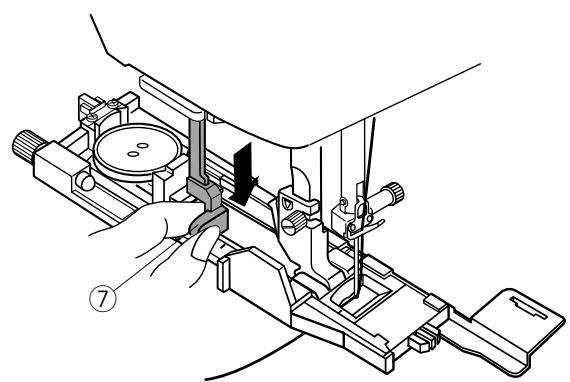
4 Lower the presser foot and pull the buttonhole lever down as far as it will go.
⑦ Buttonhole lever
NOTE:
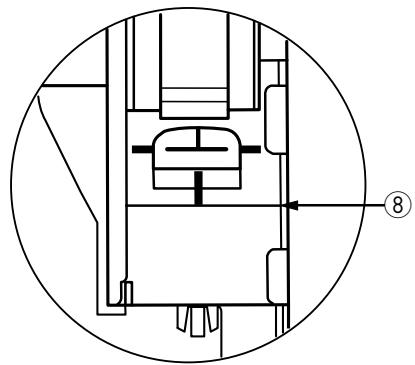
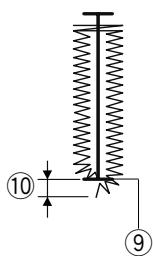
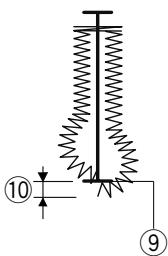
Make sure there is no gap between the slider and front stopper, otherwise the buttonhole will be out of position or there will be a sewing gap.
⑧ No gap
⑨ Starting point
⑩ Sewing gap
5 Start sewing while pulling the needle thread lightly to the left. After sewing a few stitches, free the thread and continue sewing.
NOTE:
If you start sewing without pulling down the buttonhole lever, the visual touch screen will show a warning and the machine will stop after a few stitches. Pull the buttonhole lever down and start sewing.
6
7
natural_image
Technical line drawing of a sewing machine needle and base mechanism (no text or symbols)
8
natural_image
Simple line drawing of a mechanical tool with zigzag lines and a handle (no text or symbols)
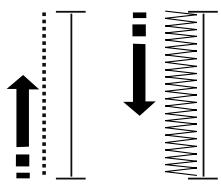
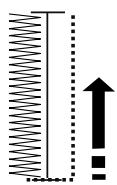
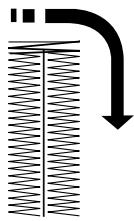
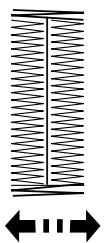
6 The buttonhole is sewn automatically in the sequence shown. When the buttonhole is finished, the machine will stop automatically with the needle in the up position. Press the thread cutter button and remove the fabric.
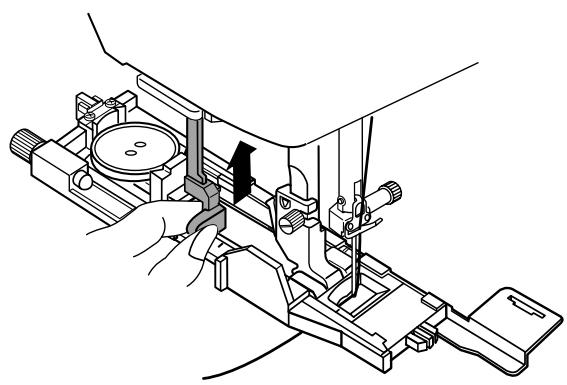
7 After you finish buttonhole sewing, push the buttonhole lever up as far as it will go.
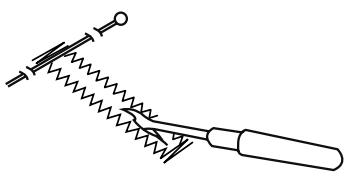
8 Place a pin just below the bartack at each end to prevent accidentally cutting the threads. Cut the opening with the seam ripper. Use an eyelet puncher to open a keyhole buttonhole.
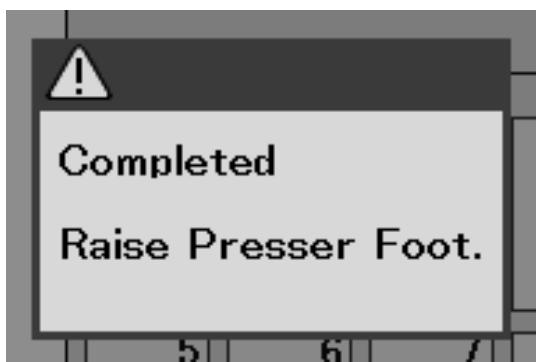
To make a sturdy buttonhole, sew another layer of buttonhole stitches over the previous stitches.
After the buttonhole is finished, simply start the machine again.
Do not raise the foot or buttonhole lever.
Do not reselect the pattern.
NOTE:
This function is disabled if Thread Cut after Auto-Lock option is turned on in the ordinary sewing setting mode (refer to page 91).
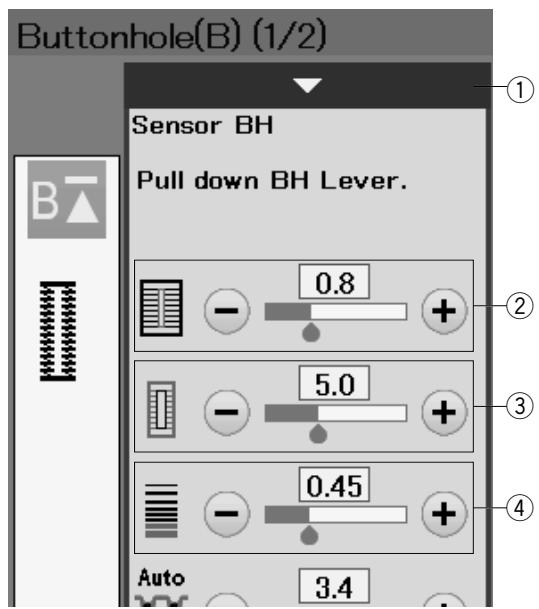
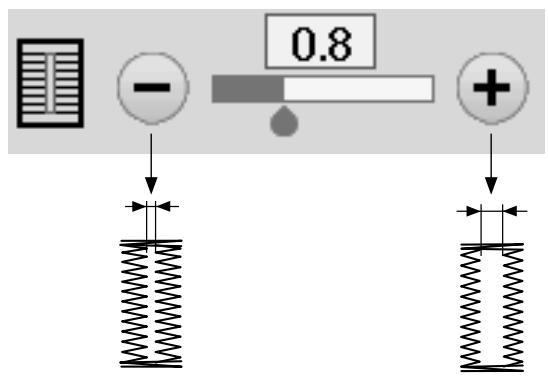
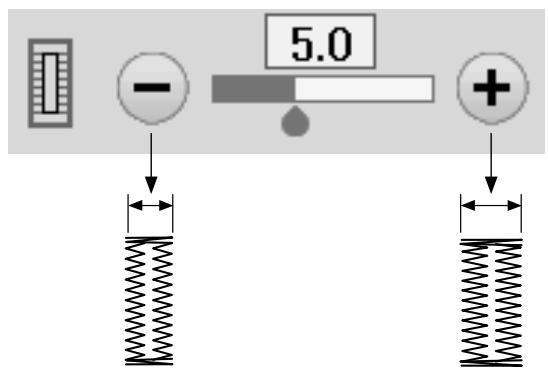
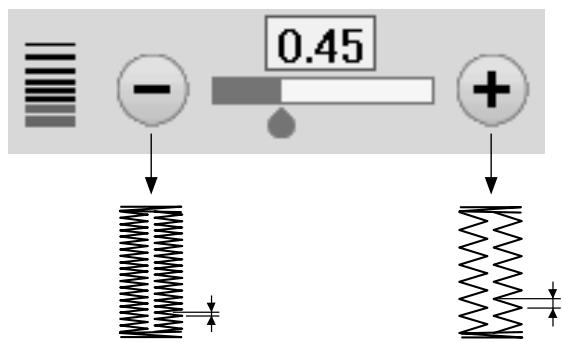
Manual settings
When you press the setting bar, the manual setting window expands to show more options.
① Setting bar
Press the “+” key to make the buttonhole opening wider. Press the “−” key to make the buttonhole opening narrower.
Press the “+” key to increase the buttonhole width. Press the “−” key to decrease the buttonhole width.
Press the “+” key to make the buttonhole stitches less dense.
Press the “−” key to make the buttonhole stitches denser.
NOTE:
The opening width can be adjusted from 0.2 to 2.0. The buttonhole width can be adjusted from 2.6 to 9.0. The stitch density can be adjusted from 0.20 to 1.00.
1
2
natural_image
Technical line drawing of a sewing machine mechanism (no text or symbols)
3
natural_image
Technical line drawing of a mechanical device with hands operating it (no text or symbols present)
Using the Stabilizer Plate
The stabilizer plate holds and supports the fabric so it is helpful when sewing buttonholes over the hem of thick fabrics.
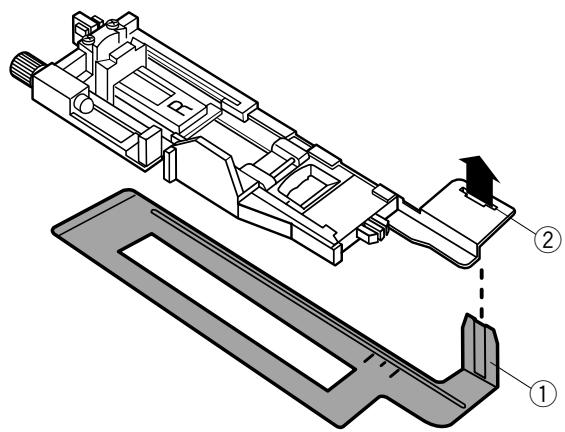
1 Insert the tab of the stabilizer plate ① into the slot ② of the buttonhole foot.
① Stabilizer plate
② Slot
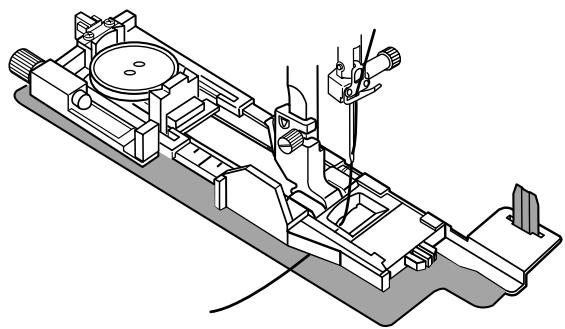
2 Place the button on the button holder of the foot.
Attach the buttonhole foot to the machine.
Draw the needle thread to the left between the foot and stabilizer plate.
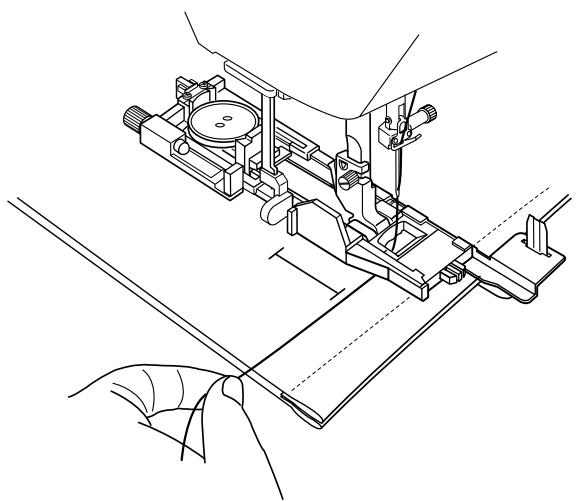
3 Place the fabric between the buttonhole foot and stabilizer plate. Lower the needle into the starting point by turning the hand wheel.
Lower the foot and buttonhole lever.
Start the machine while pulling the needle thread lightly to the left. After sewing a few stitches, free the thread and continue sewing.
NOTE:
The sewing procedure is exactly the same as that for B1 sensor (square) buttonholes.
1
Buttonhole(B) (1/2)
natural_image
Technical line drawing of a mechanical assembly with no visible text or symbols
flowchart
graph TD
    A["Start Stop"] --> B{Control Signals}
    B --> C["Directional Control"]
    C --> D["Spring Symbol"]
    D --> E["Directional Arrow"]
    E --> F["Spring Diagram"]
    style A fill:#f9f,stroke:#333
    style F fill:#ccf,stroke:#333
2
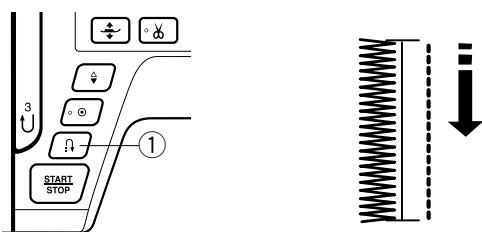
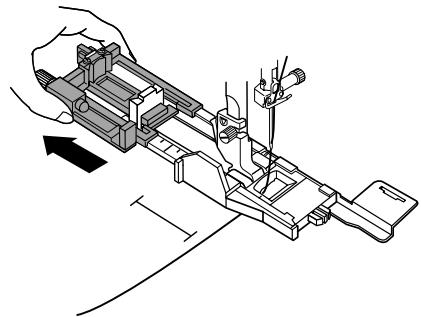
Pull the button holder all the way out.
Mark the buttonhole position on the fabric.
Place the fabric under the foot, and lower the needle at the starting point.
Lower the foot and start sewing while pulling the needle thread lightly to the left. After sewing a few stitches, free the thread and continue sewing.
NOTE:
You do not need to pull down the buttonhole lever. If you wish to sew a buttonhole longer than the size permitted by the automatic buttonhole foot R, use satin stitch foot F.
NOTE:
The opening width can be adjusted from 0.2 to 2.0. The buttonhole width can be adjusted from 2.6 to 9.0. The stitch density can be adjusted from 0.20 to 1.00.
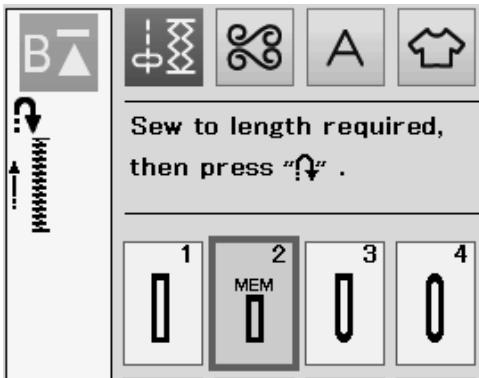
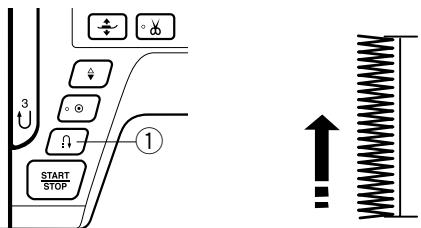
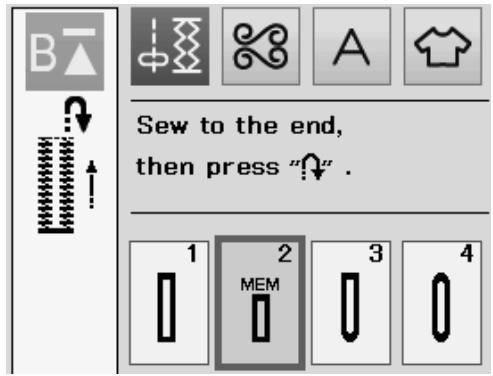
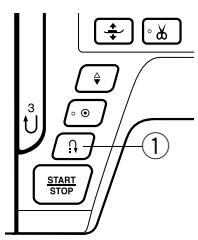
1 Sew the left side up to the required buttonhole length and stop the machine. Then press the reverse button ①.
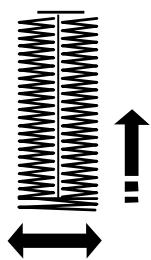
2 Start sewing again, and the machine sews back with a straight stitch.
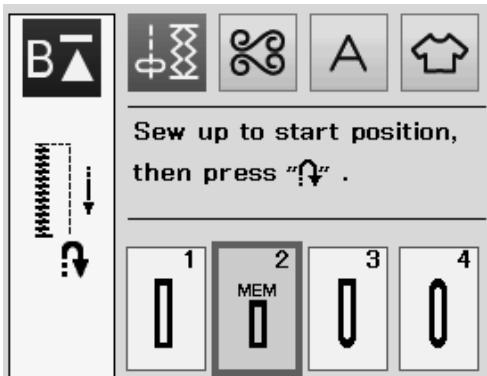
Stop the machine when you reach the starting point. Then press the reverse button ①.
3
flowchart
graph TD
    A["Start Stop"] --> B{Check}
    B --> C["Return"]
    C --> D["Stop"]
    D --> E["Exit"]
    style A fill:#f9f,stroke:#333
    style E fill:#ccf,stroke:#333
natural_image
Pure diagram of a vertical spring with double-headed arrows indicating upward and downward motion (no text or symbols)
4
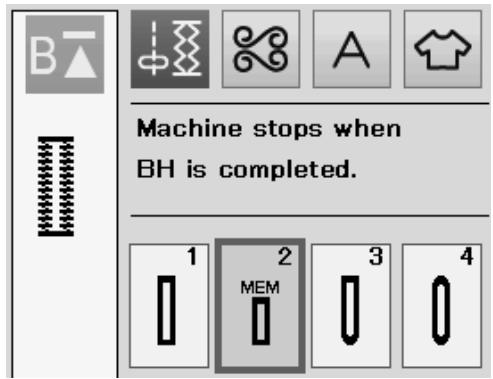
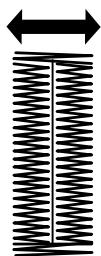
3 Start sewing again, and the machine sews the front bartack and right side of the buttonhole.
Stop the machine when you reach the ending point.
Then press the reverse button ①.
4 Start sewing again, and machine sews the back bartack and locking stitches then stops automatically with the needle in the up position.
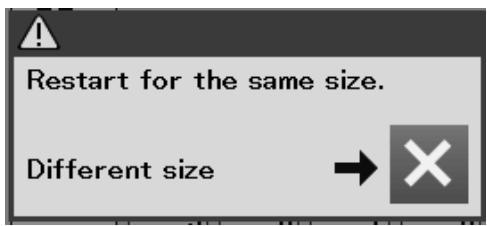
When the buttonhole is finished, a message will appear.
To make the next buttonhole, position the fabric and start sewing again. The message disappears and the machine sews another buttonhole identical to the first one then stops automatically.
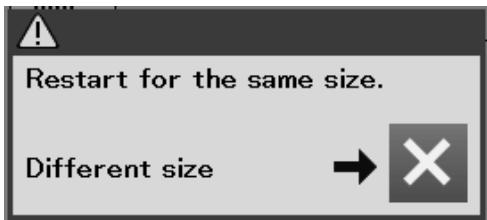
To sew another buttonhole in a different size press the X key on the dialog box.
NOTE:
To cut the buttonhole opening, refer to the instructions on page 39.
The memorized length will be cancelled if the presser foot is raised or the startover key is pressed before buttonhole is completed.
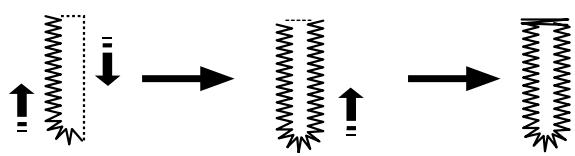
flowchart
graph TD
    A["↑"] --> B["↓"]
    B --> C["→"]
    C --> D["↑"]
    D --> E["→"]
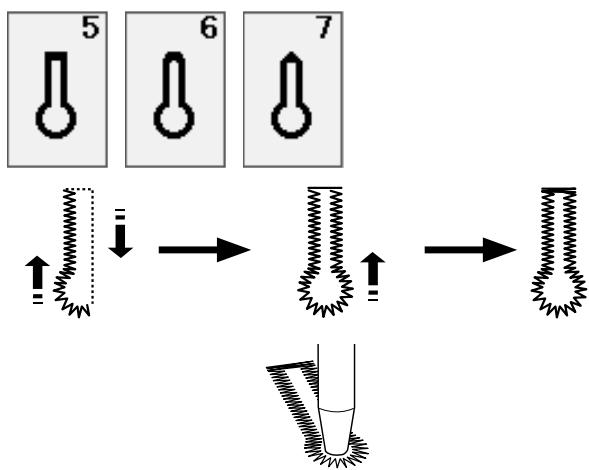
flowchart
graph TD
    A["5°C"] --> B["6°C"]
    B --> C["7°C"]
    D["↑↓"] --> E["→"]
    E --> F["↑↓"]
    F --> G["→"]
    G --> H["试管"]

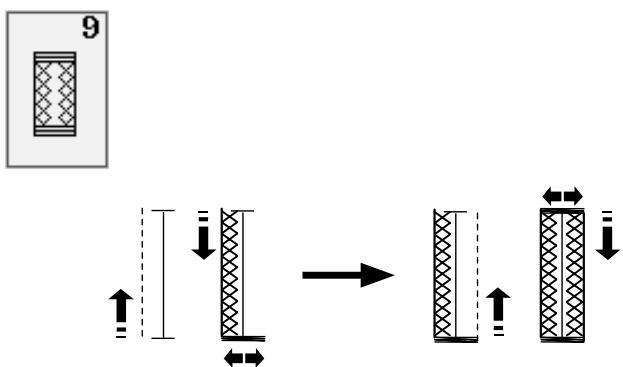
The sewing procedure is the same as that of B1 square (sensor) buttonhole (refer to page 37-39).
NOTE:
The opening width can be adjusted from 0.2 to 2.0. The buttonhole width can be adjusted from 2.6 to 9.0. The stitch density can be adjusted from 0.20 to 1.00.
The sewing procedure is the same as B1 square (sensor) buttonhole (refer to page 37-39).
Use an eyelet punch to open the keyhole buttonhole.
NOTE:
The opening width can be adjusted from 0.2 to 2.0. The buttonhole width can be adjusted from 5.6 to 9.0. The stitch density can be adjusted from 0.20 to 1.00.
The sewing procedure is the same as B1 square (sensor) buttonhole (refer to page 37-39).
The sewing steps are as shown.
NOTE:
The opening width can be adjusted from 0.2 to 2.0. The buttonhole width can be adjusted from 2.6 to 9.0. The stitch density can be adjusted from 0.50 to 1.00 (B8), from 0.50 to 2.50 (B10).
The sewing procedure is the same as B1 square (sensor) buttonhole (refer to page 37-39).
NOTE:
The opening width can be adjusted from 0.2 to 2.0. The buttonhole width can be adjusted from 2.6 to 9.0. The stitch density can be adjusted from 0.70 to 1.20.
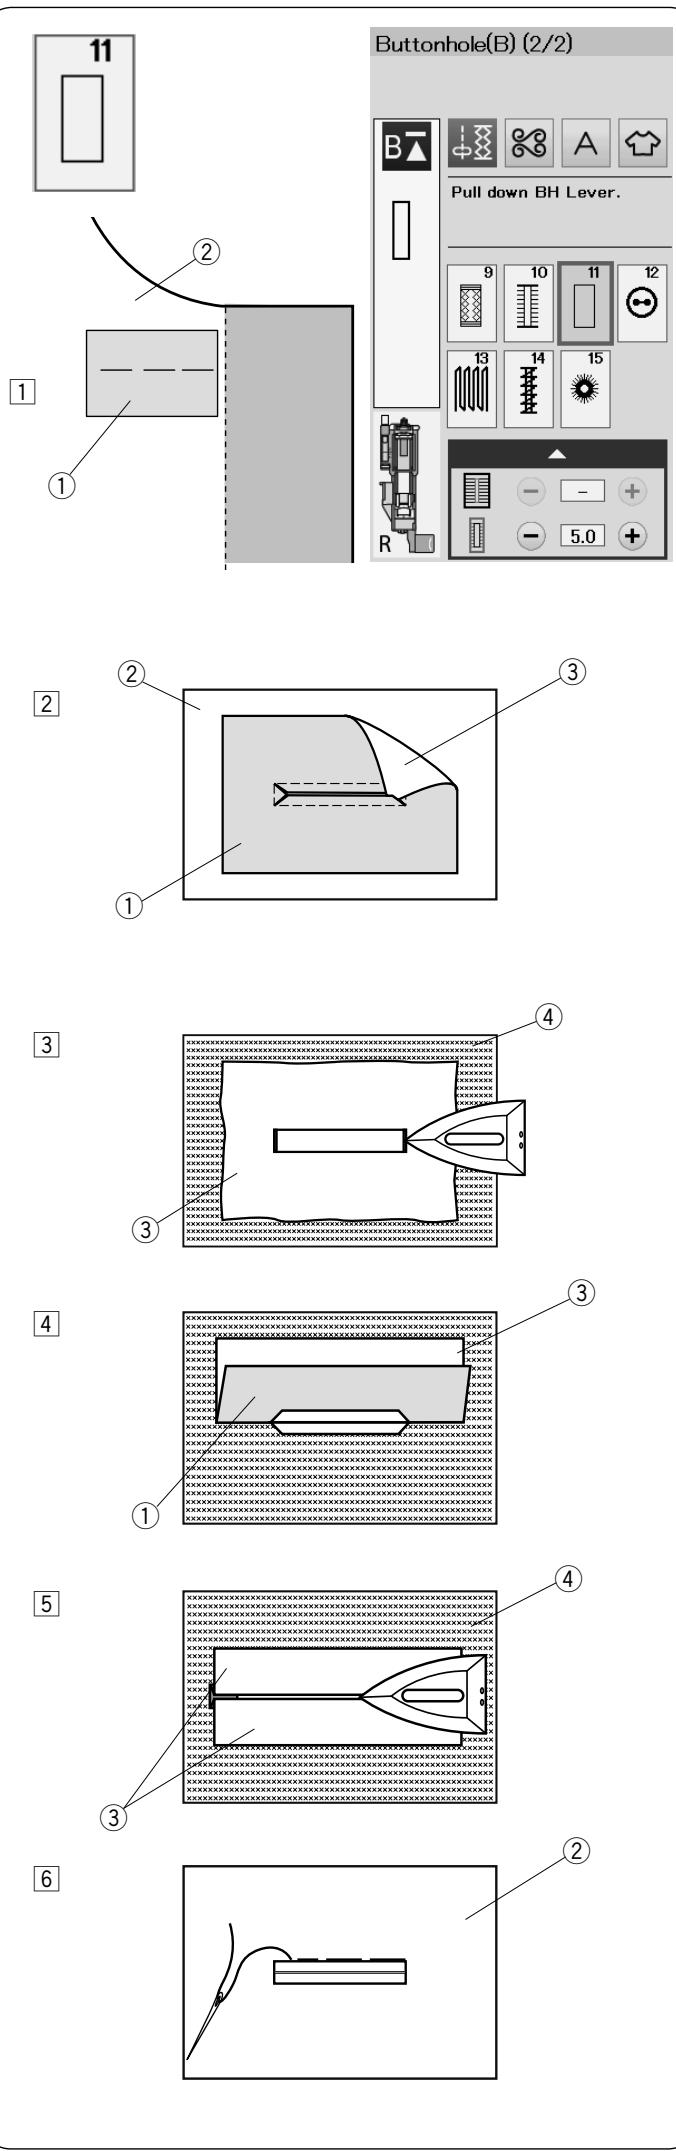
A welted buttonhole is made by stitching a strip or patch of fabric to the buttonhole.
Welted buttonholes are particularly suitable for tailored garments, but are not recommended for sheer or delicate fabrics where the patch might show through or add bulk.
1 Baste a patch to the garment fabric with the right sides together.
① Wrong side of patch
② Right side of garment fabric
2 Select pattern B11.
Sew the welted buttonhole on both fabrics together. Cut the buttonhole opening as illustrated then pull the patch out through the slit to the other side.
① Wrong side of patch
② Right side of garment fabric
③ Right side of patch
3 Pull out the patch until the right side of the patch is showing. Use an iron to press both corner ends until they are squared off.
③ Right side of patch
④ Wrong side of garment fabric
4 Fold back each side of the patch to form buttonhole lips.
① Wrong side of patch
③ Right side of patch
5 Press both folds with an iron.
③ Right side of patch
④ Wrong side of garment fabric
6 Baste both edges of the seam with a needle and thread by hand.
② Right side of garment fabric
7
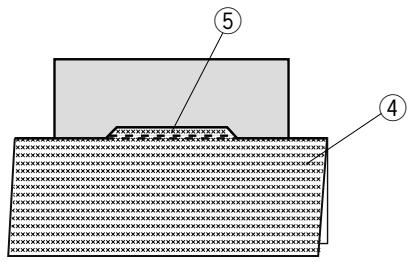
8
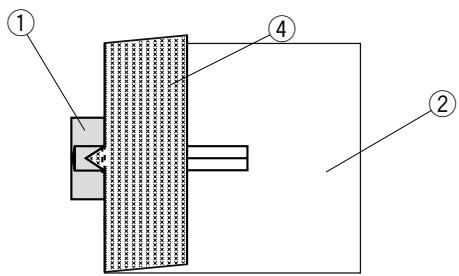
9
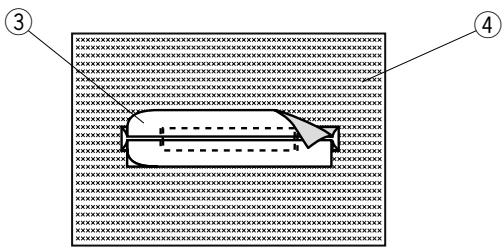
10
11
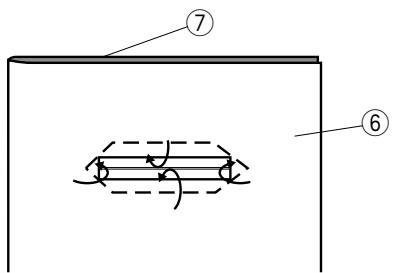
12
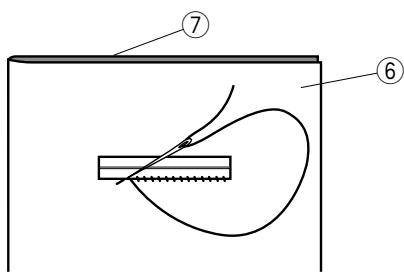
13
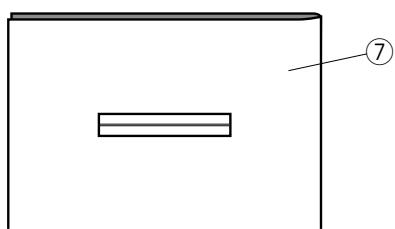
natural_image
Simple line drawing of a rectangular container with a labeled section (7), no text or symbols present.
7 Fold over the length of the garment fabric, sew back and forth beside the original seam to secure flaps of the patch.
④ Wrong side of garment fabric
⑤ Sew back and forth
8 Fold over the end of fabric and sew back and forth three times over the triangular end.
① Wrong side of patch
② Right side of garment fabric
④ Wrong side of garment fabric
9 The patch should be cut 1 to 1.5 cm (7/16" - 5/8") away from the hole. The corners should be cut rounded off as shown.
③ Right side of patch
④ Wrong side of garment fabric
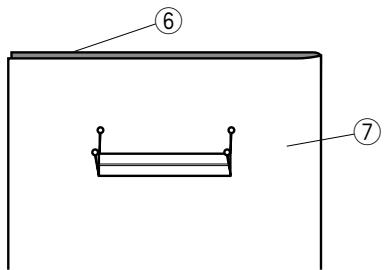
10 Place the facing on the wrong side of the garment fabric. Mark the 4 corners with pins as shown.
⑥ Facing
⑦ Garment fabric
11 Turn all the layers over and cut the buttonhole opening on the facing in the same way as step 2.
Four marker pins show you the corner points on the facing. Fold back each flap between the facing and patch.
⑥ Facing
⑦ Garment fabric
12 Stitch around the opening with a needle and thread as shown.
⑥ Facing
⑦ Garment fabric
13 The welted buttonhole is complete.
⑦ Garment fabric
1
2
natural_image
Technical line drawing of a sewing machine with hands operating it (no text or symbols present)
3
natural_image
Simple line drawing of scissors cutting through a saw (no text or symbols)
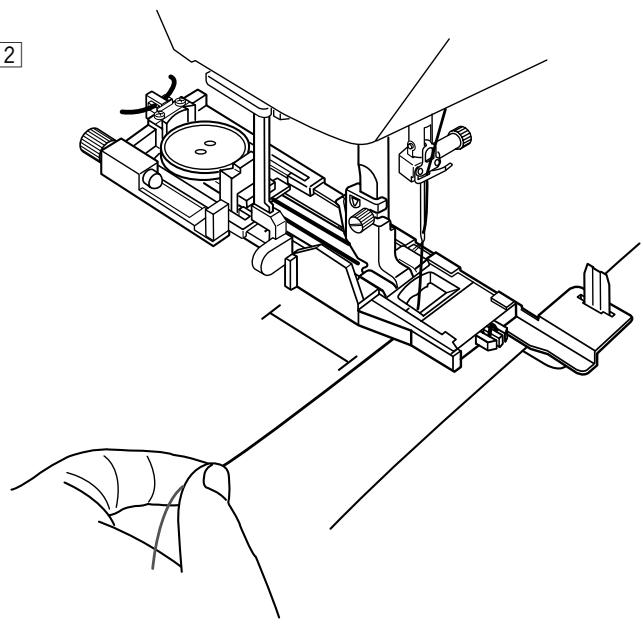
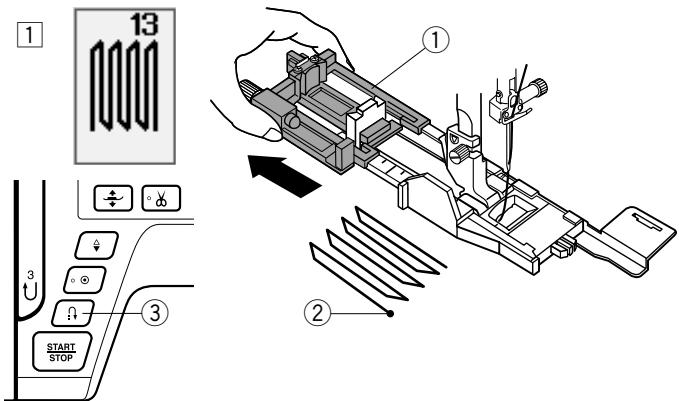
To sew a corded buttonhole, follow the same procedure as for B1 square (sensor) buttonhole.
Select pattern B1.
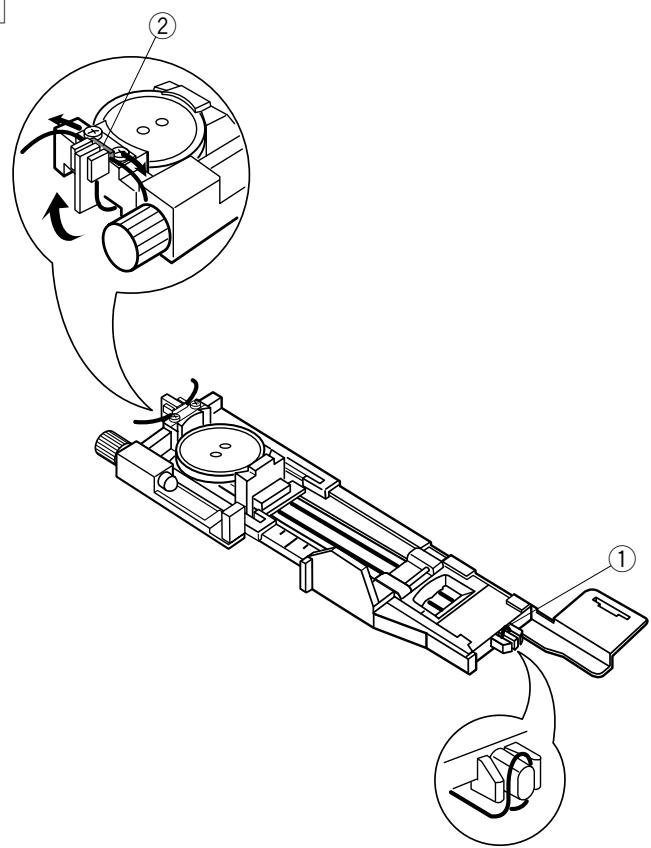
1 Place the button on the button holder on the buttonhole foot.
Hook a filler cord on the spur on the front of the foot. Bring the ends of cord toward the back and under the foot.
Bring up the ends of the cord and insert both ends between the ribs and metal plate.
① Spur
② Metal plate
Set the stabilizer plate as necessary and attach the buttonhole foot.
2 Lower the needle into the fabric where the buttonhole will start.
Lower the foot and buttonhole lever.
Pull the needle thread lightly to the left.
Start the machine to sew the buttonhole over the cord.
The machine stops automatically when finished.
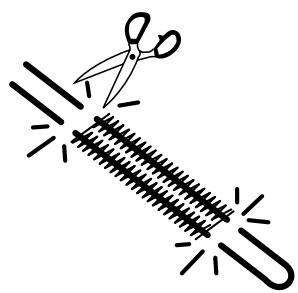
Remove the fabric from the machine and cut the sewing threads only.
3 Cut the filler cord at both ends as close to the buttonhole as possible.
NOTE:
Do not adjust the opening width wider than 0.8.
Set the stitch width in accordance with the thickness of the cord used.
To cut the buttonhole opening, refer to the instructions on page 39.
2
3
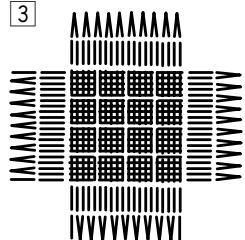
natural_image
Symmetrical pattern of repeating black and white vertical bars with no text or symbols
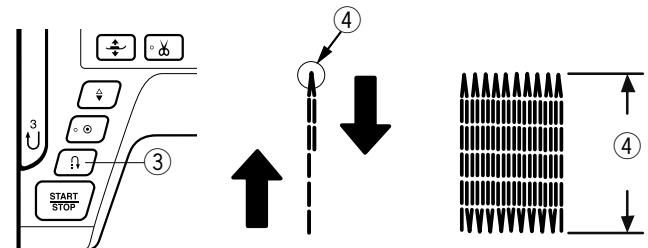
flowchart
graph TD
    A["Start Stop"] --> B{Step 3}
    B --> C["Directional Arrow"]
    C --> D["Downward Arrow"]
    D --> E["Waveform Display"]
    E --> F["Step 4"]
    F --> G["Downward Arrow"]
flowchart
graph LR
    A["Grid-like structure"] --> B["Vertical structure"]
    B <--> C["Vertical structure"]
Speciality Stitches
See page 79, 80 and 49 for referring sewing instructions of B12, B14 and B15.
B13 Darning
1 Attach the automatic buttonhole foot R and pull the button holder all the way out.
Place the fabric under the foot, and lower the needle at the starting point. Then lower the foot.
① Button holder
② Starting point
2 Start the machine and sew to the required length, then press the reverse button. This sets the darning length. Continue sewing until the machine stops automatically.
③ Reverse button
④ Required length
3 Sew another layer of darning over the first layer, at a right angle to it.
NOTE:
The maximum darning length is 2 cm (3/4") and the maximum width is 0.9 cm (3/8").
To sew the same size darning
When finished sewing, a confirmation message will appear.
Simply start the machine to sew another layer of darning stitches in the same size.
To sew the next layer of darning stitches in a different size, press the X key.
To sew a shorter darning
Sew the first line to the desired length and stop the machine.
Press the reverse button and start the machine again. The machine will sew the rest of the darning and stop automatically.
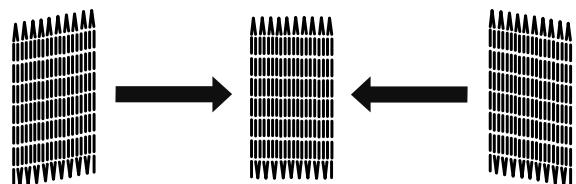
To adjust the evenness of darning stitches
You can correct unevenness of darning stitches by pressing the “−” or “+” key of the adjusting window. If the left corner is lower than the right side, press the “−” key to correct it.
If the right corner is lower than the left side, press the “+” key to correct it.
B15 Eyelet
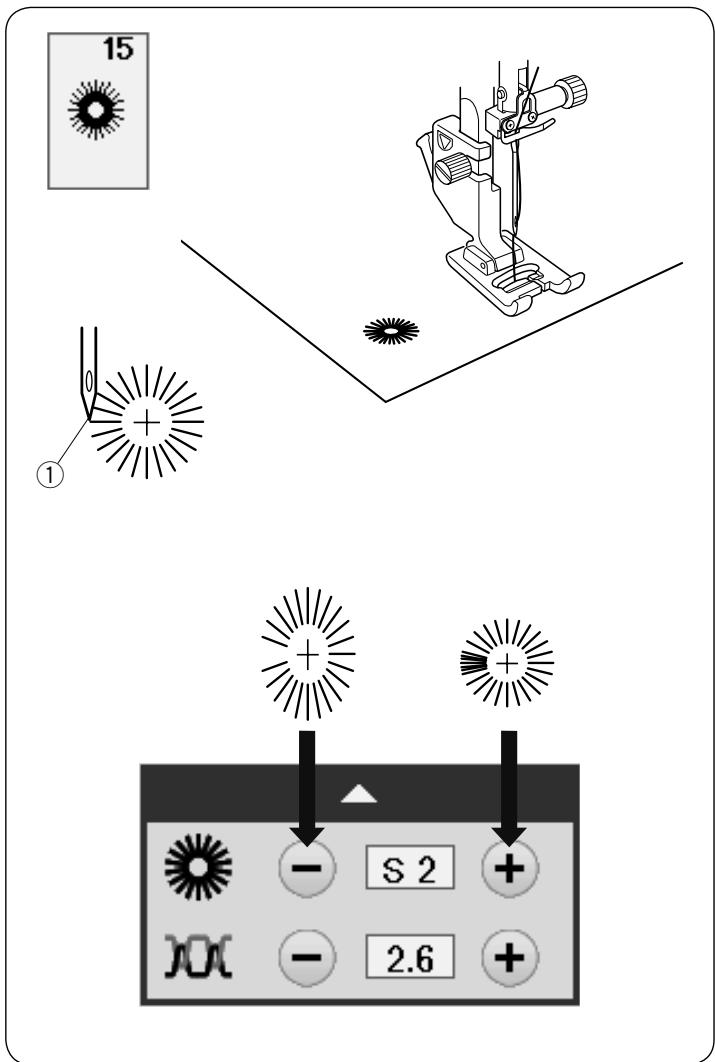
The eyelet is used for belt holes, etc.
Attach the satin stitch foot F.
To sew:
Place the garment under the foot and lower the needle to the starting point.
Sew until the machine stops automatically.
① Starting point
Open the eyelet with an awl, puncher or pointed scissors.
To correct the shape of an eyelet:
If the eyelet is open, press the “—” key.
If the eyelet overlaps, press the “+” key.
NOTE:
The shape can be adjusted within L1 to L3 (default setting is L2).
DECORATIVE STITCHES
Decorative Stitches
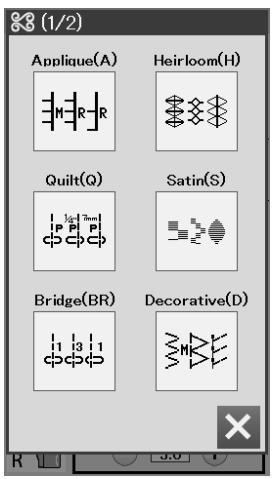
The patterns in this section are classified into 10 groups. These patterns are programmable and you can make a pattern combination.
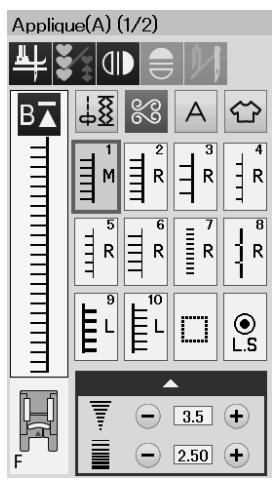
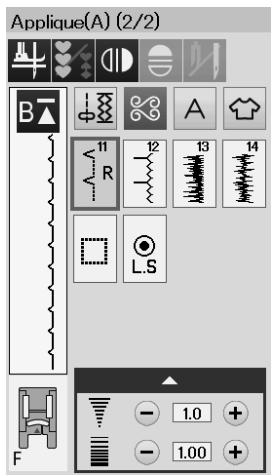
Applique stitches (A): 2 pages
Stitches in this group are for applique.
(Refer to page 81.)
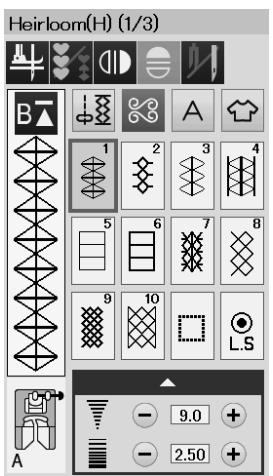
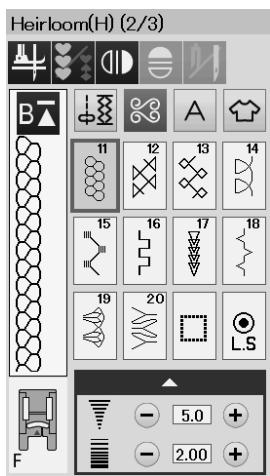
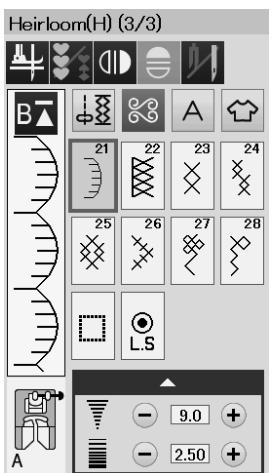
Heirloom stitches (H): 3 pages
This group provides heirloom stitches and cross stitches for craft sewing and home décor.
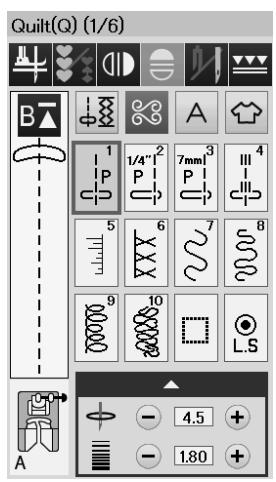
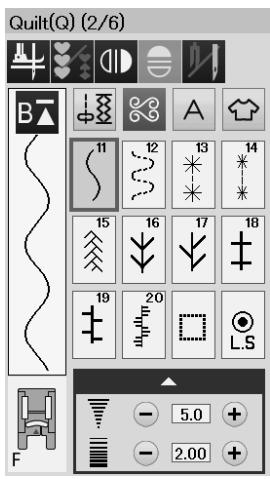
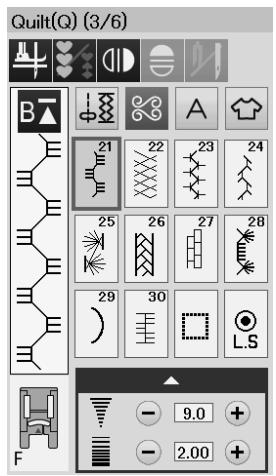
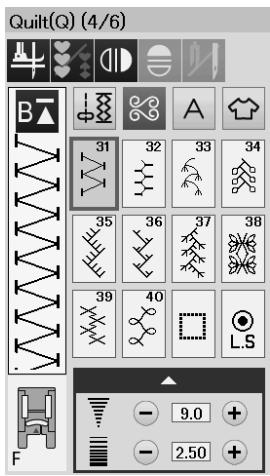
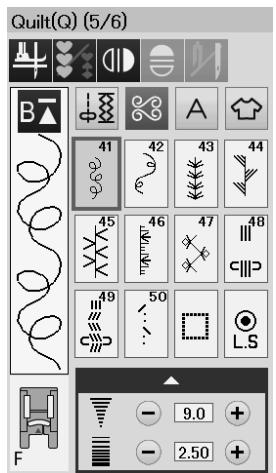
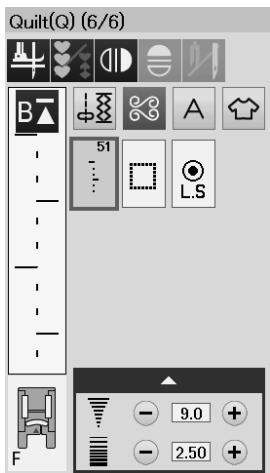
Quilting stitches (Q): 6 pages
Stitches in this group are for patchwork and quilting.
(Refer to pages 54, 82-85.)
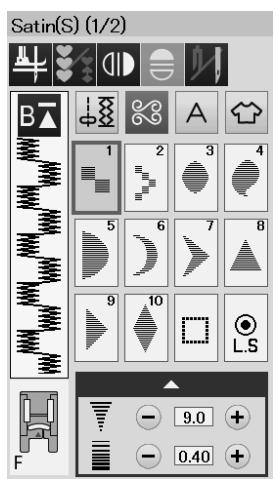
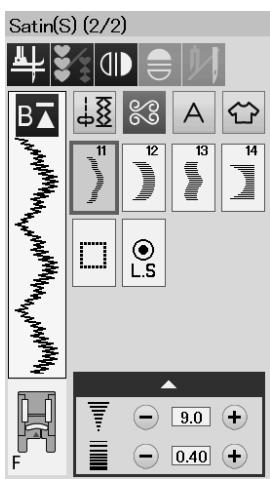
Satin stitches (S): 2 pages
The stitches in this group can be elongated up to 5 times their original length while the stitch density remains the same.
(Refer to page 55.)
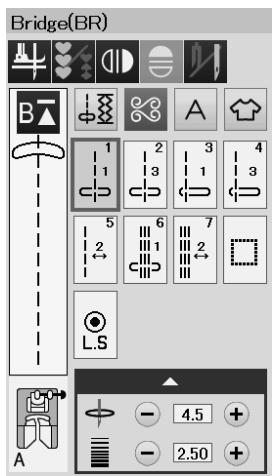
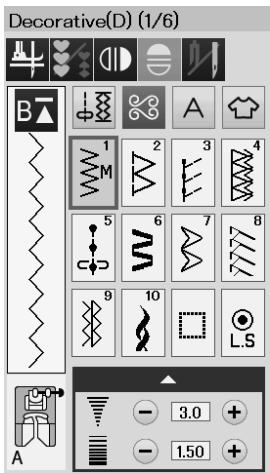
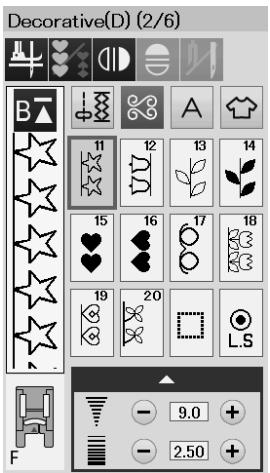
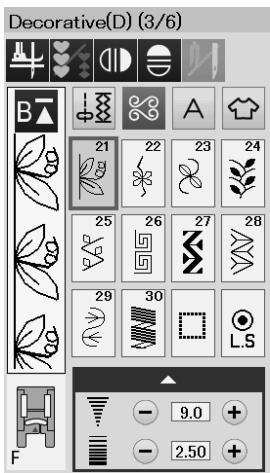
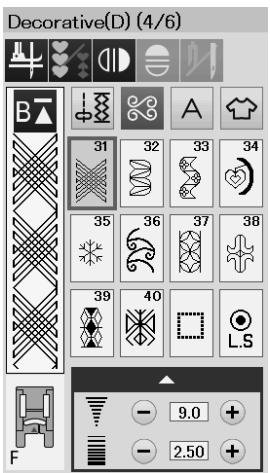
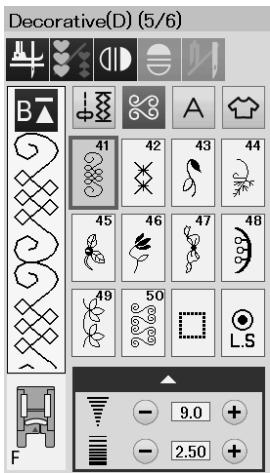
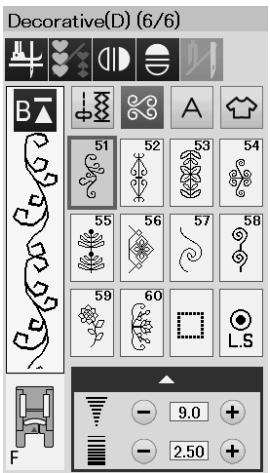
Bridge stitches (BR): 1 page
Bridge stitches are used for inserting straight stitches after a stitch pattern.
The number beside the stitch image on the straight stitch key indicates the stitch count of a programmable unit.
Patterns BR5 and BR7 will inherit the needle drop position and stitch length of the previous pattern in the programmed pattern combination.
(Refer to page 58.)
Decorative stitches (D): 6 pages
60 attractive patterns are available in this group.
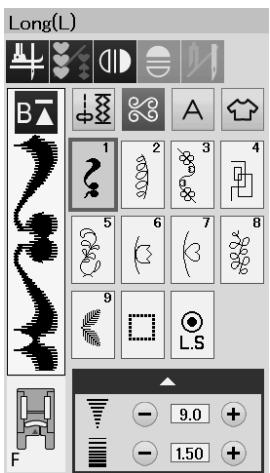

Long stitches (L): 1 page
Patterns in this group are ideal for decorating garments and for adding border trims.
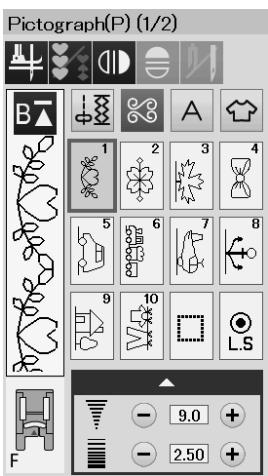
Pictograph stitches (P): 2 pages
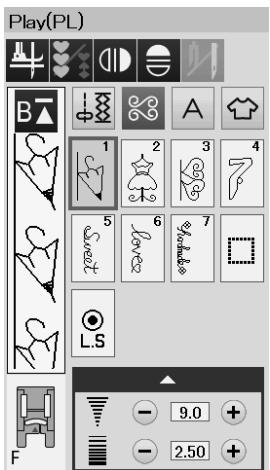
Play stitches (PL): 1 page
There are many cute designs, fancy motifs and calligraphy available in these groups.
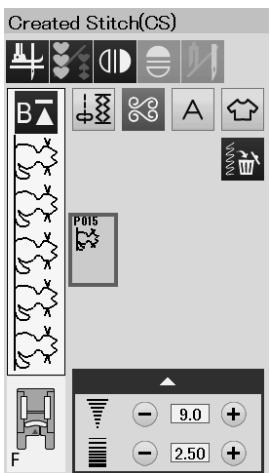
Created stitches (CS)
In this section, you can select original stitch patterns created with Stitch Composer.
Refer to page 56 for how to transfer created stitch patterns from the PC to the machine.
natural_image
Line drawing of a handbag with floral patterns and a handle (no text or symbols)
Quilting(Q)
Using the Quilting Guide Bar
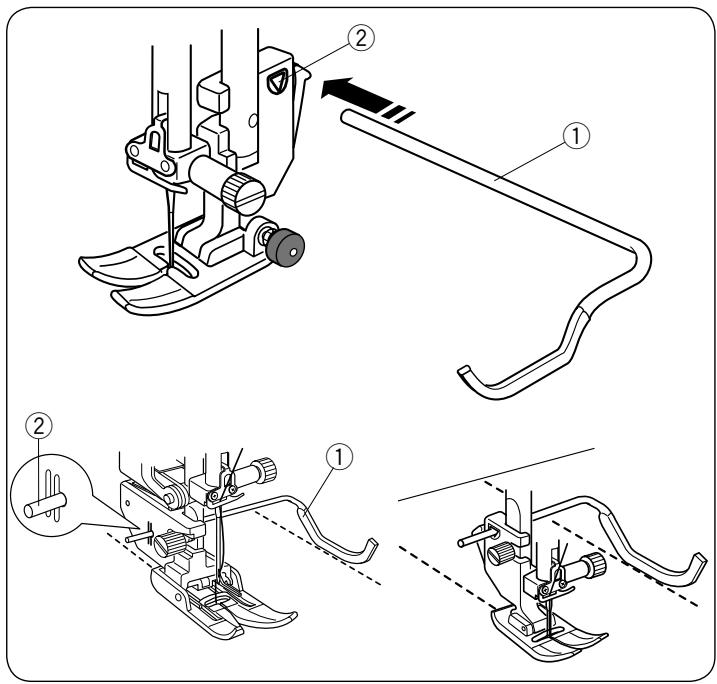
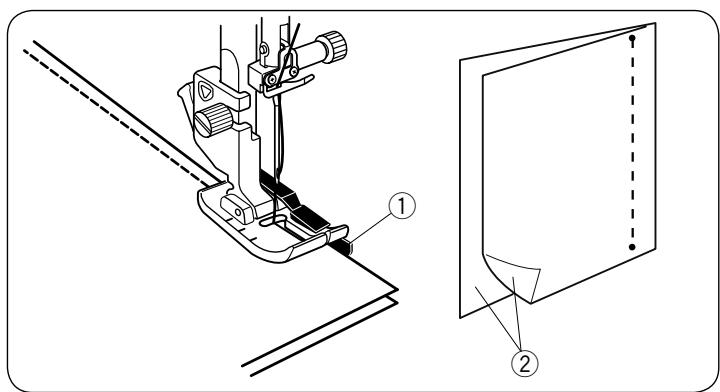
The quilting guide bar is helpful when sewing parallel, evenly spaced rows of stitches.
Insert the quilting guide bar into the hole in the back of the foot holder. Slide the quilting guide bar and set it to the desired spacing.
① Quilting guide bar
② Hole
Sew rows of stitches while tracing the previous row of stitches with the quilting guide bar.
Q1-Q3 Patchwork Piecing
Patterns Q1 to Q3 are special stitches for seaming patchwork pieces.
Patterns Q2 and Q3 are for patchwork piecing with 1/4" and 7 mm seam allowances respectively.
Use the 1/4" seam foot O.
Place the patchwork pieces right sides together. Sew while guiding the edge of fabric along the guide.
① Guide
② Right side of the fabric
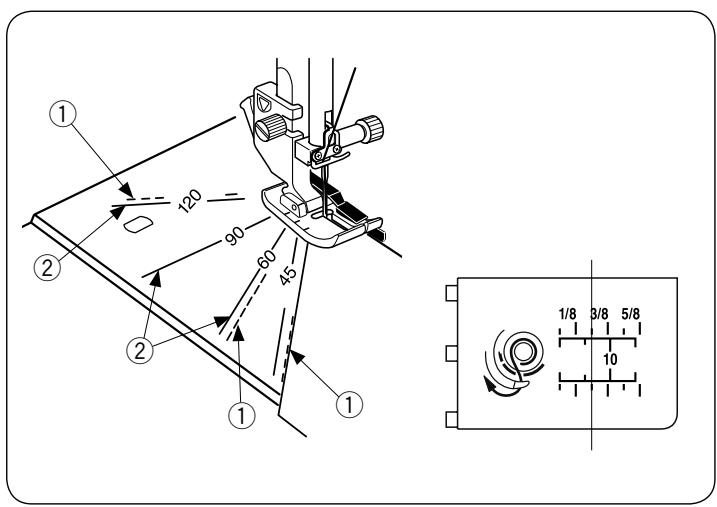
Angle Scales on the Needle Plate
You can easily seam patchwork pieces at the desired angle without marking, by using the angle scales on the needle plate.
The angle scales are marked at 45, 60, 90 and 120 degrees.
Use the broken lines when piecing the patchwork pieces with the 1/4" seam foot O as illustrated.
① Broken line
NOTE:
Use the solid lines when piecing the patchwork pieces with the zigzag foot A. Align the edge of the fabric to the 1/4" seam guide line.
② Solid line
③ 1/4" seam guide line
Q48-Q51 Hand-look quilt stitches
Patterns Q48 to Q51 are special stitches for quilting which look like hand sewn stitches.
Use a transparent nylon thread for the needle and ordinary sewing thread for the bobbin.
The bobbin thread is pulled up on the right side of the fabric and the stitches look as if they were sewn by hand.
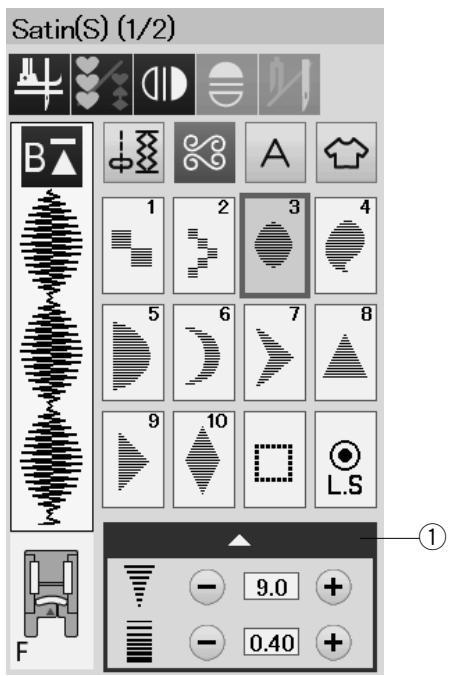
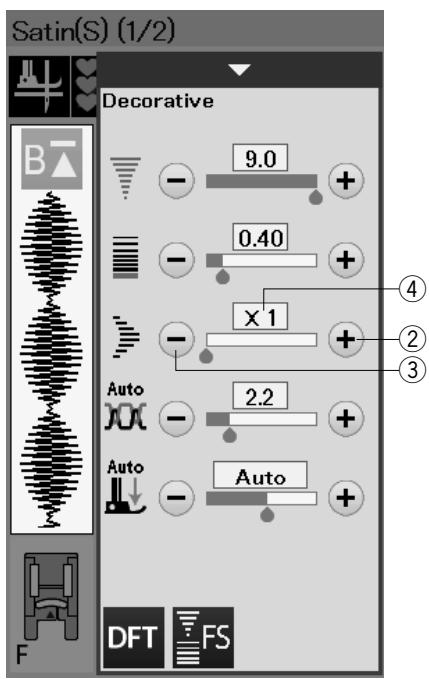
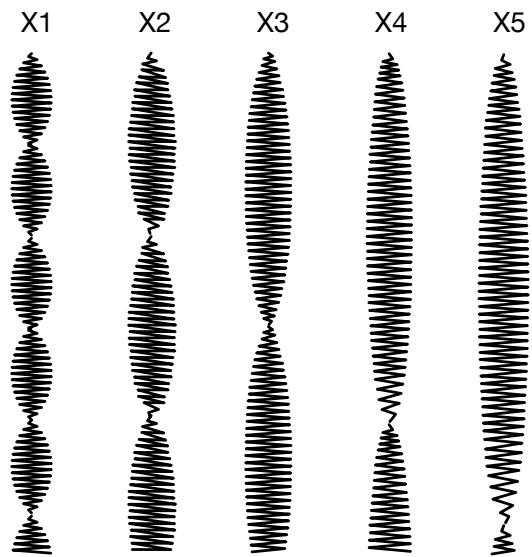
S1-S14 Decorative Satin Stitches
Elongation Ratio
Patterns S1 to S14 are decorative satin stitches for which the pattern length can be elongated without changing the stitch density.
Press the setting bar ① to expand the manual setting window.
① Setting bar
Press the “+” key to elongate the stitch pattern.
② “+” key (elongation)
To reduce the elongation ratio, press the “−” key.
③ “-” key (elongation)
The pattern can be elongated up to 5 times the original length.
The elongation ratio is indicated in the box.
④ Elongation ratio
You can also alter stitch density and stitch width.
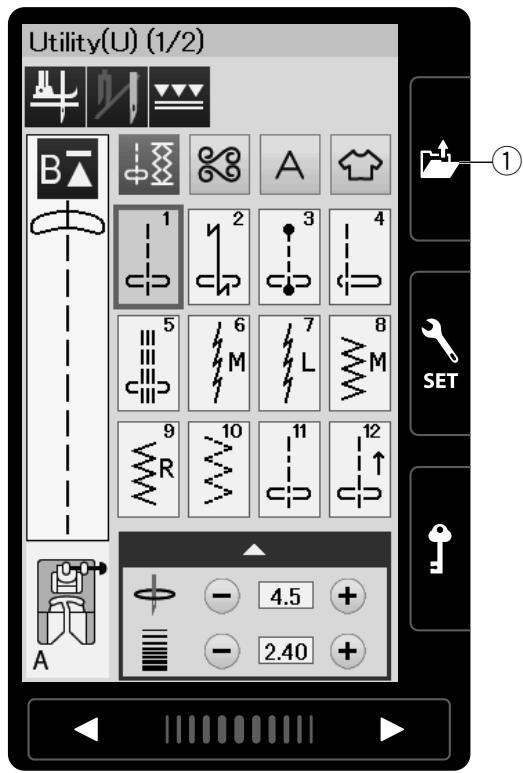
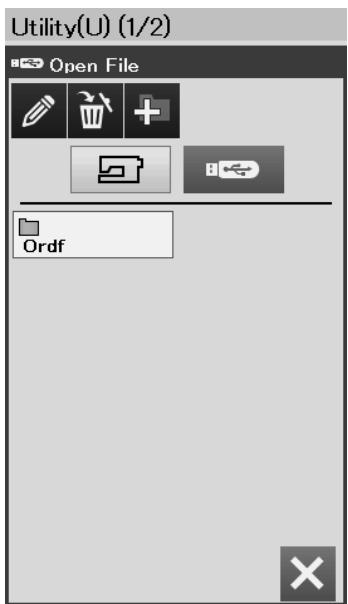
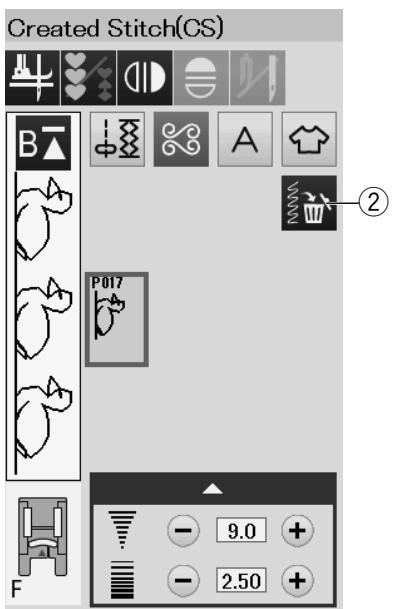
Created Stitches (CS)
Original stitch patterns created with Stitch Composer are saved in this group.
Insert the USB flash drive containing the original stitch patterns and press the open file key.
① Open file key
Select the USB icon and the folder list will appear.
Select the desired folder to open and the file list will appear.
Select the desired file and the original stitch pattern is saved and the pattern selection key is created.
You can select, program and sew these patterns the same way as with the built-in stitch patterns.
To delete the pattern, press the delete key and select the pattern to delete.
A confirmation message will appear. Press the OK key to delete the pattern.
② Delete key
NOTE:
- Up to 40 patterns can be saved in this group.
- Twin needle sewing is not available for the created stitches.
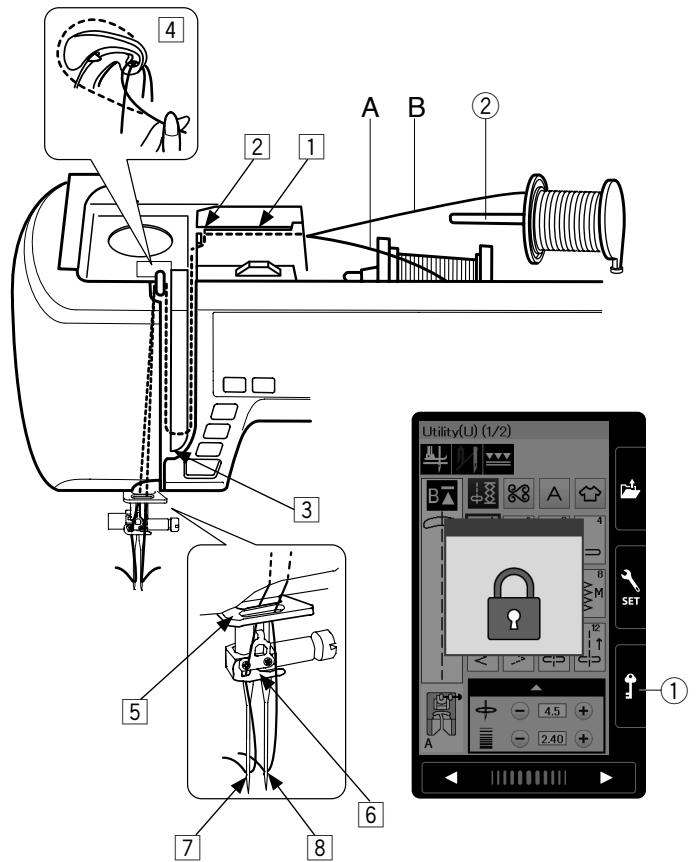
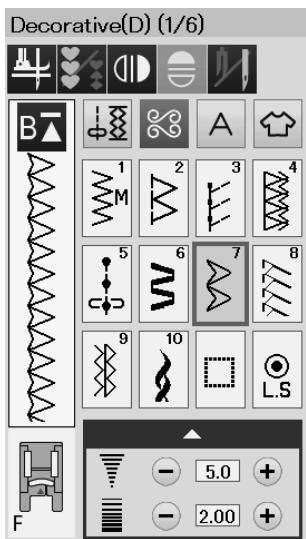
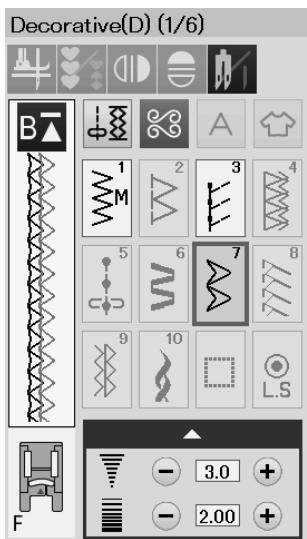

natural_image
Repeating geometric pattern of black triangles arranged in a zigzag, vertical line (no text or symbols)
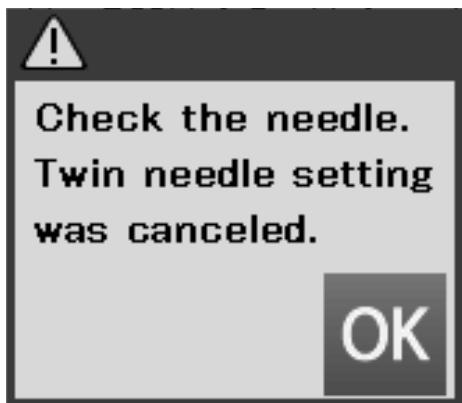
Twin Needle Sewing
Some of the utility stitches and decorative stitches can be sewn with a twin needle.
Replace the needle with the twin needle supplied with the standard accessories.

CAUTION:
Turn the power switch off or press the lockout key before changing the needle.
Do not use twin needles other than the one included in the standard accessories, otherwise the needle may hit the needle plate, foot or hook and break.
① Lockout key
Insert the extra spool pin into the hole under the top cover.
Place a spool of thread and the felt on the additional spool pin and the spool stand (refer to page 10).
② Extra spool pin
Draw both threads from the spools and pass them through the threading points from 1 to 4.
Slip the thread A through the needle bar thread guide 5, then pass through points 6 and 7 as illustrated.
Thread the thread B through the front hole of needle bar thread guide 5, then pass it through the needle hole 8.
Make sure that the two strands of thread from the spools do not get tangled.
NOTE:
- Threading from points 1 to 4 is the same as for a single needle (refer to page 13).
- The needle threader cannot be used with the twin needle.
Press the twin needle key and select the desired pattern. Patterns not suitable for twin needle sewing cannot be selected (pattern selection keys are grayed out).
Buttonholes, specialty stitches and monogram cannot be selected.
③ Twin needle key
NOTE:
- When you sew patterns with the twin needle, test the stitches first before you sew on the garment.
- Use the zigzag foot A or satin stitch foot F for twin needle sewing.
- Use the threads #60 or finer.
- When changing the sewing direction, raise the needle and presser foot then turn the fabric (foot up for pivoting option is not available when the twin needle is selected).
- Use the thread cutter on the face plate when cutting threads.
After twin needle sewing is finished, press the twin needle key and the warning message will appear. Press the OK key and replace the twin needle with a single needle.
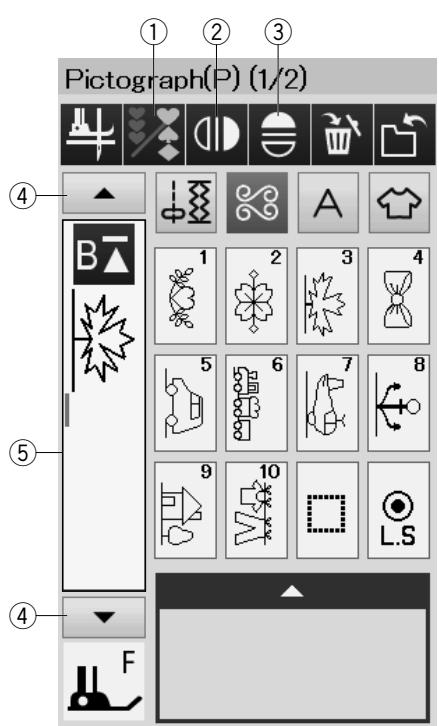
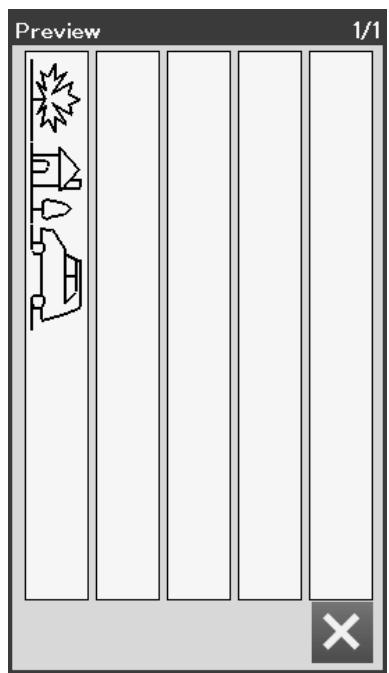


PROGRAMMING A PATTERN COMBINATION
The patterns in the decorative stitch category and monograms can be programmed to make a pattern combination.
Press the program key and select as many patterns as you wish to program.
You can program up to 100 patterns in each combination. The images of programmed patterns are shown on the left side of the visual touch screen.
① Program key
Mirror Image of Patterns
To sew or program the pattern as a mirror image, press the vertical mirror key or horizontal mirror key.
Select the desired patterns to create the mirror image.
Press the vertical or horizontal mirror key again to cancel the mirror image function.
② Vertical mirror key
③ Horizontal mirror key
To view the entire pattern combination, press the cursor key to scroll over the pattern combination or press the edit box to show the entire pattern combination at a glance.
④ Cursor keys
⑤ Edit box
NOTE:
Horizontal mirror image is available only for the specific patterns. For pattern identification, these patterns are shaded in light grey on the reference chart inside the top cover.
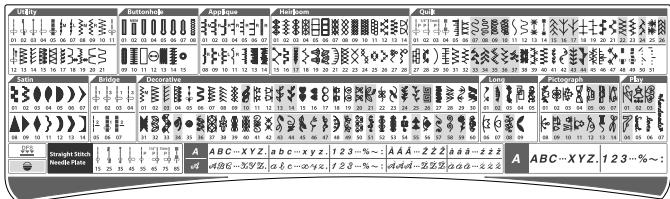
Mirror image function will be canceled and mirror image icon will disappear if the selected pattern is not suitable for the mirror image.
NOTE:
Presser foot pressure cannot be adjusted to the stitch patterns of a pattern combination individually. If you attempt to do so, only the last pattern's presser foot pressure settings are applied to all the programmed patterns.
Bridge Stitches
Bridge stitches are used for inserting straight stitches after a stitch pattern.
If you want more space between French knots (D5), for example, insert pattern BR5 after pattern D5.
Two counts of straight stitches are added to pattern D5.
NOTE:
Patterns BR5 and BR7 will inherit the stitch length and needle drop position of the previous pattern in the pattern combination.
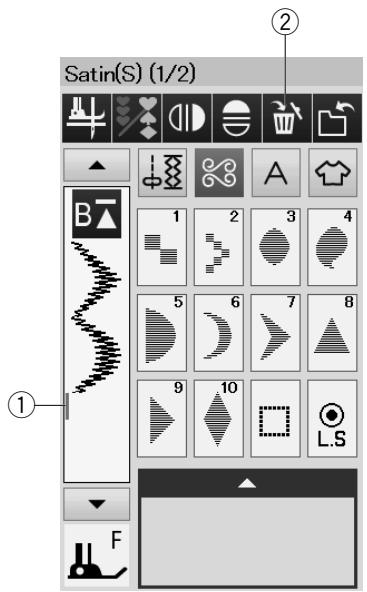
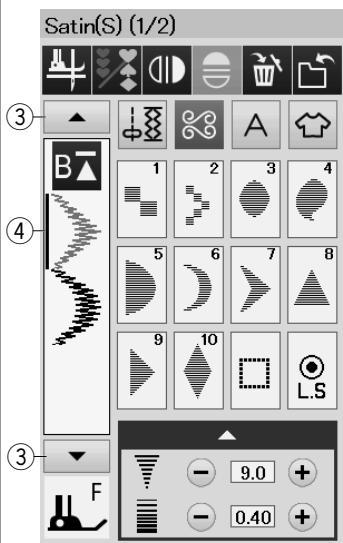
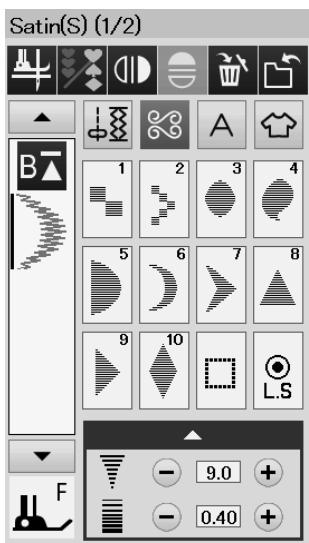
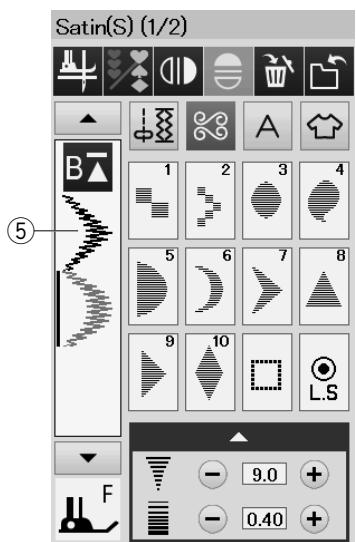
Editing a Pattern Combination
Deleting a Pattern
The pattern before the cursor or shown in blue is deleted by pressing the delete key.
① Cursor
② Delete key
To delete a pattern in the middle of a combination, press the cursor key to select the pattern you wish to delete. The stitch image of the selected pattern turns blue. Press the delete key to delete the selected pattern.
③ Cursor key
④ Selected pattern
Inserting a Pattern
Press the cursor key to select the pattern next to where you wish to insert a pattern. Enter the desired pattern to insert it before the selected pattern.
⑤ Inserted pattern
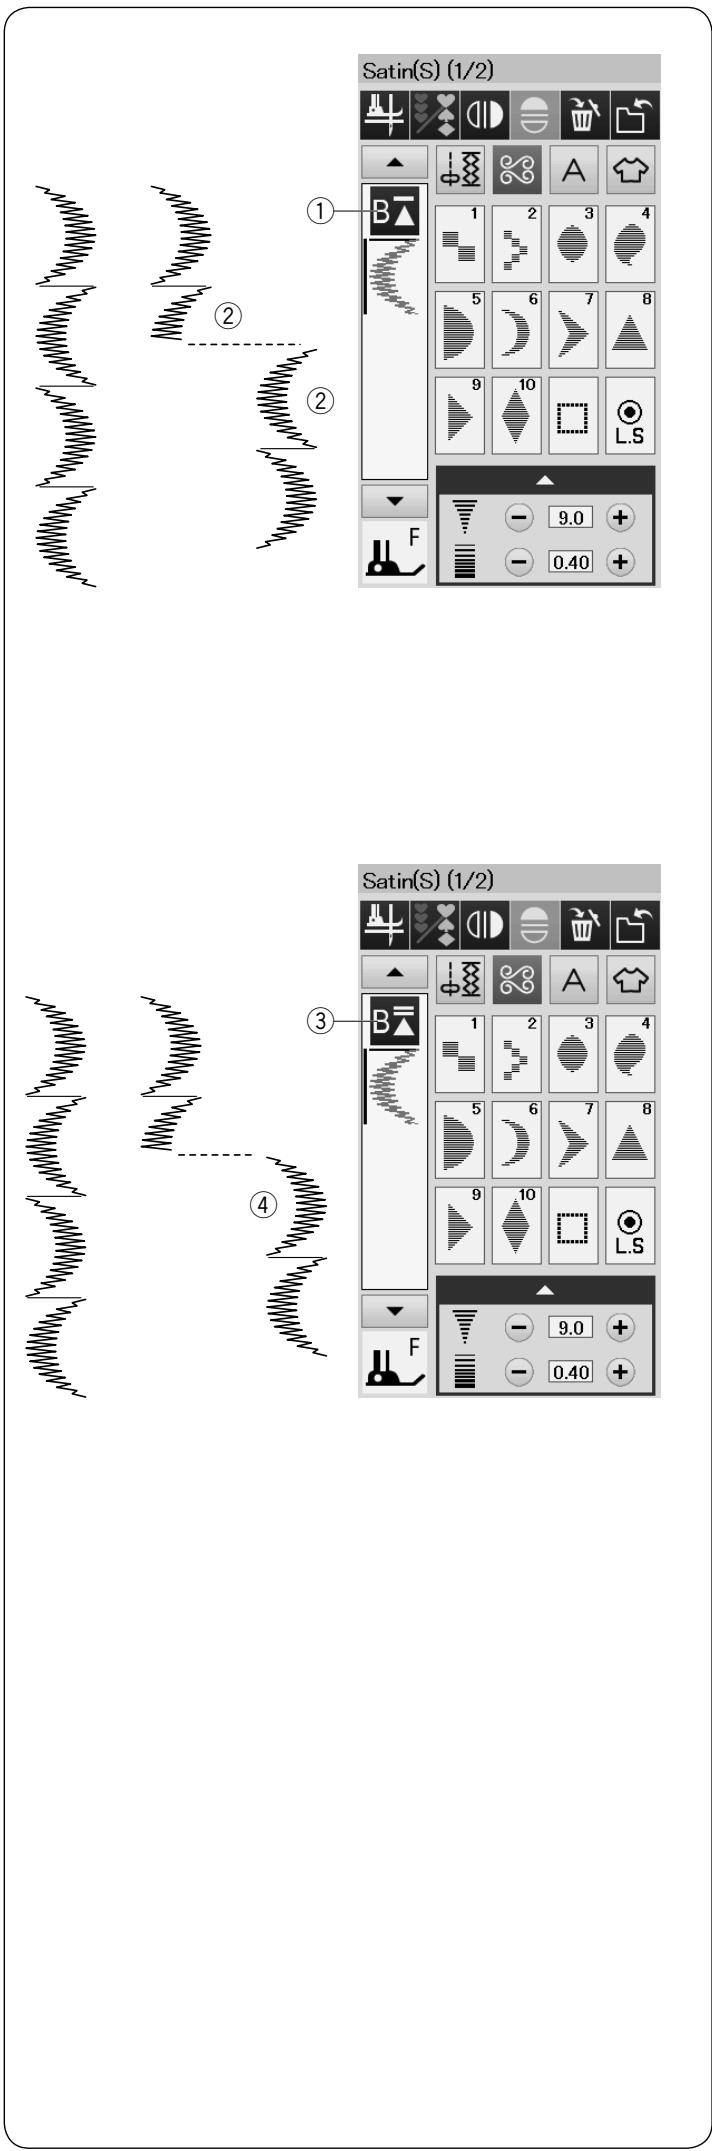
Startover Key
This is a 2-way function key to start sewing a pattern combination over from the beginning.
When you stop sewing a pattern combination, the startover key is activated.
The key shows a triangle and single bar that means the machine will start over from the current pattern.
When you press the startover key, the key will change and show a triangle and double bar that means the machine will start over from the first pattern of the combination.
Current pattern startover
If you wish to start sewing from the beginning of the current pattern, press the startover key once and start the machine.
① Startover key (current pattern)
② Current pattern
First pattern startover
If you wish to start sewing from the beginning of the first pattern of the combination, press the startover key twice and start the machine.
③ Startover key (first pattern)
④ First pattern
NOTE:
If auto thread cutting is done, the machine will startover from the first pattern.
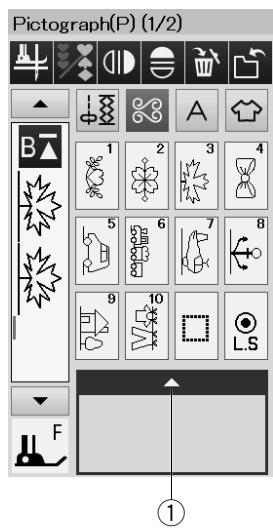
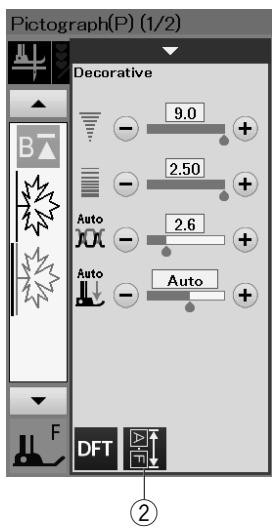
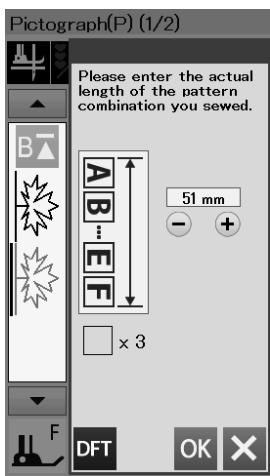
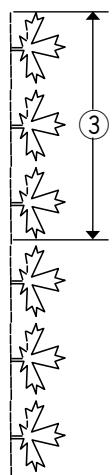
natural_image
Diagram showing snowflake patterns with a numbered label (3) and vertical dimension line, no text or symbols present.
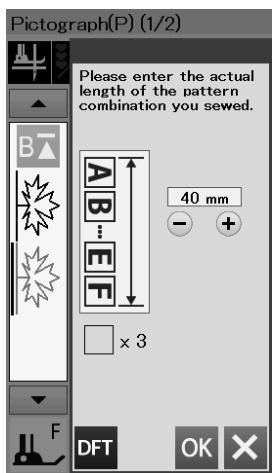
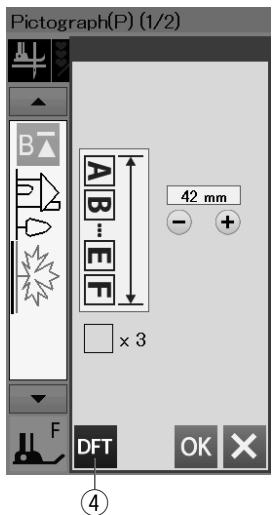
Checking Pattern Combination Length
You can check the total length of the pattern combination by pressing on the pattern combination length key indicated in the manual setting window.
Press the setting bat to open the manual setting window.
① Setting bar
② Pattern combination length key
The readout of the total length is a theoretical value and the actual length may vary depending on sewing conditions.
For example, select the pattern P3 three times, and sew a pattern combination.
If the actual length differs considerably from the readout, measure the actual length and enter the nearest value by pressing the “+” or “−” key.
In this case, the theoretical value is 51 mm. However, if the actual length ③ is 40 mm, enter 40 mm by pressing “—” key. Press the OK to register it.
③ Actual length
The readout is adjusted automatically when calculating the length of other pattern combinations.
The message “Please enter the actual length of the pattern combination” disappears to indicate that the displayed value is adjusted already.
For example select patterns P5, P9 and P3.
The theoretical value is 53 mm. However, the read out is calculated according to the measured actual length. In this case, the adjusted value is 42 mm.
Press the default key to clear the entered actual length.
④ Default key
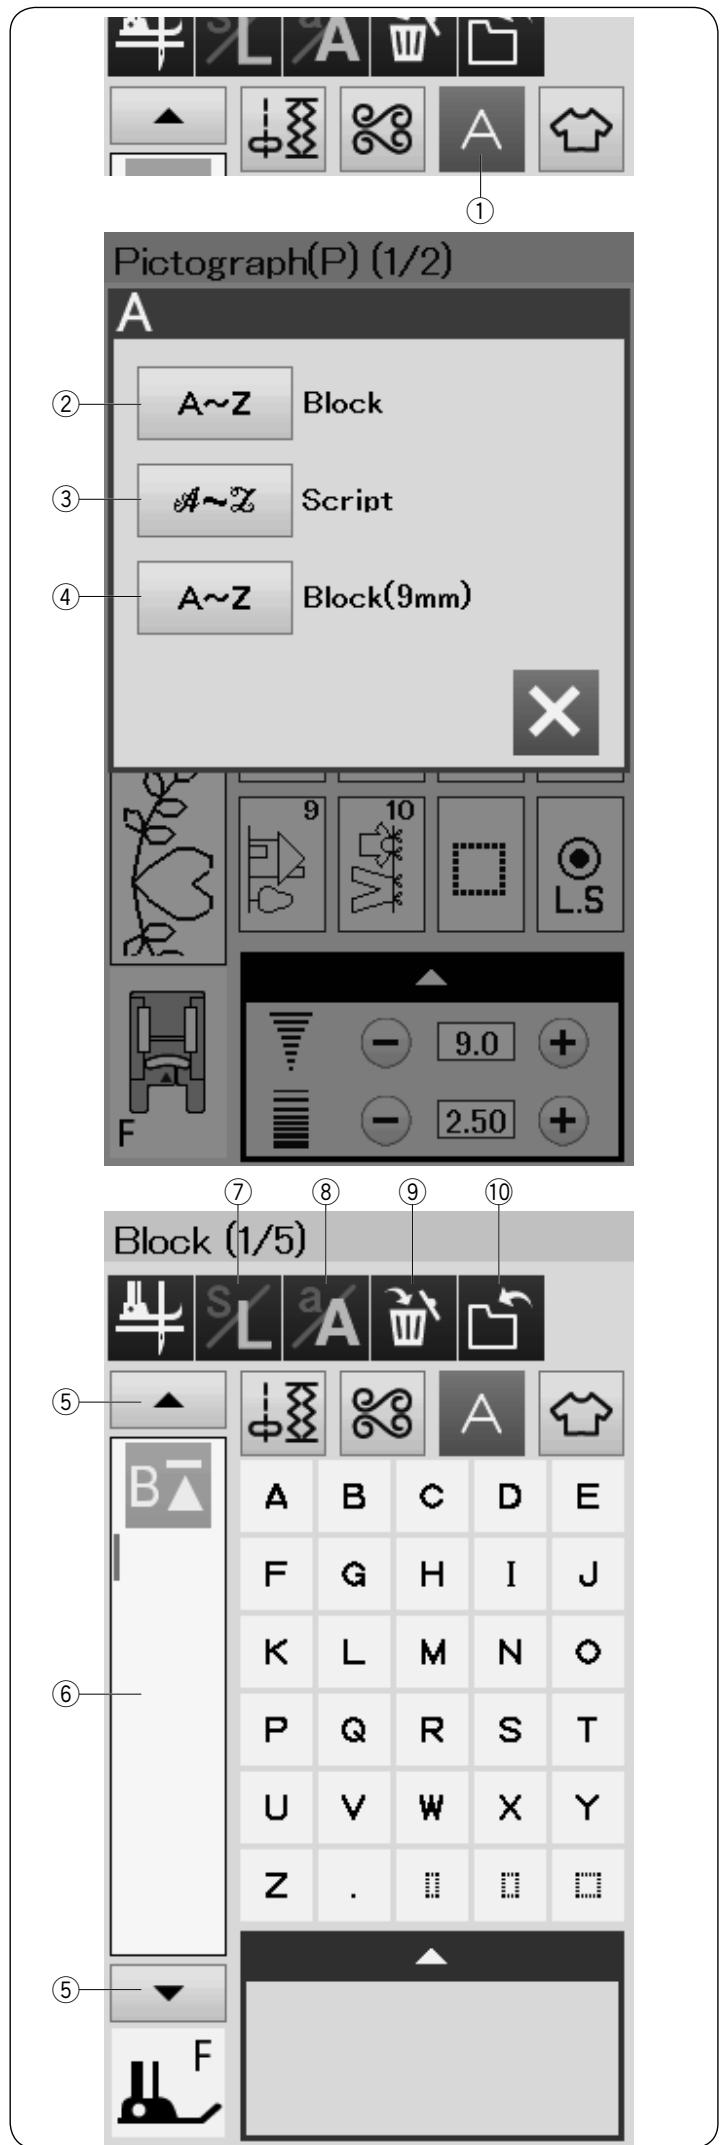
You can program letters and symbol designs for monogramming.
Press the Monogram key and the font selection window will open.
You can select one of 3 fonts*.
Select the desired font by pressing the corresponding key.
① Monogram key
② Block font key
③ Script font key
④ Block font (9 mm) key
The monogram mode window will open.
NOTE:
- The height of Block font (9 mm) is approximately 9 mm.
* If you select Russian or Japanese language for the visual touch screen, you can select Cyrillic alphabets or Japanese font as well.
Function Keys
⑤ Cursor key
Press the cursor key to move the cursor up or down.
⑥ Edit box
Press the edit box to view the entire monogram.
⑦ Letter size key
Press this key to select the full size (L) or small size (S).
⑧ Letter case key
Press this key to select the upper case or lower case.
⑨ Delete key
Press this key to delete the selected character or symbol.
⑩ File save key
Press this key to save the monogram as a data file.
NOTE:
Numbers, symbols and European letters are available on pages 2/5 through 5/5.
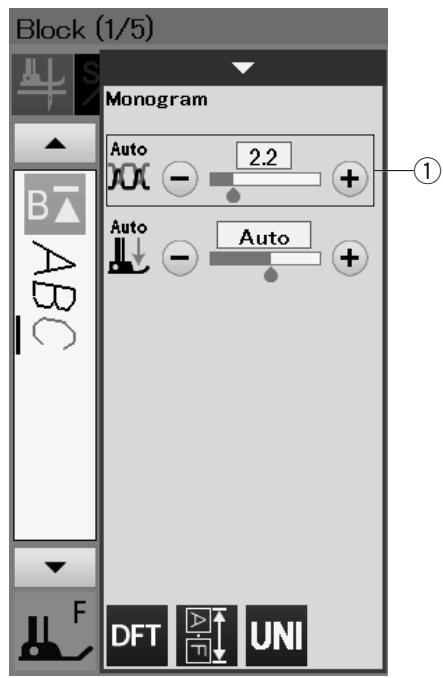
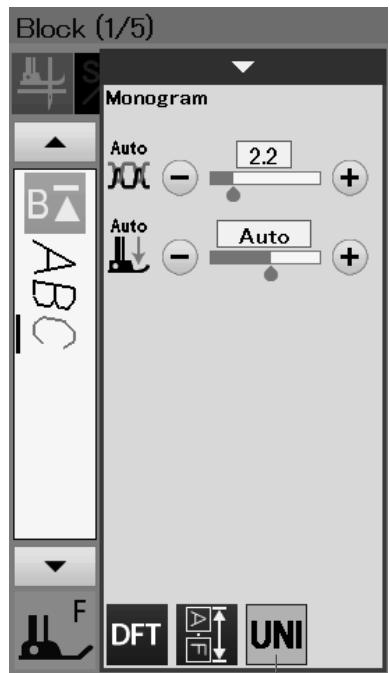
②
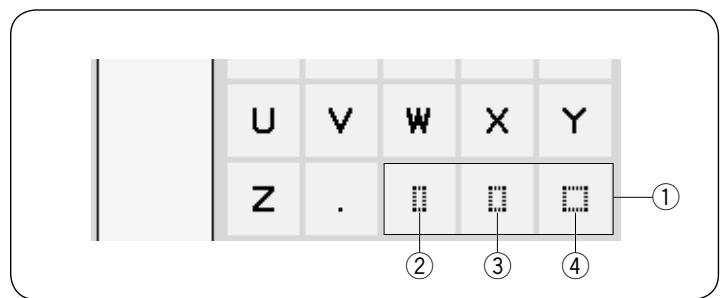
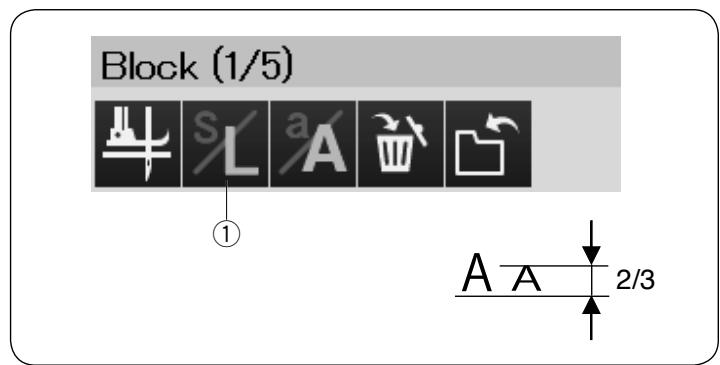
Manual Thread Tension
This machine is equipped with automatic thread tension control. However, you may need to manually adjust the tension balance depending on the sewing conditions.
To adjust the thread tension, press the setting bar to show the option.
Individual Thread Tension Adjustment
To apply the thread tension adjustment to each letter individually, select the letter by moving the cursor.
Press “+” or “−” to adjust the thread tension of the selected letter. The adjusted thread tension is applied to the selected letter.
① Thread tension adjustment
Unified Thread Tension Adjustment
To apply the thread tension adjustment to all letters together, you do not need to select the letters.
Press the unified thread tension key ②.
Press “+” or “−” to adjust the thread tension.
The adjusted thread tension is applied to all entered letters.
When unified thread tension control is applied, the unified thread tension key turns to yellow.
Press the unified thread tension key again to deactivate the unified thread tension adjustment.
Spacing
To enter a space in monogramming, press one of the three space keys on the lower right corner of the monogram selection.
① Space keys
② Small-size space
③ Medium-size space
④ Large-size space
Reducing the Size of Letters
To reduce the height of a character to approximately 2/3 of its original size, select the character and press the letter case key ①.
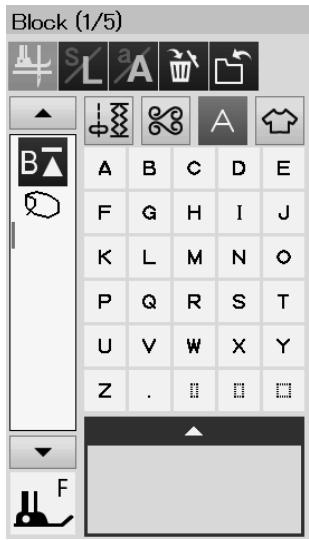
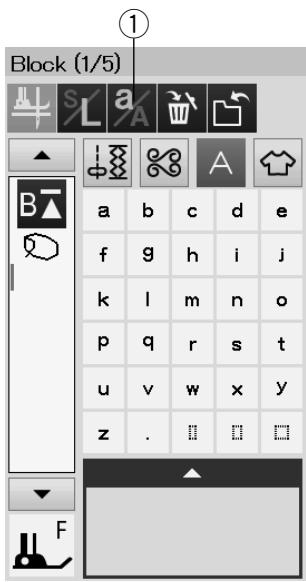
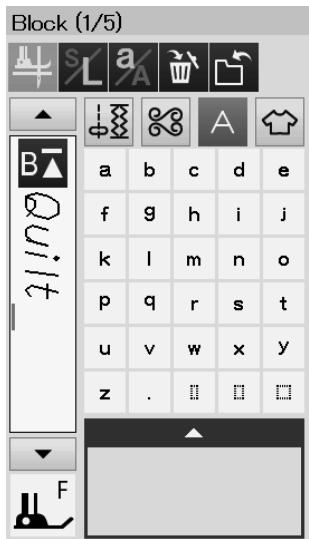
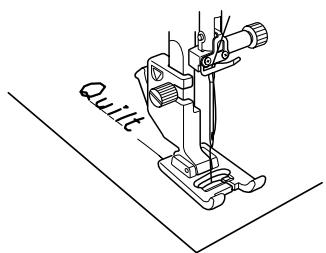
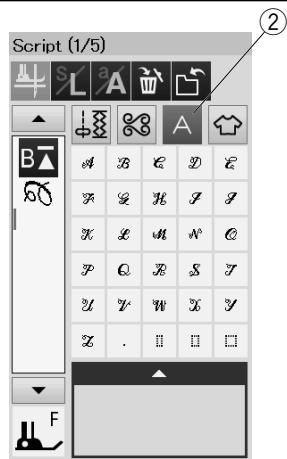
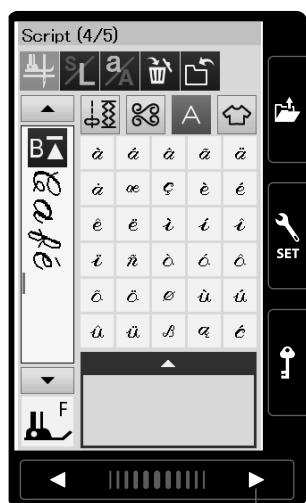
③
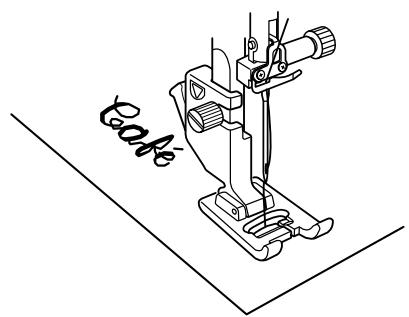
natural_image
Line drawing of a sewing machine with serpentine thread, no text or symbols present
Programming a Monogram
Simply enter the characters by pressing the corresponding keys to program a monogram.
Example 1: "Quilt" in Block font
Select Block font. Enter "Q".
Press the letter case key ① to select lower case.
① Letter case key
Enter "u", "i", "l" and "t".
Example 2: "Café" in Script font
Press the monogram key and select Script font. Enter "C".
② Monogram key
Press the letter case key and select lower case letters. Enter "a" and "f".
Press the page key ③ 3 times to go to the page 4 of 5. Press the letter case key. Enter “é”.
NOTE:
Use a blue tip needle for sewing a monogram.
Apply a sheet of stabilizer to fine fabrics or stretch fabrics.
Test sew to check the sewing results.
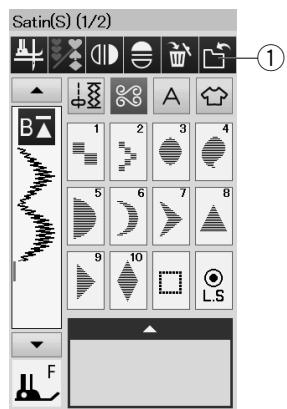
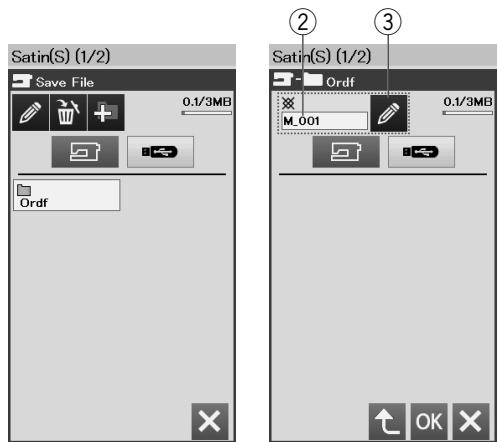
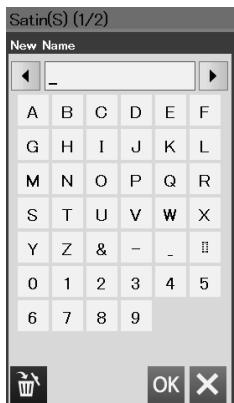
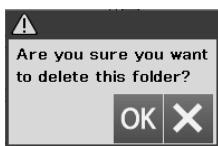
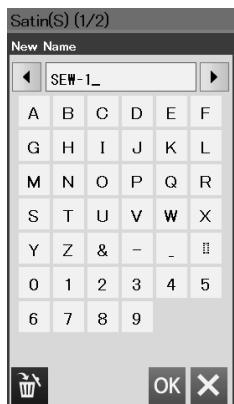
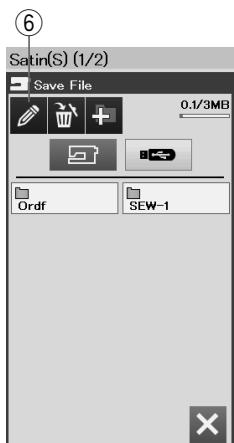
Saving a Pattern Combination
The pattern combination and monogram can be saved as a file in the machine's internal memory or a USB flash drive.
The machine has a USB port for USB flash drive.
Press the save file key after programming a pattern combination, and the save file window will open.
① Save file key
Select the location to where you wish to save the pattern combination.
The "Ordf" folder is shown.
Select the "Ordf" folder and the file name is assigned automatically starting from M_001.....in order.
Press the OK key to save the file under the assigned name.
② File name
If you wish to assign a unique name to the file, press the rename key and the keyboard window will open.
③ Rename key
Enter a new name and press the OK key to change the file name.
Press the OK key and the file is saved under the new name.
NOTE:
The files and folders are displayed on different pages.
Creating a new folder
Select a location for a new folder and press the new folder key. The keyboard window will open.
Enter a folder name and press the OK key.
The new folder is created under the assigned name.
④ New folder key
Deleting a file or folder
Press the delete key and select the file or folder to delete. A confirmation message appears.
Press the OK key to delete the file or folder.
⑤ Delete key
Changing the folder name or file name
Press the rename key and select the folder or file of which you wish to change its name. The keyboard window will open.
Enter the new name and press the OK key.
The name of the folder or file will change.
⑥ Rename key
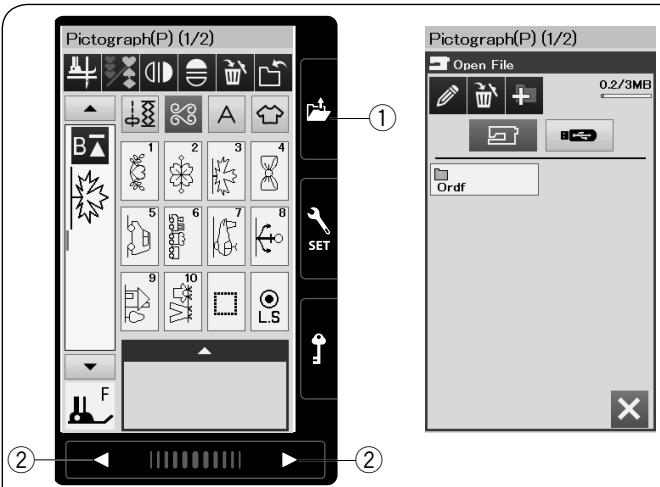
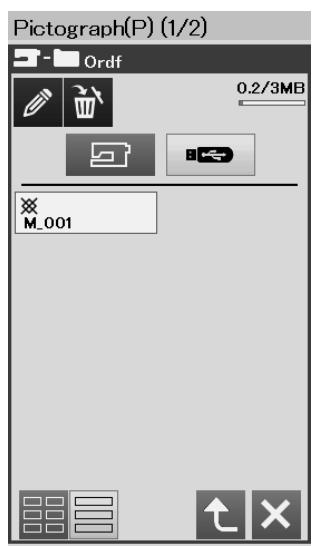
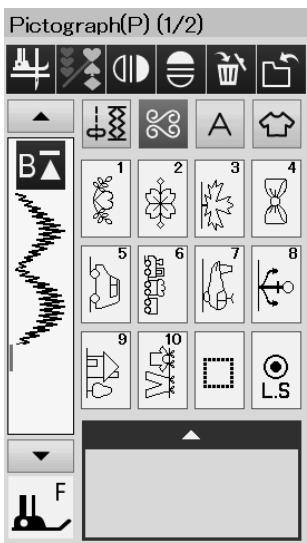
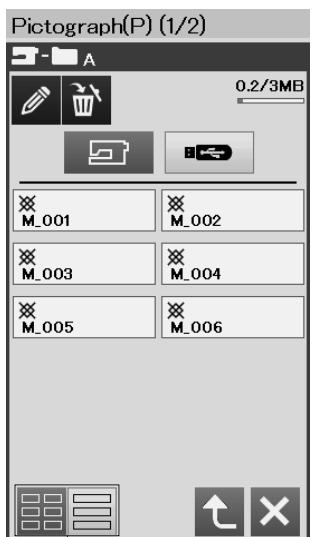
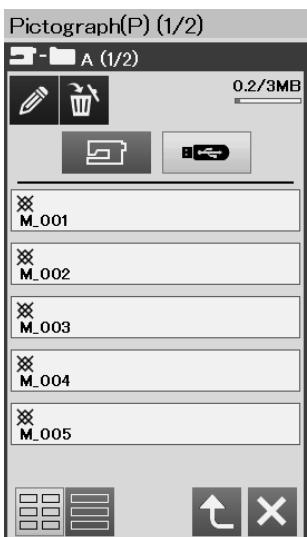
③
Opening a Pattern Combination
You can open the pattern combination and monogram saved in the machine's internal memory or a USB flash drive.
Press the open file key and the open file window will open.
① Open file key
Select the memory location; either the machine's internal memory or a USB flash drive.
The "Ordf" folder will appear.
NOTE:
- If you created any folders before, those folders will also appear.
- If you cannot find the desired folder or the file in the page, press the next or previous page key ② to display the other pages.
Select the desired folder and the file list will appear.
Select the desired file.
The screen will return to the ordinary sewing window showing the saved pattern combination or monogram.
Press one of the layout keys ③ to select the layout of the file list as shown.
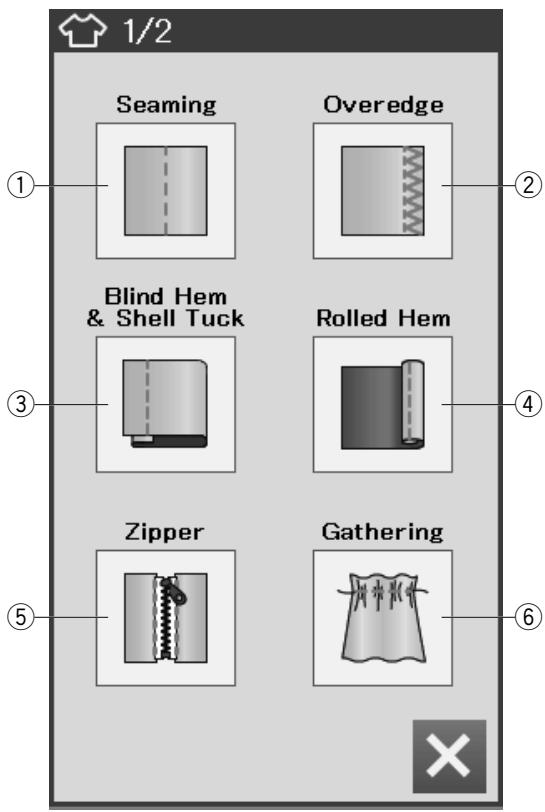
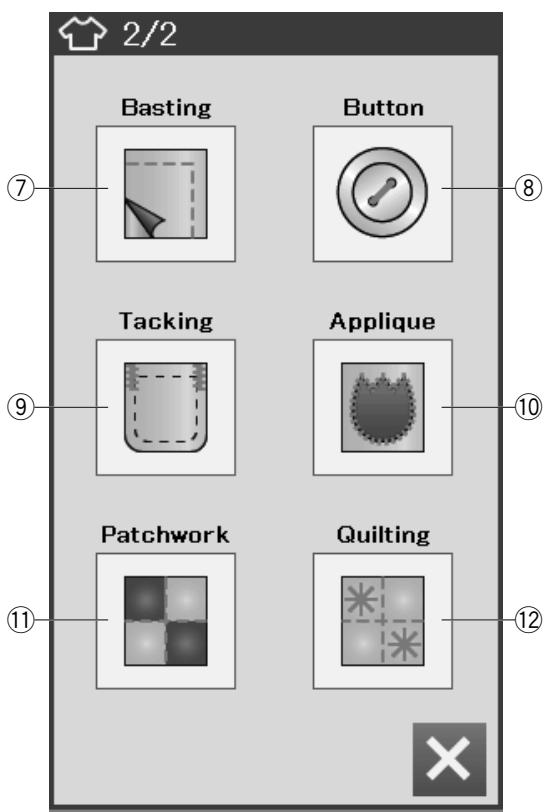
SEWING APPLICATION
Sewing Application
Sewing application is a unique feature that provides you with 12 useful sewing applications.
Press the sewing application key and the sewing application menu will open.
The 12 sewing applications are as follows:
① Seaming
② Overedge
③ Blind Hem & Shell Tuck
④ Rolled Hem
⑤ Zipper Sewing
⑥ Gathering
⑦ Basting
⑧ Button Sewing
⑨ Tacking
⑩ Applique
⑪ Patchwork
⑫ Quilting
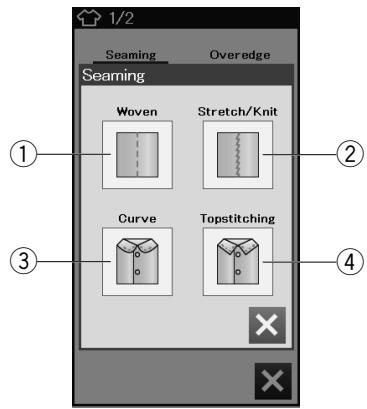
①
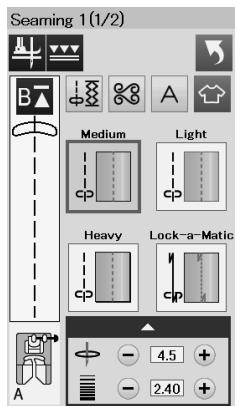
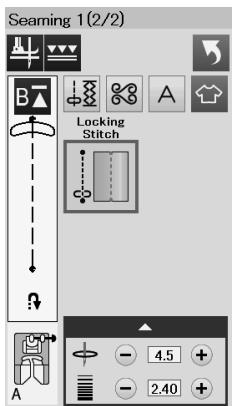
②
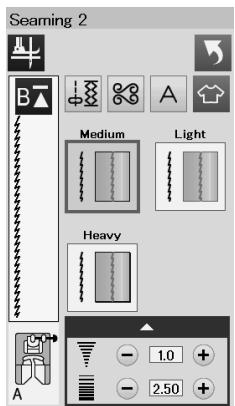
③
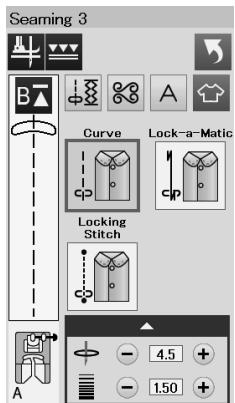
④
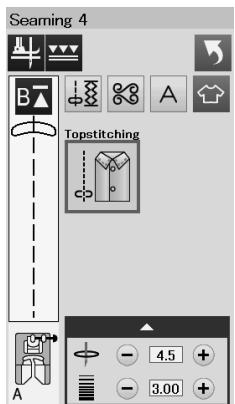
Seaming
There are 4 types of stitches for seaming in this group.
① Woven (Seaming 1)
Straight stitches for seaming regular woven fabrics.
② Stretch/Knit (Seaming 2)
Narrow stretch stitches for seaming stretch or knit fabrics.
③ Curve (Seaming 3)
Short straight stitches for seaming curved line.
④ Topstitching (Seaming 4)
Long straight stitch for topstitching with thick threads.
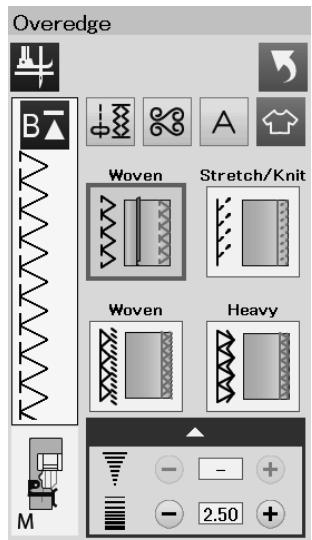
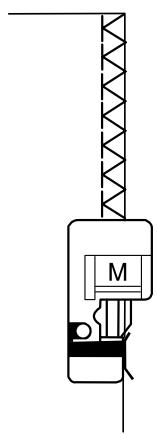
natural_image
Pure mechanical diagram showing a crane lifting a motor (no text or symbols)
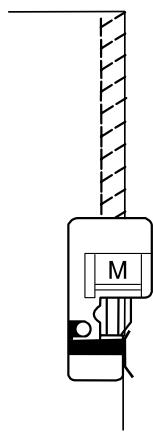
natural_image
Pure mechanical diagram showing a vertical rod connected to a central component labeled M, without any text or symbols.
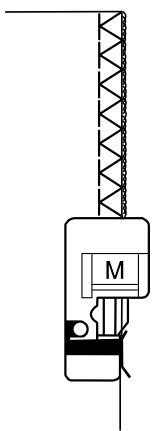
natural_image
Pure mechanical diagram showing a vertical structure with a labeled component 'M' and no text or symbols
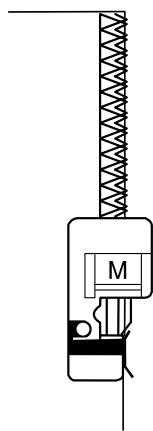
natural_image
Pure mechanical diagram showing a spring-loaded component with no text or symbols
Overedge
① Woven
Overcasting stitch for regular woven fabrics.
② Stretch/Knit
Knit stitch for finishing raw edges of stretch or knit fabrics.
For better results, use the zigzag foot A and sew leaving an adequate seam allowance.
After sewing, trim the seam allowance close to the stitches (refer to page 31).
③ Woven
Overlock stitch similar to a professional overlocker stitch.
④ Heavy
Double overedge stitch for preventing raw edges of linens and gabardines from ravelling.
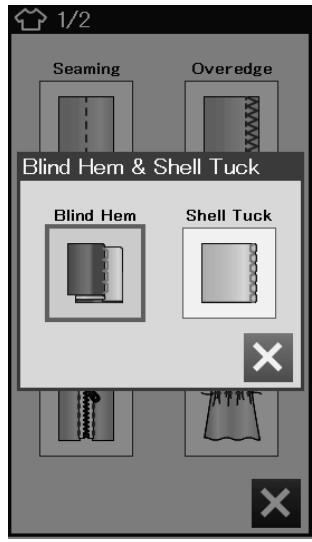
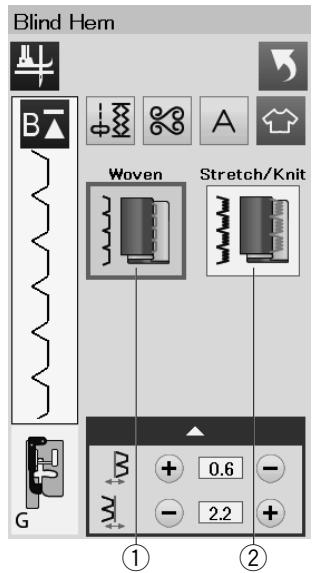
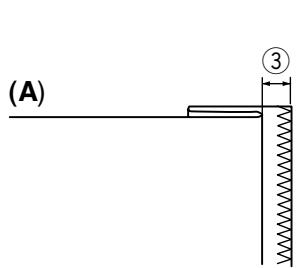
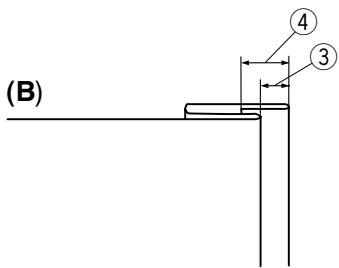
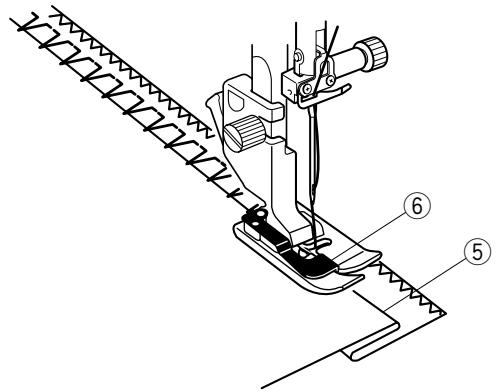
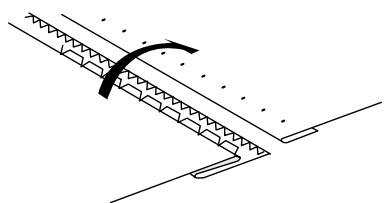
natural_image
Pure technical line drawing of a structural joint or connection (no text or symbols)
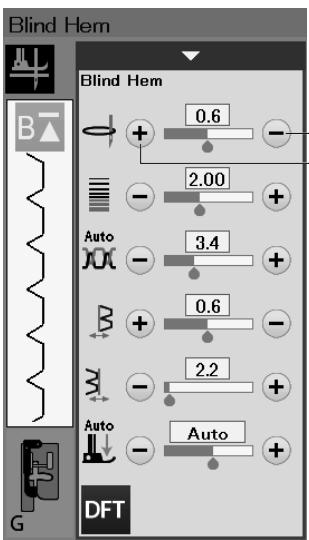
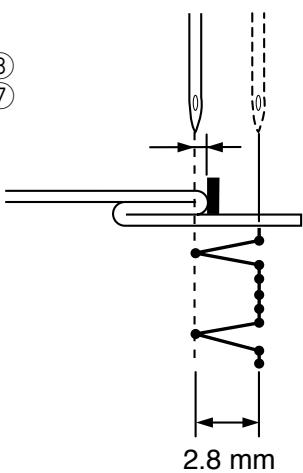
Blind Hem
Select "Blind Hem".
The following 2 options are available.
① Woven
For blind hemming regular woven fabric
② Stretch/Knit
For blind hemming stretch or knit fabric.
To sew:
Attach the blind hem foot G.
Fold the fabric to form a hem leaving a 0.5 cm (1/4") allowance as shown.
③ 0.5 cm (1/4")
(A) Medium to heavy fabrics: The raw edge should be overcasted.
(B) Fine fabrics: Fold the raw edge 1 cm (1/2").
④ 1 cm (1/2")
Position the fabric so that the fold comes to the left side of the guide on the foot. Lower the presser foot.
The needle should just pierce the folded edge when it comes over to the left side.
Adjust the position of the needle drop if necessary.
Sew guiding the fold along the guide.
⑤ Fold
⑥ Guide
After sewing is finished, open the fabric flat.
The seam on the right side of the fabric is almost invisible.
Adjusting the needle drop position
Press the setting bar to expand the manual setting window.
Press the “+” key ⑦ in the upper row to move the needle drop positions to the left.
Press the “—” key ⑧ in the upper row to move the needle drop positions to the right.
The needle drop position will change, while the stitch width (2.8 mm) remains consistent.
The distance between the left needle drop position and guide of the foot is indicated in millimeters.
NOTE:
You can alter the stitch width by changing the right needle drop position.
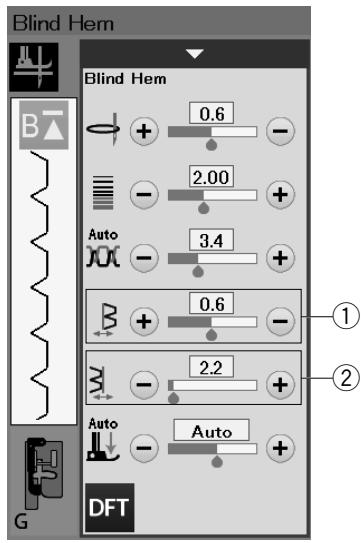
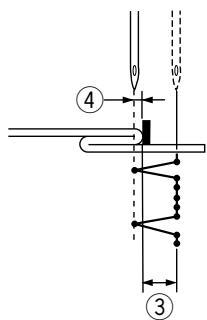
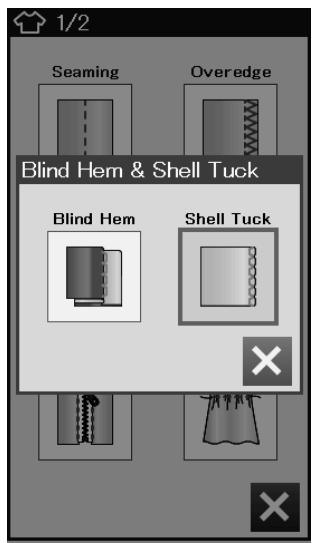
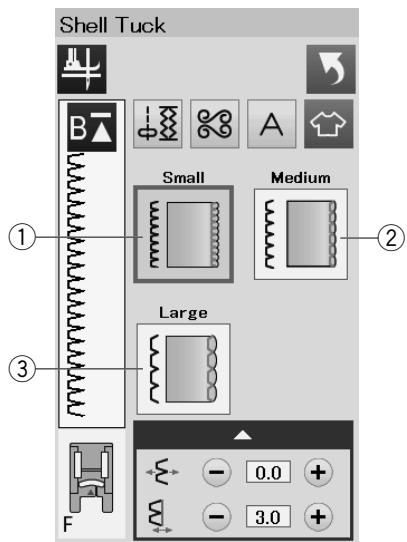
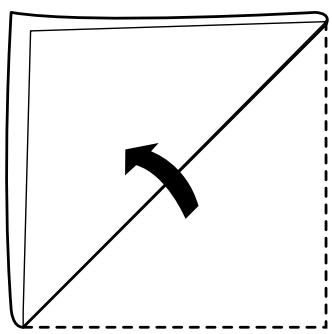
natural_image
Simple geometric diagram showing a right-angled arrow inside a square with dashed border (no text or symbols)
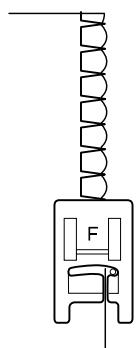
natural_image
Pure mechanical diagram showing a spring and housing component without any text or symbols
Altering blind hem stitch width
Press the “+” key in the row ② to increase the stitch width ③.
Press the “—” key in the row ② to decrease the stitch width ③.
NOTE:
You can move the left needle drop position ④ with the “+” or “−” key in the row ①.
Shell Tuck
Select "Shell Tuck".
The following 3 options are available.
① Small
Narrow shell tuck stitch
② Medium
Medium width shell tuck stitch
③ Large
Regular shell tuck stitch
To sew:
Use a light weight fabric (Tricot, for example).
Fold the fabric in bias as shown and stitch on the fold.
Allow the needle to barely clear the folded edge to create a shelled edge.
If you sew shell tucks, space the rows at least 1.5 cm (5/8") apart.
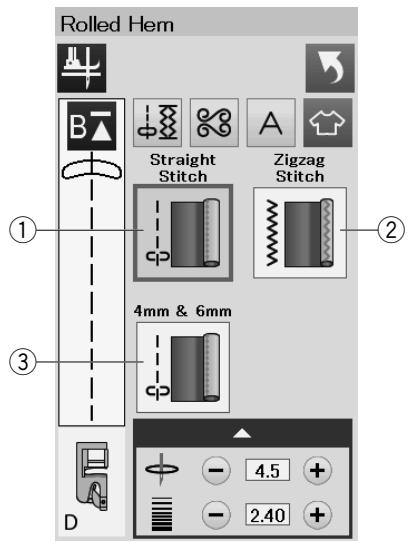
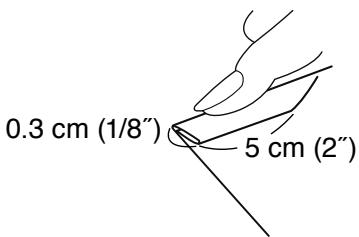
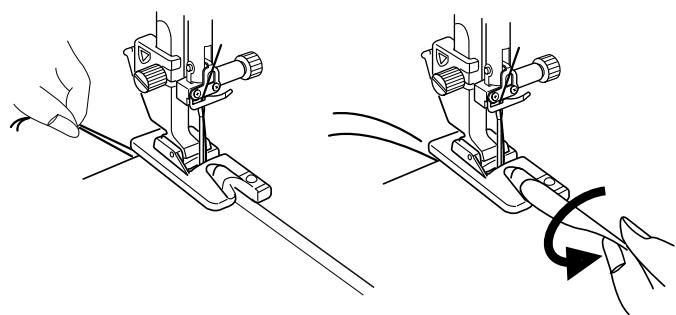
natural_image
Illustration of two sewing machine stitching techniques, showing hand positioning and angle rotation (no text or symbols)
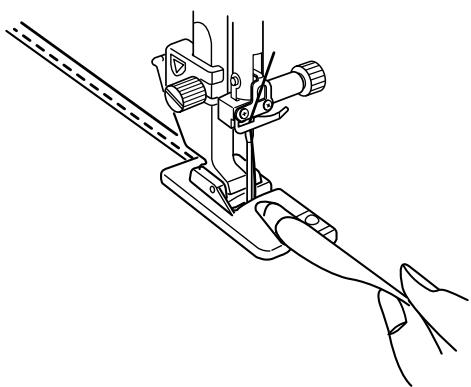
natural_image
Line drawing of a sewing machine needle stitching a hand, showing no text or symbols
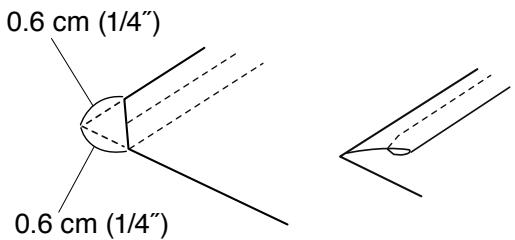
Rolled Hem
① Straight Stitch
Rolled hemming with straight stitch
② Zigzag Stitch
Rolled hemming with narrow zigzag stitch
③ 4 mm & 6 mm
Rolled hemming using optional rolled hemming feet D1 and D2
To sew:
Attach the rolled hem foot D.
Fold the fabric edge twice to form a hem, 0.3 cm (1/8") wide and 5 cm (2") long then press.
Place the fabric aligning the hem edge with the guide of the foot. Turn the hand wheel to lower the needle to the starting point.
Lower the foot and sew several stitches slowly while pulling on the threads to assist feeding the fabric.
Stop the machine and lower the needle into the fabric. Raise the foot and insert the folded portion of the fabric into the curl of the foot.
Lower the foot and sew while lifting the edge of the fabric to keep it feeding into the curl smoothly and evenly.
NOTE:
Trim the corners 0.6 cm (1/4") to reduce bulk.
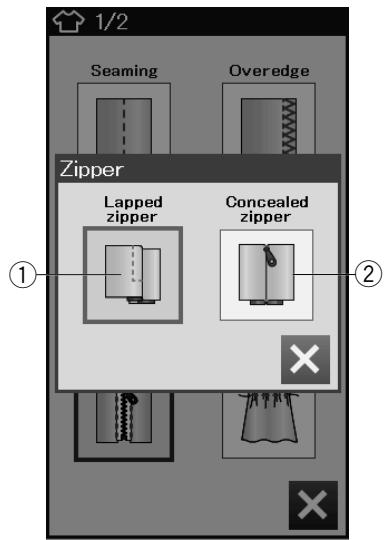
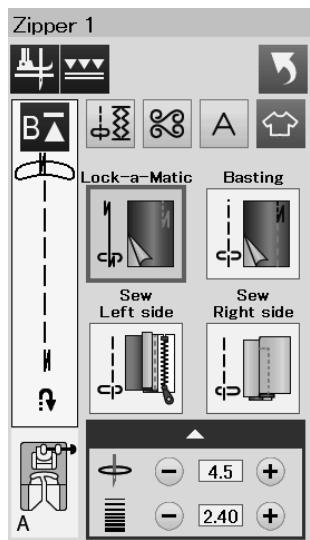
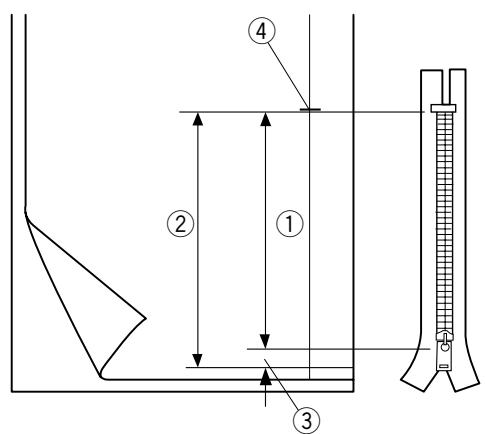
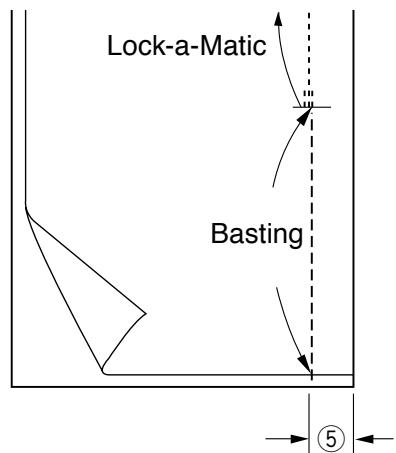
Zipper Sewing
① Lapped zipper
Lapped zipper application with the zipper foot E
② Concealed zipper
Concealed zipper application with the optional concealed zipper foot Z
Lapped zipper sewing
Press the lapped zipper icon and the zipper sewing window will open.
Press the sewing step icon and the machine setting will automatically adjust to suit each sewing step.
Fabric preparation
Add 1 cm (3/8") to the zipper size. This is the overall opening size.
Mark the end of opening.
① Zipper size
② Opening size
③ 1 cm (3/8")
④ End of opening
Attach the zigzag foot A.

Lock-a-Matic
Place the right sides of the fabric together and sew to the end of the opening leaving a 2 cm (3/4") allowance.
⑤ 2 cm (3/4")

Basting
Baste the zipper opening.
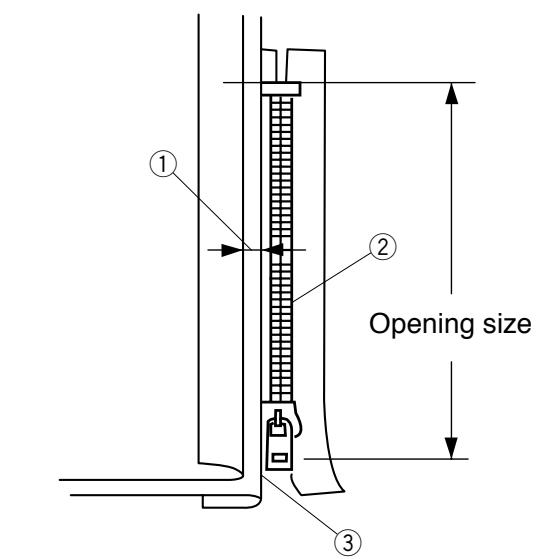
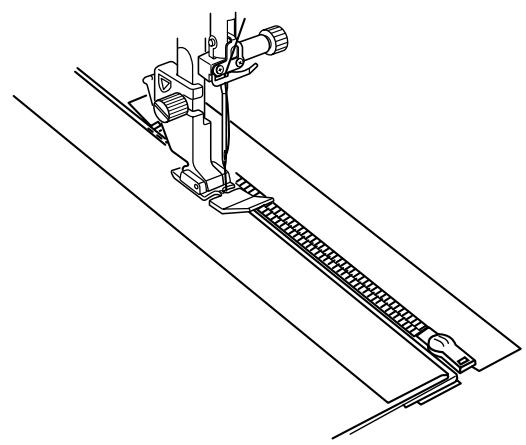
natural_image
Line drawing of a sewing machine needle stitching a slotted fabric (no text or symbols)

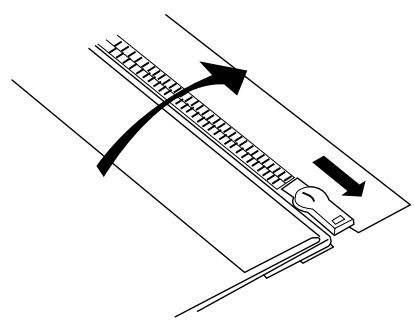
natural_image
Diagram showing a mechanical assembly with arrows indicating motion or force direction (no text or symbols)

Sew left side
Attach the zipper foot E.
Fold back the left seam allowance. Turn the right seam allowance under to form a 0.2 to 0.3 cm (1/8") fold.
Place the zipper teeth next to the fold and pin in place.
① 0.2-0.3 cm (1/8")
② Zipper teeth
③ Fold
Lower the foot onto the topside at the bottom of the zipper so that the needle pierces the fabric next to the fold and the zipper tape.
Sew along the zipper guiding the zipper teeth along the bottom edge of the foot.
Sew through all layers next to the fold.
Stop 5 cm (2") before zipper foot E reaches the slider on the zipper tape.
④ 5 cm (2")
Raise the foot and open the zipper. Lower the foot and stitch the remainder of the seam.
Close the zipper and spread the fabric open flat with the right side of the fabric facing up.
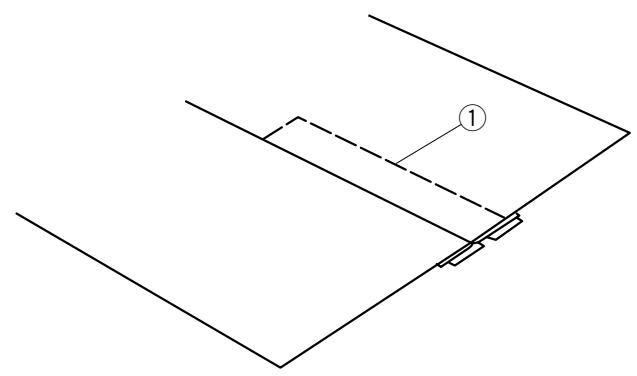
natural_image
Pure technical line drawing of intersecting planes and a rectangular object, no text or symbols present
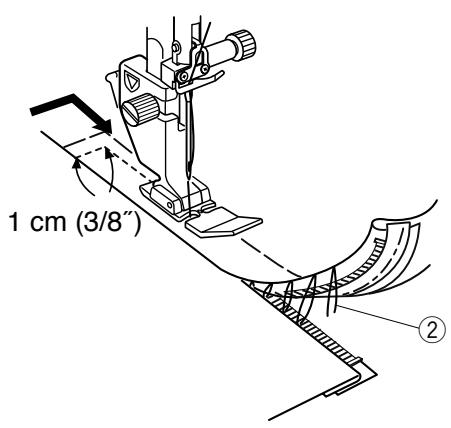
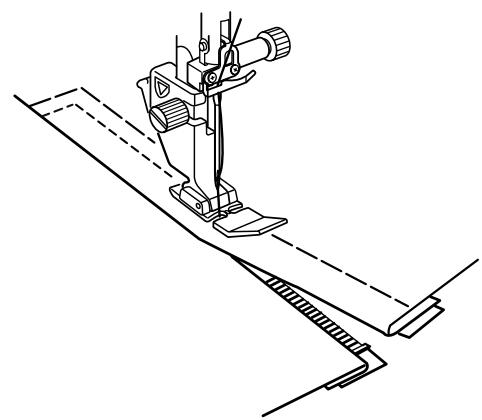
natural_image
Line drawing of a sewing machine needle and fabric (no text or symbols)
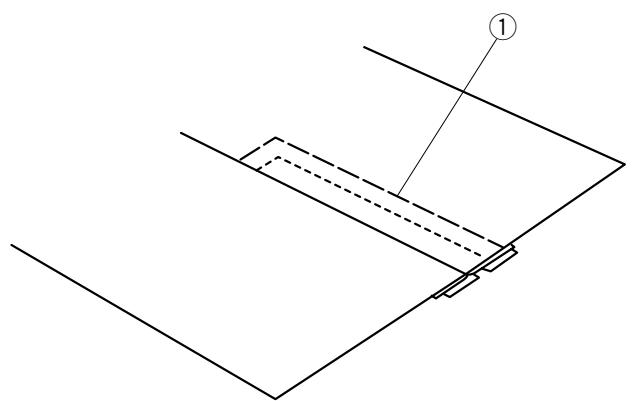
natural_image
Pure technical line drawing of a mechanical assembly with no text or symbols

Basting
Replace the foot with the zigzag foot A.
Baste the opened fabric and zipper tape together.
① Basting
Sew right side
Replace the foot with the zipper foot E.
Backstitch across the end of opening to 1 cm (3/8").
Stitch through the garment and zipper tape, guiding the zipper teeth along the bottom edge on the foot.
Stop about 5 cm (2") from the top of the zipper.
Lower the needle into the fabric, raise the foot and remove the basting stitches.
② Basting stitches
Open the zipper and move the slider to the rear of the foot.
Lower the foot and stitch the remainder of the seam making sure the fold is even.
Remove the basting stitches.
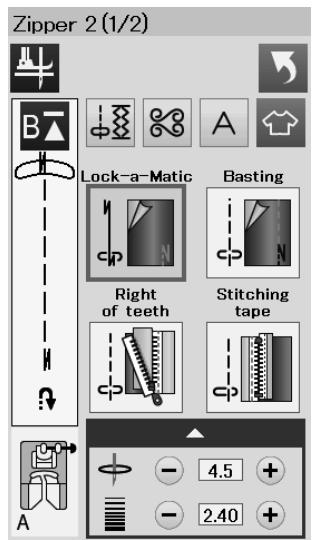
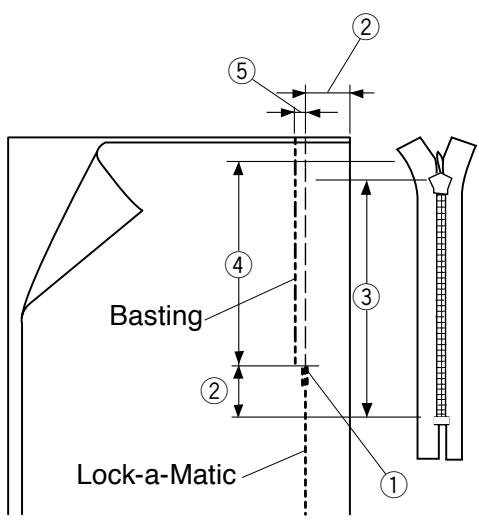
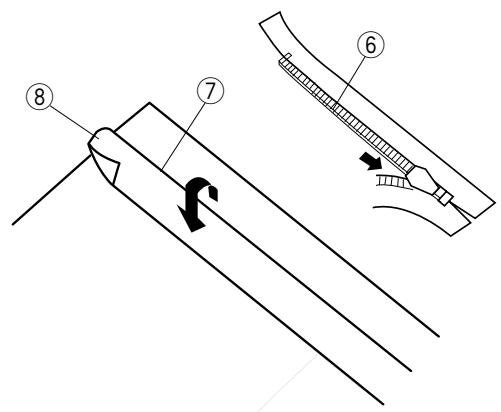
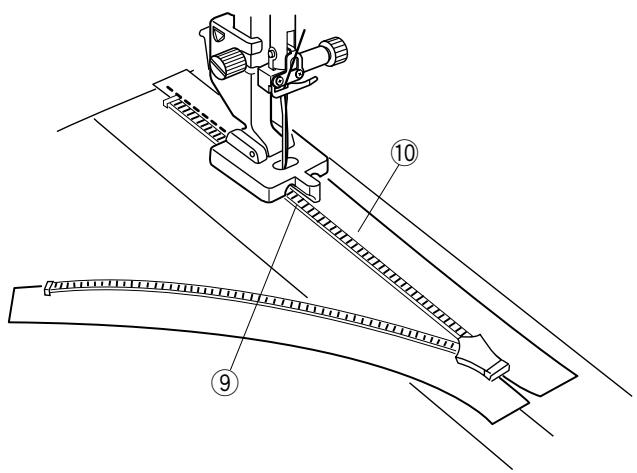
Concealed Zipper Sewing (optional)
Press the concealed zipper icon and the window will show the step-by-step icon keys.
Prepare a concealed zipper 2 cm (3/4") longer than the opening size.
Press the sewing step icon and machine settings will automatically adjust to suit each sewing step.

Lock-a-Matic
Attach the zigzag foot A. Place the right sides of the fabric together and sew to the end of the opening with a 2 cm (3/4") seam allowance. Press the reverse button to lock the seams.
① End of opening
② 2 cm (3/4")
③ Zipper size
④ Opening size

Basting
Baste the opening 0.3 cm (1/8") inside of the seam line.
⑤ 0.3 cm (1/8")
Place the right zipper teeth next to the fold and pin it in place.
Fold up the left seam allowance to the bodice. Open the zipper and put it on the right seam allowance with the back side up.
⑥ Zipper teeth
⑦ Fold
⑧ Left seam allowance
Right of teeth
Attach the concealed zipper foot Z.
Raise the zipper teeth on the right and lower the foot so the left groove of the foot catches the zipper teeth.
Stitch through the zipper tape and fabric up to the end of the opening.
Reverse the stitches to secure the seam.
⑨ Left groove
⑩ Zipper tape
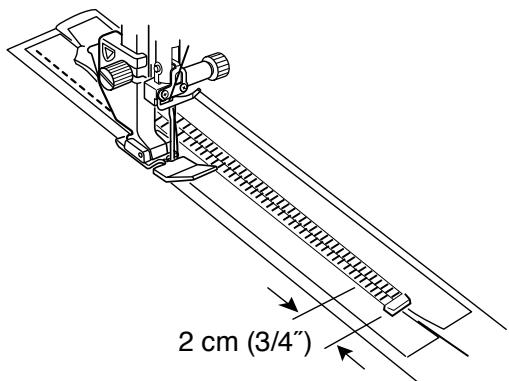
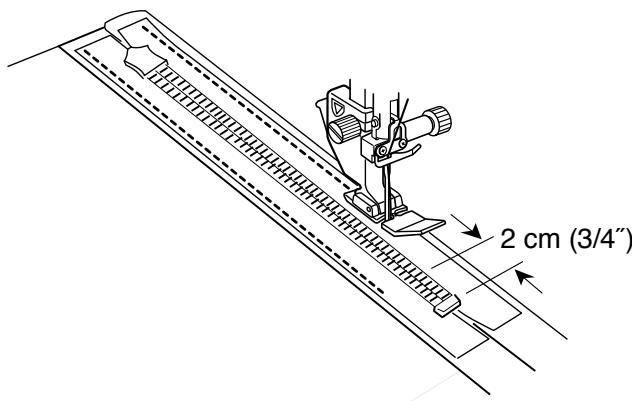
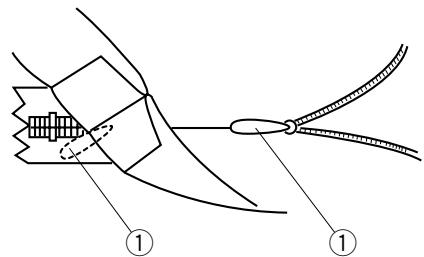
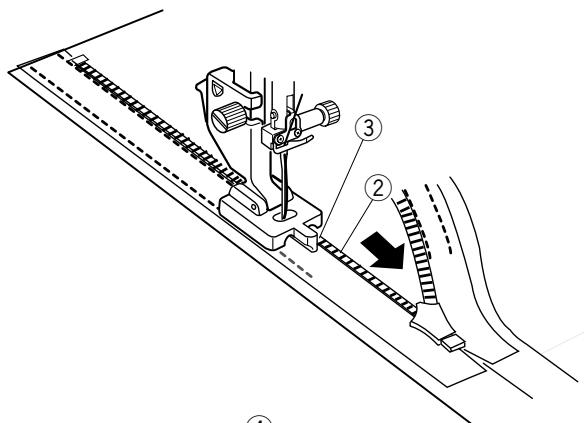
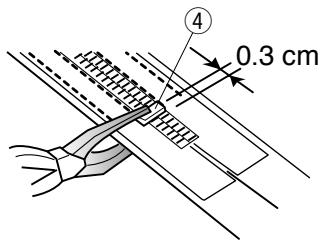
Stitching tape
Raise the foot and close the zipper.
Replace the foot with the zipper foot E.
Turn and fold the bodice to the right. Seam along the edge of the left zipper tape and reverse the stitches 2 cm (3/4") before the zipper bottom.
Stitching tape
Turn and fold the bodice to the left.
Seam along the edge of the right zipper tape and reverse the stitches 2 cm (3/4") before the zipper bottom.
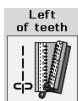
Left of teeth
Raise the foot and replace it with the concealed zipper foot Z.
Remove the basting stitches.
Open zipper and insert the pull tab between fabric and zipper tape to allow the slider to reach the stopper.
① Pull tab
Raise the zipper teeth on the left and lower the foot so the right groove of the foot catches the zipper teeth.
Stitch through the zipper tape and fabric up to the end of the opening. Reverse the stitches to secure the seam.
② Zipper teeth
③ Groove
Slide up the stopper to 0.3 cm (1/8") below the end of the opening and fasten the stopper with pliers.
④ Stopper
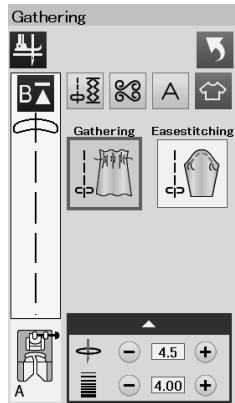
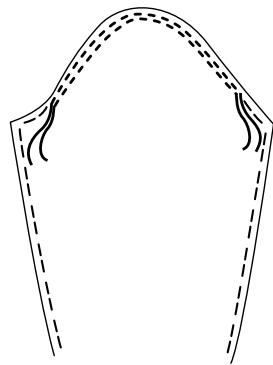
natural_image
Simple line drawing of a garment collar with dashed seam lines (no text or symbols)
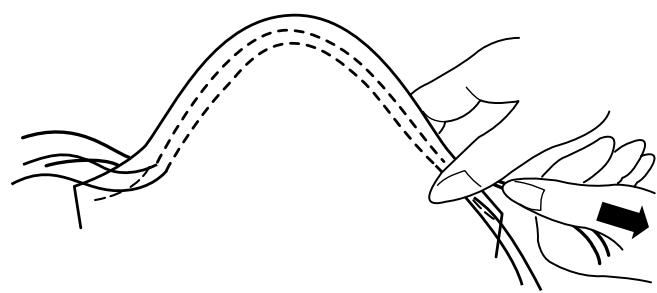
natural_image
Illustration of a hand holding a curved rope or cable, with a black arrow indicating direction (no text or symbols present)
Gathering
In addition to the regular gathering stitch, this section offers you a special stitch for easing sleeve tops.
Easing a sleeve top
Pull both of the threads about 10 cm (4").
Sew a pair of lines, 3 mm (1/8") apart, along the edge of the sleeve top.
Pull the bobbin threads to contract the sleeve top carefully, matching it with the armhole size.
Make sure not to make gathers in the sleeve top.
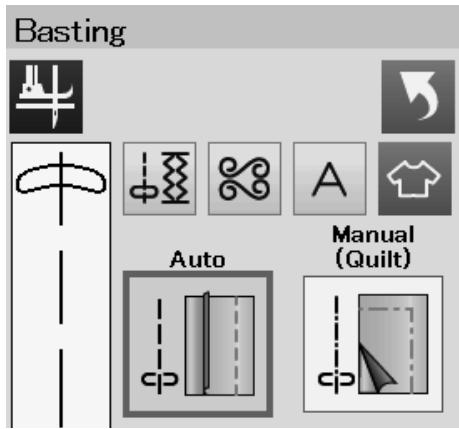
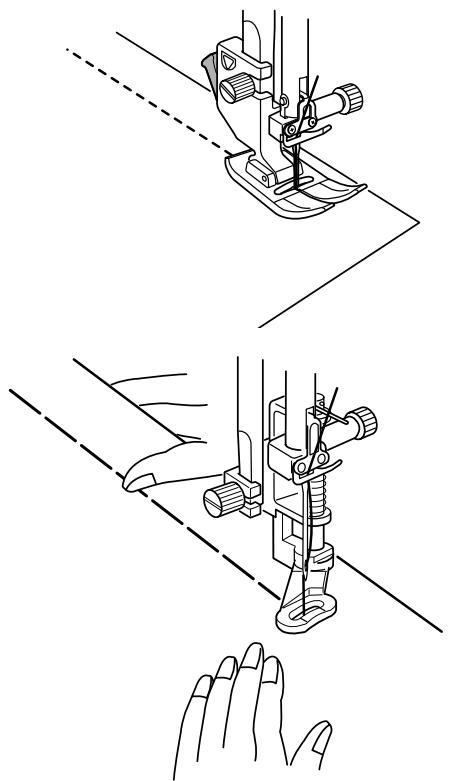
natural_image
Line drawings of a sewing machine and a hand, showing mechanical components and alignment lines (no text or symbols)
Basting
There are 2 basting stitches available in this section.
Basting (Auto)
This stitch is used for basting zipper tape or fitting of garments.
Sew in the same way as that for straight stitch sewing.
Basting (Manual/Quilting)
Attach the darning foot PD-H.
Lower the feed dog.
NOTE:
Refer to page 19 for how to attach the darning foot PD-H.
To sew
Hold the fabric taut and depress the foot control.
The machine will make one stitch and stop automatically.
Slide the fabric to the rear for the next stitch.
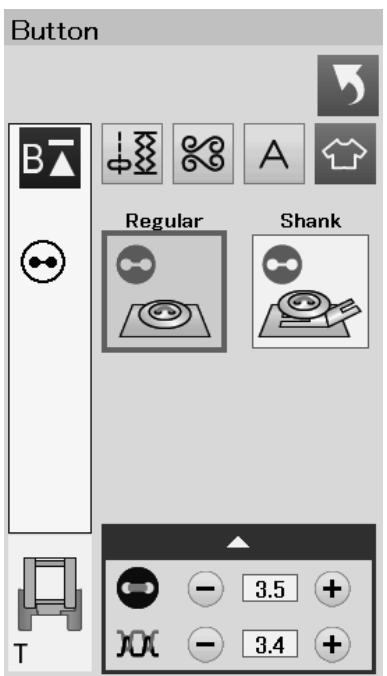
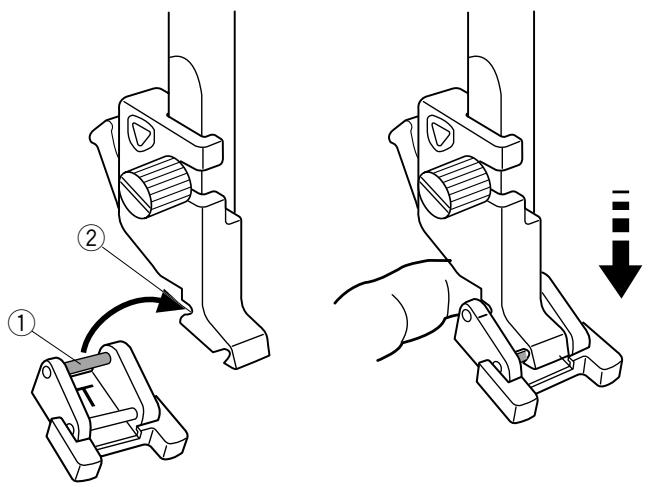
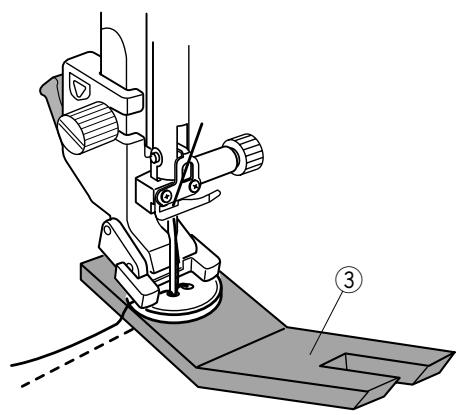
natural_image
Technical line drawing of a sewing machine with labeled component (no text or symbols present)
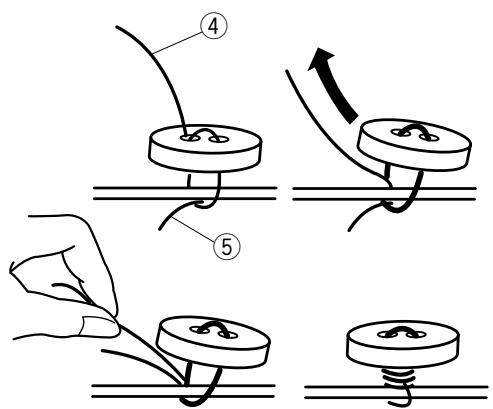
When attaching a button to thick fabric, you need to make a shank by using the button shank plate.
Select "Shank" Lower the feed dog.
Make sure to press the lockout key to lock the machine. Insert the rear pin of the foot into the rear groove of the foot holder.
① Rear pin
② Rear groove
Gently lower the presser foot lifter while holding the foot with your finger to fit the foot. Press the lockout key to unlock the machine.
Place a button on the fabric and lower the needle into the left hole of the button by turning the handwheel with your hand.
Insert the button shank plate under the button.
Lower the foot to hold the button in place, aligning the direction of the button.
③ Button shank plate
Raise the needle by turning the handwheel until the needle bar swings to the right.
Press the “+” or “−” key so the needle enters into the right hole of the button. The maximum stitch width is 0.7 cm (1/4").
Start sewing and continue until the machine stops automatically.
Remove the fabric from the machine.
Cut the all threads leaving at least 10 cm (4") tails. Trim the thread at the beginning close to the fabric.
Pass the needle thread at the end of stitching through the left hole in the button, between the button and fabric.
Pull the needle thread to bring the bobbin thread up to the right side of the fabric.
④ Needle thread at the end
⑤ Bobbin thread
Wind the threads to form a shank and knot them together.
NOTE:
The button shank plate cannot be used if the button is too thick.
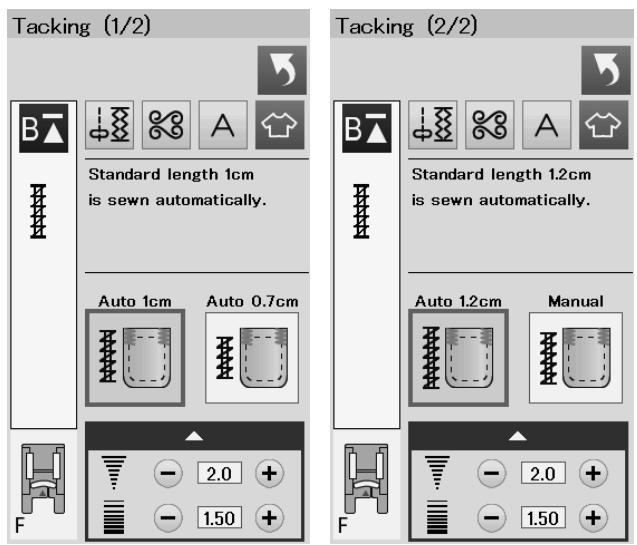
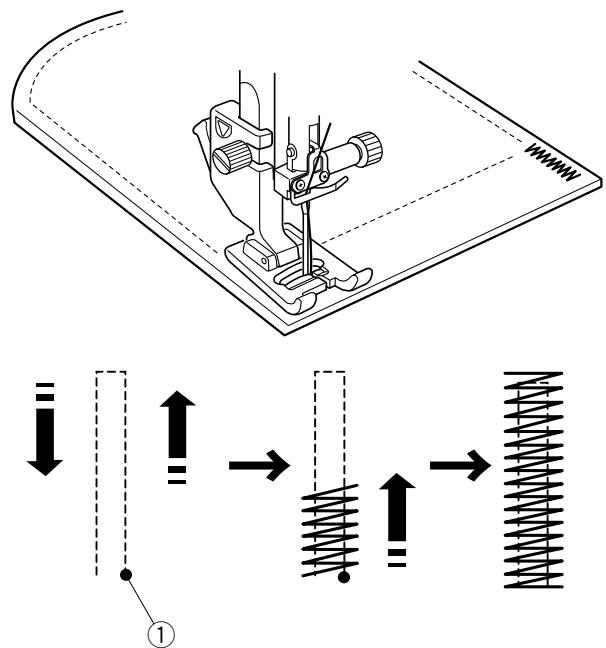
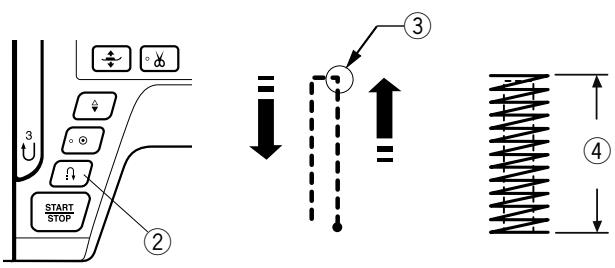
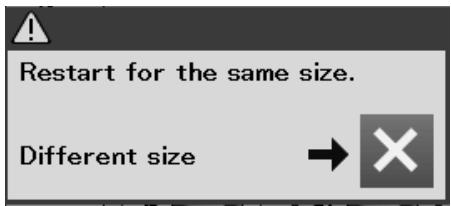
Tacking
Tacking is used to reinforce pockets, crotches and belt carriers where extra strength is needed.
There are 3 auto tacking sizes and manual tacking available.
Attach the satin stitch foot F.
Auto tacking
Lower the needle at the starting point and start sewing. The machine will sew the tack of the selected size and stop automatically when it is finished.
① Starting point
Manual tacking
Start the machine and sew to the required length ③, then press the reverse button ②. This sets the tack length ④. Continue sewing until the machine stops automatically.
③ Required length
NOTE:
The maximum length of tacking is 1.5 cm (5/8").
To sew the same size tack
To sew another tack in the same size, simply start the machine and sew until the machine stops automatically.
To sew the next tack in a different size, press the X key.
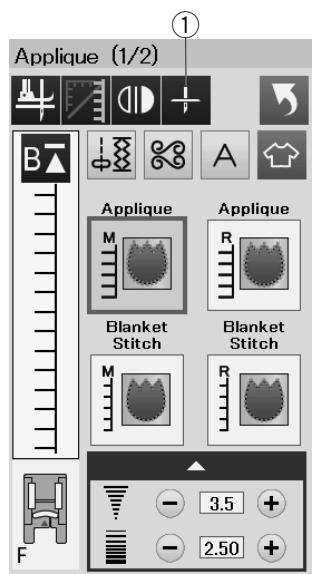

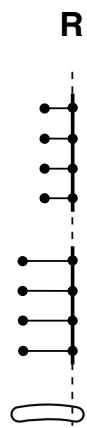
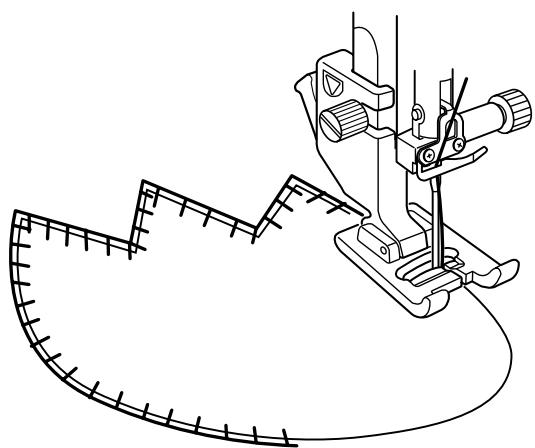
natural_image
Line drawing of a sewing machine needle stitching fabric (no text or symbols)
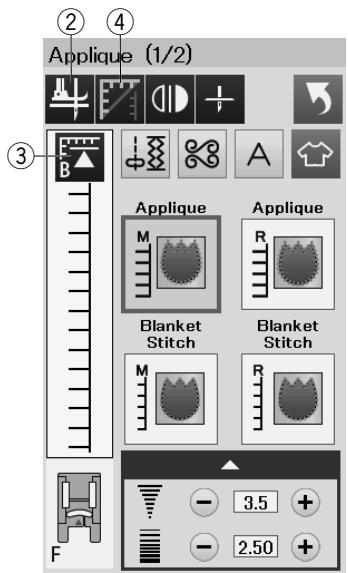
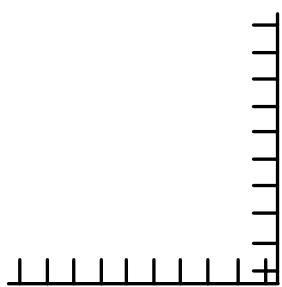
natural_image
Pure vertical axis line with tick marks, no text or symbols present
Applique
There are 6 types of applique stitches available in this section.
You can select the needle stop position either up or down by pressing the needle stop position key.
① Needle stop position key
The letter above the stitch image denotes the baseline of the needle drop position.
M: Middle (center)
R: Right
The baseline can be adjusted without changing the stitch width by pressing the “+” or “−” key on the bottom row.
Pivoting at applique corners
When sewing an applique with sharp corners, you may turn on the “Foot up for pivoting” option so that the presser foot automatically goes up when the machine stops.
Press the foot-up key to turn on this option
② Foot-up key
NOTE:
Make sure to stop the machine with the needle dropped at the outer edge of the applique.
Starting over from the corner
Press the startover key before sewing in the new direction to sew from the beginning of the pattern.
③ Startover key
Two options of startover are available for applique stitches. Press the cornering key to select normal startover or cornering startover.
The key icon will change to show which option is being selected when pressing the key.
④ Cornering key
Normal startover:
Sew a locking stitch then start sewing from the beginning of the pattern.
Cornering startover:
Start sewing from the beginning of the pattern without a locking stitch.
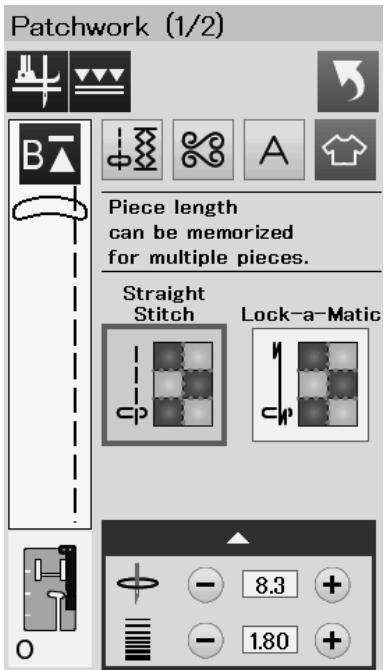
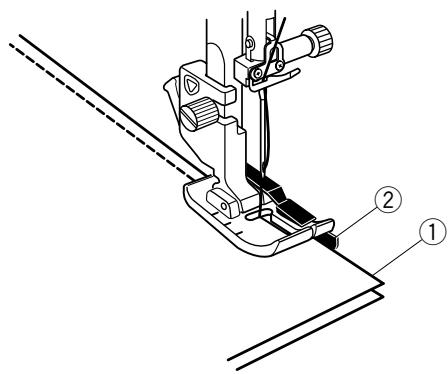
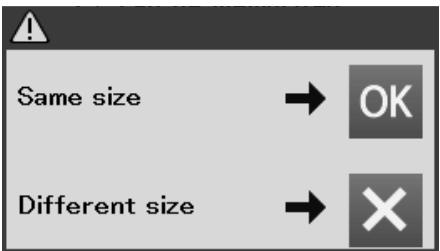
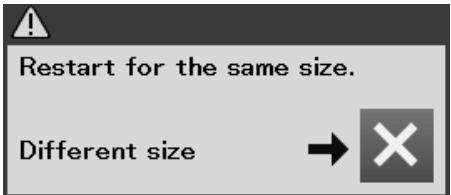
Patchwork
Patchwork piecing
There are 3 stitches for seaming patchwork pieces in this section.
The default stitch length is set at 1.8 mm, ideal for patchwork piecing, but you can fine tune the stitch length by pressing the “+” or “−” key.
Attach 1/4" seam foot O, which helps you to keep a constant 1/4" (6 mm) seam allowance.
Put 2 pieces of fabric with right sides together.
Place the patchwork pieces under the foot so that the edge of the fabric matches the guide on the presser foot.
① Edges of fabric
② Guide on the 1/4" seam foot O
When you stop the machine, a message will appear.
Press the OK key and the machine memorizes the seam length to sew another piece of the same length.
Press the X key to sew in a different size.
After sewing the memorized length, a message will appear.
To sew the same length, start the machine and it will stop automatically after sewing the memorized length.
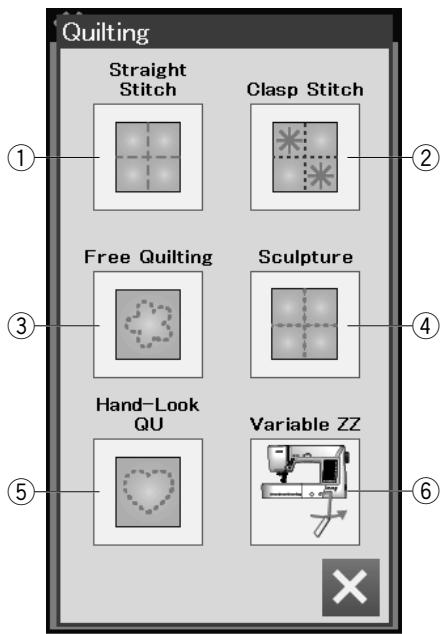
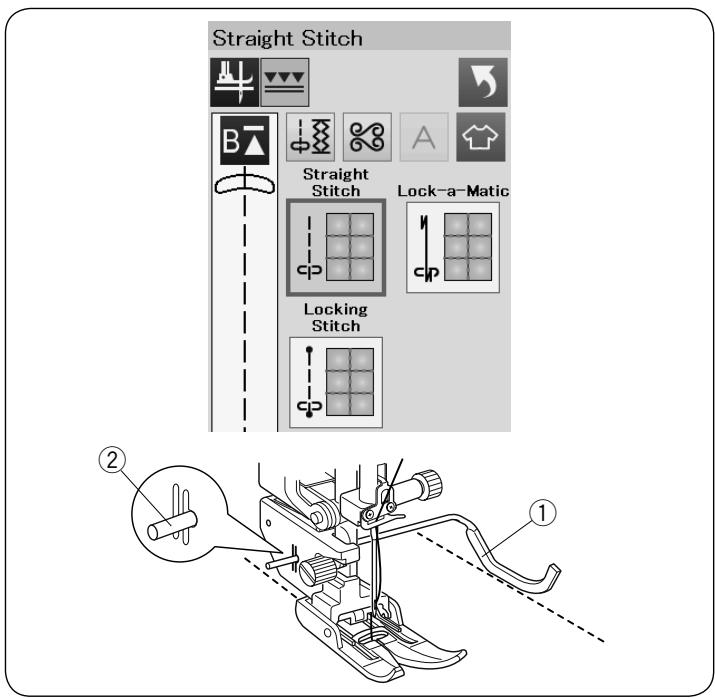
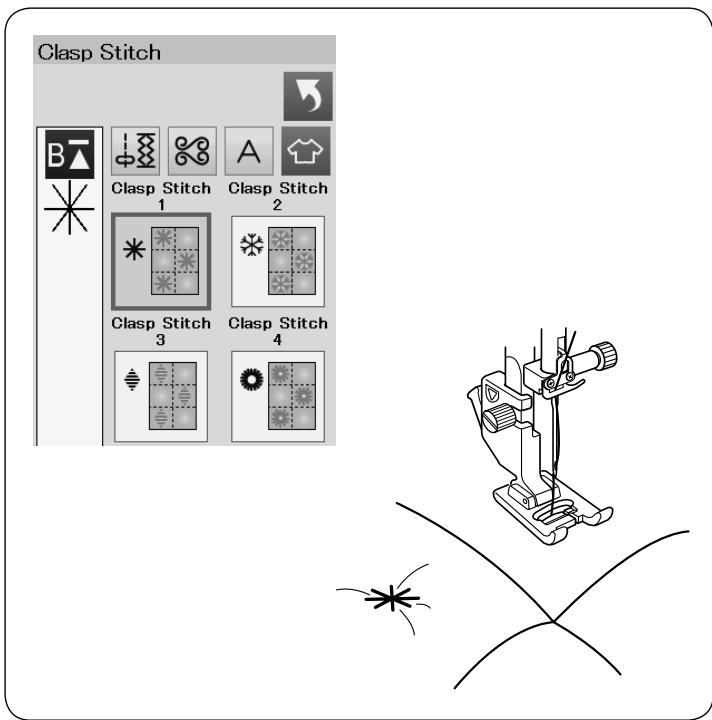
Quilting
In this section, 6 types of useful stitches for quilting are available.
① Straight stitches (with dual feed)
② Clasp stitches
③ Free motion quilting stitches
④ Sculpture stitches (with dual feed)
⑤ Hand-look quilt stitches
⑥ Variable zigzag stitches
Straight stitches (with dual feed)
Straight stitches in this section are suitable for seaming quilt layers using the dual feed foot (refer to page 19 for how to attach it). Please refert to page 54 if you wish to use zigzag foot A.
The quilting guide bar is helpful when sewing parallel, evenly spaced rows of stitching.
Insert the quilting guide bar into the hole in the rear of the foot holder.
Shift the quilting guide bar to the desired spacing.
① Quilting guide bar
② Hole
Sew rows of stitching while tracing the previous row of stitches with the quilting guide bar.
Clasp Stitches
You can close quilt layers and batting using the clasp stitch.
Use the satin stitch foot F.
The machine sews one unit of the pattern and automatically stops with the needle in up position when completed.
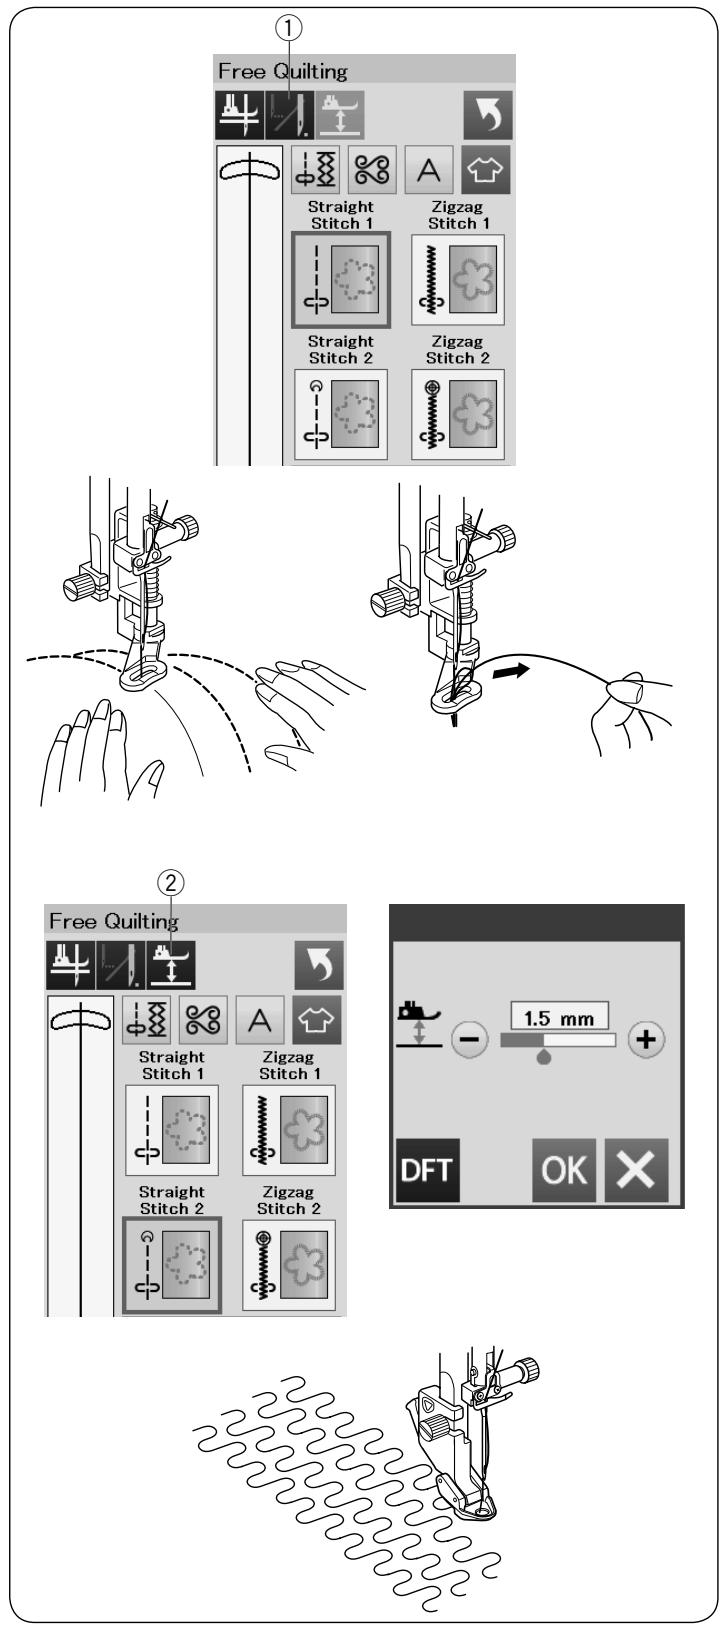

Free Quilting
For ordinary and bulky quilts, select “Straight Stitch 1” or “Zigzag Stitch 1”, and use the darning foot PD-H (refer to page 19 for how to attach the darning foot).
Select the "Straight Stitch 2" or "Zigzag Stitch 2" for flatter quilts and use the free quilting foot QC, QO or QV.
One Stitch Off
The machine stops automatically after sewing one stitch so that you can bring the bobbin thread up to prevent it from bunching up on the wrong side of the fabric.
Hold the needle thread and sew one stitch and the machine stops automatically.
Pull the needle thread up to bring the bobbin thread up.
Hold both the needle and bobbin threads and sew several stitches to secure the threads.
You can trim the thread tails with scissors.
The machine will stitch continuously when you resume sewing.
If you wish to start sewing without “one stitch off”, press the one stitch off key to cancel this function.
The key icon changes to 📁.
When "one stitch off" is active, the key icon shows 1.
① One stitch off key
To sew
Sew at medium speed while guiding the fabric with your hands.
Move the quilt 3 mm or less per stitch.
Refer to page 79 (button sewing foot) for how to attach the free quilt feet.
When “Straight stitch 2” or “Zigzag stitch 2” is selected, the height of down position of the free motion quilting feet (QC, QO, QV) is optimized automatically.
However, you can fine tune the foot height according to the quilt thickness.
Place the fabric under the foot and lower the foot.
Press the foot height key and the adjusting window opens. Adjust the foot height by pressing the “+” key or “−” key and press the OK key to register the setting.
② Foot height key
Reduce the height if the fabrics bounce when sewing. Increase the height if the foot gets trapped in the fabrics when sewing.
NOTE:
- Purple tip needle is recommended for free motion quilting to prevent skipped stitch.
- Do not move the quilt layers toward you when the open-toe foot is attached.
Sculpture Stitches
These stitches are used to accentuate design outlines and to create a mock hand-quilt.
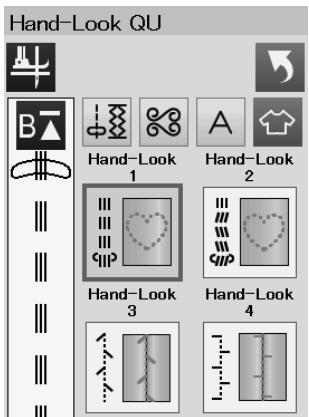
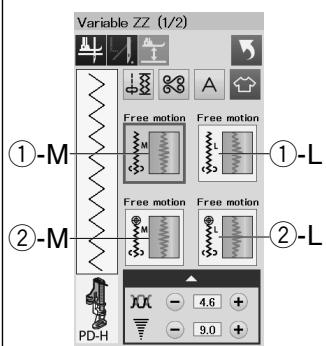
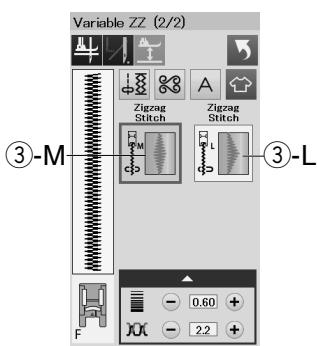
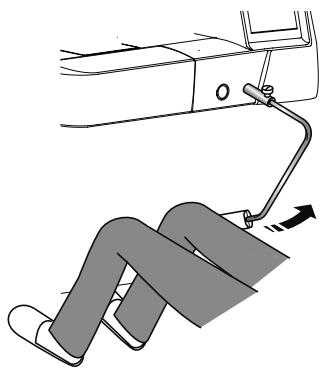
natural_image
Illustration of a person using a manual lever to lift a seat (no text or symbols present)
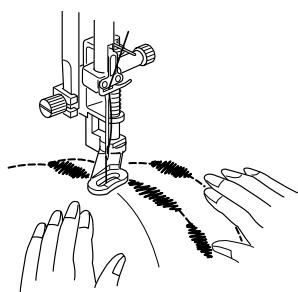
natural_image
Line drawing of a sewing machine needle stitching on a pair of hands (no text or symbols)
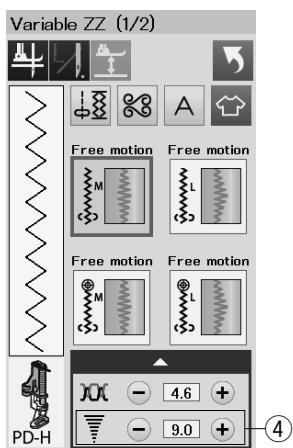
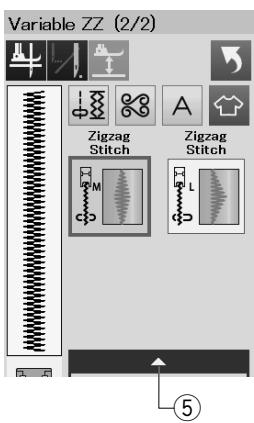
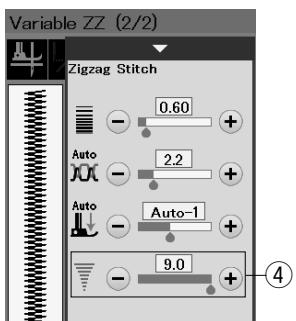
Hand-look Quilt Stitches
Use a transparent nylon thread for the needle and ordinary sewing thread for the bobbin.
The bobbin thread is pulled up on the right side of the fabric and the stitches will look as if sewn by hand.
Variable Zigzag
This unique feature allows you to control zigzag width with the knee lifter.
Select ①-M or ①-L, using the darning foot PD-H for sewing quilt layers. Drop the feed dog. Guide the fabric with your hands while sewing.
Select ②-M or ②-L, using the clear view free quilt foot QV for sewing flat and firm fabrics. Drop the feed dog. Guide the fabric with your hands while sewing.
Select ③-M or ③-L, using the satin stitch foot for sewing variable zigzag stitches.
The fabric is fed by the feed dog and the stitch width can be varied with the knee lifter.
Attach a stabilizer to the wrong side of the fabric if needed.
Sew at slow to medium speed while guiding the fabric with your hands and controlling the stitch width with your knee.
NOTE:
When the machine stops, you can raise and lower the presser foot with the knee lifter.
Purple tip needle is recommended for free motion quilting to prevent skipped stitch.
Maximum Zigzag Width Adjustment
The maximum zigzag width can be limited to suit your sewing needs.
Press the “+” or “−” key beside the maximum zigzag width setting ④ to limit the maximum zigzag width to your preference.
For the variable zigzag stitches with the satin stitch foot, press the setting bar ⑤ to open the maximum zigzag width setting.
④ Maximum zigzag width setting
⑤ Setting bar
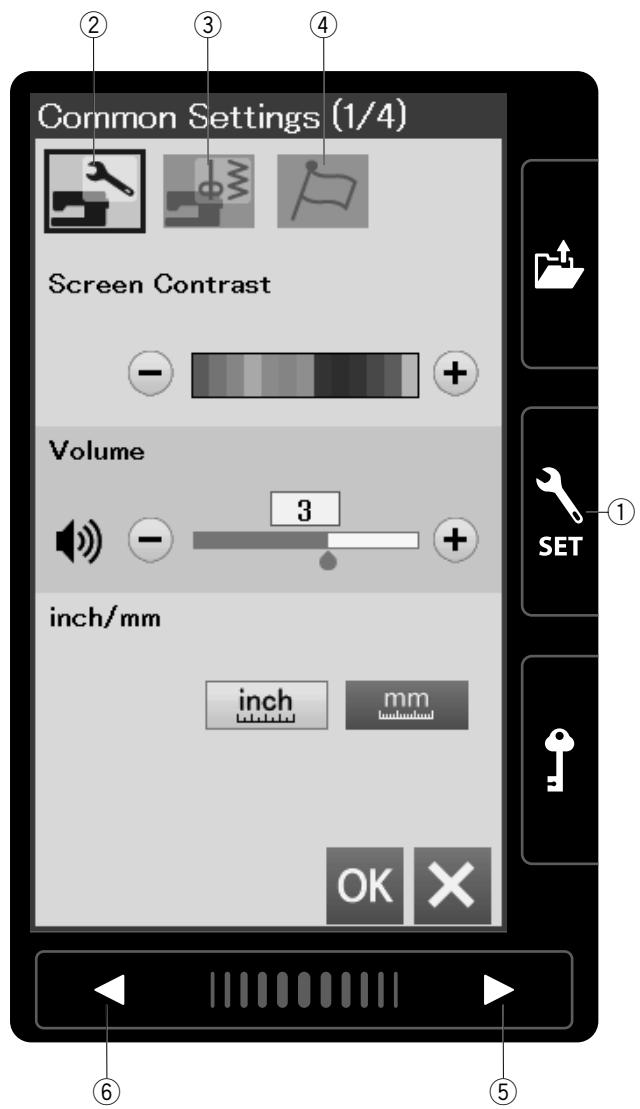
CUSTOMIZING MACHINE SETTINGS Machine Setting Mode
Press the set mode key to enter the machine setting mode.
You can select various options and customize the machine settings to suit your personal preference.
① Set mode key
Press one of the 3 keys to select the mode to customize.
② Common setting mode key
Press the common setting mode key to enter the common setting mode.
In this mode, you can customize the general machine settings and options.
③ Ordinary sewing setting mode key
Press the ordinary setting mode key to enter the ordinary setting mode.
In this mode, you can customize the machine settings and options for ordinary sewing (refer to pages 89-91 for the operation).
④ Language selection mode key
Press the language selection mode key to enter the language selection mode. In this mode, you can select the desired language for the screen messages.
To browse pages in each mode, press the next page key or previous page ley
⑤ Next page key
⑥ Previous page key
Registering the custom settings
After customizing the settings, press the OK key to enable the new settings.
To cancel the changes to the settings, press the X key and the setting mode window will close.
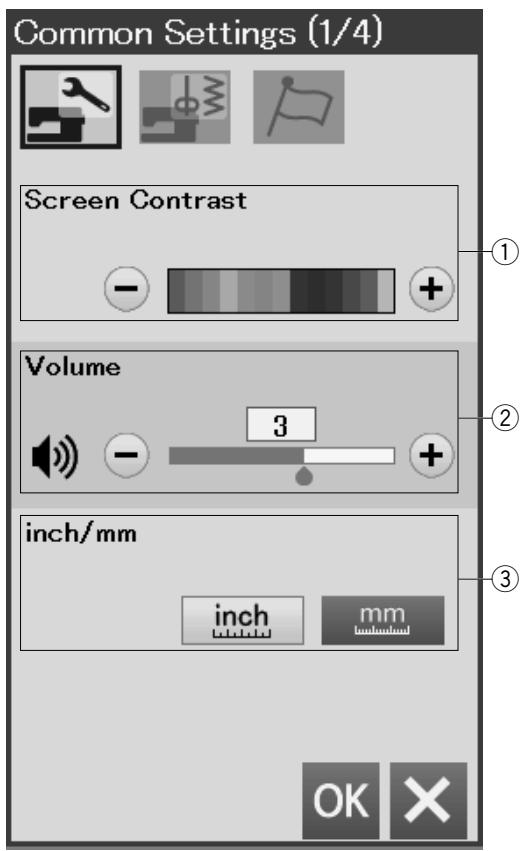
Common Setting Mode
① Screen Contrast
You can adjust the contrast of the visual touch screen by pressing the “+” or “−” key.
② Sound Volume
The signal sound can be adjusted by pressing the “+” or “−” key.
Set the value to “0” by pressing the “—” key several times to mute the signal sounds.
③ Inch/mm Option
You can set your machine's dimensional unit to either inches or millimeters by pressing the "inch" or "mm" icon key.
The default unit is millimeters.
Press the next page key to show the next menu.
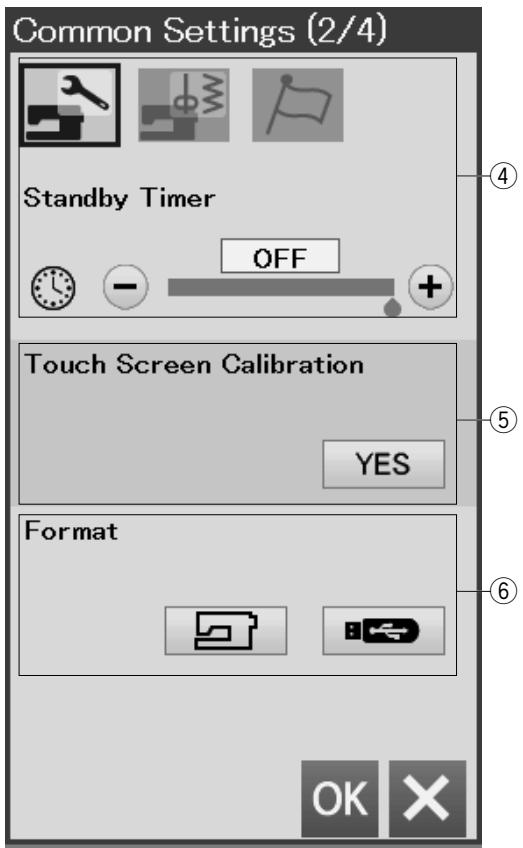
④ Standby Timer
The sewing lights will turn off and the machine will enter standby mode if you do not use the machine within the time period set by this timer. Doing any operation will turn the lights and screen on again.
The standby timer can be set from 1 to 30 minutes.
If you wish to turn off the timer, press and hold the “+” key until “OFF” shows in the timer window.
⑤ Touch Screen Calibration
You can calibrate the key positions of the touch screen if you feel the touch screen key is not responding properly. Press the Yes key to open the calibration window.
Press the “+” sign with the touch panel stylus as the sign appears.
When you press the last sign, the screen shows "END" and the calibration window will close.
If the internal memory of the machine or USB flash drive does not function due to damage to the memory bank, you need to re-enable it by formatting the memory.
To format the machine's internal memory, press the machine icon key and a confirmation message will appear. Press the OK key to format.
To format a USB flash drive, press the USB icon and the confirmation window will open. Press the OK key to format.

CAUTION:
Do not turn off the power or disconnect the USB flash drive while a warning message is displayed otherwise it may damage the memory bank.
Press the next page key to show the next menu.
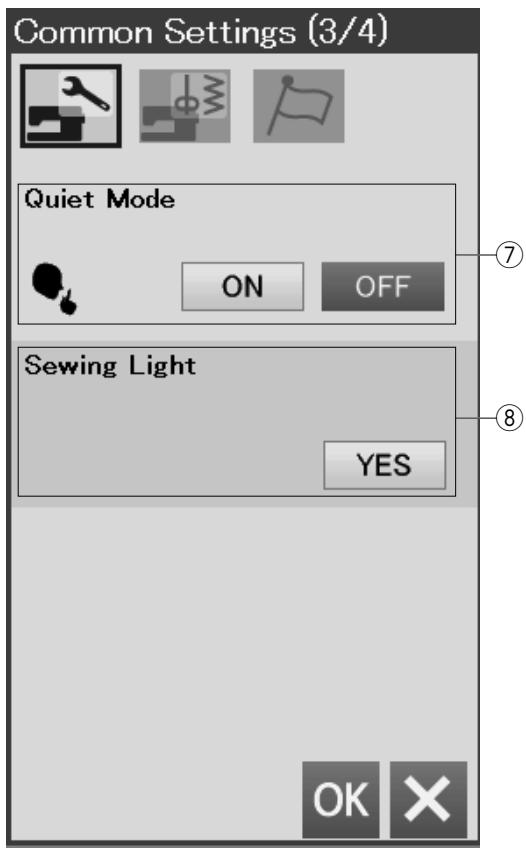

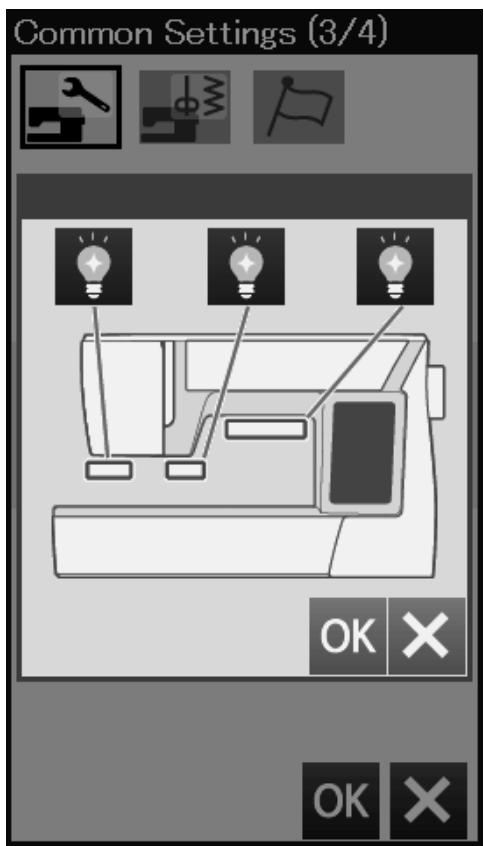
⑦ Quiet Mode
If you prefer the machine to run more quietly, turn on this option so the signal sound and start-up sewing speed will be set at the lowest levels.
The quiet mode setting overrules any previous settings for these parameters.
NOTE:
The quiet sign ⑨ will appear on the right upper corner of the screen, sound volume on the common settings, and the adjustable start-up speed on the ordinary sewing settings when the quiet mode option is on.
⑧ Sewing Light
The sewing lights can be turned on or off individually. Press the corresponding light keys to turn on or off the sewing lights.
Press the next page key to show the next menu.
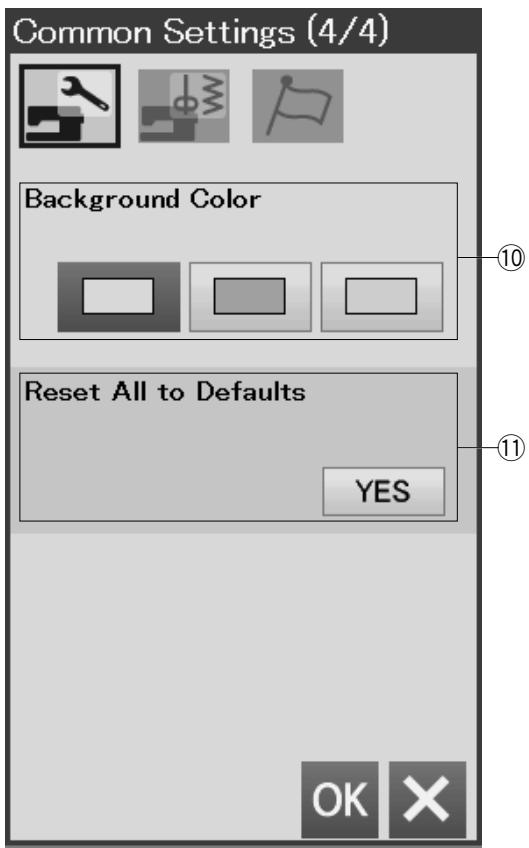
⑩ Background Color
You can select from the colorful wallpapers for the background of the visual touch screen by pressing the relevant icon.
⑪ Reset All to Defaults
Press the Yes key to reset all the parameters to the original values (factory settings).
Press the OK key to register the new settings.
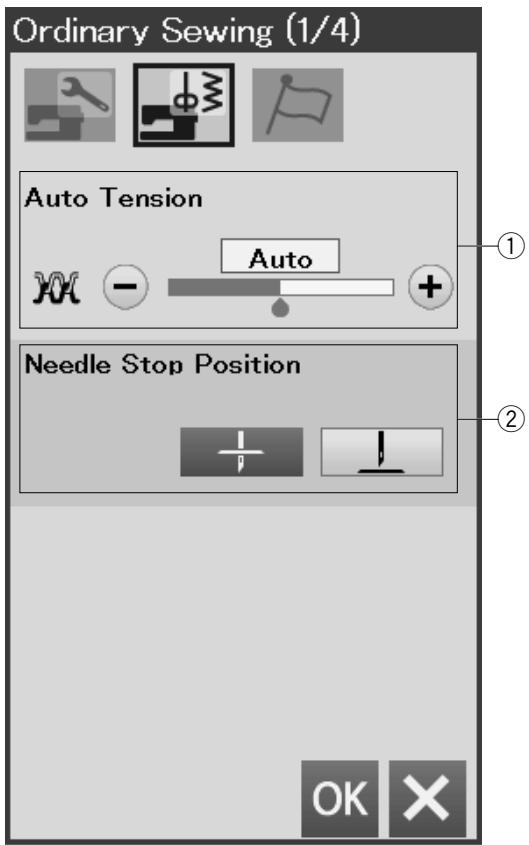
Ordinary Sewing Setting Mode
① Auto thread tension
You can adjust the auto thread tension level by pressing the “+” or “−” key.
② Needle stop position
The machine always stops with the needle in the down position except when sewing buttonholes, specialty stitches, monograms, etc. However you can change the needle stop position to up by pressing the needle up key.
NOTE:
The machine stops with the needle in the down position if Foot-up key option is turned on, even if the needle stop position is set to up position.
Press the next page key to show the next menu.
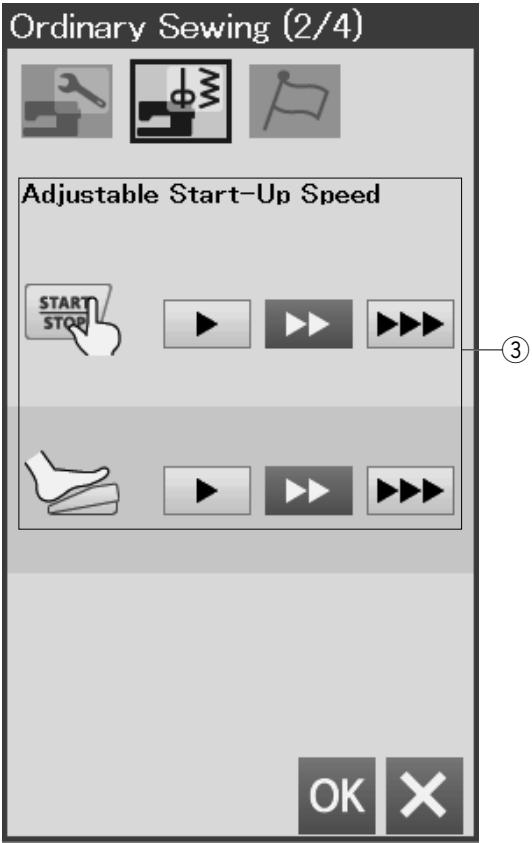
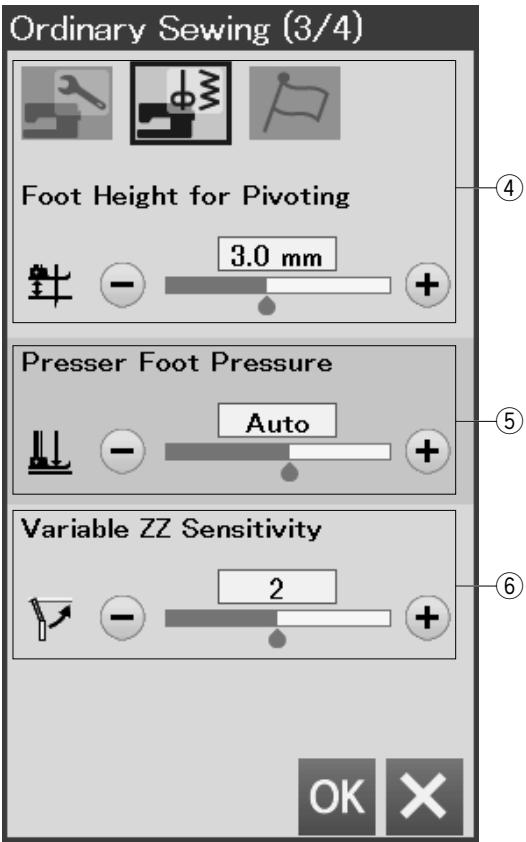
③ Adjustable Start-Up Speed
The machine will start running slowly and the sewing speed will gradually increase to maximum. You can select the desired start-up speed from slow, normal or high by pressing the corresponding key, and set the speed for the start/stop button or foot control individually.
Press the next page key to show the next menu.
When the foot up option is turned on, the presser foot will automatically go up when the machine stops.
The height of the foot in the up position can be adjusted by pressing the “+” key or “−” key in accordance with thickness of the fabrics.
The foot pressure is automatically optimized but you can adjust the foot pressure manually by pressing the “+” key or “−” key.
⑥ Variable zigzag sensitivity
You can adjust the amount of needle swing against the knee lifter movement for variable zigzag in sewing applications.
Press the “—” key so the needle swings a small amount when moving the knee lifter.
Press the “+” key so the needle swings a large amount when moving the knee lifter.
Press the next page key to show the next menu.
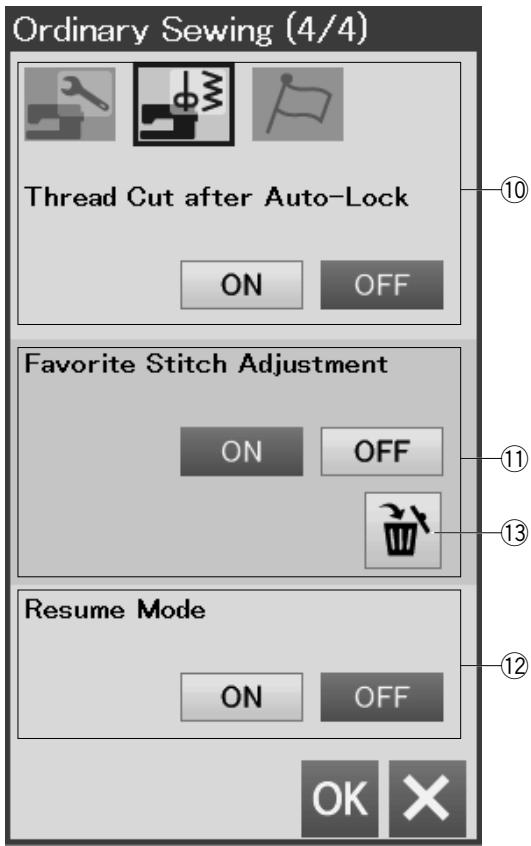
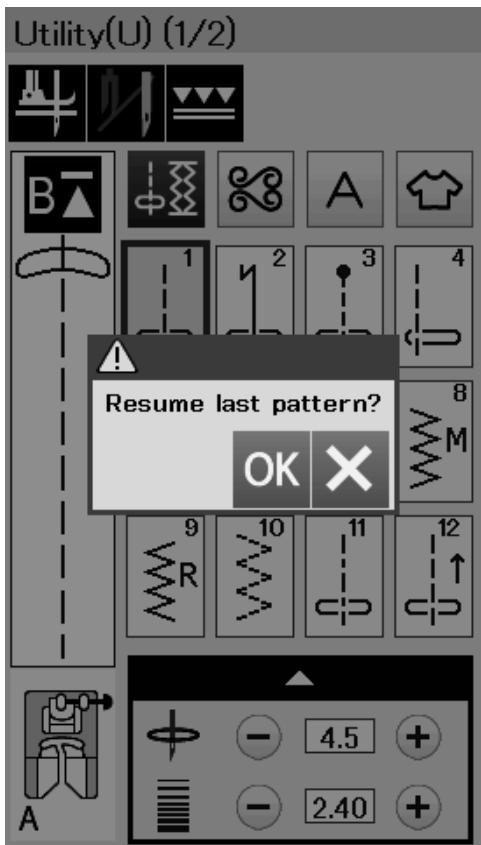
⑩ Thread Cut after Auto-Lock
The machine automatically trims the threads after sewing locking stitches when this option is turned on.
⑪ Favorite Stitch Adjustment
If you wish to save the changes to manual stitch settings, turn on this option by pressing the ON key.
If this option if turned off, the manual stitch setting will be cleared when turn the power switch off.
Press the delete icon ⑬ to clear the manual stitch setting.
NOTE:
This option is available for all stitches in ordinary sewing mode except monogram.
⑫ Resume Mode
Turn on this option when you wish to resume the last pattern sewn before turning the power switch off.
When the power is turned on again, the confirmation message will appear. Press the OK key to resume the last pattern.
NOTE:
Resume data will be cleared under the following conditions:
- Created stitch is imported with the import key.
- Created stitch is deleted with the delete key.
- The internal memory is formatted.
After customizing the settings, press the OK key to enable the new settings.
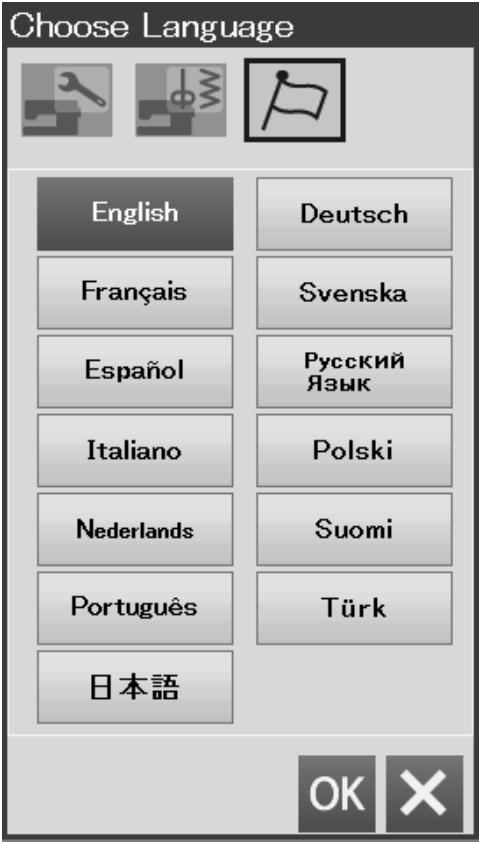
Language Selection Mode
Select the desired language and press the OK key.
The visual touch screen shows messages in the selected language.
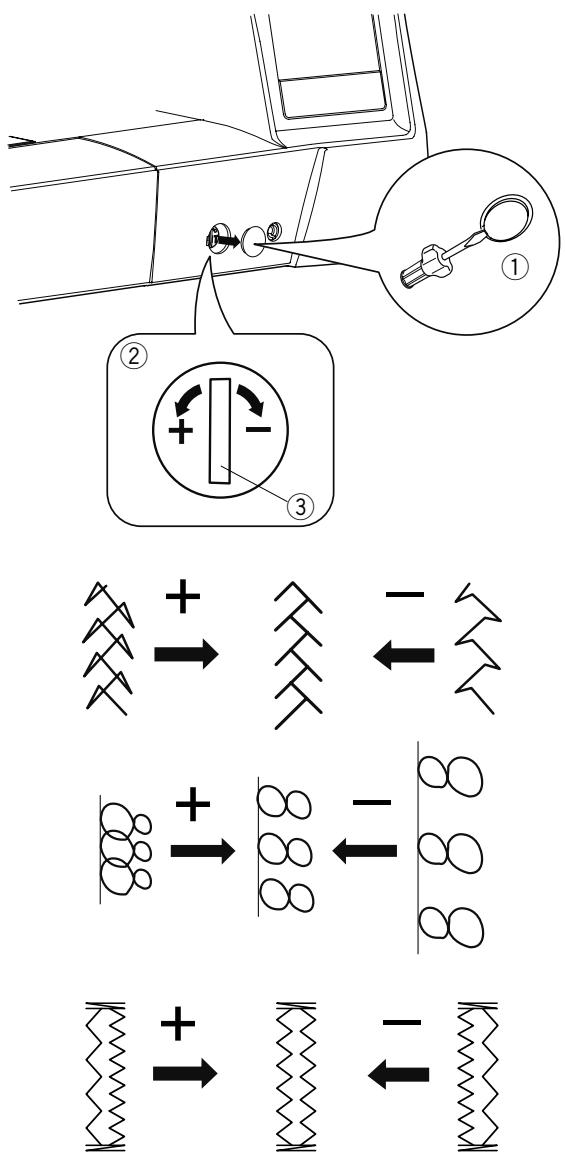
Correcting Distorted Stitch Patterns
The sewing results of the stitch patterns may vary depending upon sewing conditions, such as sewing speed, type of the fabric, number of layers etc.
Always test sew on a scrap piece of the fabric that you wish to use.
If decorative stitch patterns, monogram or the stretch buttonhole is distorted, correct it with the feed balancing dial.
Remove the cap by using the screwdriver etc. Make sure not to scratch the machine body with the screwdriver.
Set the feed balancing dial at the neutral position for normal sewing.
① Cap
② Feed balancing dial
③ Neutral position
NOTE:
Return the feed balancing dial to its neutral position when the sewing is finished.
Stretch stitch pattern (Q15)
If the pattern is compressed, turn the feed balancing dial in the direction of “+”.
If the pattern is drawn out, turn the feed balancing dial in the direction of “—”.
Letters and numbers
If the pattern is compressed, turn the feed balancing dial in the direction of “+”.
If the pattern is drawn out, turn the feed balancing dial in the direction of “—”.
If the right row is denser, turn the dial in the direction of “+”. If the left row is denser, turn the dial in the direction of “−”.
1
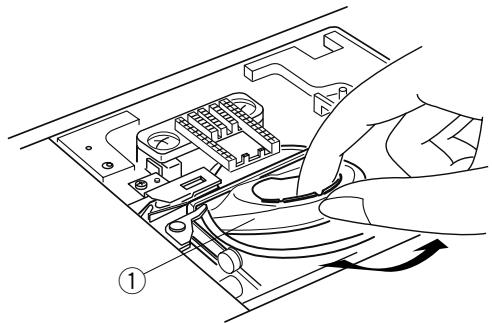
natural_image
Diagram of hands connecting a device into an open circuit board (no text or symbols visible)
2
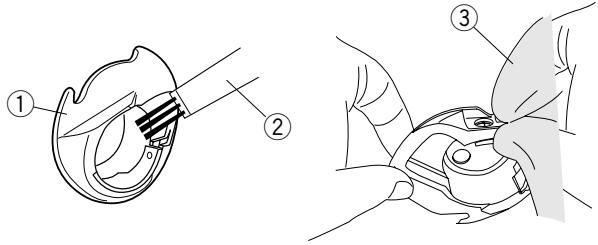
3
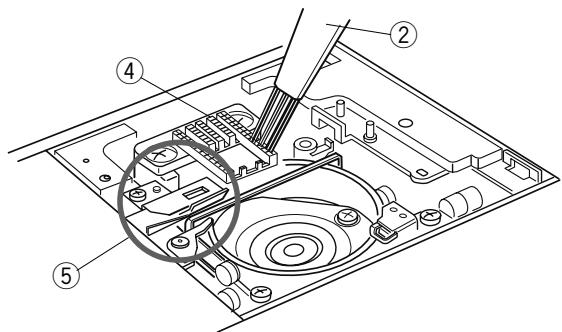
4
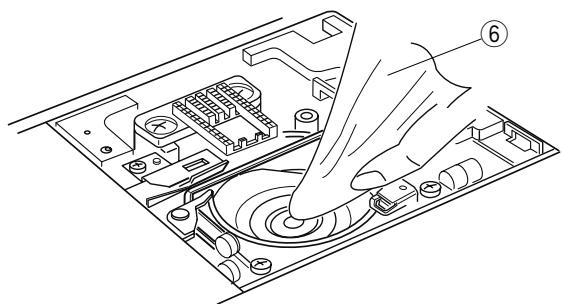
5
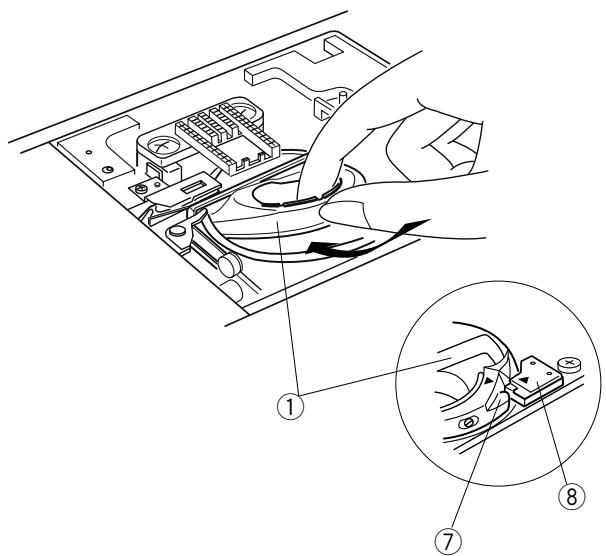
CARE AND MAINTENANCE

WARNING:
Turn the power switch off and unplug the machine before cleaning.
Do not dismantle the machine in any way other than as explained in this section.

CAUTION:
Do not store the machine in a high-humidity area, near a heat radiator, or in direct sunlight. Store the machine in cool dry place.
Clean the outside of the machine with a soft cloth. Do not use chemical solvents.
Cleaning the Hook Area
Clean the hook area at least once a month.
1 Turn the power switch off and unplug the machine. Remove the needle plate (refer to page 20). Remove the needle and presser foot. Take out the bobbin and bobbin holder.
① Bobbin holder
2 Clean the bobbin holder with a lint brush.
Wipe the bobbin holder both inside and outside with a soft cloth.
② Lint brush
③ Soft cloth
3 Clean the feed dog and auto thread cutter device with the lint brush.
④ Feed dog
⑤ Auto thread cutter device
4 Clean the hook race with a soft cloth.
⑥ Soft cloth
5 Insert the bobbin holder so that the knob fits next to the stopper in the hook race.
Insert the bobbin.
Attach the needle plate, presser foot and needle.
⑦ Knob
⑧ Stopper
1
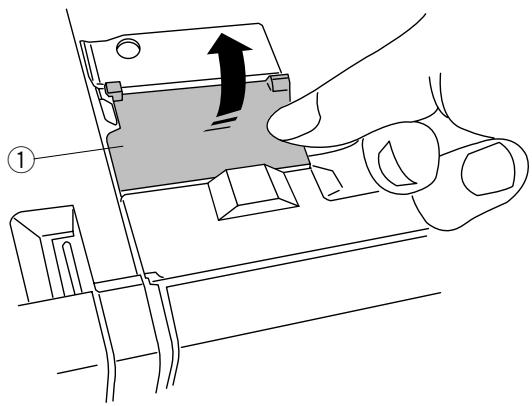
2
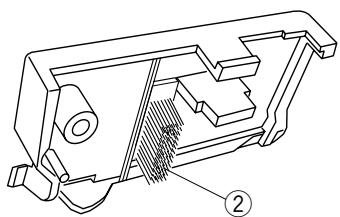
natural_image
Technical line drawing of a mechanical component with labeled parts (no text or symbols present)
3
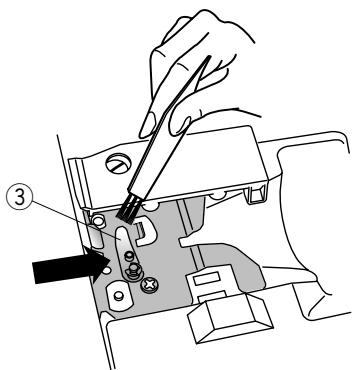
4
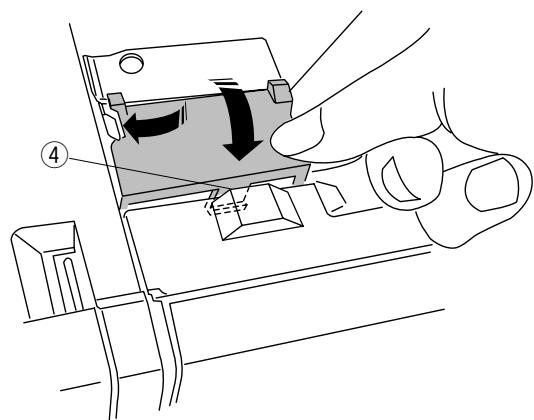
Cleaning the Inside of the Thread Guide
Clean the inside of the thread guide plate under the top cover at least once a month.
1 Remove the needle thread and remove the thread guide plate by pulling it up.
① Thread guide plate
2 Remove lint and dust from the brush on the underside of the thread guide plate using a lint brush.
② Brush on the thread guide plate
3 Clean the area around and under the pre-tension leaf with the lint brush.
③ Pre-tension leaf
4 Set the thread guide plate on the machine, inserting the tenons into the slots. Push the thread guide plate down to snap it in place.
④ Tenon
Problems and Warning Signals
If a buzzer sounds and the visual touch screen shows a warning sign, follow the guidance below.
| Warning Sign | Cause | Try this |
 | 1. The start/stop button is pressed with the foot control connected. | Disconnect the foot control. |
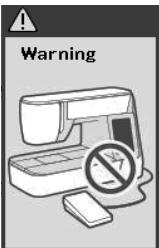 | The foot control is out of order. | Contact the service center or the store from whom the machine was purchased. |
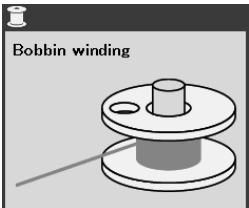 | The bobbin winder spindle is shifted to the right. | Shift the bobbin winder spindle to the left for stitching. |
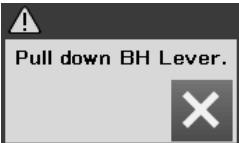 | The machine will stop if the buttonhole is sewn without lowering the buttonhole lever. | Lower the buttonhole lever and start the machine again. |
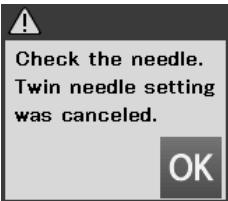 | The twin needle key is pressed when the twin needle sign is indicated on the LCD screen. | Replace the twin needle with a single needle and press the OK key. |
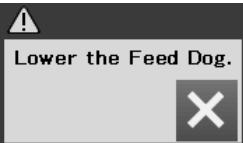 | The machine is started without lowering the feed dog with button sewing selected. | Lower the feed dog. |
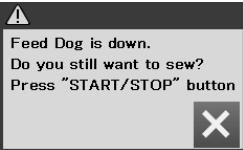 | The machine is started with the feed dog lowered. | Raise the feed dog unless you want to sew with the feed dog lowered. |
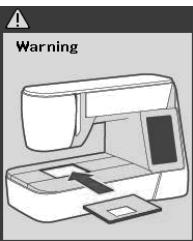 | The needle plate is removed. | Attach the needle plate. Check if the needle plated is attached properly. |
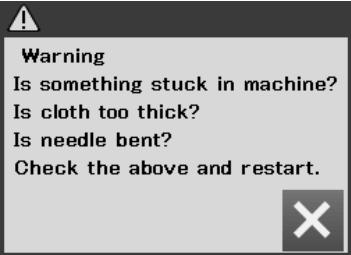 | The machine is halting due to overload. | Wait for at least 15 seconds to restart. Remove tangled threads around take-up lever, hook race and automatic thread cutting mechanism. |
Troubleshooting
| Condition | Cause | Reference |
| The needle thread breaks | 1. The needle thread is not threaded properly.2. The needle thread tension is too tight.3. The needle is bent or blunt.4. The needle is incorrectly inserted.5. The needle thread is not set under the presser foot when start sewing.6. The fabric is moved too fast when stitching free motion quilting.7. The thread is tangled around the spool. | Page 13Page 33Change the needle.Page 16Page 26Page 84Use the spool holder. |
| The bobbin thread breaks | 1. The bobbin thread is not threaded properly in the bobbin holder.2. Lint has collected in the bobbin holder.3. The bobbin is damaged and does not turn smoothly. | Page 12Page 93Change the bobbin. |
| The needle breaks | 1. The needle is incorrectly inserted.2. The needle is bent.3. The needle clamp screw is loose.4. The needle is too fine for the fabric being used.5. An inappropriate presser foot is used. | Page 16Change the needle.Page 16Page 16Use the correct foot. |
| Skipped stitches | 1. The needle is incorrectly inserted, bent or blunt.2. The needle and/or threads are not suitable for the work being sewn.3. A blue tip needle is not being used for sewing stretch, very fine fabrics and synthetics.4. The needle thread is not threaded properly.5. A poor quality needle is used.6. A purple tip needle is not being used for sewing thick fabrics, denims and across the hem. | Page 16Page 16Use the stretch stitch needle.Page 13Change the needle.Page 16 |
| Seam puckering | 1. The needle thread tension is too tight.2. The needle thread is not threaded properly.3. The needle is too heavy for the fabric being sewn.4. The stitch length is too long for the fabric.5. The foot pressure is not adjusted properly.6. A stabilizer is not used when sewing very fine fabrics. | Page 33Page 13Page 16Make stitch shorter.Page 33Apply a stabilizer. |
| The fabric is not feeding smoothly | 1. The feed dog is packed with lint.2. The stitches are too fine.3. The feed dog is not raised after "drop feed" sewing. | Page 93Make stitch longer.Page 22 |
| Loops on the seams | 1. The needle thread tension is too loose.2. The needle is too thick or too fine for the fabric. | Page 33Page 16 |
| The machine does not run | 1. The machine is not plugged in.2. Thread has been caught in the hook race.3. The start/stop button is used for ordinary sewing with the foot control plugged in. | Page 6Page 93Page 6 |
| Buttonhole sewing is not sewn properly | 1. The stitch density is not suitable for the fabric being sewn.2. The interfacing has not been used for the stretch or synthetic fabric.3. The buttonhole lever is not lowered. | Page 40Apply an interfacing.Page 38 |
| The machine is noisy | 1. Thread has been caught in the hook race.2. Lint has built up in the hook race or bobbin holder. | Page 93Page 93 |
| Auto thread cutting failed | 1. Thread is too thick for the auto thread cutting.2. Threads have been caught in the thread cutter mechanism. | Page 14Page 93 |
| Pattern selection keys are grayed out. | 1. The needle plate for straight stitch is attached to the machine.2. Dual feed key is on.3. Twin needle key is on. | Page 20Page 29Page 57 |
| Pattern selection keys do not work | 1. The key position is out of alignment. | Page 87 |
| The needle thread appears on the wrong side of the fabric when the stitch width value is larger than “7.0”. | 1. Thread tension is not balanced. | Page 33 |
It is not abnormal for a faint humming sound to be heard from the internal motors.
The LCD screen and function key area may become warm after several hours of continuous use.
Stitch Chart
Utility(U)

Buttonhole (B)

Applique (A)

Heirloom (H)

Quilt (Q)


Satin (S)

Decorative (D)


tree
| Category | Value |
|---|---|
| 1 | 31 |
| 2 | 32 |
| 3 | 33 |
| 4 | 34 |
| 5 | 35 |
| 6 | 36 |
| 7 | 37 |
| 8 | 38 |
| 9 | 39 |
| 10 | 40 |
| 11 | 41 |
| 12 | 42 |
| 13 | 43 |
| 14 | 44 |
| 15 | 45 |
| 16 | 46 |
| 17 | 47 |
| 18 | 48 |
| 19 | 49 |
| 20 | 50 |
| 21 | 51 |
| 22 | 52 |
| 23 | 53 |
| 24 | 54 |
| 25 | 55 |
| 26 | 56 |
| 27 | 57 |
| 28 | 58 |
| 29 | 59 |
| 30 | 60 |
Long (L)

Play (PL)

* Stitch patterns marked with grey can be flipped vertically. (Horizontal mirror image)
Stitch Chart (Monogram)
Block
| A | B | C | D | E | F | G | H | I | J | K | L | M | N | | | |
| O | P | Q | R | S | T | U | V | W | X | Y | Z | . | ☐ | ☐ | ☐ | |
| a | b | c | d | e | f | g | h | i | j | k | l | m | n | | | |
| o | p | q | r | s | t | u | v | w | x | y | z | . | ☐ | ☐ | ☐ | |
| 1 | 2 | 3 | 4 | 5 | 6 | 7 | 8 | 9 | 0 | & | - | $ | @ | . | . | |
| , | ? | ¿ | ! | i | ‘ | ’ | < | > | ( | ) | - | + | = | / | // % ~ : | |
| À | Á | Â | Ä | Ä | Å | Æ | Ç | È | É | Ê | Ë | ì | í | Î | Ï | Ñ |
| Ò | Ó | Ô | Õ | Ö | ∅ | Ù | Ú | Û | Ü | ß | Aç | Ć | Ε | Ğ | İ | IJ |
| Ł | Ñ | Ñ | Œ | Ś | Ş | Ý | ž | ž | ž | | | | | | | |
| à | á | â | ã | ä | å | æ | ç | è | é | ê | ë | ì | í | î | ï | ñ |
| ò | ó | ô | õ | ö | ø | ù | ú | û | ü | β | aç | ć | ¢ | ğ | ı | ij |
| ł | ń | ň | œ | ś | ş | ý | ź | ż | ž | | | | | | | |
Script