DO221 - Food processor SEB - Free user manual and instructions
Find the device manual for free DO221 SEB in PDF.
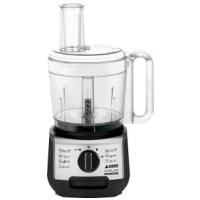
| Product type | Food processor |
| Brand | SEB |
| Model | DO221 |
| Power supply | 220-240 V |
| Speeds | 2 speeds (1 and 2) + Pulse (intermittent operation) |
| Main functions | Knead, mix, chop, grate, slice, emulsify, blend, juice citrus fruits (depending on model), chop herbs |
| Kneading capacity | Up to 600 g heavy dough, 500 g special dough |
| Chopping capacity | Up to 300 g of food |
| Blending capacity | Up to 0.5 L (thick) or 0.8 L (liquid) |
| Included accessories | Multi-function knife, emulsifying disc, 6 vegetable cutting inserts (fine grater, coarse grater, thin slicer, thick slicer, french fry cutter, reibekuchen/parmesan), herb chopper, blender bowl, citrus juicer (depending on model) |
| Safety | Bowl and lid locking, automatic motor stop if unlocked |
| Care and cleaning | Accessories dishwasher safe; wipe motor block with a damp sponge |
| Weight | 4.5 kg (approx.) |
| Dimensions (W x D x H) | 35 x 25 x 30 cm (approx.) |
| Spare parts and repairability | Spare parts available at authorized service center |
| Warranty | International warranty (see service booklet) |
Frequently Asked Questions - DO221 SEB
User questions about DO221 SEB
0 question about this device. Answer the ones you know or ask your own.
Ask a new question about this device
Download the instructions for your Food processor in PDF format for free! Find your manual DO221 - SEB and take your electronic device back in hand. On this page are published all the documents necessary for the use of your device. DO221 by SEB.
USER MANUAL DO221 SEB
b Ensemble bol hachoir
g Support cartouches
h Bol mixer
h1:Bouchon doseur
h2: Couvercle
h3:Bol
i Presse-agrumes
i1:Cone
i2: Entraineur Presse-agrumes
i3:Panier
j Moulin fines herbs
j1: Couvercle
j2:Bol moulin fines-herbes
k Spatule
Tiroir derangement
Mise en service
3: Mélanger/mixer/hacher/pétrir
- Ensemble bol mixer (h).
- Ensemble presse-agrumes (i).
- Bol (b3).
The accessories contained in the model you have just purchased are represented on the label located on top of the packaging.
Safety Tips
- Read the instructions carefully before using your appliance for the first time: any use not in accordance with the instructions will release the manufacturer from all liability.
- Check that the supply voltage of your appliance corresponds to that of your power supply.
- Any connection error cancels the warranty. Your appliance is intended for domestic use inside the home.
- This appliance is not intended for use by people (including children), with reduced physical, sensory or mental capacity, or by people lacking experience or knowledge, unless they are able to benefit, through a person responsible for their safety, from supervision or instructions prior to using the appliance.
- It is advisable to supervise children to ensure that they do not play with the appliance.
- Unplug your appliance as soon as you have finished using it (even in the event of a power cut) and when you are cleaning it.
- Do not use your appliance if it is not working correctly or if it has been damaged. In this case, contact an approved service centre (see list in the service booklet).
- Any intervention other than cleaning and routine maintenance by the customer should be carried out by an approved service centre (see list in the service booklet).
- Do not put the appliance, power lead or plug in water or any other liquid.
- Do not leave the power lead within reach of children.
- The power lead should never be left near or in contact with the hot parts of your appliance or near a heat source or resting on a sharp corner.
- If the power lead or plug is damaged, do not use the appliance. To avoid any danger, have it replaced by an approved service centre (see list in the service booklet).
- For your own safety, only use accessories and parts that fit your appliance, sold by an approved service centre.
- Always use the pushers to guide the food through the feeder tubes, never your fingers, a fork, spoon, knife or any other object.
- Precautions should be taken on handling the multi-function blade, the mixer bowl blade, herb grinder and vegetable cutter cartridges when you are cleaning them and when you empty the bowls; they are extremely sharp. You must remove the multifunction blade (d) by its spindle (c) before emptying the contents of the bowl.
- Do not run your appliance while it is empty.
Always use your mixer bowl with its lid. - Never touch moving parts, wait for the appliance to come to a complete stop before removing the accessories.
- Do not use the accessories as containers (freezing - cooking - hot sterilisation).
- Do not use the accessories in the microwave.
- Do not allow long hair, scarves, ties, etc. to hang over the bowl and the accessories while in operation.
- Do not carry your appliance around by holding it by the drawer.
a Motor drive
a1:Motor drive slow output
a2:Motor drive fast output
a3:Speed selector:Pulse position (intermittent operation)-0-1-2
b Chopping bowl assembly
b1:Pusher with measuring section
b2:Lid with feeder tube
b3:Bowl
C Spindle
ACCESSORIES DEPENDING ON MODEL:
d Multifunction blade
e Emulsifying disc
f Vegetable cutter cartridges
A:Fine grater
D:Fine slicer
C:Coarse grater
G: Rosti (potato cakes)/parmesan
H:Thick slicer
E: French fries cutter
g Cartridge holder
h Blender
h1:Feeder cap
h2:Lid
h3:Jug
i Citrus press
i1:Cone
i2: Citrus press spindle
i3:Filterbasket
j Herb grinder
j1:Lid
j2:Herbgrinderbowl
k Spatula
Storage drawer
Using your appliance
- Before using for the first time, wash all parts of the accessories in hot soapy water (see section on cleaning). Rinse and dry.
- Place the motor drive (a) on a flat surface that is clean and dry.
- Plug in your appliance.
- Pulse (intermittent operation): turn the knob (a3) to Pulse position - using a succession of pulses can give you better control when preparing certain foods.
- Continuous operation: turn the knob (a3) to position 1 or 2.
- Stop: turn the knob (a3) to position 0.
The numbering of the paragraphs corresponds to the numbering of the diagrams.
1 : Fitting the chopping bowl and lid
ACCESSORIES USED:
- Bowl assembly (b).
FITTING THE ACCESSORIES:
- Place the bowl (b3) on the motor drive (a), with the handle positioned slightly to the right of the button.
- Lock the bowl (b3) by turning it to the right.
- Fit the lid (b2) onto the bowl (b3). Lock the lid by pushing it to the right in the bowl handle.
It is essential to lock the bowl onto the motor drive (a) before locking the lid (b2) onto the bowl (b3).
2 : Removing the chopping bowl and lid
- Unlock the lid by turning it clockwise to release the bowl handle. You will then be able to lift and remove it.
- Unlock the bowl by turning it clockwise.
- Only now will you be able lift and remove the bowl from the motor drive.
3: Mixing/blending/chopping/kneading
ACCESSIONS USED:
- Bowl assembly (b).
Spindle (c). - Multifunction blade (d).
FITTING THE ACCESSORIES:
- Place the bowl (b3) onto the motor drive (a) and lock it in place.
- Slide the multifunction blade (d) onto the spindle (c), and position the entire assembly on the motor drive (a1).
- Place the ingredients in the bowl.
- Place the lid (b2) and lock it on the bowl (b3).
- To remove the bowl-lid assembly: unlock the lid then unlock the bowl.
KNEADING/MIXING
- Turn the speed selector (a3) to position 2 to start it up.
You can knead up to:
- 600 g of heavy dough, such as white bread dough, shortcrust pastry in 30 sec.
- 500 g of special bread dough, such as rye bread, wholemeal bread, wholegrain bread, etc. in 30 sec.
You can mix up to:
- 600 g of light cake mixture such as biscuit dough, pound cake, sponge cake, etc. in approximately 1 min 30 sec.
You can also mix up to 0.5 litre of pancake or waffle batter in 1 min to 1 min 30 sec.
CHOPPING
- Turn the speed selector (a3) to position 2 to start, or for better control of chopping, use the pulse position.
You can chop up to 300g of food such as:
- Raw or cooked meat (boned, trimmed and diced).
- Raw or cooked fish (skinned and filleted).
- Hard foods: cheese, dried fruit, some vegetables (carrots, celery, etc.).
- Soft foods: some vegetables (onions, spinach, etc.).
BLENDER
- Turn the speed selector (a3) to position 2 to start.
You can blend up to 0.5 litre of soup or stewed fruit in 20 sec.
4 : Grating/slicing
ACCESSORIES USED:
- Bowl assembly (b).
Spindle (c). - Cartridge of choice (f) (depending on model).
- Cartridge support (g).
FITTING THE ACCESSORIES:
- Place the bowl (b3) on the motor drive (a) and lock it.
- Insert the selected cartridge (f) into the cartridge support (g), introduce the spindle axle (c) as far as it will go through the cartridge (f), and lock the assembly, then position it on the motor drive (a1).
- Fit the lid (b2) and lock it on the bowl (b3).
- To remove the bowl-lid assembly: unlock the lid and then unlock the bowl.
Check that the metal axle of the spindle (c) is inserted in the centre of the lid with measuring tube (b2)
USAGE AND TIPS:
- Introduce the food through the lid feeder tube and guide it through using the pusher (b1).
- Turn the speed selector (a3) to position 1 for slicing or position 2 for grating.
You can prepare the following with the cartridges (depending on model):
- Coarse grating (C) / fine grating (A): celeriac, potatoes, carrots, cheese, etc.
- Thick slices (H) / thin slices (D): potatoes, onions, cucumber, beetroot, apples, carrots, cabbage, etc.
- French fries (E): chips, etc.
- Potato fritters/Parmesan (G): for grating parmesan, coconut, etc.
5 : Emulsifying/beating/whipping
ACCESSIONS USED:
- Bowl assembly (b).
- Spindle (c).
- Emulsifying disc (e).
FITTING THE ACCESSORIES:
- Place the bowl (b3) on the motor drive (a) and lock it in place.
- Slide into place and lock the emulsifying disc (e) on the spindle (c), and position the assembly on the motor drive output (a1).
- Place the ingredients in the bowl.
- Position the lid (b2) and lock in on the bowl (b3).
- To remove the bowl-lid assembly: unlock the lid then unlock the bowl.
Fit the emulsifying disc in the right direction: see inset drawing 5.
USAGE AND TIPS:
- Turn the speed selector (a3) to position 2 to start.
- Never use this accessory to knead heavy dough or to mix cake mixtures.
You can prepare: mayonnaise, aioli, sauces, egg whites (1 to 6), whipped cream, chantilly cream (up to 0,2 litres).
6 : Liquidising/blending/mixing very finely (depending on model)
ACCESSORIES USED:
- Jug blender assembly (h).
FITTING THE ACCESSORIES:
- Place the ingredients in the blender jug (h3) without exceeding the maximum level shown on the jug.
- Fit the lid (h2), with the feeder cap (h1), and lock it onto the jug.
- Position the assembled jug (h) on the motor drive output (a2), with the jug handle facing towards you.
- Wait for the appliance to come to a complete stop before removing the blender jug from the motor drive.
USAGE AND TIPS:
- Turn the speed selector (a3) to position 1 or 2 to start up.
You can use the Pulse position for better control of mixing. - Never fill the blender jug with boiling liquid.
- Never use the blender jug for dry products (nuts, almonds, peanuts, etc.).
Always use your blender jug with the lid on. - Pour all liquid ingredients into the jug first before adding the solid ingredients, without exceeding the maximum level shown:
-1 I for thick mixtures.
- 0.8 l for liquid mixtures.
- To add ingredients during mixing, remove the feeder cap (h1) from the lid and pour the ingredients through the filling hole without exceeding the filling level shown on the jug.
Maximum usage time: 3 min.
Tips:
- During mixing, if the ingredients get stuck to the sides of the jug, switch off the appliance and unplug it. Remove the blender jug assembly from the main body of the appliance. Use the spatula to push the preparation down onto the blade. Never put your hands or fingers into the jug or near the blade.
You can:
- Prepare extra smooth soups, sauces, stewed fruit, milk-shakes and cocktails.
- Blend batters (pancakes, doughnuts, fritters, cake).
7 : Squeezing citrus fruit (depending on model)
ACCESSIONS USED:
- Citrus press assembly (i).
- Bowl (b3).
FITTING THE ACCESSORIES:
- Place the bowl (b3) on the motor drive (a) and lock it.
- Slide the spindle (i2) onto the motor drive output (a1).
- Place the basket (i3) on the bowl and lock.
- Place the cone (i1) on the container tube (i3).
- To remove the citrus press assembly: unlock the filter basket (i3) and then the bowl and you can then lift the assembly from the motor drive.
USAGE AND TIPS:
- Place half a citrus fruit on the cone (i1).
- Turn the speed selector (a3) to position 1 to start up.
You can obtain up to 0.6 l of citrus juice without emptying the bowl.
- Attention: you should rinse the filter basket every 0.2l.
8 : Finely chopping small quantities (depending on model)
ACCESSIONS USED:
Herb grinder assembly (j).
FITTING THE ACCESSORIES:
- Place the ingredients in the herb grinder bowl (j2).
- Fit the lid (j1) over the herb grinder bowl (j2) and lock it by turning it clockwise.
- Place the assembly on the motor drive (a).
USAGE AND TIPS:
- Turn the speed selector (a3) to position 2 to start up, holding the herb grinder down on the motor drive during operation.
You can use the "Pulse" position for better control of mixing.
- With the herb grinder (j) you can grind the following in a few seconds:
- Garlic, parsley, onion, breadcrumbs, ham, etc.
- Quantity / Maximum time: 50g / 10 sec
- Dried apricots, dried figs, stoned prunes
-
Quantity / Maximum time: 80g / 5 sec
-
Be very careful with the blade when emptying the bowl, it is very sharp.
9: Accessory storage (depending on model)
- Your appliance comes with an integrated storage drawer (i) where you can put the multifunction blade (d) and the 4 vegetable slicer cartridges (f).
- After storing the accessories, slide the storage drawer (i) in the motor drive (a).
Cleaning
- Unplug the appliance.
-
For easier cleaning, quickly rinse the accessories after use.
-
Wash the accessories in hot water and washing up liquid then dry thoroughly, or they are all dishwasher safe.
To clean the blender jug, pour some water containing a few drops of washing-up liquid into the blender jug (h3). Close the lid (h2), fitted with the feeder cap (h1). Pulse a few times. Disconnect the appliance. Rinse the jug. - Do not place the motor drive (a) in water or under running water. Wipe it with a damp sponge.
- The accessory blades are very sharp. Handle them with care.
Tip: if your accessories become discoloured by food (carrots, oranges, etc.), rub them with a cloth dipped in cooking oil then clean them in the usual way.
Storage
- Do not store your appliance in a damp atmosphere.
What to do if your appliance is not working
-
If your appliance is not working, check:
-
That your appliance is plugged in.
-
That each accessory is locked in place.
-
If your appliance is still not working contact an approved service centre (see the list in the Service booklet).
HELPLINE:
If you have any product problems or queries, please contact our Customer Relations Team first for expert help and advice:
0845 602 1454-UK
(01) 677 4003 - Ireland
or consult our website - www.tefal.co.uk
Disposal of packaging and the appliance

- The packaging is comprised exclusively of materials that present no danger for the environment and which may therefore be disposed of in accordance with the recycling measures in force in your area.
For disposing of the appliance itself, please contact the appropriate service of your local authority.
End-of-life electrical or electronic products

Think of the environment!


Your appliance contains valuable materials which can be recovered or recycled.

Leave it at a local civic waste collection point.
Accessories
-
You can customise your appliance and obtain the following accessories from your retailer or an approved service centre:
-
Vegetable cutter cartridges
A: Fine grater
D: Thin slicer
C: Coarse grater
H: Thick slicer
G: Rosti (potato cakes)/parmesan
E: French fries cutter
- Herb grinder
- Jug blender
- Citrus press
EN
ATTENTION:
To obtain an accessory, please take these instructions with you.
Some basic recipes
White bread dough
375 g strong white bread flour - 225 ml warm water - 1 sachet dried yeast - 5 g salt
Put the flour, salt and yeast into the bowl fitted with the multifunction blade. Operate at speed 2 and after a few seconds pour the warm water through the lid feeder tube. As soon as the dough forms a ball (around 30 sec), stop the appliance. Leave the dough to rise in a warm place until it has doubled in size. Then rework the dough to shape it and place it on a greased, floured baking tray. Leave to rise again. Preheat the oven to 240^ . When the bread has doubled in size, put it in the oven and lower the temperature to 180^ . Bake for approximately 30 min. At the same time, place a glass of water in the oven to encourage the crust to form.
For UK only: Use 500 g strong white bread flour. Substitute 2 sachets of dried yeast with 1 teaspoon of Easy Bake or Fast Action dried yeast and add to the bowl with the flour plus 1 teaspoon salt. Add 300 ml warm water and process as above. After processing, shape the dough into a ball and place on a greased baking tray. Leave to rise for about 1 hour in a warm place until doubled in size. Shape and cook for about 20 min in a preheated oven at 220^ , UK gas mark 7 and then reduce to 180^ /UK Gas mark 4 for a further 15 mins.
Pizza dough
150 g strong white bread flour - 90 g warm water - 2 dessertspoons olive oil - 12 sachet dried yeast - salt Put the flour, salt and yeast into the bowl fitted with the multifunction blade. Operate at speed 2 and after a few seconds pour the warm water and oil through the lid feeder tube. As soon as the dough forms a ball (15 to 20 sec), stop the appliance. Leave the dough to rise in a warm place until it has doubled in size. Preheat the oven to 240^ . Meanwhile, spread out the dough and add toppings as required: tomato and onion puree, mushrooms, ham, mozzarella, etc. Liven up your pizza with a few anchovies and black olives, sprinkle a little oregano and grated gruyere and pour a few drops of olive oil over it. Place the pizza on greased, floured baking tray. Bake for 15 to 20 min to your taste.
For the UK only: Use strong white bread flour. Substitute half sachet of bakers yeast with half teaspoon of Easy Bake or Fast Action dried yeast and add to the bowl with the flour, 12 teaspoon salt and 12 teaspoon sugar. Then prepare as directed above with 90 ml warm water and 1 tablespoon olive oil. Roll out to a 28 cm circle and cover with the topping of your choice. Bake in a preheated oven at 220^ , UK gas mark 7 for about 15 - 20 min or until crisp.
Rich Shortcrust Pastry
280 g plain flour - 140 g softened butter - 70 ml cold water - pinch salt.
Put the flour, salt and butter into the bowl fitted with the multifunction blade.
Operate at speed 2 for a few seconds then pour the water through the lid feeder tube. Continue until the dough forms a ball (25 to 30 sec). Leave to chill for at least 1 hour before rolling out and baking with the filling of your choice.
160 g plain flour - 1/3l milk - 2 eggs - 12 teaspoon fine salt - 2 dessertspoons oil -10 g sugar (optional) - Rum (if desired).
Put all the ingredients into the bowl fitted with the multifunction blade: the flour, milk, eggs, sugar and Rum. Operate at speed 1 for 20 sec, then change to speed 2 for 25 sec.
Put all the ingredients in the blender jug except the flour. Operate at speed 2, and after a few seconds gradually add the flour through the central hole of the blender jug, then blend for 45 sec.
Sponge cake
150 g plain flour - 12 sachet or 1 teaspoon baking powder - 150 g softened butter - 150 g caster or fine sugar - 3 whole eggs - 1 pinch salt.
Put all the ingredients into the bowl fitted with the multifunction blade. Operate at speed 2 for 1 min 30. sec Preheat the oven to 180^ . Pour the mixture into a cake tin and bake for 40 min.
Spice cake
150 g plain flour - 70 g softened butter cut into pieces - 70 g caster or fine sugar - 3 eggs - 50 ml milk - 2 teaspoons baking powder - 1 teaspoon cinnamon - 1 teaspoon ginger - 1 teaspoon nutmeg - zest of 1 orange - 1 pinch pepper.
Put all the ingredients into the bowl fitted with the multifunction blade. Select speed 2 and operate for 50 sec. Pour into a greased, floured cake tin and bake for 50 min at 180^ .
Serve warm or cold with stewed fruit or jam.
Chocolate cake
5 eggs, 200 g caster or fine sugar, 3 dessertspoons plain flour, 200 g melted butter, 200 g good quality plain chocolate (at least 65% cocoa solids), 1 sachet or 3 teaspoons baking powder, 100 ml milk.
Melt the chocolate in a bain-marie (or in bowl over a pan of boiling water) with 2 dessertspoons of water. Add the butter and stir until the mixture is completely blended.
Put the sugar and eggs in the bowl fitted with the multifunction blade and operate at speed 2 for 45 sec until the mixture becomes frothy. Without stopping the appliance, add the melted chocolate, flour, baking powder and milk through the feeder tube and continue to operate for 15 sec.
Pour into a greased, floured cake tin and bake for around 1 hr at 160^ .
Chantilly cream
200 ml very cold fresh whipping cream, 30 g icing sugar.
Place the bowl in the refrigerator for a few minutes so that it is very cold.
Put the fresh cream and the icing sugar into the bowl fitted with the emulsifying disc. Select speed 2 and operate for 40 sec.
Mayonnaise
1 egg yolk, 1 dessertspoon mild mustard, 1 dessertspoon vinegar, 14 litre oil, salt, pepper.
Put all the ingredients except the oil in the bowl fitted with the emulsifying disc. Select speed 2 and operate for 5 sec. then stop the appliance and pour the oil very slowly through the lid feeder tube. When the mayonnaise is ready it becomes pale in colour.
Important: to be successful with the mayonnaise, the ingredients should be at room temperature. Note: keep in the refrigerator and consume within 24 hours.
ACCESSIONS CONFORM MODEL:
d Multifunctioneel mes
e Mengschnittf
f Patronen groentes
g Holder for innsatsene
hBlandebolle
h1:Doseringskopp
h2:Lokk
h3:Bolle
i Sitruspresse
i1:Hode
i2: Stapper for citruspressen
i3:Skal
j Urtekvern
j1:Lokk
j2:Bolle for urtekvernen
k Spatel
Oppbevaringskkuffe
Igangsetting
-
yds - Jydu 100
-
8y2y1y2y1y2y1y2y1y2y1y2y1y2y1y2y1y2y1y2y1y2y1y2y1y2y1y2y1y2y1y2y1y2y1y2y1y2y1y2y1y2y1y2y1y2y1y2y1y2y1y2y
2 2 aal l 1
a 0. 0. 0. 0. 0. 0. 0. 0. 0. 0. 0. 0. 0. 0. 0. 0. 0. 0. 0. 0. 0. 0. 0. 0. 0. 0. 0. 0. 0. 0. 0. 0. 0. 0.
a a a a a a a a a a a a a a a a a a a a a a a a a
a 10 aal laii iie gaiy jil
()1rroegeoalgaoaoljuaoljuaoljuaoljuaol
uuiuuiu uus
.
Lolai 1111 1111 1111 1111 1111 1111 1111
2 2 aal yaiyaiyaiyaiyaiyaiyaiyaiyaiyaiyaiyaiyaiyaiyaiyaiyaiyaiyaiyaiyaiyaiyaiyaiyaiyaiyaiyaiyaiyaiyaiyaiyaiyaiyaiyaiyaiyaiyaiyaiyaiyaiyaiyaiyaiyaiyaiyaiyaiyaiyai
Jll
Jalil - Jala - Cui jil jil jil - Jall jol oj yu kai Jali - Jol jol jol jol jol jol
a 1 a 2 a 3 a 4 a 5 a 6 a 7 a 8 a 9
aaii iia aiee aieae eae aeae aeae aeae aeae aeae aeae aeae aeae aeae aeae aeae aeae aeae aeae aeae aeae aeae aeae aeae aeae aeae aeae aeae aeae aeae aeae aeae aeae aeae aeae aeae aeae aeae aeae aeae aeae aeae aeae aeae aeae aeae aeae aeae aeae aeae aeae aeae aeae aeae aeae aaee
aill
L 1
aia 1
jLl lclbs 1
aoc1o: A
ai a b ai 的最小值为 k .
a: C
_i = 1^na_ib_i = H
jzjy jy/yyjy:G
aaiyaaal sblll aclbs:E
Liiic jiaho
b11 !
l_1 : y = - 9x
4
J 1
a
#
2 2 2 2 2 2 2 2 2 2 2 2 2 2 2 2 2 2 2 2 2 2 2 2 2 2 2 2 2 2 2 2 2 2 2 2 2 2 2 2 2 2 2 2 2 2 2 2 2 2 2
Jolal Jolal Jolal Jolal Jolal
1jnn
2 2 2 2 2 2 2 2 2 2 2 2 2 2 2 2 2 2 2 2 2 2 2 2 2 2 2 2 2 2 2 2 2 2 2 2 2 2 2 2 2 2 2 2 2 2 2 2 2 2 2
j0 10 sall j.
Shortcrust
-1000 - 100000000000000000000000000000
a
Jy jnnn nn nnnn nn nnnnnnnnnnnnnnnnnnnnnnnnnnnnnnnnnnnnnnnnnnnnnnnnnnnnnnnnnnnnnnnnnnnnnnnnnnnnnnnnnnnnnnnnnnnnnnnnnnnnnnnnnnnnnnnnnnnnnnnnn
jLd 1000
JLJIaIILJLJIJIJIJIJIJIJIJIJIJIJIJIJIJIJIJIJIJIJIJIJIJIJIJIJIJIJIJIJIJIJIJIJIJIJIJIJIJIJIJIJIJIJIJIJIJIJIJIJIJIJIJIJIJIJIJIJIJIJIJIJIJIJIJIJIJIJIJIJIJIJIJIJIJIJIJIJIJIJIJIJIJIJIJIJIJIJIJIJIJIJIJIJIJIJIJIJIJIJIJIJLI JIJAIIJIAI.
1 1
J 1 J 1 J 1 J 1 J 1 J 1 J 1 J 1 J 1 J 1 J 1 J 1 J 1 J 1 J 1 J 1 J 1 J 1 J 1 J 1 J 1 J 1 J 1 J 1 J 1 J 1 J 1 J 1 J 1 J 1 J 1 J 1 J 1 J 1 J
aLlall lJusllalolll aIyllal lal yIy jy Jy 1111111111111111111111111111111111111
Jauai jia jia jia jia jia jia jia jia jia jia jia jia jia
():9
AR
Lb(d)lglalssjooj (1)jzjj
(1) 1,2,3 all possible
(a) all aIg (1) jzjll cJd Jd
joc/p/ob/25:5
:laaiuilll laloll
(b)
(C)
(3) ylauiy iiai y
:JdJd
aIgawu
Olymyry Olymniy
paill jil:
gill
a aal l aal aal aal aal aal aal aal aal aal aal aal aal aal aal aal aal aal aal aal aal aal aal aal aal aal aal aal aal aal aal aal aal aal aal aal aal aal aal aal aal aal
iill lla Jlll
iiybl y 1y 5ill lalv ay
JL 1
.
.1ai20
aio 1000 1000
(aaal aai jaijai jai jai)
aJilw yclly wlll 1y
JlaljI Jgaiy
Jus Jy jyj yj yj yj yj yj yj yj yj yj yj yj yj yj yj yj yj yj yj yj yj yj yj yj yj yj yj yj yj
.
aall jlll laiiaai all aaiy jlll baaag aalalbss Jauu,
1-2x200-0000000000000000000000000000000000000000000000
100-siss
Jolk jn bglg l g dai Lal 1r. k k y r y 2 1
a a a a a a a a a a a a a a a a a a a a a a a a
a a a a a a a a a a a a a a a a a a a a a a a a a a a a a
JlaaLbI (8e,JIaIyB) aI Ss yI yI yI yI yI yI yI yI yI yI yI yI yI yI yI yI yI yI yI yI yI yI yI yI yI yI yI yI yI
aai jai yale Jg rssu w g k aai y s
S_1 = 14 · ( 2x - 4)
( c - l_2) = 0
:laLsbs
1 1
aaiia aiaaaiaaaiaaa aa aiaaaaaaaaa
0845 602 1454 - UK
(01) 677 4003 - Ireland
s 1
j j 100000000000000000000000000000000000000000
Jalol Jolal Jai

y
y
aalai jla jj g a (a) gaa (g) (b3)
(a1) 000000000000000000000000000000000000000000
Lai Jzj g dJr 1 (i3)
(i3)(i1)(i1)
jLjikjIurksuysuusduoJyI (i3) jldu:gsck
1 1 1
gul
(i)gj0gjy
1 1 (a3)
10.6 1
0.2 1
()):8
:olalil 100
((j)_{\rho \rho \rho \rho \rho \rho \rho \rho \rho \rho \rho \rho \rho \rho \rho \rho \rho \rho \rho \rho \rho \rho \rho \rho \rho \rho \rho \rho \rho \rho \rho \rho \rho \rho \rho \rho \rho \rho \rho \rho \rho \rho \rho \rho \rho \rho \rho \rho \rho \rho \rho
:Liabjugai jliigo
j2) j 1
(j2)
Lai Jss
(a) 1
gulglslglalglal
2a3) (a3)
aaii iiaai j 1j 1j 1j 1j 1j 1j
Laiu 1
. 5
10/50 50
4a 1
5/≤80:loj≤1/2/j
():
0i 1 i j i j i j i i (i) i i S i i
4(d)
a (a) 1 a 1 1 1 1 1 1 1 1 1 1 1 1 1
1
5Js4:la
.
:olal
(b)
C)
(2) 12 · 49 · 49
:Liabjugai jliigo
aai jaa aie yjra jra (a) 2000
(C)y
a1)
4wksj1s1rso
Jb3)K 1200 (b2)
J 1
sul slaia gao laa dya
Lai jk 2 2 (a3) c
aaii aiee i 58 bglz jj y jkiw glaia jj aabj jol k
olio,oiooj oioi: (Jc6 1) jorpoofoo,lo yoo, yoljol; laolai bolo loljol
(20 0.2口)≤slant
(joo j) Jols n nn /nnnss
100
( h) ≤ hLhL = h.
:Liabjugai jliigo
j 1 (h3) j
- 1234567890
L (h2) (h1)
(2a)
aagaa aolkskssu laaasr gaaasgaa j sbsgsj
gai jiai
21 (a3) c
aaii oaii iui jus bgsio Jae jie uii ciu yuui aui jui g
()
laai dlaol 1goo oos
1-
0.8-
j 1 (h1)
iai jia jia jia jia jia jia jia jia
2a3)
30 1
30 25 1 1 1 1 1 1 1 1 1 1 1 1 1 1 1 1 1 1 1 1 1 1 500
aaiia bglio Jgoljdo joi
30 1 s wlo 5 5 5 5 5 5 5 5 5 5 5 5 5 5 5 5 5 5 5 5 5 5 5 5 5 5 5 5 5 5 5 5 5 5 5 5 5 5 5 5 5 5 5 5
30 1 5 0.5
j213 2 a3) c
Jc0s 1C (C)200000000000000000000000000000000
a a a a a a a a a a a a a a a a a a a a a a a a a a
a1(a1)2
Jb3) 1sK JrRjRjRjRjRjRjRjRjRjRjRjRjRjRjRjRjRjRjRjRjRjRjRjRjRjRjRjRjRjRjRjRjRjRjRjRjRjRj
J 1 J 1 J 1 J 1 J 1 J 1 J 1 J 1 J 1 J 1 J 1 J 1 J 1 J 1 J 1 J 1 J 1 J 1 J 1 J 1 J 1 J 1 J 1 J 1 J 1 J 1 J 1 J 1 J 1 J 1 J 1 J 1 J 1 J 1 J
1
jIjIiJiJiJiJiJiJiJiJiJiJiJiJiJi
15 15 15 15
1
J 1
y
1
.
.
jzuygagaiydiiaaui j1j1iayk g a ygolkiyds k jksd
(1oJ 10000000000000000000000000000000000000000000000000
j j j j j j j j j j j j j j j j j j j j j j j j j j j j j j j j j j j j j j j j j j
( 21 + 22) + 23 + 24 = 281
LaiolilwJ 1
jolk, jldu 1jic uus 2julai ouiu s jilj i jil jil jil jil jil jil jil jil
aaii iiaai i 1
y 1