
SMALL OFFICE SECURITY - Small Business Security KASPERSKY LAB - Free user manual and instructions
Find the device manual for free SMALL OFFICE SECURITY KASPERSKY LAB in PDF.


| Product Type | Security Suite for Small Businesses |
| Brand | KASPERSKY LAB |
| Model | SMALL OFFICE SECURITY |
| Operating System Compatibility | Windows 98, Me, NT Workstation 4.0 SP6a, 2000 Pro/Server SP4+, XP Home/Pro SP1+, XP Pro x64, Vista (32/64-bit), Server 2000/2003 (32/64-bit), Small Business Server 2003 |
| Available Licenses | 5 workstations, 5 workstations + 1 server, 10 workstations + 1 server |
| Real-time Protection | File Anti-Virus, Mail Anti-Virus, Web Anti-Virus, Proactive Defense, Anti-Spy, Anti-Hacker, Anti-Spam |
| Scheduled Scans | Critical Areas, My Computer, Startup Objects (customizable) |
| Database Update | Automatic (by interval or every 2 hours), manual, distribution to other workstations |
| Activation | By activation code, license key (.key) or trial version |
| Self-defense | Process protection, password for settings modification |
| Rescue Tools | Rescue Disk, quarantine, file backup |
| Minimum System Requirements | 300 MHz processor, 50 MB disk space, 64/128/512 MB RAM depending on OS, IE 5.5+, Windows Installer 2.0 |
| Documentation Languages | French, English, others (translation available upon request) |
| Support | Technical support by phone, email, forum, online FAQ |
Frequently Asked Questions - SMALL OFFICE SECURITY KASPERSKY LAB
User questions about SMALL OFFICE SECURITY KASPERSKY LAB
0 question about this device. Answer the ones you know or ask your own.
Ask a new question about this device
Download the instructions for your Small Business Security in PDF format for free! Find your manual SMALL OFFICE SECURITY - KASPERSKY LAB and take your electronic device back in hand. On this page are published all the documents necessary for the use of your device. SMALL OFFICE SECURITY by KASPERSKY LAB.
USER MANUAL SMALL OFFICE SECURITY KASPERSKY LAB
Revision date: September 2008
Table of Contents
CHAPTER 1. KASPERSKY SMALL OFFICE SECURITY 5
1.1. Software overview 5
1.2.Software packages 5
1.3. Getting started 7
1.4. Support for registered users 11
CHAPTER 2. KASPERSKY ANTI-VIRUS 6.0FOR WINDOWS WORKSTATIONS... 12
2.1. Overview 12
2.1.1. What's new in Kaspersky Anti-Virus 6.0 for Windows Workstations 12
2.1.2. The elements of Kaspersky Anti-Virus for Windows Workstations Defense 15
2.1.2.1. Protection components 15
2.1.2.2.Virus scan tasks 17
2.1.2.3. Program tools 18
2.2. Installing Kaspersky Anti-Virus 6.0 for Windows Workstations 19
2.2.1. Hardware and software system requirements 20
2.2.2. Installation procedure using the Installation Wizard 21
2.2.3. Setup Wizard 25
2.2.3.1. Using objects saved with Version 5.0 26
2.2.3.2. Activating the program 26
2.2.3.3. Selecting a security mode 28
2.2.3.4. Configuring update settings 29
2.2.3.5. Configuring a virus scan schedule 30
2.2.3.6. Restricting program access 30
2.2.3.7. Configuring Anti-Hacker settings 31
2.2.3.8. Finishing the Setup Wizard 33
CHAPTER 3. KASPERSKY ANTI-VIRUS 6.0 FOR WINDOWS SERVERS 34
3.1. Overview 34
3.1.1. What's new in Kaspersky Anti-Virus 6.0 for Windows Servers 34
3.1.2. The elements of Kaspersky Anti-Virus for Windows Servers Defense..... 35
3.1.2.1. File Anti-Virus 36
3.1.2.2.Virus scan tasks 36
3.1.2.3. Program tools 37
3.2. Installing Kaspersky Anti-Virus 6.0 for Windows Servers 38
3.2.1.Hardware and software system requirements 39
3.2.2. Installation procedure using the Installation Wizard 39
3.2.3. Setup Wizard 43
3.2.3.1. Using objects saved with Version 5.0 44
3.2.3.2.Activating the program 44
3.2.3.3. Configuring update settings 46
3.2.3.4. Configuring a virus scan schedule 47
3.2.3.5. Restricting program access 47
3.2.3.6. Finishing the Setup Wizard 48
APPENDIX A. KASPERSKY LAB 49
CHAPTER 1. KASPERSKY SMALL OFFICE SECURITY
Kaspersky Small Office Security is a software package aiming to provide small organizations with protection against viruses and other threats.
1.1. Software overview
Kaspersky Small Office Security is a suite of products designed to protect Windows workstations and Windows servers of your network. These products are Kaspersky Anti-Virus for Windows Workstations 6.0 (see Chapter 2, pg. 12) and Kaspersky Anti-Virus 6.0 for Windows Servers (see Chapter 3,pg. 34).
1.2. Software packages
Depending on the size of your network Kaspersky Small Office Security, as a flexible solution, can provide licenses for the following sets of computers:
5 workstations
5 workstations and 1 server
10 workstations and 1 server
You can purchase the boxed version of Kaspersky Small Office Security from our resellers, or download it from Internet shops, including the eStore section of www.kaspersky.com.
If you buy the boxed version of the program, the package will include:
- A sealed envelope with an installation CD containing the program files
- An application activation code on the CD slip or on a special paper sheet
A User Guide
The end-user license agreement (EULA)
Note:
Before breaking the seal on the installation disk envelope, carefully read through the EULA.
If you buy Kaspersky Small Office Security from an online store, you copy the product from the Kaspersky Lab website (Downloads Product Downloads). You can download the User Guide from the Downloads Documentation section.
You will be sent an activation code by email after your payment has been received. By installing downloaded software you accept all the terms of the EULA.
The End-User License Agreement is a legal agreement between you and Kaspersky Lab that specifies the terms on which you may use the software you have purchased.
Read the EULA through carefully.
If you do not agree with the terms of the EULA, you can return your boxed product to the reseller from whom you purchased it and be reimbursed for the amount you paid for the program. If you do not agree to all of the terms of EULA do not break the CD's sleeve, download, install or use this software.
1.3. Getting started
To install a product included in Kaspersky Small Office Security on your computer or server insert the installation CD in CD/DVD-ROM drive. Then a splash window (see fig. 1) will appear.
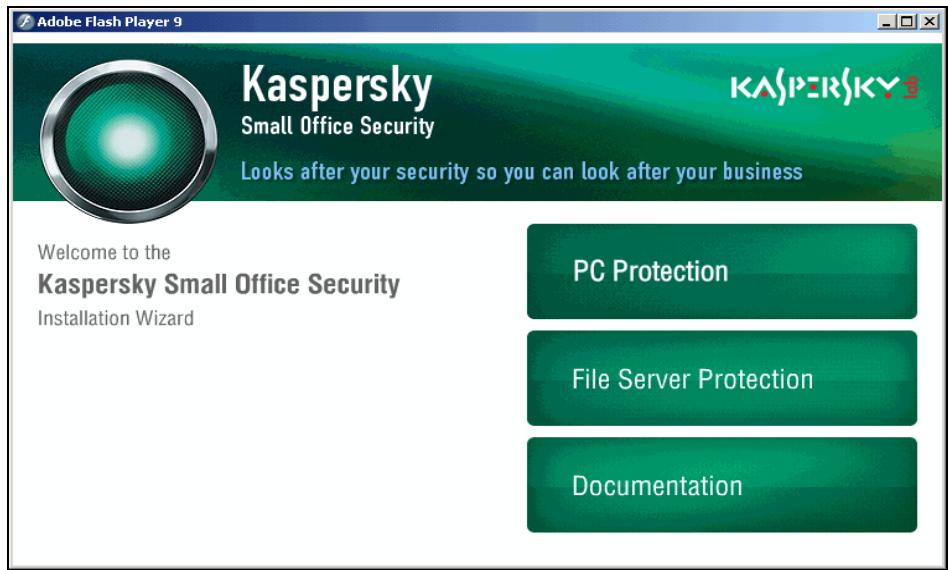
Figure 1. Kaspersky Small Office Security splash window
According to your purpose select one of the menu items:
- PC protection, if you are going to install Kaspersky Anti-Virus on a workstation. In the new window (see fig. 2) on the left side click Install to start the installation wizard and follow its instructions (see 2.2, pg. 19)
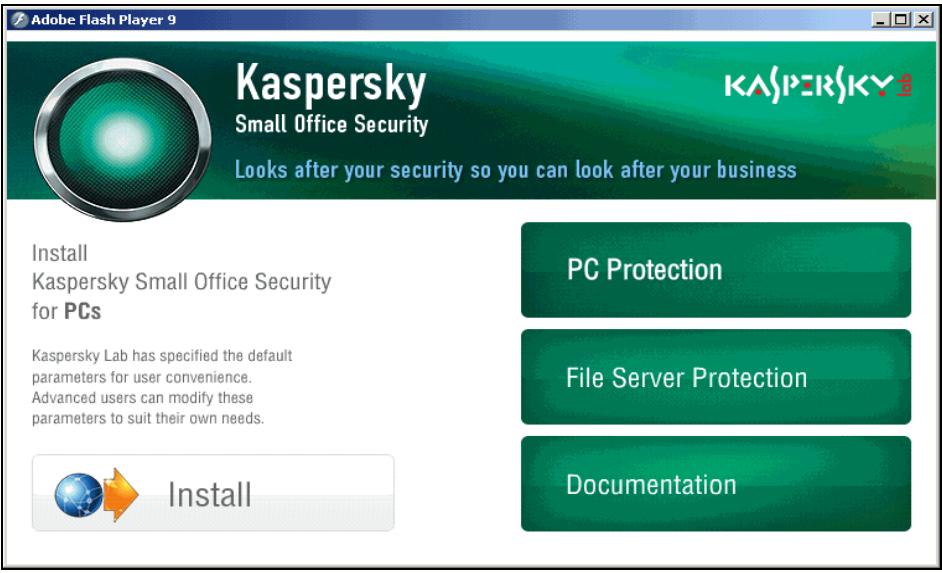
Figure 2. Kaspersky Small Office Security splash window. Kaspersky Anti-Virus for Windows Workstaions installation
- File Server protection, if you are going to install Kaspersky Anti-Virus on a server. In the new window (see fig. 3) on the left side click Install to start the installation wizard and follow its instructions (see 3.2, pg. 38)
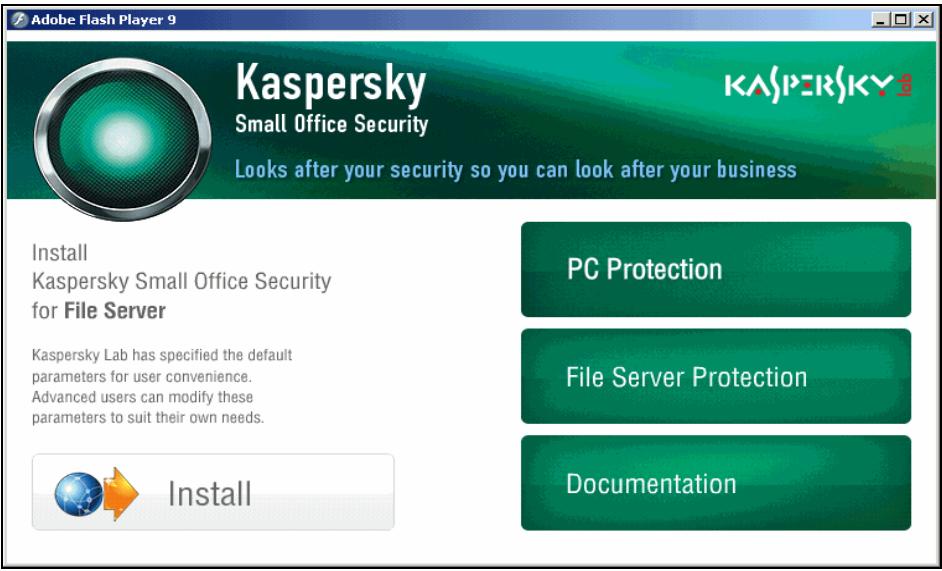
Figure 3. Kaspersky Small Office Security splash window. Kaspersky Anti-Virus for Windows Servers installation
-
Documentation, if you want to get more information about products. In the new window (see fig. 4) select:
-
Kaspersky Small Office Security Installation Guide to open the installation guide
- Kaspersky Anti-Virus for Windows Workstation User Guide to open corresponding document
- Kaspersky Anti-Virus for Windows Sever User Guide to open corresponding user guide
- Install Adobe Acrobat Reader to install software which allows to open user guides properly
Technical support to visit web-site of Kaspersky Lab Technical Support
Kaspersky Lab UK to visit Kaspersky Lab UK web-site.
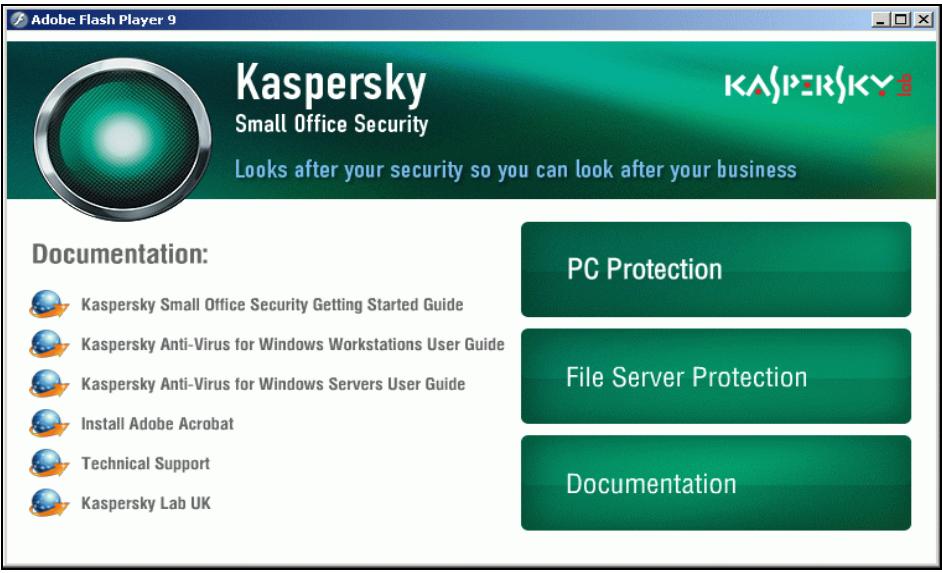
Figure 4. Kaspersky Small Office Security splash window. Documentation
Note:
Splash window appears only if autorun is enabled. If autorun is disabled straight follow instructions presented in section 2.2, pg. 19 for Kaspersky Anti-Virus for Workstations installation and in section 3.2, pg. 38 for Kaspersky Anti-Virus for Servers installation.
1.4. Support for registered users
Kaspersky Lab provides its registered users with an array of services to make Kaspersky Anti-Virus for Windows Servers more effective.
When the program has been activated, you become a registered user and will have the following services available until the license expires:
New versions of the program free of charge
- Consultation on questions regarding installation, configuration, and operation of the program, by phone and email
- Notifications on new Kaspersky Lab product releases and new viruses (this services is for users that subscribe to Kaspersky Lab news mailings)
Note:
Kaspersky Lab does not provide technical support for operating system use and operation, or for any products other than its own.
CHAPTER 2. KASPERSKY ANTI-VIRUS 6.0FOR WINDOWS WORKSTATIONS
Kaspersky Anti-Virus 6.0 for Windows Workstations heralds a new generation of data security products.
What really sets Kaspersky Anti-Virus for Windows Workstations 6.0 apart from other software, even from other Kaspersky Lab products, is its multi-faceted approach to data security.
2.1. Overview
Kaspersky Anti-Virus 6.0 for Windows Workstations has a new approach to data security. The program's main feature is that it combines and noticeably improves the existing features of all the company's products in one security solution. The program provides protection against viruses, spam attacks, hacker attacks, unknown threats, phishing, and rootkits.
You will no longer need to install several products on your computer for overall security. It is enough simply to install Kaspersky Anti-Virus for Windows Workstations 6.0.
Comprehensive protection guards all incoming and outgoing data channels. All of the program's components have flexible settings that enable Kaspersky AntiVirus for Windows Workstations to adapt to the needs of each user. Configuration of the entire program can be done from one location.
2.1.1. What's new in Kaspersky Anti-Virus 6.0 for Windows Workstations
Let's take a look at the new features in Kaspersky Anti-Virus for Windows Workstations.
New Protection Features
- Kaspersky Anti-Virus for Windows Workstations protects you both from known malicious programs, and from programs still unknown. Proactive Defense is the program's key advantage. It analyzes the behavior of
applications installed on your computer, monitoring changes to the system registry, tracking macros, and fighting hidden threats. The component uses a heuristic analyzer to detect and record various types of malicious activity, with which actions taken by malicious programs can be rolled back and the system can be restored to its state prior to the malicious activity.
- The program protects the computer against rootkits and dialers, blocks banner ads, popup windows, and malicious scripts downloaded from web pages, and detects phishing sites.
- File Anti-Virus technology has been improved to lower the CPU load and increase the speed of file scans. iChecker™ and iSwift™ help achieve this. By operating this way, the program rules out scanning files twice.
- The scan process now runs as a background task, enabling the user to continue using the computer. If there is a competition for system resources, the virus scan will pause until the user's operation is completed and then resumes at the point where it left off.
- Critical areas of the computer, which if infected would seriously affect data quality or security, are given their own separate task. This task can be configured to run automatically every time the system is started.
-
Protection for email systems against malicious programs and spam has been significantly improved. The program scans these protocols for emails containing viruses and spam:
-
IMAP, SMTP, POP3, regardless of which email client you use
- NNTP (virus scan only), regardless of the email client
-
Regardless of the protocol (MAPI, HTTP) when using plug-ins for Microsoft Office Outlook and The Bat!
-
Special plug-ins are available for the most common mail clients, such as Outlook, Microsoft Outlook Express (Windows Mail), and The Bat! These place email protection against both viruses and spam directly in the mail client.
- Anti-Spam now has a training mode, based around the iBayes algorithm, which learns by monitoring how you deal with email. It also provides maximum flexibility in configuring spam detection - for instance, you can create black and white lists of addressees and key phrases that mark email as spam.
-
Anti-Spam uses a phishing database, which can filter out emails designed to obtain confidential financial information.
-
The program filters inbound and outbound traffic, traces and blocks threats from common network attacks, and lets you use the Internet in Stealth Mode.
- When using a combination of networks, you can also define which networks to trust completely and which to monitor with extreme caution.
- The user notification function has been expanded for certain events that arise during program operation. You can select the method of notification yourselves for each of these event types: e-mails, sound notifications, pop-up messages.
- Scanning has been added for data transmitted across secure SSL connections.
- The program has added self-defense features, including protection against unauthorized remote administration tools and password-protected program settings. These features help keep malicious programs, hackers, and unauthorized users from disabling protection.
- You can also create a rescue disk, with which you can reboot your operating system after a virus outbreak and scan your computer for malicious code.
New Program Interface Features
- The new Kaspersky Anti-Virus for Windows Workstations interface makes the program's functions clear and easy to use. You can also change the program's appearance by using your own graphics and color schemes.
- The program regularly provides you with tips as you use it: Kaspersky Anti-Virus for Windows Workstations displays informative messages on the level of protection, accompanies its operation with hints and tips, and includes a thorough Help section.
New Program Update Features
- This version of the program debuts our improved update procedure: Kaspersky Anti-Virus automatically checks the update source for updates. If it finds new updates, Anti-Virus downloads them and installs them on the computer.
- The program downloads updates incrementally, ignoring files that have already been downloaded. This lowers the download traffic for updates by up to 10 times.
-
Updates are downloaded from the most efficient source.
-
You can choose not to use a proxy server, by downloading program updates from a local source. This noticeably reduces the traffic on the proxy server.
- The program has an update rollback feature that can return to the previous version of the signatures, if the threat signatures are damaged or there is an error in copying.
- A tool has been added to Updater that copies updates to a local folder to give other computers on the network access to them. This cuts down on Internet traffic.
2.1.2. The elements of Kaspersky AntiVirus for Windows Workstations Defense
Kaspersky Anti-Virus for Windows Workstations is designed with the sources of threats in mind. In other words, a separate program component deals with each threat, monitoring it and taking the necessary action to prevent malicious effects of that threat on the user's data. This makes the Security Suite flexible, with user-friendly options for each of the components to fit the needs of a specific user or a business as a whole.
Kaspersky Anti-Virus for Windows Workstations includes:
- Protection Components (see 2.1.2.1, pg. 15) that comprehensively defend all channels of data transmission and exchange on your computer in real-time mode
- Virus Scan Tasks (see 2.1.2.2, pg. 17) that virus-check the computer's memory and file system, as individual files, folders, disks, or regions
- Support Tools (see 2.1.2.3, pg. 18) that provide support for the program and extend its functionality
2.1.2.1. Protection components
These protection components defend your computer in real time:
File Anti-Virus
A file system can contain viruses and other dangerous programs. Malicious programs can remain inactive in your file system for years after one day being copied from a floppy disk or from the Internet, without showing
themselves at all. But you need only act upon the infected file, and the virus is instantly activated.
File Anti-virus is the component that monitors your computer's file system. It scans all files that are being opened, executed or saved on your computer and all connected disk drives. Each time a file is accessed, Kaspersky Anti-Virus intercepts it and scans the file for known viruses. If a file cannot be disinfected for any reason, it will be deleted, with a copy of the file either saved in Backup, or moved to Quarantine.
Mail Anti-Virus
Email is widely used by hackers to spread malicious programs, and is one of the most common methods of spreading worms. This makes it extremely important to monitor all email.
The Mail Anti-Virus component scans all incoming and outgoing email on your computer. It analyzes emails for malicious programs, only granting the addressee access to the email if it is free of dangerous objects.
Web Anti-Virus
By opening various web sites on the Internet, you risk infecting your computer with viruses installed on it with scripts that are stored on the web pages. You also risk download a dangerous file to your computer.
Web Anti-Virus is specially designed to combat these risks, by intercepting and blocking scripts on web sites if they pose a threat, and by thoroughly monitoring all HTTP traffic.
Proactive Defense
With every new day, there are more and more malicious programs. They are becoming more complex, combining several types, and the methods they use to spread themselves change, they become harder and harder to detect.
To detect a new malicious program before it has time to do any damage, Kaspersky Lab has developed a special component, Proactive Defense. It is designed to monitor and analyze the behavior of all installed programs on your computer. Kaspersky Anti-Virus decides, based on the program's actions: is it potentially dangerous? Proactive Defense protects your computer both from known viruses and from new ones that have yet to be discovered.
Anti-Spy
Programs that display unwanted advertising (for example, banner ads and popup windows), programs that call numbers for paid Internet services without user authorization, remote administration and monitoring tools, joke programs, etc. have become increasingly common.
Anti-Spy traces and blocks these actions on your computer. For example, the component blocks banner ads and popup windows, blocks programs that attempt autodialing, and analyzes web pages for phishing content.
Anti-Hacker
Hackers will use any potential hole to invade your computer, whether it is an open port, data transmissions between computers, etc.
The Anti-Hacker component protects your computer while you are using the Internet and other networks. It monitors inbound and outbound connections, and scans ports and data packets.
Anti-Spam
Although not a direct threat to your computer, spam increases the load on email servers, fills up your email inbox, and wastes your time, thereby representing a business cost.
The Anti-Spam component plugs into your computer's email client program, and scans all incoming email for spam subject matter. The component marks all spam emails with a special header. Anti-Spam can be configured to process spam as you like (auto delete, move to a special folder, etc.).
2.1.2.2. Virus scan tasks
In addition to constantly monitoring all potential pathways for malicious programs, it is extremely important to periodically scan your computer for viruses. This is necessary to detect malicious programs that were not previously discovered by the program because, for instance, its security level was set too low.
Kaspersky Anti-Virus for Windows Workstations configures, by default, the following virus-scan tasks:
Critical Areas
Scans all critical areas of the computer for viruses. This includes system memory, programs loaded on startup, boot sectors on the hard drive, and the Microsoft Windows system directories. The task aims to detect active viruses quickly without fully scanning the computer.
My Computer
Scans for viruses on your computer with a thorough inspection of all disk drives, memory, and files.
Startup Objects
Scans for viruses in all programs that are loaded automatically on startup, plus RAM and boot sectors on hard drives.
There is also the option to create other virus-scan tasks and create a schedule for them. For example, you can create a scan task for email databases once per week, or a virus scan task for the My Documents folder.
2.1.2.3. Program tools
Kaspersky Anti-Virus for Windows Workstations includes a number of support tools, which are designed to provide real-time software support, expanding the capabilities of the program and assisting you as you go.
Updater
In order to be prepared for a hacker attack, or to delete a virus or some other dangerous program, Kaspersky Anti-Virus for Windows Workstations needs to be kept up-to-date. The Updater component is designed to do exactly that. It is responsible for updating the Kaspersky Anti-Virus for Windows Workstations threat signatures and program modules.
The update distribution feature can save threat signature and application module updates retrieved from Kaspersky Lab update servers in a local folder. It then grants other computers on the network access to them to conserve on Internet bandwidth.
Data Files
Each protection component, virus search task, and program update creates a report as it runs. The reports contain information on completed operations and their results. By using the Reports feature, you will remain up-to-date on the operation of all Kaspersky Anti-Virus for Windows Workstations components. Should problems arise, the reports can be sent to Kaspersky Lab, allowing our specialists to study the situation in greater depth and help you as quickly as possible.
Kaspersky Anti-Virus for Windows Workstations sends all files suspected of being dangerous to a special Quarantine area, where they are stored in encrypted form to avoid infecting the computer. You can scan these objects for viruses, restore them to their previous locations, delete them, or manually add files to Quarantine. Files that are found not to be infected upon completion of the virus scan are automatically restored to their former locations.
The Backup area holds copies of files disinfected and deleted by the program. These copies are created in case you either need to restore the files, or want information about their infection. These backup copies are also stored in an encrypted form to avoid further infection.
You can manually restore a file from Backup to the original location and delete the copy.
Rescue Disk
Kaspersky Anti-Virus for Windows Workstations can create a Rescue Disk, which provides a backup plan if system files are damaged by a virus attack and it is impossible to boot the operating system. By using the Rescue Disk in such a case, you can boot your computer and restore the system to the condition prior to the malicious action.
Support
All registered Kaspersky Anti-Virus users can take advantage of our technical support service. To learn where exactly you can get technical support, use the Support feature.
Using these links, you can go to a Kaspersky Lab user forum and a list of frequently asked questions that may help you resolve your issue. In addition, by completing the form on the site, you can send Technical Support a message on the error or failure in the operation of the application.
You will also be able to access Technical Support on-line, and, of course, our employees will always be ready to assist you with Kaspersky Anti-Virus by phone.
2.2. Installing Kaspersky Anti-Virus 6.0 for Windows Workstations
There are several ways to install Kaspersky Anti-Virus for Windows Workstations:
- Local Installation: install the application on a single host. Direct access to the host in question is required to run and complete the install. A local install may be performed in one of the two modes below:
- an interactive install using the application Installation Wizard (see 2.2.2 on page 21); this mode requires user input for the install to proceed
- a non-interactive install run from the command line and not requiring any user input for the install to proceed (see User's Guide for Kaspersky Anti-Virus 6.0 for Windows Workstations for more information)
-
Remote Installation: install the application to networked computers remotely from an administrator workstation using:
-
Microsoft Windows Server 2000/2003 group domain policies (see User's Guide for Kaspersky Anti-Virus 6.0 for Windows Workstations for more information)
Warning!
It is recommended that all running applications be closed prior to Kaspersky AntiVirus installation (including a remote installation).
In the event that you already have Kaspersky Anti-Virus 5.0 installed, it will be removed and updated to Kaspersky Anti-Virus 6.0 when the installation procedure is run (see User's Guide for Kaspersky Anti-Virus 6.0 for Windows Workstations for more information). Updates to more recent builds (minor versions) within Kaspersky Anti-Virus 6.0 are transparent.
2.2.1. Hardware and software system requirements
For Kaspersky Anti-Virus 6.0 for Windows Workstations to run properly, your computer must meet these minimum requirements:
General Requirements:
- 50 MB of free hard drive space
- CD-ROM drive (for installing Kaspersky Anti-Virus 6.0 for Windows Workstations from an installation CD)
- Microsoft Internet Explorer 5.5 or higher (for updating threat signatures and program modules through the Internet)
Microsoft Windows Installer 2.0
Microsoft Windows 98, Microsoft Windows Me, Microsoft Windows NT Workstation 4.0 (Service Pack 6a):
Intel Pentium 300 MHz processor or faster (or compatible)
64 MB of RAM
Microsoft Windows 2000 Professional (Service Pack 4 or higher), Microsoft Windows XP Home Edition, Microsoft Windows XP Professional (Service Pack 1 or higher), Microsoft Windows XP Professional x64 Edition:
Intel Pentium 300 MHz processor or compatible
128 MB of RAM
Microsoft Windows Vista, Microsoft Windows Vista x64:
Intel Pentium 800 MHz 32-bit (x86)/ 64-bit (x64) or faster (or compatible)
512 MB of RAM
2.2.2. Installation procedure using the Installation Wizard
To install Kaspersky Anti-Virus for Windows Workstations on your computer, open the Windows Installer file on the installation CD.
Note:
Installing the program with an installer package downloaded from the Internet is identical to installing it from an installation CD.
An installation wizard will open for the program. Each window contains a set of buttons for navigating through the installation process. Here is a brief explanation of their functions:
Next - accepts an action and moves forward to the next step of installation.
Back - goes back to the previous step of installation.
Cancel - cancels product installation.
Finish - completes the program installation procedure.
Let's take a closer look at the steps of the installation procedure.
Step 1. Checking for the necessary system conditions to install Kaspersky Anti-Virus for Windows Workstations
Before the program is installed on your computer, the installer checks your computer for the operating system and service packs necessary to install Kaspersky Anti-Virus for Windows Workstations. It also checks your computer for other necessary programs and verifies that your user rights allow you to install software.
If any of these requirements is not met, the program will display a message informing you of the fault. You are advised to install any necessary service packs through Windows Update, and any other necessary programs, before installing Kaspersky Anti-Virus for Windows Workstations.
Step 2. Installation Welcome window
If your system fully meets all requirements, an installation window will appear when you open the installer file with information on beginning the installation of Kaspersky Anti-Virus for Windows Workstations.
To continue installation, click the Next button. You may cancel installation by clicking Cancel.
Step 3. Viewing the End-User License Agreement
The next window contains the End-User License Agreement which is made between you and Kaspersky Lab. Carefully read through it, and if you agree to all the terms of the agreement, select I accept the terms of the License Agreement and click the Next button. Installation will continue.
To cancel the installation click the Cancel button.
Step 4. Selecting an installation folder
The next stage of Kaspersky Anti-Virus for Windows Workstations installation determines where the program will be installed on your computer. The default path is:
$$ \begin{array}{l} \text {< d r i v e > \to P r o g r a m F i l e s \to K a p s e r s k y L a b \to K a p s e r s k y A n t i - V i r u s 6 . 0} \ \text {f o r W i n d o w s W o r k s t a t i o n s - f o r 3 2 - b i t s y s t e m s .} \end{array} $$
$$ < \text {d r i v e} > \rightarrow \text {P r o g r a m F i l e s (x 8 6)} \rightarrow \text {K a p s e r k y L a b} \rightarrow \text {K a p s e r k y A n t i - V i r u s 6 . 0 f o r W i n d o w s W o r k s t a t i o n s - f o r 6 4 - b i t s y s t e m s}. $$
You can specify a different folder by clicking the Browse button and selecting it in the folder selection window, or by entering the path to the folder in the field available.
Warning!
If you enter the full path to the installation folder manually, its length must not exceed 200 characters or contain special characters.
To continue installation, click the Next button.
Step 5. Using Saved Installation Settings
In this step, you are prompted to specify whether you wish to use previously saved security settings, threat signatures, and Anti-Spam databases if these were in fact saved when a previous Kaspersky Anti-Virus 6.0 installation was removed from your computer.
Let's take a closer look at how to use the options described above.
If you have previously installed another version or build of Kaspersky Anti-Virus for Windows Workstations on your computer and you saved its threat signatures when you uninstalled it, you can use it in the current version. To do so, check Threat signatures. The threat signatures included with the program installation will not be copied to the server.
To use protection settings that you configured and saved from a previous version, check Protection settings.
You are also advised to use the Anti-Spam base if you saved one when you uninstalled the previous version of the program. This way, you will not have to retrain Anti-Spam. To use the base that you already created, check Anti-Spam base.
Step 6. Selecting an installation type
In this stage, you select how much of the program you want to install on your computer. You have three options:
Complete. If you select this option, all Kaspersky Anti-Virus for Windows Workstations components will be installed. The installation will recommence with Step 8.
Custom. If you select this option, you can select the program components that you want to install. For more, see Step 7.
Anti-virus features. This option installs only the components that protect you against viruses. Anti-Hacker, Anti-Spam and Anti-Spy will not be installed.
To select a setup type, click the appropriate button.
Step 7. Selecting program components to install
Note:
This step occurs only if you select the Custom setup type.
If you selected Custom installation, you can select the components of Kaspersky Anti-Virus for Windows Workstations that you want to install. By default, all protection components are selected.
To select the components you want to install, left-click the icon alongside a component name and select Will be installed on local hard drive from the opened menu. You will find more information on what protection a selected component provides, and how much disk space it requires for installation, in the lower part of the program installation window.
If you do not want to install a component, select Entire feature will be unavailable item from the context menu. Remember that by choosing not to install a component you deprive yourself of protection against a wide range of dangerous programs.
After you have selected the components you want to install, click Next. To return the list to the default programs to be installed, click Reset.
Step 8. Disabling the Microsoft Windows firewall
Note:
You will only take this step if you are installing the Anti-Hacker component of Kaspersky Anti-Virus for Windows Workstations on a computer with the built-in firewall enabled.
In this step, Kaspersky Anti-Virus for Windows Workstations asks you if you want to disable the Windows Firewall, since the Anti-Hacker component of Kaspersky Anti-Virus for Windows Workstations provides full firewall protection.
If you wish to use Anti-Hacker as your primary browsing security tool, click Next. The Windows Firewall will be disabled automatically.
If you want to use the Windows Firewall, select Keep Windows Firewall enabled. If you select this option, Anti-Hacker will be installed, but disabled to avoid program conflicts.
Step 9. Searching for other anti-virus programs
In this stage, the installer searches for other anti-virus products installed on your computer, including Kaspersky Lab products, which could raise compatibility issues with Kaspersky Anti-Virus for Windows Workstations.
The installer will display on screen a list of any such programs it detects. The program will ask you if you want to uninstall them before continuing installation.
You can select manual or automatic uninstall under the list of anti-virus applications detected.
To continue installation, click the Next button.
Step 10. Finishing installing your program
In this stage, the program will ask you to finish installing the program on your computer.
When initially installing Kaspersky Anti-Virus 6.0, we do not recommend deselecting Enable Self-Defense before installation. Having protection
modules enable will allow the installation to be rolled back correctly if errors occur while installing the application. If you are attempting to install the application again, we recommend deselecting this checkbox.
Note:
If the application is installed remotely via Windows Remote Desktop, we recommend unchecking the flag Enable Self-Defense before installation. Otherwise the installation procedure might not complete or complete correctly.
To continue installation, click the Next button.
Warning!
When Kaspersky Anti-Virus components which intercept network traffic are being installed current network connections are broken. Most of them will be recovered in some period of time.
Step 11. Completing the installation procedure
The Complete Installation window contains information on finishing the Kaspersky Anti-Virus installation process.
To start the setup wizard, click Next (see 2.2.3, pg. 25).
If installation is completed successfully, you will need to restart your computer, and a message on the screen will tell you so.
2.2.3. Setup Wizard
The Kaspersky Anti-Virus 6.0 for Windows Workstations Setup Wizard starts after the program has finished installation. It is designed to help you configure the initial program settings to conform to the features and uses of your computer.
The Setup Wizard interface is designed like a standard Windows Wizard and consists of a series of steps that you can move between using the Back and Next buttons, or complete using the Finish button. The Cancel button will stop the Wizard at any point.
You can skip this initial settings stage when installing the program by closing the Wizard window. In the future, you can run it again from the program interface if you restore the default settings for Kaspersky Anti-Virus for Windows Workstations.
2.2.3.1. Using objects saved with Version 5.0
This wizard window appears when you install the application on top of Kaspersky Anti-Virus 5.0. You will be asked to select what data used by version 5.0 you want to import to version 6.0. This might include quarantined or backup files or protection settings.
To use this data in Version 6.0, check the necessary boxes.
2.2.3.2. Activating the program
Note:
Before activating the program, make sure that the computer's system date settings match the actual date and time.
The program is activated by specifying the activation code that Kaspersky AntiVirus will use to obtain a license key and to determine the expiration date for it.
The license key contains system information necessary for all the program's features to operate, and other information:
- Support information (who provides program support and where you can obtain it)
Name, number, and expiration date of your license
2.2.3.2.1. Selecting a program activation method
Depending on whether you have a key for Kaspersky Anti-Virus or need to obtain one from the Kaspersky Lab server, you have several options for activating the program:
Activate using the activation code. Select this activation option if you have purchased the full version of the program and were provided with an activation code. Using this activation code you will obtain a key file providing access to the application's full functionality throughout the effective term of the license agreement.
Activate trial version. Select this activation option if you want to install the trail version of the program before making the decision to buy a commercial version. You will be given a free key valid for a term specified in the trial version license agreement.
Apply existing license key. Activate the application using a Kaspersky AntiVirus 6.0 license key file.
Activate later. If you choose this option, you will skip the activation stage. Kaspersky Anti-Virus 6.0 for Windows Workstations will be installed on your computer and you will have access to all program features except updates (you can only update the threat signatures once after installing the program).
The first two activation options use a Kaspersky Lab web server, which requires an Internet connection. Before activating, make sure to edit your network settings in the window that opens when you click LAN settings (if necessary). For more in-depth information on configuring network settings, contact your system administrator or ISP.
If you have no Internet connection when installing the program you can activate the application later using its interface or you can use Internet access of another computer to register at Kaspersky Lab Technical Support website and get the key using activation code
2.2.3.2.2. Entering the activation code
You must enter an activation code to activate the program. If you purchase the program through the Internet, you will receive the activation code by e-mail. If you purchase a boxed version of the program, you will find the activation code on the installation CD-ROM envelope.
The activation code is a sequence of numbers and letters separated by dashes into four sections of five characters each, no spaces. For example, 11AA1-11AAA-1AA11-1A111. Note that the code must be entered in Latin characters.
Enter your contact information in the lower part of the window: full name, e-mail address, and country and city of residence. This information might be requested to identify a registered user if, for example, a key is lost or stolen. If that were to happen, your contact information will enable you to obtain a new license key.
2.2.3.2.3. Obtaining a key file
The Settings Wizard connects to Kaspersky Lab servers and sends them your registration data (the activation code and personal information), which are inspected on the server.
If the activation code passes inspection, the Wizard receives a key file. If you install the demo version of the program, the Settings Wizard will receive a trial key file without an activation code.
The file received will be installed automatically to use the program and you will see an activation completion window with detailed information on the key being used.
If the activation code does not pass inspection, you will see a corresponding message on the screen. If this occurs, contact the software vendors from whom you purchased the program for information.
2.2.3.2.4. Selecting a license key file
If you have a license key file for Kaspersky Anti-Virus 6.0 for Windows Workstations, the Wizard will ask if you want to install it. If you do, use the Browse button and select the file path for the key file with the .key extension in the file selection window.
After you have successfully installed the key, you will see information about the license in the lower part of the window: name of the person to whom the software is registered, license number, license type (full, beta-testing, demo, etc.), and the expiration date for the key.
2.2.3.2.5. Completing program activation
The Setup Wizard will inform you that the program has been successfully activated. It will also display information on the license key installed: name of the person to whom the software is registered, license number, license type (full, beta-testing, demo, etc.), and the expiration date for the key.
2.2.3.3. Selecting a security mode
In this window, the Settings Wizard asks you to select the security mode that the program will operate with:
Basic. This is the default setting and is designed for users who do not have extensive experience with computers or anti-virus software. It sets all the program's components to their recommended security levels and only informs the user of dangerous events, such as the detection of malicious code or the execution of dangerous actions.
Interactive. This mode provides more customized defense of your computer's data than Basic Mode. It can trace attempts to modify system settings, suspicious activity in the system, and unauthorized activity on the network.
Each of these activities could be initiated by malicious programs or be a standard activity for some of the programs you use on your computer. You will have to decide for each separate case whether those activities should be allowed or blocked.
If you choose this mode, specify in what contexts it should be used:
Enable Anti-Hacker Training Mode - prompts user for confirmation when programs installed on your computer attempt to connect to certain network resources. You can either allow or block that connection, and configure an Anti-Hacker rule for that program. If you disable Training Mode, Anti-Hacker runs with minimal protection settings, meaning that it grants all applications access to network resources.
Enable Registry Guard - prompts user for a response when attempts to modify system registry keys are detected.
Warning!
If the application is installed on a computer running Microsoft Windows XP Professional x64 Edition, Microsoft Windows Vista, or Microsoft Windows Vista x64, the interactive mode settings listed below will not be available.
Enable Extended Proactive Defense - analyzes all suspicious activity by applications in the system, including browsers opening with command line settings, injection into application processes, and window hook interceptors (by default, this option is not selected).
2.2.3.4. Configuring update settings
Your computer's security depends directly on updating the threat signatures and program modules regularly. In this window, the Setup Wizard asks you to select a mode for program updates, and to configure a schedule.
Automatically. Kaspersky Anti-Virus checks the update source for updates at specified intervals. During virus outbreaks, the check frequency may increase, and decrease when they are gone. If it finds new updates, AntiVirus downloads them and installs them on the computer. This is the default setting.
Every 2 hours. Updates will run automatically according to the schedule created. You can configure the schedule by clicking Edit.
Manually. If you choose this option, you will run program updates yourself.
Note that the threat signatures and program modules included with the software may be outdated by the time you install the program. That is why we recommend downloading the latest program updates. To do so, click Update now. Then Kaspersky Anti-Virus for Windows Workstations will download the necessary updates from the update servers and will install them on your computer.
If you want to configure updates (set up network properties, select the resource from which updates will be downloaded, set up running task under a certain account or enable update distribution option), click Settings.
2.2.3.5. Configuring a virus scan schedule
Scanning selected areas of your computer for malicious objects is one of the key steps in protecting your computer.
When you install Kaspersky Anti-Virus for Windows Workstations, three default virus scan tasks are created. In this window, the Setup Wizard asks you to choose a scan task setting:
Startup objects
By default, Kaspersky Anti-Virus automatically scans Startup objects when it starts up. You can edit the schedule properties in another window by clicking Change.
Critical Areas
To automatically scan critical areas of your computer (system memory, Startup objects, boot sectors, Windows system folders) for viruses, check the appropriate box. You can configure the schedule by clicking Change.
The default setting for this automatic scan is disabled.
My Computer
For a full virus scan of your computer to run automatically, check the appropriate box. You can configure the schedule by clicking Change.
The default setting, for scheduled running of this task, is disabled. However, we recommend running a full virus scan of your computer immediately after installing the program.
2.2.3.6. Restricting program access
Kaspersky Anti-Virus gives you the option of password-protecting the program, since several people with different levels of computer literacy may use the same computer, and since malicious programs could potentially disable protection. Using a password can protect the program from unauthorized attempts to disable protecting or change settings.
To enable password protection, check Enable password protection and complete the Password and Confirm password fields.
Select the area below that you want password protection to apply to:
All operations (other than warning notifications). Request password if the user attempts any action with the program, except for responses to notifications on detection of dangerous objects.
Selected operations:
Saving program settings - request password when a user attempts to save changes to program settings.
Exiting the program - request password if a user attempts to exit the program.
- Stopping / pausing protection components and virus scan tasks – request password if user attempts to pause or fully disable any protection component or virus scan task.
2.2.3.7. Configuring Anti-Hacker settings
Anti-Hacker is the Kaspersky Anti-Virus for Windows Workstations component that guards your computer on local networks and the Internet. At this stage, the Setup Wizard asks you to create a list of rules that will guide Anti-Hacker when analyzing your computer's network activity.
2.2.3.7.1. Determining a security zone's status
In this stage, the Setup Wizard analyzes your computer's network environment. Based on its analysis, the entire network space is broken down into zones:
Internet - the World Wide Web. In this zone, Kaspersky Anti-Virus for Windows Workstations operates as a personal firewall. In doing so, default rules for packet filtering and applications regulate all network activity to ensure maximum security. You cannot change protection settings when working in this zone, other than enabling Stealth Mode on your computer for added safety.
Security zones - certain zones that mostly correspond with subnets that include your computer (this could be local subnets at home or at work). These zones are by default average risk-level zones. You can change the status of these zones based on how much you trust a certain subnet, and you can configure rules for packet filtering and applications.
All the zones detected will be displayed in a list. Each of them is shown with a description, their address and subnet mask, and the degree to which any network activity will be allowed or blocked by Anti-Hacker.
- Internet. This is the default status assigned to the Internet, since when you are connected to it, your computer is subjected to all potential threat types. This status is also recommended for networks that are not
protected by any anti-virus programs, firewalls, filters, etc. When you select this status, the program ensures maximum security while you are using this zone, specifically:
- blocking any network NetBios activity within the subnet
- blocking rules for applications and packet filtering that allow NetBios activity within this subnet.
Even if you have created a shared folder, the information in it will not be available to users from subnetworks with this status. Additionally, if this status is selected for a certain subnetwork, you will not be able to access files and printers of this subnetwork.
-
Local Area Network. The program assigns this status to the majority of security zones detected when it analyzes the computer's network environment, except the Internet. It is recommended to apply this status to zones with an average risk factor (for example, corporate LANs). If you select this status, the program allows:
-
any network NetBios activity within the subnet
- rules for applications and packet filtering that allow NetBios activity within this subnet
Select this status if you want to grant access to certain folders or printers on your computer, but want to block all other outside activity.
- Trusted (allow all connections). This status is given to networks that you feel are absolutely safe, so that your computer is not subject to attacks and attempts to gain access to your data while connected to it. When you are using this type of network, all network activity is allowed. Even if you have selected Maximum Protection and have created block rules, they will not function for remote computers from a trusted network.
You can use Stealth Mode for added security when using networks labeled Internet. This feature only allows network activity initiated from your computer, meaning that your computer becomes invisible to its surroundings. This mode does not affect your computer's performance on the Internet.
Warning!
We do not recommend using Stealth Mode if you use your computer as a server (for example, a mail or HTTP server), as the computers that attempt to connect to the server will not see it as connected.
To change the status of a zone or to enable/disable Stealth Mode, select the zone from the list, and use the appropriate links in the Rule description box
below the list. You can perform similar tasks and edit addresses and subnet masks in the Zone Settings window, which you can open by clicking Edit.
You can add a new zone to the list while viewing it. To do so, click Find. Anti-Hacker will search for available zones, and if it detects any, the program will ask you to select a status for them. In addition, you can add new zones to the list manually (if you connect your laptop to a new network, for example). To do so, use the Add button and fill in the necessary information in the Zone Settings window.
To delete a network from the list, click the Delete button.
2.2.3.7.2. Creating a list of network applications
The Setup Wizard analyzes the software installed on your computer and creates a list of applications that use network connections.
Anti-Hacker creates a rule to control network activity for each such application. The rules are applied using templates for common network applications, created at Kaspersky Lab and included with the software.
You can view the list of network applications and their rules in the Anti-Hacker settings window, which you can open by clicking List.
For added security, we recommend disabling DNS caching when using Internet resources. DNS caching drastically cuts down on the time your computer is connected to this valuable Internet resource; however, it is also a dangerous vulnerability, and by exploiting it, hackers can create data leaks that cannot be traced using the firewall. Therefore, to increase the degree of security for your computer, you are advised to disable DNS caching.
2.2.3.8. Finishing the Setup Wizard
The last window of the Wizard will ask if you want to restart your computer to complete the program installation. You must restart for Kaspersky Anti-Virus for Windows Workstations drivers to register.
Some program components will not work until you can restart.
CHAPTER 3. KASPERSKY ANTI-VIRUS 6.0 FOR WINDOWS SERVERS
Kaspersky Anti-Virus 6.0 for Windows Servers heralds a new generation of data security products.
3.1. Overview
Kaspersky Anti-Virus for Windows Servers protects data stored on Windows file servers (including the latest x64 versions) from all types of malicious programs. The solution maintains high reliability and meets the exacting demands of corporate servers that carry heavy loads.
3.1.1. What's new in Kaspersky Anti-Virus 6.0 for Windows Servers
Let's take a closer look at the new features in Kaspersky Anti-Virus for Windows Servers.
New Protection Features:
- The program's file protection technology has been changed: now you can lower the load on the central processor and disk subsystems and increase the speed of file scans. iChecker and iSwift make this possible. By operating this way, the application will not scan files twice.
- The scan process now runs as a background task, enabling the administrator to continue using the computer. If there is a competition for system resources, the virus scan will pause until the user's operation is completed and then resumes at the point where it left off.
- Critical areas of the server where infection could lead to serious consequences are given their own separate task. You can configure this task to run automatically every time the system is started.
- The user notification function has been expanded for certain events that arise during program operation. You can select the method of
notification yourselves for each of these event types: e-mails, sound notifications, pop-up messages.
- New features included application self-defense technology, protection from unauthorized remote access of program services, protection of application files from unauthorized access or modification, and password protection for program settings.
New Program Interface Features:
- The new Kaspersky Anti-Virus for Windows Servers interface makes the program's functions clear and easy to use. You can also change the program's appearance by using your own graphics and color schemes.
- The program regularly provides you with tips as you use it: Kaspersky Anti-Virus for Windows Servers displays informative messages on the level of protection, accompanies its operation with hints and tips, and includes a thorough Help section.
New Program Update Features:
- This version of the application debuts our improved update procedure: Kaspersky Anti-Virus automatically checks the update source for update packages. When Anti-Virus detects fresh updates, it downloads them and installs them on the computer.
- The program downloads updates incrementally, ignoring files that have already been downloaded. This lowers the download traffic for updates by up to 10 times.
- Updates are downloaded from the most efficient source.
- The program has an update rollback feature that can return to the previous version of the signatures, if, for example, the threat signatures are damaged or there is an error in copying.
- A feature has been added for distributing updates to a local folder to give other network computers access to them to save bandwidth.
3.1.2. The elements of Kaspersky AntiVirus for Windows Servers Defense
Kaspersky Anti-Virus for Windows Servers protection includes:
-
File Anti-Virus (see 3.1.2.1, pg. 36), which monitors the computer's file system in real-time mode.
-
Virus Scan Tasks (see 3.1.2.2, pg. 36) that virus-check the computer's memory and file system, as individual files, folders, disks, or regions.
- Support Tools (see 3.1.2.3, pg. 37) that provide support for the program and extend its functionality.
3.1.2.1. File Anti-Virus
The server is protected in real-time using File Anti-Virus.
A file system can contain viruses and other dangerous programs. Malicious programs can be stored in a file system for years after one day making it through on a floppy disk or from the Internet, without showing themselves at all. But you need only open the infected file, and the virus is instantly activated.
File Antivirus is the component that monitors your computer's file system. It scans all files that are being opened, executed or saved on the server and all connected disk drives. Kaspersky Anti-Virus intercepts every attempt to access a file and scans the file for known viruses. The file can only be used further if the file is not infected or is successfully treated by File Anti-Virus. If a file cannot be disinfected for any reason, it will be deleted, with a copy of the file saved in Backup, or moved to Quarantine.
3.1.2.2. Virus scan tasks
In addition to constantly monitoring all potential pathways for malicious programs using File Anti-Virus, it is extremely important to periodically scan your computer for viruses. This is necessary to detect malicious programs that were not previously discovered by File Anti-Virus because, for instance, its security level was set too low.
Kaspersky Anti-Virus for Windows Servers configures, by default, the following virus-scan tasks:
Critical Areas
Scans all critical areas of the computer for viruses. This includes system memory, programs loaded on startup, boot sectors on the hard drive, and the Microsoft Windows system directories. The task aims to detect active viruses quickly without fully scanning the computer.
My Computer
Scans for viruses on your computer with a through inspection of all disk drives, memory, and files.
Startup Objects
Scans for viruses in all programs that are loaded automatically on startup, plus RAM and boot sectors on hard drives.
There is also the option to create other virus-scan tasks and create a schedule for them.
3.1.2.3. Program tools
Kaspersky Anti-Virus for Windows Servers includes a number of support tools, which are designed to provide real-time software support, expanding the capabilities of the program and assisting you as you go.
Update
In order to be prepared to delete a virus or some other dangerous program, Kaspersky Anti-Virus for Windows Servers needs to be kept up-to-date. The Update component is designed to do exactly that. It is responsible for updating the Kaspersky Anti-Virus for Windows Servers threat signatures and program modules.
The Update Distribution feature enables you to save updates for the threat signature database and application modules retrieved from Kaspersky Lab update servers and then give other computers access to them to save bandwidth.
Data Files
File Anti-Virus and each virus scan and program update create a report as they run. The reports contain information on completed operations and their results. By using the Reports feature, you will remain up-to-date on the operation of any Kaspersky Anti-Virus for Windows Servers components. Should problems arise, the reports can be sent to Kaspersky Lab, allowing our specialists to study the situation in greater depth and help you as quickly as possible.
Kaspersky Anti-Virus for Windows Servers sends all files suspected of being dangerous to a special Quarantine area, where they are stored in encrypted form to avoid infecting the computer. You can scan these objects for viruses, restore them to their previous locations, delete them, or manually add files to Quarantine. Files that turn out uninfected upon completion of the virus scan are automatically restored to their former locations.
The Backup area holds copies of files disinfected and deleted by the program. These copies are created in case you need either to restore the files, or want information about their infection. These backup copies are also stored in an encrypted form to avoid further infection.
You can manually restore a file from Backup to the original location and delete the copy.
Support
All registered Kaspersky Anti-Virus users can take advantage of our technical support service. To learn where exactly you can get technical support, use the Support feature.
Using the links, you can go to the Kaspersky Lab users forum and browse frequently asked questions with answers that might help you solve your problem. You can also send an error report or question on program operation to Technical Support by completing an on-line form.
You will also be able to access Technical Support on-line, and, of course, our employees will always be ready to assist you with Kaspersky Anti-Virus by phone.
3.2. Installing Kaspersky Anti-Virus 6.0 for Windows Servers
There are several ways to install Kaspersky Anti-Virus 6.0 for Windows Servers:
-
Local Installation: install the application on a single host. Direct access to the host in question is required to run and complete the install. A local install may be performed in one of the two modes below:
-
an interactive install using the application Installation Wizard (see 3.2.2, pg. 39); this mode requires user input for the install to proceed;
-
a non-interactive install run from the command line using default settings and not requiring any user input for the install to proceed (see User's Guide for Kaspersky Anti-Virus 6.0 for Windows Servers for more information).
-
Remote Installation: install the application to networked computers remotely from an administrator workstation using:
-
Microsoft Windows Server 2000/2003 group domain policies (see User's Guide for Kaspersky Anti-Virus 6.0 for Windows Servers for more information).
Warning!
It is recommended that all running applications be closed prior to Kaspersky AntiVirus installation (including a remote installation).
In the event that you already have Kaspersky Anti-Virus 5.0 installed, it will be removed and updated to Kaspersky Anti-Virus 6.0 when the installation procedure is run (see User's Guide for Kaspersky Anti-Virus 6.0 for Windows Servers for more information). Updates to more recent builds (minor versions) within Kaspersky Anti-Virus 6.0 are transparent.
3.2.1. Hardware and software system requirements
For Kaspersky Anti-Virus to run properly, your computer must meet these minimum requirements:
General Requirements:
- 50 MB available space on your hard drive
- CD-ROM (for installing Kaspersky Anti-Virus 6.0 for Windows Servers from the installation CD)
- Microsoft Internet Explorer 5.5 or higher (for updating threat signatures and program modules through the Internet)
Microsoft Windows Installer 2.0
Operating system:
- Microsoft Windows 2000 Server/Advanced Server Service Pack 4 or higher, all available updates.
Microsoft Windows NT Server 4.0 Service Pack 6a. - Microsoft Windows Server 2003 Standard/Enterprise Edition, Microsoft Windows Server 2003 Web Edition, Microsoft Windows Storage Server 2003, Microsoft Small Business Server 2003, all Service Packs, all available updates.
- Microsoft Windows Server 2003 R2 Standard x64 Edition, Microsoft Windows Server 2003 R2 Enterprise x64 Edition, Microsoft Windows Server 2003 R2 Standard Edition, Microsoft Windows Server 2003 R2 Enterprise Edition.
3.2.2. Installation procedure using the Installation Wizard
To install Kaspersky Anti-Virus for Windows Servers on your computer, open the Windows Installer file on the installation CD.
Note:
Installing the program with an installer package downloaded from the Internet is identical to installing it from an installation CD.
An installation wizard will open for the program. Each window contains a set of buttons for navigating through the installation process. Here is a brief explanation of their functions:
- Next - accepts an action and moves forward to the next step of installation.
- Back - goes back to the previous step of installation.
- Cancel - cancels product installation.
Finish - completes the program installation procedure.
Let's take a closer look at the steps of the installation procedure.
Step 1. Checking for the necessary system conditions to install Kaspersky Anti-Virus for Windows Servers
Before the program is installed on your computer, the installer checks your computer for the operating system and service packs necessary to install Kaspersky Anti-Virus for Windows Servers. It also checks your computer for other necessary programs and verifies that your user rights allow you to install software.
If any of these requirements is not met, the program will display a message informing you of the fault. You are advised to install any necessary service packs through Windows Update, and any other necessary programs, before installing Kaspersky Anti-Virus for Windows Servers.
Step 2. Installation Welcome window
If your system fully meets all requirements, an installation window will appear when you open the installer file with information on beginning the installation of Kaspersky Anti-Virus for Windows Servers.
To continue installation, click the Next button. You may cancel installation by clicking Cancel.
Step 3. Viewing the End-User License Agreement
The next window contains the End-User License Agreement which is made between you and Kaspersky Lab. Carefully read through it, and if you agree to all
the terms of the agreement, select I accept the terms of the License Agreement and click the Next button. Installation will continue.
To cancel installation click Cancel.
Step 4. Selecting an installation folder
The next stage of Kaspersky Anti-Virus for Windows Servers installation determines where the program will be installed on your computer. The default path is:
\Program Files\Kaspersky Lab\Kaspersky Anti-Virus 6.0 for Windows Servers – for 32-bit systems \Program Files (x86)\Kaspersky Lab\Kaspersky Anti-Virus 6.0 for Windows Servers – for 64-bit systems
You can specify a different folder by clicking the Browse button and selecting it in the folder selection window, or by entering the path to the folder in the field available.
Warning!
If you enter the full path to the installation folder manually, its length must not exceed 200 characters or contain special characters.
To continue installation, click the Next button.
Step 5. Using Saved Installation Settings
In this step, you are prompted to specify whether you wish to use previously saved security settings or threat signatures if these were in fact saved when a previous Kaspersky Anti-Virus 6.0 installation was removed from your server.
Let's take a closer look at how to use the options described above.
If you have previously installed another version or build of Kaspersky Anti-Virus for Windows Servers on your computer and you saved its threat signatures when you uninstalled it, you can use it in the current version. To do so, check Threat signatures. The threat signatures included with the program installation will not be copied to the server.
To use protection settings that you configured and saved from a previous version, check Protection settings.
Step 6. Selecting an installation type
In this stage, you select how much of the program you want to install on your computer. You have two options:
Complete. If you select this option, all Kaspersky Anti-Virus for Windows Servers components will be installed.
Custom. If you select this option, you can select the program components that you want to install. For more, see Step 7.
To select a setup type, click the appropriate button.
Step 7. Selecting program components to install
Note:
This step occurs only if you select the Custom setup type.
If you selected Custom installation, you can select the components of Kaspersky Anti-Virus for Windows Servers that you want to install. By default, File Anti-Virus, and the virus scan component are selected for installation.
To select the components you want to install, left-click the icon alongside a component name and select Will be installed on local hard drive from the opened menu. You will find more information on what protection a selected component provides, and how much disk space it requires for installation, in the lower part of the program installation window.
If you do not want to install a component, select Entire feature will be installed on local hard drive item from the context menu.
After you have selected the components you want to install, click Next. To return the list to the default programs to be installed, click Reset.
Step 8. Searching for other anti-virus programs
In this stage, the installer searches for other anti-virus products installed on the server, including Kaspersky Lab products, which could raise compatibility issues with Kaspersky Anti-Virus for Windows Servers.
The installer will display on screen a list of any such programs it detects. The program will ask you if you want to uninstall them before continuing installation.
You can select manual or automatic uninstall under the list of anti-virus applications detected (only Kaspersky Lab products will be deleted automatically).
To continue installation, click the Next button.
Step 9. Finishing installing your program
In this stage, the program will ask you to finish installing the program on the server.
We do not recommend deselecting the Enable Self-Defense before installation when initially installing Kaspersky Anti-Virus 6.0. By enabling the protection modules, you can correctly roll back installation if errors occur while installing the program. If you are reinstalling the program, we recommend that you deselect this checkbox.
Note:
If the application is installed remotely via Windows Remote Desktop, we recommend checking Enable Self-Defense before installation. Otherwise the installation procedure might not finish or finish correctly.
If you want exclusions recommended by Microsoft for servers to be added to the exclusions automatically, check Exclude areas recommended by Microsoft from virus scan.
If you want the environment variable %Path% to be added to avp.com after installation, check Add path to avp.com to system variable %PATH%.
To continue installation, click the Next button.
Warning!
When Kaspersky Anti-Virus components which intercept network traffic are being installed current network connections are broken. Most of them will be recovered in some period of time.
Step 10. Completing the installation procedure
The Complete Installation window contains information on finishing the Kaspersky Anti-Virus installation process.
To start the setup wizard, click the Next button (see 3.2.3, pg. 43).
If installation is completed successfully, you will need to restart your computer, and a message on the screen will tell you so.
3.2.3. Setup Wizard
The Kaspersky Anti-Virus 6.0 for Windows Servers Setup Wizard starts after the program has finished installation. It is designed to help you configure the initial program settings to conform to the features and uses of your computer.
The Setup Wizard interface is designed as a standard Windows Wizard and consists of a series of steps that can be navigated using the Back and Next buttons, or complete using the Finish button. The Cancel button will stop the Wizard at any point.
If you stop the setup wizard by closing the wizard window, the application will not run. Every time you start the application, the setup wizard will start over until the setup procedure is completed successfully.
3.2.3.1. Using objects saved with Version 5.0
This wizard window appears after finishing the application installation process on top of Kaspersky Anti-Virus 5.0. You will be asked to select what data used by version 5.0 you want to import to version 6.0. This might include quarantined or backup files or protection settings.
To use this data in Version 6.0, check the necessary boxes.
3.2.3.2. Activating the program
Note:
Before activating the program, make sure that the computer's system date settings match the actual date and time.
The program is activated by specifying the activation code that Kaspersky AntiVirus will use to obtain a license key and to determine the expiration date for it.
The license key contains system information necessary for all the program's features to operate, and other information:
- Support information (who provides program support and where you can obtain it)
Name, number, and expiration date of your license
3.2.3.2.1. Selecting a program activation method
Depending on whether you have a key for Kaspersky Anti-Virus or need to obtain one from the Kaspersky Lab server, you have several options for activating the program:

Activate using the activation code. Select this activation option if you have purchased the full version of the program and were provided with an activation code. Using this activation code you will obtain a key file providing
access to the application's full functionality throughout the effective term of the license agreement.
Activate trial version. Select this activation option if you want to install the trail version of the program before making the decision to buy a commercial version. You will be given a free key valid for a term specified in the trial version license agreement.
Apply existing license key. Activate the application using a Kaspersky AntiVirus 6.0 license key file.
Activate later. If you choose this option, you will skip the activation stage. Kaspersky Anti-Virus 6.0 for Windows Servers will be installed on your computer and you will have access to all program features except updates (you can only update the threat signatures once after installing the program).
The first two activation options use a Kaspersky Lab web server, which requires an Internet connection. Before activating, make sure to edit your network settings in the window that opens when you click LAN settings (if necessary). For more in-depth information on configuring network settings, contact your system administrator or ISP.
If you have no Internet connection when installing the program you can activate the application later using its interface or you can use Internet access of another computer to register at Kaspersky Lab Technical Support website and get the key using activation code
3.2.3.2.2. Entering the activation code
You must enter an activation code to activate the program. If you purchase the program through the Internet, you will receive the activation code by e-mail. If you purchase a boxed version of the program, you will find the activation code on the installation CD-ROM envelope.
The activation code is a sequence of numbers and letters separated by dashes into four sections of five characters each, no spaces. For example, 11AA1-11AAA-1AA11-1A111. Note that the code must be entered in Latin characters.
Enter your contact information in the lower part of the window: full name, e-mail address, and country and city of residence. This information might be requested to identify a registered user if, for example, a key is lost or stolen. If that were to happen, your contact information will enable you to obtain a new license key.
3.2.3.2.3. Obtaining a key file
The Settings Wizard connects to Kaspersky Lab servers and sends them your registration data (the activation code and personal information), which are inspected on the server.
If the activation code passes inspection, the Wizard receives a key file. If you install the demo version of the program, the Settings Wizard will receive a trial key file without an activation code.
The file received will be installed automatically to use the program and you will see an activation completion window with detailed information on the key being used.
If the activation code does not pass inspection, you will see a corresponding message on the screen. If this occurs, contact the software vendors from whom you purchased the program for information.
3.2.3.2.4. Selecting a license key file
If you have a license key file for Kaspersky Anti-Virus 6.0 for Windows Servers, the Wizard will ask if you want to install it. If you do, use the Browse button and select the file path for the key file with the .key extension in the file selection window.
After you have successfully installed the key, you will see information about the license in the lower part of the window: name of the person to whom the software is registered, license number, license type (full, beta-testing, demo, etc.), and the key expiration date.
3.2.3.2.5. Completing program activation
The Setup Wizard will inform you that the program has been successfully activated. It will also display information on the license key installed: name of the person to whom the software is registered, license number, license type (full, beta-testing, demo, etc.), and the key expiration date.
3.2.3.3. Configuring update settings
Your computer's security depends directly on updating the threat signatures and program modules regularly. In this window, the Setup Wizard asks you to select a mode for program updates, and to configure a schedule.
Automatically. Kaspersky Anti-Virus checks the update source for update packages at specified intervals. Scans can be set to be more frequent during virus outbreaks and less so when they are over. When Anti-Virus detects fresh updates, it downloads them and installs them on the computer. This is the default setting.
Every 2 hour(s). Updates will run automatically according to the schedule created. You can configure the schedule by clicking Change.
Manually. If you choose this option, you will run program updates yourself.
Note that the threat signatures and program modules included with the software may be outdated by the time you install the program. That is why we recommend downloading the latest program updates. To do so, click Update now. Then Kaspersky Anti-Virus for Windows Servers will download the necessary updates from the update servers and will install them on your computer.
If you want to configure updates (set up network properties, select the resource from which updates will be downloaded, set up running task under a certain account or enable update distribution option), click Settings.
3.2.3.4. Configuring a virus scan schedule
Scanning selected areas of your computer for malicious objects is one of the key steps in protecting your computer.
When you install Kaspersky Anti-Virus for Windows Servers, three default virus scan tasks are created. In this window, the Setup Wizard asks you to choose a scan task setting:
Startup objects
Kaspersky Anti-Virus scans startup objects automatically when it is started by default. You can edit the schedule settings in another window by clicking Change.
Critical Areas
To scan critical areas of your computer automatically (system memory, Startup objects, boot sectors, Windows Server system folders) for viruses, check the appropriate box. You can configure the schedule by clicking Change.
The default setting for this automatic scan is disabled.
My Computer
For a full virus scan of your computer to run automatically, check the appropriate box. You can configure the schedule by clicking Change.
The default setting, for scheduled running of this task, is disabled. However, we recommend running a full virus scan of the server immediately after installing the program.
3.2.3.5. Restricting program access
Kaspersky Anti-Virus gives you the option of password-protecting the program, since several people may use the same computer, and since malicious programs
could potentially disable protection. Using a password can protect the program from unauthorized attempts to disable protecting or change settings.
To enable password protection, check Enable password protection and complete the Password and Confirm password fields.
Select the area below that you want password protection to apply to:

All operations (except notifications of dangerous events). Request password if the user attempts any action with the program, except for responses to notifications on detection of dangerous objects.

Selected operations:
Saving program settings - request password when a user attempts to save changes to program settings.
Exiting the program - request password if a user attempts to exit the program.
- Stopping/pausing protection components or virus scan tasks – request password if user attempts to pause or fully disable any protection component or virus scan task.
3.2.3.6. Finishing the Setup Wizard
In the last window of the wizard, you will see a message saying that the program has been installed and configured successfully. You can start the application immediately by checking Start product.
If something went wrong during installation, such as an incompatibility problem with other antivirus applications, you will be asked to restart your computer.
APPENDIX A. KASPERSKY LAB
Founded in 1997, Kaspersky Lab has become a recognized leader in information security technologies. It produces a wide range of data security software and delivers high-performance, anti-virus, anti-spam and anti-hacking systems.
Kaspersky Lab is an international company. Headquartered in the Russian Federation, the company has offices in the United Kingdom, France, Germany, Japan, the Benelux countries, China, Poland, Romania and the USA (California). A new company office, the European Anti-Virus Research Centre, has recently been established in France. Kaspersky Lab's partner network includes over 500 companies worldwide.
Today Kaspersky Lab employs over 450 highly qualified specialists including 10 MBA degree holders and 16 PhD degree holders. Senior experts hold membership in the Computer Anti-Virus Researchers Organization (CARIO).
The most valuable asset of our company is the unique knowledge and expertise accumulated by its specialists during the fourteen years of the never-ceasing fight against computer viruses. A thorough analysis of computer virus activities enables the company's specialists to foresee the malware development trends and delivery to our users a timely protection against new types of attacks. Resistance to future attacks is the basic policy implemented in all Kaspersky Lab's products. At all times, the company's products remain one step ahead of other vendors in delivering anti-virus coverage to our clients.
Years of hard work have made the company one of the top anti-virus software developers. Kaspersky Lab was one of the first businesses of its kind to develop the highest standards for anti-virus defense. The company's flagship product, Kaspersky Anti-Virus, provides full-scale protection for all tiers of a network. Workstations, file servers, mail systems, firewalls, internet gateways and handheld computers. Its convenient and easy-to-use management tools ensure the maximum degree of automation of the anti-virus protection of computers and corporate networks. Many well-known manufacturers use the Kaspersky AntiVirus kernel. The list of such companies includes Nokia ICG (USA), F-Secure (Finland), Aladdin (Israel), Sybari (USA), G Data (Germany), Deerfield (USA), Alt-N (USA), Microworld (India) and BorderWare (Canada).
Kaspersky Lab's customers benefit from a wide range of additional services that ensure both the stable operation of the company's products, and compliance with specific business requirements. We design, implement and support corporate anti-virus complexes. Kaspersky Lab's anti-virus database is updated every hour. The company provides its customers with a 24-hour technical support service available in several languages.
If you have any questions, you can contact our dealers or contact Kaspersky Lab directly. Detailed consultations are provided on the web link below. You will receive full and comprehensive answers to any question.
| Address: | 10/1 1st Volokolamsky Proezd Moscow 123060 Russian Federation |
| Support Information: | http://www.kaspersky.com/sos |
| WWW: | http://www.kaspersky.com http://www.viruslist.com |

- Table of Contents
- CHAPTER 1. KASPERSKY SMALL OFFICE SECURITY 5
- CHAPTER 2. KASPERSKY ANTI-VIRUS 6.0FOR WINDOWS WORKSTATIONS... 12
- CHAPTER 3. KASPERSKY ANTI-VIRUS 6.0 FOR WINDOWS SERVERS 34
- Installing Kaspersky Anti-Virus 6.0 for Windows Servers 38
- APPENDIX A. KASPERSKY LAB 49
- CHAPTER 1. KASPERSKY SMALL OFFICE SECURITY
- Software overview
- Software packages
- Note:
- Getting started
- Support for registered users
- CHAPTER 2. KASPERSKY ANTI-VIRUS 6.0FOR WINDOWS WORKSTATIONS
- Overview
- What's new in Kaspersky Anti-Virus 6.0 for Windows Workstations
- New Program Interface Features
- New Program Update Features
- The elements of Kaspersky AntiVirus for Windows Workstations Defense
- Protection components
- File Anti-Virus
- Mail Anti-Virus
- Web Anti-Virus
- Proactive Defense
- Anti-Spy
- Anti-Hacker
- Anti-Spam
- Virus scan tasks
- Critical Areas
- My Computer
- Startup Objects
- Program tools
- Updater
- Data Files
- Rescue Disk
- Support
- Installing Kaspersky Anti-Virus 6.0 for Windows Workstations
- Warning!
- Hardware and software system requirements
- General Requirements:
- Installation procedure using the Installation Wizard
- Step 1. Checking for the necessary system conditions to install Kaspersky Anti-Virus for Windows Workstations
- Step 2. Installation Welcome window
- Step 3. Viewing the End-User License Agreement
- Step 4. Selecting an installation folder
- Step 5. Using Saved Installation Settings
- Step 6. Selecting an installation type
- Step 7. Selecting program components to install
- Step 8. Disabling the Microsoft Windows firewall
- Step 9. Searching for other anti-virus programs
- Step 10. Finishing installing your program
- Step 11. Completing the installation procedure
- Setup Wizard
- Using objects saved with Version 5.0
- Activating the program
- Selecting a program activation method
- Entering the activation code
- Obtaining a key file
- Selecting a license key file
- Completing program activation
- Selecting a security mode
- Configuring update settings
- Configuring a virus scan schedule
- Restricting program access
- Configuring Anti-Hacker settings
- Determining a security zone's status
- Creating a list of network applications
- Finishing the Setup Wizard
- CHAPTER 3. KASPERSKY ANTI-VIRUS 6.0 FOR WINDOWS SERVERS
- Overview
- What's new in Kaspersky Anti-Virus 6.0 for Windows Servers
- New Protection Features:
- The elements of Kaspersky AntiVirus for Windows Servers Defense
- File Anti-Virus
- Virus scan tasks
- Program tools
- Update
- Installing Kaspersky Anti-Virus 6.0 for Windows Servers
- Hardware and software system requirements
- Installation procedure using the Installation Wizard
- Step 1. Checking for the necessary system conditions to install Kaspersky Anti-Virus for Windows Servers
- Step 8. Searching for other anti-virus programs
- Step 9. Finishing installing your program
- Step 10. Completing the installation procedure
- Setup Wizard
- Using objects saved with Version 5.0
- Activating the program
- Selecting a program activation method
- Entering the activation code
- Obtaining a key file
- Selecting a license key file
- Completing program activation
- Configuring update settings
- Configuring a virus scan schedule
- Restricting program access
- Finishing the Setup Wizard
- APPENDIX A. KASPERSKY LAB
Brand : KASPERSKY LAB
Model : SMALL OFFICE SECURITY
Category : Small Business Security