
DF300 - Portable air conditioner DAITSU - Free user manual and instructions
Find the device manual for free DF300 DAITSU in PDF.


| Product type | Digital camera |
| Brand | DAITSU |
| Model | DF300 |
| Image sensor | 3 megapixels (2048 x 1536) |
| Photo resolutions | 2560x1920, 2272x1704, 2048x1536, 1600x1200 |
| Digital zoom | 6x |
| LCD screen | 1.5-inch color TFT (280x220) |
| Internal memory | 16 MB flash |
| External memory support | SD/MMC card (up to 512 MB) |
| Power | Built-in rechargeable 3.7V lithium-ion battery |
| Battery life | Approximately 2.5 hours continuous, about 150 minutes or 1800 photos (without flash) |
| Built-in flash | Yes, modes: Auto, Off, Forced, Forced proximity |
| Flash range | 0.5 m to 2.5 m |
| Focus | Macro: 0.5-1.2 m, Normal: 1.2 m to infinity |
| Video recording | VGA 640x480 at 15 fps, CIF 352x288 at 30 fps, with sound |
| Voice recording | Yes, 8 kHz sampling |
| TV out | NTSC/PAL via AV jack |
| PC connectivity | USB 1.1 |
| Dimensions (W x D x H) | 92.7 x 59.7 x 16 mm |
| Weight | Approximately 100 g (with battery) |
| Operating temperature | 0°C to 40°C |
| Included accessories | CD-ROM (Photo Explorer 8.0SE/SlimCard Driver), USB cable, AV cable, wrist strap, carrying case, lithium-ion battery |
| Cleaning | Use a soft, dry cloth to clean the exterior. Do not use chemicals. |
| Safety | Do not expose to water, high temperatures, or direct sunlight. Remove the battery if not in use for extended periods. |
Frequently Asked Questions - DF300 DAITSU
User questions about DF300 DAITSU
0 question about this device. Answer the ones you know or ask your own.
Ask a new question about this device
Download the instructions for your Portable air conditioner in PDF format for free! Find your manual DF300 - DAITSU and take your electronic device back in hand. On this page are published all the documents necessary for the use of your device. DF300 by DAITSU.
USER MANUAL DF300 DAITSU
Dear user, thanks for purchasing this product. Much investment in time and effort has gone into its development, and it is our hope that it will give you many years of trouble-free service.
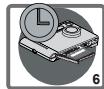
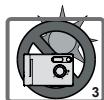
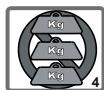
- Do not drop, puncture or disassemble the camera; otherwise the warranty will be void.
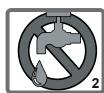
- Avoid all contact with water and have dry hands before using.
- Do not expose the camera to high temperature or leave in direct sunlight. Doing so may damage the camera.
- Use the camera with care. Avoid pressing hard on the camera body.
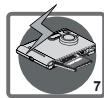
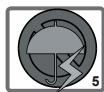
- For your own safety, avoid using the camera when there is a storm or lighting.
- Remove battery during long periods between usage, as a deteriorated battery may affect the functionality of the camera.
- Remove battery if it shows signs of leaking or distortion.
- We suggest using only the accessories supplied by the manufacturer.


Getting Start
1.Identifying the part 1
2. Systems requirements and PC hardware requirements 2
3. Accessories 2
2. Inserting the battery 3
3. Inserting and removing the SD/MMC card (optional) 3
4. Attaching the strap (optional) 4
5. Using the tripod (optional) 4
Basic Operation
- Power on/off 5
- Setting the Mode switch 5
- Taking pictures 6
- Recording movies 8
- Recording voice 9
Playing Back Your Images on the LCD
- Viewing pictures and movies 10
- TV out 11
- Deleting the picture and movie 12
Advanced Operations and Settings
- Using the MENU/OK button 13
Software Installation
- The software installation 16
- Completing the related installation procedure 22
Enjoying Viewing Your Images on a PC
- Download Pictures 23
Troubleshooting
1.Troubleshooting 24
Additional Information
- Life of battery 26
- LED indicator events 26
- Storage capacity 27
- More on frequency 27
- Specification 28
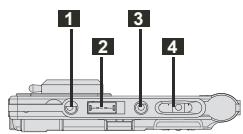
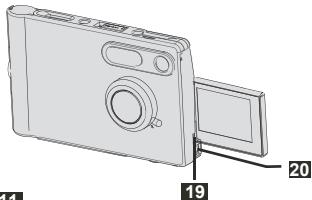
1. Identifying the part
Knowing your camera parts well before using it will help you operate it more easily.
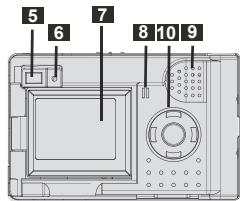
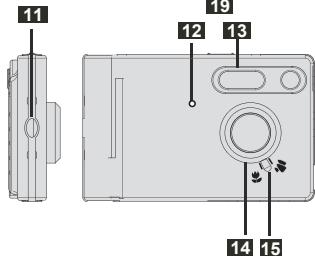
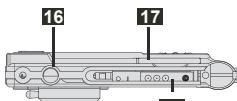
18
Power ON/OFF Button
2 Mode switch
LCD Display Button
4 Snap
5 Viewfinder
6 Power LED indicator
LCD
8 Microphone
9 Speaker
10 MENU/OK Button
Strap Holder
LED(selftimer/charging indicator)
13 Flash Light
Lens
Power On/Off & Focus Switch
16 Tripod Port
SD/MMC Card Slot
Li-Battery
USB Port
TV Out jack
2. System requirements and PC hardware requirements
- System :PC with Pentium II 300MHz or higher
Work with Windows 98SE/Me/2000/XP - 64MB RAM
300MB free hard disk space - CD-ROM driver
Sound card
3. Accessories
Please make sure the following products are included in the package. If any accessories are short, please contact the retailer:
CD-ROM(Photo Explorer 8.0SE /SlimCard Driver)
Hanging line
Bracket
USB cable to PC
TV RCA jack
3.7v Lithium Ion battery
Pouch
Optional Accessory:
Battery charger
STANDARD ACCESSORIES

1

2


4

5

6

7
OPTIONAL ACCESSORY
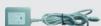
0

4. Inserting the battery
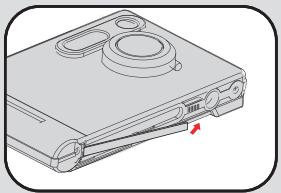
Slide the battery cover in the direction of the indication to open it.
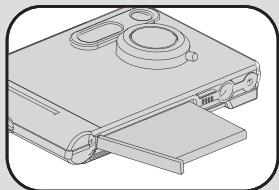
Close the battery cover to lock it.
NOTE: You should charge the battery for over three hours the first time.
For details of battery life, refer to "Life of battery" section on page 26.
5. Inserting and removing the SD/MMC card (Optional)
1 Never remove the SD/MMC card while the camera is processing data.
Removing the card
Push in and release the card to remove it

The camera comes with 16MB flash memory built inside for storage. If you do not insert a SD/MMC card, the data will be saved in the built-in flash memory automatically.
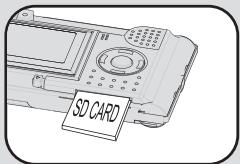
For details of the storage capacity of the SD/MMC card and internal memory (16MB flash memory), please refer to "Storage capacity" section on page 27.
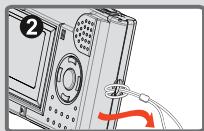
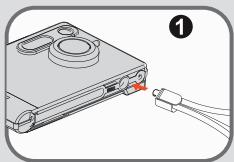
6. Attaching the strap
For convenience and safety, you may wish to attach the carrying strap.
- Thread the strap loop through the holder in the direction indicated.
- Fasten the strap as indicated.
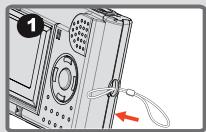
7. Using the tripod
The tripod can be attached to your camera to minimize camera shaking and to ensure optimal image quality, particularly while taking self-portraits, longer movies or in a macro mode.
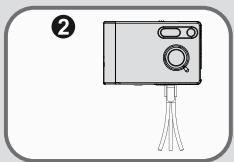
- Rotate the tripod to the port on the bottom of the camera.
- Unfold the legs to set up. Adjust the alignment to the desired position.
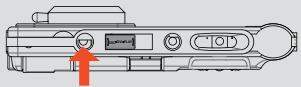
1. Power on/off
Using the power ON/OFF button
Press "power ON/OFF button", if the camera has been auto power off, or press this button to enter sleep status to save power.
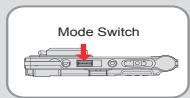
2. Setting the Mode Switch
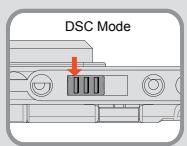
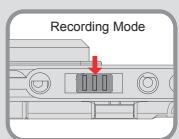
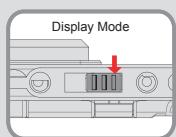
This camera provides three modes. Slide the Mode switch to select the mode that you want to use.
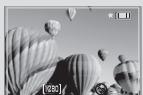
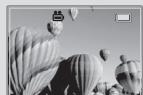
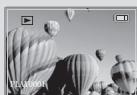
3. Taking pictures
Follow the steps to take pictures :
Snapshot
- Set the mode switch to DSC mode.
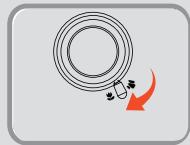
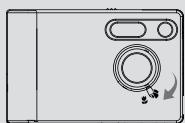
- Manully roll the lens switch to choose the proper focus length.
Marco mode : 0.5m~1.2m
Normal mode: 1.2m~
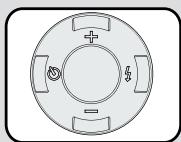
- Use control buttons to adjust zoom in or zoom out for the image you want.
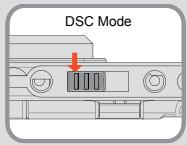
-
Press the SNAP button to take pictures. (LCD appear : "Capture3..2..1..." meaning camera is saving image)
-
When the LCD screen is open, the picture on the LCD screen is a mirror image, This feature allows the camera subject to view him-or herself on the LCD screen.
Focus
Adjust the focus before taking picture,rotate the focus switch to or , The following table helps you to select focusing distance to get the best image.
| Macro | 0.5m-1.2m |
| Normal | 1.2m-∞ |
Self-timer
Press button, you can set to take photo selftimer delay 10 seconds, press button again to cancel selftimer mode.
> Flash strobe
The camera provides 4-way flash mode as in the following table, to press
button to choose flash mode.
| Auto flash | |
| Flash off | |
| Force flash | |
| Force flash for near location |
NOTE: 1) When you want to use flash strobe :
in the state of Macro 念 you must use flash mode, never use the flash mode; in the state of Normal 念 you should use flash mode.
2) The flash range: 0.5m - 2.5m
LCD display under the DSC mode.
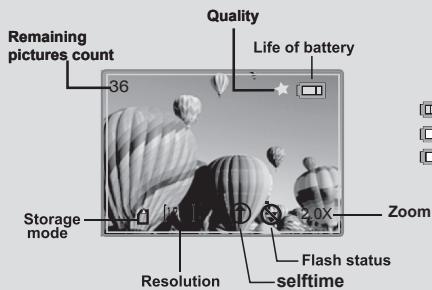
Power full
Power Warning
Power Low
NOTE: Remaining pictures count may vary depending on the resolution and color saturation, the data is for reference only.
4. Camcorder
1). Set the mode switch to Recorder mode.
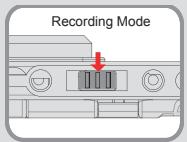
2). Utilize the Menu/OK button to select the video.
3). Press the snap button to record video clip, then the LCD will show the time of recording video clip, press the snap button again to stop recording.
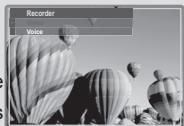
The resolution of the dynamic image and relevant specification is on page 28.
LCD display under the Camcorder mode.
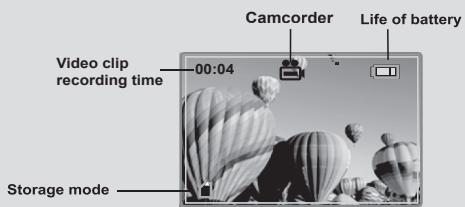
SD/MMC card
Power full
Flash memory: non-Icon
Power Warning
Power Low
5. Recording Voice
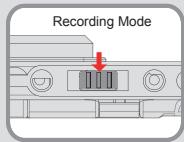
1). Set the mode switch to Recording mode.
2). Utilize the Menu/OK button to select the voice.
3). Press the snap button to record voice, led will flash all the time, then LCD will turn off to save the battery, press the snap button again to stop recording.
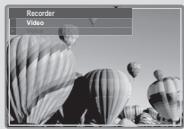
LCD display under the Recording Video mode.

SD/MMC card
Flash memory: non-Icon
Power full
Power Warning
Power Low
1. Playing Back Your Images on the LCD
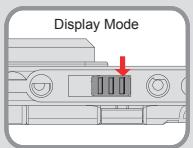
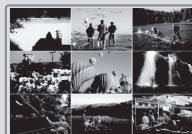
1). Set the mode switch to Display mode.
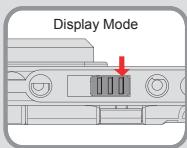
2). It will display nine pictures on the LCD.
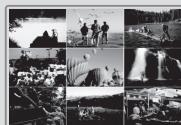
3). Press the Control buttons to select the image, then Press the SNAP button, view it on the LCD display.
- You can switch to MINIATURE and full screen image by pressing MENU/OK button.
LCD display under the Display mode.
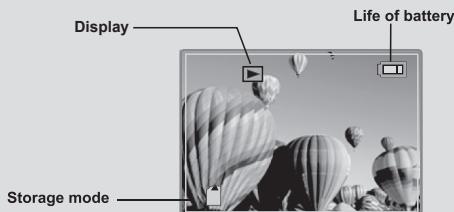
SD/MMC card
Flash memory: non-Icon
Power full
Power Warning
Power Low
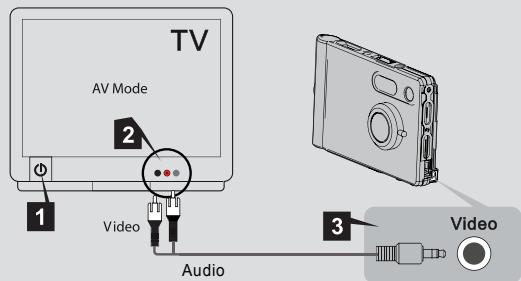
2. TV Out
Connect your camera to the TV via an AV cable to share pictures and audio recordings with friends and family.
1). Turn on your TV and switch to AV mode.
2). Connect the audio and video ends of the AV cable to your TV.
3). Connect the other end to your camera.
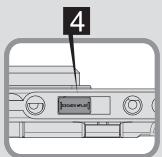
4). Turn on your camera and Set mode switch to DSC mode.
5). Press the Menu/OK button with control button to TV Out menu, Press the Menu/OK button,with control button select you need mode,press Menu/OK to play.
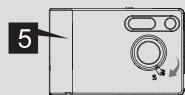
Before unplugging the AV cable from TV, you should turn off the camera first.
3. Delete the picture and movie
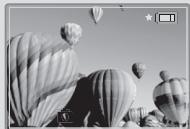
Under the DISPLAY mode,press MENU/OK button ,enter DELETE mode. Follow theses steps if you want to delete one picture or movie.
1
2
3
4
1). Switch the mode button to Display mode.
2).Press controlling button select a picture.
3). Press the control button , select delete a picture or delete all pictures. Press the Menu/OK button, select "yes" with button then press the menu/ok button to complete the action of delete.
1. Using the MENU button
- The MENU provides more advanced features for setting up best condition for your camera. Use the MENU/OK button to enter the MENU.
Menu display under the DSC mode.
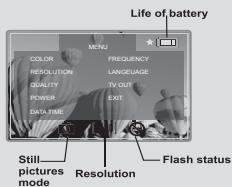
Press the Menu/OK button, and the Control button to switch Menu, Press the control button to highlight the item.
| MENU | ITEM | LCD Display | DESCRIPTION | |
| Color | Auto | No | Under the lower illumination camera will enhance the sensitivity automatically so that you can take better images, but flame rate will decrease. This item allows you to set the color temperature with the light in the certain environment. If you know the color conditions of your shooting environment, such as the "Sunny" (bright), "Cloudy" (dim), "Fluorescent" (high color condition) and "Tuengsten" (low color condition) situations, select the mode you consider most appropriate. Select the "Auto" mode if you are not sure the color condition of the environment. | |
| Exposure | EV | No | ||
| 0 | No | |||
| White Balance | Auto | No | ||
| Sunny | No | |||
| Cloudy | No | |||
| Fluorescent | No | |||
| Tuengsten | No | |||
| Sharpness | Normal | No | ||
| Sharp | No | |||
| Soft | No | |||
| Resolution | 2560x1920 | [2560] | This item allows you to change the resolution of the picture. Select the "1600x1200" or "2272x1704" "2048x1536" type when you want to develop 4x6 photos. | |
| 2272x1704 | [2272] | |||
| 2048x1536 | [2048] | |||
| 1600x1200 | [1600] | |||
| Quality | High | ★★ | This item allows you to set the image quality. | |
| Standard | ★ | |||
| Power | Set | Auto Pwer Off | No | This item allows you to set time for auto power off. |
| 03:00 | No | |||
| Date Time | Set | 2001 01 01 | No | This item allows you to set time and date. |
| 00:00:00 | No | |||
| Frequency | 50Hz | No | This item allows you to set flicker. | |
| 60Hz | No | |||
| Language | English | No | This item allows you to set language. | |
| Deutsch | No | |||
| Francais | No | |||
| Italiano | No | |||
| Português | No | |||
| Espanol | No | |||
| TV Out | NTSC | No | This item allows you to set TV Out . | |
| PAL | No | |||
| Exit | Exit the menu manager | |||
Menu display under the Recording mode.
Press the Menu/OK under the Recording mode, Recording menu display on the LCD. Select video or voice, then press the Menu/OK.
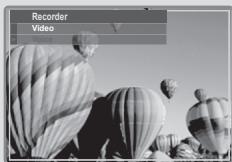
NOTE: You can play movie files in PC with Quick time.
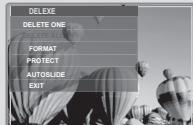
Menu display under the display mode.
- Press the Menu/OK button to delete menu. (under state of the full screen image)
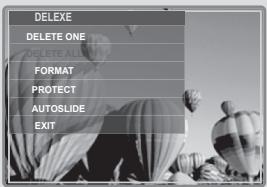
| ITEM | DESCRIPTION |
| Delete one | Delete a picture or movie |
| Delete all | Delete all pictures or movies |
| Format | Delete all files and format flash memory |
| Protect | Protect the picture ,audio or movie not to be delete. |
| Autoslide | Display photos or films automatically from the first to the end. |
| Exit | Exit "Delete" menu. |
NOTE: Please don't format by computer.
About Photo Explorer
Photo Explorer is ideal for organizing the photos that are transferred from your digital camera to your computer. It allows you to categorize, move, copy and edit your photos in an intuitive, user-friendly environment.
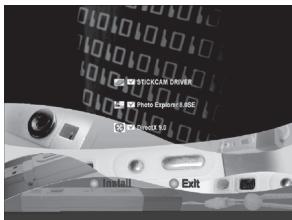
1. Insert the CD into your computer using the auto installation program will pop up.
1). Click "Install" for software installation
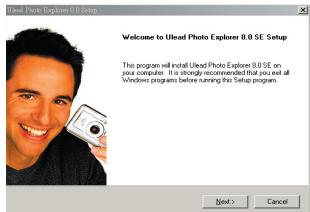
2). Click "Next" to continue
3). Click "Yes" to continue
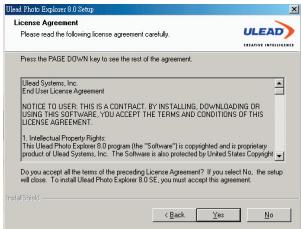
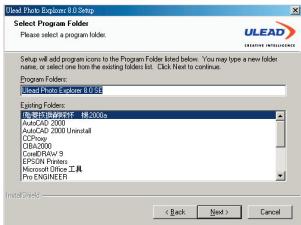
4). Select install path and continue
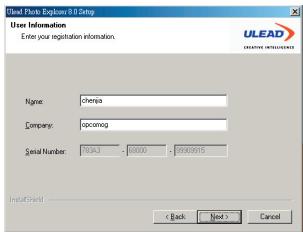
5). Select install path and click "Next" continue.
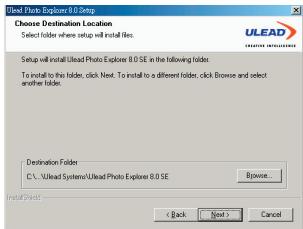
6). Click "Next" continue.
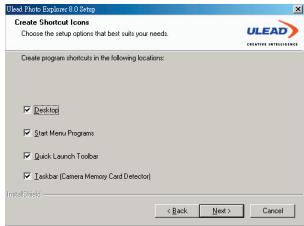
7). Click "Next" continue.
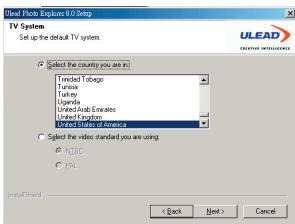
8). Select country and click "Next" continue.
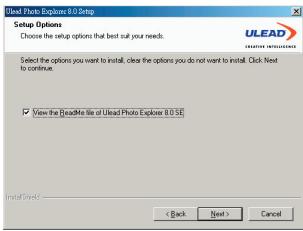
9). Click "Next" continue.
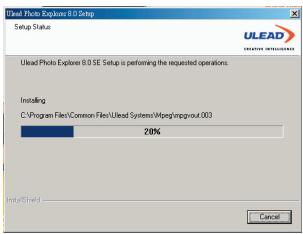
10). Copy file.
11).Click "Next" continue.
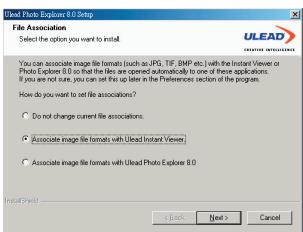
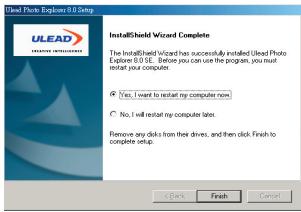
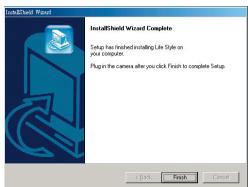
12). Click "Finish" if installation is OK.
2. If you select SlimCard Driver, then continue to install SlimCard Driver.
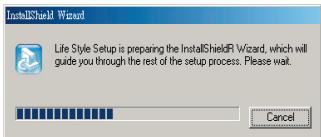
1) Click "NEXT" to continue.
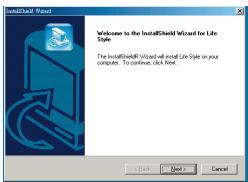
2) Click "FINISH" if Installation is OK.
- If you select DirectX 9.0, then continue install DirectX 9.0.
1).Click"Next"to continue
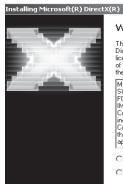
Welcome to setup for DirectX
The Directive 10 was regarded by you through invitation of the Secretary of State, and it is not yet clear how much it would be of the agreement. You must accept the agreement to continue working with the Government.
METHODS OF DIRECT SOCS:
Methods of direct communication (TSG) and license agreement
PRACTICATION BY CONTRACT (Supplemental EUA5)
CONNECTIONS AND INTERESTS:
(1) The author(s) will be responsible for the following conditions: including any "online" or electronic documentation TSG and/or the author(s) will be responsible for the following conditions: including any "document" or document in the agreement under which you have granted the right to use the material.
C I accept the agreement
C I don't accept the agreement.

2).Click "Next" to continue
Installing Microsoft(R) DirectX(R)
Direc0X Setup
Install DieCXTune components

DirecX 9.0 Runtime Install
This install package will search for updated DirectX Runtime Components and update as necessary. It may take a few minutes.
To start installation, please click Next.
<Back
Next
Cancel
3). Click "Finish" to installation is OK
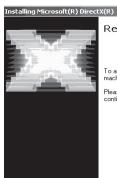
Restart Computer
To apply the changes, DoC× setup needs to restart your machine.
Please save your work and then close all applications before continuing.
Finish
Control
2. Completing the related installation procedure
1) Turn on your computer.
2) Set the Mode switch on your camera to DSC.
3) Insert the USB cable to the USB port on your computer.
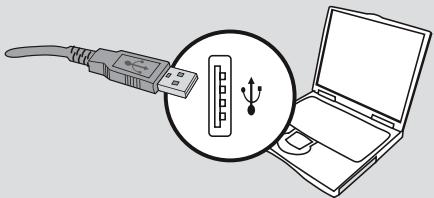
4) Insert the other end of the USB cable to the USB port on your camera. You can use PC-CAM with PHOTO EXPELORER.

Download Picture
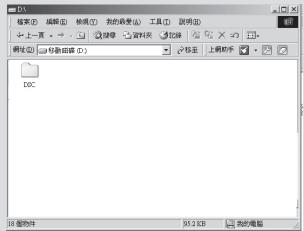
- Please connect your camera to your computer, the camera will become a removable disk.
- Double-click "my computer", double-click "removable disk", double-click "DCIM" folder, then you can copy photo to PC.
| Question | Answer |
| When using the camera | |
| The camera has no power. | The battery may be out of power, please charge the battery. Make sure that the battery is installed correctly. |
| Cannot power on my camera even though battery is installed. | Make sure that the battery is installed correctly. If it is idle over 3 minutes, the camera will shut down automatically, please press the Power wake up button to restart. |
| Cannot take pictures and movies when pressing the SNAP button. | Make sure that the power is on The storage is full. Please free some space of the SD/MMC card or flash memory. Check if the camera is under the status of charging batteries. Check if the SD/MMC card is set to "protected". If the "MEMORY ERROR" message shows on the LCD display, please set the Mode switch to mode format the card. |
| I did not delete the picture and movie, but cannot find the data in the SD/MMC card. | Check if your files are stored in the camera's built-in memory. If there is a icon at the right bottom section on the LCD display, it means you are using the camera with a SD/MMC card. Please remove the card to find the data in the flash memory. (For details, refer to the "Removing the card" section on page 3) |
| Cannot set the strobe to the "On" mode. | Charging the flash strobe requires more power "to" battery. When the battery is under the status of low power, the strobe can't work. Please charge the battery. |
| The image is too blurred. | Please adjust the focus (refer to page 6). |
| The image is too dark. | You may need to take pictures or movies in the place with adequate light or use the flash strobe. |
| Sound playback is not available when viewing the movie on the LCD display. | This situation is normal. If you want the movie with sound playback, please copy the movie to your computer and view it on the computer. |
| Noise occurs on my camera when viewing the image on the LCD display or on the computer. | Set the frequency matching the place you are. Please refer to the "More on frequency" section on page 27. |
| When connecting the camera to your computer | |
| The driver installation failed. | ● Please remove the driver and other related programs. Follow the installation steps in this manual to reinstall. ● Install the driver before inserting the USB cable. |
| A conflict with other installed camera or capture device. | If you have any other camera or capture device, completely remove the camera and its driver form the computer to avoid a driver conflict. |
| The movie cannot be played on my computer. | Please install Quicktime. |
| Noise occurs on my computer when using Video Conferencing. | Set the frequency matching the place you are. Please refer to the page 27. |
1. Life of battery
| Number Condition | Number of images | Battery life (minutes) |
| Taking Still Pictures 2048x1536 (without flash strobe) | 1800 | 150 |
Notes:1. Life of battery will be shorten in the following conditions.
(1) Taking snapshot at low temperature.
(2) Turn on/off the power repeatedly.
- The table above is for reference only.
- Using the flash light will decrease the number of pictures to be taken.
2. LED indicator events
1 Never remove the card and battery while LED flash is on.
| Condition | LED color | Meanings |
| Power (LED indicator) | Red | Power on |
| Flash (LED indicator) | Red | Camcorder |
| Record voice | ||
| State indacation (LED indicator) | Green | selftime |
| Charging |
3. Storage capacity
| Memory | Still picture | Movie | Voice | |||
| 2560x1920 | 2272x1704 | 2048x1536 | 1600x1200 | 320x240 | 8kHz | |
| Flash memory (16MB) | 26 | 34 | 38 | 63 | 5 Min. | 60 Min. |
| SD/MMC card (32MB) | 52 | 68 | 76 | 126 | 10 Min. | 120 Min. |
| SD/MMC card (64MB) | 104 | 136 | 152 | 252 | 20 Min. | 240Min. |
| SD/MMC card (128MB) | 208 | 272 | 304 | 504 | 40 Min. | 480Min. |
| SD/MMC card (256MB) | 416 | 544 | 608 | 1008 | 80 Min. | 960 Min. |
| SD/MMC card (512MB) | 832 | 1088 | 1216 | 2016 | 160 Min. | 1720Min. |
Notes: 1. Actual number of pictures stored may vary (up to 30% ) depending on the resolution and color saturation.
- The table above is for reference only.
4. More on frequency
The default frequency setting of your camera is based on your country. When using the camera abroad, please refer to the table below to match the frequency setting with the place you go.
| Country | England | Germany | France | Italy | Spain | Netherlands |
| Setting | 50Hz | 50Hz | 60Hz | 50Hz | 50Hz | 50Hz |
| Country | Portugal | America | Taiwan | China | Japan | Korea |
| Setting | 50Hz | 60Hz | 60Hz | 50Hz | 50/ 60Hz | 60Hz |
- Specification
| ITEM | DESCRIPTION |
| Model | Slim Card |
| Image Sensor | 3Mega 2048x1536 pixels |
| Interface | USB Revision 1.1 |
| Working System | Windows98se / Windows2000 / Windows ME / Windows XP |
| Indicator | LED for Power Indicator |
| Image Compression | JPEG / Motion JPEG |
| Video Format | VGA 640X480 JPEG @15fps |
| CIF 352X288 JPEG @30fps | |
| Internal Memory | 16MB Flash memory |
| Memory interface | SD / MMC interface(UP to 512MB) |
| Digital Still Camera | 5.0M 2560x1920: 26Pictures(per 16MB Flash Memory) |
| 4.0M 2272x1704: 34Pictures(per 16MB Flash Memory) | |
| 3.0M 2048x1536: 38 Pictures(per 16MB Flash Memory) | |
| 2.1M 1600x1200: 63 Pictures(per 16MB Flash Memory) | |
| Digital Camcorder with Audio | 5 minutes with 7.5fps 320x240 resolution(per 16MB Flash Memory) |
| Digital Voice Recorder | 1hr /8k sample rate(per 16MB Flash Memory) |
| Digital Zoom | 6X |
| Viewfinder | TFT LCD / Optical Viewfinder |
| LCD | 1.5" Color TFT LCD(280x220) |
| TV Out Function | NTSC/PAL Color System |
| Focusing Ranges | Macro:0.5~1.2m Normal:1.2m~infinity |
| Flash Strobe | Off/Auto/Flash/Flash- |
| Power Source | Built in 3.7V Lithium Ion Battery |
| Battery operation times | 2.5hr continuous |
| USB Output Voltage | DC 5V±0.5V |
| Auto Power Off | After 30sec~3min (by setting up) |
| Automatic Image Correction | Brightness |
| Exposure | -1.5EV~+1.5EV (In 0.3EV Steps) |
| White Balance(WB) | Auto/Sunny/Cloudy/Fluorescent/Tungsten |
| Self-Timer | with 10 seconds delay |
| LENS | f=8.5mm F:2.8 FOV(D):52° |
| Operating Temperature Range | 0°C ~ 40°C (32°F ~ 104°F) |
| Dimensions(L)X(W)X(H) | 3.7"x2.4"x0.6"(92.7mm x 59.7mm x 16mm) |


- Getting Start
- Basic Operation
- Playing Back Your Images on the LCD
- Advanced Operations and Settings
- Software Installation
- Enjoying Viewing Your Images on a PC
- Troubleshooting
- Additional Information
- Identifying the part
- System requirements and PC hardware requirements
- Accessories
- STANDARD ACCESSORIES
- OPTIONAL ACCESSORY
- Inserting the battery
- Inserting and removing the SD/MMC card (Optional)
- Removing the card
- Attaching the strap
- Using the tripod
- Power on/off
- Using the power ON/OFF button
- Setting the Mode Switch
- Taking pictures
- Snapshot
- Focus
- Self-timer
- > Flash strobe
- LCD display under the DSC mode.
- Camcorder
- Recording Voice
- Playing Back Your Images on the LCD
- LCD display under the Display mode.
- TV Out
- Delete the picture and movie
- Using the MENU button
- Menu display under the DSC mode.
- Menu display under the Recording mode.
- Menu display under the display mode.
- About Photo Explorer
- Insert the CD into your computer using the auto installation program will pop up.
- 3). Click "Yes" to continue
- 4). Select install path and continue
- 5). Select install path and click "Next" continue.
- 6). Click "Next" continue.
- 7). Click "Next" continue.
- 8). Select country and click "Next" continue.
- 9). Click "Next" continue.
- 10). Copy file.
- 11).Click "Next" continue.
- 12). Click "Finish" if installation is OK.
- If you select SlimCard Driver, then continue to install SlimCard Driver.
- 1) Click "NEXT" to continue.
- 2) Click "FINISH" if Installation is OK.
- Welcome to setup for DirectX
- 2).Click "Next" to continue
- Installing Microsoft(R) DirectX(R)
- Direc0X Setup
- DirecX 9.0 Runtime Install
- 3). Click "Finish" to installation is OK
- Restart Computer
- Completing the related installation procedure
- Download Picture
- Life of battery
- LED indicator events
- Storage capacity
- More on frequency
Brand : DAITSU
Model : DF300
Category : Portable air conditioner