
MP3-DJ - DJ Equipment GENIUS - Free user manual and instructions
Find the device manual for free MP3-DJ GENIUS in PDF.


| Product type | MP3 player / DJ equipment |
| Brand | Genius |
| Model | MP3-DJ |
| Dimensions (H x W x D) | 72 x 26 x 18 mm |
| Net weight | 22.5 g |
| Power supply | 1 rechargeable AAA battery (up to 10 hours battery life) |
| Internal memory | Internal flash 256 MB / 512 MB |
| Interface | USB 2.0 full speed |
| Supported audio formats | MP3, WMA |
| FM radio | 87.5 - 108 MHz, stereo, up to 30 presets |
| Voice recording | ADPCM with built-in microphone |
| Display | LCD 128 x 32 pixels, blue LED backlight |
| Signal-to-noise ratio | 90 dB |
| Frequency response | 20 Hz - 20 kHz |
| Audio output | 5 mW (L and R) |
| Total harmonic distortion | < 0.05% |
| Lyrics display | Synchronized (.lrc file) |
| Equalizer | Normal, Pop, Classic, Jazz, Rock |
| Lock function | Yes (HOLD switch) |
| Care and cleaning | Avoid liquids, extreme temperatures, disassembly. Clean with a soft, dry cloth. |
| Safety | Do not expose to moisture, do not use at high volume for long periods, do not leave in sunlight. |
| Compatible operating systems | Windows 98SE/Me/2000/XP, Mac OS 9.2.2 or higher |
Frequently Asked Questions - MP3-DJ GENIUS
User questions about MP3-DJ GENIUS
0 question about this device. Answer the ones you know or ask your own.
Ask a new question about this device
Download the instructions for your DJ Equipment in PDF format for free! Find your manual MP3-DJ - GENIUS and take your electronic device back in hand. On this page are published all the documents necessary for the use of your device. MP3-DJ by GENIUS.
USER MANUAL MP3-DJ GENIUS
Introduction 1
Accessories 1
System Requirements 1
Care and Maintenance 2
Knowing your MP3 PLAYER 3
Software Installation 5
Connecting to PC. 6
Downloading music 7
Function Instructions 8
Overall View of LCD 10
Menu Settings 10
Listening to FM Radio 15
Specifications 18
Introduction
Genius MP3 PLAYER
Thank you for purchasing the Genius MP3 player. You do not need to carry a cassette tape or CD anymore.
With this MP3 Player, enjoying CD-quality music becomes a breeze. You can store dozens of MP3 files in the built-in flash memory. Also, you can listen to the radio or even record your favorite radio program, interview, conversation or lecture.
Accessories

Stereo Earphone
USB cable

Install CD/Manual

AAA rechargeable battery
System Requirements
- Pentium 200 MHz
- 40MB hard disk space
- USB 1.1 Port or above
CD/DVD-ROM Drive - Microsoft Windows 98SE / Me / 2000 / XP or Mac 9.2.2 or above
Care and Maintenance
- Do not set the volume level too high. Avoid using the equipment continuously for a long period of time to minimize impairment to your hearing.
Extreme temperatures may have a temporary effect on the operation of your MP3 player. This is normal and does not indicate a fault. - Do not modify or disassemble the equipment. There are no user serviceable parts.
Vibration during walking or exercising will not affect the MP3 player. However, dropping the player or dropping a heavy object on the player may result in distorted sound. - Avoid contact with liquids. If the equipment becomes wet, remove the power immediately and contact your retailer.
- Do not leave the equipment in direct sunlight or in a humid, dusty or hot area.
- Keep metallic and magnetic items that may accidentally touch the terminals away from the equipment.
When connecting the player to an external source, read the operating instructions of the equipment for the correct connection and safety precautions. Ensure the player is compatible with the product it is being connected to.
When disposing of any packing materials or old equipment check with your local authorities for information on recycling.
Knowing your MP3 player
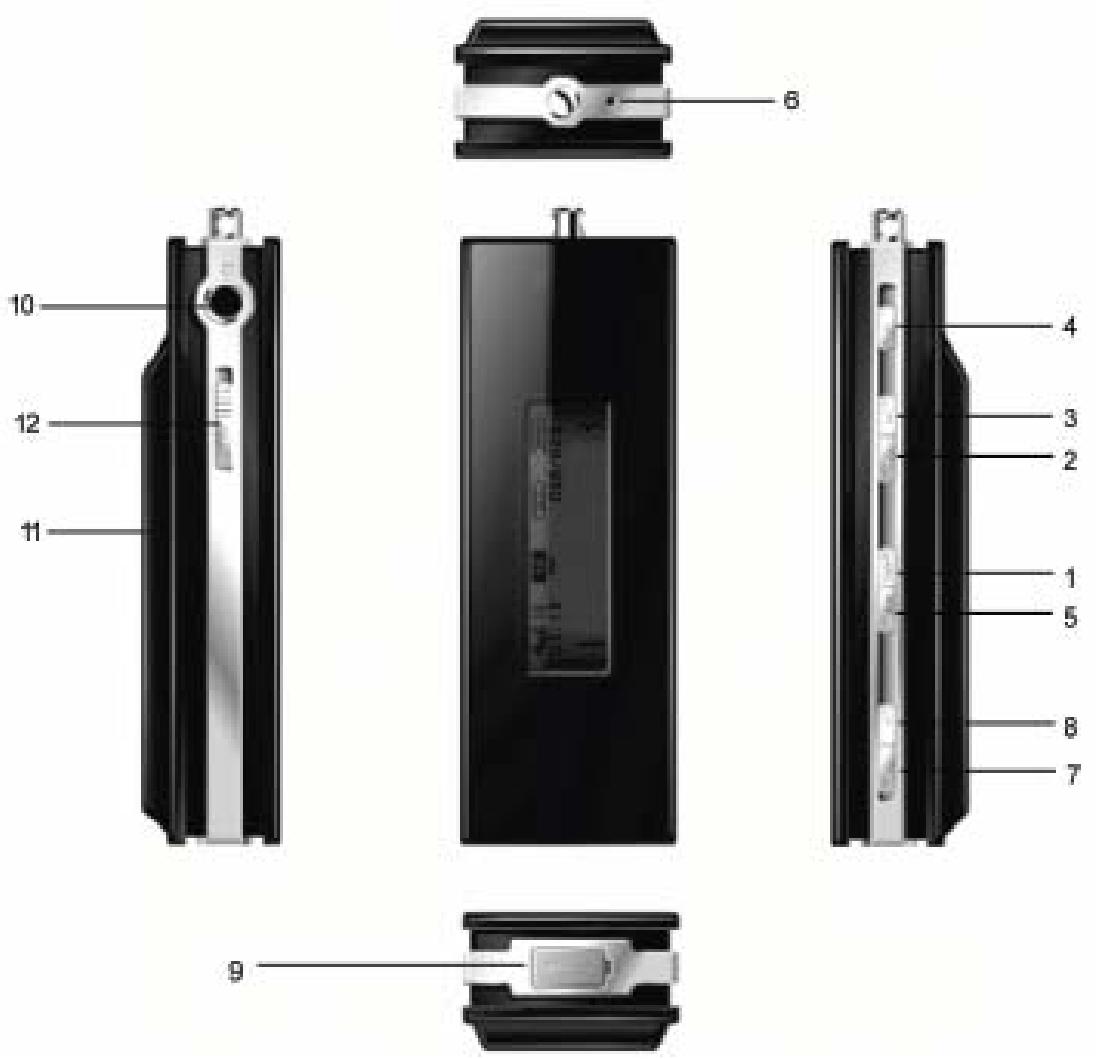
1. Power On / Play / Pause / Stop / Power Off
Press the button to power on the player
Playback or pause playback of music or voice file
Press and hold to power off the player
2/3. FORWARD / BACKWARD
Press to skip to next track
Press and hold to fast forward within the current track
Press to skip to previous track
Press and hold to fast reverse within the current track
4. MENU M
Press to enter menu or sub-menus to configure different settings of the player Press to confirm the selected menu option
Press and hold to exit menu and return to playback mode
5. A-B A-B
Repeat between Section A and B during music mode
Press and hold to start voice recording
Press to set the start point (A- appears and flashes)
Press again to set the end point (A-B appears)
6. MIC
Built-in microphone for voice recording
7/8. VOLUME (+) / VOLUME (-) +/-
Press to increase the volume level
Press to decrease the volume level
9. USB 2.0 Port
You can upload / download files via this port with the USB cable
10. Earphone Jack
- Battery Door
12. HOLD HOLD
Software Installation
Connect the player to your PC, the built-in flash memory of the player will be shown under "My Computer" as a Removable Disk Drive. After it is finished, you can upload, download and manage the files in the player.
How To Install the Driver:
Windows Me / 2000 / XP
The installation CD is not required when installing your player under these operating systems. However, for those who are using Windows 2000, we recommend you to update the OS by Service Pack 4.
Windows98 SE
- Insert the software installation CD into the CD-ROM drive. If the setup program does not run automatically, go to steps 2 to 3. Otherwise, skip to step 4.
- Click Start -> Run.
- In the Run dialog, type D:\ShowMenu.exe (where D:\ is your CD-ROM drive) and click OK. Follow up the install instruction.
- At the Genius Driver screen, click on the "INSTALL" icon once.
- The driver installation wizard starts. Follow the instructions given by the wizard to complete the installation.
- Restart your computer once for the new hardware installation to take effect.
- After your computer has restarted, connect your player to the computer, and the new hardware will be found: mp3 player
Connecting to PC
- Plug the flat USB connector of the USB cable to your computer.
- Plug the mini connector of the USB cable to the player.
- The player will power on automatically.
When your MP3 player is connected to your computer, it starts working as a removable hard disk (external drive) on your computer. You can transfer, copy, paste, and delete the data (audio
files, voice recording files, etc.), which are stored on your player into your computer very conveniently. It can also be used for storage of non-music files.
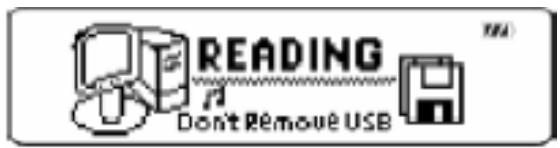
Attention:
The removable drive can be found under "My Computer" or "Windows Explorer". Also, open the "Device Manager" of your Windows and you will see the player is recognized as "USB Mass Storage Device" USB Device", which becomes one of the disk drives in your computer
Downloading music
To download music or files to the player, connect the player with PC first, then:
- Select the track you want to download to the player by clicking on the file icon.
- Right-click on the files, a menu appears. Click Copy.
- Under My Computer, double-click Removable Disk to open the drive. The Removable Disk window appears.
- Right-click on the Removable Disk window and click Paste in the menu.
- Start copying the files. The display will show:
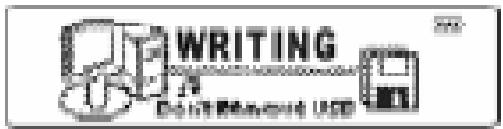
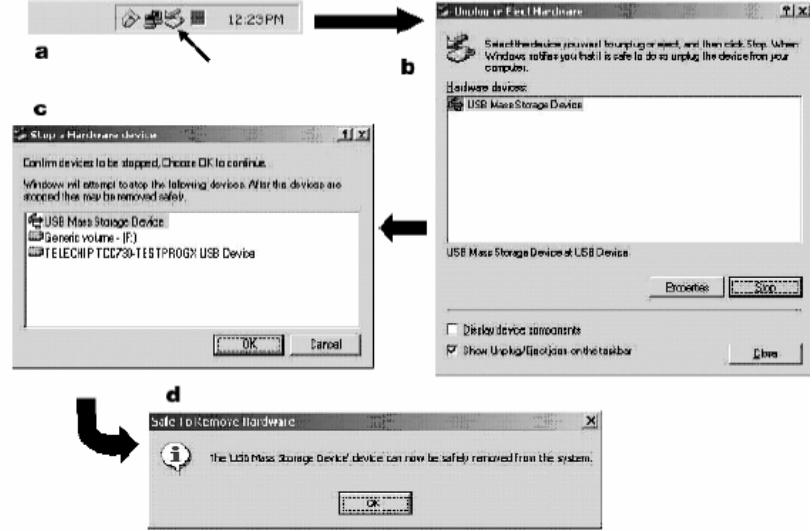
Please do not disconnect your player until you see "Ready" comes up on the LCD. For users of Windows Me / 2000 / XP, please remove the MP3 player safety.
Function Instructions
■ Voice recording in music / voice mode
This feature offers high quality, one-touch voice recording. You can use the player to record lectures, interviews or meetings. Under music or voice mode, the player is in playback or stop mode, press and hold A-B to start recording.
During recording, a "●" will be shown on the LCD.
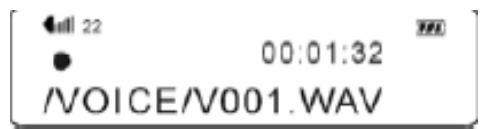
To stop recording, press M once. You will see "Saved" displayed on the LCD. The recorded files will be named and saved automatically to a Voice folder at the root Directory.
Key Lock (Hold) HOLD
You may lock the buttons on the player to prevent inadvertent contact to the buttons during playback.
The MP3 player supports key lock function, just push HOLD , the steps are as follows :
While the player is in playback, stop or FM radio mode, push HOLD once.
"8" icon appears on the LCD, implies the key lock function has deactivated.
To deactivate key lock function, push HOLD back.
" 8 " icon disappeared from the LDC , implies the key lock function has deactivated.
Key lock function will NOT work when the player is in power off status.
ID3 Tag Display
This MP3 player is able to display the name of the current track, artist, album, etc. during playback. It displays ID3 tag information in English, French, German, Italian, Spanish, Deutsch, Portuguese and Russian. However, you may have to configure the language setting manually inside the MENU.
In case if the ID3 tag information is too much and exceeds the display area of the LCD, the rest of the information will be displayed by dynamic scrolling, from right to left across the LCD.
■ Lyric Display Synchronization
The MP3 player supports standard (file extension - .lrc), synchronized lyric display. You may download the lyric document (.lrc) from the Internet, or create one yourself by using lyric editor software, such as Windows Notepad.
After you have downloaded or created the lyric document (.lrc), please rename the file in accordance with the name of the corresponding MP3 track.
For example, when you are uploading the track - Love.mp3 onto your MP3 player, at the same time, you have to upload the lyric file - Love.Irc as well.
Afterwards, the lyric display will be synchronized with the corresponding MP3 track and displayed on the LCD during playback.
Power Off
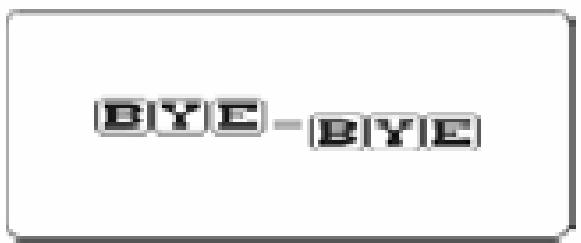
Press and hold / for 3 seconds, the player will power off.
Overall View of LCD
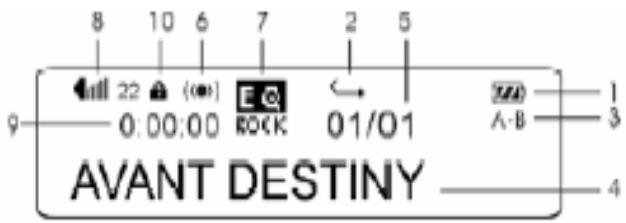
Indications
- Battery Power Indicator
- Play Mode
- A-B Looping Function
- ID3 Tag
- Current / Total Track Number
- Mode Indicator (Music / Voice / FM radio)
- EQ Mode
- Volume
- Time Elapsed
- 10.Hold
Menu Settings
While your player is in playback or stop status (idle), you may press M at anytime to enter the MENU, it allows you to change different settings of the player according to your own preferences.
Inside the MENU, you may press / to move to the next or previous MENU setting. Press M again to enter sub-menu (if any). Again, you may press / to move to the next or previous available options inside the sub-menu(s). Press M to confirm your selected options inside the MENU or sub-menu(s). Press and hold M for 2 seconds to exit the MENU and return to music mode.
| Remark | |||
| Music | Go to Play Music | ||
| Voice | Go to Play Voice | ||
| FM | FM Radio | ||
| Setting | EQ | Normal | Normal effect |
| Pop | Pop music effect | ||
| Classic | Classic music effect | ||
| Jazz | Jazz music effect | ||
| Rock | Rock music effect | ||
| Play Mode | Normal | No repeat | |
| Repeat one | Play current music repeatedly | ||
| Repeat all | Play all music repeatedly | ||
| Shuffle + Repeat | Random play music repeatedly | ||
| Language | English | Id3 Tag Language | |
| French | Id3 Tag Language | ||
| German | Id3 Tag Language | ||
| Italian | Id3 Tag Language | ||
| Spanish | Id3 Tag Language | ||
| Deutsch | Id3 Tag Language | ||
| Portuguese | Id3 Tag Language | ||
| Russian | Id3 Tag Language | ||
| Back Light | Disable | No backlight function | |
| 3 second | The backlight shuts off after 3 sec | ||
| 5 second | The backlight shuts off after 5 sec | ||
| 10 second | The backlight shuts off after 10 sec | ||
| Contrast | Adjust the LCD screen contrast value | ||
| Power Saving | Disable | No power saving function | |
| 1min | The player shuts off time (How long the player is idle) | ||
| 2min | The player shuts off time (How long the player is idle) | ||
| 5min | The player shuts off time (How long the player is idle) | ||
ENGLISH
| 10min | The player shuts off time (How long the player is idle) | ||
| Scroll | Speed 0-16 | Adjust the Id3 Tag & Irc display speed | |
| Exit | Exit to Menu screen | ||
| Delete | Music | Choose one song to erase |
| Voice | Choose one voice memo to erase | |
| Exit | Exit to Menu screen | |
| About | Displays the Firmware version, Media capacity and Free space | |
| Exit | Go to Play Music | |
MENU-1 Music
Choose Music from menu will return to music mode (playback of MP3/ WMA).
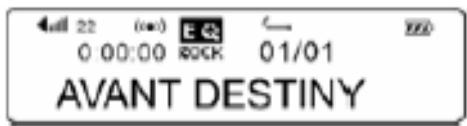
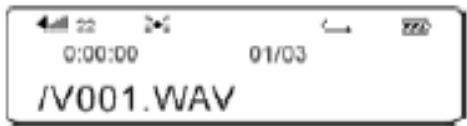
MENU-2 Voice
Choose Voice from menu to enter voice-recording mode. You may browse your voice files, playback voice files, or start voice recording. Please note that the way to playback voice files is exactly the same as playback music files.
MENU-3 FM
Choose FM from menu to enter FM radio mode. Please refer to "Listening to FM Radio" below for further details regarding its operation.
MENU-4 Settings
Choose Settings from menu to enter and configure different settings for the player. Press M again to enter sub-menu.
MENU-4-1 EQ
There are 5 audio output effects available:
Normal - Pop - Classic - Jazz - Rock
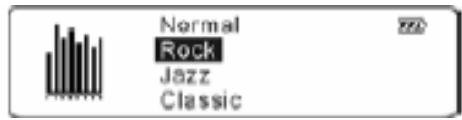
MENU-4-2 Play mode
There are 4 play modes available:
Normal - Repeat one - Repeat all - Shuffle + Repeat
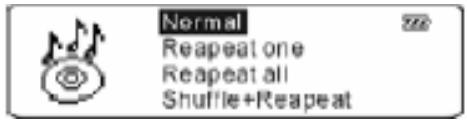
MENU-4-3 Language
8 settings are available:
English/French/German/Italian/Spanish/Deutsch/Portuguese-Russian
- You may have to change the language setting according to the language used in the ID3 tag and lyric display of the music track.
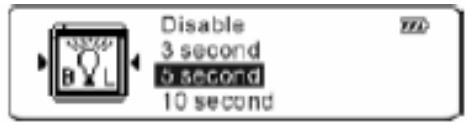
MENU-4-4 Back Light
This setting controls the duration time of back light. Available options are:
Disable - 3 second - 5 second - 10 second
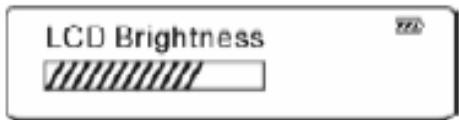
MENU-4-5 Contrast
This setting controls the contrast of the LCD display. Press / to adjust the level of contrast you desire.
MENU-4-6 Power Saving
With this power saving control, you may set the standby time for the player to power off automatically when it remains idle for a period of time. It aims to save battery power. Available options are:
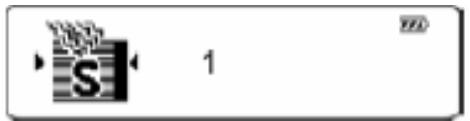
This setting controls the scrolling speed for ID3 tag and lyric display during playback. Available options are:
0-1-2-3-4-5-6-7-8-9-10-11-12-13-14-15-16
0 - slowest speed
16 - fastest speed
MENU-4-8 Exit
Press M once to exit sub-menu(s) and return to MENU-4 Settings.
MENU-5 Delete
Choose Delete from menu if you want to erase any music or voice files on your MP3 player. Press M again to enter sub-menu.
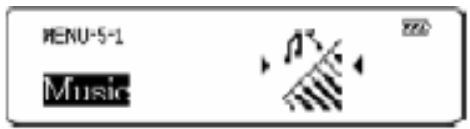
MENU-5-1 Music
Delete your music files (MP3 / WMA) here.
Press / to browse and select the music file(s) that you wish to delete.
Press A-B to start deleting the selected file as shown below:
Press M to exit.
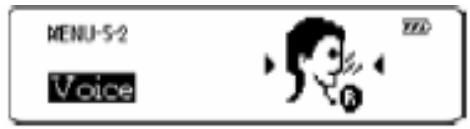
MENU-5-2 Voice
Delete your voice files (voice recording) here.
Press / to browse and select the voice file(s) that you wish to delete.
Press A-B to start deleting the selected file.
Press M to exit.
MENU-5-3 Exit
Press M once to exit sub-menu(s) and return to MENU-5 Delete.
MENU-6 About
Choose About from menu to view the current status of your MP3 player.
The following information serves as an example:
Ver: 1.1.4 (Current Firmware Version of the MP3 player)
Flash: 254 MB (Total capacity of built-in memory available on the MP3 player)
MENU-7 Exit
Choose Exit from menu to exit MENU and return to music mode (playback of MP3 / WMA).
Listening to FM Radio
To activate FM radio mode
Press M once, press / until MENU-3 FM comes up on the LCD.
Press M to enter FM radio mode.
The range of FM radio frequency is 87.5 108 MHz.
There are 2 modes available for FM radio - Search and Preset. Press M to toggle to your desired mode.
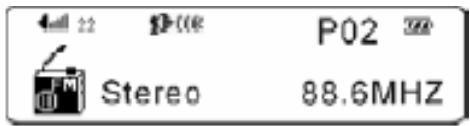
Search Mode
When search mode is activating, symbol appears on the LCD at the same time. See diagram below for illustration:
Auto Search
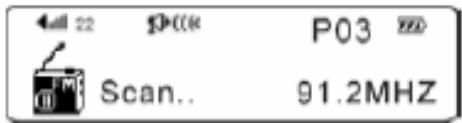
Press A-B to activate auto-search function.
Auto-search will try to locate and identify the available channels within the frequency range.
Once the player captures a frequency, auto-search will be paused automatically and saved it to the preset channel from 1 to 30 one by one.
Press M to cancel the auto-searching while it is searching.
Manual Search
Press 四 / 四 to search for available frequency manually.
Each time when you press it will increase or decrease frequency at a step size of 0.1 MHz. Search direction can be either forward or reverse, depending on the button that you pressed.
NOTE: You are advised to change your location from time to time in order to increase the reception quality under Auto or Manual search function.
Preset Frequency
Press to select a desired frequency. Press once, at the same time, "Save?" comes up on the LCD.
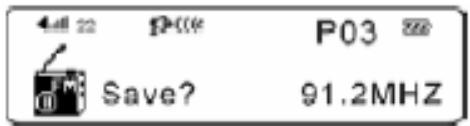
Press to assign a channel number (P01 - P30).
Press A-B to confirm and preset the frequency, at the same time, "Saved" comes up on the LCD.
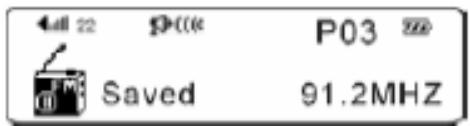
Up to 30 frequency preset channels are available.
NOTE: Once a channel number is assigned to a preset frequency, you will not be able to delete it and release the memory. However, you can always use the same channel number repeatedly and replace it by another preset frequency. Simply repeat the above steps, and choose the channel number in which you want it to be replaced by another preset frequency.
Preset Mode
When preset mode is activating, symbol appears on the LCD at the same time. See diagram below for illustration:
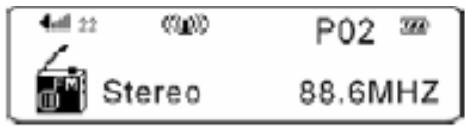
Press to select a desired preset channel.
To exit FM radio mode
Press and hold M to exit FM radio mode and return to MENU.
FM radio recording in FM radio mode
Press M once, keep pressing until MENU-3 FM comes up on the LCD.
Press M to enter FM radio mode.
Select the radio station that you wish to record.
Press and hold A-B to start recording in FM radio mode.
During recording, a "●" will be shown on the LCD.
To stop recording, press M once. You will see "Saved" displayed on the LCD.
The recorded files will be named and saved automatically to a FM folder at the root directory
Note: Radio recording quality depends on the reception quality.
Specifications
Size (H x W x D)
72x26x18 mm
Net Weight
22.5gram
Memory Capacity
Internal Flash Memory 256MB/512MB
Power Supply
1 AAA Rechargeable battery
Play time up to 10 hours (Normal/1KHz)
Interface
USB 2.0 Full Speed
FM Tuner
87.5 - 108 MHz FM stereo broadcasting
Up to 30 frequency preset channels available
Digital Music Format
MP3
WMA
Voice Recording
ADPCM type
Built-in MIC
FM tuner recording
Display
128 x 32 Dot-Matrix LCD
LED (Blue) Back Light
Signal to Noise Ratio
90dB
Frequency Response
20 Hz ~ 20 KHz
Output
5mW (L & R output)
Total Harmonic Distortion Output
< 0.05%
■Lyrics Display
Supports .Irc file for lyric display
- Introduction
- Genius MP3 PLAYER
- Accessories
- System Requirements
- Care and Maintenance
- Knowing your MP3 player
- Power On / Play / Pause / Stop / Power Off
- 2/3. FORWARD / BACKWARD
- MENU M
- A-B A-B
- MIC
- 7/8. VOLUME (+) / VOLUME (-) +/-
- USB 2.0 Port
- Earphone Jack
- HOLD HOLD
- Software Installation
- How To Install the Driver:
- Windows Me / 2000 / XP
- Windows98 SE
- Connecting to PC
- Attention:
- Downloading music
- Function Instructions
- ■ Voice recording in music / voice mode
- Key Lock (Hold) HOLD
- ID3 Tag Display
- ■ Lyric Display Synchronization
- Power Off
- Overall View of LCD
- Indications
- Menu Settings
- MENU-1 Music
- MENU-2 Voice
- MENU-3 FM
- MENU-4 Settings
- MENU-5 Delete
- MENU-6 About
- MENU-7 Exit
- Listening to FM Radio
- Search Mode
- Auto Search
- Manual Search
- Preset Frequency
- Preset Mode
- FM radio recording in FM radio mode
- Specifications
Brand : GENIUS
Model : MP3-DJ
Category : DJ Equipment