
BX281110 - Built-in oven GAGGENAU - Free user manual and instructions
Find the device manual for free BX281110 GAGGENAU in PDF.


| Product type | Built-in oven |
| Brand | GAGGENAU |
| Model | BX281110 |
| Number of ovens | Double (upper and lower) |
| Cooking modes | Convection, Eco, Convection + bottom heat, Bottom heat, Top heat, Grill, Grill + convection, Eco grill, Keep warm, Defrost, Dough proofing, etc. |
| Meat probe | Yes, programmable (1-99°C) |
| Rotisserie | Yes (lower oven only) |
| Cleaning | Pyrolysis (485°C, 3 hours) |
| Child lock | Yes, control lock |
| Safety shut-off | Yes (after 12 hours of inactivity) |
| Timer | Timer, cooking duration, cooking end time, stopwatch |
| Display | Touch screen with touch keys |
| Interior light | Replaceable halogen bulbs (ceiling and side) |
| Power supply | 230 V ~ 50 Hz |
| Additional functions | Keep warm (24-74 h), defrost, dough proofing, delayed cooking |
Frequently Asked Questions - BX281110 GAGGENAU
User questions about BX281110 GAGGENAU
0 question about this device. Answer the ones you know or ask your own.
Ask a new question about this device
Download the instructions for your Built-in oven in PDF format for free! Find your manual BX281110 - GAGGENAU and take your electronic device back in hand. On this page are published all the documents necessary for the use of your device. BX281110 by GAGGENAU.
USER MANUAL BX281110 GAGGENAU
Double Oven BX 280/281
Table of Contents
| Safety Notes | 4 |
| Before Use | 4 |
| Intended Use | 4 |
| Safety while Baking | 4 |
| Pyrolysis (Self Cleaning) | 4 |
| Damage to the Appliance | 4 |
Operating for the First Time 5
Avoiding Damage to the Appliance and the Cabinet 5
Oven 5
Cabinet Fronts near the Oven 5
Features of your New Oven 6
Oven 6
Display and Controls 7
Keys 7
Accessories 8
Heating Modes 9
| First Settings after Installation | 10 |
| Note | 10 |
| Choosing the Time Format | 10 |
| Setting the Language | 10 |
| Setting the Clock | 10 |
| Setting the Date | 11 |
| Temperature Unit °C or °F | 11 |
| Exiting Menu and Saving Settings | 11 |
| Activating the Oven | 12 |
| Standby | 12 |
| Activating the Oven | 12 |
| Setting the Oven | 13 |
| Setting the Temperature and Cooking Mode | 13 |
| Current Oven Temperature Display | 13 |
| Setting the upper and lower oven | 14 |
| Display | 14 |
| Meat Probe | 15 |
| Programming the Meat Probe | 15 |
| Note | 16 |
| Cleaning | 16 |
| Recommended Temperature Values | 16 |
| Rotary Spit | 17 |
| Preparation | 17 |
| Switching on the Rotary Spit | 17 |
| Switching off the Rotary Spit | 18 |
| Note | 18 |
| Baking Table | 19 |
| Roasting Table | 20 |
Grilling Table 22
| Tips and Tricks | 23 |
| Baking | 23 |
| Further Tips for Baking | 24 |
| Rising Dough (Fermenting) | 24 |
| Tips for Roasting and Grilling | 24 |
| Defrosting | 24 |
| Timer | 25 |
| Calling up the Timer Menu | 25 |
| Timer | 25 |
| Stopwatch | 26 |
| Cooking Time Duration | 27 |
| Cooking Time End | 28 |
| Extended Timer | 29 |
| Setting the Program | 29 |
| Note | 29 |
| Child Lock | 30 |
| Activating the Child Lock | 30 |
| Deactivating the Child Lock | 30 |
| Note | 30 |
| Additional Functions | 31 |
| Safety Deactivation | 31 |
| Fast Heating up | 31 |
| Changing the Basic Settings | 32 |
| Note | 32 |
| Example: Changing the Standby Screen | 32 |
| The Following Settings Can Be Changed | 33 |
| Care and Manual Cleaning | 35 |
| Pyrolysis | 36 |
| Before Starting Pyrolysis | 36 |
| Setting the Program | 36 |
| Delaying the Switch-off Time | 37 |
| Note | 37 |
| Cleaning Accessories with Pyrolysis | 38 |
| Trouble Shooting | 39 |
| Error Messages | 39 |
| Exhibition Mode | 39 |
| Power Cut | 40 |
| Replacing the Oven Lights | 41 |
| Replacing the Ceiling Light | 41 |
| Replacing the Side Light | 41 |
Before Use
The appliance is only guaranteed safe to use if installed by a specialist in accordance with the installation instructions. The installer is liable for any damage resulting from incorrect installation.
The appliance may only be connected by a licensed specialist. The local electricity supplier's regulations and construction regulations apply.
Read the instruction manual carefully before operating the appliance. Only then will you be able to operate your appliance safely and correctly. Keep the instruction and installation manual for future reference.
Do not connect the appliance if it has been damaged.
Intended Use
This appliance is intended only for domestic use. Only use the appliance to prepare meals. Do not use the appliance to heat up the room in which it is installed.
Never allow children to play with the appliance.
Do not let adults or children operate the appliance unsupervised:
- if they are mentally or physically unable to use the appliance safely and correctly
- if they don't have the knowledge and experience to use the appliance safely and correctly.
Safety while Baking
Warning, risk of burns! Do not touch hot heating elements or interior surfaces of oven. Keep children away.
Warning, risk of fire! Do not store flammable products in the oven. Only leave the parts needed inside the oven during use.
Warning, if preparing food with alcoholic beverages (for example rum, cognac, wine, etc.). Remember that alcohol evaporates at high temperatures. It is possible that vapours released by the alcohol can catch fire.
Warning, risk of fire! Oil and fat can ignite quickly. Remove cooking oil and fat deposits before the next use.
Warning! Hot steam can escape during use. Do not touch the ventilation openings.
Warning! Hot steam can escape when opening the oven door.
Warning, risk of burns! The inside of the door gets very hot during operation; observe appropriate caution when opening the appliance. The open door can swing back.
Do not trap connecting cables of electrical appliances in the hot oven door. The cable insulation can melt. Risk of short-circuiting!
Pyrolysis (Self Cleaning)
Warning, fire risk! Food remains, fat and meat juices may ignite during pyrolysis. Remove coarse soiling before every pyrolysis operation.
Damage to the Appliance
If the appliance is damaged, switch off the corresponding household fuse. Call after-sales service.
Incorrect repairs are dangerous. Repairs must be carried out by one of our experienced after-sales engineers.
Operating for the First Time
Remove the packaging from the appliance and dispose of it according to local regulations. Be careful to remove all accessories from the packaging. Keep packaging elements and plastic bags away from children.
Check the appliance for transport damage after unpacking it. Do not connect the appliance if it has been damaged.
The appliance must be connected by an authorised specialist. No warranty claims can be lodged for any damage resulting from incorrect connection. Observe the installation instructions.
Thoroughly clean the appliance before using it for the first time. This will eliminate any 'newness' smells and soiling.
This appliance is labelled in accordance with the European Directive 2002/96/EG concerning used electrical and electronic appliances (waste electrical and electronic equipment - WEEE). The guideline
determines the framework for the return and recycling of used appliances as applicable.
Avoiding Damage to the Appliance and the Cabinet
Oven
Remove fruit acids such as the juice of lemons or plums etc. after every baking operation. The acid can cause spots on the oven's enamel.
Never splash water into a hot oven. This could damage the enamel.
Do not place the baking tray directly onto the bottom of the oven. Do not place utensils (for example a roaster) directly onto the bottom of the oven. Do not line the bottom of the oven with aluminium foil. This will cause a build-up of heat which can damage the enamel.
Do not cover the ventilation openings of the oven.
Do not take off the door seal. A damaged door seal must be changed immediately.
The socket for the separate heating element for the roaster and the baking stone (special accessory) can be found in the middle of the back panel at the bottom. During normal operation, please leave the cover in the socket.
Cabinet Fronts near the Oven
After taking the food out of the oven, allow the oven to cool down with the door closed. Do not leave the oven door half open, the hot air can cause damage to adjacent cabinets. The cooling fan will continue to run for a while and will then switch off automatically.
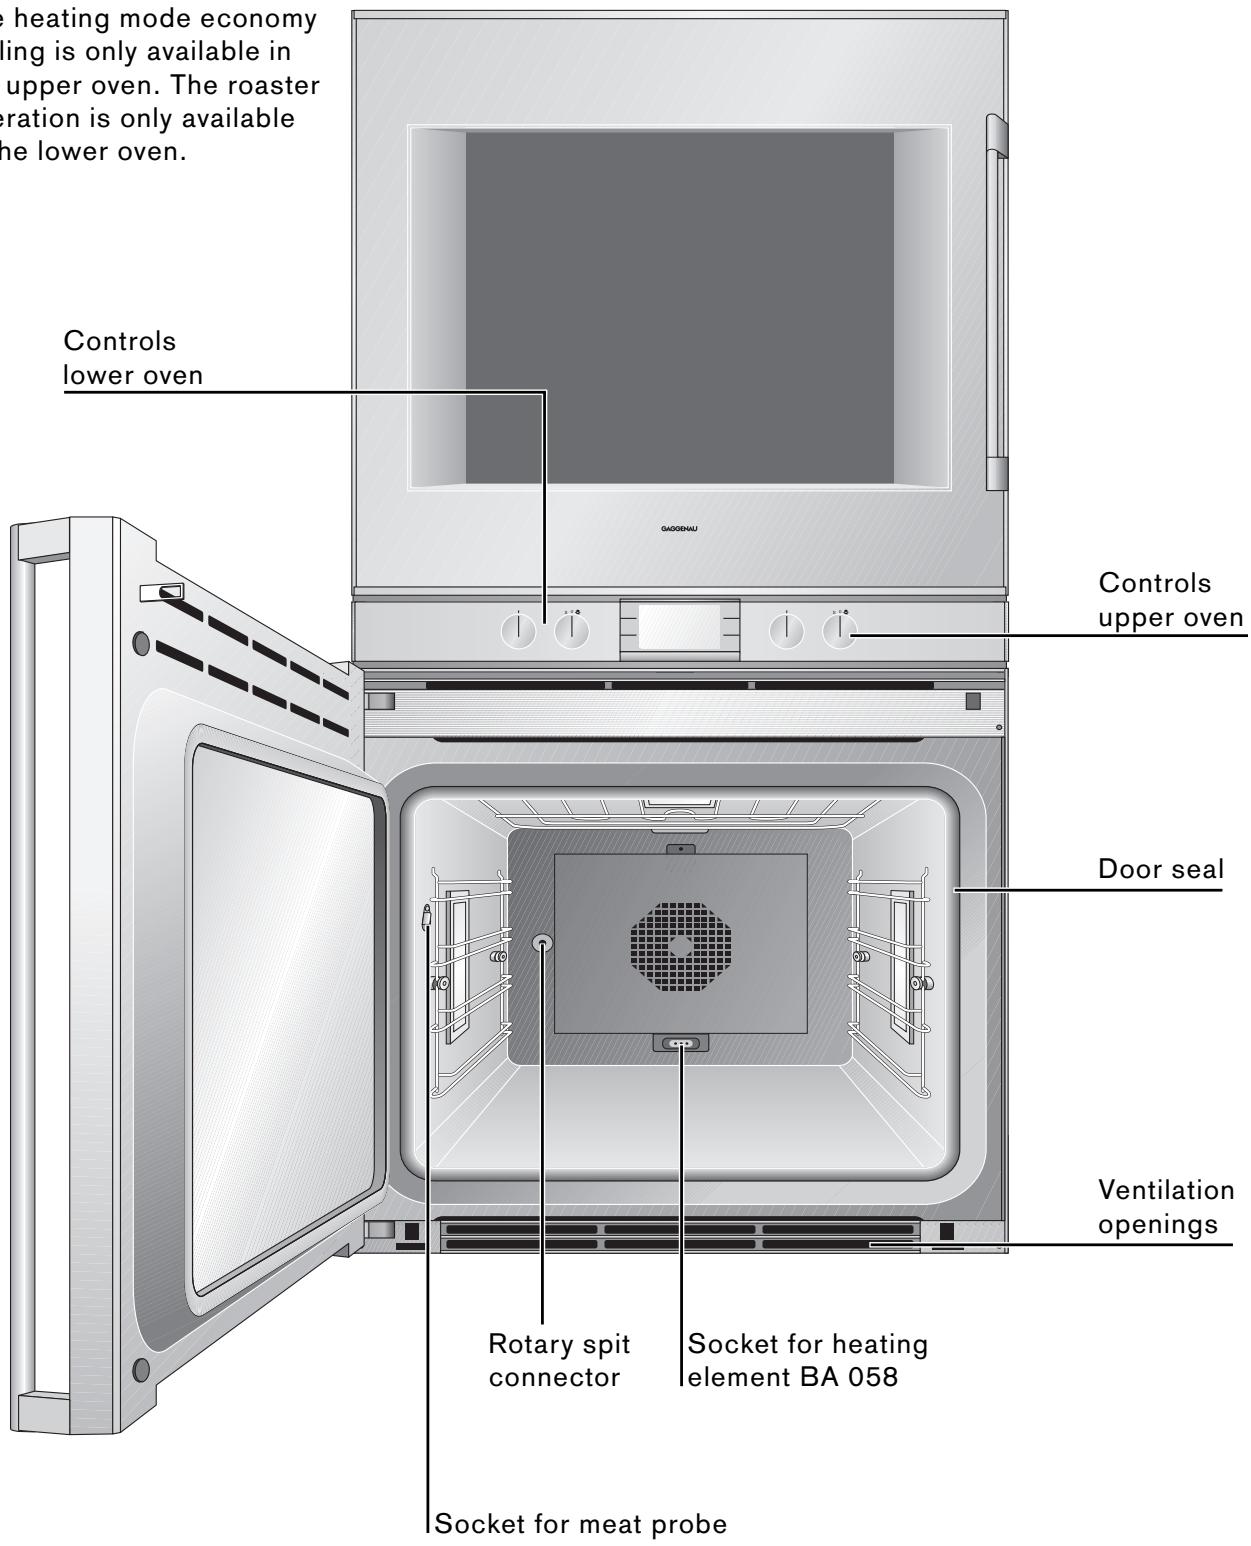
Oven
The operation of the upper and lower oven is identical.
The rotary spit and the meat probe are only available in the lower oven.
The heating mode economy grilling is only available in the upper oven. The roaster operation is only available in the lower oven.
Display and Controls
Display
In the top part of the display is the status bar or a call up menu. The lower part shows the different settings.
GAGGENAU
Touch keys
The keys on the left and right beside the display are touch sensitive. The function of the keys depends on the chosen setting. The icon beside the key shows the function of the key.
Function selector
Use the left knob to select the cooking mode you will use to prepare your meal or the pyrolysis function. You can turn the knob to the right or left.
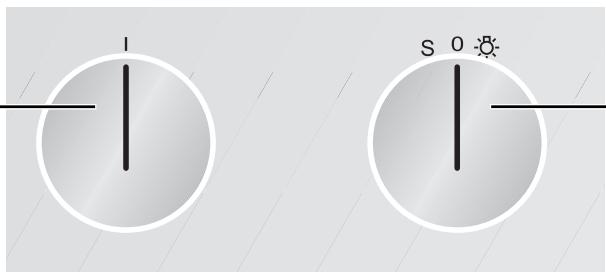
Temperature selector
You can set a temperature between 50 and 300^ or pyrolysis. You can turn the knob to the right or left. To switch on the light in the oven, turn the temperature selector one position to the right.
The light in the oven remains off if the temperature is set below 70^ .
Keys
| Symbol | Function |
| > | move right |
| < | move left |
| ← | save selected values / start |
| C | cancel |
| + | increase values |
| - | decrease values |
| ○ | timer menu |
| / | basic settings menu |
| × | rotary spit |
| i | call up additional info |
| [ ] | child lock activate |
| [ ] | child lock deactivate |
| [ ] | extended timer |
| II | timer stop |
| > | timer start |
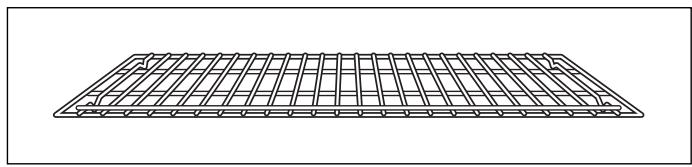
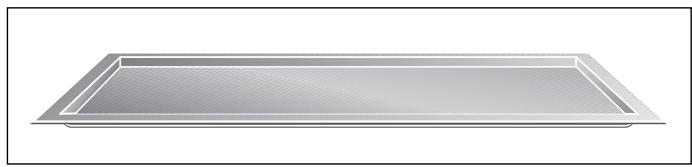
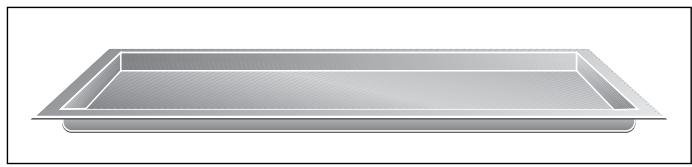
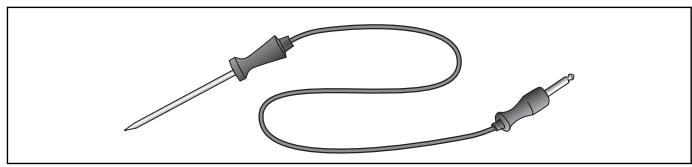
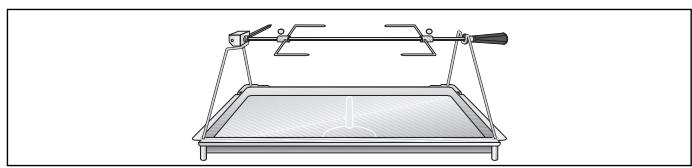
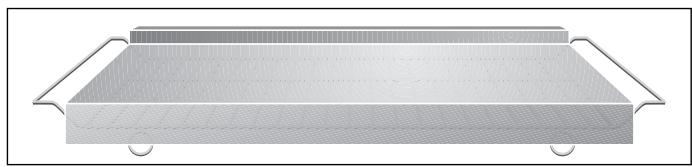
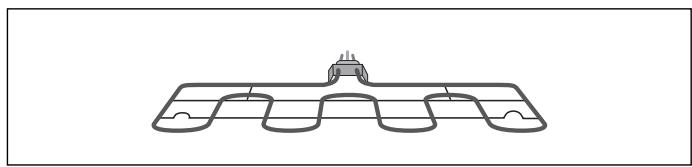
As standard, your appliance comes with the following accessories:
- Wire rack for cake tins, roasts, grilled pieces and crockery
Always insert the wire rack with the double crossbrace to the front.
Baking tray for cakes, biscuits and pastries
Grilling tray for roasts or as a grease collecting tray - Meat probe
- Rotary spit with support frame
You can order the following special accessories:
- Baking stone with wire rack and wooden pizza spatula for pizza and bread
Additionally you will require the heating element
Heating element for baking stone
| Display | Heating mode | Use |
| 165° | Hot air | For cakes, biscuits and puff pastry on several levels |
| 165° | Economy (the oven light is off) | Energy saving hot air mode for cakes, small pastries or gratins |
| 165° | Hot air and 1/3 bottom heat | Additional reduced heat from beneath. |
| 165° | Hot air and bottom heat | Additional heat from beneath for moist cakes, for example fruit cakes |
| 170° | Bottom heat | Further baking, for example for fruit cakes, for preserving or for food in a bain-marie |
| 170° | 1/3 Top and bottom heat | Bottom heat with reduced top heat |
| 170° | Top and bottom heat | For cakes in tins or on trays, gratins or roasts |
| 170° | Top and 1/3 bottom heat | Top heat with reduced bottom heat |
| 170° | Top heat | Direct heat from the top, for example to brown meringue on a fruit cake |
| 190° | Grilling with hot air | Evenly distributed heat for meat, poultry or whole fish |
| 200° | Grilling | Grilling flat pieces of meat, sausages or fish fillets melting cheese, gratins |
| 200° | Economy grilling (upper oven only) | Only the middle part of the heating element is on. Energy saving grilling for small amounts of food |
| 220° | Roaster operation (lower oven, only with special accessories) | Heated cast roaster for large quantities of meat, gratin or the Christmas turkey |
| 300° | Baking stone operation (only with special accessories) | Heated baking stone for crispy pizza, bread or bread rolls like from a solid stone oven |
| 38° | Dough proofing | Raising yeast dough, the perfect temperature setting is 38 °C |
| 45° | Defrosting | Even and gentle defrosting between 40 - 60 °C depending on the food |
| 80° | Keeping warm | Keep meals warm, warm porcellain dishes |
| 485° | Pyrolysis | Automatic self cleaning |
When your new oven has been connected, the first settings menu appears on the display.
You can set the
time format,
language,
clock,
date,
- temperature unit.
Note
The first settings menu appears only after the appliance has been connected or if the appliance is without electricity for several days.
Refer to the chapter basic settings if you wish to change these parameters at any time.
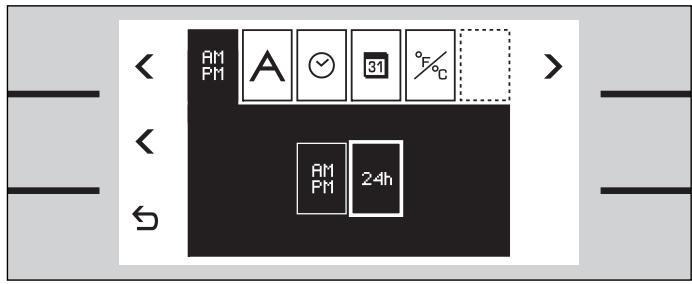
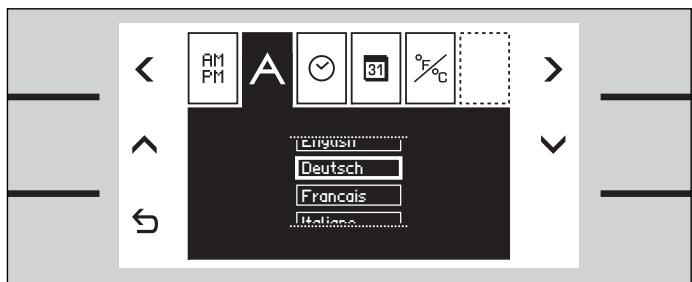
Choosing the Time Format
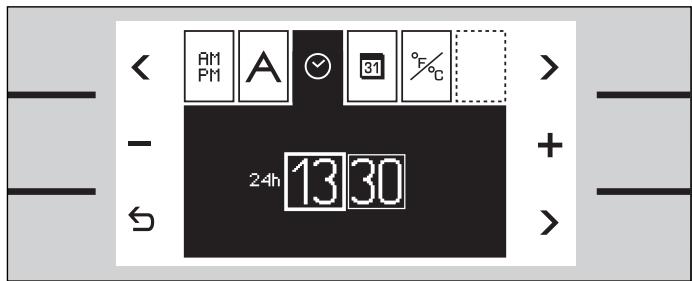
1 The time fotat setup menu appears on the screen. The time fotat can be either 12 hour format (AM/PM) or 24 hour format. The 24 hour format is pre-selected.
2 You can change the time format using the centre < key.
Setting the Language
1 Using the menu key select the language setup menu. The available languages for the display messages appear on the screen. German is pre-selected.
2 You can change the language using the or keys or switch the display messages off.
Setting the Clock
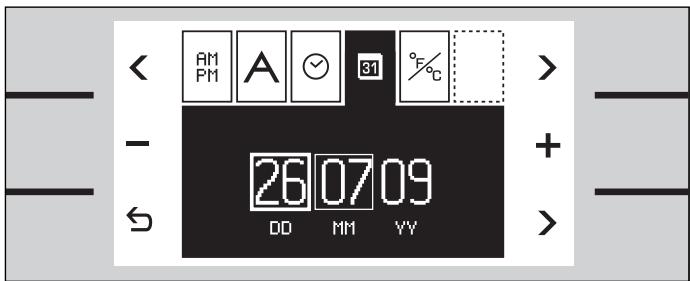
1 Using the menu key select the clock function .
2 Using the + / - keys set the correct time.
Use the arrow key bottom right to change from hours to minutes.
Setting the Date
1 Using the menu key select the date function 51.
2 Using the + / - keys enter day, month, year.
Use the arrow key bottom right to change from day/month/year.
Temperature Unit ^ C or ^ F
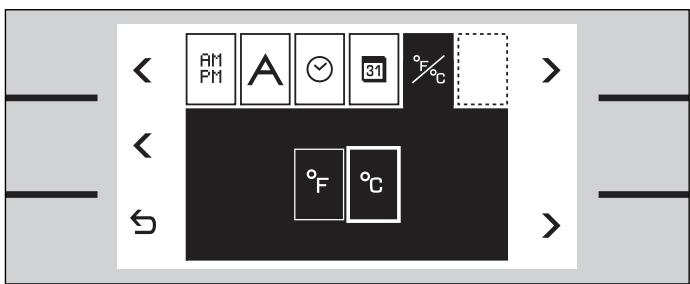
1 Using the menu key select the temperature unit function % ^ C is pre-selected.
2 You can change the temperature unit using the middle < key.
Exiting Menu and Saving Settings
Touch the key to exit the menu. All settings are saved.
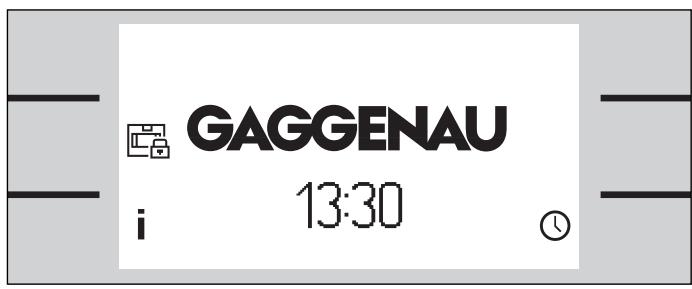
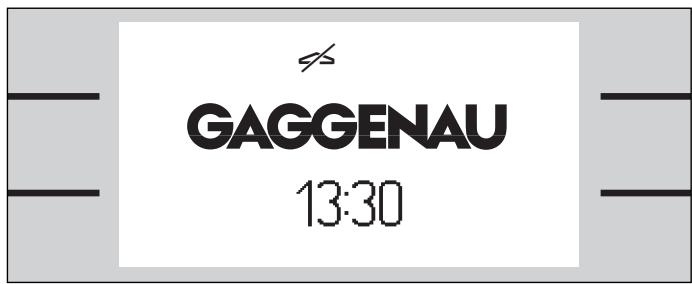
The oven is on standby. The standby screen appears.
GAGGENAU
13:30
Standby
The oven remains on standby when no operating mode is selected or the child lock is activated.
The keys are not activated. The display is not lit.
Note:
You can choose between different standby screens. GAGGENAU and the clock is pre-selected. Refer to the chapter basic settings if you want to change the standby screen.
Note:
To protect the display, GAGGENAU will not be shown on the screen between 23.00 and 6.00 o'clock if the oven is on standby.
Note:
The display contrast depends on the vertical viewing angle. You can adjust the contrast of the display in the basic settings.
Activating the Oven
To leave standby do one of the following:
touch a key
open or close the oven door
- turn the temperature knob
- turn the function knob
Now you are able to set the required function. Read the relevant chapter on how to activate the required function.
Note:
The standby screen reappears after one minute if no further function is chosen. The display light goes off.
The main operations of your oven are easily set using the knobs.
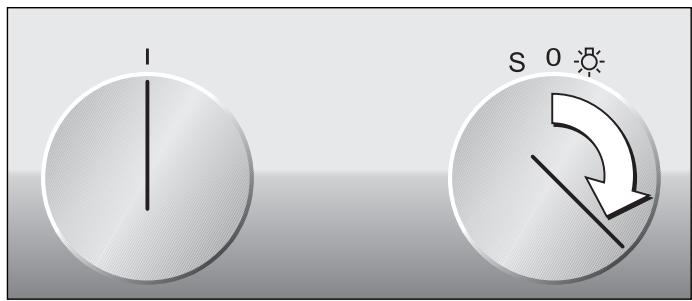
Using the right knob on each of the knob pairs you can set the temperature. To switch on the light in the oven, turn the temperature knob one position to the right.
The temperature range is 50 - 300 °C.
Exception:
Fermenting 30 - 50 °C
Defrosting 40 - 60 °C
Keeping warm 50 - 120 °C
Roaster operation 50 - 220 °C
Using the left knob on each of the knob pairs you can set the cooking mode. The top position is hot air.
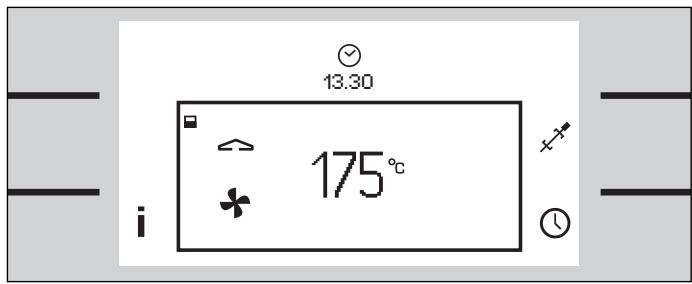
Setting the Temperature and Cooking Mode
1 Set the temperature knob to the required temperature.
Temperature and cooking mode symbol appear on the display. The light in the oven goes on.
To select another cooking mode:
2 Turn the function knob until the required cooking mode appears on the screen.
The heating up symbol appears until the required temperature is reached. The symbol appears again when the oven heats during operation.
A signal sounds when the selected temperature is reached. Press any key to switch off the signal.
Note: You can deactivate the heating up signal in the basic settings.
The temperature and cooking mode can be changed at any time.
When the meal is ready switch the oven off using the temperature knob. The oven light goes off. The standby screen appears.
Current Oven Temperature Display
The current oven temperature is briefly shown when you press the info key. Using the key you can return to the standard screen.
Note:
Depending on the heating mode, a slight temperature variation after heating up during use is normal.
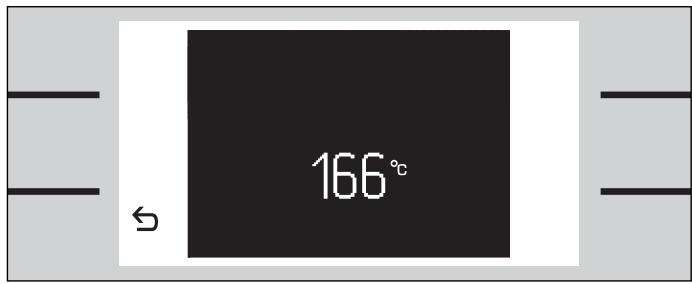
Setting the upper and lower oven
The operation of the upper and lower oven is identical. The two ovens have some different features.
The rotary spit and the meat probe are only available in the lower oven.
- The heating mode economy grilling is only available in the upper oven. The roaster operation is only available in the lower oven.
It is not possible to do a pyrolytic cleaning in both ovens at the same time.
While doing a pyrolytic cleaning in one oven it is not possible to use the other oven.
Display
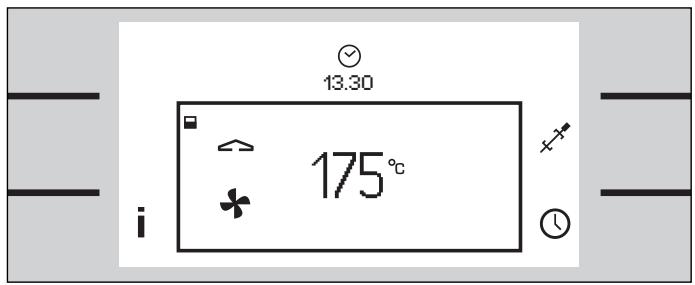
When operating only one oven the temperature and operating mode are shown on the display. The symbol or shows, whether the upper or lower oven is being used.
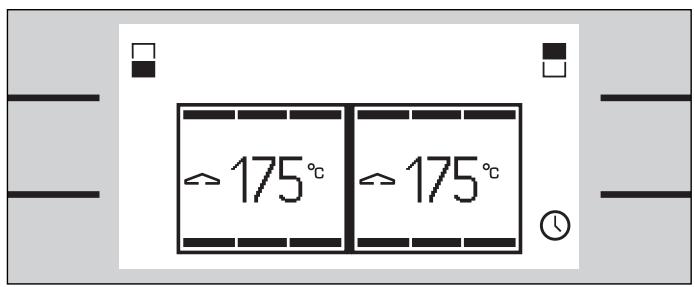
When operating both ovens at the same time the display shows the settings of both ovens. By touching the or key you can select the display screen for one of the ovens and change a setting, for example set the timer or check the current oven temperature. After a short while the display for both ovens appears again.
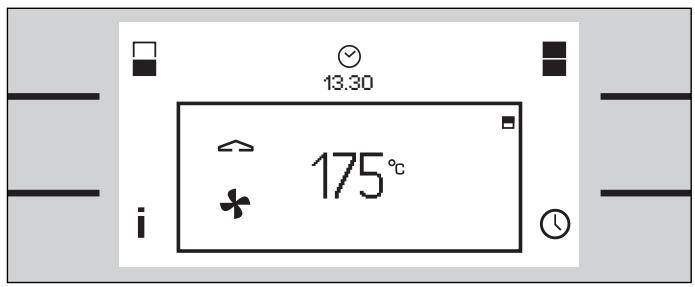
When turning a knob of one of the ovens, the settings of this oven are shown on the display. After a short while the display for both ovens appears again. You can also touch the key to return to the display for both ovens.
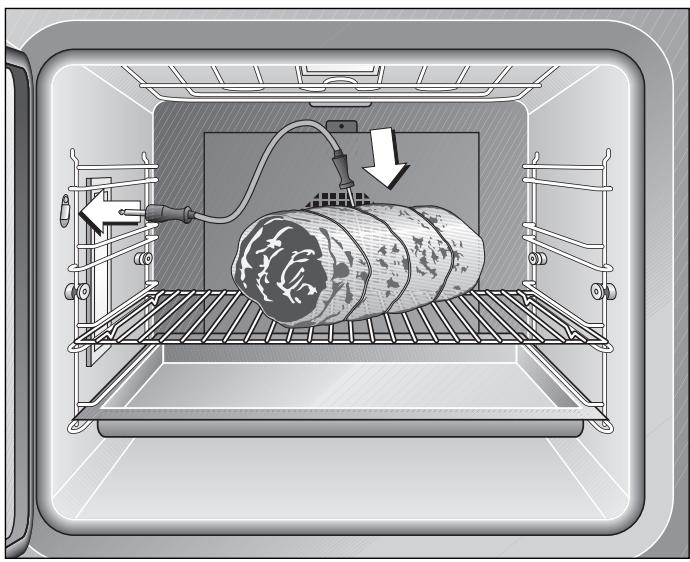
The meat probe enables you to cook your meat exactly as you want it.
Using the meat probe, during the cooking process you can measure the core temperature of the interior of the food you are preparing exactly between 1^ and 99^ .
Fully insert the tip of the meat probe in the middle of the food, at its thickest point. The tip should not be inserted into fat and should not touch any dishes, bones or fatty tissue.
In the case of poultry, do not insert the tip of the meat probe in the middle (hollow) but between the belly and the thigh.
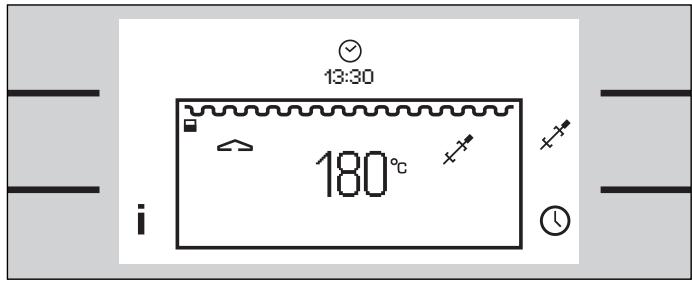
When you connect the meat probe to the socket in the oven, the symbol appears on the display.
The smaller temperature display on the top shows the measured temperature from the meat probe.
The meat probe is only available in the lower oven.
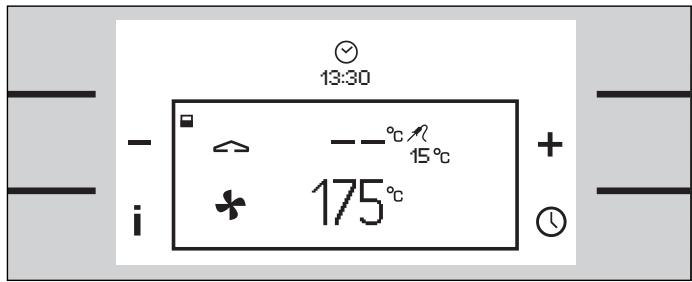
Programming the Meat Probe
You can program the desired core temperature for your meal. The appliance switches off automatically, when the programmed temperature has been reached.
1 Preheat the oven to the desired setting.
2 Insert the tip of the meat probe into the meat.
3 Put the meat in the oven. Connect the meat probe to the socket. Caution, risk of burns when plugging the cable into the socket!
4 Using the + / - keys set the correct core temperature.
The larger temperature display on the top shows the programmed temperature, the smaller display shows the measured temperature from the meat probe.
The current oven temperature is briefly shown when you press the i info key. The temperature display on the top shows the measured temperature from the meat probe. Using the key you can return to the standard screen.
A signal sounds when the programmed core temperature has been reached. The appliance stops heating.
Switch the temperature knob off and open the oven door. Remove the meat probe before taking the food from the oven.
Danger, risk of burns! Use an oven glove. The meat probe gets very hot during use.
Note
Pull the meat probe from the socket if you want to end the programming.
If you program meat probe and timer simultaneously, the program that reaches the entered value first will switch off the oven.
Only use the included original meat probe. You can order the meat probe as a spare part.
Only use the meat probe up to a temperature of 250^ .
Remove the meat probe from the oven when it is not in use.
Remove the meat probe from the oven during pyrolysis.
Cleaning
Only rub the meat probe with a moist cloth. The meat probe is not dishwasher-proof.
Recommended Temperature Values
| Beef | ||
| Roast beef / fillet of beef / entrecôte | ||
| blood rare | 45-47 °C | |
| rare | 50-52 °C | |
| medium-rare | 58-60 °C | |
| well-done | 70-75 °C | |
| Beef roast | 80-85 °C | |
| Pork | ||
| Roast pork | 72-80 °C | |
| Back of pork | medium-rare | 65-70 °C |
| well-done | 75 °C | |
| Meat loaf | 85 °C | |
| Fillet of pork | 65-70 °C | |
| Veal | ||
| Fillet of veal | rare | 50-52 °C |
| medium-rare | 58-60 °C | |
| well-done | 70-75 °C | |
| Roast veal | well-done | 75-80 °C |
| Breast of veal, stuffed | 75-80 °C | |
| Back of veal | medium-rare | 58-60 °C |
| well-done | 65-70 °C | |
| Venison | ||
| Back of venison | 60-70 °C | |
| Leg of venison | 70-75 °C | |
| Back of venison steaks | 65-70 °C | |
| Back of hare | 65-70 °C | |
| Poultry | ||
| Chicken | 85 °C | |
| Guinea fowl | 75-80 °C | |
| Goose,turkey, duck | 80-85 °C | |
| Duck breast | medium-rare | 55-60 °C |
| well-done | 70-80 °C | |
| Ostrich steak | 60-65 °C | |
| Lamb | ||
| Leg of lamb | medium-rare | 60-65 °C |
| well-done | 70-80 °C | |
| Back of lamb | medium-rare | 55-60 °C |
| well-done | 65-75 °C | |
| Mutton | ||
| Leg of mutton | medium-rare | 70-75 °C |
| well-done | 80-85 °C | |
| Back of mutton | medium-rare | 70-75 °C |
| well-done | 80 °C | |
| Fish | ||
| Fillet | 62-65 °C | |
| Whole | 65 °C | |
| Tureen | 62-65 °C | |
| Other | ||
| Bread | 90 °C | |
| Pâté | 72-75 °C | |
| Tureen | 60-70 °C | |
| Foie gras | 45 °C | |
Use the rotary spit to grill large roasts or poultry. Grilling with the rotary spit produces a crispy crust and even browning all-round.
You can use the rotary spit in all heating modes. You get the best results in the grill or top heat modes.
The rotary spit is only available in the lower oven.
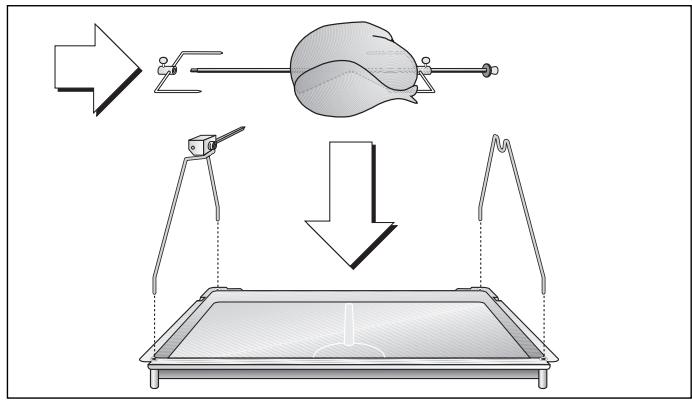
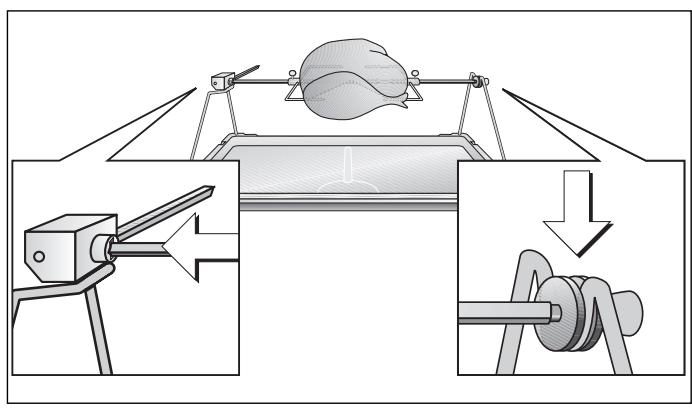
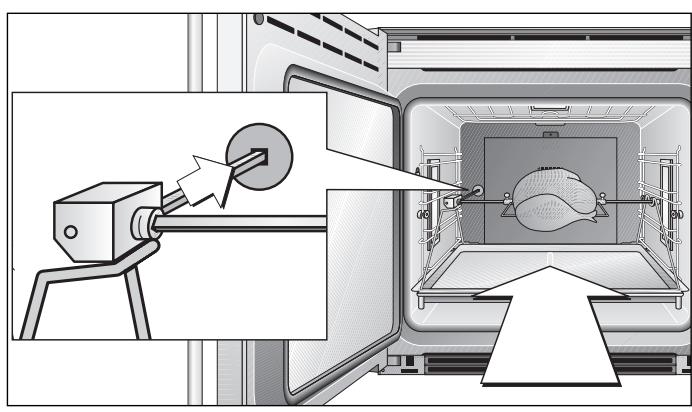
Preparation
1 Push both spit holders in the fittings on the grilling tray. The rotary drive is on the left.
2 Slide the right retainig clip onto the spit and tighten the screw.
3 Place the food you want to prepare on the rotary spit. Secure protruding parts (e.g. wings) to make sure they do not touch the grill heating element.
4 Slide the left retaining clip onto the spit and tighten the screw.
5 Place the spit onto the spit holders. Insert the square edge into the drive.
6 Insert the grilling tray and the rotary spit on the lowest level of the oven. The drive shaft has to engage into the opening on the back of the oven interior.
Switching on the Rotary Spit
1 Set the required temperature and mode.
2 Touch the x^ key, until the ^ symbol appears next to the temperature display. The rotary spit is switched on.
Switching off the Rotary Spit
1 Touch the x^ key until the x^ symbol goes off.
2 Switch off the oven by the temperature selector.
3 Warning, risk of burns! Use an oven glove to take out the grilling tray with the rotary spit. Place it on a stable, heat-resistant surface.
4 Screw the handle on to the side of the spit to take it off.
Note
The core temperature sensor cannot be used in combination with the rotary spit.
Only use the rotary spit up to a temperature of 250^ .
Do not clean the rotary spit drive in a dishwasher.
| Cakes and biscuits | Level from below | Hot air Temp. °C | Economy Temp. °C | Hot air and bottom heat Temp. °C | Top and bottom heat Temp. °C | Baking time Min. |
| Swiss roll | 2 | 210 | 7-9 | |||
| Flan base | 2 | 165-175 | 30-35 | |||
| Fruit flan on yeast dough | 2 | 165 | 165-175 | 40-45 | ||
| Fruit flan on short-crust pastry | 2 | 165 | 165 | 165 | 165-175 | 40-45 |
| Small flaky pastry cakes | 1+3/2* | 180 | 180 | 190 | 15-20 | |
| Cheesecake (high) | 2 | 165 | 165 | 165 | 165-170 | 90-100 |
| Cheesecake slices (flat) | 2 | 165 | 165 | 165 | 165-175 | 45-50 |
| Sponge cake (round) | 2 | 160-170 | 160-175 | 170-175 | 50-60 | |
| Loaf cake | 2 | 160-170 | 160-175 | 170-175 | 50-60 | |
| Yeast dough ring cake (tall) | 1 | 160-175 | 165-175 | 40-50 | ||
| Biscuits | 1+3/2* | 160-175 | 160-175 | 165-170 | 15-20 | |
| ‘Hefezopf’ | 2 | 165 | 165-170 | 30-40 | ||
| Cake on baking tray (dry top) | 2 | 165-170 | 165-170 | 165-170 | 40-50 | |
| Cake on baking tray (moist top) | 2 | 165-170 | 165-170 | 170 | 165-170 | 40-50 |
| Cream puffs | 1+3/2* | 180 | 180 | 180-190 | 20-25 | |
| Mixed-grain bread** | 2 | 200/170 | 210/170 | 40-50 |
- In the economy and hot air modes you can bake simultaneously on several levels.
** Preheat the appliance to the specified temperature. Switch back to the second temperature when inserting the food.
Note: The values given above should be looked upon as recommended values. We advise you to always preheat the oven.
For baking yeast dough we recommend the hot air circulation mode.
The recommended mode is printed in bold.
| Dish | Level from below | Hot air Temp. °C | Grill and hot air Temp. °C | Top and bottom heat Temp. °C | Cooking time Minutes | Meat probe temp. °C |
| Beef | ||||||
| Roast beef 1,5 kg* | 2 | 180 | 180 | 60-90 | ||
| Roast beef rare 1,5 kg** | 2 | 230/180 | 230/180 | 45-50 | 45-50 | |
| Roast beef medium 1,5 kg** | 2 | 230/180 | 230/180 | 60-70 | 55-65 | |
| Roast beef well done 1,5 kg** | 2 | 230/180 | 90-100 | 70-80 | ||
| Pork | ||||||
| Pork roast 1,5 kg** | 2 | 230/180 | 230/180 | 60-70 | 75-80 | |
| Pork roast with rind 1,5 kg*** | 2 | 180/200 | 180/200 | 60-70 | 75-80 | |
| Smoked pork 1,5 kg** | 2 | 180/160 | 40-50 | 65-70 | ||
| Leg of pork*** | 2 | 150/200 | 150/200 | 50-60 | 80-85 | |
| Collared roast** | 2 | 230/180 | 230/180 | 60-70 | 75-80 | |
| Veal | ||||||
| Roast veal** | 2 | 230/180 | 230/180 | 60-70 | 75-80 | |
| Leg of veal*** | 2 | 150/180 | 150/180 | 50-60 | 75 | |
| Loin of veal | 2 | 160-170 | 20 | 70-75 | ||
| Stuffed breast of veal* | 2 | 120-130 | 120 | 75-80 |
- First brown the meat all-round in the casserole on the cooker.
** Brown the meat at a high heat level, switch back to a lower temperature after 15-20 minutes.
*** Cook the meat at a low temperature, set the temperature higher for the last 15-20 minutes.
Note: The values given above should be looked upon as recommended values. We advise you to always preheat the oven.
The recommended mode is printed in bold.
| Dish | Level from below | Hot air Temp. °C | Grill and hot air Temp. °C | Top and bottom heat Temp. °C | Cooking time Minutes | Meat probe temp. °C |
| Venison | ||||||
| Roast boar* | 2 | 170-180 | 60-90 | |||
| Leg of venison* | 2 | 170-180 | 60-80 | 75-80 | ||
| Saddle of venison | 2 | 165-175 | 170-180 | 20-25 | 65-70 | |
| Leg of lamb* | 2 | 180-200 | 35-45 | 65-75 | ||
| Poultry | ||||||
| Duck 2-3 kg** | 2 | 160/190 | 160/190 | 100-120 | 80-85 | |
| Duck breast | 2 | 160 | 160 | 15-20 | 70 | |
| Goose 2-3 kg** | 2 | 160/190 | 160/190 | 100-120 | 85-90 | |
| Turkey 3-4 kg** | 2 | 160/190 | 160/190 | 120-180 | 85-90 | |
| Roast chicken | 2 | 180 | 180 | 50-60 | 85 | |
- First brown the meat all-round in the casserole on the cooker.
** Brown the meat at a high heat level, switch back to a lower temperature after 15-20 minutes.
Note: The values given above should be looked upon as recommended values. We advise you to always preheat the oven.
The recommended mode is printed in bold.
| Dish | Level from below | No pre-heat | Temp. °C | Grill Minutes | Grill and hot air Minutes | Cooking Time Minutes | ||
| 1 side | 2 side | 1 side | 2 side | |||||
| Sliced pork belly | 3 | 180-200 | 6 | 4 | 5 | 5 | 10 | |
| Kebab | 3 | 190 | 8 | 8 | 16 | |||
| Fried sausage | 3 | 200 | 5 | 4 | 9 | |||
| Merguez (grilled sausage) | 3 | 200 | 6 | 6 | 12 | |||
| Roast chicken* | 2 | X | 180 | 30 | 30 | 60 | ||
| Leg of chicken | 3 | 180 | 20 | 20 | 15 | 15 | 30-40 | |
| Spare Ribs | 3 | 180-200 | 15 | 15 | 12 | 12 | 24-30 | |
| Leg of pork** | 2 | 150/200 | 50-60 | |||||
| Trout | 3 | 180-200 | 8 | 8 | 16 | |||
| Vegetable kebabs | 3 | 200 | 7 | 7 | 14 | |||
| Shrimp kebabs | 3 | 175 | 7 | 7 | 14 | |||
| Preparing au gratin | ||||||||
| Toasted sandwich | 3 | 190 | 5-7 | |||||
| Crème caramel*** | 4 | X | 250 | |||||
| Crème brulée*** | 4 | X | 250 | |||||
| Cake with meringue*** | 3 | 200 | ||||||
Important: Only grill with the oven door closed.
For grilling use the wire rack that fits the grilling tray (accessory or special accessory, depending on the version) to collect dripping fat.
- In the case of appliances featuring a rotary spit, you are advised to use the spit in the grill mode.
Do not turn the leg of pork. Set the temperature high for the last 15-20 minutes.
* You should bake this dish au gratin until it has reached the level of browning you require.
Note: The values given above should be looked upon as recommended values.
The recommended mode is printed in bold.
Baking
| What to do if... | The solution |
| ...a cake baked in a tray is too light at the bottom? | Insert the tray on a lower level and remove all other trays from the oven. |
| ...a cake baked in a form is too light at the bottom? | Do not insert the baking form in the oven on the tray, but on the wire rack. |
| ...a cake/small cakes and pastries are too dark at the bottom? | Insert the cake/pastries at a higher level. |
| ...a cake is too dry? | Set the oven temperature to a slightly higher value. Preheat the oven. |
| ...a cake is too moist on the inside or if meat is not cooked on the inside? | Set the baking or roasting temperature to a slightly lower value. Important: baking or roasting times cannot be shortened by selecting higher temperatures. It is better to choose a slightly longer baking or roasting time and to allow the dough to bake longer. |
| ...a cake baked with hot air in a form or a rectangular form is too dark at the back? | Do not place the baking form directly in front of the rear wall of the oven, but in the middle. |
| ...a cake sinks? | Use less fluid the next time or set the oven temperature to a value that is lower by 10 degrees. Pay attention to the stirring times specified in the recipe. Do not open the oven door too soon. |
| ...a cake has risen in the middle and is lower at the edges? | Do not grease the edge of the spring form. After baking, carefully loosen the cake with a knife. |
| ...a cake is too dark at the top? | Insert it on a lower level, select a lower temperature and bake the cake for a slightly longer time. |
| ...a cake is too dark at the bottom? | Insert it at a higher level and choose a lower temperature the next time. |
| ...a fruit cake is too light at the bottom and the fruit juices spill over? | Use the deeper grilling tray for baking. |
| ...a cake is too dry at the bottom? | Use a toothpick to make small holes in the finished cake. Then sprinkle fruit juice or an alcoholic beverage over it. The next time, choose a temperature that is higher by 10 degrees and shorten the baking time. |
| ...bread or a cake looks good from the outside, but is too moist on the inside? | The next time, use slightly less fluid and bake slightly longer at a lower temperature. In the case of cakes with a moist covering, first bake the base, sprinkle almonds or breadcrumbs over it and then add the covering. Pay attention to recipes and baking times. |
| ...you have baked on several levels and your cake on the top tray is darker than on the bottom one? | If you select a slightly lower temperature, your cakes and pastries will be browned more evenly. Trays inserted at the same time need not be ready at the same time. Allow the bottom trays to bake for 5-10 minutes longer and insert them at an appropriately earlier time. |
| ...biscuits stick to the tray? | Briefly reinsert the tray in the oven and remove the biscuits immediately. |
| ...a cake does not come out of the tin easily? | Carefully loosen the edge with a knife. Turn out the cake again and cover the form several times with a cold wet cloth. The next time, grease the form well and additionally sprinkle breadcrumbs into it. |
Further Tips for Baking
You are advised to use dark metal baking forms. You may also use light baking forms in the hot air mode. In this case, the baking time is longer.
The values in the cooking tables apply to the preheated oven. The temperature and duration depend on the quantity and consistency of the dough. This is why the tables list temperature ranges. You are advised to begin with the lowest temperature the first time. If required, set it higher the next time.A lower temperature ensures more even browning.
To find out if your cake mixture has baked properly, insert a wooden stick at the highest point of the cake around 5-10 minutes before expiry of the baking time specified in the recipe. The cake is ready if dough no longer sticks to the wood.
Rising Dough (Fermenting)
Use the fermenting mode. Set the temperature to 38^ .
For large amounts of dough (for example bread) set the temperature between 38 - 40^ . The dough will rise evenly from the middle to the edge.
For small pieces of dough (for example bread rolls) set the temperature between 40 - 45^ .
Tips for Roasting and Grilling
You can use any heat-resistant dishes.
Place dishes in the middle of the wire rack.
You can also use the grilling tray for large roasts.
The side racks can be removed when preparing large, bulky roasts. Place the wire rack directly onto the bottom of the oven and place the dish or the roaster onto the wire rack. Do not place the dish or roaster directly onto the enamelled bottom of the oven.
After removing glass dishes, place them on a dry kitchen cloth or cooling grill. Do not place them on a cold or wet support surface. The glass could crack.
Before serving, allow the roast to rest for 10 minutes with the oven switched off and closed. This keeps the roast juicy.
Always grill in the closed oven. If possible, grilled pieces should be equally thick, at least 2 to 3cm . When this is the case, they will brown evenly and will stay nice and juicy. Never grill steaks salted! Place pieces for grilling directly on the wire rack.
Poultry becomes particularly crispy brown if you coat it with butter, salt water, dripped-off fat or orange juice.
For roasting use the wire rack that fits the grilling tray (accessory or special accessory, depending on the version). Put a small amount of water into the grilling tray. This ensures that the juices of the meat are collected and the oven stays clean.
In the case of duck or goose, pierce the skin under the wings to allow the fat to drain off.
What to do, if...
...a roast has become dark and parts of the crust are burnt? Check the insertion height and the temperature.
...a roast looks good, but the sauce is burnt? The next time, choose a smaller roasting dish and add more fluid.
...a roast looks good, but the sauce is too light and has become watery?
The next time, choose a larger roasting dish and use less fluid.
...the table does not list a weight for the roast? Choose the next lowest weight in the list and prolong the roasting time.
Defrosting
Use the defrosting mode. Set the temperature between 40 - 60^
Insert the wire rack with the frozen food on the second level. Insert the grilling tray below to collect the liquid.
Important: pour away the defrosting liquid.
Defrost large pieces of meat (roasts, chicken, etc.) between 45 - 50^ , otherwise the outer part may start to brown.
You can defrost small or flat pieces between 50 - 55^
Using the timer menu you can set the following:
timer
stopwatch
cooking time duration (not during stand-by)
cooking time end (not during stand-by)
Calling up the Timer Menu
Touch the key beside the symbol ① to call up the timer menu.
If the appliance is on standby, touch any key. Now the display is activated. The info i and timer ① symbols are shown.
Touch the key next to the timer symbol ①. The timer menu appears.
Timer
The timer counts down independently of all other settings of the appliance. You can enter a maximum value of 90 minutes.
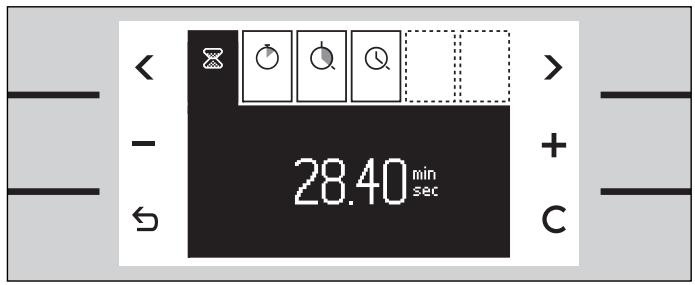
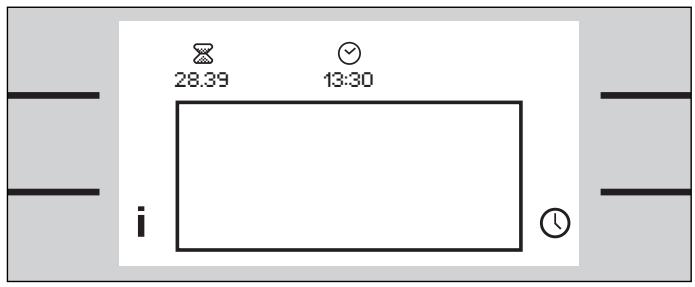
Setting the Timer
1 Call up the timer menu. The timer function is shown on the display.
2 Using + or - set the desired duration.
3 Start using the key.
The timer menu is closed. The symbol and the elapsing time are shown in the status bar.
Note: the timer starts automatically after a few seconds without touching the key.
A signal sounds when the time has elapsed. Touch the ① key to switch off the signal.
Note
To cancel an active timer:
Call up the timer menu, select the timer function and touch the C key.
Stopwatch
The stopwatch will count the elapsed time up to 90 minutes.
The pause function pauses the stopwatch.
The stopwatch runs independently of all other settings of the appliance.
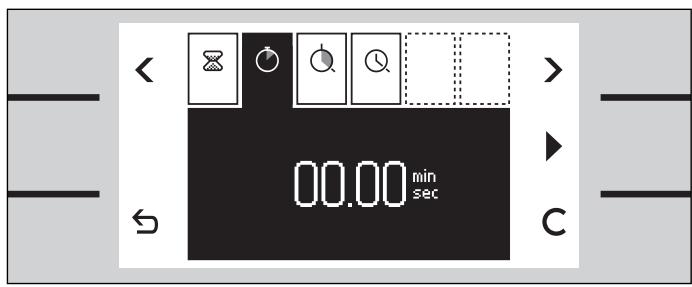
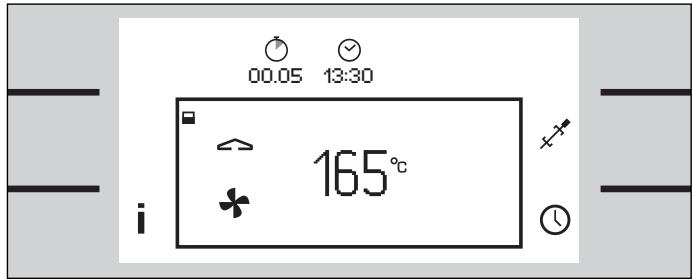
Starting the Stopwatch
1 Call up the timer menu.
2 Using < or > select the stopwatch function .
3 Start using the key.
The timer menu is closed. The symbol and the elapsing time are shown in the status bar.
A signal sounds when the time has elapsed. Touch the ① key to switch off the signal.
The timer menu is closed immediately when you touch the key.
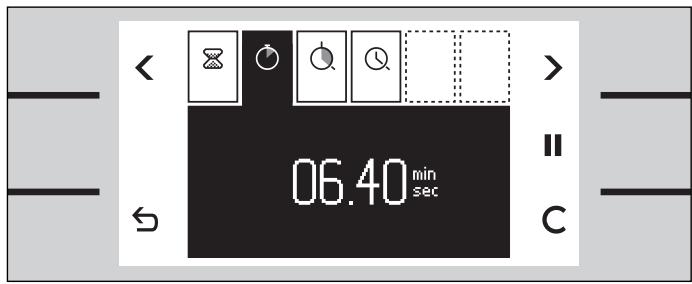
Pausing the Stopwatch
1 Call up the timer menu.
2 Using < or > select the stopwatch function .
3 Touch the key. The counter stops. The key reverts to start
4 Start again using the key. The counter continues.
After 90 minutes the time reverts to 00:00 minutes. The symbol in the status bar disappears. The stopwatch is switched off.
Note
To cancel the stopwatch:
Call up the timer menu, select the stopwatch function O and touch the C key.
Cooking Time Duration
If you set a cooking time duration for your meal, the appliance switches off automatically after the selected time.
This enables you to leave the kitchen while the meal is being prepared.
You can select a cooking time between 1 minute and 23 hours 59 minutes.
Select the temperature and heating mode and place your meal in the oven.
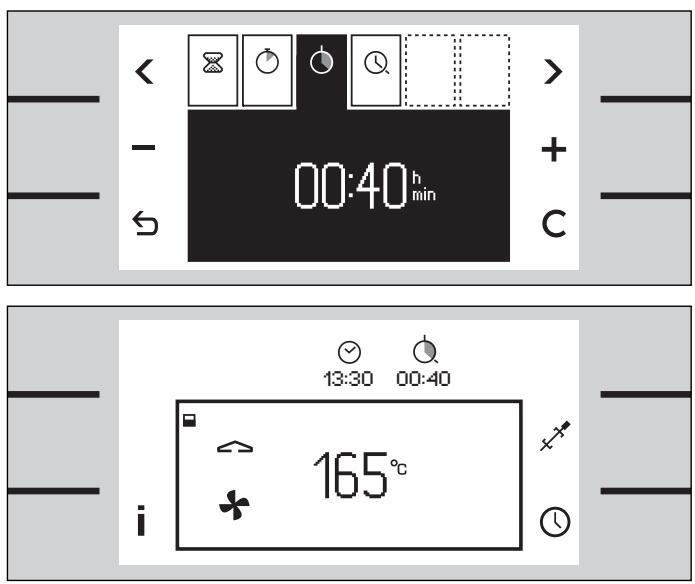
Switching off Automatically
1 Call up the timer menu.
2 Using < or > select the cooking time duration function.
3 Using ^+ or - set the required cooking time.
4 Start the program using the key.
The timer menu is closed. Temperature and heating mode are shown on the display. The elapsing time is shown in the status bar.
After the time has elapsed the appliance switches off. A signal sounds. Touch the ① key or open the appliance door to switch off the signal.
Note
To cancel the cooking time:
Call up the timer menu. Touch the C key, then touch S to confirm.
To change the cooking time:
Call up the timer menu. Change the time with + or -, then touch to confirm.
To stop the program:
Switch the temperature knob off.
Cooking Time End
You can program a cooking time end. Example: it is 13:30. The meal will take 40 minutes to cook and must be ready at 15:30.
Set the cooking time duration and set the cooking time end to 15:30. The electronics will calculate the start time. The appliance will start automatically at 14:50 and switch off at 15:30.
Please note that food which can easily go off should not stay in the oven too long.
Note:
Always set the desired temperature, heating mode and cooking time duration first. Only by setting these values can the cooking time end be programmed.
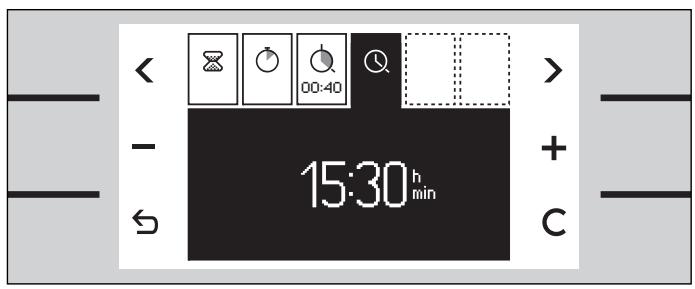
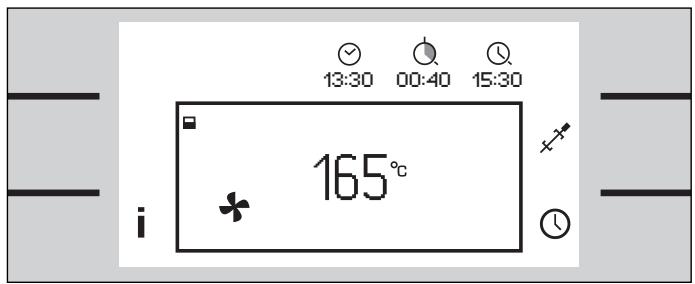
Switching on and off Automatically
1 Set the required cooking time.
2 Using select cooking time end . The switch off time appers on the display.
3 Using ^+ set a later switch-off time.
4 Start using the key. The timer menu is closed.
Temperature and operating mode appear on the display. The status bar appears. The appliance is on standby and will start automatically. After the cooking time duration it will switch off.
After the time has elapsed the appliance switches off. A signal sounds. Touch the ① key, open the appliance door or switch off the temperature selector to switch off the signal.
Note
To cancel the cooking time:
Call up the timer menu. Touch the C key, then touch to confirm. Cooking time duration and end are cancelled.
To stop the program:
Switch the temperature knob off.
If the symbol flashes:
You have not set the cooking time duration. Always set the cooking time duration first.
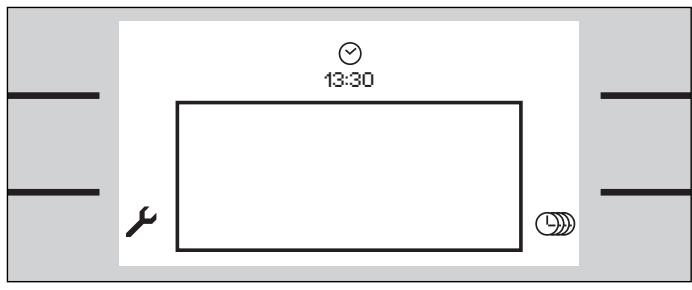
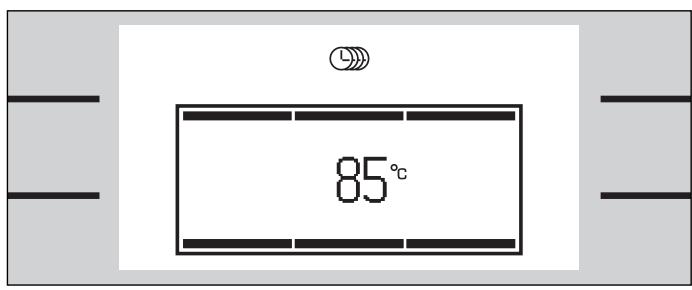
This function keeps the oven at a temperature of 85^ in the top and bottom heat mode.
You can keep food warm 24 to 74 hours, without switching the oven on or off.
Please note that food which can easily go off should not stay in the oven too long.
Supposition:
The intended timer key is available. You have to make the intended timer key available in the basic settings. See chapter basic settings.
Setting the Program
1 Turn the temperature knob one position to the right to the light position.
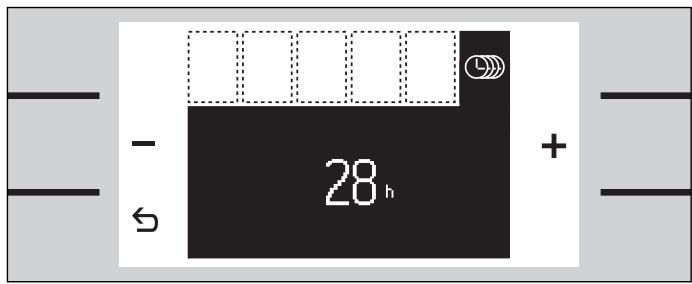
2 Touch the key beside the symbol . The suggested value of 28 h appears on the display.
3 Using ^+ or - set the desired duration.
4 Start using the key.
The cooking mode and temperature appear on the display. The oven light stays off. The keys are locked. The display lighting is switched off. The softkey tone is switched off.
At the end of the programmed time the oven stops heating. The display is empty. Switch the temperature knob off.
Note
If you cannot find the key:
You have to make the extended timer key available.
See chapter basic settings - extended timer.
To stop the program:
Switch the temperature knob off.
The oven has a child lock. It prevents the oven being turned on unintentionally.
Supposition:
You have to make the child lock available in the basic settings. See chapter basic settings.
Activating the Child Lock
Supposition:
The temperature knob is in the OFF position.
1 Touch any key. The symbol appears beside the centre left key.
2 Touch the key for at least 6 seconds.
The child lock is active, the controls are locked.
The standby screen appears. The symbol 品 appears in the status bar.
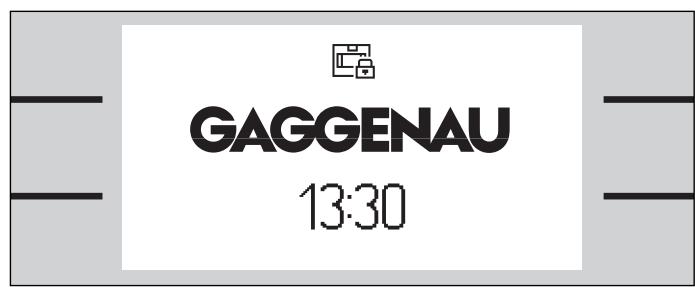
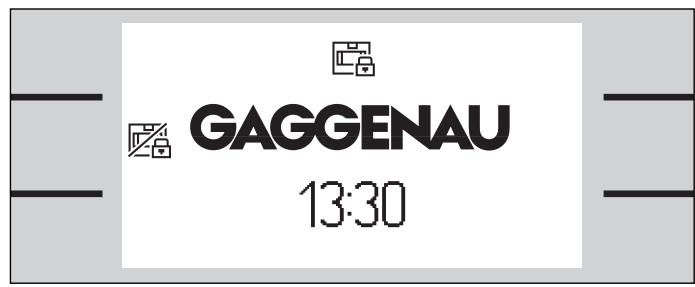
Deactivating the Child Lock
1 Touch any key. The symbol appears beside the centre left key.
2 Touch the key for at least 6 seconds.
The child lock is deactivated. You can operate the appliance as usual.
Note
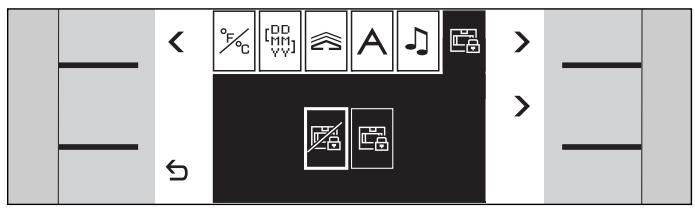
If you cannot find the key beside the centre key: Call up the basic settings menu. Select the child lock function. Select "child lock available".
If the child lock key is no longer required: Call up the basic settings menu. Select the child lock function. Select "child lock not available"
Safety Deactivation
For your protection the appliance has a safety deactivation. The safety deactivation switches off the heat if the oven is left on for more than 12 hours without the controls being touched.
Three dashes appear on the display. Switch the temperature knob off. Then you can operate the appliance as usual.
Fast Heating up
This mode heats up the oven particularly fast.
You can activate the fast heating up in the basic settings menu.
If you have selected fast heating up, always heat up the empty oven before putting the dish in the oven.
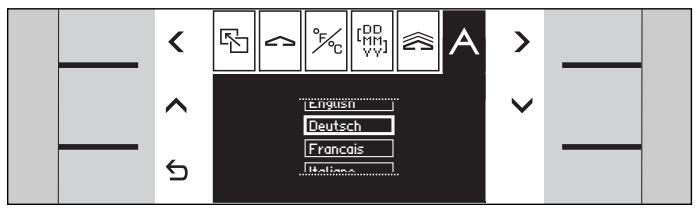
Your appliance has several basic settings.
You can customize these settings: Turn the temperature knob of the upper oven one position to the right to the light position.
- Call up the basic settings menu with the key.
Use the top < or > keys to move between the settings.
Use the centre keys to change the selected setting. You can change several settings individually without leaving the menu. - Touch the key to exit the menu. All settings are saved.
Note
The status bar only shows six options.
Use the top < or > keys to move to the required option. You can scroll back- or forward with these keys.
If no key has been touched for 60 secs the menu disappears. The standby screen appears. All settings are saved.
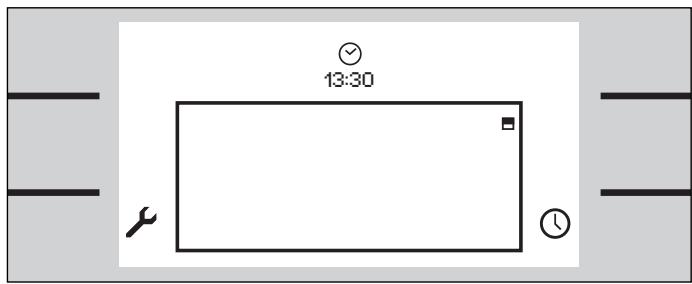
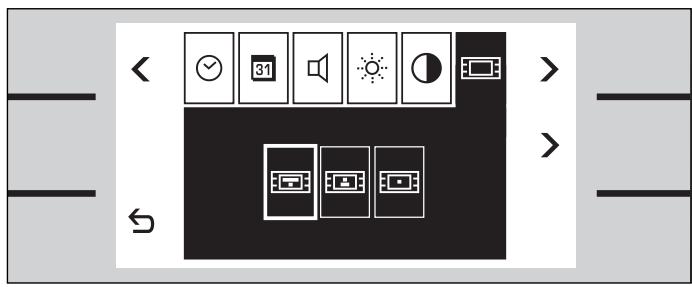
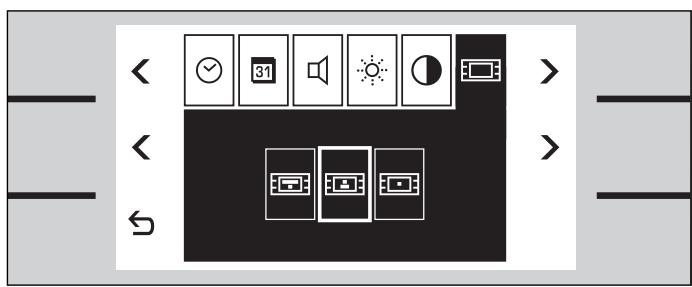
Example: Changing the Standby Screen
1 Call up the basic settings menu by turning the temperature knob one position to the right to the light position.
Touch the key next to the symbol. The menu appears.
2 Use the menu key to select the function standby screen
3 Use the middle keys < or > to select the required setting. The selected screen appears briefly.
Now you can change further settings or exit the menu with the key.
The Following Settings Can Be Changed
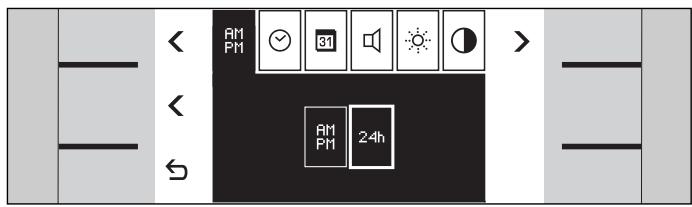

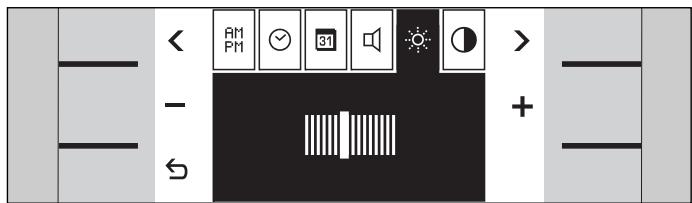
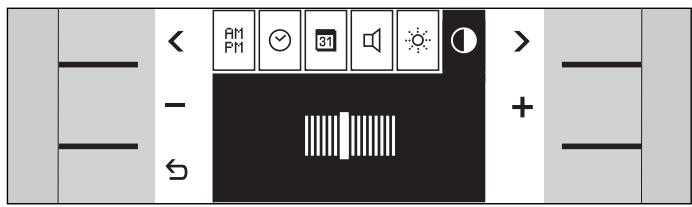
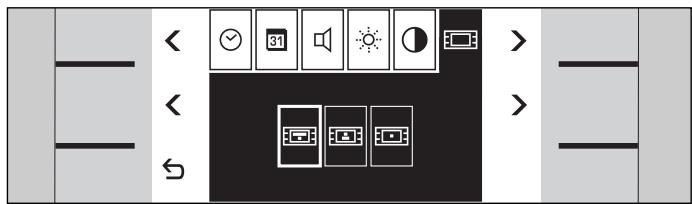
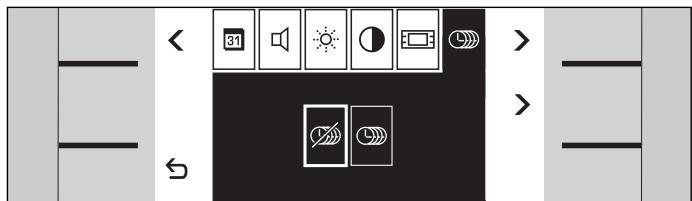
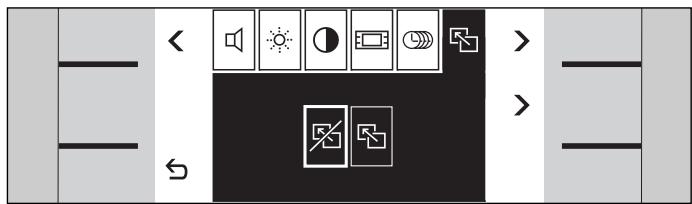
Time format
12 hour format (AM/PM) or 24 hour format
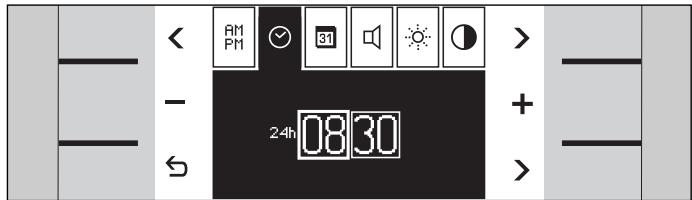
Clock
Hours / minutes
Use the arrow key bottom right to change from hours to minutes.
Date
Day / month / year
Use the arrow key bottom right to change from day to month to year.
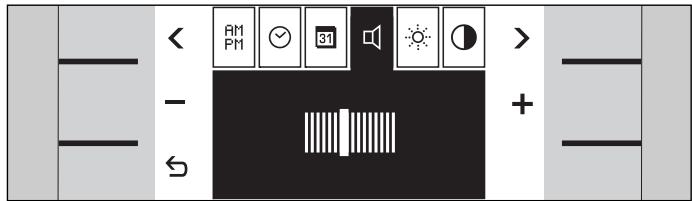
Key tones volume
In 8 levels
Adjust the volume of the key tones.
The signal volume cannot be adjusted.
Display brightness
In 8 levels
Display contrast
In 8 levels
The display contrast depends on the viewing angle.
Standby screen
Gaggenau with clock / clock and date / clock
The selected screen appears briefly.
Extended timer
- Extended timer key not available / available
Reset all parameters to the factory setting
No/yes
Immediately confirm a reset with the 日 key.
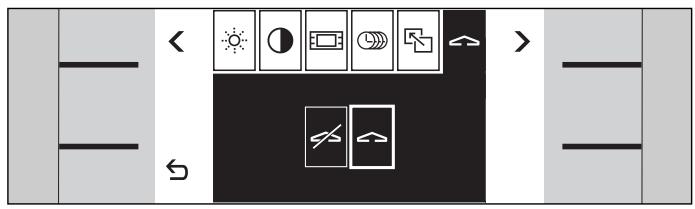

Exhibition mode
The setting "exhibition mode not active" must be selected and must not be changed. The appliance does not heat up during exhibition mode .
You can only change this setting 3 minutes after the appliance has been connected to the electricity.
Temperature unit
^ or ^
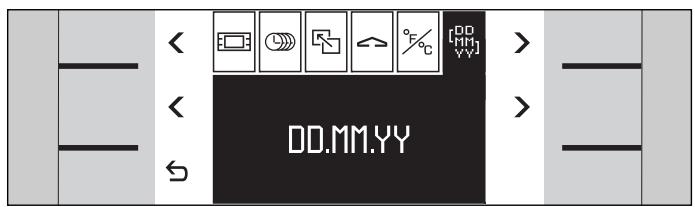
Date format
Day.month.year or day/month/year or month/day/year
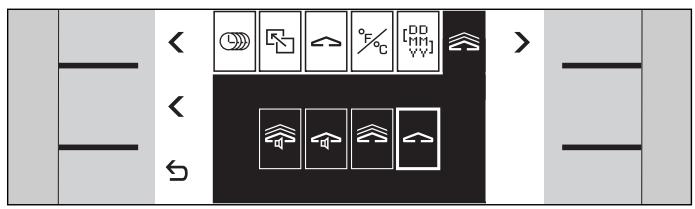
Heating up with / without signal
- Rapid heating up with signal / normal heating up with signal / rapid heating up without signal / normal heating up without signal
The signal sounds when the oven has heated up.
Language
- Select the language for the display messages or switch the display messages off.
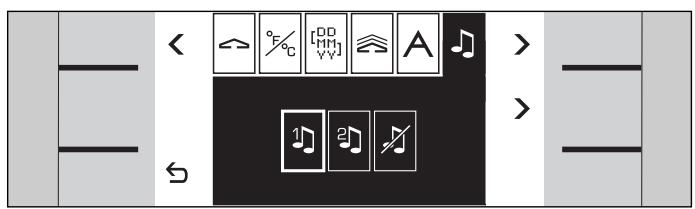
Key tones
Sound 1 (beep) / sound 2 (click) / key tones off
Choose the key tones.
The signal tone cannot be changed.
Child lock
- Child lock key not available / available
Safety Notes
Warning! Do not clean the hob using high pressure cleaners or steam jets.
Warning, risk of burns! Before cleaning, wait until the appliance has cooled down.
Cleaning the Oven Interior
Clean the oven with a cloth/sponge and a small amount of hot soapy water. Avoid residues burning in. After cleaning, leave the door open until the oven has dried.
Do not scrape off baked-in remainders of food. Instead, moisten them with a wet cloth and detergent.
If the oven is heavily soiled use the pyrolysis for best results.
Fruit juices from moist cakes dripping onto the oven interior can damage the enamel. Remove such soiling as soon as the oven has cooled down sufficiently.
Do not use non-suitable cleaning agents:
scouring cleaning agents
- nitro polishing agents
- cleaners containing chloride
- abrasive sponges or objects
Note: Only use oven cleaner on the enamel in the oven interior. Do not let the oven cleaner come into contact with the door seal. Do not spray oven cleaner onto the door frame.
Cleaning the Glass Front
Clean the glass front with a soft cloth and glass cleaner. Do not wipe the glass front with a soaking wet cloth as water might enter behind the glass.
Do not use aggressive, scouring cleaning agents or glass scrapers. They can scratch the surface and destroy the glass.
A rainbow coloured shimmer may be seen on the front glass. This is the heat resistant coating.
Only clean the display with a soft cloth. Do not wipe the display with a soaking wet cloth as water might enter behind the screen.
Cleaning the Door Seal
Always keep the door seal clean and free of food remains.
Do not use aggressive cleaning agents (e.g. oven cleaner) on the door seal. They can destroy the door seal.
Do not remove the door seal.
Cleaning the Accessories
Clean accessories (baking tray, wire grill and grill pan) with hot soapy liquid.
Soak baked-in remainders and clean with a brush.
Cleaning the Baking Stone
(special accessory)
Remove coarse soiling from the baking stone. Turn the baking stone round before using it again. This will burn off most residues from the bottom side.
Note: Do not clean the baking stone with water and detergents! Moisture inside the baking stone can cause cracking.
Warning, risk of burns! Very high temperatures occur during the pyrolysis! Keep children away!
During the pyrolytic self cleaning the oven is heated to 485^ . Any food residues from baking, roasting and grilling are reduced to ash.
The duration of the pyrolysis is 3 hours.
For your safety the oven door remains locked. During pyrolysis the light in the oven remains switched off.
It is not possible to do a pyrolytic cleaning in both ovens at the same time.
While doing a pyrolytic cleaning in one oven it is not possible to use the other oven.
Before Starting Pyrolysis
- Remove coarse soiling and food remains from the oven.
Warning, fire risk! Food remains, fat and meat juices may ignite during pyrolysis. - Manually clean the door seal, the inside of the door and the glass panel. The pyrolysis does not clean these parts.
- Remove all loose interior parts (for example wire rack or meat probe) from the oven. No objects should be left in the oven!
- Close the oven door.
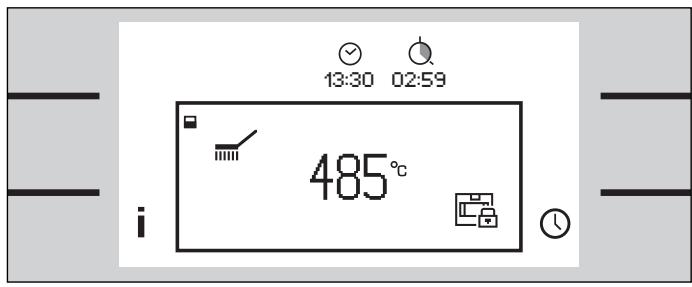
Setting the Program
1 Turn the temperature knob and the function knob one position to the left.
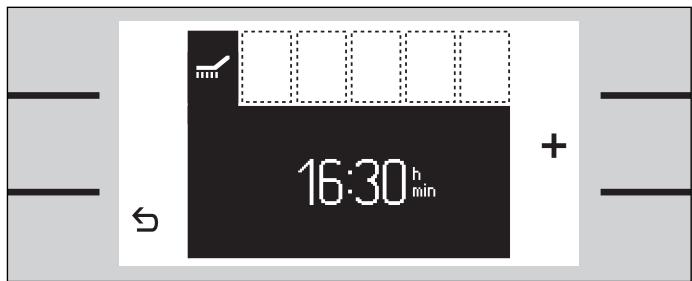
2 The pyrolysis menu appears. The switch off time appears on the display.
3 Press to start.
The pyrolysis menu disappears. The symbol and the pyrolysis temperature appear on the display. The status bar shows the duration of the pyrolysis.
The oven light and the display light stay off during pyrolysis.
Delaying the Switch-off Time
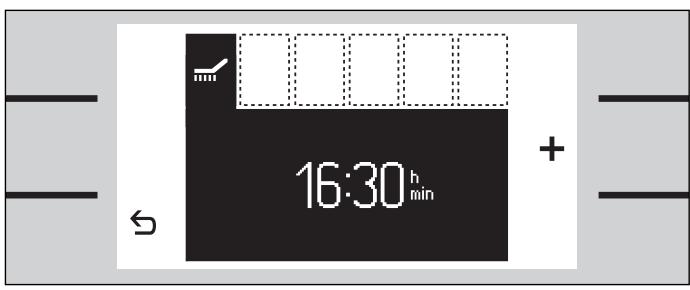
If you want the pyrolysis to run at a later time (for example during the night), you can change the switch-off time. In this way you can use your oven during the day as usual.
Make the settings as described in 1 and 2.
3 Press the + key to change the switch-off time.
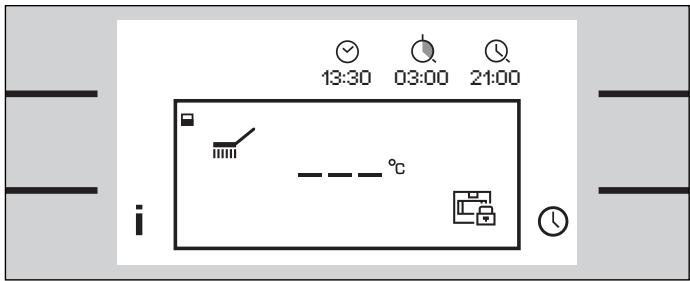
4 Press the key to confirm.
After confirmation the symbol appears on the display. The status bar shows the switch-off time of the pyrolysis. Three dashes instead of the temperature are shown on the display. After the start of the pyrolysis the temperature appears on the display.
A signal is sounded at the switch-off time.
Exception: There is no signal between 22.00 and 8.00.
The pyrolysis has ended. Switch off the temperature knob.
Allow the oven to cool down fully. Then wipe out the oven using a moist cloth.
Note
The duration of the pyrolysis cannot be changed.
During pyrolysis the appliance cooling fan might be louder than usual.
If the pyrolysis does not start and the or
symbol flashes on the display:
Check if the door is fully closed and the meat probe has been removed.
If you want to stop the pyrolysis:
Switch off the temperature knob.
For your safety the oven door remains locked. The door is automatically unlocked when the oven has cooled down and the symbol disappears.
Cleaning Accessories with Pyrolysis
Gaggenau baking trays and grilling trays are coated with pyrolysis-proof enamel. To arrive at an optimum cleaning result, you are advised to remove all accessories from the oven before the pyrolytic cleaning process. Only this will ensure optimum heat distribution.
If you would like to remove burnt-in residues from your baking tray or your grilling tray, it is imperative that you observe the following safety notes:
- Remove extreme fatty soiling, roast juice and food remainders before the pyrolytic cleaning process.
Warning, fire risk! Food remains, fat and meat juices may ignite during pyrolysis. - Only insert one baking tray or one grilling tray in the lowest shelf in the oven.
- Fully insert the baking tray or grilling tray.
- Do not clean wire rack, rotary spit, cast roaster, baking stone, meat probe or other accessories in the pyrolytic cleaning process.
In case of a malfunction first check the household fuses. If the power supply is functioning correctly contact your dealer or Gaggenau after-sales service.
Please specify the E number and FD number of the appliance when calling our after-sales service. You find these numbers on the rating plate of the appliance.
Repairs may only be carried out by authorised technicians, in order to guarantee the electrical safety of the appliance.
Warning! Incorrect repairs may result in serious injury to the user.
All poles of the appliance must be disconnected from the electricity when being repaired (switch off the household fuse or the circuit breaker in the fuse box).
Non compliance with these recommendations results in the warranty coverage becoming invalid.
Error Messages
If a maljunction occurs and the appliance does not heat up, an error code will be shown on the display.
If E003, E303, E115 or E215 is shown on the display the appliance is too hot. Switch off the appliance and let it cool down.
If a different error code is shown on the display call the after-sales service. Please specify the error code and the appliance type. You find the appliance type on the rating plate.
Switch off the temperature knob.
Note:
The short timer and stop clock can still be used.
Exhibition Mode
If the symbol appears on the standby screen, exhibition mode is activated. The appliance does not heat up.
Disconnect the appliance from the electricity for a few seconds (switch off the household fuse or the circuit breaker in the fuse box). Within 3 minutes after reconnecting the appliance go to the basic settings menu and deactivate exhibition mode.

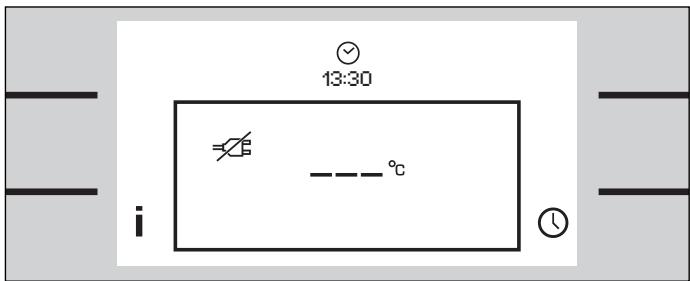
Power Cut
The appliance bridges a power cut of up to 5 minutes. The operation continues.
After a longer power cut the appliance will switch off the operation. The symbol appears on the display and three dashes instead of the temperature.
Switch off the temperature knob and switch the appliance back on.
The "first settings" menu reappears if the appliance is without electricity for several days. You have to set the clock and date.
Note: The basic settings remain stored even if the appliance is without electricity for several days.
If an oven light fails, it must be replaced. Heat-resistant replacement bulbs can be obtained from the after-sales service or specialist shops. Only use these bulbs.
Warning, risk of burns! Oven lights get very hot during use. Only replace the oven light when it is cold.
Disconnect the appliance from the electricity before replacing the light (switch off the household fuse or the circuit breaker in the fuse box).
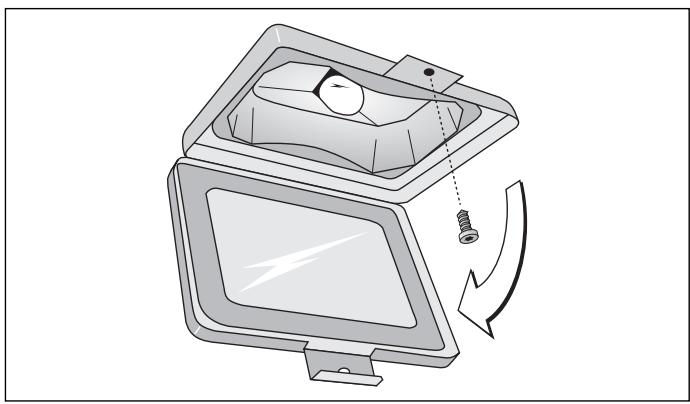
Replacing the Ceiling Light
1 Loosen the screw on the lamp cover. Tilt down the lamp cover.
2 Pull out the bulb. Push the new bulb in firmly. Make sure that the pins are in the correct position. Note: Only use a heat-resistant halogen bulb of the same type (BO 270: 60 W, BO 280: 75 W/ 230 V / G9). Do not touch the halogen lamp with your hands. Use a dry cloth.
3 Tilt the lamp cover up and screw it back on.
4 Switch the circuit breaker back on.
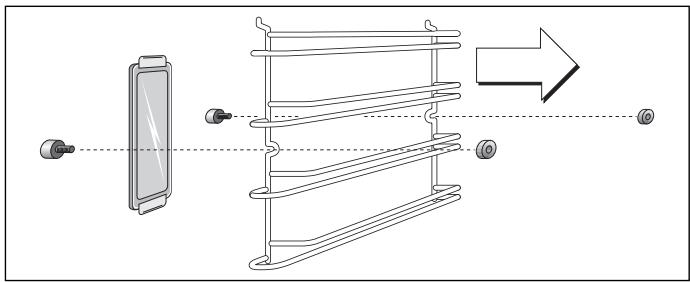
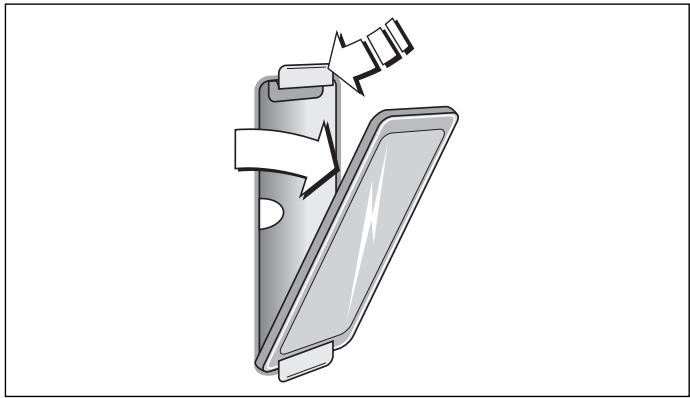
Replacing the Side Light
1 Place a tea towel in the oven to prevent damage.
2 Pull out the shelf after undoing the knurled nuts.
3 Push the top mounting bracket back and remove the glass cover.
4 Pull out the bulb. Push the new bulb in firmly. Make sure that the pins are in the correct position. Note: Only use a heat-resistant halogen bulb of the same type (10 W / 12 V / G4). Do not touch the halogen lamp with your hands. Use a dry cloth.
5 Insert the glass cover under the bottom mounting bracket and press it down firmly on the top. The sloping edges must face to the interior of the oven.
6 Remove the tea towel and switch the circuit breaker back on.
You must replace a damaged glass cover. Suitable glass covers may be obtained from the after-sales service.
- Double Oven BX 280/281
- Table of Contents
- Operating for the First Time 5
- Avoiding Damage to the Appliance and the Cabinet 5
- Features of your New Oven 6
- Accessories 8
- Heating Modes 9
- Grilling Table 22
- Before Use
- Intended Use
- Safety while Baking
- Pyrolysis (Self Cleaning)
- Damage to the Appliance
- Operating for the First Time
- Avoiding Damage to the Appliance and the Cabinet
- Oven
- Cabinet Fronts near the Oven
- Display and Controls
- Display
- GAGGENAU
- Touch keys
- Function selector
- Temperature selector
- Keys
- Note
- Choosing the Time Format
- Setting the Language
- Setting the Clock
- Setting the Date
- Temperature Unit ° C or ° F
- Exiting Menu and Saving Settings
- 13:30
- Standby
- Note:
- Activating the Oven
- Setting the Temperature and Cooking Mode
- Current Oven Temperature Display
- Setting the upper and lower oven
- Programming the Meat Probe
- Cleaning
- Preparation
- Switching on the Rotary Spit
- Switching off the Rotary Spit
- Further Tips for Baking
- Rising Dough (Fermenting)
- Tips for Roasting and Grilling
- What to do, if...
- Defrosting
- Calling up the Timer Menu
- Timer
- Setting the Timer
- Stopwatch
- Starting the Stopwatch
- Pausing the Stopwatch
- Cooking Time Duration
- Switching off Automatically
- Cooking Time End
- Switching on and off Automatically
- Setting the Program
- Activating the Child Lock
- Deactivating the Child Lock
- Safety Deactivation
- Fast Heating up
- Example: Changing the Standby Screen
- The Following Settings Can Be Changed
- Time format
- Clock
- Date
- Key tones volume
- Display brightness
- Display contrast
- Standby screen
- Extended timer
- Reset all parameters to the factory setting
- Exhibition mode
- Temperature unit
- Date format
- Heating up with / without signal
- Language
- Key tones
- Child lock
- Safety Notes
- Cleaning the Oven Interior
- Cleaning the Glass Front
- Cleaning the Door Seal
- Cleaning the Accessories
- Cleaning the Baking Stone
- (special accessory)
- Before Starting Pyrolysis
- Delaying the Switch-off Time
- Cleaning Accessories with Pyrolysis
- Error Messages
- Power Cut
- Replacing the Ceiling Light
- Replacing the Side Light
Brand : GAGGENAU
Model : BX281110
Category : Built-in oven