BLACKBOX 1.5 - Electronic musical instrument 1010music - Free user manual and instructions
Find the device manual for free BLACKBOX 1.5 1010music in PDF.
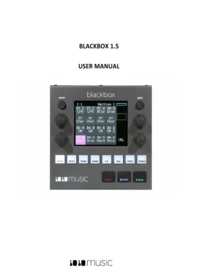


| Product type | Compact studio sampler and sequencer |
| Brand | 1010music |
| Model | Blackbox |
| Firmware version | 1.5 (user manual) |
| Screen | 4.3-inch color touchscreen |
| Pads | 16 velocity-sensitive backlit pads |
| Main functions | WAV sample recording and playback, sequencing, song creation, built-in effects, MIDI control, granular and slicer modes |
| Audio input | Stereo input for sampling |
| Audio outputs | Stereo outputs for amplifier or mixer |
| MIDI | MIDI input/output via mini TRS (5-pin DIN MIDI adapter included) |
| Storage | microSD card for samples, presets, and updates |
| Power supply | USB 5V DC (USB power adapter recommended) or internal rechargeable battery |
| Dimensions | Approximately 230 mm × 137 mm × 45 mm |
| Weight | Approximately 500 g |
| Maintenance and cleaning | Clean with a soft, dry cloth; avoid abrasive products and liquids |
| Safety | Do not expose to moisture, heat, or dust; unplug before cleaning |
| Spare parts and repairability | No user-serviceable parts; contact 1010music support |
| General information | User manual included; updates available on the official website; MIDI adapters provided |
Frequently Asked Questions - BLACKBOX 1.5 1010music
User questions about BLACKBOX 1.5 1010music
0 question about this device. Answer the ones you know or ask your own.
Ask a new question about this device
Download the instructions for your Electronic musical instrument in PDF format for free! Find your manual BLACKBOX 1.5 - 1010music and take your electronic device back in hand. On this page are published all the documents necessary for the use of your device. BLACKBOX 1.5 by 1010music.
USER MANUAL BLACKBOX 1.5 1010music
BLACKBOX 1.5
USER MANUAL
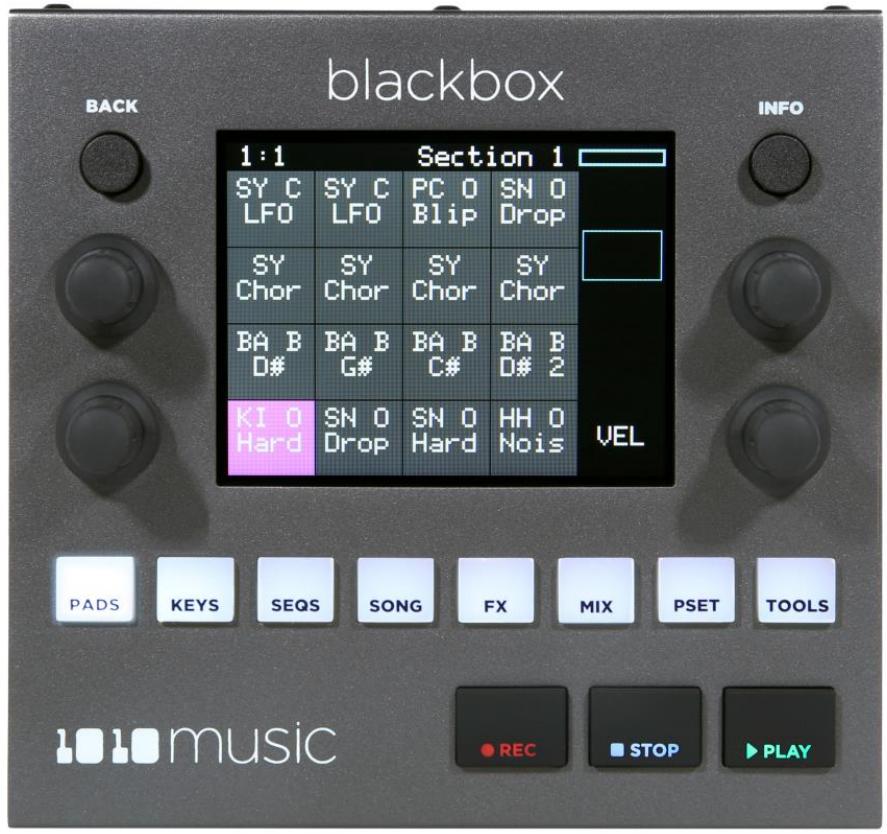
TABLE OF CONTENTS
WELCOME......6
OVERVIEW 7
SET UP BLACKBOX 8
Control the Volume......8
Test Your Setup 8
Connect an Audio Input for Sampling....8
Working with a Battery....8
QUICK START 10
Explore PADS....10
Explore KEYS .... 10
Explore Sequences ...... 11
Explore Song Sections....11
Song Mode and REC | STOP | PLAY Buttons 11
To Save a Preset: 12
CREATE A NEW PRESET....13
To Create and Name a Preset:....13
WORK WITH PADS 14
To Select WAV Files and Assign Pad Modes: 14
Set Up a Sample Pad....19
Single Sample Pads....19
Multi-Sample Pads....21
Work with a Clip Pad....24
Work with Slicer Pads....26
To Manually Create or Remove Slices: 28
To Use Auto Scan to Create Slices: 28
To Use Slice to Grid: 28
To Use Slices to Synchronize Playback of Clip Pads: 28
Work with Granular Pads....28
Record a New WAV File .... 30
To record a WAV file: 30
If you are recording WAVs for the current preset: 31
If you are recording WAVS to build up a library of sounds: 31
To Record a WAV File while Sequences or Song Sections are Playing: 32
To Record a Multi-sample pack onto blackbox:....32
Save and Load Parameters in WAV Files 32
Trim WAV Files....34
Use Clipboard Functions with Pads....34
Manage WAV Files 34
Working with WAV Files on the microSD Card....34
To Delete, Save As or Rename a WAV File: 35
Packing Presets 36
To Pack a Preset: 36
USE KEYS TO PLAY PADS CHROMATICALLY OR TO PLAY SLICED WAV FILES 37
To Play a Sample, Clip or Granular Mode Pad With the Traditional Keyboard: 37
To Play a Sample, Clip or Granular Mode Pad With the Grid Keyboard:....37
To Play Slicer Mode Pads With Keys: 37
To Select a Scale on the Grid Keyboard: 38
WORK WITH SEQUENCES.... 39
Record and Play Sequences....39
To Toggle Song Mode On and Off: 39
To Record a Sequence: 39
To Play Sequences: 40
To Edit and View the Notes and Pad Triggers in a Sequence:....40
To Edit Sequence Settings: 41
To Use Sequence Quick Action Buttons: 42
WORK WITH SONG SECTIONS.... 43
To Toggle Song Mode: 43
Record and Play Song Sections....43
To Record a Song Section: 43
To Play Song Sections: 44
To Edit Song Sections: 44
To Reorder Song Sections: 44
To Change the Playback Speed of a Song: 45
To Add Swing to a Song: 45
APPLY EFFECTS 46
To Route a Pad to an Effect: 46
To Modify Effect Parameters: 46
ADJUST THE MIX 48
To Adjust the Sound Level and Pan of a Pad: 48
To Mute and Unmute Pads: 48
MANAGE PRESETS.... 49
To Save Changes to a Preset: 50
To Load a Preset: 50
To Pack a Preset: 50
To Clean unused WAV files out of a Preset's folder: 50
To Delete a Preset: 51
To Rename a Preset: 51
To Save Current Changes as a New Preset: 51
Work with Preset Files on the MicroSD Card....51
Upgrading from Previous Firmware Versions....52
What will happen to my legacy presets? How do I convert them to the new file structure? ....52
When will my legacy WAV files get cleaned out of the root folder? 52
USE TOOLS TO CUSTOMIZE YOUR BLACKBOX.... 53
USE MIDI DEVICES WITH BLACKBOX 55
Work with MIDI Inputs....55
To Trigger Pad Hits and Sequences with a MIDI Device: 55
To Play Notes and Use Common MIDI Modulation Signals with a Specific Pad or Pads: 56
To Play Notes and Use Common MIDI Modulation Signals with the Currently Selected Pad: 56
To Configure MIDI modulation for a parameter using named MIDI sources:....57
To Use MIDI CC in Learn mode to Modulate Pad and Effect Parameters: 57
To Remove MIDI Modulation from a Parameter: 58
Sharing of MIDI Input Channels 58
Use MIDI Program Change to Open a Preset....58
To Enable or Disable MIDI Program Changes: 59
Work with MIDI Outputs....59
To Send MIDI Notes from a Sequence to an External MIDI Device: 59
To Send MIDI Notes from a Pad to an External MIDI Device: 59
Use MIDI Notes to Play Slices....60
To Use MIDI Notes to Play Slices:....60
Synchronize Playback with a Clock....60
Configure Blackbox to Follow an External Clock....61
Send the Blackbox Clock Signal to External Devices....62
Reset the Clock 62
Powering MIDI Devices 62
CREATE PRESET TEMPLATES FOR RE-USE 63
To Configure a Pad without a WAV file:....63
To Add a WAV file to a Template Pad: 63
REDUCE ALIASING WHEN PLAYING PADS CHROMATICALLY 64
PROCESSOR MANAGEMENT TIPS....65
UPDATE FIRMWARE, AUDIO FILES AND PRESETS 66
Switch to a New MicroSD Card While Operating Blackbox 66
Backup Your Presets and WAV Files 66
Install New Firmware 66
Reset Blackbox Presets to Factory Settings 66
TECHNICAL SPECS....68
On-Board Memory......68
Maximum Sample Length 68
Samples Supported 68
Maximum Number of Voices Supported....68
Pin Mapping for Mini TRS Jack to MIDI 5 Pin DIN Connectors....68
STAY UP TO DATE....69
Demonstration Videos and Latest Documentation....69
Connect with Other Blackbox Users....69
Contact Us....69
APPENDIX A - SUMMARY OF CHANGES.... 70
Changes in V 1.5 ....70
Changes in V 1.4 ....70
Welcome
Blackbox by 1010music is a compact sampling studio. With blackbox, you can record and play samples, sequence those samples into patterns and riffs, and then record those sequences into sections, which together can form a song. Use blackbox to record complete compositions from the comfort of your studio or, with the help of a USB power block, from the seat of your train or the park bench. You can also use blackbox to create materials to play in the background while you sing or perform with other instruments. We can't wait to see what you create with it!

Pads

Keys

Sequences

Song Sections

FX

Mixer
Overview
Blackbox has a fairly simple set of input controls. You choose which functional area you are controlling by pushing the white navigation buttons. You control playback and recording of clips, sequences and songs using the black transport buttons. You select and trigger sound elements and configure parameters using the touch screen and the knobs. The INFO button allows you to drill into an item on the screen to edit more details. Push it repeatedly to access detailed information about the item. The BACK button takes you to the previous screen.
Blackbox was designed so that you build your song by working through the navigation buttons from left to right. You can certainly jump around and do things in any order, but the general flow is to start on the left and move to the right.

- On the PADS screen, play, record, and organize a bank of samples. Blackbox comes with prerecorded samples and allows you to record or transfer over your own WAV files.
- The KEYS screen lets you play samples chromatically. You can also connect a MIDI device to blackbox to trigger pads.
- On the SEQS screen, record sequences as you play pads or keys. Each sequence can record any one or more of the pads.
- On the SONG screen, enable Song Mode to record Song Sections as you turn sequences on and off.
- On the FX screen, adjust the parameters for the delay and reverb effects.
- On the MIX screen, adjust the volume and pan of each pad.
- On the PSET screen, save your work and start a new creation.
The black bar along the top of the screen displays the blackbox playback state and recording context. The number pair on the left displays the overall playback time in measures and beats. The text in the middle displays the recording context. In Song Mode, this will display the name of the section that you are recording into. When not in Song Mode, this displays the number of the sequence that will be recorded. You can toggle the state of Song Mode by pushing the SONG button, then touching the on-screen Song button. Song Mode is active when the on-screen button is blue. In the top right-hand corner, a progress bar displays the current playback progress of the sequence or section that has recording context.
In this manual, we will first briefly make sure you have blackbox set up correctly and can make some sound with it. Next, we will explore one of the provided presets so that you can see what blackbox is capable of doing. After that, we will quickly create a new preset so you have a blank slate to use as we next walk through the basic use of the screens behind each of the navigation buttons. That will be followed by a discussion of how to use MIDI devices with blackbox, along with some more advanced usage features. Lastly, we will delve into managing blackbox firmware and files, touch on a couple of technical specs and finally tell you where you can find more information about blackbox and other 1010music products.
This manual was written for version 1.5 of the blackbox firmware.
Set Up Blackbox
To get started with blackbox, simply insert the microSD card in the front slot, plug it in, and connect it to speakers or headphones. The microSD card slot is along the short front panel. The power jack and audio outputs are on the back panel. To start, we recommend connecting external speakers or headphones to the PHONES jack, since all outputs are routed to the PHONES jack.
When connecting to power, be sure to use a well rated USB cable like the one provided with blackbox. The cable should be at least 24 gauge or better. The smaller the gauge number, the bigger and better the cable. One example to look for is a USB 28/24 AWG cable. A standard printer cable that you can find at an office store is probably not going to reliably power the blackbox.
All of the audio jacks are stereo 3.5mm connectors. This makes for a total of 6 audio outputs (3 Audio Out jacks x2), stereo headphones, and a stereo input. The audio output will be at Eurorack levels which is +/- 5 volts. This is louder than a consumer electronics line level, so you may need a mixer to connect with consumer electronics gear.

A microSD card must be inserted into blackbox before you can get started.
All presets are stored on the microSD card and all wav files are streamed from the card. Preset changes are only saved when you choose to save them.
Control the Volume
If you are using the phones jack, you will want to control the volume of the output:
- Press the TOOLS button.
- Turn the knob next to the Headphone parameter in the top right.
Test Your Setup
Let's make sure you are getting some sound out of your blackbox before we go any deeper.
- Press the PADS button. You will see a grid of samples that have been assigned to the current preset.
- Touch one of the pads on the touchscreen to trigger playback of the pad. You should hear the sample playing out through the connected audio output.
If you don't hear anything, try a different pad. Some pads may be assigned to different outputs. But all pads will play out through the PHONES output.
Connect an Audio Input for Sampling
Blackbox assumes Eurorack level audio is coming in to the AUDIO IN jack at +/-5V. If you are using a line level signal of +/- 1V you may need to adjust the input gain on the recording screen. You could also use a mixer or pre-amp with your microphone or other input to adjust the level of the incoming signal.
Working with a Battery
You can plug blackbox into a USB power bank when you are away from a power outlet. However, these power banks do not send information to blackbox about how much power is remaining. There may be a low power indicator light on the power bank itself. Blackbox will not give you a warning when power is low. So be sure to save your presets before the power bank runs out.
Some batteries may not be sufficient to support a USB MIDI device in addition to blackbox. See Powering MIDI Devices below for more information.
Quick Start
Blackbox comes with a number of presets preinstalled on the microSD card. Let's explore one to see how blackbox works. We will dive into more detail later. We will start by loading a preset:
- Push the white PSET button to see the preset loader screen.
- Turn any knob to scroll through the list of presets until you have SL BASS MUSIC KIT highlighted in blue.
- Touch the Load button at the top of the screen to load the preset and go to the PADS screen. If this preset is already loaded, the Load button will be disabled.
Explore PADS
Touch the PADS button to go to the Pads screen with a grid of 16 WAV files. Touch a pad to trigger it. Depending on how the pad is configured, the sample might play all the way through each time you press it, it might play only while you are touching the pad, or it might play until you touch it again. A blue progress bar appears at the bottom of the pad while it is playing. You can trigger multiple pads at once.
The pink box indicates which pad is currently selected. Use the touch screen or a knob to select a pad. Push INFO to cycle between the WAV screen and the parameters screens for the selected pad. Touch the page names at the bottom of the parameters screen to access additional parameter pages. Touch the name of the WAV file at the top of the waveform screen to select a different WAV file for this pad. Touch the grid icon in the top left corner to select a different pad to edit. The colored square in the grid indicates the selected pad.

Pads
While on the Pads screen, turn the lower right knob to access the Actions menu where you can cut, copy, paste and clear pads. Turn the knob the other way to bring back the Velocity slider.
Please select one of the pads labeled SY Chor so we can have fun with it on the Keys screen.
Explore KEYS
With SY Chor selected on the Pads screen, push the KEYS button. Blackbox displays a keyboard on the screen. Touch some of the keys on the keyboard to hear the selected pad play pitch shifted by key. You can adjust which octave is playing by touching the arrow buttons above the keyboard or by turning a knob. The C keys are numbered so you can quickly identify which octave will be playing.
Push INFO to access the Grid Based keyboard. Use the two buttons in the top right of the screen to select the Key and Scale that will be used by the grid keyboard. Now you can play without worrying about hitting an off-key note.

Keys

Grid Keyboard
Explore Sequences
Now that we know how to trigger the pads, let's play some sequences. Before we do that, let's take a minute to
turn off Song Mode. Push the white SONG button. You will see a list of sections that have been created for this song. Touch the on-screen Song button to toggle the state of Song Mode. The on-screen Song button is blue when Song Mode is active, but for now let's make it gray for inactive so we can focus on sequences.
Push SEQS to go to the Sequences screen with a grid of 16 sequence cells. The cells that have sequences have dots in the mini-piano roll icon on the cell. Touch one or more filled cells to make them active. A white box appears around the active sequences. Push the black PLAY button to play the active sequences. Touch sequences to turn them on and off. There may be a delay in response as the

Sequences
blackbox waits for the next quantization point before triggering the sequence. Playing sequences have a blue progress bar at the bottom of the cell. Sequences that are queued and waiting for a quantization break to play have a white box in place of the blue progress bar. Push STOP when you are done. Push STOP a second time to interrupt any pads that continue to play out after the sequence ended.
Select a sequence by touching the cell or turning a knob. The currently selected sequence is highlighted pink. The number of this sequence is displayed in the context bar above the grid. This is visible on all of the top-level screens. This is the sequence that will capture the notes and pad triggers you play while recording. Push the INFO button repeatedly to cycle through the piano roll and parameter pages for the sequence.
Select an empty sequence cell and we will record into it. Push PADS to go to the Pads screen. Hold down the REC button and push PLAY to start recording a sequence. After the 4 beat count down, tap some pads to create a sequence. By default, the sequence is one bar long. Blackbox will play the sequence in a loop as soon as you finish recording it. If you tap some more pads, you will add more pad triggers to the sequence. Push REC to stop recording while the sequence still plays. You can choose different sequences to record into while the other sequences are playing. Press STOP when you want the sequences to stop.
Before we move on to song sections, go back to the SEQS screen and touch OFF on the right. This will deactivate all sequences.
Explore Song Sections
Push the SONG button to go to the Song screen with its list of song sections. Touch the on-screen Song button to enable Song Mode. Notice that the context bar at the top of the screen now displays the name of the currently selected section. Now press PLAY to play the song sections in order starting with the selected section. You can jump around between the sections by touching a section to make it the next section. You can play a section on loop by touching the Loop button at the top of the screen.
While a song section is playing, push the SEQS button to watch as blackbox plays the sequences in the section. You can play additional sequences by making them active. This will not add to the song section because you aren't recording yet.

Song Sections
While a song section is playing, push the PADS button to watch pads being triggered by the sequences in the song section. Touch a pad to trigger it and play along. On the Song screen, turn the top left knob to adjust the BPM of the internal clock. The song will slow down or speed up in real time as you adjust this. Turn the top right knob to adjust the amount of swing in the notes.
Push STOP to end playback of the song section.
Song Mode and REC | STOP | PLAY Buttons
Let's talk about Song Mode and the transit buttons. When Song Mode is disabled, the PLAY, STOP and REC buttons generally control the sequences. The one exception is when you are recording a new sample on the Sample
Recording screen. When Song Mode is enabled, the PLAY, STOP and REC buttons control the song sections. The text in the top middle of the top-level screens always indicates what will be the target of a recording action. If Song Mode is disabled, this text will indicate which sequence cell is currently selected, e.g. Seq 8. When Song Mode is enabled, this text will indicate which Song section is currently selected, e.g. Inspiration. Here's what happens when you use the transit buttons in the different modes:
| Song Mode? | Button Pressed | Action |
| Enabled | PLAY | Play the currently selected section plus any active sequences. |
| Enabled | REC + PLAY | Record start and stop events for sequences and save this in the selected section. This information is recorded as an overlay, so you can add to a section over time. |
| Enabled | STOP | Stop playing and recording all sections and sequences. |
| Disabled | PLAY | Play any active sequences. You can start and stop sequences while playing. The sequences will play in a loop until you press STOP or deactivate them. |
| Disabled | REC + PLAY | Play any active sequences and record any PADS or KEYS entries into the currently selected sequence. This is recorded as an overlay so you can add to a sequence over time. The sequences will play and record in a loop until you press STOP or deactivate them. |
| Disabled | STOP | Stop playing and recording all sequences. |
To record a song section, select the section you want to record into and then hold REC while you press PLAY. Any sequences that are active at this time will start to play and be recorded into the section. Touch sequence cells to activate and deactivate them and add them to the section. If you record on top of a previously recorded section, it will add to the content that is already there.
To Save a Preset:
If you want to save the work you have done so far, push PSET, touch File and then touch Save or Save As. If you choose Save As, you will have a chance to save to a new preset so you don't overwrite the original preset. Note that blackbox does not automatically save changes as you work. If you don't save your changes, the preset will remain in its original state on your microSD card when you load a different preset, create a new preset or power down blackbox.
Hopefully, that's enough to give you a feel for what blackbox can do. We will dive into more detail about each of the functional areas of blackbox next.
Create a New Preset
A preset is the master file that stores a blackbox composition. It holds the pad assignments, sequences, song sections, FX settings, Mix settings and the detailed parameters for each of these. Blackbox does not automatically save your work. You must save the preset to avoid losing your work when you change presets or turn off the unit.
To Create and Name a Preset:
First, you will create a new preset that will be used to store your creation. Follow these steps to create and name your preset:

Preset Management
- Touch the PSET button below the screen to display the Preset Management screen. This screen shows a list of the presets stored on the microSD card with a menu across the top. The currently selected preset is
highlighted in blue.
- Touch File then New in the top menu. Use the onscreen keyboard to enter a name for the preset. Touch Enter to save the name and return to the Presets screen with the new preset selected.
- Push the PADS button to start working with your new preset from the Pads screen.

Preset File Menu
Note:
- When blackbox first starts up, it loads the last preset you used on this microSD card.
Work With PADS
Each pad in blackbox can be assigned a WAV file or a folder of WAV files. You can configure playback options, such as trigger mode and looping, individually for each pad. Once a pad is loaded, you can touch the pad on the main Pads screen to trigger it. You can also use the Keys screen to play the currently selected pad. When you trigger a pad from the Keys screen, a pad with a single WAV file is pitch shifted to correspond to the note played. Multi-sample pads play the WAV file with a root note closest to the played note, with pitch shifting if needed. We'll talk more about multi-samples later.
To Select WAV Files and Assign Pad Modes:
From the Pads screen you will choose WAV files to assign to pads and assign a mode to each pad. The main screen has a 4x4 grid of 16 light gray pads. A WAV file can be assigned to each of these pads, and each pad is assigned a Pad Mode.
Blackbox supports the following pad modes:
| Icon | Pad Mode | Description | Reverse Playback | Beat Synch | Set Loop Points | Play Slices | Polyphony |
 | Sample | Use to play single notes or drum hits. You can control start and end points for playback and looping. Supports reverse playback, along with forward and bidirectional looping. | √ | √ | 4 notes | ||
| Sample - multi-sample mode | Spread a folder full of wav files across the keyboard to get more realistic instrument pitch shifting or to map different sounds to each key on the keyboard. | 4 notes | |||||
 | Clip | Use for synchronized loops and quantized playback, e.g. drum loops and guitar tracks between one and eight measures long. | √ | 2 notes | |||
 | Slicer | Use with a WAV file with different sections that you want to trigger independently. | √ | 2 notes | |||
 | Granular | Generate new sounds from your samples. The sample is played back in small portions about 10 to 200ms in length, called grains. | √ | √ | Mono | ||
| New Recording | Use to start recording a new WAV file or clear a WAV from a pad. |
Each pad can have a different Pad Mode. You can use the same WAV file in different pads in different Pad Modes. To load a WAV file into a pad:
- Push the PADS button to bring up the Pads screen.
- Select a pad by touching it or using the control knobs to cycle through the pads. (The top control knobs move the selection horizontally. The bottom left control knob moves the selection vertically.) The selected pad is highlighted pink. Touching a pad that is loaded with a WAV file will also trigger playback of that WAV file.
- Press the INFO button. If the pad was empty, the WAV Load and Record screen will be displayed. If the pad already had a WAV file assigned, the Waveform screen will be displayed.

WAV Load and Record Screen

Waveform Screen

WAV File Selection Screen
- If you are on the WAV Load and Record screen, touch Load in the top menu bar. If you are on the Waveform screen, touch the name of the WAV file at the top of the screen (SY Chord1 LF in the example). You will now be on the WAV File Selection screen.
- From the WAV file selection screen, use the control knobs to scroll through the list of files. Blackbox displays the directories at the top of the list followed by the individual files in alphabetical order. The selected file or directory name has a blue highlight. Touch Play to preview the highlighted file. The Play button will turn blue to show that auto-preview is enabled. Blackbox will play each WAV file once when you pause on it while scrolling. If you have a sequence or a MIDI input trigger playing for this pad, blackbox will play the selected WAV file whenever a trigger is received for this pad. Touch the Play button again to disable auto-preview mode. Touch Load to assign the selected WAV file to this pad. When looking at the list of files, list items that start with a slash \ are directories. Load a directory to see its contents. The file path is displayed above the list of files (e.g. SoundtrackLoops\SL Bass Mu in the example above.) Touch the caret ^ to navigate back up the directory tree. Touch the back arrow ← to go back to the previous screen.
Note:
- There may be considerable differences in volume levels of WAV files depending on how they were originally recorded. Be careful when previewing the WAVs on the load screen or you could get a rude surprise if you switch between soft and loud WAV files.
Once you have loaded a WAV file, you will be on the Waveform screen. There are a number of important features on the Waveform screen. The grid icon in the top left of the screen, immediately below the clock counter, provides a graphical representation of which pad in the grid you are configuring. You can touch it to bring up a pad selection grid. Touch a square in the grid to change which pad you are working with. The icon just to the right of that is a button that allows you to select the Pad Mode. The text in the top bar displays the first characters of the name of the loaded WAV file, and can be touched to choose a different file. Trigger playback by touching the arrow button on the right.
There are two views of the waveform displayed on the screen. The top view always displays the full waveform with a blue square indicating the subsection of the waveform that is displayed in the bottom, bigger waveform. You can use pinch and stretch touchscreen gestures to zoom in and out of the waveform, then swipe to scroll along the length of the waveform. You can quickly jump to a different section of a long waveform by touching that section of the wave in the top view.
If the pad is in Sample or Granular mode, the bottom waveform shows a pink bracket that indicates the portion of the WAV file that will be played by this pad. Turn the top left knob to adjust the start position, and the top right knob to adjust the length. If this pad uses looping, a white bracket is displayed to show the loop points. Turn the bottom two knobs to adjust the loop start and loop end points.
If the pad is a Slicer you will see pink bars that indicate the position of the slices. If a wav has slices embedded in it, you may also see slices when the pad is in Clip mode.
The next step is to configure general pad parameters including choosing a Pad Mode.
- Touch the icon immediately to the left of the WAV file name at the top of the screen to display the Pad Mode menu. Touch one of the options, Sample, Clip, Slicer or Granular, to set the Pad Mode. The icon changes to represent the selected Pad Mode. See the table on the previous page for a description of each of these modes.
- From the waveform screen, press the INFO button to display the Pad Parameters Screen. Touch the buttons across the bottom to access the different pages of pad parameters. You can press INFO again to toggle between the Pad Parameter Screen and the Waveform Screen.
- On the Main Pad Parameters page, there are four menu items below the measure and beat count. The left most item is the grid icon and pad selector. Touch this icon to change which pad you are editing. The pink square in the grid indicates which pad you are currently editing. The second menu item is the output selection button (Out1 in the example screenshot). Touch this menu item to display the list of output options:
| Output Option | Description |
| Out1, 2, 3 | The output of this pad is sent to selected output in stereo. |
| Out1L, 1R, 2L, 2R, 3L, 3R | The output of this pad is sent to the left or right stereo channel of the selected output. |

Pad Mode Selector Screen

Main Pad Parameters Screen

Output Selector
Note:
- The PHONES output will always contain a mix of all of the outputs.
-
Touch the desired output option to select it.
-
The next menu item (Mono in the example screenshot) controls the polyphony of the pad. Touch the menu option to select Polyphonic or Monophonic playback for this pad. Sample pads support 4-note polyphony. Clip mode and Slicer mode support 2-note polyphony. Granular mode is monophonic.
-
The last menu item displays an abbreviated version of the WAV file name (PC O and NAS_9 in the screenshots). Touch this menu item to start playback of the pad. The playback functionality will depend on the other parameter settings. The WAV file is playing when this menu item is highlighted blue. For Clips, when this square is filled in white the clip is queued up to begin when the Play transport button is pushed.
-
As you push the buttons across the bottom of the Pad Parameters screen, blackbox will cycle through the Pad Parameter pages. Some of the pad parameters are the same for all Pad Modes, while others vary by mode. Touch the control knob closest to each parameter to set its value. Here are the parameters that are the same for all Pad Modes:
| Parameter | Description | Range of Values | Mod Target? |
| Level | Adjusts the loudness level of the pad | -96.0 to +12.0 dB | Yes |
| Pitch | Adjusts the pitch of the pad up or down | -24.0 to +24.0 semitones | Yes |
| Filter | Applies either a high pass or low pass filter to this pad. | -100% to +100%Negative values apply a low pass filter. Positive values apply a high pass filter. | Yes |
| Launch Mode | This controls how a note trigger affects the playback of a pad. | Trigger: Activate the Pad by touching the pad or through MIDI note on. Blackbox will start playback of the WAV file and play through to the end.Gate: Begin the WAV file playback in the same manner as Trigger mode. But in Gate mode, playback will stop when you release the touch or the MIDI note is released.Toggle: Begin the WAV file playback in the same manner as Trigger mode. When another trigger event happens, the playback will stop. | No |
| Attack | The time it takes for the sound to reach its loudest level | 0.0 to 100.0% The attack percentage is a logarithmic scale between 0 and 9 seconds. | No |
| Decay | How long it takes for the sound to go from the initial peak to the sustain level | 0.0 to 100.0% The decay percentage is a logarithmic scale between 0 and 38 seconds. | No |
| Sustain | The volume level that the sound maintains when you hold a note | 0.0 to 100.0% | No |
| Release | The release specifies how long the note will continue to play and fade out when the note is released. In Gate mode, the release begins when the touch ends, the gate signal goes low, or the MIDI note off event occurs. In Toggle mode, the release begins when the toggle off occurs. In Trigger mode with sample pads the release begins when reaching the Loop End point in loop mode, or the Start + Len point when not looping. In Trigger mode for Clips and Slicers, the release has no effect. | 0 to 100% The release percentage is a logarithmic scale between 0 and 38 seconds. | No |
| MIDI In | Specifies a MIDI channel to be used to play this pad pitch shifted or sliced across keys. and for some MIDI parameters.When a value other than None is assigned to this parameter, this sample will respond to all notes played on this MIDI channel. The response depends on the pad mode. If the pad mode is Sample, Clip or Granular, the sample will be played back pitch shifted based on the distance from the root note of the sample. The root note will play the note as recorded. Each note above or below the root note will transpose the pitch the corresponding number of semitones. If no root is specified in the WAV file or the pad parameters, the root note defaults to Note 60, typically middle C.If the pad mode is Slicer, blackbox will play the slice that corresponds to the note played. Slice 1 is played for note C2, and each subsequent slice is assigned to the next semitone.If you want to use MIDI controls (other than MIDI CC) to modulate parameters for this pad, you will need to specify the source MIDI channel here.More than one pad can be assigned to the same MIDI channel. In this case, all assigned pads will be triggered.Any MIDI channel that is mapped to a pad using this parameter no longer triggers any events for MIDI parameters set to OMNI.Modulation sources PTCH (pitch bend), MODW (Modulation Wheel), MVOL (Volume control), and MPAN (Pan control) also follow this channel assignment.Note that MIDI Input channels can also be assigned globally on the MIDI In tab of the Tools page. See the section Use MIDI Devices with Blackbox below for more information about how all of these MIDI parameters interact. | None, Ch1 through Ch16. | No |
| MIDI Out | Specifies a MIDI Channel that will be used to send out notes when this pad is triggered. When this pad is triggered using notes, the corresponding note will be sent out on the specified MIDI channel. If this pad is triggered as a pad hit, note 64 will be sent out on this channel. Please note that Sequences can also be assigned to MIDI Outputs. See the section Use MIDI Devices with Blackbox below for more information about MIDI Outputs. | None, Ch1 through Ch16. | No |
| Pad Note | Controls which MIDI note on the MIDI Pads channel will trigger playback of this pad. | Default, C#-1 through G9.C#-1 maps to MIDI Note Number 0. | No |
The remaining parameters are specific to the Pad Mode (sample, multi-sample, clip, slicer or granular). We will discuss each Pad Mode individually in the next sections. 9:2 Sep 8
- At the top of the Attack, Decay, Sustain, and Release parameters page, the menu option to the right of the grid icon allows you to control exclusive grouping of pads. Touch this menu option, Excl C in the screenshot, to see the options. Touch an option to select it. When Excl X is selected, there will not be an exclusive behavior for this pad. When a pad is assigned to Exclusive Group A, B, C or D, any other pad in this group will stop whenever a pad in the group is triggered.

- To the right of the exclusive grouping option is the Playback quality option, set to Normal in the screenshot. For most WAV files, the normal mode provides high quality playback with a moderate draw on the processor. If you hear aliasing during playback of your WAV file, touch this button and select HighQ mode. HighQ mode has a higher draw on the processor, so it is recommended that you use Normal mode unless you are having issues.
Pad Exclusive Groupings
Several of the pad parameters have three black boxes below them. These pads are potential modulation targets, and these boxes are used to control the modulation parameters. We will discuss modulation later in the Work with MIDI Inputs section.
The remaining configuration options for a pad vary based on which Pad Mode is selected. We will walk through the configuration of each of the Pad Modes next.
Set Up a Sample Pad
Use a sample pad when you only want to play or loop through a WAV file with no slicing and no beat synchronization within the playback. You can also use this mode when you have a bank of samples that you want to map across the keyboard. We will first discuss Sample mode pads loaded with a single sample, and then explain the special case of multi-samples.
Single Sample Pads
A sample pad loaded with a single sample supports reverse playback, along with forward and bidirectional looping. You can also use the Start and Len parameters to play a portion of the WAV file.

Sample Mode

More Sample Mode
Follow the steps in the previous section to create a sample pad. An example of a good WAV file to use for a sample pad is \drums\Kick 1.wav. Press the INFO button to toggle between the Waveform screen and the Pad Parameters screen. Touch the buttons across the bottom of the parameters screen to access the various parameter pages for this pad. Use the control knob closest to the parameter name to change the value of a parameter. The table below describes the parameters available that are specific to a sample pad with a single sample loaded.
| Parameter | Description | Range of Values | Mod Target? |
| Loop Mode | Controls whether the WAV file plays in a loop, and the direction of the loop.When looping is enabled, if you have the Launch Mode set toTrigger, looping will happen for the duration of the Release phase of the note.If you have the Launch Mode set to Gate, looping plays through the gate pulse and the release time.If you have the Launch Mode set to Toggle, looping starts to play when the initial pulse is received and continues until the terminating toggle pulse is received.If Loop Mode is Bidirect, and Rev is ON, playback will start from the end of the sample, and then loop as described, but starting with the Loop End to Loop Start pass. | None: Plays once from the value assigned to the Start parameter through the value assigned to the Length parameter.Forward: Plays from the value assigned to the Start parameter through the value assigned to the Loop End Parameter, then jumps back to the value of the Loop Start parameter. Play continues to loop between Loop Start and Loop End for the duration of the note.Bidirect: Works similarly to forward, but loop playback proceeds from Loop Start to Loop End then backwards to Loop Start. It then repeats the looping back and forth. | No |
| Rev | When Reverse isON, the WAV file will play in reverse. | ON, OFF | No |
| Root Note | When you use notes to play this sample, the base sample will play for this root note. The sample will be pitch shifted up or down one semi-tone for each note away from the root note. Blackbox will read the root note from the WAV file if available when you add the WAV to the preset. However, you can specify a different value here to be used for this WAV on this pad in this preset.When None is specified, the sample is assumed to have a root note of 60 (typically middle C)If you save the WAV file from this pad, the Root Note value will be saved with it. | None, C#-1 through G9 | No |
| Start | Point where playback will begin when playing forward or ends when playing in reverse. Expressed as a sample number. | 0 to number of samples in the file | Yes |
| Len | When Loop Mode is None, how long the sample will play past the value of the Start parameter. Expressed in samples. | 0 to number of samples in the file | Yes |
| LpStr | Point where the looping will begin when playing forward, or looping will end when playing in reverse. Expressed in samples. Must be before or equal to LpEnd.LpStr is read from the WAV file when sample is loaded, and saved to the WAV file when the WAV is saved. | 0 to number of samples in the file | Yes |
| LpEnd | Point where the looping will end when playing forwards, or looping will begin when playing in reverse. Expressed in samples. Must be after or equal to LpStr.LpEnd is read form the WAV file when a sample is loaded, and saved to the WAV file when the WAV is saved. | LpStr to number of samples in the file | Yes |
You can also set the values for Start, Len, LpStr and LpEnd from the Waveform screen. When viewing the waveform, the pink frame on the large waveform represents the Start and Len parameters. You can move these end points by turning the top two control knobs. If Loop Mode is set to Forward or Bidirect, you will also see a white frame within the pink frame that defines the Loop Start and Loop End points. Use the bottom two control knobs to adjust these end points. The corresponding values for the end points are displayed above and below the large waveform. The sensitivity of the control knobs depends on the Zoom level. Zoom out to make big adjustments then zoom in to make fine adjustments.
Multi-Sample Pads
Multi-sampling is a useful tool for improving the sound quality when playing samples pitch shifted, and when you want to map a number of different WAV files to different keys on the keyboard.
If you have a number of samples of a single instrument at various pitches with root notes defined for each WAV file, you can map these samples together to reduce the amount of pitch shifting required to play a broad range of notes. Put the files you want to use in one multi-sample pad into a single directory by themselves. There are several folders of samples like this in the \Symplesound folder included with the 1.3 firmware update. To load one of these sample banks into a pad:
- Push the PADS button to bring up the Pads screen.
- Select a pad by touching it or using the control knobs to cycle through the pads. (The top control knobs move the selection horizontally. The bottom control knobs move the selection vertically.) The selected pad is highlighted pink.
- Press the INFO button. If the pad was empty, the Load and Record screen will be displayed. If the pad already had a WAV file assigned, the Waveform screen will be displayed.
- If you are on the Load and Record screen, touch Load in the top menu bar. If you are on the Waveform screen, touch the name of the WAV file at the top of the screen. You will now be on the WAV file selection screen.
-
From the WAV file selection screen, Use the control knobs to scroll through the list of files and directories. The selected file name has a blue highlight. When looking at the list of files, list items that start with a slash \ are directories. Load a directory to see its contents. The file path is displayed above the list of files. Touch the caret ^ to go back to the previous directory. Highlight one of the files in the directory of samples that you want to load into the pad. A good example of a directory to use with multi-samples is \Symplesound\Housepiano. You can select any file within that directory.
-
Touch File and then Load All.
Blackbox will now load all of the files in the current directory into this pad and map the files to notes across the keyboard based on the root notes defined in the WAV files. Now, use the KEYS screen or an external MIDI controller to play notes for that pad, and blackbox will play the sample with the root note that is closest to the note played, and pitch shift as needed to achieve the necessary tone.
You can also use multi-sampling to map multiple waves across the keyboard. This can be useful if you have a folder full of drum sounds that you want to trigger with a keyboard. If you follow the steps above and load a folder where the files do not have root note mappings, it will load the files in alphabetical order, map the first file to note C2, and then each subsequent file to the next note above that. If you load the folder \SoundtrackLoops\SL Acoustic kit, you can see this in action. This folder has 16 drum samples which get mapped to notes C2 through D#3. Notes below C2 will play the first WAV file pitch shifted down the appropriate number of half steps.
You can use blackbox to map the files to specific notes if you want. Open the files as individual samples on blackbox and edit the Root Note on the Misc tab of the Parameters screen. Save the WAV file with the root note information. After you have done this for all of the files in the folder, use File->Load All to load them all into a pad and you will hear that the notes are mapped accordingly.
Because a multi-sample pad uses multiple samples, it is not possible to set start, length, loop start or loop end points for these pads. Therefore, it doesn't make sense to enable looping for these pads either. As a result, the POS and MISC tabs of the parameter page are not used when multiple samples are loaded in a pad. Only the standard Main, ADSR and MIDI parameters are supported for Multi-samples.
Note:
- Multi-sampling can quickly use a lot of samples. In order to prevent potential issues, blackbox limits you to loading 80 wav files at a time. If you hit that limit, it won't load any more wav files until you free up some slots by clearing out a pad. There is also a limit of 64 WAV files per pad.
- If you change the pad mode of a multi-sample pad to something other than sample, it will load only the first sample in the folder and work with that. You will need to reload the files to change back to multi-sample mode.
- Anytime you use File -> Load All to load a directory of samples into a pad the pad mode will automatically be changed to Sample.
Work with a Clip Pad
Use Clip Mode for WAV files where you want to use synchronized loops and quantized playback for the entire WAV file. Clip Mode works well with drum loops between one and eight measures long, but there is no hard limit to the length. This is the only Pad Mode that supports beat synchronization. An example of a file that works well with Clip Mode is \SoundtrackLoops\SL LoFi Hip Hop2\SY L Pad14 A Melody2 08. This clip is used in the preset SL LOFI HIP HOP KIT 2.

Clip Parameters
Note:
- In order to synchronize the clips, there has to be an available clock. Blackbox only uses the clock when in Play mode. Therefore, you must push Play before playback of a clip pad will begin. If you trigger a clip pad before you push Play, a white bar will appear below the pad to show that it is queued up and ready to start. The name of the pad in the top right corner of the parameters screen will be replaced with a white square until you push Play.
The following parameters are specific to Clip mode:
| Parameter | Description | Range of Values | Mod Target? |
| Loop Mode | Controls whether the WAV file plays in a loop. The whole WAV file will be played in the loop for clip pads. Only forward looping is supported with clip pads. | On, Off | No |
| Beat Count | Enter the number of beats in the clip file to give blackbox more information to work with when synchronizing playback to the current song BPM. If set toAuto, blackbox will attempt to detect the beat count automatically. | Auto, 1 to 512 | No |
| Quant Size | Use Quant Size to quantize when the playback starts and stops. Quantization will cause playback to snap to a musical grid with intervals specified by the Quant Size parameter. When quantization is used, the note trigger will cause playback to start and end on the next quant size boundary. For example, if the Quant Size is set to 1-bar and you press the pad, the playback will begin at the start of the next bar. | None - always start and stop immediately1/16 - sixteenth note1/8 - eighth note1/4 - quarter note1/2 - half note1 bar - a whole note assuming 4/4 time2 bars4 bars8 bars | No |
| Sync | Syncis only enabled when quantizing is enabled (the Quant Size parameter is not None.) The Sync feature prevents timing drift that can occur when the length and BPM of a clip does not align exactly with the tempo of playback. When Sync is used, blackbox will realign the audio to match the clock at the step size specified here.Even slight differences between WAV file BPM and clock tempo can cause significant drift over time. Select a value for Syncthat will control the size of the musical unit to which the clip will be synchronized. Choose small settings, like 1/16th, for rhythmic or percussion clips.Choose large settings, like 1-bar, for sustained tones or drones. | None – playback will occur at the original rate. Looping will happen as soon as the sample ends.1/16 - quantize to the next sixteenth note time1/8 - eighth note1/4 - quarter note1/2 - half note1 bar - a whole note assuming 4/4 timeSlice (See To Use Slices to Synchronize Playback of Clip Pads below for more information) | No |
Let's talk some more about Quant Size and Sync. When a Quant Size other than None is selected, the playback of the wave file will be delayed until the next selected unit of music as specified in Quant Size. This will ensure that your playback "snaps to the grid" of the beats established by your clock. Sometimes, the WAV file you are playing is longer than one beat. For example, the WAV file might contain a 2 bar drum riff. For a clip pad, blackbox will make some assumptions about where the beats in your file occur. In Clip mode, blackbox will play the whole 2 bar riff when the note is triggered. But the beats in the WAV file might not be playing at the same tempo as the clock speed. If you leave Sync set to None, the WAV file will play in its entirety and will get out of sync with your clock. If your WAV file tempo is faster than your clock tempo, it will sound like the beats are running ahead of the rest of the music. If your WAV file tempo is slower than your clock tempo, it will sound like your drums are lagging. If you want to fix that, then choose the value for Sync that identifies how tightly you want to snap to the clock while the WAV file is playing in response to a single sustained note trigger. While the note is playing, the sync will cause the playback of the WAV file to jump to the next selected sync increment in the file when the corresponding clock time has passed. So if the WAV was a little faster than your clock, the playback position will jump backwards to move the playback of the WAV to the selected clock increment. If the WAV is slower than your clock, the playback position will jump ahead to the selected clock increment. This will work well if the difference between the BPM of your WAV file and the BPM of your clock is small. It will sound like a stutter if the difference is large.
Note:
- Blackbox assumes your clips use 4:4 time. If you are using other time signatures or polyrhythms, blackbox will have trouble synchronizing the clip.
Tips for Synchronizing Clips:
- Make sure your WAV file starts at the beginning of a measure and ends at end of a measure. There should be no blank space at either end and it should loop cleanly at full length.
-
Help blackbox determine the beat count. Blackbox will use the following methods in this order to identify the beat count:
-
Look at the BeatCount parameter when it is not Auto
- Look for a valid ACID Tag in the WAV file that includes the beat count
- Try to calculate it using the following assumptions:
o the time signature is 4:4
o the beat count is a power of two (2, 4, 8, 16, 32, 64, ...)
- the clip tempo is close to the current clock tempo
Work with Slicer Pads
Slicer Mode is useful when a single WAV file has multiple sections that you want to trigger independently. For example, if you have a drum riff you may want to trigger different drum hits within the drum riff independently. Or if you have a recording of a vocal track, you may get an interesting effect if you skip around to playback different words or phrases over time.
In order to use Slicer mode effectively, you will need to identify slices within the WAV file. Blackbox can automatically detect the slice points within the wave file, and you can manually add or remove slice points. The WAV files in the folder LOOPMASTERS\01 Loops\Drums are good examples to try with slice mode.

Slicer Pad Parameters Screen
The following parameters are specific to Slicer Mode:
| Parameter | Description | Range of Values | Mod Target? |
| Loop Mode | Controls whether the slice playback is looped. This does not work with Launch Mode of Trigger. Use Launch Mode of Gate or Toggle if you want to loop slices. | ON, OFF | No |
| Beat Count | Enter the number of beats in the clip file to give blackbox more information to work with when synchronizing playback to the current song BPM. If set toAuto, blackbox will attempt to detect the beat count automatically. Only used when Sync is set toON. | Auto, 1 to 512 | No |
| Quant Size | UseQuant Sizeto quantize when the playback starts and stops. Quantization will cause playback to snap to a musical grid with intervals specified bytheQuant Sizeparameter. When quantization is used, the note trigger will cause playback to start and end on the next quant size boundary. For example, if the Quant Size is set to 1-bar and you press the pad, the playback will begin at the start of the next bar. | None - always start and stop immediately1/64, 1/32T, 1/32, 1/16T, 1/16, 1/8T, 1/8, 1/4T, 1⁄4, 1/2T, 1⁄2, 1 bar, 2 bars.Assumes 4/4 time. | No |
| Sync | The Sync feature prevents timing drift that can occur when the length and BPM of a clip does not align exactly with the tempo of playback. When Sync is used, blackbox will realign the audio to match the clock at the step size specified here.Even slight differences between WAV file BPM and clock tempo can cause significant drift over time. Select a value for Sync that will control the size of the musical unit to which the clip will be synchronized. Choose small settings, like 1/16th, for rhythmic or percussion clips.Choose large settings, like 1-bar, for sustained tones or drones. | OFF – playback will occur at the original rate. Looping will happen as soon as the sample ends.ON – blackbox will synchronize the playback of the slice. | No |
| Slice | Indicates which slice will be played when a note is triggered. You can use modulation to vary this value over time. | 1 through the number of slices in the pad. | Yes |
| Slice Seq | When Slice Seq is set to a value other than None, each new note will advance the selection of the next slice to play.The value of this parameter controls the order in which slice selection is advanced. | None: This parameter will not be used to control the order of playback of slices.Forward: A trigger will cause the playback to move to the next slice.Backwards: A trigger will cause the playback to move to the previous sliceRandom: A trigger will cause the playback to move to a randomly selected sliceStagger: A trigger will cause the playback to move through the slices in a somewhat random way. It will move forward a few slices, then back a couple of slices, and repeat. | No |
| PlayThru | Controls whether or not playback continues through the end of the slice. | ON – playback will continue past the end of the slice to the end of the file.OFF – playback will stop at the end of the triggered slice. | No |
In addition to setting parameters for a slicer pad, you also need to create the slices. There are three ways to do this: manually, auto scan, and slice to grid. When you configure slices manually, you use the Split and Join menu options to and remove splits. The manual process may also be used to refine the results after you use auto scan or slice to grid. When you use auto scan, blackbox uses an internal algorithm to decide where to place the splits. You can control the sensitivity of the algorithm. When you use slice to grid, you define a fixed number of slices and blackbox will create splits that evenly divide the WAV file into the specified number of slices.
To Manually Create or Remove Slices:
- On the Waveform screen for the slicer pad touch the menu item with the three dots “...”. This will display the Waveform Slicing menu.
- Use touch gestures to move the waveform so the fixed cursor position (the vertical white line) is at the position where you want to add another slice point. Touch Split to create a slice point. The slice point is shown as a pink horizontal line with a small pink square near the bottom.
- Use touch gestures to move the waveform so the fixed cursor position (the vertical white line) is on or near a slice point that you want to remove. Touch Join to remove the slice point.

Waveform Slicing Menu
You can have as many or as few slices as you want.
To Use Auto Scan to Create Slices:
- From the Waveform screen for the slicer pad, touch the menu item with the three dots “...”. This will display the Waveform Slicing menu.
- Touch Scan and then use a control knob to select a Threshold percentage for the sensitivity of the scan. The lower the threshold, the higher the number of slices that will be created. Touch OK when you are ready to scan. (You can touch anyplace outside of the Threshold field to cancel the scan.) Blackbox will detect and create slice points in the file automatically. The slice points are shown as pink horizontal lines with a small pink square near the bottom.
To Use Slice to Grid:
- From the Waveform screen for the slicer pad, touch the menu item with the three dots “...”. This will display the Waveform Slicing menu.
- Touch Grid and then use a control knob to select the number of Slices to create. Touch OK when you are ready to scan. (You can touch anyplace outside of the Slices field to cancel the scan.) Blackbox will automatically divide up the WAV file evenly into the number of slices you specified. The slice points are shown as pink horizontal lines with a small pink square near the bottom.
You can adjust the results of the slice to grid or auto scan by manually adding or removing slices to get the slices that match your creative vision.

Scan Threshold

Grid Slices Selector
To Use Slices to Synchronize Playback of Clip Pads:
You can use slices in a clip pad to synchronize playback of the beats in the clip. When the value of the Sync parameter for a clip pad is set to Slice, blackbox will use the location of the slices in the WAV file as the location of the “beats” for Sync purposes in order to prevent timing drift.
But how do you get slices in a clip pad? First configure the pad in Slicer Mode, create the slices, and then change the Pad Mode to Clip. The slices will still be visible on the Waveform screen and can be used for synchronization.
Work with Granular Pads
The final pad mode is granular mode. Granular is similar to sample mode, but with the additional ability to use multiple grains when playing back your sample. You can use granular to facilitate loop crossfading and to generate new sounds from your samples. In this mode, the sample is played back in small portions about 10 to 200ms in length, called grains. You can control the size, count, spread and playback speed of the grains.
Granular pads support all of the same parameters as sample pads, along with the following additional parameters:
| Parameter | Description | Range of Values | Mod Target? |
| Grain Size | The size of the small segments of the WAV file that will be played, measured in number of samples. | 1024 to 16384, which is about 10ms to about 200ms | No |
| Grain Count | How many different grains are layered together during playback. | 2 to 8. Keep in mind that more grains require more processor power. | No |
| Spread | The width of the range from which the grains are randomly chosen for playback. The range is centered around the current playback position in the WAV file. | No | |
| Speed | How quickly the playback of the grains advances through the source WAV file. At 100% it will sound most like the original file. At 50% it will be half speed. At 200%, it will progress through the WAV file at twice the original rate. | 0 to 200% | Yes |
In granular mode, the root note is used as a guide for randomizing the slice positions. If the source file is a single tone, make sure the root note is set correctly to achieve more musical sounds. If the source WAV file has multiple tones, experiment with the root note parameter to get the effect you want or set it to None to remove this factor from the grain engine.
If you want to get use granular mode to generate tonal content, use a very low speed, a high grain count, small grain size, and small spread.
To start with something that is close to the original wave file, set the spread to 0, speed to 100%, Grain size to 1024 and grain count to 2. These settings are useful when you want to use granular mode to smooth out the cross-over points for your loops.
Record a New WAV File
Blackbox comes with over 800 WAV files preloaded on the microSD card. You can also record new WAV files to create your own custom sound.
To record a WAV file:
- Start by plugging an audio signal source into the Audio In jack. This is a stereo input.
- Push the PADS button to display the sample bank.
- Touch a pad in the grid to select it. With the pad selected, press the INFO button. If the pad is empty, blackbox will display the Load and Record
screen. If the pad is already loaded, blackbox will display the Waveform screen. If you are on the Waveform screen, press the Pad Mode icon to the left of the WAV file name at the top of the screen and then touch New Recording. You will now see the Load and Record screen.

WAV Load and Record
Screen
4. In the top menu, touch the menu item to the right of the grid icon (L+R in the example screenshot). This will display the list of input choices. Touch one of the options to choose whether to record the left channel, right channel, in stereo audio input, or resample the audio currently being generated by blackbox through Out 1.
5. Touch the menu item to the right of the input button to select the output for the pad. This output will also be used for monitoring the input.
6. Use the threshold recording option if you want to start recording when a sound level threshold is reached. Touch the Thres button in the top menu to toggle threshold recording on and off. The button is blue when enabled.
7. Before you start recording, set up the parameters that control the recording:
| Parameter | Description | Range of Values |
| Length | This parameter allows you to specify a length of time that you want to record, in terms of notes and bars.When Custom is selected, touch theStopbutton to stop recording. | Custom, 1⁄4, 1⁄2, 1 bar, 2 bars, 4 bars, 8 bars, 16 bars, 32 bars, 64 bars, 128 bars |
| Rec Quant | This parameter lets you quantize the recording to start and stop at the designated musical time interval. This is not available when Threshold recording is enabled. | None - always start and stop immediately1/16 - quantize to the next sixteenth note time1/8 - eighth note1/4 - quarter note1/2 - half note1 bar - a whole note assuming 4/4 time2 bars4 bars8 bars |
| Gain | The VU meters represent the level of the signal to be recorded. You can adjust the gain to get the desired level and avoid clipping. | -96.00 dB to +20.00 dB |
| Rec Mon | Controls whether the input signals received through IN1 and IN2 are played out through Out1 and Out2 to enable you to monitor the recording. | Off - Inputs are never played through the outputs.Auto - Inputs play through the outputs while recording or the recording screen is visible.On - Inputs always play through the outputs. |
| Threshold | When threshold recording is enabled, this controls the minimum sound level required to trigger recording to begin. | -96.00 dB to +12.00 dB |
- Send a signal to the audio Input. The source will play through the selected output if the Rec Mon setting is ON or Auto. The lower left corner of the Load and Record screen displays the levels of each of the input signals. For best results leave some room (a few dB) between your loudest level and the max allowed, which is 0dB. If a red bar appears to the right of the level, the signal is clipping and the level of the input signal should be lowered for best quality.
- To start recording, hold the REC button while you press the PLAY button. If you have the global Lead In option enabled (See Use Tools to Customize Your Blackbox below), Blackbox will wait four beats and then will start recording. If you are using threshold recording, the recording will start once the input level meets the threshold level specified. If you selected a time value for Length, recording will stop after the selected length of time. The Load and Record screen displays a running clock of measures and beats and time duration of the recording. There may be a delay between when you touch Rec and when the recording starts as blackbox waits to quantize the recording to the selected Rec Quant time interval. See Synchronize Playback with a Clock below for more information about clocks and quantization.
- Touch Stop to end recording. There may be a delay between when you touch Stop and when the recording ends due to quantization. When the recording has stopped, the main screen is displayed with the new WAV file loaded in the selected pad. The clip name will be RC with a numeric suffix. We will discuss changing file names and managing WAV files in Manage WAV Files below. If you have the Tools setting RecToPlay set to ON (Push TOOLS, then push INFO to see this setting), blackbox will automatically start to play the new sample when recording ends if the Length parameter was used for recording.
When you record a new WAV file, the file is stored on the microSD card in the folder associated with the preset. This folder is located under \Presets and has the same name as the preset. For example, if your preset name is KickinGroove then your recordings will be in the folder \Presets\KickinGroove. How you will work with these files depends on whether you are recording samples to build a library to use in presets in the future, or whether you are recording WAVs specifically for the current preset.
If you are recording WAVs for the current preset:
- Record WAVS until you get the files you need. The WAVs are stored in the preset specific folder.
- Assign the WAVs you want to use to individual pads.
- Push Preset and then touch File->Pack to create copies of any of the other files used in the preset into the preset folder.
If you are recording WAVS to build up a library of sounds:
- Create a new preset to host the content from your recording session.
- Record into pads as desired. Blackbox places the WAVs into the preset's folder.
- You can optionally use your computer to move the WAV files from the preset's folder on the microSD card into sound library folders on the card. When you want to use these files in another preset, point to the WAV files you moved to the library folders. Then pack up those presets to preserve copies of the WAVs you used.
NOTE:
- Blackbox won't stop you from loading a WAV file from Preset B's folders into Preset A. However, if you do this, you could potentially break Preset A if you ever move or rename Preset B for any reason. Therefore, if you have WAV files that you want to re-use across presets, we encourage you to move these WAV files into library folders outside of the \Presents folder, and to Pack your presets often.
- If you record into a loaded pad, the original WAV file remains intact on the microSD card and a new WAV file is created.
- If you have RecToPlay set to ON in the Tools pages, blackbox will automatically start playing the new sample when recording ends if the Length parameter was used for recording.
• You can turn off the Lead In and Metronome on the Tools pages. - Blackbox streams the recording directly to your microSD. The length of your recording is limited to the space available on the microSD card.
- Use the Resam input option to layer recordings, apply effects or capture new clips.
To Record a WAV File while Sequences or Song Sections are Playing:
You can record WAV files while you are also playing sequences or song sections.
- Set up the sequences or song sections you want to play, and start playback.
- Go to the WAV Load and Record screen and configure the empty cell.
- Push Rec while on the WAV Load and Record screen and the sequences or sections are playing.
- Push Rec again if needed to stop recording. The sequences or sections will continue to play. If you have Rec To Play enabled, the pad will also start to play. Configure looping and other options as desired.
To Record a Multi-sample pack onto blackbox:
- Create a preset for the multi-sample pack. Let's call it MyBank.
- Record the files into the new MyBank preset. Delete any extra files that are not needed.
- Assign root notes to each of the files if you want to ensure blackbox maps the files to the correct note. For example, if you recorded a sample for C3 and you want that sample to be used when you play C3 and pitched shifted for notes on either side of it, then set the root note parameter for that WAV file to C3. Do this for each of the pitched samples that you recorded. This means you will have to load each WAV into a pad individually in order to set the root note. Be sure to save the WAV file after you set the root note so the setting will be saved into the file.
- Open the Preset where you want to use the multi-sample pack. Let's call it MySong.
- Create a new sample pad and use "Load All" to load the multi-sample preset's folder into the sample. For our example, that would mean using "Load All" for the folder \presets\MyBank into the multi-sample pad.
- Pack up the target preset (MySong in our example) to copy the multi-sample files into a sub-folder under the target preset's folder. In this case, you would end up with the following folder: \Presets\MySong\MyBank
- Now you are free to delete or move the original MyBank preset if desired, or leave it there for future re-use.
Save and Load Parameters in WAV Files
There are several pad parameters that blackbox can read from and write to WAV files. There parameters are:
| Parameter | Description | Supported Pad Modes |
| Root Note | When you use Notes to play this sample, the base sample will play for this root note. The sample will be pitch shifted up or down one semi-tone for each note away from the root note. Blackbox will read the root note from the WAV file if available when you add the WAV to the preset. However, you can specify a different value here to be used for this WAV on this pad in this preset.If you save the WAV file from this pad, the Root Note value will be saved with it.Stored in the WAV smpl tag. | Sample (single and Multi-), Granular |
| LpStr | Point where the looping will begin when playing forward, or looping will end when playing in reverse. Expressed in samples. Must be before or equal to LpEnd.LpStr is read from the WAV file when sample is loaded, and saved to the WAV file when the WAV is saved.Stored in the WAV smpl tag. | Sample (single) |
| LpEnd | Point where the looping will end when playing forwards, or looping will begin when playing in reverse. Expressed in samples. Must be after or equal to LpStr.LpEnd is read form the WAV file when a sample is loaded, and saved to the WAV file when the WAV is saved.Stored in the WAV smpl tag. | Sample (single) |
| BeatCount | Enter the number of beats in the clip file to give blackbox more information to work with when synchronizing playback to the current song BPM.Stored in the WAV acid tag. | Clip |
| Slice Points | The slice markers that are inserted into the file. Some other software calls these Cue Points.Stored in the WAV cue points. | Slicer, Clip |
These parameters are saved in a format that is commonly used by other music products. This means you can set these values in the other product and then use them in blackbox, and the reverse.
When blackbox first loads a WAV file that has parameters stored in it, it will load the values of the parameters that are in the WAV and use default values for the other parameters. If you change a value of one of these parameters for the pad, those changes only apply to this pad and are not automatically saved back to the WAV file. This allows you to override parameters for specific pads. Blackbox also makes an assumption about the pad mode based on the parameters that are available in the WAV file. If there are slices in the WAV, then it sets the pad mode to slicer. If there are loop points in the WAV, then it sets the pad mode to sample.
To save the values you have configured for a pad back to the WAV file:
- Open the WAV screen for the pad.
- Touch the name of the WAV file at the top of the screen to display the WAV selection screen.
- Touch File and then Save or Save As. If you selected Save, blackbox will save the configured parameters into the same WAV file you have loaded. If you chose Save As, you will see the WAV file naming screen. Type in a new name to save the changes to a different WAV file, and then touch Enter to save. Blackbox will now load the newly modified WAV file into the pad.
To revert back to the parameter and slice values stored in the WAV file, simply reload the file into the pad.
Note:
- If you use an existing file name when you use Save As, the old file will be overwritten with the current WAV file and parameters.
Trim WAV Files
When recording new samples, you sometimes get some unwanted material at the start or the end of the WAV file. Here's how to trim the file:
- Open a pad with a WAV file you want to trim.
- Set the pad mode to Sample.
- On the WAV screen, turn the top left knob to set the left side of the pink bracket to where you want the new file to begin. Turn the top right knob to set the length of the pink bracket to be where you want the desired end point for the WAV file.
- Touch the name of the WAV file at the top of the screen to display the WAV selection screen.
- Touch File and then Trim. Blackbox will ask if you want to Trim and Save? Touch OK to overwrite the WAV file with the portions outside of the pink bracket trimmed off. Touch anywhere else on the screen to cancel.
- Save your preset to save the change to the pad. Otherwise, the length parameter for the pad will be wrong when you reload the preset.
Note:
- You may want to use File -> Save As before you trim the file to give yourself a backup copy of the file.
Use Clipboard Functions with Pads
Blackbox has a slightly hidden set of clipboard buttons on the Pad screen. You can use these buttons to Cut, Copy and Paste between pads and to Clear a pad. To access these functions, turn the lower right knob while on the Pads screen. The blue Velocity bar on the right edge of the screen will be replaced with several clipboard buttons. Select the pad you want to act on, then touch the button for the desired action. Turn the lower right knob back the other way to go back to the Velocity bar.
Manage WAV Files

Pads Screen with Clipboard Side Panel
Blackbox comes with hundreds of WAV files bundled with the firmware. You can
load WAV files into pads in order to add them to a preset. We talked about how to configure pads previously in this document. Here we will discuss what tasks you can perform to manage the WAV files themselves.
Working with WAV Files on the microSD Card
You can use the microSD card with your computer to manage the WAV files on the card. You can load new WAV files onto the card or backup your existing WAV files for safekeeping. Blackbox is compatible with all standard WAV files.
You can use a microSD Adapter to insert your microSD card into your computer. Then you may use standard file techniques to rename the WAV files, reorganize them into directories, delete them, copy them onto your computer or copy them onto other microSD cards. We recommend that you occasionally make backup copies of your WAV files, especially before upgrading to new firmware.
Blackbox supports organizing WAV files into folders and subfolders. You can create your own folder structure on the microSD card.
Blackbox 1.5 changes where new recordings are stored. When you create a new recording, it will be stored in the folder for that preset. For example, the first new recording for the My Kickin Grooves preset will be saved as
\Presets\My Kickin Grooves\RC000001.wav. When you load an existing WAV file into a pad, the preset will have a pointer to that WAV file in its source folder. If you want to gather copies of all of the files for a preset into the preset folder, use the preset pack option.
Note:
- If you delete, move or rename a WAV file, it will no longer be available for use by presets that were previously using it. The name of the WAV file will still appear in the Preset, but the Waveform screen will be blank until you load a new WAV file into the pad.
- Blackbox supports samples in the WAV file format. It supports 1 or 2 channel files with 16, 24 or 32 bit resolution at any sample rate. 48kHz is the preferred sample rate.
- WAV file names may use Alpha Numeric Characters (A-Z, 0-9) and some special characters. The following characters are NOT allowed: double quotes, forward slash, back slash, question mark, asterisk, less than and greater than symbols, the colon and the pipe symbol (" / \ ? * < > : | ). File names must be less than 256 characters, including the path name. Files that do not conform to these naming constraints will not be recognized by blackbox.
To Delete, Save As or Rename a WAV File:
When you use blackbox to delete a WAV file, that file is removed from the microSD card. This file will no longer be available for use by presets. This means that any presets that previously used this WAV file will no longer include this WAV file. To delete a WAV file:
- Touch a loaded pad on the Pads screen to display the Waveform Screen.
- Touch the name of the WAV file at the top of the screen to display the WAV Edit screen.
- Use the control knobs to scroll to the WAV file you want to delete. You may need to load directories to navigate to the file you want to delete.
- Touch File to display the WAV File Actions menu.
- Touch Delete to delete the selected WAV file from the microSD card. Touch Save As to save a copy of the WAV file with a different name. Touch Rename to change the name of the file on the microSD card.
- If you select Delete, blackbox will display a confirmation prompt. Touch OK to confirm, or touch anywhere else to cancel.
- If you select Rename or Save As, blackbox displays the File naming keyboard. Use the touchscreen to enter letters using the keyboard. Touch the ← to delete the previous letter. Turn a knob to reposition the cursor. Touch Enter to save your changes.
- You can Load a different WAV file from here as well.
- Touch the back arrow <- to exit the screen.
Note:
- If you delete, move or rename a WAV file, it will no longer be available for use by presets that were previously using it. The name of the original WAV file will still appear in the Preset, but the Waveform screen will be blank until you load a new WAV file into the pad.
- To remove a WAV file from a pad without deleting the file, go to the Waveform screen and touch the Pad Mode icon to the left of the file name, and then touch New Recording. You can press PADS to go back to the Pads screen without loading a file and the pad will be empty.

WAV File Actions Menu
Packing Presets
After you spend time carefully creating a preset, you don't want to worry about it getting broken if you make changes to that WAV file or re-organize your sample library. You may also want to gather up all of the files used in a preset so you can move it to another microSD card or archive it on your computer. The Pack feature was created to address these needs.
To Pack a Preset:
- Load the preset you want to pack.
- Push PSET and then touch File->Pack. Blackbox will find all of the WAV files that are assigned to pads and copy them into the folder for this preset. Multi-sample banks will be copied to a subfolder.
NOTE:
- If you continue to add WAV files to your preset after you pack it, the preset will still point to these WAV files in their source folders. Pack the preset again to copy these files over.
- If the Pack option is disabled, then the preset is fully packed already.
Use Keys to Play Pads Chromatically or to Play Sliced WAV Files
The Keys screens provide two alternative ways for you to play WAV files that have been configured on the PADS screen. When you select a sample or clip pad to play with Keys, blackbox will play the WAV file for that pad pitch shifted based on the triggered note. The native sample will play with the root note, and it will shift up or down the appropriate number of semitones based on the note you play. When you select a slicer pad to play with Keys, blackbox will map the slices in the pad to the notes on the keyboard. When you use multi-sample pad with Keys, it will play the sample that has the root note closest to the played note and then pitch shift as needed.
There are two Keys modes. The first time you push the KEYS button, blackbox will display a traditional black and white keyboard. Push KEYS again to toggle to the grid keyboard. On the grid keyboard, you can trigger four octaves of notes within the scale specified using Scale selection buttons in the top right of the screen, so you don't have to worry about scale specific sharps and flats. Use the arrow buttons at the top of the screen to access
additional octaves.
To Play a Sample, Clip or Granular Mode Pad With the Traditional Keyboard:
- Push PADS to view the sample bank.
- Touch a pad or turn a knob to select the desired pad. The pad will be pink when selected.
-
Push KEYS once to display the Traditional Keyboard screen. Touch the keys on the screen to play notes. You can slide your finger across the screen to play adjacent notes.
-
Touch the arrow buttons at the top of the screen or turn a knob to scroll left or right one note or one octave. The current octave label is displayed on each C note.

Traditional Keyboard
To Play a Sample, Clip or Granular Mode Pad With the Grid Keyboard:
- Push PADS to view the sample bank.
- Touch a pad or turn a knob to select the desired pad. The pad will be pink when selected.
- Push KEYS twice to display the Grid Keyboard screen. Touch the grid squares on the screen to play notes. You can slide your finger across the screen to play adjacent notes.
- Touch the arrow buttons at the top of the screen to scroll up or down one octave. The current octave label is displayed on each root note.

Grid Keyboard
To Play Slicer Mode Pads With Keys:
You can use the Keys screen to trigger individual slices within a pad. Here is a basic example of how to do this:
- Create a slicer pad and create 4 or more slices by either using the Scan feature or manually creating the slices.
- Set the following values for the pad parameters:
| Parameter | Value | Explanation |
| LaunchMode | Trigger | This will cause the WAV slice to play from beginning to end when a trigger is received. Other values will work, but let's use this for the example. |
| Loop Mode | Off | We will turn off looping for this example. |
| Slice | 3 | This doesn’t impact how the Keys screen plays the slices. |
| Slice Seq | None | We will not use the Slice Sequencer in this example. |
- Push KEYS to go to the Traditional Keyboard screen.
- Play C2 on the Traditional Keyboard screen. You will hear that slice 1 is played.
- Play D#2 and slice 4 will be played. Keys C2 and up are now mapped to Slices 1 and up for playback.
- Push KEYS again to go to the Grid Keyboard screen. Blackbox will display numbered squares in the grid for each slice in the WAV file. Use the arrows at the top of the screen to access additional
- Touch a numbered square on the grid to play that slice.
- Touch STOP at the top of the screen to stop playing all slices. (The SLICE button next to the STOP button does not do anything, it is just a reminder that this is a slice pad.)
Note:

Grid Keyboard for Slices
- On the traditional keyboard, the last slice will be played for all notes above the last slice. Nothing will play for notes below C2.
- If you use the Grid-based keyboard with a slicer pad, the slices are mapped to the notes available in the selected scale.
- The steps above show a simple example of using Keys alone to trigger different slices within one pad. You can use this with Loop Mode ON with Launch Modes of Gate or Toggle to achieve different effects. You could also use this with Slice Seq if you wanted to have the Slice Seq control what slices play when a pad trigger is received.
To Select a Scale on the Grid Keyboard:
- Push the KEYS button until you see the Grid keyboard.
- Touch the left Scale Selector button to display a list of values for the Root Note. Touch an option to select it. Alternatively, you can turn any knob while on the grid keyboard to change the Root Note.
- Touch the right Scale Selector button to display the Scale or Mode options. Turn any knob to scroll through the values. Touch the screen or any button when the desired value is displayed.
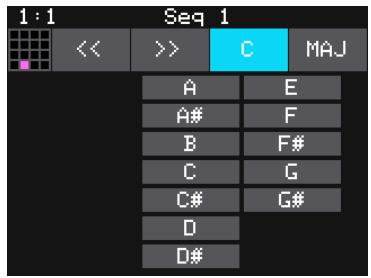
Grid Keyboard Root Note Selector
Note:
- To find the right key to match some music, tap a root note on the grid while turning a knob to scan through the root notes.
Work with Sequences
Now that you have some samples selected, you can record some sequences. When you press SEQS will see a grid of sequence cells. Each cell displays a mini piano roll view of the sequence. You can reuse a pad in multiple sequences if you choose. You can use more than one pad in each sequence. You can also use the Keys screen to trigger the pads while recording sequences. You can choose which sequences you want to play while you are recording other sequences, and which sequence cell you want to record into. You can have multiple sequences playing at one time. Sequences can start and stop independently based on their quantization settings.

Sequences Grid
On the sequences screen, the currently selected sequence is pink. Any active cells
have a white border around the cell. Touch a cell to toggle the active state of the sequence. The context display at the top of the screen (e.g. Seq 3 or Section 1) displays the current recording context for blackbox. When not in Song Mode, this context display will indicate the sequence that you are recording or editing, and the blue progress bar in the top right displays the current playback state of the sequence that has context.
When a sequence is queued up to play at the next quantization break, a white rectangle appears at the bottom of the sequence cell. When a sequence is actively playing that white rectangle is replaced with a blue progress bar.
Record and Play Sequences
Before we dive into the details of working with Sequences, make sure Song Mode is disabled because you cannot record sequences when you are in Song Mode.
To Toggle Song Mode On and Off:
- Push the SONG button below the screen.
- Touch the on-screen Song button if needed to disable Song Mode. The Song button is blue when enabled, and grey when disabled. The context display at the top of the screen will be updated to display the current sequence number (when disabled) or song section (when enabled).
To Record a Sequence:
- Push SEQS to see the sequences grid.
- Touch a cell or turn a knob to select a sequence cell. The selected sequence cell will be pink. The context at the top of the screen will now display the number of the selected sequence.
- Push PADS or KEYS to play the sequence to be recorded. You could also trigger pads using an external MIDI device.
- Hold down the REC button while you push PLAY to start recording. If you have the global Lead In option set to ON, blackbox will wait four beats, then start to play any active sequences and start recording.
- Touch pads or keys to add notes to the sequence you are recording.
- Push REC to continue playing but stop recording. Push STOP to stop recording and stop playing the loop.
Note:
- While recording, the sequence will record to the length specified in the sequence parameters, and then loop back and play what has been recorded while layering additional notes onto the recording if you continue to play.
- Any active sequences will play while you are recording. However, the notes from other sequences will not record into the currently selected sequence. Only the notes you play on PADS or KEYS will be added to the sequence.
- You can push REC while another sequence is playing to start recording immediately into the selected sequence.
To Play Sequences:
- Push SEQS to see the sequences grid.
- Touch sequence cells to toggle their active state. Active sequences have a white frame. You can play multiple sequences at once.
- Push PLAY to start playing the active sequences.
-
Touch sequence cells to turn them on or off. The cells start and stop in alignment with the sequence's quantization settings. A blue progress bar shows the current playback state of the sequence. A white progress bar indicates that the sequence will start at the next quantization break.
-
Push STOP when you are finished. If some WAV files remain playing, you can push STOP again to turn them off.
Note:
- Some sequences trigger long WAV files. These WAV files may still be playing after the sequence stops.
- Some sequences use toggle mode to trigger WAV files. It's possible to stop a sequence between the toggle on and the toggle off notes, leaving the WAV still playing after the sequence stops.
- You can record a sequence while others are playing. Simply push REC in this case to start and stop recording. You can even switch which sequence you are recording into without pushing STOP.
To Edit and View the Notes and Pad Triggers in a Sequence:
You can use the INFO button with a selected sequence cell to view and edit the sequence.
- Touch a sequence cell to select it.
- Push the INFO button to drill into that cell. Blackbox will display the sequence editor screen. If you recorded the sequence using KEYS, the piano roll view will have a keyboard representing the scale along the left side of the screen. In Pads Mode, the left edge lists the pad numbers. The piano roll displays the notes or pads recorded for each step over time moving from left to right. You can touch the view mode button at the top of the screen to switch view modes between KEYS and PADS.
- If you recorded Keys input for more than one pad, you can select the pad to view and edit in the piano roll by touching the grid icon in the top right in KEYS view, then touching the cell for the desired pad.
- You can use the control knobs and touch gestures to adjust notes and to zoom and scroll through the sequencer:

Piano Roll Keys View

Piano Roll Pad Selector
| Action | Result |
| Turn the top left control knob | Cycles the note selection through the notes on the piano roll |
| Turn the top right control knob | Change the length of the currently selected note |
| Turn the bottom left control knob | Moves the note left or right to change the timing of the note |
| Turn the bottom right control knob | Moves the currently selected note up or down through the piano scale. (Only works in KEYS view) |
| Two finger pinch or stretch | Zooms the piano roll in or out |
| Single finger drag or swipe | Scrolls the piano roll |
Note:
- When the Sequencer Screen reloads, it zooms horizontally to display the number of steps that have been selected in Step Count, and scrolls vertically to display the entered notes.
- The note position is restricted to the Step Count configured for this Note Sequencer.
- When recording, the sequencer will add the incoming notes to the sequence. It will not remove previously existing notes. Touch Clear before touching REC if you want to start with a clean piano roll.
- The C notes on the piano roll are numbered to indicate which octave is currently displayed. If you zoom out too far the numbers will not be displayed.
- The numbers across the top of the piano roll indicate the step numbers. If you zoom out too far the numbers will not be displayed.
-
To quickly switch which sequence you are editing, touch the grid icon in the top left corner of the screen and then touch the square in the selection grid that corresponds to the sequence you want to edit.
-
Push EDIT from the Piano Roll screen to access some basic editing features.
| Edit Menu Option | Action |
| Cut | Copy all of the notes and pad triggers and parameter settings in this sequence and clear the piano roll of this sequence. The cut information is now in the clipboard for pasting into a sequence. |
| Copy | Copy all of the notes and pad triggers and parameter settings in this sequence. The copied information is now in the clipboard for pasting into a sequence. |
| Paste | Paste the sequence information from the clipboard into the current sequence. Pasting is an additive action. This means that it only adds notes and pad triggers to the piano roll. It doesn't remove them. This can be useful to merge two sequences together. Keep in mind that the sequence parameters are also copied along with the note and pad events. |
| Clear | Clear all note and pad trigger information from this sequence. All parameter settings remain untouched. |

Piano Roll Edit Menu
To Edit Sequence Settings:
Each sequence cell has sequence parameters to control the length of the steps, the length of the sequence, quantization, duty cycle and MIDI Output channel.
- Push SEQ and touch the sequence cell you want to edit.
- Push INFO twice to display the sequence parameters page. Push INFO again to cycle through additional parameter pages and the piano roll view.
- Use the control knobs to adjust the values of the sequence parameters:
| Parameter | Description | Range of Values |
| Step Len | Controls the length of time the sequence will spend on each step, in terms of fractions of a bar. | 1/64, 1/32T, 1/32, 1/16T, 1/16, 1/8T, 1/8, 1/4T, 1/4 , 1/2T, 1/2 , 1 bar, 2 bars, 4 bars, 8 bars(T= Triplet) |
| Step Count | The number of steps in the sequence. | 1 to 128 |
| Duty Cycle | The duration of the note events where 0% is inaudible, and 100.0% is always playing. | 0% to 100.0% |
| MIDI Out | The MIDI channel that this sequencer will use for output. | None, Ch 1 through Ch 16 |
| Quant Size | Defines precisely when to start the sequence. When a sequence is activated or deactivated, blackbox will wait until the start of the next Quant Size interval to start or stop the sequence. | 1/64, 1/32T, 1/32, 1/16T, 1/16, 1/8T, 1/8, 1/4T, 1/4 , 1/2T, 1/2 , 1 bar, 2 bars(T= Triplet) |
Note:
- If a value of a Note Sequencer parameter is changed during playback of the sequence, the change will take effect at the start of the next loop through the sequence.
To Use Sequence Quick Action Buttons:
On the sequences screen, there are a few buttons along the right side to allow quick access to some actions.
| Sequence Button | Action |
| UNDO | Rolls back the last round of changes to the notes and pad triggers added to the selected sequence. Any notes or pad triggers added since the last time you pressed REC will be removed from the sequence. |
| CLEAR | Clears all notes and pad triggers from the selected sequence. Sequence parameters remain untouched. |
| OFF | This is a quick way to deactivate all sequences. |
Work with Song Sections
Once you have a few sequences set up, you can use Song Mode to record song sections. When Song Mode is enabled, you will record into the currently selected song section. While recording a section, you can record turning sequences on and off over time. You can record multiple sections to playback as a complete song. You can have up to 16 sections in a preset. Swipe the touch screen to scroll up and down through the list of sections.
To Toggle Song Mode:
When you create a new preset, by default Song Mode is turned off. This means that blackbox is recording and playing sequences. Song sections are ignored in this mode. When you enter Song Mode, you can now record into and playback song sections. To toggle Song Mode on or off:
- Push the SONG button below the screen.
- Touch the Song button at the top of the screen to toggle Song Mode. Song Mode is enabled when the on-screen button is blue.

Song Screen
Record and Play Song Sections
When Song Mode is enabled, the currently selected section will play when you push the PLAY button. Any active sequences will also play. You can quickly deactivate all sequences by touching the DEACT button on the sequences screen.
To Record a Song Section:
- Enable Song Mode as described above.
- On the Song screen, turn the top left knob to adjust the BPM of the song. This number is displayed to the left of the Edit button.
- Select the song section you want to record into.
- Push INFO to display the section parameter screen. Here you can set the length of the song section in bars. The maximum length allowed is 32 bars.
- Push SEQS to display the sequences screen. Activate the sequences you want to have playing when you start recording the song section, and deactivate those you don't want.
- Hold down the REC button while pressing PLAY to start playing and recording the active sequences.
- Touch sequences to activate and deactivate them over time.
- Push REC to stop recording but continue playback. Push STOP to discontinue playback and recording.
Note:
- Each time you record a song section, you add to the current song section. Any previous sequence actions are still there. If you want to start over again with a clean section, select the song section, then touch Edit and Clear.
- Song sections record on and off events for sequences. If you change a sequence, you will also change the song section.
- Song sections do not record pads or keys actions.
- You can modify the BPM at any time to adjust the playback speed of the song sections and the sequences.
- When in Song Mode, the context display at the top of the screen shows the name of the active Song section, and the progress bar to the right of that displays the progress of this section.
To Play Song Sections:
- Push SEQS to display the sequences screen. Activate the sequences you want to have playing along with the song section, and deactivate those you don't want.
- Push SONG to view the Song screen and then touch the song section you want to start playing. The selected section will be pink.
- If you want the selected section to play in a loop, touch the Loop button at the top of the screen to enable it. Otherwise, blackbox will play all subsequent song sections in order.
- Push the PLAY button and blackbox will start playing the selected song section along with any active sequences.
- You can jump around between song sections by touching the next section you want to play. That section will start to play at the beginning of the next bar.
- You can toggle Loop mode while a song section is playing to stay with a section for a while and then let it fall through to the next section at the end of the current loop.
Note:
- You can play additional sequences during song section playback by activating them on the sequence screen.
- You can play pads and keys on top of song sections that are playing.
To Edit Song Sections:
The Edit menu on the Song screen allows you to perform basic clipboard operations and to rename the section.
- On the Song screen, select the song section you want to edit.
- Touch the Edit button at the top of the screen. The Edit menu will be displayed.
- Touch the menu item for the action you want to perform:
| Edit Menu Item | Action |
| Cut | Copy a song section and remove it. All sequence events, the section name and the section length will all be copied. The information is held on the clipboard for pasting. |
| Copy | Copy a song section. All sequence events, the section name and the section length will all be copied. The information is held on the clipboard for pasting. |
| Paste | Paste the section information in the clipboard into the selected section. All information in the target section will be replaced. |
| Clear | Clears all sequence actions from the selected song section and resets the section length back to 32 beats. |
| Add | Inserts a new song section below the selected song section. |
| Rename | Displays a virtual keyboard where you can rename the section. Touch enter at the bottom of the screen when you are ready to save the changes. |
| Delete | Deletes the selected song section |
To Reorder Song Sections:
-
Add a new song section where you want the section to be.
-
Select the section you want to move and touch Edit then Cut.
- Select the new song section you added in step 1 and then touch Edit and Paste.
To Change the Playback Speed of a Song:
- Push the Song button.
- Turn the top left knob. The BPM display in the top left will update as you turn the knob and the song playback speed will change in real time. The default is 120 BPM.
To Add Swing to a Song:
Swing is a feature that makes electronic music sound more like a live performance. The swing setting in blackbox controls the relative timing of even numbered 16 th notes compared to the notes on either side of them. When the swing setting is set to the default of 50%, the even 16 th notes occur in their metered place halfway between the notes on either side. When the number is less than 50%, the even 16 th notes shift closer in time to the previous note. When the number is above 50%, the even 16 th notes shift closer in time to the following note.
- Push the SONG button.
- Turn the top right knob. The Swing setting display to the right of the BPM will update as you turn the knob and the song playback will change in real time. The default swing amount is 50%.
Note:
- Your sequence must have a step size of 1/16th or smaller for Swing to take effect.
Apply Effects
Blackbox has two effects that can be applied to as many pads as you want. You apply an effect by selecting the send amount for the pad for each of the desired effects (FX1 or FX2) and then configuring the parameters for that effect. After the effect is applied, the wet signal is routed to Audio Out 1. All pads will get the same parameter values for an effect.
To Route a Pad to an Effect:
- On the FX screen, select the pad that you want to use.
- Turn the top left knob near FX1 to set the FX1 send amount for the pad. This is the amount of the signal from this pad that you want to send to FX1 for effects processing. You can also use the touch screen to slide the level selector next to the knob to the desired position. When a pad is sending some of its signal to FX1, a blue triangle is displayed in the top left corner of the pad. You can repeat this step for FX2 and a blue triangle will appear in the top right corner of the pad.

FX Screen
To Modify Effect Parameters:
- Push the FX button to display the FX screen.
- Touch the FX1 or FX2 box in a lower corner of the screen to select it. The currently selected effect is highlighted pink.
- Push INFO to display the effect parameters screen for the selected effect.
- Turn the knobs to adjust the effect parameters. You will hear the impact of the parameter changes in real time. Here are the available effect parameters:
| Effect | Parameter | Settings | Mod Target? |
| FX1 = Delay | Delay | Determines the delay length. When Beat Sync is On, delay is specified in musical intervals:1/64, 1/32, 1/16, 1/8 T, 1/16D, 1/8, 1/4T, 1/8D, 1/4, 1/2T, 1/2, 1 barWhen Beat Sync is Off, delay is specified as a percentage from 0.0% to 100.0%. | Yes |
| Feedback | 0 to 100%. Determines the amount of regeneration or echo in the delayed signal. | Yes | |
| Beat Sync | This parameter controls whether the delay is measured in musical time intervals or percentage. | No | |
| FX2 = Reverb | Decay | 0 to 100% How long the reverberation will ring out. | Yes |
| Damping | 0 to 100%. The amount of damping that is applied to the reverb. Higher values will make the reverb end sooner. | Yes | |
| Predelay | 0 to 100% Determines the amount of delay in the signal before it reaches the reverberation. In real life, this is related to how close the source is to the walls. | No |
Note:
- The same effect parameter values are applied to all pads that are sending signals to that effect.
- The Reverb effect is very processor intensive. Blackbox does not limit what you can do based on anticipated processor needs. As a result, it is possible to overdrive the processor, causing crackling and drop outs. See Reduce Aliasing When Playing Pads Chromatically
Blackbox offers two choices for the interpolation algorithm used to play pads Chromatically. The first algorithm is called Normal mode. In this mode, blackbox may introduce some aliasing with some WAV files when pitch shifting notes to play sample, multi-sample and granular pads chromatically. The second algorithm is the High Quality (High Q) algorithm. This algorithm reduces the aliasing, but it requires more processing power, leaving less room to do other things. By default, your pads will use the Normal mode algorithm. You can configure a sample, multi-sample and granular pad to use the High Quality algorithm when needed. Here's how to configure this option:
- Open the parameter pages for the pad that is experiencing aliasing.
- Touch ADSR to select that page.
- At the top of the screen, to the right of the Exclusive grouping option, is the interpolation algorithm option, which is set to Normal by default. Touch this to display the options menu. Touch High Q to select the High Quality algorithm.
Note:
- The High Quality setting uses more processing power. This means you may encounter drop outs or crackling sooner when this option is selected. See Processor Management Tips below to learn techniques to avoid drop outs and crackling.
- This option only applies when playing sample, multi-sample and granular pads chromatically. If you are not playing the pad chromatically, it's best to leave it set to Normal.
- Processor Management Tips below for more information about preventing sound artifacts.
Adjust the Mix
On the Mix screen you can independently adjust the volume and pan of each pad. The number on the pad represents the dB level of the audio output. The bar at the bottom of the grid cell represents the pan position for the pad. Pan is only available if the pad is routed to a stereo output. When the pan line is in the middle, the output is balanced equally between left and right. A solid blue bar below the sound level indicates a pad is actively playing. A red bar at the top of a cell indicates that pad is muted.

Mixer Screen
To Adjust the Sound Level and Pan of a Pad:
- Push Mix to display the mixer screen.
- Touch the cell you want to adjust.
- Turn one of the top two knobs to adjust the level of the currently selected pad.
- Turn one of the bottom two knobs to adjust the pan, if available.
Note:
- You can hear adjustments to pan and volume in real time when a sequence or pad is playing.
To Mute and Unmute Pads:
The mixer screen also allows you to mute individual pads.
- Push the INFO button on the Mix screen to enter Mute Mode. In this mode, active pads have a green background and muted pads have a red background.
- Touch a pad while in Mute Mode to toggle it's mute state.
- Push INFO again to go back to controlling level and pan. Any muted pads will have a red bar across the top of the pad.

Mixer Mute Mode
Note:
- Mute might be handy if you want to use a pad to drive an external MIDI device when the device is available, but play a pad when it's not. Muted pads still play out over MIDI.
Manage Presets
Blackbox stores a set of pad configurations, sequences and song sections as a preset. You can save as many presets as you want, as long as there is room for the files on your microSD card. When you turn on blackbox, it automatically loads the most recently used preset on this microSD card. The microSD card that comes with blackbox has about 60 presets and corresponding WAV files preloaded.
When blackbox loads a preset, it loads the set of WAV files and configured parameters for each pad, sequence and song section saved in the preset. Review the preloaded presets to see some examples of blackbox features in action. The presets that are preloaded on blackbox use only a fraction of the WAV files that are available on the microSD card. You can use the microSD card to load your own WAV files into blackbox, as well as record new ones. Blackbox also enables you to customize and create your own presets.
Presets are saved on the microSD card when you choose to save them. If you load a different preset without first saving the current preset, you will lose your work. If you change to a different microSD card, you will have a different set of presets. When you switch to a different preset, all previous settings will be replaced with the settings of the newly selected preset, which may be blank.
As of Blackbox 1.5, blackbox now stores all of the preset xml files in subfolders under the \Presets folder. Each preset has its own subfolder with the name of the preset, and a preset.xml file within that subfolder. E.g. the preset My Kickin Grooves will be stored as a file named preset.xml in the \Presets\My Kickin Grooves folder. When you first start working with the preset, it will point to the WAV files in their source folders. The Pack function will copy all of the used WAV files into the preset folder.
Blackbox 1.5 also changes where new recordings are stored. When you create a new recording, it will be stored in the folder for that preset. For example, the first new recording for the My Kickin Grooves preset will be saved as \Presets\My Kickin Grooves\RC000001.wav.
Blackbox will migrate legacy presets to the new file structure as you use them.
In summary:
- All of the preset folders are gathered under one \Presets folder at the root. This helps reduce the clutter at the root and reduces the number of directories that the system has to scan to find presets.
- Before you Pack a preset file, the .xml file lives in its own subfolder under \Presets which is created as soon as you create a preset, but the WAV files stay in their source folders until you "pack" them.
- Blackbox will automatically move a legacy preset into the new folder location the first time you load that preset after upgrading to the 1.5 firmware. You may then use the Pack function to consolidate all of the files used by the preset into the preset's folder.
- All presets have a file named preset.xml under the folder that has the name of the preset.
We covered how to create a new preset in To Create and Name a Preset above. We will cover more preset and WAV file management tasks next.
Note:
- Presets are not saved automatically in the background. This ensures that you don't make unintended changes to a preset.
To Save Changes to a Preset:
By now you may have added a few pads to your preset and spent some time configuring them. If you want to
keep the results of your efforts, you will need to save the preset. Blackbox does not automatically save changes as you work. If you change to a different preset or unplug blackbox, you will lose your work. To save the preset:

- Press PSET to display the Preset Management screen.
- Touch File to display the Preset File Menu.
- Touch Save to store your changes to the currently loaded preset.
Preset File Menu
To Load a Preset:
To switch to a different preset:
- Press PSET to display the Preset Management screen.
- Use the to scroll through the list of presets. The blue highlight indicates the currently selected preset.
- Touch Load to load into blackbox the information that was previously saved for this preset. The only values that are not stored in each preset are the values on the TOOLS pages. These are global settings that apply across presets and are stored separately on the microSD card.
To Pack a Preset:
After you spend time carefully creating a preset, you don't want to worry about it getting broken if you make changes to that WAV file or re-organize your sample library. You may also want to gather up all of the files used in a preset so you can move it to another microSD card or archive it on your computer. The Pack feature was created to address these needs.
- Load the preset you want to pack.
- Push PSET and then touch File->Pack. Blackbox will copy all of the WAV files used by this preset into the preset's folder. Any multi-sample banks will be copied with their folder. The preset.xml file will be updated to point to these copies of the WAV files and will be saved.
NOTE:
- If you continue to add WAV files to your preset after you pack it, the preset will still point to these WAV files in their source folders. Pack the preset again to copy these files over.
- If the Pack option is disabled, then the preset is fully packed already.
To Clean unused WAV files out of a Preset's folder:
If you change which WAV files are loaded in your Pads, you may want to remove any unused WAVs from the preset folder.
- Load the preset you want to clean.
- Push PSET and then touch File->Clean. Blackbox will prompt you to confirm "Del Unused WAVs?" If you choose OK, blackbox will search the preset folder for any WAV files that are not mapped to pads in this preset. Any unmapped WAV files in this preset's folder will be deleted. Blackbox will save the preset.xml file as part of this process. WARNING: this action cannot be undone. Touch anywhere besides OK to cancel this operation..
To Delete a Preset:
When you delete a preset, you remove the preset from the list of presets on the Preset Management Screen, and
you delete the corresponding XML file from the microSD card. You cannot undo this action. To delete a preset:

Preset Management Screen
- Push the PSET button to view the Preset Management screen.
- Use the control knobs to scroll through the list of presets. The blue highlight indicates the currently selected preset.
- Touch File to display the Preset File Menu.
- Touch Delete to delete the highlighted preset.
Note:
- You will not be prompted to confirm the delete action, and there is no Undo option so please take care when using this feature.
To Rename a Preset:
To change the name of a preset:
- Push the PSET button to view the Preset Management screen.
- Use the control knobs to scroll through the list of presets. The blue highlight indicates the currently selected preset.
- Touch File to display the Preset File Menu.
- Touch Rename to display the keyboard screen.
- Touch the back arrow <- to erase the preset name. Then use the onscreen keyboard to type in a new name. Use the carat button ^ to toggle between upper- and lower-case letters. Touch the 123 button to display the numeric keyboard if needed. When the name is complete, touch enter to save the name and return to the Presets screen with the preset selected.
Note:
- Renaming a preset does not load that preset.
To Save Current Changes as a New Preset:
Sometimes while working on a preset, you decide to save your changes to a different preset in order to save your work while still preserving the original preset state. To save current changes as a new preset:
- Push the PSET button to view the Preset Management screen.
- Touch File to display the Preset File Menu.
- Touch Save As. Blackbox displays a touch screen keyboard you can use to enter a new name. Touch the enter button to save the changes and go back to the Pads screen with the renamed preset loaded.
Note:
• If you enter a name that is already in use, you will replace the old file with the current preset.
Work with Preset Files on the MicroSD Card
Preset files can be backed up on your computer or shared with other blackbox users. The presets are saved as XML files on the microSD card. Each preset is saved in a preset.xml file in a folder with the name of the preset under the
\Presets folder. For example, a preset named April Gig will be stored as \Presets\April Gig\presets.xml. If you have packed a preset, all of the WAV files for that preset will be stored in the preset's folder.
You can use a microSD Adapter to insert your microSD card into your computer. You can then use standard file techniques to rename the preset folders, delete them, copy them onto your computer or copy them onto other microSD cards. We recommend that you occasionally make backup copies of your presets, especially before upgrading to new firmware. Keep in mind that if you move a preset file to another microSD card, it will only work properly if the WAV files needed for that preset are on the new card in the same directory structure. The pack function makes that much easier.
Note:
- Blackbox stores all presets in self named folders under the \Presets folder. Blackbox will not find them if you move the XML files outside of these folders or move these folders outside of the \Presets folder.
Upgrading from Previous Firmware Versions
Blackbox Firmware version 1.5 changed the way presets and new sample recordings are managed. It moves the preset files out of the root and into individual folders under the \presets folder. New WAV file recordings are now stored in the preset's folder. But what if you have some legacy presets on your microSD card?
What will happen to my legacy presets? How do I convert them to the new file structure?
When you load presets, blackbox will display a single list with all presets stored at the root and all presets stored under the \Presents folder. The files will be in alphabetical order by file name, independent of where they are stored. Each time you open a preset that is stored in the root, blackbox will create the preset folder for this preset and move the preset into that folder. In this way, as you open the presets, they will be migrated to the new structure one at a time. You can then use the File->Pack feature to collect all of the WAV files used by this preset into the corresponding subfolder. Any new recordings you make will be stored in the preset subfolder.
When will my legacy WAV files get cleaned out of the root folder?
We won't move them automatically. We recommend that you pack up all of your presets one by one, which will copy all of the files used by the presets into their respective folders. When that is done, you may choose to delete the files that are stored at the root or safely move them to a subfolder for future use.
Use Tools to Customize Your Blackbox
The Tools screen is the home for global parameters that apply across presets. This is where you can adjust the Headphone volume and control the metronome. Push INFO or touch the page buttons along the bottom of the screen to cycle through the available parameter pages. Turn a knob to adjust the value of the nearest parameter.
Here are the available settings:
| 1:1 Seq 1 | |||
| 4GB | 1.4.1 | ||
| Brightness: 100.0% | Headphone: 52.7% | ||
| Compressor: ON | |||
| Main | Rec | MIDIIn | Metro |
TOOLS Screen
| Page | Parameter | Description |
| Main | Brightness | Controls the brightness of the display screen. |
| Headphone | Controls the volume of the signal going to the headphones. | |
| Compressor | When set to On, blackbox will apply a compressor to the signals sent to Out 1. | |
| Rec | RecToPlay | If you have RecToPlay set to ON, blackbox will automatically start to play the new sample when recording ends if the Length parameter was used for recording. |
| RecConfig | When this is set to Global, changes made to recording settings on the Pad Loading and Recording screen will apply to all empty pads.When this is set to Per Pad, these changes only change the current pad and do not change what is used for other empty pads. Use Per Pad when you want to set up a Template preset with different recording configurations for each pad. | |
| Lead In | When this is ON, blackbox will wait 4 beats before recording begins. It will display the count down as a negative number in the measure counter in the top left of the screen. | |
| MIDI In | MIDI PadsMIDI Keys | This is used to specify which MIDI channel is used to trigger pads and sequences. If a channel selected here is also chosen as the MIDI IN channel for a pad, that pad will also play notes in response to signals received on this MIDI channel. See the section below on Use MIDI Devices for more information.When this parameter is set to Omni, pad hits and sequences can be triggered by all MIDI channels. However, any MIDI channel that is assigned as the MIDI In for a pad or as the MIDI Keys parameter will be excluded from the list of channels that will trigger pad hits.MIDI Program Change messages received on this channel will be processed by the blackbox if the ProgChange setting (below) is set to ON.This is used to specify which MIDI channel is used to play notes for the currently selected pad. If a channel selected here is also chosen as the MIDI IN channel for a pad, that pad will also play notes in response to signals received on this MIDI channel. See the section below onUse MIDI Devicesfor more information.When this parameter is set to Omni, notes will be triggered for the currently selected pad by all MIDI channels. However, any MIDI channel that is assigned as the MIDI In for a pad or as the MIDI Pads parameter will be excluded from the list of channels that will trigger notes for the currently selected pad.MIDI Program Change messages received on this channel will be processed by the blackbox if the ProgChange setting (below) is set to ON. |
| ProgChange | When set toON, blackbox will respond to MIDI program change messages received on the MIDI Pads and MIDI Keys channels by opening the Preset that maps to the specified program number. See the section below onUse MIDI Devicesfor more information. Program change messages on other channels will be ignored.Remember that blackbox does not automatically save changes. This means that when you change presets you will lose any unsaved changes. | |
| ClockSource | This parameter allows you to select a source for the clock signal when you have one or more MIDI devices connected to blackbox. SelectMIDI Portto use the device connected via the TRS MIDI In port. ChooseUSB Portto use the device connected via the USB Device port. SelectAllwhen you only plan to have one device with a clock connected at a time and don't want to have to keep changing this parameter, or you want to let the two clocks fight it out. SelectNoneto ignore all incoming clock signals and always use the internal signal. | |
| Metro | Metronome | This controls when the metronome is used. SelectOFFto disable the metronome completely. ChooseRecto only use the Metronome when you start recording. ChoosePlayto use the metronome whenever the Play button is active. |
| Output | The metronome will only play on the audio output channel selected here. You can choose to play it on Stereo outs Out1, Out2 or Out3, or only the left or right channel of any of those outputs. You can also choose to send it to the headphones output by selecting HP. If you choose any channel other than HP, the signal will not be included in the headphone output. | |
| Gain | Adjusts the volume level of the metronome in decibels. |
Use MIDI Devices with Blackbox
If you prefer a more tactile input mode, you can use a MIDI device to play pads, keys and sequences. MIDI can also be used to change the sound that is playing and to synchronize clocks with other instruments. If you'd like to drive an external instrument with a sequence in blackbox, you can connect it to the MIDI Outputs of blackbox.
Work with MIDI Inputs
Blackbox is designed to work with MIDI devices to offer a more tactile input mode and a bigger keyboard. It can also use MIDI inputs to modulate pad and effects parameters. Blackbox can also use MIDI clocks to synchronize with external equipment.
To start, plug your MIDI input device into either the Device USB jack or the MIDI In TRS jack. If you are having trouble getting MIDI to work through the TRS jack, please read the Mini TRS Audio Jacks for MIDI Connections Compatibility Guide at https://1010music.com/stereo-minijacks-midi-connections-compatibility-guide. You may need to use the MIDI adapter that came with blackbox. You can use MIDI inputs in a few different ways:
- Trigger pad hits and trigger sequences
- Play notes and use common MIDI modulation signals with a specific pad or pads
- Play notes and use common MIDI modulation signals with the currently selected pad
• Use MIDI Continuous Controllers (CCs) to modulate various pad and effects parameters
• Use a MIDI Program Change to change the selected Preset
You can combine these different MIDI input modes to use more than one at a time, but there are some rules about how they interact. First, we will talk about how to use each of these MIDI play modes and then we will discuss how they interact with each other.
To Trigger Pad Hits and Sequences with a MIDI Device:
Blackbox has a MIDI Pads parameter that defines which MIDI channel can trigger pads and sequences. By default, this value is set to Omni, which means that it will respond to all MIDI channels. You can configure a specific channel by changing the value of the MIDI Pads parameter on the TOOLS screen.
- Push TOOLS to display the tools screen.
- Touch MIDI In at the bottom of the screen to go to that page of the Tools screen.
- Turn the knob next to the MIDI Pads parameter to select the MIDI channel that you want to use to trigger
pads and sequences. Set this to Omni to respond to all MIDI input channels that have not been otherwise assigned.
-
Connect your MIDI device to blackbox and configure it to use the MIDI channel selected for the MIDI Pads channel.
-
Play some notes on your MIDI device to trigger pads. The table on the right shows the default mapping of MIDI note numbers to the blackbox pads. The range for pads is Note 36 (usually C2) through Note 51 (usually D#3/Eb3). You may need to shift your MIDI device up or down octaves to reach these notes.
| 48 | 49 | 50 | 51D#3 |
| 44 | 45 | 46 | 47 |
| 40 | 41 | 42 | 43 |
| 36C2 | 37 | 38 | 39 |
Note:
- You can customize the mapping of notes to pads on the MIDI page of the Pads Parameters screen for each pad.
Default Mapping of MIDI Notes to Blackbox Pads
-
Push PADS and you can watch the pads activate on the Pads screen as you play notes on your MIDI device.
-
Play some higher notes on your MIDI device to trigger sequences. The table on the right shows how the MIDI note numbers map to the blackbox sequences. The range for triggering sequences is Note 52 (usually E3) through Note 67 (usually G4). You may need to shift your MIDI device up or down octaves to reach these notes. Playing a MIDI note for a given sequence will toggle its active state on and off.
- Push SEQS and you can watch the sequences start and stop on the Sequences screen. A white rectangle will appear at the bottom of the sequence cell to show that the sequence is queued up to play at the quantization break. This rectangle is replaced with a blue progress bar when the sequence starts to play. The bar will turn into a white rectangle again when the sequence is playing out after deactivation
| 64 | 65 | 66 | 67G4 |
| 60 | 61 | 62 | 63 |
| 56 | 57 | 58 | 59 |
| 52E3 | 53 | 54 | 55 |
MIDI Notes to Blackbox Sequences
To Play Notes and Use Common MIDI Modulation Signals with a Specific Pad or Pads:
You can also configure a specific pad to respond to MIDI notes by assigning a MIDI channel to the pad on the pad's parameters screen. How the pad responds will depend on the Pad mode.
- Push PADS, and select the pad you want to control with the MIDI Device.
- Push INFO twice to see the Pad Parameter screen, and then touch MIDI at the bottom of the screen to see the MIDI related parameters.
- Turn the knob next to MIDI In to assign a specific channel to this pad and now your MIDI device transmitting on this channel will play this pad. If the pad is in sample (single), granular or clip mode, each MIDI note will play the pad pitch shifted in the same way the Keys screen works. If the pad is a Slicer, each MIDI note will play a slice of the file in the same way it works on the Keys screen. If the pad is using multi-sample, the notes will trigger the appropriate sample based on root note or sample mapping.
Note:
- You can have more than one pad mapped to a specific MIDI channel. In this case, blackbox will play all mapped pads when a note is received on that channel.
- If you are using a modulation source other than MIDI CC for this pad, then the corresponding MIDI Modulation signals received on this pad's MIDI In channel (e.g. MIDI Velocity) will be applied as configured for this pad.
To Play Notes and Use Common MIDI Modulation Signals with the Currently Selected Pad:
This is a more global version of the procedure described in the previous section. The difference is that here you are setting up a MIDI channel that is not pad specific. Whichever pad is currently selected will respond to the MIDI channel specified as the MIDI Keys channel. As with the MIDI Pads setting, you can select OMNI for the MIDI Keys channel to have blackbox respond to all channels in this way. However, any channel that is assigned to anything else is pulled from the pool of MIDI channels that blackbox responds to in Omni mode.
- Push TOOLS and then touch MIDI In to see the global MIDI input settings.
- Turn the knob next to MIDI Keys to select the MIDI Channel blackbox will use as the global keys channel.
- Connect a MIDI Device to blackbox and set the device to use the channel assigned to MIDI Keys.
- Go to the Pads screen and select a pad to play via MIDI. Play notes on the MIDI Device and you will see and hear the currently selected pad respond to the MIDI notes. Select a different pad and play notes on the MIDI Device and you will see and hear the new pad respond.
Note:
- If you have the same channel assigned to both a specific pad and to the MIDI Keys setting, the assigned pad and the currently selected will both respond to the MIDI input.
To Configure MIDI modulation for a parameter using named MIDI sources:
- From the Pads screen, touch the pad you want to modulate.
- Push INFO until you see the MIDI parameter. Select a MIDI channel to be used to modulate this pad.
- Push INFO until you see the parameter you want to modulate.
-
Touch one of the three black boxes below the parameter to display the Modulation Parameters screen.
-
Use the control knobs to select a value for the Source parameter. This parameter specifies which signal will be used to control this parameter. Available values are:
-
None – no modulation source will be used.
-
VEL – MIDI Velocity or the Velocity slider on the Pads screen. This is note specific.
• PTCH – MIDI pitch bend signal
• MODW – MIDI Mod Wheel
• MVOL – MIDI Volume
• MPAN – MIDI Pan -
Use the control knobs to select the Amount of modulation that will be applied. This is used to increase or decrease the amount of impact the modulation will have on this parameter.
Note:
- The Modulation sources described in this section only impact the pad if the modulation signal is received on the MIDI In channel for this pad.
- Modulation is currently only available for pad and effect parameters. Sequence and section parameters cannot be modulated.
To Use MIDI CC in Learn mode to Modulate Pad and Effect Parameters:
You can use a broad range of MIDI controls to modulate some of the pad parameters, such as Filter and Pitch, and some of the FX parameters, such as Reverb Decay and Delay Feedback. It can be challenging to determine which MIDI CC number is sent by any given control on your MIDI device. To make it easier to use these MIDI CCs, blackbox has the ability to learn which control you want to use for modulation for any given parameter.
To configure a parameter to use a MIDI CC input for modulation:
- Connect a MIDI controller to blackbox.
- Navigate to the parameter page for the pad or FX parameter you want to modulate.
- Touch one of the three black boxes below the parameter you want to modulate. This brings up the Modulation Source screen.
- Touch Learn in the top right corner to enable MIDI CC learning mode.
- Move the MIDI control, such as a knob or slider, that you want to use with this parameter. When blackbox has learned the mapping, the Learn button will turn from blue to grey, and the Source parameter will change to MIDI CC.
- Turn the top right knob to adjust the Amount of modulation you want to allow with this controller.
- Now play the pad and use the controller and you will hear the modulation. The Modulation box associated with this mapping will be labeled CC.
Note:
- Different parameters work differently with MIDI CC inputs. For example, for the Filter parameter, the values are bi-polar with 0 at the middle of the range for the control by default. But with the Start parameter, the values only move in one direction.
- You can map the same MIDI control to more than one parameter on more than one pad or effect.
- MIDI CC controls use the on-screen parameter value as a starting point. Blackbox then maps the range of the controller to values from the starting point to the value of Starting Point +/- the Modulation Amount parameter. For example, if the Filter parameter is set to 20%, and you set the Modulation Amount to 15%, then the lowest value of the control will map to 5% (20% - 15%), and the highest value of the control will map to 35% (20% + 15%).
- MIDI CC mappings are recorded in the blackbox preset as a mapping to a specific MIDI CC number on a specific MIDI Channel. If you swap out MIDI controllers, and the new controller uses the same MIDI CC number and channel, it will continue to modulate the assigned parameter.
- The MIDI channel assigned to a pad does not need to match the MIDI channel used for MIDI CC modulation.
• There is a maximum of 8 MIDI CC mappings per pad.
To Remove MIDI Modulation from a Parameter:
- Go to the parameter screen for that parameter.
- Touch the modulation box you want to clear.
- On the modulation parameters screen, turn the top left knob to set the Source to none.
Sharing of MIDI Input Channels
How do all of these MIDI Input channel assignments work together? Basically, they all work together, with one big exception for Omni settings. Any channel that is assigned to anything else will no longer be included in the list of channels responded to by a parameter with the Omni setting. Here's another way to think about it:
- If the MIDI In channel is assigned on a pad, that pad will always respond to MIDI notes received on that channel.
- The currently active pad will always respond to MIDI notes on a given MIDI channel if that channel has been specifically assigned as the MIDI Keys channel on the TOOLS screen.
- Pad hits and sequences will be triggered by notes on an incoming MIDI channel if that channel has been specifically assigned as the MIDI Pads channel on the TOOLS screen.
- If the MIDI Keys parameter is set to Omni, and the incoming notes are on a MIDI channel that has not been specifically assigned to anything else (a pad's MIDI In, or the MIDI Pads parameter), then the currently selected pad will respond to notes on this channel.
- If the MIDI Pads parameter is set to Omni, and the incoming notes are on a MIDI channel that has not been specifically assigned to anything else (a pad's MIDI In or the MIDI Keys parameter), then the incoming notes will trigger pad hits and sequences.
As a result, if you, for example, assign the same MIDI channel to both a specific pad's MIDI In parameter and to the MIDI Pads parameter on the TOOLS screen, notes on that channel will be played by that specific pad and they will trigger pad hits and sequences. This gives you lots of flexibility but could result in confusing results if you aren't careful.
Use MIDI Program Change to Open a Preset
Some MIDI controllers support a MIDI command to trigger a program change. Blackbox can be configured to respond to MIDI program changes by loading a preset. Blackbox will map the presets on the device in alphabetical order to program numbers. The first preset on the device will be mapped to program 1. Keep in
mind that when you change presets, even with a program change, blackbox does not save your changes. So be sure to save your preset if needed before initiating a program change.
Because of the potential for data loss, blackbox has a Tools parameter that allows you to control whether or not the device responds to program change signals. By default, this is set to off.
To Enable or Disable MIDI Program Changes:
- Push Tools.
- Push Info until you see the MIDI PC parameter. Set the value as desired.
Now when you initiate a MIDI Program change on any connected MIDI Channel, blackbox will change to the corresponding Preset.
Note:
- Blackbox supports using MIDI Program Changes to access the first 128 presets. This limit is the result of how MIDI manages program banks.
- Blackbox does not pass through or send out MIDI Program Changes.
Work with MIDI Outputs
You can also use blackbox pads and sequences to send note events to drive other MIDI instruments. Connect your blackbox to a MIDI device via the MIDI Out TRS jack. If you are having trouble getting MIDI to work through the TRS jack, please read the Mini TRS Audio Jacks for MIDI Connections Compatibility Guide on 1010music.com. You may need to use the MIDI adapter that came with blackbox.
To Send MIDI Notes from a Sequence to an External MIDI Device:
- Connect your MIDI device to the blackbox MIDI TRS Output jack and configure it to use the desired MIDI channel.
- Create a sequence you want to use to drive the MIDI device. You can use any WAV file in the pad used to play the sequence, and then mute the pad on the Mix screen if you don't want blackbox to generate sound for that pad.
- Push SEQS and select the sequence you want to use to drive the MIDI device.
- Push INFO until you see the parameters screen with the MIDI Out parameter.
- Set the MIDI Out parameter to the MIDI channel used by the MIDI device.
- Activate the sequence and push PLAY on blackbox. Blackbox will now send the note events from the configured sequence to the MIDI device.
To Send MIDI Notes from a Pad to an External MIDI Device:
- Connect your MIDI device to the blackbox MIDI TRS Output jack and configure it to use the desired MIDI channel.
- Configure a pad you want to use to drive the MIDI device. You can use any WAV file in the pad, and then mute the pad on the Mix screen if you don't want blackbox to generate sound for that pad.
- Push PADS and select the pad you want to use to drive the MIDI device.
- Push INFO twice and then touch MIDI at the bottom of the screen to bring up the MIDI parameters for that pad.
-
Set the MIDI Out parameter to the MIDI channel used by the MIDI device that will receive the signal.
-
Trigger the pad on the blackbox by touching the pad, or playing it in a sequence. Blackbox will now send the note events from the configured pad to the MIDI device on the same MIDI channel.
Note:
- You can configure more than one sequence and pad to send MIDI out on the same channel.
- Blackbox does not send out or pass through MIDI Program Change messages.
Use MIDI Notes to Play Slices
When you a Slicer pad responds to MIDI Notes, it plays individual slices within the WAV file.
To Use MIDI Notes to Play Slices:
- Create a slicer pad and create 4 or more slices by either using the Scan feature or manually creating the slices.
- Set the following values for the pad parameters:
| Parameter | Value | Explanation |
| LaunchMode | Trigger | This will cause the WAV slice to play from beginning to end when a trigger is received. Other values will work, but let's use this for the example. |
| Loop Mode | Off | We will turn off looping for this example. |
| Slice | 3 | This doesn't impact how the MIDI device or Keys screen plays the slices. |
| MIDI | Choose a MIDI Channel not used by other pads or the GlobalMIDI setting. | We want to see the difference between the default MIDI behavior on the GlobalMIDI Channel and using MIDI to trigger slices, so we need to use a separate channel. MIDI notes received on the channel you select here will choose a slice to play. |
| Slice Seq | None | We will not use the Slice Sequencer in this example. |
-
Connect a MIDI device for input that uses the MIDI Channel you selected for the MIDI parameter. Play MIDI note 36 (usually C2). You will hear that slice 1 is played.
-
Play MIDI Note 39 and slice 4 will be played. MIDI Notes 36 and up are now mapped to Slices 1 and up for playback.
The steps above show a simple example of using MIDI alone to trigger different slices within one pad. You can use this with Loop Mode ON with Launch Modes of Gate or Toggle to achieve different effects.
Synchronize Playback with a Clock
Blackbox can either run on its own internal clock or follow an external clock. It can also provide a clock signal for other devices to follow.
Configure Blackbox to Follow an External Clock
There are a few different musical clock sources that you can use with blackbox:
| Name | Description | Priority |
| Clock In | Blackbox gets a Clock signal from an input to theClock Injack on the back of the case. Blackbox expects a clock pulse signal with 4 pulses per quarter (PPQs), or a pulse per 16thnote. | 1 |
| MIDI Input via USB Device port | When a MIDI signal is connected to the Device USB jack on the back of the case, blackbox will follow MIDI Start, Stop and Clock messages. | 2 |
| MIDI Input via MIDI TRS In port | When a MIDI signal is connected to the MIDI In TRS jack on the back of the case, blackbox will follow MIDI Start, Stop and Clock messages. | 2 |
| Blackbox Internal Clock | When no other clock input is provided, blackbox will use its own internal clock. Set the BPM on the Song screen to adjust the clock speed. | 3 |
You can control whether blackbox responds to the USB Device MIDI input, the TRS MIDI Input, or ignores MIDI clock on the TOOLS screen:
- Push TOOLS and then touch MIDI In at the bottom of the screen.
- Turn the knob next to the ClockSource parameter to select which MIDI clock source you want to use. Select None to ignore the clock signal on both MIDI inputs. Select All if you expect you will only use one clocked MIDI input at a time, or if you just want the two clocks to fight it out.
Blackbox displays the current clock time in the top left corner of most screens in the format
Blackbox can adjust the timing of the playback of a clip pad to synchronize it with a specified unit of musical clock time.
Note:
- The Clock input must use 4 pulses per quarter (PPQs), or a pulse per 16th note.
- If MIDI and CLOCK inputs are both used, Blackbox will select the highest priority clock based on the following order of priority: 1.) CLOCK Input; 2.) MIDI Input; 3.) Internal Clock.
• See
• Work with a Clip Pad above for more information about synchronizing Clips.
Send the Blackbox Clock Signal to External Devices
Blackbox sends out a MIDI clock signal through the TRS MIDI output. If you are using the TRS MIDI port, be sure to check TRS Mini-jack compatibility. See Pin Mapping for Mini TRS Jack to MIDI 5 Pin DIN Connectors below for more information about compatibility.
Blackbox sends an analog pulse clock through the Clock Out port. It sends a clock pulse signal with 4 pulses per quarter (PPQs), or a pulse per 16 th note.
Reset the Clock
You can use the following methods to reset the clock counter back to 1:1:
- Press Play.
- Stop the Clock input for a few seconds and then restart it.
• Receive MIDI play and MIDI clock signal.
Powering MIDI Devices
When you are using an external USB MIDI device with blackbox, you will need to ensure you have an adequate power supply to drive both blackbox and the MIDI device. Use the provided USB power cable with one of the following to ensure adequate power:
• The power supply provided to plug blackbox into a standard power outlet
- A power adapter that delivers at least 2 amps at 5 volts. Newer iPad adapters will work.
The following power sources may not reliably provide sufficient power to support blackbox plus a MIDI device:
• An iPhone adapter
• A laptop or computer USB connection
• Any adapter that supports under 1 amp

Power Supply with International Adapters
If you need to use one of these lower power sources for blackbox, you may be able to use a separate power supply to power the MIDI device. If the power supplied is insufficient, the MIDI controller may not power up and blackbox may have unreliable behavior.
Create Preset Templates for Re-Use
Preset template support was added in blackbox 1.2 in response to requests from some users who like to set up their presets a certain way each time, and other users who want to configure a preset in preparation for a live performance. Preset templates allow you to configure the pad mode, output, MIDI settings, modulation and other settings before you have associated a WAV file with the pad.
A preset template is simply a preset that has pads which have been configured but do not have WAV files associated with them. Preset templates can also store all of the other information a standard preset has: Sequences, Song Sections, FX, Mixer settings and more.
To Configure a Pad without a WAV file:
- Select the pad you want to configure as a template on the PADS screen.
- Push INFO. If the pad is loaded with a WAV file, this will display the WAV screen. In this case, touch the pad mode icon on the top left of the screen and then select New Recording to remove the WAV file mapping. You will now see the Load and Record screen.
- Push INFO again to see the Parameters screen for this pad.
- Choose the Pad Mode on the Main page of the Parameters screen.
- Use the buttons across the bottom of the screen to choose the desired page and update the parameters as you normally.
- Push PSET and then touch File and Save or Save As to save the changes to this preset.
To Add a WAV file to a Template Pad:
- Select the pad you want to configure as a template on the PADS screen.
- Push INFO to display the Load and Record screen.
- Touch Load if you want to use and existing WAV file. Otherwise, begin recording a new WAV as usual.
Note:
- Not all parameters are available before you add a WAV file to the Pad. For example, you cannot add loop points to a sample mode pad because blackbox does not know how long the file will be.
- You can use the SEQs, SONG, FX and MIX screens to configure other elements as needed.
Reduce Aliasing When Playing Pads Chromatically
Blackbox offers two choices for the interpolation algorithm used to play pads Chromatically. The first algorithm is called Normal mode. In this mode, blackbox may introduce some aliasing with some WAV files when pitch shifting notes to play sample, multi-sample and granular pads chromatically. The second algorithm is the High Quality (High Q) algorithm. This algorithm reduces the aliasing, but it requires more processing power, leaving less room to do other things. By default, your pads will use the Normal mode algorithm. You can configure a sample, multi-sample and granular pad to use the High Quality algorithm when needed. Here's how to configure this option:
- Open the parameter pages for the pad that is experiencing aliasing.
- Touch ADSR to select that page.
- At the top of the screen, to the right of the Exclusive grouping option, is the interpolation algorithm option, which is set to Normal by default. Touch this to display the options menu. Touch High Q to select the High Quality algorithm.
Note:
- The High Quality setting uses more processing power. This means you may encounter drop outs or crackling sooner when this option is selected. See Processor Management Tips below to learn techniques to avoid drop outs and crackling.
- This option only applies when playing sample, multi-sample and granular pads chromatically. If you are not playing the pad chromatically, it's best to leave it set to Normal.
Processor Management Tips
If you have experienced drop outs or crackling sounds with blackbox, you have probably pushed the processor to its limits. Blackbox does not limit what you can do based on anticipated processor load. We have tried to balance the design of the system to optimize what you can do without overdriving the processor while still giving you room to make creative choices. That being said, here are some tips you can use to reduce your processor load and the corresponding chance of encountering sound artifacts:
- Configure your pads to run monophonic whenever possible. On most percussion sounds, you won't hear the difference and this is an easy win.
- Disable the reverb by making sure no pads have FX2 applied on the FX screen. This is an expensive algorithm that can also be done off board. Keep in mind that the reverb will continue to run for 60 seconds after you disable it, so you won't get the benefit for a short while.
- Use mono samples instead of stereo where appropriate. Stereo samples are twice the work to load and play.
- Use 48kHz samples when possible—especially for stuff played at unity pitch. This gives the CPU less work to do.
• Use the pad level filters sparingly. - Reduce the number of grains used for pads in granular mode.
- For sample, multi-sample and granular pads, use Normal mode (at top of ADSR screen). The High Q mode uses more processor cycles.
If you like crackly sounds, by all means do the opposite of what each of the tips above suggest. Have fun!
Update Firmware, Audio Files and Presets
You can update the blackbox firmware to get the latest features and other updates. The firmware can be updated with the factory image, which includes the original presets, or just the firmware itself. You can also choose individual presets to copy over to your microSD Card.
Switch to a New MicroSD Card While Operating Blackbox
You can switch to a different microSD card while operating blackbox. Simply remove the current card and insert the new one, then load a preset from the new card as usual. Just make sure you save any changes before you remove the original card.
Backup Your Presets and WAV Files
Before you use a microSD card to update firmware, backup the files that are stored on the microSD card:
Remove the microSD card from the front edge of blackbox and insert into your computer. You may need to use a microSD adapter for your computer (not included).
Copy the files from the microSD card onto your computer.
Install New Firmware
Here are the steps required:
- Download the desired firmware onto your computer. You can find the latest firmware images on the forum at https://forum.1010music.com. You must be a registered user of the forum to access the download files. Forum registration is free.
- Unpack the zip file. Some browsers do this automatically for you.
- Prepare a microSD card with the FAT32, MSDOS Fat, or ExFat format. The card that comes with blackbox is formatted properly, but you may need to reformat a card that came from somewhere else.
- If you want to replace the Presets with the factory image, copy the full contents of the zip file onto a microSD card. If you do not want to overwrite your presets, copy only the BLACKBOX.BIN file to the microSD card.
- Unplug blackbox.
- Place the updated microSD card in blackbox.
- While plugging in blackbox, hold the BACK and INFO buttons. When you see the words "Blackbox Installer" on the screen, you can let go of the buttons.
- When the upgrade finishes in about 15 seconds, the unit will restart with the new software.
Reset Blackbox Presets to Factory Settings
If you want to reset one or more of the blackbox presets to the original factory settings, you can copy individual preset files onto your microSD card.
- Download the blackbox firmware onto your computer. You can find the available firmware images on the forum at https://forum.1010music.com. You must be a registered user of the forum to access the download files. Forum registration is free.
- Unpack the zip file. Some browsers do this automatically for you.
-
Find the *.xml file in the unpacked folder that has the same name as the preset you want to restore. Copy the .xml file onto the microSD card to replace the file on the card. Keep in mind that you will also need the WAV files that go with that Preset and you may need to copy those over as well.
-
Insert the microSD card into the MICRO SD slot of blackbox.
- Push the PSET button to display the Presets selection screen.
- Select any preset to load the updated presets.
Technical Specs
On-Board Memory
Blackbox has 64MB of on-board RAM. However, this is a cache--not a hard limit to what can be loaded at once.
Maximum Sample Length
Blackbox streams the longer samples from the microSD card, so the maximum length is a function of the maximum file size for a sample. The maximum file size is 4GB, which can be many hours depending on the sample rate and bit depth.
Blackbox caches smaller sample as needed.
Samples Supported
Blackbox supports stereo samples. It can record in stereo and has stereo outputs.
Blackbox supports samples in the WAV file format. It supports 1 or 2 channel files with 16, 24 or 32-bit resolution at any sample rate. 48kHz is the preferred sample rate. The blackbox engine uses a 24-bit ADC and DAC.
WAV file names may use Alpha Numeric Characters (A-Z, 0-9) and some special characters. The following characters are NOT allowed: double quotes, forward slash, back slash, question mark, asterisk, less than and greater than symbols, the colon and the pipe symbol (" / \ ? * < > : |). File names must be less than 256 characters, including the path name. Files that do not conform to these naming constraints will not be recognized by blackbox.
Maximum Number of Voices Supported
Blackbox supports 4-note polyphony for pads in Sample Mode, 2-note polyphony in Clip and Slicer Modes, and one note polyphony in Granular mode. Nothing in blackbox will prevent you from trying to play 4 voices on all 16 pads at the same time. However, the CPU can be overloaded if you play too many notes at once while also using sequencing and fx. You can reliably play 16 voices across all pads simultaneously. Beyond that, you may encounter some sound quality issues like crackling. The exact breaking point depends on whether effects are running, the CPU load and other factors.
Pin Mapping for Mini TRS Jack to MIDI 5 Pin DIN Connectors
The musical instrument industry currently uses several different ways of mapping MIDI 5 Pin DIN signals to mini TRS jack connectors. The diagram to the right shows the numbering of the pins on a MIDI connector and the labels of the connection components of a mini TRS jack. 1010music products are compatible with cables that use the following mapping of MIDI signals between female MIDI connectors and mini TRS jacks:
| MIDI Signal | MIDI Connector | Mini TRS |
| Current Source | Pin 4 | Tip |
| Current Sink | Pin 5 | Ring |
| Shield | Pin 2 | Sleeve |
MIDI Connector to Mini TRS Jack Mapping
For more information on the use of adapters, read the blog post on our website Mini TRS Jacks for MIDI Connections Compatibility Guide at:
https://1010music.com/stereo-minijacks-midi-connections-compatibility-guide

5 Pin DIN and Mini TRS Jack Connectors
Stay Up to Date
Demonstration Videos and Latest Documentation
You can find links to video demonstrations of blackbox on our website at https://1010music.com/blackboxdocs.
You can also look there for updated versions of this user manual and the Quick Start Guide.
Connect with Other Blackbox Users
There is a very active community of users of 1010music products at forum.1010music.com. If you have a question about blackbox that isn't answered in this manual, this is your best source for help. We actively monitor the wish list sub-forums for ideas for future versions of our products. Forum registration is free. We hope to see you out there!
Contact Us
Are you loving blackbox? Have questions? You can contact us through our website at http://1010music.com/contact-us.
Appendix A - Summary of Changes
For those of you who have read the manual before and just want to see what's new, here is a list of changes by version.
Changes in V 1.5
• Explore KEYS in the Quick Start: Added an introduction to the Grid Keyboard.
- Create a New Preset: Updated to reflect that NEW is now under the File menu. Also the blackbox will now load the last used preset on this microSD card on power up.
- Work With PADS: updated the Pad Mode summary table. Described how you can use the grid in the top left corner of the parameters screen to switch pad you are working on. Added description of High Q mode.
- Record a New WAV File: Described changes to where the newly recorded WAV files are stored on the microSD card. Describe how to record a multi-sample bank.
- Save and Load Parameters in WAV Files: Added names of the tags used in the WAV file to store the parameters.
- Working with WAV Files on the microSD Card: Updated to reflect changes to where WAV files are stored when you record them and to talk about packing.
- Packing Presets: This new feature allows you to gather copies of all of the WAVs used in a preset into the preset's folder.
- Manage Presets: Updates to discuss the changes to where presets are stored and how legacy presets will be handled.
- Work with Preset Files on the MicroSD Card: Updated to reflect the change to where presets are stored and other related features.
Changes in V 1.4
- Pad Parameters table: Added Pad Note parameter.
- Slicer pad parameters table: Added new parameters to support quantization and synching of slices.
- Slicer pad parameters table: Added new parameter to support Slicer Play Through mode.
- Keys Screen Description: Updates throughout this section to describe the new Grid Keyboard and the ability to glide across keys.
- MIDI Note mapping for Pads: Note that you can override the default values for pad mapping.
- Tools parameters table: Updated descriptions of parameters on the MIDI In page to clarify how blackbox responds to MIDI program changes. Added parameters on the Metro page to support new metronome controls.
- Notes under "Work with MIDI Outputs": Specify that blackbox does not support outgoing Program change.
- BLACKBOX
- USER MANUAL
- TABLE OF CONTENTS
- RECORD A NEW WAV FILE
- SAVE AND LOAD PARAMETERS IN WAV FILES
- TRIM WAV FILES
- USE CLIPBOARD FUNCTIONS WITH PADS
- MANAGE WAV FILES
- USE KEYS TO PLAY PADS CHROMATICALLY OR TO PLAY SLICED WAV FILES
- WORK WITH SEQUENCES
- RECORD AND PLAY SEQUENCES
- WORK WITH SONG SECTIONS
- RECORD AND PLAY SONG SECTIONS
- APPLY EFFECTS
- ADJUST THE MIX
- MANAGE PRESETS
- WORK WITH PRESET FILES ON THE MICROSD CARD
- UPGRADING FROM PREVIOUS FIRMWARE VERSIONS
- USE TOOLS TO CUSTOMIZE YOUR BLACKBOX
- USE MIDI DEVICES WITH BLACKBOX
- WORK WITH MIDI INPUTS
- WORK WITH MIDI OUTPUTS
- USE MIDI NOTES TO PLAY SLICES
- SYNCHRONIZE PLAYBACK WITH A CLOCK
- POWERING MIDI DEVICES
- CREATE PRESET TEMPLATES FOR RE-USE
- REDUCE ALIASING WHEN PLAYING PADS CHROMATICALLY
- PROCESSOR MANAGEMENT TIPS
- UPDATE FIRMWARE, AUDIO FILES AND PRESETS
- TECHNICAL SPECS
- STAY UP TO DATE
- WELCOME
- OVERVIEW
- SET UP BLACKBOX
- CONTROL THE VOLUME
- TEST YOUR SETUP
- CONNECT AN AUDIO INPUT FOR SAMPLING
- WORKING WITH A BATTERY
- QUICK START
- EXPLORE PADS
- EXPLORE KEYS
- EXPLORE SEQUENCES
- EXPLORE SONG SECTIONS
- SONG MODE AND REC | STOP | PLAY BUTTONS
- TO SAVE A PRESET
- CREATE A NEW PRESET
- NOTE
- WORK WITH PADS
- SET UP A SAMPLE PAD
- SINGLE SAMPLE PADS
- MULTI-SAMPLE PADS
- WORK WITH A CLIP PAD
- WORK WITH SLICER PADS
- TO MANUALLY CREATE OR REMOVE SLICES
- TO USE AUTO SCAN TO CREATE SLICES
- TO USE SLICE TO GRID
- TO USE SLICES TO SYNCHRONIZE PLAYBACK OF CLIP PADS
- WORK WITH GRANULAR PADS
- TO RECORD A WAV FILE
- IF YOU ARE RECORDING WAVS FOR THE CURRENT PRESET
- IF YOU ARE RECORDING WAVS TO BUILD UP A LIBRARY OF SOUNDS
- TO RECORD A MULTI-SAMPLE PACK ONTO BLACKBOX
- WORKING WITH WAV FILES ON THE MICROSD CARD
- TO DELETE, SAVE AS OR RENAME A WAV FILE
- PACKING PRESETS
- TO PACK A PRESET
- TO SELECT A SCALE ON THE GRID KEYBOARD
- TO TOGGLE SONG MODE ON AND OFF
- TO RECORD A SEQUENCE
- TO PLAY SEQUENCES
- TO EDIT AND VIEW THE NOTES AND PAD TRIGGERS IN A SEQUENCE
- TO EDIT SEQUENCE SETTINGS
- TO TOGGLE SONG MODE
- TO RECORD A SONG SECTION
- TO PLAY SONG SECTIONS
- TO EDIT SONG SECTIONS
- TO REORDER SONG SECTIONS
- TO CHANGE THE PLAYBACK SPEED OF A SONG
- TO ADD SWING TO A SONG
- TO ROUTE A PAD TO AN EFFECT
- TO MODIFY EFFECT PARAMETERS
- TO ADJUST THE SOUND LEVEL AND PAN OF A PAD
- TO MUTE AND UNMUTE PADS
- TO SAVE CHANGES TO A PRESET
- TO LOAD A PRESET
- TO CLEAN UNUSED WAV FILES OUT OF A PRESET'S FOLDER
- TO DELETE A PRESET
- TO RENAME A PRESET
- TO SAVE CURRENT CHANGES AS A NEW PRESET
- TO USE MIDI CC IN LEARN MODE TO MODULATE PAD AND EFFECT PARAMETERS
- TO REMOVE MIDI MODULATION FROM A PARAMETER
- SHARING OF MIDI INPUT CHANNELS
- USE MIDI PROGRAM CHANGE TO OPEN A PRESET
- TO ENABLE OR DISABLE MIDI PROGRAM CHANGES
- TO SEND MIDI NOTES FROM A SEQUENCE TO AN EXTERNAL MIDI DEVICE
- TO SEND MIDI NOTES FROM A PAD TO AN EXTERNAL MIDI DEVICE
- TO USE MIDI NOTES TO PLAY SLICES
- CONFIGURE BLACKBOX TO FOLLOW AN EXTERNAL CLOCK
- SEND THE BLACKBOX CLOCK SIGNAL TO EXTERNAL DEVICES
- RESET THE CLOCK
- TO CONFIGURE A PAD WITHOUT A WAV FILE
- TO ADD A WAV FILE TO A TEMPLATE PAD
- SWITCH TO A NEW MICROSD CARD WHILE OPERATING BLACKBOX
- BACKUP YOUR PRESETS AND WAV FILES
- INSTALL NEW FIRMWARE
- RESET BLACKBOX PRESETS TO FACTORY SETTINGS
- ON-BOARD MEMORY
- MAXIMUM SAMPLE LENGTH
- SAMPLES SUPPORTED
- MAXIMUM NUMBER OF VOICES SUPPORTED
- PIN MAPPING FOR MINI TRS JACK TO MIDI 5 PIN DIN CONNECTORS
- MIDI CONNECTOR TO MINI TRS JACK MAPPING
- DEMONSTRATION VIDEOS AND LATEST DOCUMENTATION
- CONNECT WITH OTHER BLACKBOX USERS
- CONTACT US
- APPENDIX A - SUMMARY OF CHANGES
- CHANGES IN V
Brand : 1010music
Model : BLACKBOX 1.5
Category : Electronic musical instrument