Toolbox - Electronic musical instrument 1010music - Free user manual and instructions
Find the device manual for free Toolbox 1010music in PDF.


| Product type | Sequencing module and function generator for Eurorack |
| Brand | 1010music |
| Model | toolbox |
| Firmware version | v1.1.4 |
| Format | Eurorack 3U module |
| Power | Via the Eurorack bus (+12V / -12V) |
| Outputs | 4 GATE outputs, 4 CV outputs, 1 MIDI output (TRS) |
| Inputs | 2 CV inputs for external modulations |
| Clock | Input/output for external synchronization |
| Storage | Micro SD card for presets and WAV files |
| Display | Integrated display for navigation and control |
| Sequencing | Notes (NOTE), gates (GATE), LFO, CV sequences (SEQ), recording (CREC), CV playback (CPLY) |
| Main functions | Sequencers, function generators, modulation, MIDI import, CV WAV file playback |
| Preset management | Save, copy, rename, delete and 'Save As' function |
| Update | Firmware updated via micro SD card |
| Compatibility | Compatible with Eurorack modules and MIDI controllers |
| Maintenance and cleaning | Clean with a dry, non-abrasive cloth |
| Safety | Respect the power specifications of the Eurorack rack |
| Spare parts | Replaceable micro SD card, standard MIDI cables |
| Repairability | Software updates possible, online support |
Frequently Asked Questions - Toolbox 1010music
User questions about Toolbox 1010music
0 question about this device. Answer the ones you know or ask your own.
Ask a new question about this device
Download the instructions for your Electronic musical instrument in PDF format for free! Find your manual Toolbox - 1010music and take your electronic device back in hand. On this page are published all the documents necessary for the use of your device. Toolbox by 1010music.
USER MANUAL Toolbox 1010music
Toolbox v 1.1.4 User Manual

Welcome 4
Overview....5
Front Panel Overview 5
Main Screen Overview....6
Series Compatibility....6
Setup Toolbox 7
Choose an Orientation....7
Rack Installation 7
Connect a Gate Output to a Sound Generating Module 7
Connect a MIDI Controller Input....8
General Module Settings 8
Working in Flipped UI Mode 8
Play Settings....9
Playback Presets 10
Select a Preset....10
Save a Preset....10
Start Playback of the Sequencers and Function Generators 10
Mute Mode....11
Configure Sequences....12
Choose a Cell Type 12
Configure a Gate Sequencer (GATE)....14
Clear the Notes in the Gate Sequencer....15
Copy and Paste Gate Events Between Gate Cells....15
Import a MIDI File into a Gate Sequencer....15
Configure a Note Sequencer (NOTE)....15
Clear the Notes in the Piano Roll 18
Copy and Paste Notes between NOTE Cells....18
Import a MIDI File into a Step Sequencer 18
Configure a Low Frequency Oscillator (LFO) 18
Configure a Control Voltage Sequencer (SEQ)....19
Record a CV Sequence Using the CREC Cell Type 20
Load a CV WAV file using a CREC Cell 22
Play Back a CV WAV File Using a CPLY Cell....22
Load a WAV File into a CPLY Cell 25
Use an Additional CPLY Output Cell (OUT) for Multi-Channel Playback 25
Apply Modulation....26
Synchronizing with Other Modules....28
Preset Management....29
Select a Preset....29
Save a Preset....29
Copy a Preset....29
Rename a Preset 29
Delete a Preset....29
Use "Save As" to Save Current Changes to a Preset as Another Preset 30
Update Firmware and Manage Preset and WAV Files 31
Install New Firmware 31
Backup and Restore Your Presets 31
Manage WAV files and Preset files....31
Technical Specs 32
Module Specs 32
Pin Mapping for Mini TRS Audio Jack to MIDI 5 Pin DIN Connectors....32
Learn More 33
Welcome
Thank you for buying our toolbox. Every good craftsperson needs a toolbox that contains some standard tools that help them do their work. We think Eurorack musicians need a toolbox for their craft as well. This toolbox contains sequencers and function generators that provide CV and MIDI outputs for use in controlling other modules. You can't create music with toolbox alone, but it certainly offers some tools to help you work with your other materials to create the music you imagine.
In this manual, we will start by giving you an overview of the front panel hardware and the Main screen so you know what you have to work with. After that, we will set up the module. Next we will quickly discuss basic preset usage and muting capabilities. Then we will walk you through how to use each of the sequencers and function generators, followed by a discussion of using modulators with the sequencers. Then we will cover how to synchronize toolbox with other modules. Finally, we will go into more depth about preset management tasks and discuss how to upgrade your firmware.
If you would rather get a quick overview of how to use the module, see the Toolbox Quick Start Guide that came with the module and that is also available online at https://1010music.com/toolbox-documentation-software.
We use the following text formatting conventions in this document:
On Screen References:
Used for text that refers to names of screens or on screen graphical elements.
Front Panel Hardware:
Used for text that refers to physical elements on the front panel of the module, but not on the touchscreen.
This document applies to version 1.1.4 of the toolbox firmware.
Overview
Toolbox is a musically intelligent control module capable of driving a rack full of gear. It features both MIDI and Control Voltage interconnects for interfacing with all kinds of different hardware. Toolbox takes full advantage of the integrated 3.5" touch screen to give immediate access to sequences, parameters, and events. The screen provides a full overview of all the active notes and events. It even offers touch based scrolling and zooming, just like a smart phone, to make editing easy and fun. Toolbox is a great way to be creative on your terms.
Front Panel Overview
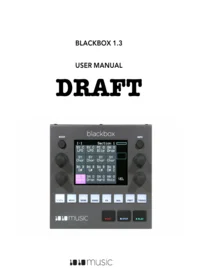
The front panel of toolbox contains a touch screen, control knobs, HOME and INFO buttons, MIDI input and output jacks, and CV input and output jacks as shown in Figure 1. The INFO and HOME buttons at the top of the front panel of toolbox are used to navigate the screens. Press INFO to view the information screen for the current selection. In some cases, you can press INFO more than once to get to deeper information. The HOME button generally takes you back a screen. If you get lost, you can press HOME until you get back to the Main screen. The Control Knobs are used to cycle through options on the screen. When there are several parameters on the screen, use the Control Knob closest to a parameter to set its value. Below the screen there are a series of mini TS audio jacks that are used for MIDI and Control Voltage input and output.

Figure 1: Front Panel Overview
Main Screen Overview
The toolbox Main screen shows the current preset selection, the state of the CV Modulator inputs, and the configuration of sequencer and function generator elements. Touch the Preset Name, or the + and – minus buttons on either side to change the preset selection. The columns and rows displayed on the screen are mapped to the input and output jacks below the screen. You can touch the individual elements on the screen in columns 2 through 5 to access parameter screens for each element, or to change the type of element used in that cell. You can also touch the Play button in the lower left corner to toggle playback of the sequences on and off. The Play button has a blue bar across the bottom when the module is playing. Some cell types also have blue bars that represent their current output state, while others have a miniature display of the configured sequence. Toolbox supports the following types of cells:
• Gate Sequencer (GATE)
• Note Sequencer (NOTE)
• Low Frequencer Oscillator (LFO)
• CV Sequencer (SEQ)
• CV Sample Recorder (CREC)
• CV Sample Player (CPLY)
• CV Sample Player Additional Output (OUT)
These cell types represent different methods for defining the signal that is sent out through the Gate, Control Voltage, and MIDI output jacks. We will go into more detail about this later. First, let's get your toolbox set up so you can try things for yourself as they are discussed.

Figure 2: Main Screen Overview
Series Compatibility
Toolbox is not part of the Series 1 group of modules from 1010music. It uses a different hardware platform that is more focused on providing outputs. Therefore, toolbox cannot run the firmware for Series 1 modules.
Setup Toolbox
In this section we will discuss how to install toolbox in your Eurorack, insert the microSD card, and configure the basic input and output signals.
Choose an Orientation
Toolbox can be configured so that the user interface will be right side up with either the touchscreen at the top of the module, or at the bottom. We originally designed the module to run with the touchscreen on the top of the module, and the text on the faceplate right side up. If you are running the module in a tabletop skiff and want to be able to access the touchscreen without reaching over the cables, install the module with the touchscreen at the bottom. That means the text on the front panel will be upside down. (You can buy an inverted faceplate on our website.) Think about how you want to use the module and decide on the orientation that will work for your setup. We will talk about how to flip the User Interface when we configure the general module settings.
Note:
- When the User Interface is flipped, the alignment of the knobs will be slightly higher than the on screen elements that they control. However, the general orientation mapping will be correct.
Rack Installation
First let's make sure you have a compatible Eurorack. Toolbox requires a +12V connection and uses the standard 16-pin ribbon cable to connect to the rack. You should always power down the Eurorack when connecting new modules. Remove toolbox from the packing material and attach the ribbon cable to the back of the module. The cable is bi-directional so it does not matter which end is inserted into the module. However, the connector must be in the correct orientation. The connector on the module is keyed so the ribbon cable won't fit in the wrong orientation. The correct orientation places the edge of the ribbon cable with the red line on the left side of the module as shown in Figure 3 to the right. Next, connect the other end of the ribbon cable to the power supply for your Eurorack. When connecting to the Eurorack power supply, extra care is needed because not all power supplies are keyed to ensure correct orientation. The ribbon cable should be connected to the power supply so that the edge of the ribbon cable with the red line is aligned with the -12V pins on the power supply bus. When you power up, watch closely to make sure that the module powers up. If the touch screen doesn't respond right away, turn off the rack and confirm the cable orientation. 1010music modules do contain some buffering to prevent burning out the module but that only buffers for so long. Don't power up yet.

Figure 3: Ribbon Cable Orientation on Module
Next make sure the microSD card that came with the module is inserted into the Memory Card Slot. Most modules come with the microSD card already inserted. The card should be inserted with the notched edge down. Now you can power up the rack. The module should start up in less than 10 seconds and you will see the Main screen as shown in Figure 2: Main Screen Overview above.
Note:
- A microSD card must be inserted into toolbox before you can get started. All presets are stored on the microSD card. Preset changes are only saved when you choose to save them.
Connect a Gate Output to a Sound Generating Module
Toolbox itself does not generate sound. It generates MIDI and Control Voltage signals that drive other sound generating modules, such as bitbox, synthbox and third party drum and synthesizer modules. In order to hear an example of the output of toolbox, connect a patch cord between Gate Output jack 1, 2, 3 or 4, and an external module. For example, you could connect it to a control voltage trigger on synthbox or bitbox. Configure the receiving module to play a sound when the gate signal is triggered.
Connect a MIDI Controller Input
Toolbox allows you to record Note Sequences from a MIDI input. If your MIDI controller has a mini TRS audio jack connector, then you can try to plug it directly into the MIDI Input Jack using a standard patch cable. However, there are competing standards for implementing mini TRS audio jacks for MIDI, so you may need to use a MIDI adapter. If it has a 5 Pin DIN connector, use an appropriate MIDI Adapter. Read the blog post Mini TRS Audio Jacks for MIDI Connections Compatibility Guide on our website at https://1010music.com/stereo-minijacks-midi-connections-compatibility-guide for more details about the MIDI adapter.
Toolbox accepts input from all MIDI channels.
General Module Settings
Before we dive into using the module, we will configure two general module settings: RecToPlay, and Flip UI.
To access these settings, press and hold the HOME button until you see the Menu screen shown in Figure 4: Menu Screen to the right. The number in the lower right corner of the screen displays the current version of the firmware installed on the module.
From the Menu Screen, touch Settings to display the Settings screen. Use the Control Knob closest to the parameter to adjust its value.
When RecToPlay is ON, toolbox will automatically play a newly recorded sample when recording completes. This only works when a time duration is selected for the recording Length parameter. When it is off, the sample will not be automatically played.
The Flip UI setting will turn the user interface upside down so you can use the module with the touchscreen on the bottom. As soon as you change the value for Flip UI, the user interface will be inverted. This means you will need to change which Control Knob you use to change it back.
Press the HOME button twice to go back to the Main screen.

Figure 4: Menu Screen

Figure 5: Settings Screen
Working in Flipped UI Mode
When the value for Flip UI is set to ON, the user interface on the touch screen will be inverted. Use this setting when the module is installed in a rack with the touchscreen on the bottom. When flipped, the firmware adjusts how the buttons, Control Knobs and jacks are mapped to the user interface. One noteworthy change is that the HOME and INFO buttons now reverse functions. This is done so that HOME is always on the left and INFO is always on the right. The alignment of the Control Knobs in this mode is slightly high compared to the parameters on the touch screen. However, the top left control knob will control the top left parameter, and the lower right control knob will control the lower right parameter. The Gate and Control Voltage outputs are also now mapped to the inverted display. The Input Jacks and MIDI Outputs maintain their original assignments. The figure below shows the faceplate labels for an inverted module.

Figure 6: Inverted Faceplate Labels
Play Settings
There are several global settings that apply to all of the sequencers and function generators. Follow these steps to configure these settings:
- Press HOME to return to the Main screen if needed.
- Touch Play and then press INFO to display the Play Settings screen.
- Use the Control Knobs to adjust the following parameters:
| Parameter | Description | Range of Values |
| BPM | The beats per minute used for playback of sequences and function generators when the internal clock is used. | 40 to 250 |
| Key Mode | Sets the type of scale used by the note sequencers for the purpose of quantizing the pitch. Choose Chromatic if you do not want the pitch quantized. | Minor BluesMinor PentMinorMajor PentMajorChromatic |
| Root Note | Together with Key Mode, this will set the exact scale and key signature that toolbox will use for pitch quantization by the note sequencers. | A, A#, B, C, C#, D, D#, E, F, F#, G G# |

Figure 7: Settings Screen
- Press HOME when done to return to the main screen.
Note:
- If the Main screen is in Mute mode when you press INFO, toolbox will first turn off Mute mode and stay on the Main screen. Press INFO again to display the Global Settings screen.
Playback Presets
Before we start creating our own sequences, lets make sure the module is setup properly by playing back some content from a preset that comes with the module.
Select a Preset
A preset is a set of pre-configured sequences, function generators and modulators. You can use the 1010music
presets or create your own. To select a preset:
- Press the HOME button to display the Main screen if needed.
- Cycle through the presets by touching the + and - buttons at the top of the Touch Screen on either side of the name of the preset (e.g. MANUAL in Figure 2: Main Screen Overview above).
- Alternatively, you can touch the name of the preset or the space above it to display the Preset Selection screen.
- Turn a Control Knob to select the desired preset.
- Touch Load to load the selected preset and go back to the Main screen.

Figure 8: Preset Selection Screen
Save a Preset
Toolbox does not automatically save your changes to presets. You have to manually save by following these steps:
- From the Main screen, touch the preset name to display the Preset Selection screen.
- Touch Edit to display the Preset Edit Submenu.
- Touch Save to save the changes to the preset and return to the Main screen, or touch Save As to save the changes to a different preset.
Toolbox allows you to switch presets in real time to switch all patterns at once. If you switch presets during playback, the change will take effect at the beginning of the next bar. This change is quantized to measure to give you smooth transitions. You can also use modulation to alter pattern length, step size, and transposition to get maximum use out of a single pattern.

Figure 9: Preset Edit Submenu
Learn more about managing presets in Preset Management below.
Start Playback of the Sequencers and Function Generators
Toolbox comes with two presets that demonstrate the use of the sequencers and function generators. Let's play one of them to demonstrate the use of the module. Select one of the two supplied presets: STABS or BBQ. Note that these presets have Gate sequencers configured for Gate outputs 2 and 3.
To control playback of all of the sequencers and function generators:
- Press the HOME button to display the Main screen if needed.
- Touch Play in the lower left corner of the screen to toggle playback on and off. The Play button is pink when it is selected. The blue bar at the bottom of the Play button indicates when playback is active.
- You can also use the bottom CV Mod In jack to control playback. Each high signal received on the bottom CV Mod In jack will toggle playback on and off.
Note:
- When the module is mounted with the screen on top, CV Mod In 4 controls playback. When the module is configured to run with the Flipped UI and the screen on the bottom, CV Mod In 1 controls playback.
Toolbox will now generate a sequence of gate signals out through the Gate Output jacks 1, 2, 3 and 4, if the corresponding cell is configured. These gate signals can trigger notes on another module. Listen to the output of the receiving module to hear the sequences. Other outputs may be sent to other jacks if the corresponding cells are configured, and are not muted.
Mute Mode
Toolbox offers the ability to quickly mute individual function or sequencer component outputs. This allows you to turn different components on and off during the course of playback or to isolate a single component while creating the sequence.
To use Mute Mode to temporarily disable playback of toolbox components:
- Press HOME to return to the Main screen if needed.
- Press HOME to toggle Mute Mode on and off. In Mute Mode, the colors of the screen components change to green and red.
- Touch boxes on the screen to mute them. Touch them again to re-activate them. Green elements are active and red elements are muted.
Configure Sequences
At this point, you should have your module set up and you have used the preconfigured presets to test basic outputs. Now you are ready to start creating your own music.
With toolbox, you can choose from a selection of sequencers and function generators for each cell to configure the module to use the combination that suits your needs. On the Main screen, each cell shows a miniature representation of each of the sequencers and function generators. The display varies based on the selected Cell Type. You can touch each of the cells in the grid to access the screens used to configure them. You can use the Control Knobs to change the currently selected cell. The current selection is highlighted in pink. You can then press the INFO button to configure the selected cell. Each of these cells maps to an output jack in the array of jacks below the touchscreen.

Figure 10: Main Screen with OUT2 Selected
Choose a Cell Type
Toolbox creates music by generating Gate, Control Voltage (CV) and MIDI sequences that will be sent to sound generating modules to control their playback. The 16 cells on the Main Screen allow you to configure 16 different sequences for each Preset. The Cell Type controls the type of sequencer or function generator used to create the signal for each cell. You can select a different Cell Type for each cell in columns 2 through 5 of the grid on the Main screen. Some Cell Types support output to the MIDI ports. Each column of cells on the screen maps directly to the column of output jacks above or below them. Some of the output jacks are wired to support Gate outputs, while others support CV outputs. As a result, not all columns can fully support all Cell Types. NOTE cells can span a Gate and a CV output to provide full Gate and CV support. The table below provides an overview of the Cell Types and the level of support enabled when used with each output jack or jack pairing. We will go into more detail about each Cell Type later.
| Name | Description | Gate 1-8 | Gate 5-8 and CV 1-4 Span | CV 1-8 |
| Gate Sequencer (GATE) | A sequence of gate signals displayed in a grid of cells where the color of the cell indicates whether the signal is on or off at that step in the sequence. | MIDI and Gate | Not Supported | MIDI |
| Note Sequencer (NOTE) | A piano roll style sequence of notes displayed with the keyboard running down the left side, and the sequence steps scrolling from left to right. The Gate output is high when a note is playing, and low when it is not. The CV output varies based on the pitch of the selected note. | MIDI and Gate | MIDI, Gate and CV | MIDI and CV |
| Low Frequency Oscillator (LFO) | A variable control voltage generated by a cycling mathematical function, such as a triangle wave. The voltage range is from -5V to +5V. | Not Supported | Not Supported | CV |
| Control Voltage Sequencer (SEQ) | A variable CV voltage generated by drawing a bar graph on the touch screen. The voltage range is 0V to +5V. | Not Supported | Not Supported | CV |
| Control Voltage Recording (CREC) | A CREC cell is used to record incoming CV signals from the CV1 and CV2 input below the Clock input. After the recording is completed, the Cell Type automatically changes to CPLY. A CREC can also load a WAV file for playback by a CPLY cell. | Not Supported | Not Supported | CV |
| Control Voltage Playback (CPLY) | Plays back a control voltage signal that was recorded via CREC. Can be used together with OUT cells to play back up to 8 channels from a loaded WAV file, or 2 channels from a WAV recorded on the module via CREC. | Not Supported | Not Supported | CV |
| Control Voltage Output (OUT) | Use this type together with a CPLY cell to play back an additional channel from the WAV file loaded in the CPLY cell. | Not Supported | Not Supported | CV |
The use of cell types in different columns is constrained based on the mapping of the cells to the output jacks below them. Gate Output jacks 1 through 8 can only output Gate signals. They are not designed to support output of control voltage signals. CV Output jacks 1 through 8 support control voltage signals, which cannot be used as gate signals. Therefore, the cell columns aligned with Gate Output jacks can only support GATE and NOTE cell types. When the NOTE cell type is used in columns aligned with Gate Output jacks, it outputs a full MIDI signal, but the output jacks are limited to only output a gate signal; no CV pitch signal is available. Cells in columns aligned with CV Output jacks can support all cell types. However, a NOTE cell type in one of these columns, while outputting full MIDI signals, will only generate a CV Pitch signal; no Gate information will be generated through the CV Output jacks. NOTE cells can also be created that span across Gate and CV jacks in order to generate both GATE and CV pitch signals for the sequence.
Note:
• Only the GATE and NOTE cell types support MIDI outputs.
To select a Cell Type:
- Press the HOME button if needed to return to the Main Screen.
- Touch one of the cells aligned with the CV Output or Gate Output jacks to select the cell. The selected cell will be highlighted in pink.
- Press the INFO button to display the parameters screen for the selected cell.
- Touch the Cell Type button in the top row just to the right of the Grid icon and select the desired Cell Type. The Cell Type button label changes to display the currently selected Cell Type. Note that you may choose a Cell Type of (none) in Gate Output columns to clear the cell. This option is not available in the other columns.
Note:
- If you have a NOTE cell that spans columns 3 and 4, you can split it into two cells of any other cell type. Simply select the NOTE cell, and then change its cell type. The NOTE cell will split into two cells, with the cell in the CV column using the Cell Type selected. The cell in the Gate column will be empty.
You are now ready to configure the selected sequencer or function generator.
Configure a Gate Sequencer (GATE)
A Gate Sequencer is a useful way to create a repeating pattern of ON and OFF signals. These signals are then typically used to trigger notes or effects in other modules. For toolbox, the GATE output signal for the ON state will be +5V, and for the OFF state will be 0V. The Gate Sequencer output is monophonic. The Gate Sequencer will also send output to the specified MIDI channel, if something other than the DEFAULT channel is selected for the MIDI channel for this cell. The Gate Sequencer will send Note 64 to the specified MIDI channel when the sequencer state is ON.
Because the CV Output jacks do not support GATE signals, the GATE Sequencer will only generate a MIDI signal when used in these columns.
You configure the steps in the sequence by using the control knobs and touch screen to control which steps in the sequence are ON or OFF. To edit a Gate Sequence:
- Press the HOME button if needed to return to the Main Screen.
-
Touch one of the GATE cells to display the Gate Sequencer screen. To change a cell to a GATE cell, touch the Cell Type button in the top row just to the right of the Grid icon and select GATE from the Cell Type list. The gate sequencer grid displays a series of boxes that control whether the gate signal is on (light blue) or off (gray) at each step in the sequence. The sequence starts with step 1 in the lower left corner and scrolls right then up. During playback, a white outline will move through the sequence of boxes to show the current playback position.
-
Touch a box in the sequence grid to change its state.
-
Press the INFO button to toggle the display between the Gate Sequencer screen and the Gate Parameters screens for this gate sequencer.
-
Use the Control Knobs to adjust the values of the following parameters:

Figure 11: Gate Sequencer Screen
| Parameter | Description | Range of Values | Modulation Target? |
| Step Len | Controls the length of time the sequence will spend on each step, in terms of fractions of a bar. | 1/64, 1/32T, 1/32, 1/16T, 1/16, 1/8T, 1/8, 1/4T, 1/4 , 1/2T, 1/2 , 1 bar, 2 bars, 4 bars, 8 bars (T= Triplet) | Yes |
| Quant Size | Defines precisely when to restart the sequence when using the internal clock. When the sequence ends, toolbox will wait until the start of the next Quant Size interval to restart the sequence. | 1/64, 1/32T, 1/32, 1/16T, 1/16, 1/8T, 1/8, 1/4T, 1/4 , 1/2T, 1/2 , 1 bar, 2 bars (T= Triplet) | No |
| Step Count | The number of steps in the sequence. The number of boxes on the screen will remain the same, but if a value lower than 32 is selected, the sequencer will only move through the number of steps selected. | 1 through 64 | Yes |
| Clk Source | This parameter allows you to use an alternative input as the clock signal. By default, the toolbox internal clock (INT) will be used. | INT, EXT1, EXT2, EXT3, GATE1, GATE2, GATE3, GATE4 | No |

Figure 12: Gate Sequencer Parameters Screen 1
| MIDI | The MIDI Channel that will be used when sending the MIDI signal for this cell. | Default, Ch 1 through Ch 16 | No |
| MIDI Port | The MIDI Port on the Toolbox module where the MIDI signal for this cell will be sent. | 1 through 4 | No |

Figure 13: Gate Sequencer Parameters Screen 2
Note:
- If a value of a Gate Sequencer parameter is changed during playback of the sequence, the change will take effect at the start of the next loop through the sequence.
- If the value of the MIDI parameter is set to Default, no MIDI signal will be sent for this GATE cell.
Clear the Notes in the Gate Sequencer
Sometimes you may want to erase all of the gate events in the gate sequencer and start over. Here's how:
- From the Gate Sequencer screen, touch Edit in the top menu, and then touch Clear. This will erase all of the gate events from the Gate Sequencer.
- If you only want to remove some of the gate events, touch the events you want to remove and they will be erased.
Copy and Paste Gate Events Between Gate Cells
The Edit menu in a GATE cell allows you to copy gate events between GATE cells.
- Open the Gate Sequencer for the source Gate cell, and touch Edit from the top menu.
- Touch Copy or Cut in the drop down menu. If you use Cut, the gate events will be removed from the currently selected GATE cell.
- Open the Gate Sequencer for the target GATE cell, and touch Edit from the top menu.
- Touch Paste in the drop down menu. All of the gate events from the source GATE cell will now be added to the target GATE cell. Any previously existing gate events in the target GATE cell will remain as well.
Import a MIDI File into a Gate Sequencer
Another way to get notes into a Gate sequencer is to import a MIDI file from the microSD card. Follow these steps:
- Copy a standard MIDI file onto the microSD card and then reinsert the card into toolbox. The MIDI file should have a .MID file extension.
- From the Gate Sequencer screen of a GATE cell, touch Edit in the top menu, then touch Import in the drop down menu.
- Use the Control Knobs to highlight the file you want, and then touch Load in the top right corner. The sequencer grid will now display the notes imported from the MIDI file. Any previous notes in the piano roll will be erased. Given the nature of the Gate Sequencer, only On/Off note information is imported. The pitch is not used.
Configure a Note Sequencer (NOTE)
Toolbox's Note Sequencers are piano roll style sequencers that generate both CV and MIDI outputs. The CV output may be in the form of a pair of gate and pitch signals for each Note Sequencer, just a gate signal, or just a CV pitch signal depending on which column or columns the cell placed in. The CV Output is monophonic. It will play back the most recently entered note for each step in the sequence.
When a NOTE cell spans a Gate and a CV Output, the Gate Output will indicate when the note is on or off, and the CV Output will represent the pitch of the note. The Gate output will be +5V for an ON signal and 0V for an OFF signal. The pitch signals on the CV Outputs will carry 1 volt per octave and support a range of 0 to 5 volts. Middle C is at 2 volts.
When a NOTE cell is aligned with only a Gate Output jack, only a Gate signal will be provided in the corresponding output jack. When it is aligned with only a CV Output jack, only a Control Voltage output for pitch will be provided in the corresponding output jack.
No matter which column a NOTE cell is placed in, it will always support MIDI output to the selected port and channel.
The table below summarizes the output jack support available based on the Output Jack or Jacks aligned with the column where the NOTE cell is placed.
| Name | Description | Gate 1-8 | Gate 5-8 and CV 1-4 Span | CV 1-8 |
| Note Sequencer (NOTE) | A piano roll style sequence of notes displayed with the keyboard running down the left side, and the sequence steps scrolling from left to right. The Gate output is high when a note is playing, and low when it is not. The CV output varies based on the pitch of the selected note. | MIDI and Gate | MIDI, Gate and CV | MIDI and CV |
The MIDI signals are output through the MIDI Output Jacks on the right edge of the module. The Note Sequencer parameters allow you to configure the MIDI port and channel for playback of each Note Sequencer. All Note Sequencers could output to the same port and channel, or each could be routed to a different port or channel. The MIDI output is polyphonic and can play up to 128 notes per step per port. When the sequence is recorded via MIDI input, or loaded from a MIDI file, the MIDI output will include gate, pitch and velocity information. Notes that are placed manually via the touchscreen will include only gate and pitch information in the MIDI output. The Note and Gate Sequencers are the only Cell Types that send a signal to the MIDI output.
Follow these steps to create a Note Sequence:
-
From the Main screen, touch one of the Note Sequencers to display the Note Sequencer screen. To change the type of a cell to NOTE, touch the Cell Type button in the top row just to the right of the Grid icon and select NOTE. The black and white display along the left side of the screen represents notes on a keyboard, with higher pitched notes at the top of the screen. The vertical gray bars represent steps in the sequence. Blue rectangles represent notes in the sequence. MIDI output can support multiple notes per step, but CV output only supports one note per step.
-
There are three ways to add notes to the sequence:
a. Touch the screen at the step and note position desired.
b. Touch Rec to record inputs coming in through the MIDI Input Jack in real time. Touch Rec again to stop recording.
c. Touch Step to record inputs coming in through the MIDI Input Jack with each successive MIDI input note adding a note to the next step in the sequence. Touch Step again to stop recording.
- You can use the Control Knobs and touch gestures to adjust notes and to zoom and scroll through the sequencer:
| Action | Result |
| Turn the top left control knob | Cycles the note selection through the notes on the piano roll |
| Turn the top right control knob | Change the length of the currently selected note |
| Turn the bottom left control knob | Moves the position of the step cursor |
| Turn the bottom right control knob | Moves the currently selected note up or down through the piano scale |

Figure 14: Note Sequencer Screen
| Action | Result |
| Two finger pinch or stretch | Zooms the piano roll in or out |
| Single finger drag or swipe | Scrolls the piano roll |
Note:
- When the Sequencer Screen reloads, it zooms horizontally to display the number of steps that have been selected in Step Count, and scrolls vertically to display the entered notes.
• The cursor position is restricted to the Step Count configured for this Note Sequencer. - When recording, the sequencer will add the incoming notes to the sequence. It will not remove previously existing notes. Touch Clear before touching REC if you want to start with a clean piano roll.
- The C notes on the piano roll are numbered to indicate which octave is currently displayed. If you zoom out too far the numbers will not be displayed.
-
The numbers across the top of the piano roll indicate the step numbers. If you zoom out too far the numbers will not be displayed.
-
Press the INFO button to toggle the display between the Note Sequencer Screen and the Note Sequencer Parameters screen pages 1 and 2.
-
Use the Control Knobs to adjust the values of the parameters:
| Parameter | Description | Range of Values | Modulation Target? |
| Step Len | Controls the length of time the sequence will spend on each step, in terms of fractions of a bar. | 1/64, 1/32T, 1/32, 1/16T, 1/16, 1/8T, 1/8, 1/4T, 1⁄4, 1/2T, 1⁄2, 1 bar, 2 bars, 4 bars, 8 bars(T= Triplet) | Yes |
| Duty Cycle | The duration of the note events where 0% is inaudible, and 100.0% is always playing. | 0% to 100.0% | No |
| Step Count | The number of steps in the sequence. | 1 to 64 | Yes |
| Clk Source | This parameter allows you to use an alternative input as the clock signal. By default, the toolbox internal clock (INT) will be used. | INT, EXT1, EXT2, EXT3, GATE1, GATE2, GATE3, GATE4 | No |
| MIDI Ch | The MIDI channel that this sequencer will use for output. | 1 through 16 | No |
| Quant Size | Defines precisely when to restart the sequence when using the internal clock. When the sequence ends, toolbox will wait until the start of the next Quant Size interval to restart the sequence. | 1/64, 1/32T, 1/32, 1/16T, 1/16, 1/8T, 1/8, 1/4T, 1⁄4, 1/2T, 1⁄2, 1 bar, 2 bars(T= Triplet) | No |
| MIDI Port | Controls which of toolbox's MIDI Output jacks will be used for the output of this sequencer. Multiple Note Sequencers may use the same MIDI Port. | 1 through 4 | No |
| Transpose | Shifts the notes up or down by the specified number of semitones when playing them. | -48 to 48 | Yes |

Figure 15: Note Sequencer Parameters Page 1

Figure 16: Note Sequencer Parameters Page 2
Note:
- If a value of a Note Sequencer parameter is changed during playback of the sequence, the change will take effect at the start of the next loop through the sequence.
To create a Note cell that spans Gate and CV Output jacks:
- Set the Cell Type of the cell in the GATE column to be (none)
- Set the Cell Type of the cell in the CV column to be NOTE. The cell display on the main screen will now span two columns.
Clear the Notes in the Piano Roll
Sometimes you may want to erase all of the notes in the piano roll and start over. Here's how:
- From the Piano Roll screen, touch Edit in the top menu, and then touch Clear. This will erase all of the notes from the piano roll.
- If you only want to remove some of the notes, touch the notes you want to remove and they will be erased.
Copy and Paste Notes between NOTE Cells
The Edit menu in a NOTE cell allows you to copy notes between NOTE cells.
- Open the Piano Roll for the source NOTE cell, and touch Edit from the top menu.
- Touch Copy or Cut in the drop down menu. If you use Cut, the notes will be removed from the currently selected NOTE cell.
- Open the Piano Roll for the target NOTE cell, and touch Edit from the top menu.
- Touch Paste in the drop down menu. All of the notes from the source NOTE cell will now be added to the target NOTE cell.
Import a MIDI File into a Step Sequencer
Another way to get notes into a Note sequencer is to import a MIDI file from the microSD card. Follow these steps:
- Copy a standard MIDI file onto the microSD card and then reinsert the card into toolbox.
- From the Piano Roll screen of a NOTE cell, touch Edit in the top menu, then touch Import in the drop down menu.
- Use the Control Knobs to highlight the file you want, and then touch Load in the top right corner. The piano roll will now display the notes imported from the MIDI file. Any previous notes in the piano roll will be erased.
Configure a Low Frequency Oscillator (LFO)
Toolbox can generate low frequency oscillation (LFO) signals by using the Cell Type of LFO for cells in columns aligned with CV Output jacks. The outputs of these cells play through the corresponding CV Output jack in the grid below the screen. The output range for these signals is -5V to +5V. LFOs do not generate MIDI signals.
To create and configure an LFO cell:
-
From the Main screen, touch one of the cells aligned with the CV Output jacks and then press INFO to display the cell parameters screen. If you need to change the Cell Type to LFO, touch the Cell Type button in the top row of the parameters screen just to the right of the grid icon, then select LFO from the list of Cell Types.
-
Use the Control Knobs to adjust the values of the following parameters:
| Parameter | Description | Range of Values | Modulation Target? |
| Waveform | Choose the desired wave shape. | SawRev SawTrianglePos TriSquarePos Square SinePos SineRandom | No |
| Depth | The amount or amplitude of the LFO. | 0 to 100% | Yes |
| Rate | The frequency of the LFO from about 0.1Hz to 12 Hz. When Beat Sync is On, this specifies the rate in beats and measures. | 0 to 100%or1/64, 1/32T, 1/32, 1/16T, 1/16, 1/8T, 1/8, 1/4T, 1⁄4, 1/2T, 1⁄2, 1 bar, 2 bars (T= Triplet) | Yes |
| Beat Sync | Controls the operation of the rate parameter. When this is ON, the wave cycle is synchronized with the clock. | On, Off | No |

Figure 17: LFO Paramters Screen
- Press HOME or touch the grid icon in the top left corner to return to the Main Screen.
Note:
- If a value of an LFO parameter is changed during playback of the sequence, the change will take effect immediately
Configure a Control Voltage Sequencer (SEQ)
The Control Voltage Sequencer (SEQ) cells allow you to create a control voltage pattern by drawing a bar chart on the touch screen. This signal plays out through the output jack that corresponds to this cell. The output range for this signal is 0V to +5V. The SEQ Cell Type can only be used in cells in columns 3 and 4 because it requires a control voltage output. The SEQ Cell Type does not create a MIDI signal. To configure an SEQ cell:
- From the Main screen, touch one of the SEQ cells in a column aligned with the CV Output jacks to display the CV Sequencer screen. To change a cell to an SEQ, touch the Cell Type button to the right of the grid icon in the top row of the cell parameters screen, and then touch SEQ from the list of Cell Types.
- Press the INFO button to display the CV Sequencer Parameters screen.
- Use the control knobs to adjust the values of the parameters:
| Parameter | Description | Range of Values | Modulation Target? |
| Step Len | The length of each step in the sequence | 1/64, 1/32T, 1/32, 1/16T, 1/16, 1/8T, 1/8, 1/4T, 1/4 , 1/2T, 1/2 , 1 bar, 2 bars, 4 bars, 8 bars(T= Triplet) | Yes |

Figure 18: CV Sequencer Screen
| Quant Size | Defines precisely when to restart the sequence when using the internal clock. When the sequence ends, toolbox will wait until the start of the next Quant Size interval to restart the sequence. | 1/64, 1/32T, 1/32, 1/16T, 1/16, 1/8T, 1/8, 1/4T, 1/4 , 1/2T, 1/2 , 1 bar, 2 bars(T= Triplet) | No |
| Step Count | The number of steps in the sequence. You may need to scroll to see all of the steps. The screen will always display at least 16 steps, but the sequencer will only move through the number of steps selected here. | 1 to 64 | Yes |
| Clk Source | This parameter allows you to use an alternative input as the clock signal. By default, the toolbox internal clock (INT) will be used. | INT, EXT1, EXT2, EXT3, GATE1, GATE2, GATE3, GATE4 | No |

Figure 19: SEQ Parameters Screen
- Press the INFO button again to return to the CV Sequencer Screen.
- On the CV Sequencer screen, use touch gestures and control knobs to configure the values of the sequencer steps. When the sequence is playing the cursor will move across the step bars to show the current playback position. Touch a step bar to set the value at the height selected. Turn the left control knobs to move the cursor through the bars. Turn the right control knobs to adjust the height of the bar at the currently selected step.
- Touch the grid icon in the top left corner, or press HOME to return to the Main screen.
Note:
- The CV Sequencer Screen always shows the same number of steps and allows the cursor to be positioned over all of the steps. However, only the number of steps selected in the Step Count parameter will be used during playback.
• To set the value of a step to 0, use the control knobs to adjust the value. - If a value of a CV Sequencer parameter is changed during playback of the sequence, the change will take effect at the start of the next loop through the sequence.
Record a CV Sequence Using the CREC Cell Type
The CREC Cell Type allows you to record a mono or stereo control voltage sequence for play back via a CPLY Cell. The recording will take input from input jack CV 1, CV 2, or both, based on your selection in the cell parameters, and will be saved as a .WAV file on the microSD card. The wave file is named RCxxxxxx.wav, where xxxxxx is the next sequential number available. You may put the microSD card into your computer to rename the files. Once the file is created, it can be selected for loading into another CPLY cell.
CREC cells can only be used in cells aligned with CV Output jacks because after you record the CV sequence, the Cell Type will change to CPLY, and a CPLY cell will play back its output through the corresponding CV Output jack.
We will further discuss playback of the recording when we discuss CPLY and Out cell types below. To use the CREC cell type to record a WAV file:
-
Before you start recording, set up the parameters that control the recording:
-
Start by plugging a CV signal source into input CV 1, CV 2, or both to record in stereo. These are the inputs on the edge of the module near the Clock input.
- Press HOME until you get to the Main screen.
- Touch a cell that is mapped to a CV Output jack to open it.
- Change the Cell Type to CREC by touching the Cell Type button next to the grid icon in the top row of the parameters screen, and then selecting CREC from the list of Cell Types. You will now see the CREC Load and Record screen.
- In the top menu, touch the menu item between the Cell Type button and the Load button (In 1/2 in the example screenshot). This will display the list of input choices. Touch one of the options to choose whether to record just from In 1, just from In 2, or from both inputs in stereo.

Figure 20: CREC Load and Record Screen
| Parameter | Description | Range of Values |
| Length | This parameter allows you to specify a length of time that you want to record, in terms of notes and bars.When Custom is selected, the module will continue recording until you touch STOP. | Custom, 1/4, 1/2, 1 bar, 2 bars, 4 bars, 8 bars, 16 bars, 32 bars, 64 bars, 128 bars |
| Rec Quant | This parameter allows you to quantize the recording to start and stop at the designated musical time interval.When a value other than None is selected, there may appear to be a lag to when recording starts and stops. This is because the recording will wait to start or stop in synch with the selected quantization setting. | None - always start and stop immediately1/16 - quantize to the next sixteenth note time1/8 - eighth note1/4 - quarter note1/2 - half note1 bar - a whole note assuming 4/4 time2 bars4 bars8 bars |
| Rec Mon | Controls whether the input signals received through CV 1 and CV 2 are played out through the CV output jack to enable you to monitor the recording. If IN 1/2 is selected as input, then the monitoring signal combines the two inputs into a mono output. However, the recording is in stereo. Read about the CPLY and OUT cell types to learn more about stereo playback. | Off - Inputs are never played through the outputs.Auto - Inputs play through the outputs while recording or the recording screen is visible.On - Inputs always play through the outputs. |
- Send a signal to the selected input or inputs. The source will play through the corresponding output jack if the Rec Mon setting is ON or Auto. The lower left quadrant of the Load and Record screen displays the levels of each of the selected input signals. For best results leave some room (a few dB) between your loudest level and the max allowed, which is 0dB. If a red bar appears to the right of the level, the signal is clipping and the level of the input signal should be lowered for best quality.
- Touch the Rec button. Toolbox will start recording. If you selected a time value for Length, recording will stop after the selected length of time. The Load and Record screen displays a running clock of measures and beats and time duration of the recording. There may be a delay between when you touch Rec and when the recording starts as toolbox waits to quantize the recording to the selected Rec Quant time interval. See
Synchronizing with Other Modules below for more information about quantizing and clocks.
- Touch Stop to end recording if the Length parameter is set to Custom. There may be a delay between when you touch Stop and when the recording ends due to quantization. When the recording has stopped, the Cell Type changes to CPLY, and the CPLY Wave screen is shown with the new WAV file loaded. The clip name will be RC with a numeric suffix.
After you record a CV WAV file, that WAV file is available for use in other CPLY cells and presets as well. The WAV file is saved on the microSD card with a file name the same as the name on the screen with a .WAV file extension. If you have the general module setting RecToPlay set to ON, toolbox will automatically start to play the new sample when recording ends if the Length parameter was used for recording. See General Module Settings above to adjust the RecToPlay setting.
Note:
- If you record into a loaded cell, the original WAV file remains intact on the microSD card and a new WAV file is created. You may eventually need to use the microSD card in your computer to
Load a CV WAV file using a CREC Cell
You can also use a CREC cell to load a WAV file into a CPLY cell:
- Press HOME until you get to the Main screen.
- Touch a cell that is aligned with a CV Output jack to open it.
- Change the Cell Type to CREC by touching the Cell Type button next to the grid icon in the top row of the parameters screen, then select CREC from the list of Cell Types. You will now see the Load and Record screen.
- Touch Load from the top menu to display the WAV file selection screen. Use the Control Knobs to scroll through the list of WAV files until the highlight is over the desired file.
- Touch Load in the top right corner to load the selected file. The cell is then changed to a CPLY cell, and the CPLY Wave screen is shown with the selected WAV file loaded.
Play Back a CV WAV File Using a CPLY Cell
The CPLY cell will play back a CV sequence that was recorded as a WAV file. You can put the microSD card into your computer to add WAV files to the card, or follow the steps in Record a CV Sequence Using the CREC Cell Type above to record a new CV sequence. The CPLY cell can only be used in cells mapped to CV Output jacks because the output is played out via the corresponding CV Output jack below the screen. CPLY cells do not output MIDI signals. CPLY cells may be paired with one or more OUT cells to play up to 8 channels from the WAV file.
To create a CPLY cell:
- Complete a recording or loading of a CREC cell as described on the previous two pages, or set the cell type to CPLY for a cell mapped to a CV Output jack.
- Press the INFO button to cycle between the CPLY Wave screen and the CPLY Parameters Screens.
- Configure the following parameters of the cell to control playback:
| Parameter | Description | Range of Values | Mod Target? |
| Amount | Adjusts the level of the voltage output signal. | -100% to 100% When a negative value is selected, the control voltage is inverted. | Yes |
| Launch Mode | This controls how a note trigger affects the playback of a cell. | AlwaysOn: The cell plays back continuously.Trigger: Playback starts when the selected Clk Source signal has a high Gate value.Playback will continue through the end.Gate: Begin the cell playback in the same manner as Trigger mode. But in Gate mode, playback will stop when the Gate signal goes low. | No |
| Play Rate | Controls the playback speed of the CV signal.100% plays the file back at the original recorded speed. Values between 99 and 0 will reduce the playback speed to the corresponding percentage.Values from -1 to -100 will cause playback to reverse. | -100 to 100% | Yes |
| Clk Source | Determines the input that will be used to trigger or gate playback of the cell. | INT: The internal module clockEXT1 - 3: The CV signal in the corresponding CV Mod In jack.Gate1-4: The internal module signal that is being sent to Gate output 1-4. | No |
| Start | Point where playback will begin when playing forward or ends when playing in reverse.Expressed in samples. | 0 to number of samples in the file | Yes |
| LpStr | Point where the looping will begin when playing forwards, or looping will end when playing in reverse. Expressed in samples. Must be before or equal to LpEnd. | 0 to number of samples in the file | Yes |

Figure 22: CPly Parameters Screen 1

Figure 21: CPly Parameters Screen 2
| Len | When Loop Mode is None, how long the sample will play past the value of the Start parameter.Expressed in samples. | 0 to number of samples in the file | Yes |
| LpEnd | Point where the looping will end when playing forwards, or looping will begin when playing in reverse. Expressed in samples. Must be after or equal to LpStr. | LpStr to number of samples in the file | Yes |
| Loop Mode | Controls whether the WAV file plays in a loop, and the direction of the loop.When looping is enabled, if you have the Launch Mode set to Trigger, looping will happen for the duration of the Release phase of the note.If you have the Launch Mode set to Gate, looping plays through the gate pulse and the release time.If you have the Launch Mode set to Toggle, looping starts to play when the initial pulse is received and continues until the terminating toggle pulse is received.If Loop Mode is Bidirect, and Rev is ON, play back will start from the end of the sample, and then loop as described, but starting with the Loop End to Loop Start pass. | None: Plays once from the value assigned to the Start parameter through the value assigned to the Length parameter.Forward: Plays from the value assigned to the Start parameter through the value assigned to the Loop End Parameter, then jumps back to the value of the Loop Start parameter. Play continues to loop between Loop Start and Loop End for the duration of the note.Bidirect: Works similarly to forward, but loop playback proceeds from Loop Start to Loop End then backwards to Loop Start. It then repeats the looping back and forth. | No |

Figure 23: CPly Parameters Screen 3
You can also set the values for Start, LpStr, Len, and LpEnd from the CPLY Wave screen. When viewing the waveform, the pink frame on the large waveform represents the Start and Len parameters. You can move these end points by turning the top two Control Knobs. If Loop Mode is set to Forward or Bidirect, you will also see a white frame within the pink frame that defines the Loop Start and Loop End points. Use the bottom two Control Knobs to adjust these end points. The corresponding values for the end points are displayed above and below the large waveform. The sensitivity of the Control Knobs depends on the Zoom level. Zoom out to make big adjustments then zoom in to make fine adjustments. You can use a pinch gesture with two fingers on the touch screen to zoom in or out.
Load a WAV File into a CPLY Cell
You don't need to use a CREC cell to load a WAV file into a CPLY cell. You can also load the WAV file directly into CPLY. Here's how:
- Navigate to the CPLY Wave screen.
- Touch the name of the WAV file in the top row of the screen to display the WAV file selection screen.
- Use the Control Knobs to scroll through the list of files until the desired file is highlighted.
- Touch Load in the top right corner to load the selected WAV file and display the CPLY WAV screen.

Figure 24: CPLY Wave Screen
Use an Additional CPLY Output Cell (OUT) for Multi-Channel Playback
When you record into a CREC cell, you have the option of recording stereo inputs. However, the resulting CPLY cell will only play the first channel out through the corresponding output jack. You can use an OUT cell to play the second channel. Also, if you load a WAV file into toolbox that has more than 2 channels, you can play up to 8 channels by using 7 OUT cells. When an OUT cell is used, the playback and muting of that cell is tied entirely to the Parent cell. Even if you MUTE the OUT cell, you will still hear its output if the Parent cell is not muted. The Parent cell will trigger the playback of the OUT cell.
To create an OUT cell:
- Press HOME if needed to return to the Main Screen.
- Touch a cell that is mapped to a CV Output jack to open the parameters screen for that cell.
- Touch the Cell Type button in the top row next to the grid icon, and then select the Cell Type of OUT.
- Use the Control Knobs to set the values of the following parameters:
| Parameter | Description | Range of Values | Mod Target? |
| Parent | Choose the CPLY cell that will be the source of the WAV file for this cell. The Parent will control playback of this OUT cell. The cells are identified as a row, column pair, where the bottom row is Row 1, and the left column is Column 1. | 1,1 through 4,5. Toolbox will allow you to choose values in Columns 1 through 3, but only columns 4 and 5 can have CPLY cells and thus be valid Parents. | No |
| Channel | Which channel of a multichannel WAV file will be played back. Choose 2 to play the second channel of a stereo WAV file. | 1 through 8 (Toolbox will allow you to pick a channel that does not exist in the file) | No |
The OUT cell will now playback the selected channel of the parent cell in synch with the parent cell.
Note:
- The playback of the OUT cell is controlled exclusively by the playback of its parent cell. This includes Muting.
Apply Modulation
Modulation is another way that you can alter your sequences using internal or external inputs. Many of the cell parameters can be modulation targets. These targets can have their values altered by modulation sources. The available modulation sources are:
• CV Modulation inputs (EXT1, EXT2, and EXT3),
• LFO cells which are aligned with CV Outputs 5 through 8 (LFO1, LFO2, LFO3, LFO4)
• SEQ cells which are aligned with CV Outputs 5 through 8 (SEQ1, SEQ2, SEQ3, SEQ4)
Note:
• GATE, NOTE, CREC, CPLY and OUT cells may not be used as modulation sources.
• Only the cells in the column in line with CV Mod 5 through 8 may be used as modulation sources.
- Toolbox always displays the same list of modulation sources even if there is no such cell configured (e.g. LFO4 is still listed if there is no LFO4 in this preset). If you select a modulation source that is not available, the parameter will not be modulated until that modulation source is configured.
The following parameters are Modulation Targets:
| Sound Element | Parameter | Example usage |
| Gate Sequencer | Step Len | Use an external input to make the playback of the Gate Sequence alternate between full speed and half speed. |
| Gate Sequencer | Step Count | Use an external input to change the number of steps |
| Note Sequencer | Step Length | Use an LFO square wave to change the rhythm of a sequencer between two different durations. |
| Note Sequencer | Step Count | Use an LFO to adjust the number of steps to add variation. |
| Note Sequencer | Transpose | Use an LFO to add movement to the pitch and variety to the sequence. |
| Low Frequency Oscillator | Depth | Use an SEQ to change the depth of the sine wave every 8 steps. |
| Low Frequency Oscillator | Rate | Use another LFO to gradually change the cycle rate of this LFO. |
| CV Sequencer | Step Len | Use another SEQ to gradually change the playback speed of this sequence by gradually adjusting the Step Length. |
| CV Sequencer | Step Count | Use a random signal from an EXT to randomly adjust the number of steps played from the sequence |
| CV Sample Player | Amount | Use an SEQ to control the amplitude of the CV signal over time. |
| CV Sample Player | Play Rate | Use EXT1 to speed up or slow down the playback of the recorded CV sequence. |
| CV Sample Player | Start | Use an SEQ to move the start position within the WAV file over time to create a variation in the sound. |
| CV Sample Player | Len | Use an SEQ to adjust the length of the loop played over time to create a stutter effect |
| CV Sample Player | LpStr | Use two SEQs to adjust the loop start and end points to alternate playback between two different sections of the sample. |
| CV Sample Player | LPEnd | Use two SEQs to adjust the loop start and end points to alternate playback between two different sections of the sample. |
To apply a modulator to a specific modulation target:
- From the Main screen, touch a cell that has modulation targets and press INFO to display the corresponding parameters screen.
- Press the INFO button to display the parameters screen.
- The parameters which can be modulated will have three black boxes below them. This allows you to apply up to three modulators to each of these parameters. Touch one of the boxes below a parameter to open the Modulation Selection Screen.
- Adjust the modulation parameters by turning the Control Knob closest to the parameter.
| Parameter | Description | Range of Values | |
| Source | The source of modulation to be applied. | None | SEQ2 |
| LFO1 | SEQ3 | ||
| LFO2 | SEQ4 | ||
| LFO3 | EXT1 | ||
| LFO4 | EXT2 | ||
| SEQ1 | EXT3 | ||
| Amount | Choose the amount of modulation that will be applied. | -100% to +100% | |

Figure 25: Modulation Selection Screen for a NOTE Cell
- Once you have selected all the settings, touch the arrow (<-) in the top left or press HOME to go back to the parameters screen.
- Touch another black box below a parameter to add more modulation.
- Press HOME to return to the Main screen.
Synchronizing with Other Modules
Toolbox is designed to work together with other modules. It can follow an external clock input and then use that to control the CV and MIDI outputs to other modules. The toolbox clock can be driven by three sources, and will use the highest priority clock signal available. The sources, in decreasing order of priority are:
- CV clock input in the Clock Input jack
- MIDI Clock from the MIDI Input jack
- Internal free running clock
When a MIDI Clock is used, toolbox responds to MIDI clock pulse, play and stop signals. When a MIDI play signal is received, the playback of the module resumes from the beginning, and the play signal is passed along to the MIDI outputs. When a MIDI stop signal is received, the module stops playback and passes this signal along to the MIDI outputs.
Toolbox can also drive a clock signal to other modules in a few different ways. You can use the four MIDI outputs to output the MIDI clock to other modules. You can also use a Gate Sequencer to configure your own custom clock signal that will go out the corresponding Gate output jack. In this way you could create a repeating sequence of 1/16th notes to generate an analog clock.
All of the sequencers generate MIDI, Gate or CV signals, or some combination thereof, which are designed to drive other modules. For example, the NOTE sequencer is a great source of a MIDI signal to drive Synthbox. Any module that can receive CV, MIDI or Gate signals can work with toolbox to create new and creative sequences.
Preset Management
A preset is a set of pre-configured sequences, function generators and modulators. You can use the 1010music presets or create your own presets to save your work.
Select a Preset
To select a preset:
- Press the HOME button to display the Main screen if needed.
- Cycle through the presets by touching the + and - buttons at the top of the Touch Screen on either side of the name of the preset (e.g. STABS in Figure 2: Main Screen Overview above).
- Alternatively, you can touch the name of the preset or the space above it to display the Preset Selection screen.
- Turn a Control Knob to select the desired preset.
- Touch Load to load the selected preset and go back to the Main screen.
Save a Preset
Toolbox does not automatically save your changes to presets. You have to manually save by following these steps:
- From the Main screen, touch the preset name to display the Preset Selection screen.
- Touch Edit to display the Preset Edit Menu.
- Touch Save to save the changes to the preset and return to the Main screen.
Copy a Preset
If you prefer not to start with a blank slate, you can copy an existing preset.
- From the Main screen, touch the preset name at the top of the grid to display the Presets screen.
- Touch the Edit button at the top of the touch screen to display the Preset Edit menu.
- Use a control knob to select the preset you want to copy, and then touch the Load button. Toolbox loads the preset and displays the Main screen.
- Touch the preset name at the top of the grid to display the Presets screen.
- Touch the Edit button at the top of the touch screen to display the Preset Edit menu, and then touch the SaveAs button.
- Use the on-screen keyboard to change the name of the preset and then touch return. Toolbox creates a copy of the preset with the new name.
Rename a Preset
Here's how to give a preset a new name:
- From the Presets screen, touch the Edit button at the top of the Touch Screen to display the Preset Edit menu.
- Use a Control Knob to select the preset you want to rename, and then touch the Rename button. Toolbox displays a touch screen keyboard you can use to enter a new name. Touch the return button to save the changes and go back to the Presets screen.
Delete a Preset
Follow these steps to delete a preset. Warning: there is no undo, and no prompt to ask "are you sure?" So make sure you are on the correct preset before you use this. If you do accidentally delete a factory preset, you can reload it from the factory image using the steps outlined in Update Firmware and Manage Preset and WAV Files below.

Figure 26: Preset Selection Screen

Figure 27: Preset Edit Menu

Figure 28: Preset Naming Keyboard
- Touch the Edit button at the top of the Presets screen to display the Edit submenu.
- Use a Control Knob to select the preset you want to delete, and then touch the Delete button. The preset is immediately deleted.
Use "Save As" to Save Current Changes to a Preset as Another Preset
You can save your work on a current preset as either a new preset or overwriting a different existing preset:
- Touch the Preset Name to display the Preset Selection screen.
- Touch Edit to display the Edit sub-menu.
- Touch SaveAs. Toolbox displays a touch screen keyboard you can use to enter a new name. Touch the return button to save the changes and go back to the Presets screen.
Update Firmware and Manage Preset and WAV Files
Toolbox owners can update the module's firmware to get the latest features and other updates. Toolbox is not cross compatible with the Series 1 Modules, bitbox, fxbox and synthbox. The firmware can be updated with the factory image, which includes the original presets, or just the firmware itself. You can also choose individual presets or WAV files to copy over to your microSD Card.
Install New Firmware
Here are the steps required:
- Download the toolbox firmware onto your computer. You can find the latest firmware image in the Firmware Downloads sub-forums at https://forum.1010music.com. NOTE: You must be a registered member of the forum in order to access the firmware download sub-forums.
- Unpack the zip file. Some browsers do this automatically for you.
- If you want to replace the Presets with the factory image, copy the full contents of the zip file onto a microSD card. If you do not want to overwrite your presets, copy only the SERIES2.BIN file to the microSD card. Place the microSD card in your toolbox.
- While powering up the unit, hold the Home and Info buttons. When you see the message about upgrading the firmware, you can let go.
- When the upgrade finishes in about 15 seconds, the unit will restart with the new software.
NOTE:
• You must register at forum.1010music.com in order to download firmware.
• You cannot run bitbox, fxbox or synthbox firmware on a toolbox module.
• You cannot run toolbox firmware on a bitbox, fxbox or synthbox module.
• The microSD card must be formatted with FAT32 or MS-DOS (FAT). The exFAT format will not work.
Backup and Restore Your Presets
Toolbox stores presets on the microSD card with file names with a .tlb extension. It is always a good idea to keep a backup of your work. You can backup the preset files that are stored on the microSD card by following these simple steps:
- Remove the microSD card from your module and insert into your computer. You may need to use a microSD adapter.
- Copy the files from the microSD card onto your computer.
To restore one or more preset files from a backup, simply copy the preset file from the backup copy onto the microSD card. You may rename the files.
Manage WAV files and Preset files
In addition to the presets, toolbox stores the CV recordings on the microSD card. These recordings have the .WAV extension. You can use the microSD card on your computer to manage the WAV files and Preset files. You can rename the files, add new files to the microSD card, or rearrange WAV files into folders. Please keep in mind however, that if you move or rename a WAV file that is used in a Preset, that Preset will no longer be able to find that WAV file. Toolbox will still allow you to open the Preset, but the CPLY cells that use that WAV file will not playback properly until the WAV file is reloaded from its new name or location.
It's also important to note that Preset files must be stored in the root folder of the microSD card or else Toolbox will not find them. WAV files and MIDI files can be in folders.
To rename or move WAV or Preset files, place the microSD card into your computer. You may need to use an SD card adapter for this. Then use the standard file management tools on your computer to make the desired changes. When you are done, safely eject the microSD card from your computer, and then reinsert it into the toolbox with the notched edge away from the screen. The new and renamed files will now be available.
Technical Specs
Module Specs
Toolbox is designed with the following specs:
- Rack width: 26 HP
• Power supply requirements:
+12V: 350mA
-12V: 0mA
5V: 0mA
Pin Mapping for Mini TRS Audio Jack to MIDI 5 Pin DIN Connectors
The musical instrument industry currently uses several different ways of mapping MIDI 5 Pin DIN signals to mini TRS audio jack connectors. The diagram to the right shows the numbering of the pins on a MIDI connector and the labels of the connection components of a mini TRS audio jack. 1010music products are compatible with cables that use the following mapping of MIDI signals between female MIDI connectors and mini TRS audio jacks:
| MIDI Signal | MIDI Connector | Mini TRS Audio |
| Current Source | Pin 4 | Tip |
| Current Sink | Pin 5 | Ring |
| Shield | Pin 2 | Sleeve |
Table 1: MIDI Connector to Mini TRS Audio Jack Mapping

Figure 29: 5 Pin DIN and Mini TRS Audio Jack Connectors
For more information on the use of adapters, read the blog post on our website Mini TRS Audio Jacks for MIDI Connections Compatibility Guide at: https://1010music.com/stereo-minijacks-midi-connections-compatibility-guide
Learn More
Download updates to the Toolbox User Manual or watch toolbox videos on our website at https://1010music.com/toolbox-support.
Join the conversation with other toolbox owners at https://forum.1010music.com.
- WELCOME
- OVERVIEW
- FRONT PANEL OVERVIEW
- MAIN SCREEN OVERVIEW
- SERIES COMPATIBILITY
- SETUP TOOLBOX
- CHOOSE AN ORIENTATION
- NOTE
- RACK INSTALLATION
- CONNECT A GATE OUTPUT TO A SOUND GENERATING MODULE
- CONNECT A MIDI CONTROLLER INPUT
- GENERAL MODULE SETTINGS
- WORKING IN FLIPPED UI MODE
- PLAY SETTINGS
- PLAYBACK PRESETS
- SELECT A PRESET
- SAVE A PRESET
- START PLAYBACK OF THE SEQUENCERS AND FUNCTION GENERATORS
- MUTE MODE
- CONFIGURE SEQUENCES
- CHOOSE A CELL TYPE
- TO SELECT A CELL TYPE
- CONFIGURE A GATE SEQUENCER (GATE)
- CLEAR THE NOTES IN THE GATE SEQUENCER
- COPY AND PASTE GATE EVENTS BETWEEN GATE CELLS
- IMPORT A MIDI FILE INTO A GATE SEQUENCER
- CONFIGURE A NOTE SEQUENCER (NOTE)
- CLEAR THE NOTES IN THE PIANO ROLL
- COPY AND PASTE NOTES BETWEEN NOTE CELLS
- IMPORT A MIDI FILE INTO A STEP SEQUENCER
- CONFIGURE A LOW FREQUENCY OSCILLATOR (LFO)
- CONFIGURE A CONTROL VOLTAGE SEQUENCER (SEQ)
- RECORD A CV SEQUENCE USING THE CREC CELL TYPE
- LOAD A CV WAV FILE USING A CREC CELL
- PLAY BACK A CV WAV FILE USING A CPLY CELL
- TO CREATE A CPLY CELL
- LOAD A WAV FILE INTO A CPLY CELL
- USE AN ADDITIONAL CPLY OUTPUT CELL (OUT) FOR MULTI-CHANNEL PLAYBACK
- TO CREATE AN OUT CELL
- APPLY MODULATION
- SYNCHRONIZING WITH OTHER MODULES
- PRESET MANAGEMENT
- TO SELECT A PRESET
- COPY A PRESET
- RENAME A PRESET
- DELETE A PRESET
- USE "SAVE AS" TO SAVE CURRENT CHANGES TO A PRESET AS ANOTHER PRESET
- UPDATE FIRMWARE AND MANAGE PRESET AND WAV FILES
- INSTALL NEW FIRMWARE
- BACKUP AND RESTORE YOUR PRESETS
- MANAGE WAV FILES AND PRESET FILES
- TECHNICAL SPECS
- MODULE SPECS
- PIN MAPPING FOR MINI TRS AUDIO JACK TO MIDI 5 PIN DIN CONNECTORS
- LEARN MORE
Brand : 1010music
Model : Toolbox
Category : Electronic musical instrument