FXBox - Audio Effects 1010music - Free user manual and instructions
Find the device manual for free FXBox 1010music in PDF.


| Product type | Audio effects processing module |
| Brand | 1010music |
| Model | FXBox |
| Category | Audio effects |
| Number of effects | 16 built-in performance effects |
| Touchscreen | Touchscreen for selection, XY control, and navigation |
| Built-in sequencer | Step sequencer for programming effects |
| XY control | XY positioning on the screen to modulate effects in real time |
| Audio inputs | Two jack inputs (IN1, IN2) |
| Audio outputs | Two jack outputs (OUT1, OUT2) |
| MIDI connectivity | MIDI input for triggering and controlling effects |
| CV connectivity | CV Trigger and CV Modulator inputs for analog control |
| External clock | CLOCK input for synchronization with external signals |
| Memory card | microSD slot for presets, firmware, and audio files |
| Preset management | Creation, copying, renaming, deletion, and modification of presets |
| Navigation buttons | HOME and INFO buttons to navigate screens |
| Control knobs | 4 context-sensitive knobs to adjust parameters |
| Box contents | Preloaded microSD card with 50 presets and quick start guide |
| Firmware update | Possible via microSD card |
| Care and cleaning | Wipe the screen and front panel with a soft, dry cloth |
| Safety | Do not expose to humidity, liquids, or severe shocks |
| Spare parts and repairability | Replaceable microSD card, maintenance accessible via the manual |
| General information | User manual downloadable from the manufacturer's website |
Frequently Asked Questions - FXBox 1010music
User questions about FXBox 1010music
0 question about this device. Answer the ones you know or ask your own.
Ask a new question about this device
Download the instructions for your Audio Effects in PDF format for free! Find your manual FXBox - 1010music and take your electronic device back in hand. On this page are published all the documents necessary for the use of your device. FXBox by 1010music.
USER MANUAL FXBox 1010music
fxbox User Manual

OVERVIEW 3
THE MICROSD CARD 4
WORKING WITH EFFECTS 4
MOMENTARILY APPLY AN EFFECT 4
TRIGGER AN EFFECT VIA CONTROL VOLTAGE SIGNAL 4
TRIGGER AN EFFECT VIA MIDI INPUT 4
SET AN EFFECT TO BE ALWAYS ON 5
EDIT THE PARAMETERS OF AN EFFECT 5
BYPASS EFFECTS 5
EFFECT PARAMETERS 6
VISUALLY MONITOR THE EFFECTS 9
WORKING WITH PRESETS 9
SELECT A PRESET 9
CREATE A NEW PRESET 10
COPY A PRESET 10
RENAME A PRESET 10
DELETE A PRESET 10
MODIFY A PRESET 10
WORKING WITH THE STEP SEQUENCER 11
START AND CONFIGURE THE STEP SEQUENCER 11
SEQUENCE AN EFFECT 11
SYNCHRONIZING EFFECTS WITH EXTERNAL SIGNALS 12
SYNCHRONIZE THE EFFECTS TO AN EXTERNAL TIMING INPUT 12
MODULATE EFFECT PARAMETERS 12
TRIGGER EFFECTS WITH A CV SIGNAL 12
MONITORING THE WET REVERB SIGNAL 12
UPDATING AND SWAPPING FIRMWARE, AUDIO FILES AND PRESETS 13
INSTALL NEW FIRMWARE 13
RESET FXBOX PRESETS TO FACTORY SETTINGS 13
LEARN MORE 13
Overview
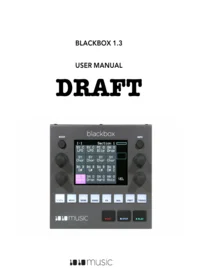
Fxbox provides 16 performance effects with XY control and a built in step sequencer. Fxbox is available as a dedicated module. Also, you can reprogram your bitbox to become an fxbox.
The diagram below identifies the various components of the fxbox module.

Fxbox is equipped with a touchscreen. You can touch cells in the grid on the screen to select them, and touch on-screen buttons to take an action. You can also drag your finger across the screen to use XY positioning to control effects.
The INFO and HOME buttons at the top of the front panel of fxbox are used to navigate the screens. Press INFO to view the information screen for the current selection. In some cases, you can press INFO more than once to get to deeper information. The HOME button generally takes you back a screen. If you get lost, you can press HOME until you get back to the Main screen.
The Control Knobs are used to cycle through options on the screen. When there are several parameters on the screen, use the Control Knob closest to a parameter to set its value.
The MicroSD Card
Fbox uses a microSD card to store settings. A microSD card must be inserted into the MICROSD slot on the front panel of the fxbox during operation of the module. A microSD card loaded with 50 presets is included with fxbox. Insert the microSD card with the notched edge down.
Working with Effects
Fxbox takes audio input from IN1 and IN2, processes the configured effects, and sends the result to OUT1 and OUT2.
When fxbox starts up, the Touch Screen displays the Main screen with the grid of 16 effects. The available effects are listed in the table below:

| Label | Effect |
| PIT | Pitch Shifter |
| DIST | Distortion |
| BTCR | Bit reduction and sample rate reduction |
| FILT | Low Pass Filter |
| CHR | Chorus |
| PHAS | Phaser |
| FLNG | Flanger |
| RING | Ring modulator |
| FRZE | Granulator based freeze effect |
| LOOP | Automated looping, with quantized start and length |
| RVRS | Reverse |
| VNYL | Turntable and similar effects including scratching, tape stop, and backspin |
| GATE | Clock based gating |
| PAN | Automated panning |
| DLY | Delay |
| RVB | Reverb |
The effects are applied by the signal processing chain in the order listed in the table above, from top to bottom.
Effects can be momentarily enabled using the touch screen, triggered via control voltage (CV) inputs or set always on by configuring the parameters for the effect.
Momentarily Apply an Effect
If you want to apply an effect manually, you can do so by touching and holding the cell for that effect on the Touch Screen. The effect is applied while you are touching the cell, and stops when you remove your finger.
Trigger an Effect via Control Voltage Signal
You can use an external signal to control when an effect is applied using independent signals for each effect. To do this, plug a control voltage gate signal into the CV Trigger jack that maps to the effect in the grid. The effect will be applied when the CV signal goes high, and be turned off when the CV signal goes low.
Trigger an Effect via MIDI Input
You can trigger an effect by plugging a MIDI controller source into the MIDI input jack. The MIDI input uses a TRS connection compatible with the Arturia BeatStep Pro. Be sure to use a TRS cable. Fxbox
P. 4
Fxbox User Manual
v. 1.0a
Copyright © 2017 1010music LLC
responds to MIDI inputs on MIDI Channel 10, which is the default channel for the drum part on the BeatStep Pro. MIDI inputs for notes 36 to 51 are mapped to the effects in the grid as shown in the diagram to the right. The Play button is mapped to note 52 and will toggle play mode.
| 48 | 49 | 50 | 51 | |
| 44 | 45 | 46 | 47 | |
| 40 | 41 | 42 | 43 | |
| 36 | 37 | 38 | 39 | 52 |
Set an Effect to be Always On
Many effects can be configured to always stay on by setting the Trigger parameter for the effect to ON. The steps to edit effect parameters are outlined below. Please note that not all effects have a Trigger parameter.
Edit the Parameters of an Effect
Each effect in the grid has a set of parameters that control how and when the effect is applied to the input signal. Follow these steps to edit the parameters for an effect:
- Touch the cell of the effect in the grid on the Main screen to select it.
- Push the Info button in the top right corner of the fxbox. You will see parameters specific to that effect, such as Trigger, Decay and Grain Size. Here are a few examples:


- Adjust a parameter by turning the Control Knob next to it. Turn the Control Knob clockwise to increase the impact of the effect.
- Alternatively, touch and drag in the middle of the Touch Screen to control the two parameters on the left side of the screen using X/Y control. Move your finger left and right to control the top parameter, up and down to control the bottom parameter. Move right and up to increase the intensity of the effect.
Bypass Effects
Fxbox allows you to temporarily bypass or disable individual effects by following these steps:
- While on the Main screen, push the Home button to enter bypass mode. The grid cells will be green.
- Touch a cell to bypass that effect. The cell will turn red. Touch it again to enable the effect, which will make it green.
- Push the Home button to leave bypass mode. A red bar appears over the names of bypassed or disabled effects.


Effect Parameters
The table below describes the parameters for each of the effects.
| Label | Effect | Parameter | Settings |
| PIT | Pitch Shifter | Pitch | -24 semitones to +24 semitones |
| Wet/Dry | Determines how much of the original signal (dry) and processed signal (wet) are heard. 0 % is fully dry. 50% is an equal mixture of both. 100% only contains the wet signal. | ||
| Trigger | ON: the effect is constantly applied.Gate: effect is triggered via CV input, momentary touch, MIDI input, or the step sequencer. | ||
| DIST | Distortion | Distortion | 0 to 100% Amount of distortion. |
| Trigger | ON: the effect is constantly applied.Gate: effect is triggered via CV input, momentary touch, MIDI input, or the step sequencer. | ||
| BTCR | Bit reduction and sample rate reduction | Frequency | 0 to 100% Determines sampling frequency from 187Hz to 48kHz. |
| Resolution | 0 to 100% Determines output resolution from 1 bit to 24 bits. | ||
| Trigger | ON: the effect is constantly applied.Gate: effect is triggered via CV input, momentary touch, MIDI input, or the step sequencer. | ||
| FILT | Low Pass Filter | Cutoff | 0 to 100% Determines the filter cutoff from 20Hz to 22kHz |
| Res | 0 to 100% Determines the filter resonance. | ||
| Trigger | ON: the effect is constantly applied.Gate: effect is triggered via CV input, momentary touch, MIDI input, or the step sequencer. | ||
| CHR | Chorus | Amount | 0 to 100% Controls the intensity of the effect. |
| Trigger | ON: the effect is constantly applied.Gate: effect is triggered via CV input, momentary touch, MIDI input, or the step sequencer. | ||
| PHAS | Phaser | Rate | 0 to 100% Controls the rate at which the effect sweeps through the full range from 0.1Hz to 10Hz. |
| Feedback | 0 to 100% Determines the amount of feedback or intensity of the effect. | ||
| Trigger | ON: the effect is constantly applied.Gate: effect is triggered via CV input, momentary touch, MIDI input, or the step sequencer. | ||
| FLNG | Flanger | Rate | 0 to 100% Controls the rate at which the effect sweeps through the full range from 0.1Hz to 10Hz. |
| Feedback | 0 to 100% Determines the amount offeedback or intensity of the effect. | ||
| Trigger | ON: the effect is constantly applied.Gate: effect is triggered via CV input, momentary touch, MIDI input, or the step sequencer. | ||
| RING | Ring modulator | Carrier | 0 to 100% Determines the pitch of the carrier signal. |
| Amount | 0 to 100% Determines the intensity of the modulation. | ||
| Trigger | ON: the effect is constantly applied.Gate: effect is triggered via CV input, momentary touch, MIDI input, or the step sequencer. | ||
| FRZE | Granulator based freeze effect | Speed | -100% to 100% Determines the scanning of the read position once the effect is held. -100% is reverse at original speed. 0% is held in place. 100% is scanning forward at the original speed. |
| Spread | 128 to 8192 Determines the width or range of the random area that the grains pull from. Small numbers are better for short events like drum hits. Big numbers are better for more steady sounds, like drones. | ||
| Grain Size | 1024, 2048, 4096, 8192 Determines the length of the individual grains. Small numbers are better for short events like drum hits. Big numbers are better for tones and more steady sounds. | ||
| Grain Count | 2 to 8 Determines the number of layers or complexity of the sound. | ||
| LOOP | Automated looping, with quantized start and length | Length | Determines the duration of the loop specified in musical length. The incoming clock or MIDI clock sets the tempo for this setting.2 bars, 1 bar, 1/2 , 1/2 T, 1/4 , 1/4 T, 1/8 , 1/8 T, 1/16, 1/16 T, 1/32, 1/32 T, 1/64 |
| Quant Size | Determines when the effect will be engaged or disengaged as specified in musical length. The incoming clock or MIDI clock sets the tempo for this setting.2 bars, 1 bar, 1/2 , 1/2 T, 1/4 , 1/4 T, 1/8 , 1/8 T, 1/16, 1/16 T, 1/32,1/32 T, 1/64 | ||
| RVRS | Reverse | (no parameters) | |
| VNYL | Turntable and similar effects including scratching, tape stop, and backspin | Mode | Tape Stop: a quick ramp down of pitchScratch: back and forth scrubbing of the soundPowerdown: a gradual reduction in speed, eventually leading to no audioBackspin: reverse playback with slowdown of the pitch |
| GATE | Clock based gating | Length | Determines the overall interval for the gate specified in musical length. The incoming clock or MIDI clock sets the tempo for this setting.2 bars, 1 bar, 1/2 , 1/2 T, 1/4 , 1/4 T, 1/8 , 1/8 T, 1/16, 1/16 T, 1/32, 1/32 T, 1/64 |
| Duty Cycle | 0 to 100% Determines how much of the audio in the interval is passed through. | ||
| Quant Size | Determines when the effect will be engaged or disengaged as specified in musical length. The incoming clock or MIDI clock sets the tempo for this setting.2 bars, 1 bar, 1/2 , 1/2 T, 1/4 , 1/4 T, 1/8 , 1/8 T, 1/16, 1/16 T, 1/32,1/32 T, 1/64 | ||
| Trigger | ON: the effect is constantly applied.Gate: effect is triggered via CV input, momentary touch, MIDI input, or the step sequencer. | ||
| PAN | Automated panning | Rate | 0 to 100% Controls the rate at which the effect sweeps through the full range from 0.1Hz to 10Hz |
| Amount | 0 to 100% Determines how wide the panning will be. | ||
| Trigger | ON: the effect is constantly applied.Gate: effect is triggered via CV input, momentary touch, MIDI input, or the step sequencer. | ||
| DLY | Delay | Delay | Determines the delay length specified in musical intervals. The incoming clock or MIDI clock sets the tempo for this setting.1/64, 1/32, 1/16, 1/8 T, 1/16D, 1/8, 1/4T, 1/8D, 1/4, 1/2T, 1/2, 1 bar |
| Amount | 0 to 100% Determines how much of the delayed signal is heard in the output. | ||
| Feedback | 0 to 100% Determines the amount of regeneration or echo in the delayed signal. | ||
| Trigger | ON: the effect is constantly applied.Gate: effect is triggered via CV input, momentary touch, MIDI input, or the step sequencer. | ||
| RVB | Reverb | Decay | 0 to 100% How long the reverberation will ring out. |
| Amount | 0 to 100% Determines how much of the reverberation is heard in the output. | ||
| Predelay | 0 to 100% Determines the amount of delay in the signal before it reaches the reverberation. In real life, this is related to how close the source is to the walls. | ||
| Trigger | ON: the effect is constantly applied.Gate: effect is triggered via CV input, momentary touch, MIDI input, or the step sequencer. |
Visually Monitor the Effects
The fxbox changes the display of the grid to show the state of the effects. The table below describes what the icons and color changes indicate:
| User Interface Example | Description | What it means |
 | Cell highlighted pink | The effect is selected. Pressing the INFO button will show the details for this particular effect. |
 | Red bar across the top of the cell | The effect is bypassed and will not be heard |
 | Unfilled blue bar across the bottom of the cell | The Trigger for the effect is set to On. |
 | Filled blue bar across the bottom of the cell | The effect has been triggered by a CV signal, the Step Sequencer, or touching it. |
 | Cell highlighted Red or Green | Fxbox is in bypass mode. Red cells are bypassed. Press the Home button to exit bypass mode. |
 | Blue bar with a line moving across it at the bottom of a MOD grid cell | A bar graph appears along the bottom of the MOD grid cell that represents the value of the corresponding CV input. |
Working with Presets
Presets are sets of configuration parameters for effects that are designed to work together to achieve an overall effect. Fxbox comes with 50 preconfigured presets and allows you to create your own. All changes you make to a preset are automatically remembered and written to the preset. There is no option to “Discard Changes” or “Save Preset”.
Select a Preset
There are two ways to select a preset. From the Main screen, you can cycle through the list of presets by touching the - and + buttons on either side of the preset name (02BadTapeEcho in the Main Screen example shown on the right).
Alternatively, on the Main screen, touch the preset name at the top of the grid (or the space above it) to display the Presets screen. Select a
Preset by scrolling through the list with any of the Control Knobs, and then touch the Load button in the top right corner of the Touch Screen.
Note:
- All changes you make to a preset's settings are automatically remembered and written to the preset. There is no option to "Discard Changes" or "Save Preset".
| 13:4 | ||||
| - | 02BadTapeEcho | + | ||
| PIT | DIST | BTCR | FILT | MOD |
| CHR | PHAS | FLNG | RING | MOD |
| FRZE | LOOP | RVRS | VNYL | MOD |
| GATE | PAN | DLY | RVB | PLAY |
| Main Screen | ||||
| New | Edit | Load | |
| 050ldMovie06TapeProblems07Trillian08Beatbreaker09Modscape10TimeTravel11FrozenSpaces | |||
| Presets Screen | |||
If you want to restore the factory presets, follow the steps in Monitoring the Wet Reverb Signal
The wet signal for the Reverb effect is played out on FX1 and FX2.
- Updating and Swapping Firmware below
Create a New Preset
You can create new presets to store your own combinations of effects parameters by following these steps:
- Push the HOME button to return to the Main screen if needed.
- Touch the preset name at the top of the grid (or the space above it) to display the Presets screen.
- Touch the New button at the top of the screen. Fxbox adds a new preset to the bottom of the list with the name New Preset X, where X is an incremental number.
- Turn a Control Knob to select the newly created preset and then touch the Load button in the top right corner of the Touch Screen.
Copy a Preset
If you prefer not to start with a blank slate, you can copy an existing preset.
- From the Main screen, touch the preset name at the top of the grid to display the Presets screen.
- Touch the Edit button at the top of the Touch Screen to display the Edit submenu.
- Use a Control Knob to select the preset you want to copy, and then touch the Copy button. Fxbox creates a copy of the preset that appears above the source preset. The name of the copy is the name of the source preset with "2" appended to the end.

Rename a Preset
Here's how to give a preset a new name:
- From the Presets screen, touch the Edit button at the top of the Touch Screen to display the Edit submenu.
- Use a Control Knob to select the preset you want to rename, and then touch the Rename button. The fxbox displays a touch screen keyboard you can use to enter a new name. Touch the return button to save the changes and go back to the Presets screen.

Delete a Preset
Follow these steps to delete a preset. Warning: there is no undo, and no prompt to ask "are you sure?" So make sure you are on the correct preset before you use this. If you do accidentally delete a preset, you can reload it from the factory image using the steps outlined in Reset fxbox Presets to Factory Settings below.
- Touch the Edit button at the top of the Presets screen to display the Edit submenu.
- Use a Control Knob to select the preset you want to delete, and then touch the Delete button. The preset is immediately deleted.
Modify a Preset
You will use the procedures described above to edit a preset:
- Select a Preset as described above.
- Use the steps outlined in Working with Effects above to modify the effects for the preset. Fxbox automatically saves the changes as you work.
Working with the Step Sequencer
The Step Sequencer creates a recurring pattern that controls when effects are applied. You can have a different pattern for each effect.
Start and Configure the Step Sequencer
- On the Main screen, touch the Play button in the lower right corner to start the Step Sequencer if needed.
- With the Play button selected, push the Info button to see the Step Sequencer Parameters screen.
- Use the Control Knobs to adjust the following parameters:
| Parameter | Settings |
| Sequencer | ON: The Step Sequencer will run constantlyOFF: The Step Sequencer will run in Toggle mode. Start and stop the Step Sequencer by pressing thePlaybutton on theMainscreen or sending a CV signal to the bottomCV Modulatorjack. Each high signal on the CV input toggles between Play and Stop mode. An unfilled blue bar appears at the bottom of the Play cell when the Step Sequencer is playing. |
| Length | The length of each step in the sequence.Values: 2 bars, 1 bar, 1/2 , 1/2 T, 1/4 , 1/4 T, 1/8 , 1/8 T, 1/16, 1/16 T, 1/32, 1/32 T, 1/64 |
| Steps | The number of steps in the sequence.Values: 2 through 32 |
| Quant Size | Determines when the sequencer will be engaged or disengaged as specified in musical length. The incoming clock or MIDI clock sets the tempo for this setting.Values: 2 bars, 1 bar, 1/2 , 1/2 T, 1/4 , 1/4 T, 1/8 , 1/8 T, 1/16, 1/16 T, 1/32, 1/32 T, 1/64 |
| 161:2 | |||
| PLAY | |||
| Sequencer:ON | Steps:32 | ||
| Length:1/16 | Quant Size:1/4 | ||
| Step SequencerParameters Screen | |||
Sequence an Effect
- From the Main screen, select an effect to sequence by touching the grid cell.
- Push the INFO button twice to display the Step Sequencer screen. A box outline moves across the grid to represent the currently playing step of the sequencer. The number of boxes the sequencer moves through is controlled by the Steps parameter. The time spent in each box is controlled by the Length parameter. The sequencer starts in the lower left corner, moves across to the right, and then moves up to the next row.
- Touch the grid boxes on the Touch Screen to enable and disable the gate for the effect on each step. The effect is enabled for the step when the grid box is highlighted blue.

- Repeat steps 1 through 3 for other effects as desired.
On the Main screen, you can see the Step Sequencer in action by watching the blue bars that appear below the effects grid cells when the sequencer enables the effect. You can have a different step sequence for each preset.
Synchronizing Effects with External Signals
The effects generated by fxbox can be controlled by external signals to align the effects with other modules. Clock signals and MIDI signals can be used to synchronize the timing of the effects. CV Signals can be used to trigger effects or to modulate effect parameters.
Synchronize the Effects to an External Timing Input
Fxbox allows you to synchronize effects to an external clock. For example, any effect with the Trigger parameter set to Gate can be triggered by a clock input. Connect one of the following timing signals to fxbox to synchronize to that source:
- Connect an external clock to the Clock input jack. Fxbox works from a 4 PPQ signal.
- OR - Connect a TRS MIDI cable to the MIDI input jack.
To restart the clock, stop the external clock source for at least 2 seconds, and then restart the external clock source. Fxbox will interpret this break in the clock as the start of a new sequence. The clock timing is shown in the upper left of the Touch Screen as Bars:Beats.
Modulate Effect Parameters
External signals may also be used to modulate effects. There are three CV Modulator jacks that can be used for this.
- Plug an external CV signal into one of the three CV Modulator jacks (the top three jacks in the right column of the array). A bar graph appears along the bottom of the MOD grid cell that represents the value of the corresponding CV input.
- To control the modulation parameters for a CV input, touch the MOD button on screen that corresponds to the CV Input jack, and then push the INFO button to display the MOD Parameters screen.
- Use the Control Knobs to adjust the following parameters:
| MOD Dest | The destination effect you want the CV input to control. The highlight on the mini grid next to the knob shows the effect being controlled. You can choose any effect in the grid. |
| Dest Param | The parameter of the destination effect to control with the CV Voltage. For example, choose the FILT effect for the MOD Dest parameter and choose Cutoff for the Dest Parameter to use the CV voltage to adjust the cutoff value of the FILT effect. |
| Amount | Adjusts how much impact the CV signal will have on the effect. |
| 28:3 | |||
| MOD | |||
| Mod Dest:4,4 [IMAGE] | Amount:94.9% | ||
| Dest Param:Cutoff: | |||
| MOD Parameters Screen | |||
Note:
- The destination effect must be active to hear the impact of the modulator changes.
Trigger Effects with a CV Signal
See Trigger an Effect via Control Voltage Signal_above.
Monitoring the Wet Reverb Signal
The wet signal for the Reverb effect is played out on FX1 and FX2.
Updating and Swapping Firmware, Audio Files and Presets
Bitbox and fxbox owners can update the module's firmware to get the latest features and other updates. This process can also be used to run bitbox firmware on fxbox hardware and vice versa. The firmware can be updated with the factory image, which includes the original presets, or just the firmware itself. You can also choose individual presets to copy over to your microSD Card.
Install New Firmware
Here are the steps required:
- Download the desired firmware onto your computer. You can choose to download either fxbox or bitbox firmware, but only one set of firmware can run at a time. You can find the latest firmware images on 1010music.com under Support.
- Unpack the zip file. Some browsers do this automatically for you.
- If you want to replace the Presets with the factory image, copy the full contents of the zip file onto a microSD card. If you do not want to overwrite your presets, copy only the MATRIX.BIN file to the microSD card.
- Place the microSD card in your bitbox or fxbox
- While powering up the unit, hold the Home and Info buttons. When you see the message about upgrading the firmware, you can let go.
- When the upgrade finishes in about 15 seconds, the unit will restart with the new software.
Reset fxbox Presets to Factory Settings
If you want to reset one or more of the fxbox Presets to the original factory settings, you can copy individual preset files onto your microSD card.
- Download the fxbox firmware onto your computer. You can find the latest firmware images on 1010music.com under Support.
- Unpack the zip file. Some browsers do this automatically for you.
- Find the .fxb file in the unpacked folder that has the same name as the preset you want to restore, for example 02BadTapeEcho.fxb. Copy the .fxb file onto the microSD card to replace the file on the card.
- Insert the microSD card into the fxbox.
- Push the HOME button to return to the Main screen if needed.
- Touch the preset name at the top of the grid (or the space above it) to display the Presets screen.
- Select any preset and touch the Load button to get fxbox to load the updated presets.
Learn More
Find how-to videos and more information on our website at http://1010music.com/fxbox-support. Stay in touch with the latest information about fxbox and other 1010music products by joining our mailing list at http://1010music.com/subscribe.
- FXBOX USER MANUAL
- OVERVIEW
- THE MICROSD CARD
- WORKING WITH EFFECTS
- WORKING WITH PRESETS
- WORKING WITH THE STEP SEQUENCER
- SYNCHRONIZING EFFECTS WITH EXTERNAL SIGNALS
- MONITORING THE WET REVERB SIGNAL
- UPDATING AND SWAPPING FIRMWARE, AUDIO FILES AND PRESETS
- LEARN MORE
- MOMENTARILY APPLY AN EFFECT
- TRIGGER AN EFFECT VIA CONTROL VOLTAGE SIGNAL
- TRIGGER AN EFFECT VIA MIDI INPUT
- SET AN EFFECT TO BE ALWAYS ON
- EDIT THE PARAMETERS OF AN EFFECT
- BYPASS EFFECTS
- VISUALLY MONITOR THE EFFECTS
- SELECT A PRESET
- IF YOU WANT TO RESTORE THE FACTORY PRESETS, FOLLOW THE STEPS IN MONITORING THE WET REVERB SIGNAL
- CREATE A NEW PRESET
- COPY A PRESET
- RENAME A PRESET
- DELETE A PRESET
- MODIFY A PRESET
- START AND CONFIGURE THE STEP SEQUENCER
- SEQUENCE AN EFFECT
- SYNCHRONIZE THE EFFECTS TO AN EXTERNAL TIMING INPUT
- MODULATE EFFECT PARAMETERS
- NOTE
- TRIGGER EFFECTS WITH A CV SIGNAL
- INSTALL NEW FIRMWARE
- RESET FXBOX PRESETS TO FACTORY SETTINGS
Brand : 1010music
Model : FXBox
Category : Audio Effects